Browsing for Network Printers
You can browse for printers only on servers running the pcnfsd daemon. You cannot browse for LPR printers.
You can start browsing from the Add Printer Wizard or from Network Neighborhood. In either case, the Solstice printer name takes a different form than when you enter a printer name manually.
When browsing, the name takes the form: \~hostalias\queuename. Here, hostalias is an internal name and may not be an actual server name.
Browsing makes printer resources on servers running the pcnfsd daemon visible to users. But users cannot connect to these printers unless the print spool directory on the server is exported. The system administrator can decide to make a PCNFSD printer available to users by exporting the print spool directory on the print server. For detailed instructions on installing the pcnfsd daemon and exporting the print spool directory, see Appendix B, Setting Up PCNFSD .
To Browse for PCNFSD Printers on Windows 95
-
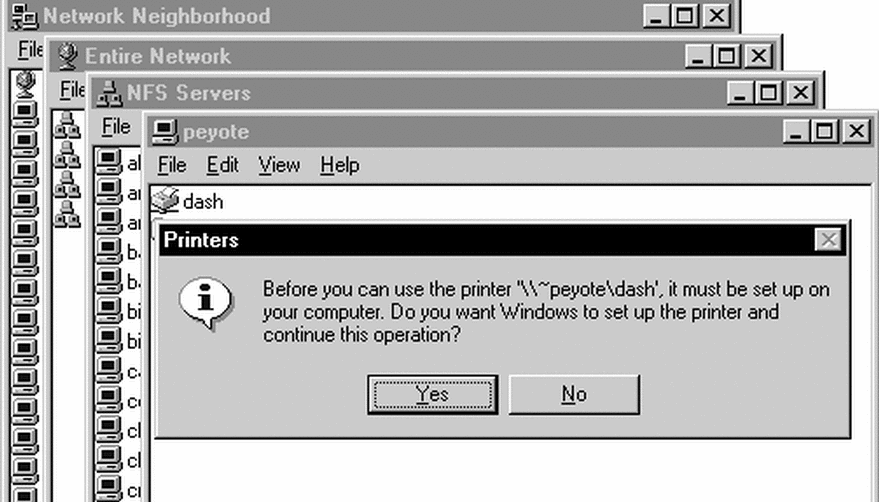
From Network Neighborhood, click the Entire Network icon.
-
Double-click NFS Servers.
The list of NFS servers appears.
-
Open each server icon to see which printers it offers.
Note -When you find a printer you want to mount, look for a usr, var, spool, or pcnfs folder in the list of resources. If you do not see one of these folders, you cannot connect to the printer either because the print spool directory is not exported or has been changed to some other location on the server.
-
Double-click the printer or drag the printer icon to the Printer control window.
-
When you are asked "Do you want Windows to set up the printer and continue this operation?", click Yes.
The Add Printer Wizard starts.
Figure 5-1 Browsing for Printers

-
Complete the remaining questions as required.
To Browse for Printers on Windows NT
-
Double-click Network Neighborhood.
-
Double-click Entire Network, double-click Solstice_NFS_Client, and then double-click NFS Servers.
-
Double-click a server name to reveal its resources.
You will recognize PCNFSD printers by the pcnfs or var folder listed under the printer icon. LPR printers do not display such folders. If you see printer icons but no pcnfs or var folders, you will not be able to mount the printer.
-
Right-click the icon of the printer to be mounted and click Open or Install on the pop-up menu.
The Add Printer Wizard starts. Alternatively, drag the selected printer icon and drop it in the Printers Window.
See "To Mount Network Printers on Windows NT"for step-by-step instructions.
- © 2010, Oracle Corporation and/or its affiliates
