| A P P E N D I X F |
|
Configuring a Sun Server Running the Solaris Operating Environment |
This appendix provides access information and LUN setup information needed when you connect a Sun StorEdge 3510 FC Array to a Sun server running the Solaris operating environment. For a list of supported adapters, refer to the Sun StorEdge 3510 FC Array Release Notes.
This information supplements the configuration steps presented in this manual and covers the following topics:
The RAID controller can be configured by means of a Solaris workstation running a VT100 terminal emulation program, or by a Microsoft Windows terminal emulation program such as HyperTerminal.
|
Note - You can also monitor and configure a RAID array over an IP network with the Sun StorEdge Configuration Service program once you have assigned an IP address to the array. For details, see Configuring a COM Port to Connect to a RAID Array and refer to the Sun StorEdge 3000 Family Configuration Service User's Guide. |
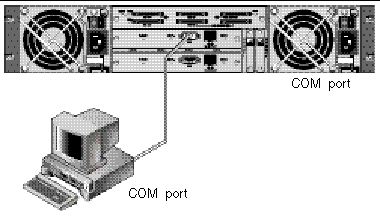
1. Use a null modem serial cable to connect the COM port of the RAID array to an unused serial port on a Solaris workstation.
A DB-9-to-DB-25 serial cable adapter is included in your package contents to connect the serial cable to a DB-25 serial port on a workstation.

It can take two or three minutes for both controllers to be initialized before communication is possible over the connection.
3. Set the serial port parameters on the workstation.
See Configuring a COM Port to Connect to a RAID Array for the parameters to use.
See Using the tip Command for Local Access to the Array for setting serial port parameters on a Solaris host.
See Using the tip Command for Local Access to the Array for instructions on using the Solaris operating environment's tip command.
You can access the RAID COM port (DB-9 connector on the controller module) locally with the following steps.
1. Connect the RAID array COM port to the serial port of a Solaris workstation, as shown in FIGURE F-1. Use the tip command to access the array locally:
where n is the COM port identifier. For instance, if you have connected the array to the COM port identified as ttyb, use this command:
2. Refresh your screen by holding down the Control key on your keyboard (this is abbreviated Ctrl on some keyboards) and pressing the letter L key on your keyboard.
1. If you have a new HBA device installed on your computer, reboot the computer.
2. Type the following the command:
3. Scroll down the listing to see the Fibre Channel devices and the related WWNs.

Copyright © 2004, Sun Microsystems, Inc. All rights reserved.