Articles
 To Create an Article
-
Login to WebSynergy.
-
Click Add Applications and expand the CMS folder.
-
Click Add against Journal portlet.
The Journal portlet is added to your page.
-
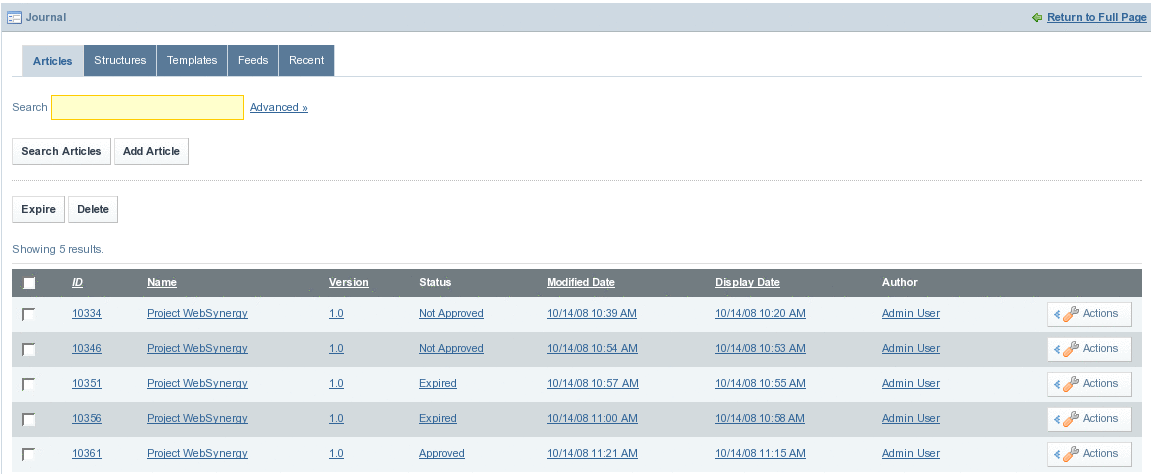
Click on the Articles tab.
All Journal articles are listed.
Figure 4–46 To create an Article
-
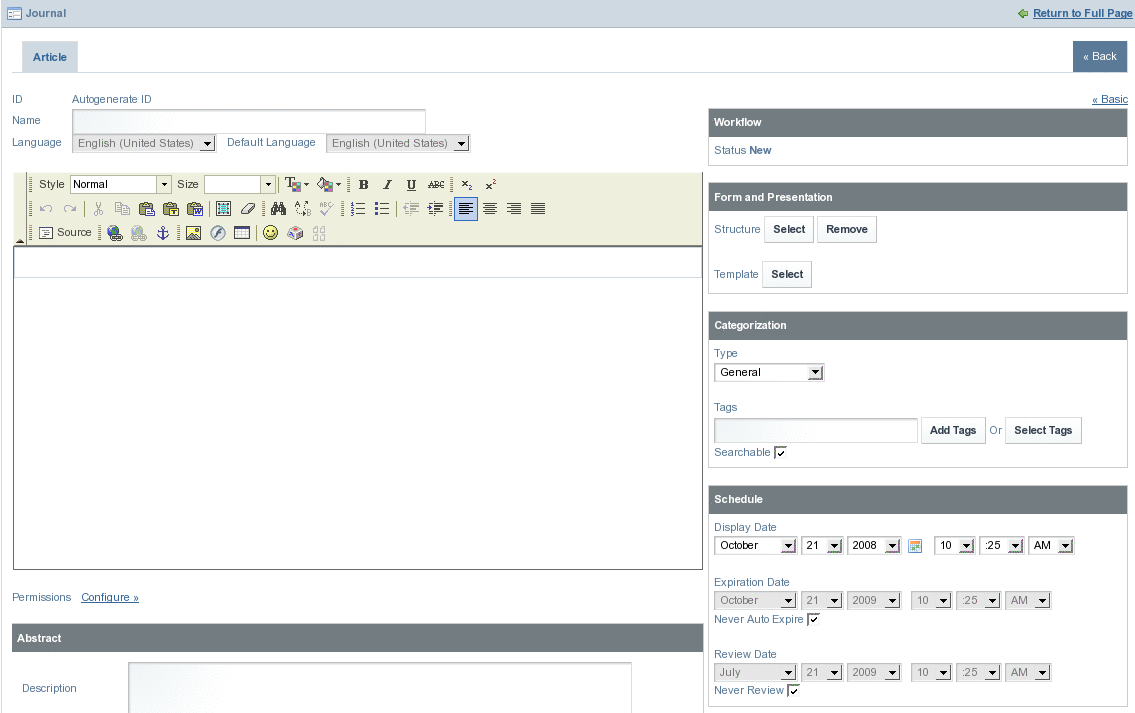
To create a new Journal Article, click on the Add Article button.
Figure 4–47 To create an Article
-
To select a Structure and a Template for the article, click on the Select button beside the Structure field.
You find the option to select a structure under Farm and Presentation.
Figure 4–48 To create an Article
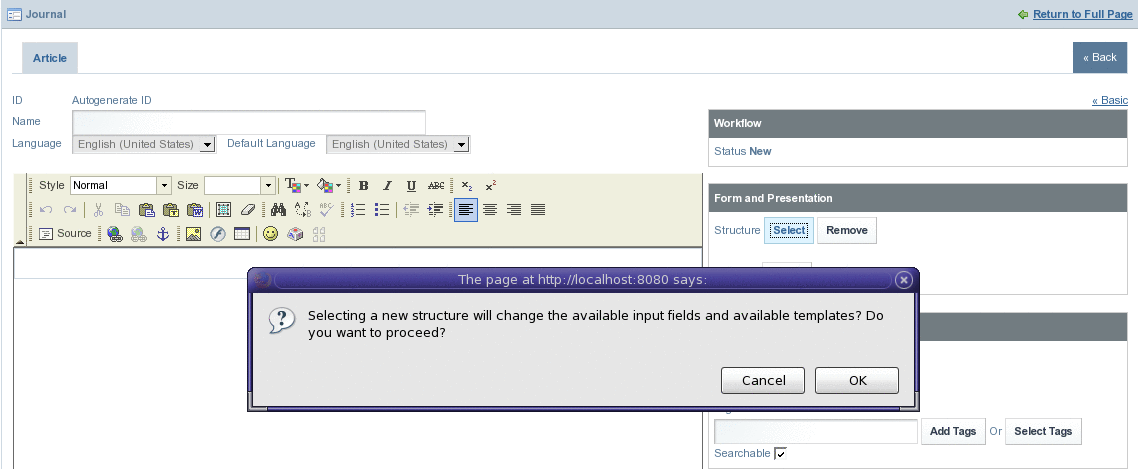
A dialog box appears with the message “Selecting a new structure will change the available input fields and available templates? Do you want to proceed?” appears. Click OK. The Structures window appears. You can select a structure by clicking on the name of a Structure. In our example, click on BASIC-WEBCAST to make it the Structure for the article.
You can note that the structure of the article has changed.
Figure 4–49 To create an Article
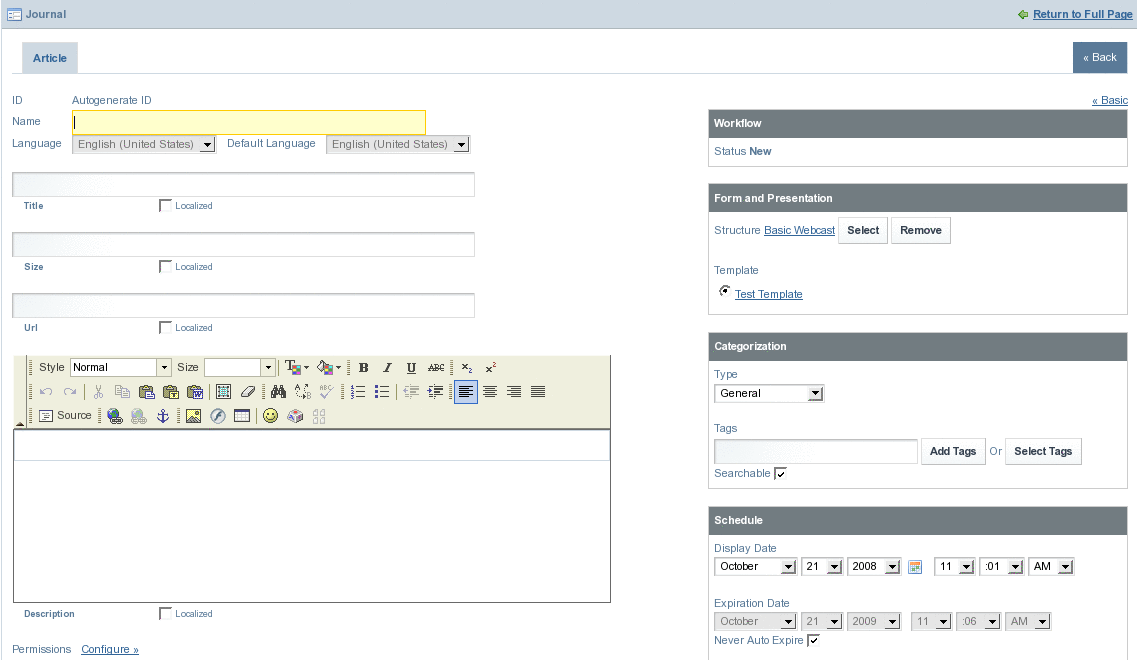
If there is a template using the structure, the template is added to the article by default.
-
Specify a name for the article.
-
Choose the Type for Categorization that the article will reside in.
Figure 4–50 To create an Article
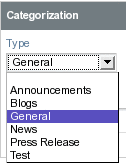
This will help make it easier for users to make manual searches of articles and organize articles.
-
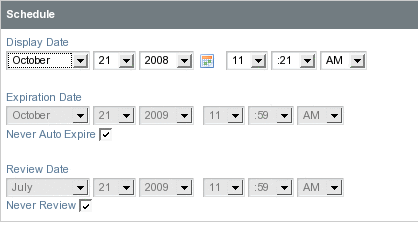
Set the Schedule details.
Set values for Display Date, Expiration Date, and Review Date fields. The default setting does not set an expiration date and review date.
Figure 4–51 To create an Article
-
Create the article, and click Save.
 To Edit an Article
-
Click on the Actions button for the article and select Edit from the menu.
Figure 4–52 To edit an Article
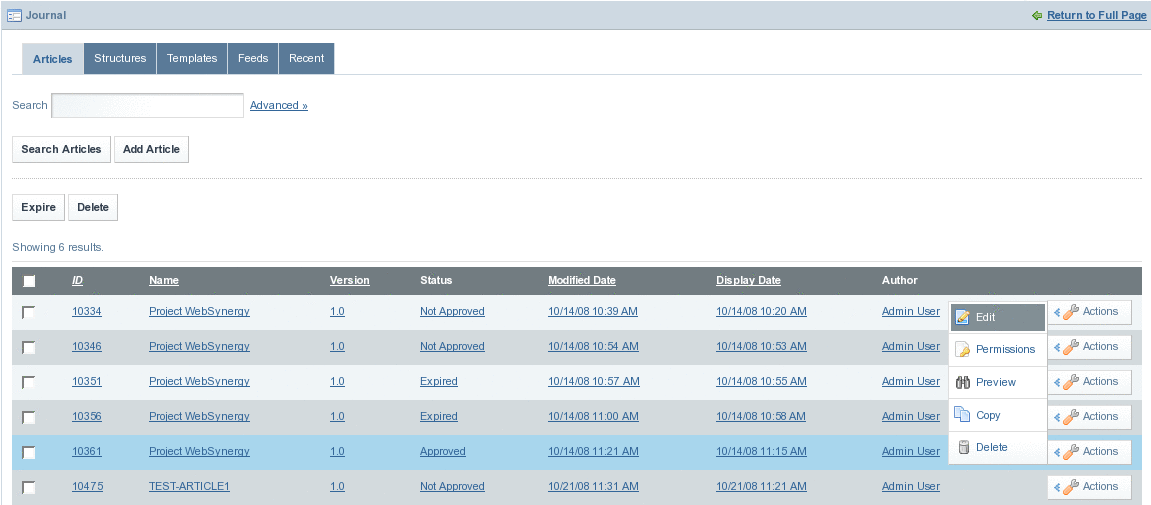
The article appears in Edit mode. In this screen you can edit anything in the article except for the article ID, which can not be changed once the article has been created. You can choose to increment the version every time you edit the article to help all users see how often the article has been changed. If you feel that the changes you are making are very minor, you can choose not to increment it. Note that if you set the expiration date to a date earlier to the current date, you will no longer be able to select that article for use in the Journal Content portlet.
-
Make necessary changes and click Save.
 To Delete an Article
- © 2010, Oracle Corporation and/or its affiliates
