4 Administering the Websphere Portal
This chapter discusses these topics:
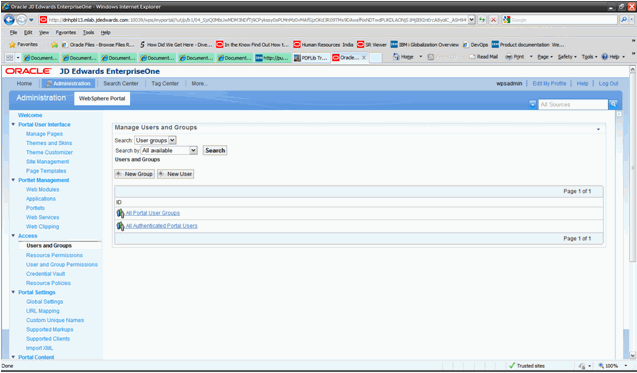
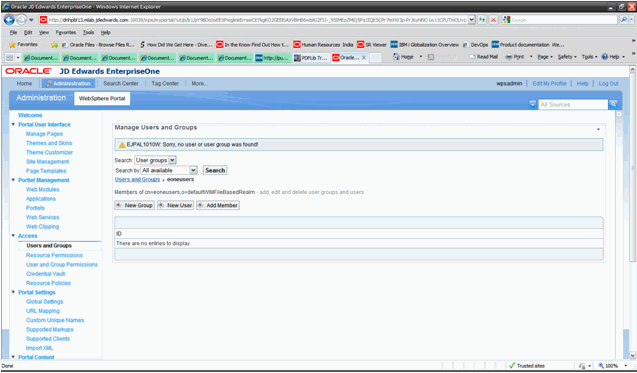
4.1 Adding users and groups in WebSphere Portal v7.0
To add a group and user:
-
Login into WPS v7.0 using administration credential (i.e wpsadmin)
-
Select Users and Groups portlet under access section.
-
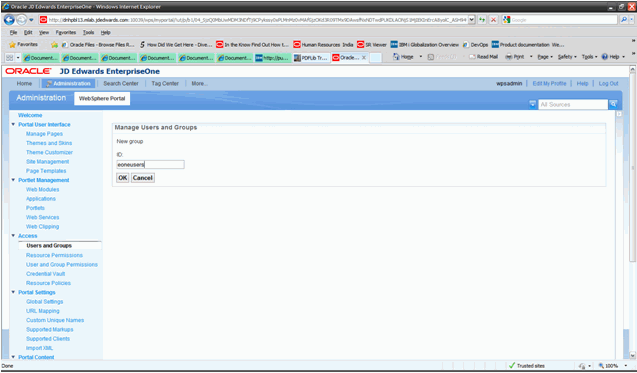
Click New Group button.
-
Provide new group id and click OK Button.
-
The new group is created and displayed in the list of users and groups.

-
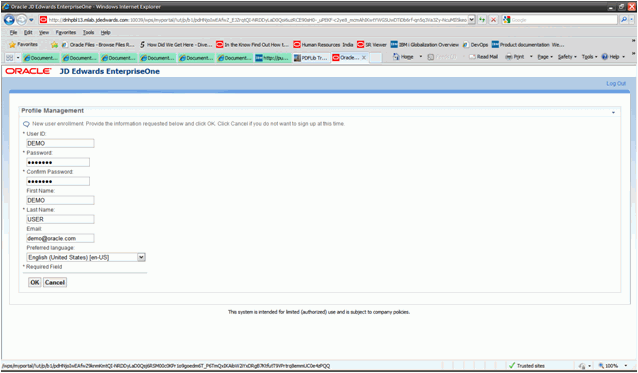
Click on New User button.
-
Fill in the details and click OK button.
-
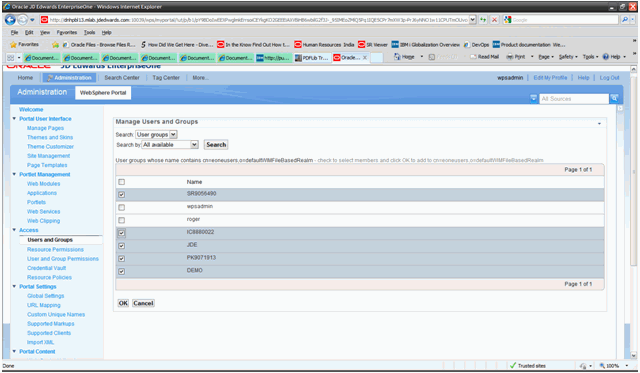
Click on the Add Member button.
-
Select the required users and click OK Button.
-
A success message is displayed ”EJPAL0140I: User or user group has been successfully added to the selected group.” After this completes and the list of available users selected is added to this group.
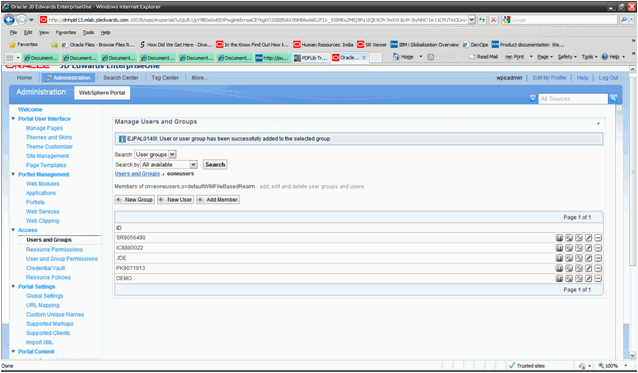
Similarly, it is possible to create and add users into existing groups (i.e wpsadmins) by following the above procedure. Also, users and groups can be removed from the Manage Users and Groups portlet.
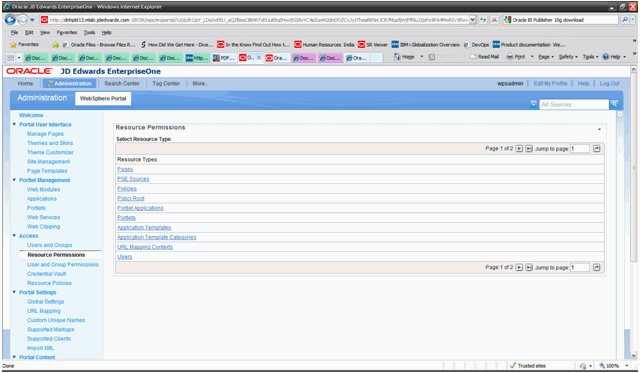
4.2 Providing Access and Resource Permissions
To providing access and resource permissions:
-
Login into WPS v7.0 using administration credential (i.e wpsadmin).
-
Navigate to Resource Permissions portlet under Access section.
-
To provide page level permission, click Pages.
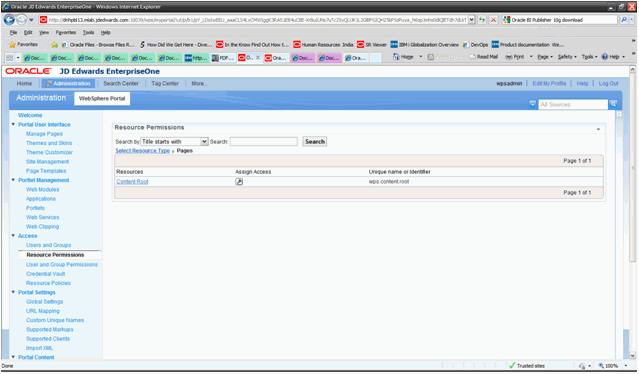
-
Click Content Root.
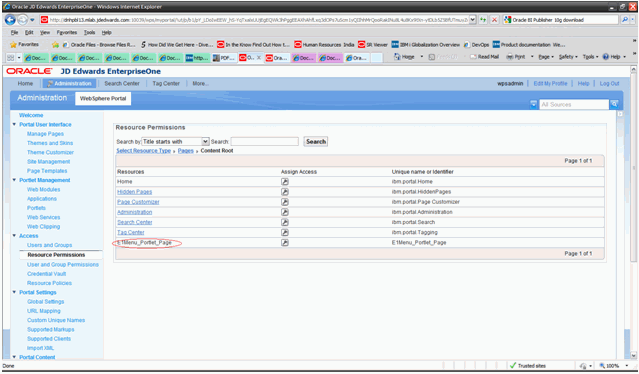
-
For the added page, click the Assign Access button for the corresponding page row.
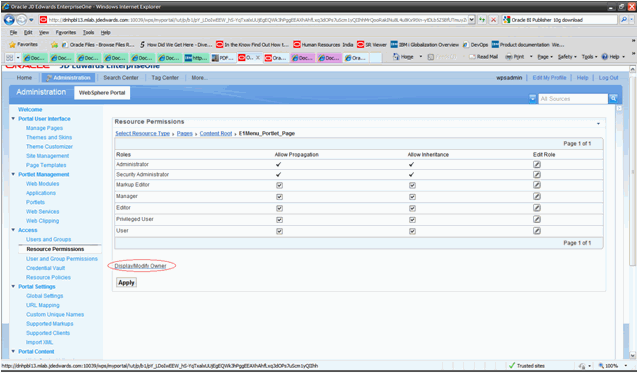
-
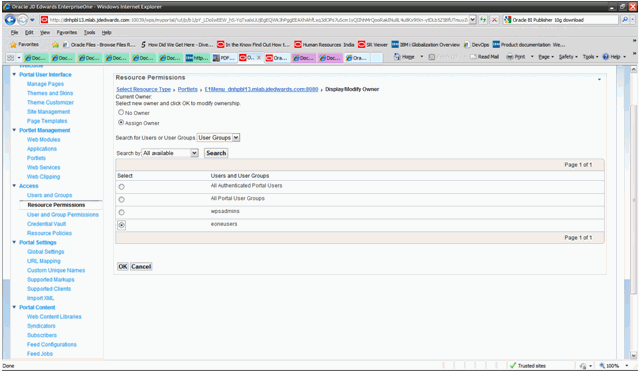
Click Display/Modify owner.
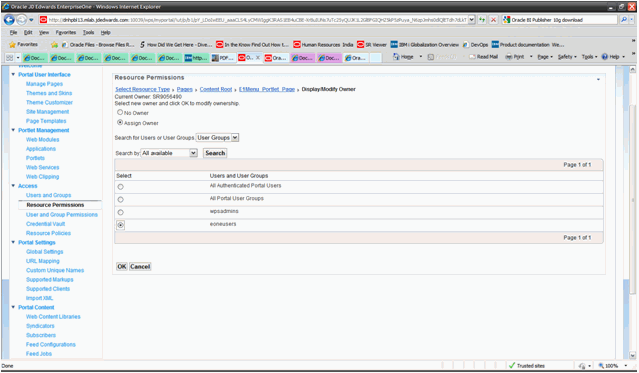
-
In the dropdown select the User Groups or Users depending what you want to filter with.
-
Click Search button.
-
Select the group you wish to assign the permission to and click OK Button.
-
Example: In the image below I have selected eoneusers group.
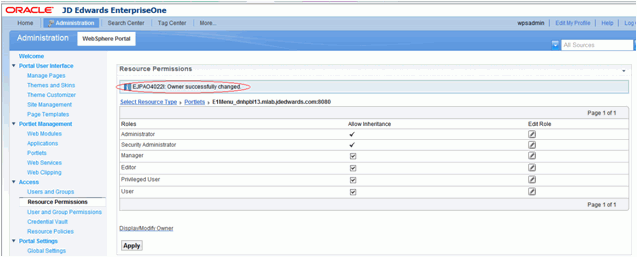
-
Owner successfully changed message will be displayed once this operation completes successfully ”EJPAO4022I: Owner successfully changed.”.
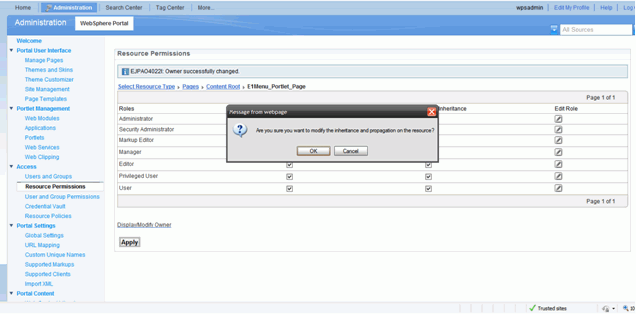
-
Finally click the Apply button to make these changes permanent.
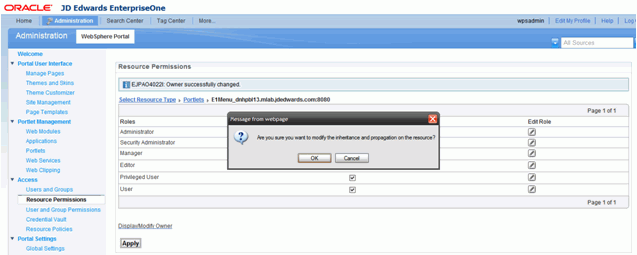
-
Click OK button in the popup.
-
Login into WPS v7.0 using administration credential (i.e wpsadmin).
-
Navigate to Resource Permissions portlet under Access section.
-
Click on portlets.
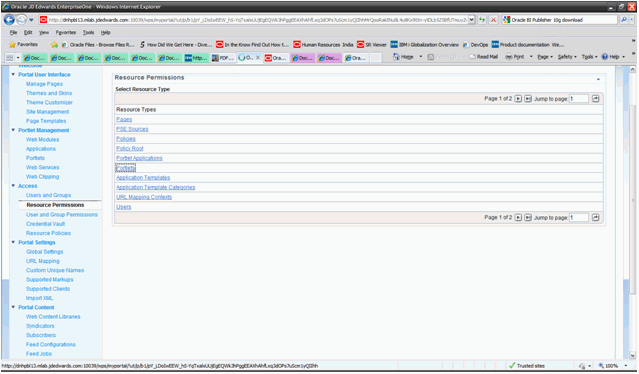
-
Using the search field, find the required portlet.
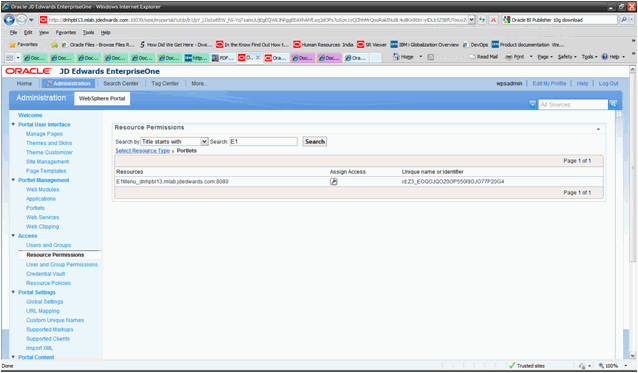
-
Click on the Assign Access button.
-
Click on display/modify owner link.
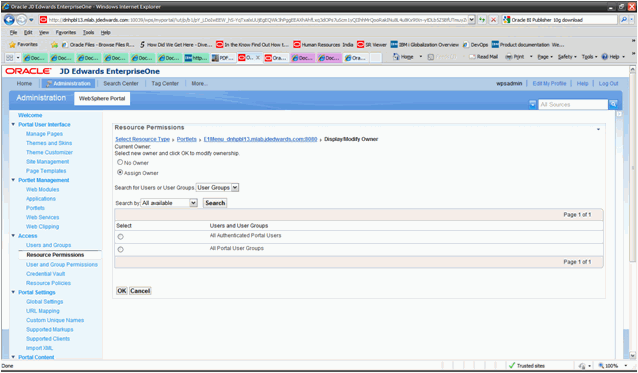
-
Search for the required user or group using the search field and assign permission as required. In the example below, the eoneusers group has been selected. Click OK button.
-
A success message is displayed indicating a successful installation.
-
Click on the Apply button to make these changes permanent.
Follow similar procedure to modify and delete portlet and page permissions and content.
4.3 Creating home page content for Non Administrative users with IBM WebSphere Portal v7.0
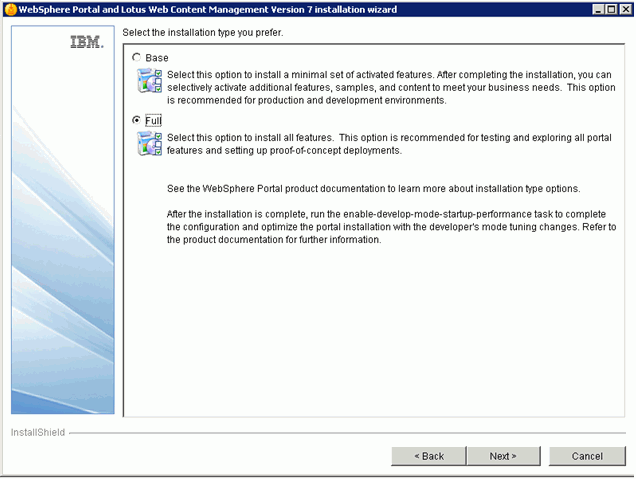
There are two installation modes available for installing WPS v7.0:
-
Base Install
-
Full Install
Per IBM. base install is recommended for production setups and full install is recommended for prototyping or testing setups.
When the Base install is carried out the default Home/Welcome page is not created, as is the case with the Full install.
The order of page resolution for any particular URI (i.e /wps/portal) is as per the order seen in the Manage Pages portlet (top to bottom):
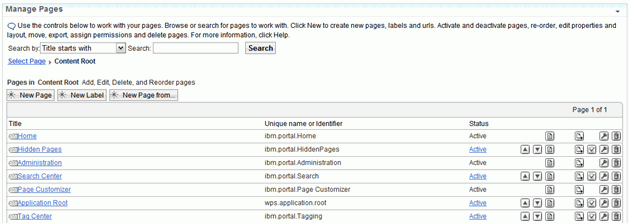
Now based on the above image the page resolution for any matching URI is pages in Home label first, next pages in Hidden Pages label and then pages in the Administration label. It is possible to change this order by moving the labels up and down using the arrow buttons in the above portlet.
Hence, for a particular non administrative user (a Portal user who is not a member of wpsadmins group) who will not have access to pages in the Administration label the resolution will be pages in Home label and pages in Hidden label.
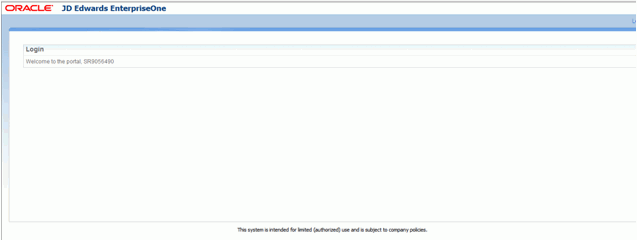
If there are no pages available in the Home label and the user doesn't have access to pages in the Hidden label then users will notice an empty screen upon successful login into the Portal (image given below), this is when logged into the usual Portal Server URL http://<portal_server_name>:10039/wps/portal (assuming 10039 is the portal server port):
In this case it is required to for the administrative user (i.e wpsadmin…etc) to create some content in the Home label which is accessible to Non Administrative users of the portal.
The administrative users of the portal can access the Administration label directly by using the below URL:
http://<portal_server_name>:10039/wps/myportal/Administration (assuming 10039 is the portal server port)
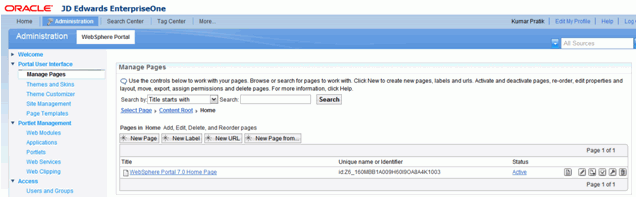
Below image shows how the Home/Welcome page can be created for Non Administrative accounts of the portal server:
After this is done, when Non Administrative users access the portal they will be presented with access to this created home page.

After this the Non Administrative users can proceed with their activities based on the role and permissions provided.