6 Working with an External HTTP Server
This chapter discusses configuring and administrating an external HTTP server.
This section discusses:
-
Section 6.1, "Configuring an External HTTP Server (IBM HTTP Server) with wp_profile"
-
Section 6.2, "Starting the ADMIN Instance of the IBM HTTP Server"
-
Section 6.3, "Creating a New HTTP Server Configuration and Instance"
-
Section 6.4, "Configuring the WebSphere Plug-in and IBM HTTP Server"
6.1 Configuring an External HTTP Server (IBM HTTP Server) with wp_profile
To configure an external HTTP server (IBM HTTP Server) with wp_profile:
-
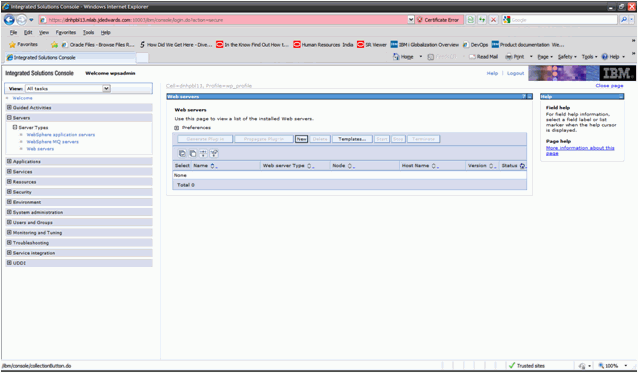
Login into the WPS v7.0 Admin Console:
-
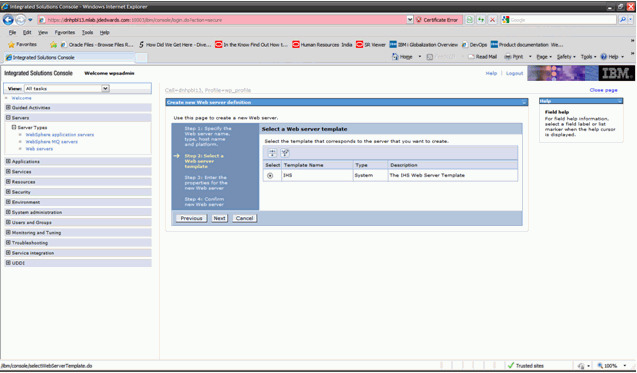
Go to Servers, Server types, Web servers.
-
Click the New button.
-
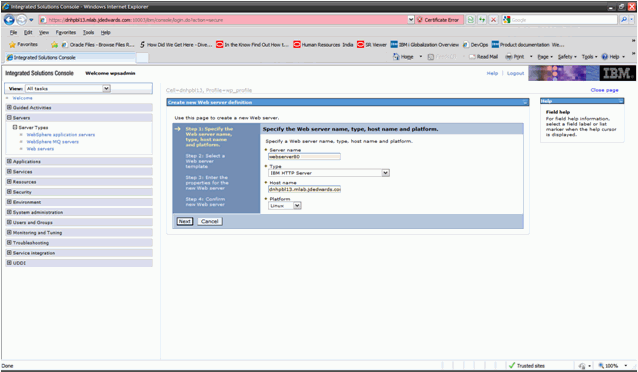
Fill in the details and click the Next button.
-
Select the appropriate host type (Windows or UNIX platforms).
-
Click Next.
-
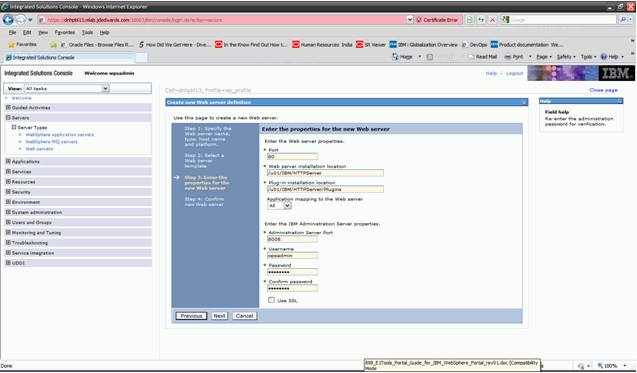
Enter the details and click the Next button.
Port number should typically be the HTTP Port number 80.
The HTTP Server and HTTP Server Plugins directory have to be provided.
-
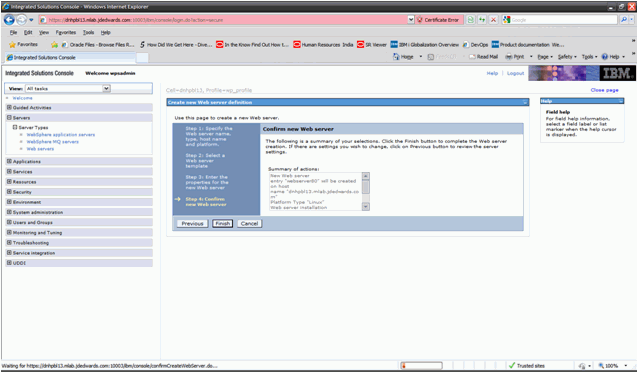
Click the Finish button after reviewing the summary information.
-
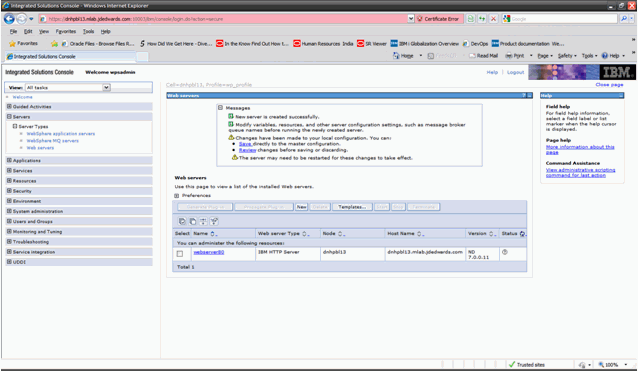
Review and click the Save link.
-
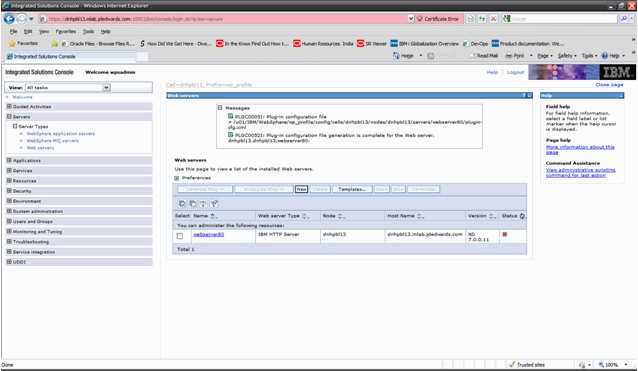
Select the newly created HTTP Server checkbox and click Generate Plugins button. This will generate the plugin-cfg.xml file.
-
Select the newly created HTTP Server checkbox and click the Propagate Plugins button.
This will copy the plugin-cfg.xml file into the HTTP Server installation directory.
Note the location of the plugin-cfg.xml file (i.e /u01/IBM/HTTPServer/Plugins/config/webserver80/plugin-cfg.xml).
-
Update the httpd.conf file with the new location of the plugin-cfg.xml file and restart the IBM HTTP Server (i.e using the WebSpherePluginConfig /u01/IBM/HTTPServer/Plugins/config/webserver80/plugin-cfg.xml line in the httpd.conf file).
Ensure the following line exists in the httpd.conf file:
Listen 80
This instructs the HTTP Server to listen to port 80.
-
After restarting the HTTP Server, attempt to access the HTTP Server home page using the URL (http://server_name). The following screen should appear:

-
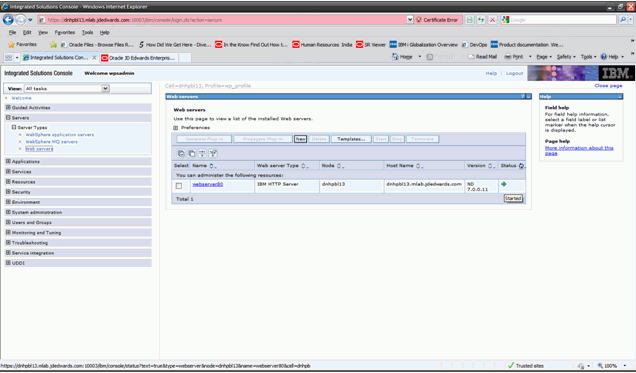
In the Admin Console you will note that the status of the IBM HTTP Server is shown as running now.
-
After this step, attempt to access the WebSphere Portal Server URL over HTTP Port (i.e http://<portal_server_machine>/wps/portal), the following screen should be presented indicating the Portal Server URL being accessed over HTTP Port (80).

Note that the port 10039 is not being show in the URL of the browser indicating access over HTTP port (80).
This completes the IBM HTTP Server Configuration for WPS v7.0 for Windows and UNIX Platforms.
Note:
The instructions provided here are general instructions for configuring ports on an IBM HTTP Server for WebSphere 7.0 running on an IBM i machine.6.2 Starting the ADMIN Instance of the IBM HTTP Server
This section discusses starting the ADMIN instance or the IBM HTTP server.
6.2.1 Starting the ADMIN Instance of the IBM HTTP Server
You must start an ADMIN instance of IBM HTTP Server for IBM i to create, change, or display an IBM HTTP server instance configuration by using the IBM HTTP Server for IBM i Configuration and Administration forms.
Note:
The images in this chapter were captured using a particular HTTP Server PTF and operating system cumulative PTF level, and may not match the screens displayed in your system. Although the placement of links and buttons can vary, the instructions are still applicable. For more information, refer to this link on IBM's website:http://www-03.ibm.com/systems/i/software/http/
This section describes these two ways in which you can start the ADMIN Instance of the IBM HTTP Server:
-
Starting the ADMIN Instance of the HTTP Server from the Command Line
-
Starting the ADMIN Instance of the HTTP Server from the Operations Navigator
6.2.2 Starting the ADMIN Instance of the HTTP Server from the Command Line
This section discusses starting the ADMIN Instance of the HTTP Server from the Command Line.
To start the ADMIN instance of the HTTP Server from the IBM i command line:
-
From the command line, enter this command:
STRTCPSVR SERVER(*HTTP) HTTPSVR(*ADMIN)
-
Press Enter.
6.2.3 Starting the ADMIN Instance of the HTTP Server from the Operations Navigator
This section discusses starting the ADMIN Instance of the HTTP Server from the Operations Navigator.
The Operations Navigator is the graphical point-and-click interface to the IBM i system. Operations Navigator is part of the IBM i Access product.
To start the ADMIN instance of the HTTP Server from the Operations Navigator:
-
Start Operations Navigator.
-
Double-click your IBM i server in the main tree view of Operations Navigator.
-
Double-click Network.
-
Double-click Servers.
-
Double-click TCP/IP.
-
Right-click HTTP Administration in the right pane.
-
Select Start from the pop-up menu.
6.3 Creating a New HTTP Server Configuration and Instance
This section discusses creating a new HTTP server configuration and instance.
6.3.1 Creating a New HTTP Server Configuration
WebSphere Application Server plugs into IBM HTTP Server for IBM i. The IBM HTTP Server routes certain client requests (such as for a servlet or JSP file) to WebSphere for processing. You must create a new HTTP server configuration that contains the information that IBM HTTP Server needs to route requests to the appropriate WebSphere Application Server methods.
You can create a new IBM HTTP Server configuration by opening the Configuration and Administration forms.
To create a new HTTP Server configuration:
-
Start your JavaScript-enabled browser.
-
In the URL location or address window, enter this url:
http://<server_name>:2001/HTTPAdmin
where <server_name> is the host name of your IBM i web server machine.
-
Press Enter.
-
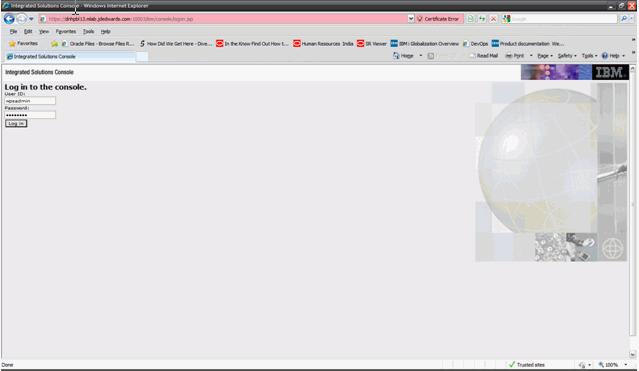
You are prompted for an IBM i user ID and password.
You should enter an IBM i user ID that has *ALLOBJ and *IOSYSCFG authority.
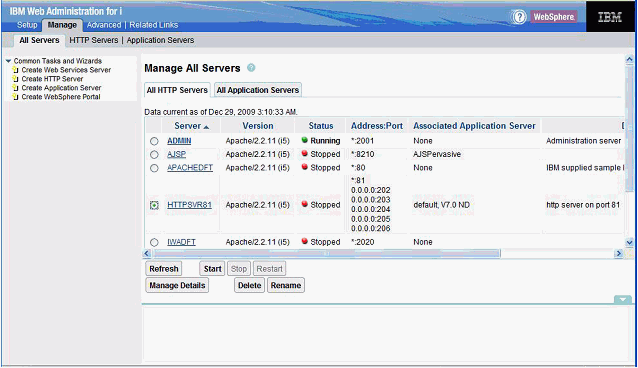
The IBM i Web administration page appears as shown in this sample screen:
-
To create an HTTP Server, click on Create HTTP Server in the left-hand pane.
6.3.2 Creating a New HTTP Server Instance
You must create a new HTTP Server instance in which an instance of your JD Edwards EnterpriseOne configuration will run.
To create a new HTTP Server instance:
-
Click on the Setup tab.
-
In the left pane, click on Create HTTP Server.
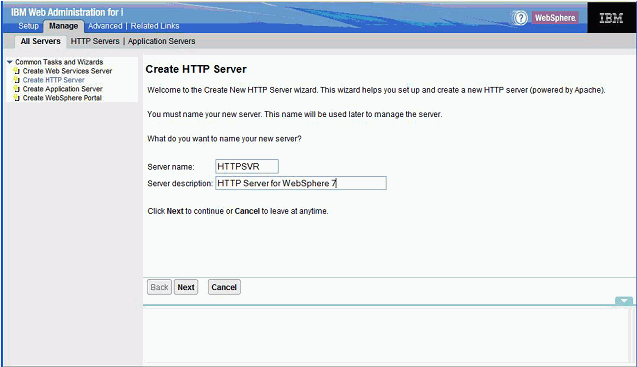
The Create HTTP server page displays in the right frame, as shown in the screen sample below:
-
On Create HTTP Server, Welcome, complete these fields:
-
Server name
Enter a server name. For example:
HTTPSVR
-
Server description
Enter a description. For example:
Enter a description. For example:
HTTP Server for WebSphere 7
-
-
Click the Next button.

-
On Create HTTP Server, you can accept the default value for the Server root directory.
-
Click the Next button.
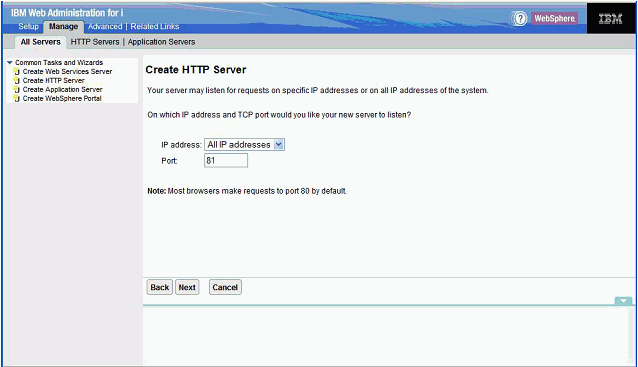
Port 80 can and should be used. Port 81 is used as an example.
On Create HTTP Server, IP address and TCP port, complete these fields:
-
IP address
You can accept the default value: All IP addresses.
-
Port
Enter a port number for the HTTP Server. For example, 81.
Note:
Since Port 80 is the default port and is already set up with a different web server, you may choose a different port number.Caution:
The port you entered in this field will not be available for use by the JD Edwards EnterpriseOne HTML Web Server. For example, if you plan to use port 84 for your JD Edwards EnterpriseOne HTML Web Server, for this HTTP server definition you must enter a port number other than 84. -
-
Click the Next button.
-
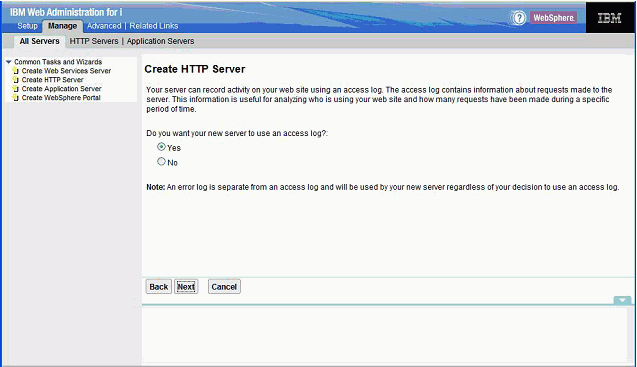
On Create HTTP Server, access log, you can accept the default radio button setting of Yes to specify you want your new server to use an access log.
-
Click the Next button.
-
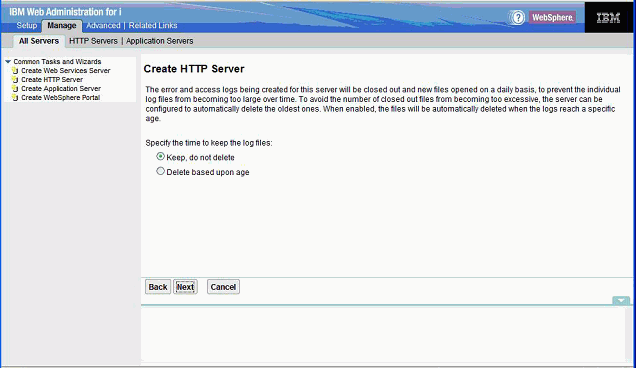
On Create HTTP Server (keep logs), you can accept the default value Keep, do not delete to specify you want to keep the log files.
-
Click the Next button.
-
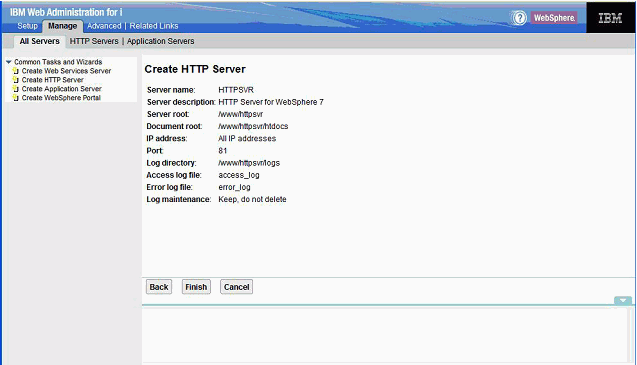
On Create HTTP Server summary, review your selections and if acceptable click the Finish button to complete the creation of the HTTP Server.
6.4 Configuring the WebSphere Plug-in and IBM HTTP Server
This section discusses configuring the WebSphere Plug-in and IBM HTTP Server.
6.4.1 Configuring the WebSphere Plug-in for a Standalone Profile Note
This process will not work if the WebSphere profile selected in Step 3 below is a managed node. To configure the WebSphere plug-in for a standalone profile:
-
Click on the Manage tab.
-
In the left pane, click the WebSphere Application Server link.
Note:
If the link is not visible, use the slider bar to scroll down. -
On WebSphere Application Server, on the General tab, select this radio button: WebSphere Application Server, V7.0.0.11 ND
The WebSphere profile drop down box lists all the profiles available. Since you are configuring a non-default profile, select the wp_profile from the dropdown.
You can accept the default value of NO in the dropdown box for choosing whether to start all WebSphere application servers.
-
Click the Apply button.
The program configures the plug-in for WebSphere, and returns to the first default screen.
-
Click the OK button.
The configuration can take several minutes to complete.
The above steps enable the HTTP server to pass requests to WebSphere.
-
Access the WebSphere Administration Console. For example: click on the servers, webservers. http://<server_name>:9060/admin.
-
On the WebSphere Administration Console, click on Servers, Webservers.
The program should display the new webserver you created. By default, the server is named:
IHS_<HTTP_SERVER_NAME>
If you follow the recommendation in this procedure, the webserver is named:
IHS_HTTPSVR
After restarting the HTTP Server, attempt to access the HTTP Server home page using the URL (http://IBM i_server_name). The following screen should appear:

In the Admin Console you will note that the status of the IBM HTTP Server is shown as running now.
6.4.2 Configuring the IBM HTTP Server
This section includes general instructions for configuring ports on an IBM i IBM HTTP Server for WebSphere 7.0 and setting up the correct virtual host.
To configure the new HTTP Server instance:
-
Open a browser and enter this URL to start the IBM HTTP Server Web Administration console:
http://server_name:2001/HTTPAdmin
-
Click the Manage tab.
-
Select the HTTP Server you created in Creating a New HTTP Server Instance, for example HTTPSVR.
-
In the left pane scroll down and select Tools, Edit Configuration File.
The configuration file includes a port listen command for the port number you specified when you created the HTTP Server port in Creating a New HTTP Server Instance. This port number might not be the same as the port you specified when you installed the HTML Web Server. For example, if you selected port 81 as the HTTP Server port, the command in the configuration file should be:
Listen *:80
This instructs the HTTP Server to listen to the port 80.
Note the location of the plugin-cfg.xml file
-
Update the httpd.conf file with the new location of the plugin-cfg.xml file and restart the IBM HTTP Server.
Update the WebSpherePluginConfig /www/httpsvr/conf/plugin-cfg.xml line in the httpd.conf.
-
Click the Apply button.
-
7. Click the OK button.
6.5 Starting the IBM HTTP Server
This section discusses starting the HTTP server.
6.5.1 Starting the IBM HTTP Server for the IBM i Instance
The IBM HTTP Server for IBM i runs in the QHTTPSVR subsystem, and each HTTP server instance starts multiple jobs. The WebSphere Application Server code that plugs into IBM HTTP Server for IBM i runs in the HTTP server job that communicates with the administrative server and one or more application servers.
There are two ways to start the IBM HTTP Server for IBM i instance:
-
Starting the IBM HTTP Server for IBM i Instance from the Command Line
-
Starting the IBM HTTP Server for IBM i Instance from the IBM i Configuration and Administration Forms
To start the IBM HTTP Server for IBM i Instance from the command line:
-
On the IBM i command line, enter this command:
STRTCPSVR SERVER(*HTTP) HTTPSVR(MYINSTANCE)
where MYINSTANCE is the name of your HTTP server instance. The syntax of this name should correspond with the recommended naming conventions specified in this guide. For example:
HTTPSVR
-
If you change your HTTP server instance configuration, stop and then start your HTTP server instance.
6.5.2 Starting the IBM HTTP Server for IBM i Instance from the IBM i Configuration and Administration Forms
The Configuration and Administration forms also allow you the option of restarting your HTTP server instance. When restarting, the HTTP server will recognize all configuration changes except for changes to the Basic and Security configuration forms.
-
Start your JavaScript-enabled browser.
-
Enter this URL in the URL location or address window:
http://<server_name>:2001/HTTPAdmin
where <server_name> is the host name of your IBM i system.
-
Press Enter to navigate to the URL.
The IBM i Tasks page appears.
-
Click the link for IBM HTTP Server for IBM i.
The IBM HTTP Server for IBM i page appears.
-
Click the Manage tab.
The Manage page appears.
-
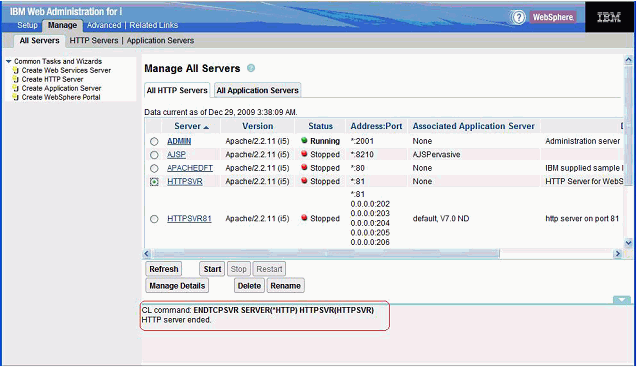
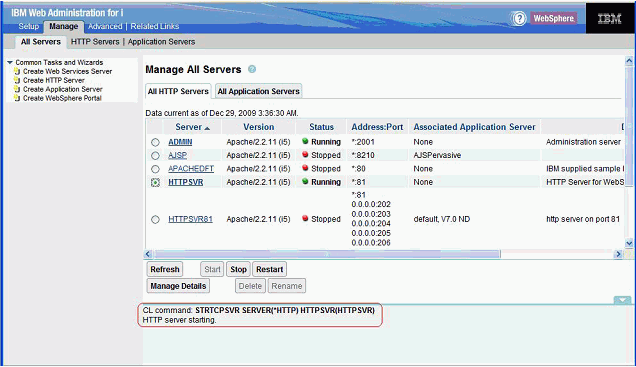
In the right pane, click Manage All Servers.
-
Click the radio button to the left of the server you created.
-
Click the Start button.
This message appears in the Message box at the bottom of the screen: HTTP server starting.
A sample image is provided below:
6.6 Stopping the IBM HTTP Server
This section discusses stopping the HTTP server.
6.6.1 Stopping the IBM HTTP Server for the IBM i Instance
If you change your HTTP server instance configuration, stop and then start your HTTP server instance.
There are two ways to stop the IBM HTTP Server for the IBM i instance:
-
Stopping the IBM HTTP Server for IBM i Instance from the Command Line
-
Stopping the IBM HTTP Server for IBM i Instance from the IBM i Configuration and Administration Forms
To stop the IBM HTTP Server for IBM i instance from the command line:
Enter this command on the IBM i command line:
ENDTCPSVR SERVER(*HTTP) HTTPSVR(MYINSTANCE)
where MYINSTANCE is the of name your HTTP server instance.
6.6.2 Stopping the IBM HTTP Server for IBM i Instance from the IBM i Configuration and Administration Forms
To stop the IBM HTTP Server for IBM i instance from the IBM i configuration and administration forms:
-
Start your JavaScript-enabled browser.
-
Enter this command in the URL location or address window:
http://<server_name>:2001/HTTPAdmin
where <server_name> is the host name of your IBM i system.
-
Press the Enter button.
You are prompted for an IBM i user ID and password; your IBM i user ID must have *ALLOBJ authority.
The IBM i Tasks page appears.
-
Click IBM HTTP Server for IBM i.
The IBM HTTP Server for IBM i page appears.
-
In the top pane, click Administration.
The Administration page appears.
-
Click Manage HTTP Servers in the left-hand frame.
-
Click the radio button to the left of the server you created.
-
Click the Stop button.
This message appears in the Message box at the bottom of the screen: HTTP server ended.
A sample image is shown below: