4 Working with the Platform Pack
This chapter discusses:
-
Section 4.3, "Understanding System Account Security for DB2 UDB Databases"
-
Section 4.4, "Troubleshooting IBM DB2 9.7 Database Installations"
-
Section 4.7, "Increasing Semaphores on Oracle Solaris on SPARC"
-
Section 4.9, "Loading LDAP-UX Libraries for HP-UX Itanium (Tools Release 9.1 Update 3)"
-
Section 4.12, "Manually Running the Database Creation Scripts - UNIX with UDB"
-
Section 4.14, "Rerunning the JD Edwards EnterpriseOne Platform Pack Installer"
4.1 Understanding the Platform Pack
The Platform Pack installs these major components:
-
JD Edwards EnterpriseOne Server code
-
JD Edwards EnterpriseOne database files
Note:
Assuming the installation programs are run on different machines, you can concurrently install these JD Edwards EnterpriseOne servers:-
Deployment Server
-
Platform Pack on Enterprise Server and/or Database Server
-
HTML Server
This can decrease the overall time it takes to complete the installation.
Note:
To reinstall any Enterprise Server components, refer to Section 4.14, "Rerunning the JD Edwards EnterpriseOne Platform Pack Installer".This table lists the mandatory and optional components of the Platform Pack installation:
| Server | Mandatory Component | Optional Components |
|---|---|---|
| Enterprise Server | JD Edwards EnterpriseOne Foundation | ES Production
ES Prototype ES Development ES Pristine |
| Database Server | System Database | Production Databases
Prototype Databases Development Databases Pristine Databases |
4.2 Platform Pack Process Flow
The Platform Pack installation process upgrades Release 9.1 system and path code files.
The diagram below illustrates the process flow for the Oracle Universal Installer for the JD Edwards EnterpriseOne Platform Pack.

4.3 Understanding System Account Security for DB2 UDB Databases
The Platform Pack installer creates a system account for each datasource owner plus JDE. If you specify to use the DEFAULT password, these accounts are assigned the same password as the owner. For example, the datasource owner sy910 is created with password SY910.
If these passwords violate your security policy, the Platform Pack install will fail. In this case you will need to specify a SECURE PASSWORD that will not violate your security policy The secure password will be used for all users that the Platform Pack creates. Refer to Section 4.16, "Working with Database Security" to create password overrides onto the Deployment Server for purposes of running the Planner and Installation Workbenches.
If you need to create new accounts, you should use this list of Release 9.1 users and add owshare as a primary group:
| Environment | Datasource Account |
|---|---|
| All environments | dd910
ol910 sy910 svm910 |
| Production environment | prodctl
proddta pd910 |
| Prototype environment | crpctl
crpdta py910 |
| Pristine environment | ps910ctl
ps910dta ps910 |
| Development environment | testctl
testdta dv910 |
4.4 Troubleshooting IBM DB2 9.7 Database Installations
This section provides some basic troubleshooting tips if you are having trouble with your IBM DB2 9.7 installation. It discusses these topics:
4.4.1 SQL5005C System Error
If on every reboot after installation of IBM DB2 9.7 you get a SQL5005C System Error, then you should add your user account to the local DB2ADMNS and to the local DB2USERS group. These groups are created during the IBM DB2 installation, but left empty.
4.4.2 Windows Server 2008 64-bit - SQLDriverConnect Failure
This section is applicable if you receive the below error on Windows Server 2008 64-bit while running porttest:
756\1640 MAIN_THREAD Mon Nov 16 03:05:13.991000 Jdbodbc.c1339
  ODB0000163 - SQLDriverConnect failure. rc=-1
  756\1640 MAIN_THREAD Mon Nov 16 03:05:13.991001 Jdbodbc.c1339
  ODB0000164 - DBC:00 [IM002][0] [Microsoft][ODBC Driver Manager] Data source
  name not found and no default driver specified
  756\1640 MAIN_THREAD Mon Nov 16 03:05:13.991002 Jdbodbc.c1349
  ODB0000010 - SQLDriverConnect failed. ODBC DSN: JDE910.
  756\1640 MAIN_THREAD Mon Nov 16 03:05:13.991003 Jdb_drvm.c909
  JDB9910164 - Failed to connect to JDE910
  756\1640 MAIN_THREAD Mon Nov 16 03:05:13.991004 Jtp_cm.c284
  JDB9909103 - Could not init connect.
  756\1640 MAIN_THREAD Mon Nov 16 03:05:13.991005 Jtp_tm.c1134
  JDB9909100 - Get connect info failed: Transaction ID =
  756\1640 MAIN_THREAD Mon Nov 16 03:05:13.991006 Jdb_rq1.c2432
  JDB3100013 - Failed to get connectinfo
The likely cause of this error is because the ODBC datasources for JDE910, JDE_DEV, JDE_PROD, and so on were created in an incorrect location, such as this 32-bit directory and file:
\System32\odbcad32.exe
For 64-bit systems, the correct location in which these datasources should be created is in this directory and file and directory:
\SysWOW64\odbcad32.exe
To remedy, launch the odbcad32.exe as an Administrator from C:\Windows\SysWOW64 and manually create the datasources.
4.5 Increasing Maxfiles Limits
In order to install the Unix Platform Pack, you must increase the number of files that can concurrently be open.
Note:
These are minimum values. If your current kernel settings are higher than these settings, do not change them. Otherwise record the current settings for these values so you can reset them after completing the Platform Pack install.4.5.1 HP/UX
Make the following changes using a HP/UX system editor such as SAM or SMH.
maxfiles=1024
rmaxfiles_lim=2048
4.5.2 Oracle Solaris on SPARC
Make the following changes in /etc/system:
rlim_fd_cur=1024
rlim_fd_max=2048
4.5.3 IBM AIX on POWER Systems
Make the following changes to the /etc/security/limits file:
nofiles=1024
nofiles_hard=2048
4.5.4 Linux
On the Enterprise Server, edit the /etc/security/limits.conf file and look for the entry for nofile. If it is missing or set lower than below, change it to match below:
#  Following increases number of concurrent open files for EnterpriseOne
*        soft      nofile             1024
Note:
Once you have made changes to the/etc/security/limits.conf, in order for the changes to take effect you must either reboot the machine or run the sysctl -p command.4.6 Installing the en_US Locale
The Platform Pack installer, which is based on InstallShield MultiPlatform, requires that the en_US locale be installed. Other English locales can be present, but the installer itself is dependent on the en_US locale. Once the Platform Pack installation has completed, you can remove the en_US locale as this is not required for running EnterpriseOne Services.
4.7 Increasing Semaphores on Oracle Solaris on SPARC
This procedure is only applicable to Oracle Solaris on SPARC platforms. There are separate procedures depending on your Solaris OS level:
4.7.1 Releases Prior to Solaris 10
To increase semaphores on Solaris levels prior to Solaris 10:
-
On the Enterprise Server that is running Solaris, log in as root.
-
Open this file in a text editor:
/etc/system -
Verify this parameter and setting are valid:
set semsys:seminfo_semmsl=1024Note:
This value is the minimum recommended setting and is only required for initial installations. You may need to reset this value after you complete the installation of the JD Edwards EnterpriseOne Platform Pack. -
If you modified any semaphore setting in the
/etc/systemfile, you must reboot your system in order for the new values to take effect.
4.7.2 Solaris 10 or Solaris 11
To increase semaphores on Solaris 10 or Solaris 11:
-
On the Enterprise Server that is running Solaris, log in as root.
-
Issue this command:
projmod 'K 'process.max-sem-nsems=(privileged,2048,deny) ' defaultThis command changes the default project to allow semaphore arrays with up to 2048 elements. For further information, see the Solaris documentation System Administration Guide: Solaris Containers-Resource Management and Solaris Zones.
4.8 Increasing Semaphores on Linux
Tip:
This procedure is only applicable to Linux platforms.This section discusses these topics:
4.8.1 Linux Versions Prior to Linux 7
-
On the Enterprise Server that is running Linux, log in as root.
-
Using any text editor, edit the
/etc/sysctl.conffile and search for this entry:# semaphores: semms1 semmns semopm semmni Added for EOne kernel.sem = 1024 32000 100 142
-
If this entry is missing or your existing values are lower than the above, change them to the above.
Note:
Once you have made changes to the/etc/sysctl.conffile, in order for the changes to take effect you must either reboot the machine or run thesysctl -pcommand.
4.8.2 Oracle Unbreakable Linux Version 7.x (Tools Release 9.1 Update 5)
-
On the Enterprise Server that is running Linux, log in as root.
-
Using any text editor, edit the
/usr/lib/sysctl.d/00-system.conffile and search for this entry:# semaphores: semms1 semmns semopm semmni Added for EOne kernel.sem = 1024 32000 100 142
Caution:
Another variant of this file, which is/etc/sysctl.conf, is used with previous releases of Linux, may be present on some versions of Oracle Unbreakable Linux 7.x. However this file will most likely be deprecated in future releases. Therefore users of Oracle Unbreakable Linux 7.x are advised to only use the/usr/lib/sysctl.d/00-system.conffile. -
If this entry is missing or your existing values are lower than the above, add the entry or change the values to the above.
Note:
Once you have made changes to the/usr/lib/sysctl.d/00-system.conffile, in order for the changes to take effect you must either reboot the machine or run thesysctl -pcommand.
4.9 Loading LDAP-UX Libraries for HP-UX Itanium (Tools Release 9.1 Update 3)
Tip:
This procedure is only applicable to HP-UX systems running on the HP-UX Itanium platform.When installing on the HP-UX Itanium platform, LDAP-UX Integration for HP-UX libraries must be installed prior to installing JD Edwards EnterpriseOne. These libraries must be obtained from Hewlett Packard, and can be downloaded at the following URL:
http://h20293.www2.hp.com/portal/swdepot/displayProductInfo.do?productNumber=J4269AA
Additionally, you must add the directory path for the 32-bit LDAP-UX libraries to the EnterpriseOne user's SHLIB_PATH environment variable. For example, assuming the LDAP-UX libraries are installed in the default location, the following line should be added to your EnterpriseOne user's .profile:
HLIB_PATH=$SHLIB_PATH:/opt/ldapux/lib/hpux32
4.10 Verifying Code Page Settings for DB2 UDB
To ensure that your DB2 UDB database has the correct settings for Release 9.1:
-
From the DB2 command window, enter this DB2 Profile Registry command:
db2set -allThe list of registry variables appears.
-
Search for the
DB2CODEPAGEvariable.If that variable is not listed, DB2 is using the default code page setting for the ANSI code pageLocal setting.
See Also
Refer to the Section 1.6, "Language Process Overview" for the National Language Support tables and other information related to multilingual installations.
4.11 Installing the Platform Pack
This section discusses:
4.11.1 Running the JD Edwards EnterpriseOne Platform Pack Installer
Caution:
If you are installing the Enterprise Server and the Database Server on different machines, you cannot run the installer on the Enterprise Server and install the Database Server remotely. You must copy the installer images to the Database Server and run the installer on that machine. For the Enterprise Server only, you will need the image for disk1. For a Database Server, you will need the disk1 image plus the database disk images.Note:
On the Linux platform, you must install the Korn Shell (ksh) scripting language because all the database install scripts use this language. If ksh is not installed in the/bin directory, you must create a link to the install location within the /bin directory. For example, if your ksh is installed in /usr/local/bin, run this command:
ln -s /usr/local/bin/ksh /bin/ksh
Note:
Prior to running the Platform Pack Installer, ensure your DB2 UDB account on the Enterprise Server has proper rights as described in Section 2.4.4, "Ensuring Proper Rights are Assigned to the Enterprise Server Account for DB2 UDB"To run the JD Edwards EnterpriseOne Platform Pack Installer:
-
Create a folder into which you will copy the .zip file of the Platform Pack image. In addition to the Platform Package image, you will copy one .zip file image of the UDB database into this same directory. The directory can be any name but cannot contain spaces or special characters in the directory path. For example, the folder might be named:
/u01/UnixPPackCaution:
Do not extract the database files into a directory other than the same base directory for the Platform Pack installation. You cannot end up with a functional installation with a structure such as:/u01/UnixPPack/udb/udb
-
Extract the two zip files within the root of the folder created above. Using the example in this guide, a correctly extracted structure is:
Note:
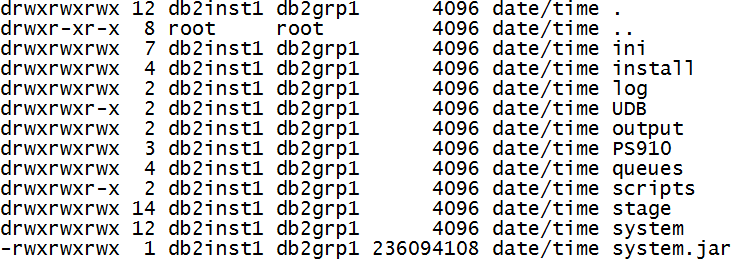
The byte counts in this example will likely not match those of your unzipped files. -
In the above extracted structure, locate and execute the
runInstallfile under the/installsubdirectory.Caution:
You must sign on as the UDB instance owner in order to run therunInstallfile. You cannot run a OUI installer as root.The installer requires that you are signed on as the UDB database user, even if you are only installing the Logic portion of the Platform Pack. You must install the UDB database client software and sign on as the owner of that install when running the Platform Pack. The Installer uses information about this account to configure the
enterpriseone.sh. If you sign on as any other user, you will see errors during the install and will need to manually configure the database variables inenterpriseone.sh.Note:
The Oracle Universal Installer takes a few minutes to start up.
-
On Welcome, click the Next button.

-
On Select Installation Type, choose your installation type:
-
Custom
In most cases this is the mode you should choose for Upgrades.
This mode is recommended for experienced users, choose this setup type if you wish to complete the Platform Pack installation by specifying the installation of a subset of pre-defined environments.
Tip:
If you choose Custom installation, continue with the steps below in this task which immediately follow. -
Typical
Choose this setup type if you wish to complete the Platform Pack installation with no further specifications. This installation option includes the required JD Edwards EnterpriseOne files for the Prototype and Pristine environments.
-
-
Click the Next button.

-
On Specify Home Details, complete these fields:
-
Name
Caution:
Do not accept the default value for this field. If any Oracle product is already installed, the installer automatically populates this field with the existing ORACLE_HOME values, which will be incorrect for JD Edwards EnterpriseOne.Enter a unique name for the JD Edwards EnterpriseOne Platform Pack installation. For example:
JDE_PPack_910_HOME
Caution:
Due to Java file and directory naming conventions, the directory name you specify here cannot contain special characters or blank (space) characters. -
Path
Caution:
Do not accept the default value for this field. If any Oracle product is already installed the installer automatically populates this field with the value corresponding to the home for the ORACLE_HOME of the installed product, which will be incorrect for JD Edwards EnterpriseOne.Enter the mount point where you want the files installed on your Enterprise Server.
/u01/jdedwardsppack/e910If you are rerunning the JD Edwards EnterpriseOne Platform Pack Installer, refer to Section 4.14, "Rerunning the JD Edwards EnterpriseOne Platform Pack Installer".
-
-
Click the Next button.
If you chose the Typical installation type, the Available Products screen will not display; you can skip to the Step 10.
If you chose the Custom installation type, the Oracle Universal Installer displays a list of available JD Edwards EnterpriseOne product components, as shown in the example below:

Tip:
Use the scroll bar to on the right hand side of the screen to view the complete list of available components.On Available Product Components, select from these choices:
JD Edwards EnterpriseOne Database Server
-
System Database
Note:
This selection includes mandatory system tables. If you do not select this box and the OUI installer does not detect that the component was previously installed, it selects this component automatically. Likewise, if you rerun the JD Edwards EnterpriseOne Platform Pack Installer to add an environment it will check to ensure that this component has already been installed and you will not be given an option to install the environment on a machine, drive, or directory that is different from that which contains the JD Edwards EnterpriseOne System Database. -
Production Databases
-
Prototype Databases
-
Development Databases
-
Pristine Databases
JD Edwards EnterpriseOne Enterprise Server
-
JD Edwards EnterpriseOne Foundation
Note:
This selection includes system files. You must choose this feature for all initial installations of the Enterprise Server. If you do not select this feature, the JD Edwards EnterpriseOne Platform Pack Installer automatically selects it for installation. -
ES Production
-
ES Prototype
-
ES Development
-
ES Pristine
Note:
For Upgrades, you should always select the Pristine environment. Otherwise, Table Conversions may not process correctly. -
-
After you have verified your selection of components, click the Next button.

-
On Would you like to Install or Upgrade EnterpriseOne?, choose whether you want to install or upgrade JD Edwards EnterpriseOne. The list below describes each run mode.
-
Install (Install EnterpriseOne)
In this mode, the JD Edwards EnterpriseOne Platform Pack Installer checks for the existence of JD Edwards EnterpriseOne business data and control tables; if either exists, the JD Edwards EnterpriseOne Platform Pack Installer aborts. This prevents the inadvertent overwriting of existing critical business data and control tables. If the JD Edwards EnterpriseOne Platform Pack Installer does not detect pre-existing JD Edwards EnterpriseOne data or control tables, the installation process continues normally.
Caution:
You should always back up all databases that you want to preserve. -
Upgrade (Upgrade EnterpriseOne)
In this mode, the JD Edwards EnterpriseOne Platform Pack Installer checks for the existence of JD Edwards EnterpriseOne business data and control tables which are prerequisites to an upgrade of JD Edwards EnterpriseOne.
Caution:
You should always back up all databases that you want to preserve.
-
-
Click the Next button.
The installer prompts for the DB2 UDB database instance name:

On DB2 UDB Database, enter the Instance Name for your DB2 UDB database and click the Next button. For remote database servers, the JD Edwards EnterpriseOne Platform Pack Installer cannot validate this value. Click the Next button to continue.
For UNIX systems, the following screen will only display if you have selected some database components for this install.

On Creating DB2 UDB database owners, before proceeding you must sign on as root and run this script to create accounts for all the DB2 UDB database owners:
addUDBacct.shTypically the above script is found in this location:
/u01/91PPack/scriptsCaution:
If you do not run the script as described in this step, the DB2 UDB database creation scripts that are executed by the installer will fail.After you have successfully run the DB2 UDB account and owner creation scripts, return to the Creating DB2 UDB database owners screen and click the Next button.

-
On Database Options, complete these fields:
-
Database Type
Use the pulldown to choose DB2 UDB.
-
Database Server
By default, the JD Edwards EnterpriseOne Platform Pack Installer automatically detects and populates this field with the machine name on which it is running. The JD Edwards EnterpriseOne Platform Pack Installer validates the Database Server name and compares it against the name of the local computer. If these values are different (for example, if you manually change the value of this field), the JD Edwards EnterpriseOne Platform Pack Installer assumes the Database Server is either a clustered or remote server. If you have selected to install databases, and the database server name that you entered cannot be validated, an error dialog is displayed with resolution instructions. Refer to the section of this chapter entitled: Section 4.13.2, "Warning - Database Server Name Does Not Match".
For additional details on all Platform Pack error conditions, refer to the section of this guide entitled: Section 4.13, "Troubleshooting Platform Pack Installation".
Caution:
If you are installing the Enterprise Server and the Database Server on different machines, you cannot run the installer on the Enterprise Server and install the Database Server remotely. You must copy the installer images to the Database Server and run the installer on that machine. For the Enterprise Server only, you will need the image for disk1. For a Database Server, you will need the disk1 image plus the database disk images. -
Secure Password
If you wish to change the default password that the JD Edwards EnterpriseOne installer uses to connect to your UDB database, you can enter a secure password. The maximum length of the password is 10 characters.
Caution:
The non-encrypted value for the Secure Password is stored in the UDB_set.sh file. This password is used to load the database components. Oracle strongly recommends that you erase this value once the database scripts have run successfully.Note: If you subsequently add an additional database component, you must set the value in the set script back to the Secure Password before running the scripts or the OUI installer (which calls the scripts) for the additional components.
Note:
If you do not change the default value (DEFAULT), the system creates a password for each user where the password is the same as their user ID. For example, if a user ID is JDE, then by default the system creates a corresponding password of JDE for that user.Caution:
If you change the default password in the Platform Pack installation for your Enterprise Server, you must also manually change the[DSPWD]section in thejde.inion the Deployment Server and specify the new secure password that you are using. If you fail to synchronize these database password settings, the various Installation Workbenches will not be able to connect to the database. -
Confirm Password
Re-enter the password.
-

On DB2 UDB Database Information, complete these fields:
Caution:
You should always consult with a DBA for the proper location of the tablespaces on your machine. Do not create the tablespaces in a location with a child relationship to the JD Edwards EnterpriseOne installation directory. For example, the installation directory might be:/u01/JDEdwardsPPack/E910
c:\JDEdwardsPPack\E910
This practice avoids a potential problem that could occur as a result of actions against the parent directory adversely impacting the child directory.
-
Instance Name
The default value for this field is blank. You should manually enter the name of your DB2 UDB instance. The JD Edwards EnterpriseOne Platform Pack Installer validates the value you enter in this field. The JD Edwards EnterpriseOne Platform Pack Installer will not allow you to continue if the value cannot be validated.
-
Number of IO Servers
Enter the number of physical disk drives on the database server.
-
Does Server Use Raid?
Use the pulldown menu to choose Yes or No.
-
Tablespace Directory
Enter a path where you want the JD Edwards EnterpriseOne Platform Pack Installer to create your DB2 UDB databases. For example:
/u01/jdedwardsppack/UDB/Tablesc:\jdedwardsppack\UDB\Tables -
Index Directory
Enter a path where you want the JD Edwards EnterpriseOne Platform Pack Installer to create your DB2 UDB indexes. For example:
/u01/jdedwardsppack/UDBIndexesc:\jdedwardsppack\UDB\Indexes -
Lob Directory
Enter a path where you want the JD Edwards EnterpriseOne Platform Pack Installer to create your DB2 UDB LOBs (large objects). For example:
/u01/jdedwardsppack/UDB/LOBc:\jdedwardsppack\UDB\LOB -
Log Directory
Enter a path where you want the JD Edwards EnterpriseOne Platform Pack Installer to create your DB2 UDB logs. For example:
/u01/jdedwardsppack/UDB/Logsc:\jdedwardsppack\UDB\Logs -
Temp Directory
Enter a path where you want the JD Edwards EnterpriseOne Platform Pack Installer to create your DB2 UDB temp directory. For example:
/u01/jdedwardsppack/UDB/Tempc:\jdedwardsppack\UDB\Temp -
Run Scripts Option
The default value is Run Scripts Automatically.

-
-
On Summary, in the top half of the screen, review your selections and in the bottom half of the screen review the NOTES, which detail the disk space requirements for OUI support files and also for the Platform Pack being installed on this machine.
-
Click the Install button.
As the installer runs it displays the Install progress, as shown in the following example.

-
When the installation completes, the following Run scripts as root dialog is displayed.

-
On Running scripts as root, the dialog instructs you to perform these actions outside the installer:
-
Sign on as root.
-
Navigate to the
SharedScriptssubdirectory of the JD Edwards install directory. For example:/u01/jdedwardsppack/e910/SharedScripts -
Run this script to set up the jde910 user and change ownership of the
systemsubdirectory of the JD Edwards install directory to the jde910 user:addacct.shFor example, the system subdirectory might be located in:
/u01/jdedwardsppack/e910/system -
When the scripts have completed successfully, click the OK button to exit the dialog and return to the OUI Platform Pack installer End of Installation screen.

-
-
On End of Installation, verify the installation of the EnterpriseOne Platform Pack was successful.
Review the Please remember ... portion for the installer log file location. The log file name is specified with the date and stamp when the installer ran. For example:
/u01/app/oraInventory/logs/installActions2011-08-16-02-09-38PM.log -
Click the Exit button to exit OUI.

-
On Exit, click the Yes button.
4.11.2 Verifying the Platform Pack Log File
You can verify that the Platform Pack Installer ran properly by viewing the log file. The log file name is specified with the date and stamp when the installer ran. For example:
/u01/app/oraInventory/logs/installActions2011-08-16-02-09-38PM.log
4.12 Manually Running the Database Creation Scripts - UNIX with UDB
Once the Platform Pack install has successfully completed on your UNIX-based Enterprise Server, the UDB database creation scripts and dump files are located in the EnterpriseOne install location on the Enterprise Server. For example:
/u01/jdedwardsppack/e910/UDB
As it runs, the Platform Pack installer edits the script that sets the environment variables. You can review this script for accuracy:
UDB_set.sh
To manually run the database installation scripts:
-
Sign on to the Enterprise Server as the instance owner. For example, db2inst1.
-
Navigate to the UDB folder under the install path. For example:
/u01/jdedwardsppack/e910/UDB -
Verify that
InstallUDBDatabase.shhas the correct setting (current directory):eexport DATABASE_INSTALL_PATH=/u01/jdedwardsppack/e910/UDB -
Run the
InstallUDBDatabase.shscript. -
Check the logs in the logs directory.
4.13 Troubleshooting Platform Pack Installation
This section discusses these potential error or warning conditions and their probable causes and resolutions when running the JD Edwards EnterpriseOne Platform Pack Installer:
4.13.1 Development Environment Warning
This Warning indicates the installer could not detect Business Data (and the Control Tables) for the Development Environment and you have chosen the Upgrade option. If you do not want the Installer to create the Business Data and Control Tables, you can click on Next and ignore this error. Otherwise go back and change your options to use the Installer in Install and Custom mode to select and install it.

4.13.2 Warning - Database Server Name Does Not Match
The Platform Pack installer displays the following error message if the machine name you specified on Database Options does not match the machine name on which the installer is being run. In order to install the database components, you must run the Platform Pack installer on the machine on which the database resides. Unless the machine name you specified is a known-good cluster name, you must cancel the installation and run the installer on the database machine.

4.14 Rerunning the JD Edwards EnterpriseOne Platform Pack Installer
You must rerun the JD Edwards EnterpriseOne Platform Pack Installer to support these scenarios:
-
You want to install the Enterprise Server and the Database Server on physically different machines.
-
You want to add an Enterprise Server environment to the Enterprise Server.
-
You want to add a Database Server database to the Database Server.
-
You want to reinstall the JD Edwards EnterpriseOne Foundation on the Enterprise Server.
-
You want to reinstall the System Database on the Database Server.
When you first ran the Platform Pack installer, to complete the installation you ran the addacct.sh script to lock down permissions to this directory:
/u01/jdedwardsppack/e910
Prior to rerunning the Platform Pack installer for any purpose, you must run the installer_chmod.sh script to unlock and change permissions to allow the installer to execute. On the machine which you initially installed the Platform Pack:
-
Sign on as the root user.
-
Change directory to the location of the Platform Pack installer. For example:
cd /u01/jdedwardsppack/e910_1/SharedScripts -
Run the
installer_chmod.shscript to change permissions so the Platform Pack installer can be re-run:. ./installer_chmod.sh
You should never reinstall any optional components without first deinstalling the components. If you select to deinstall the mandatory components you must also select to deinstall or have already deinstalled all related optional components. This table lists the mandatory and related optional components:
| Server | Mandatory Component | Optional Components |
|---|---|---|
| Enterprise Server | JD Edwards EnterpriseOne Foundation | ES Production
ES Prototype ES Development ES Pristine |
| Database Server | System Database | Production Databases
Prototype Databases Development Databases Pristine Databases |
4.15 Installing the Latest Tools Release and Latest Tools Release Patch to the Enterprise Server
Caution:
The Tools Release level must match what was installed on the Deployment Server.For instructions on installing the tools release on the Deployment Server, refer to the JD Edwards EnterpriseOne Deployment Server Reference Guide.
To install the latest tools release and latest tools release patch:
-
From the Update Center homepage, download the latest Tools Release Patch (for example, 9.1.1.0) and Tools Release documentation.
-
Using Server Manager, install the Tools Release Patch to the Enterprise Server.
4.16 Working with Database Security
In order to maximize your database security, you should change the passwords on all table owners created during the Platform Pack installation; these are created with the user and password equal to the same value. Such a user and password relationship could expose you to worms and viruses aimed at gaining access to your database. Consult with your DBA for advice on changing passwords to meet the security requirements of your database installation.
The Installation Workbench assumes that the table owner 's password is the same as the table owner, unless it finds this override in the jde.ini file on the Deployment Server. Once the database passwords have been changed, you will need to add this section to the jde.ini file:
[DSPWD]
Datasource_owner=new_password
For example, if you changed the passwords for PRODDTA and PRODCTL to alaska5 and nevada6 your section would look like this:
[DSPWD]
PRODDTA=alaska5
PRODCTL=nevada6
The Installation Workbench assumes that the database user is JDE and that the password is the same, unless it finds this override in the jde.ini file on the Deployment Server. As a security precaution, you should also change the password on the JDE user and add an override in the [DSPWD] section of the jde.ini file. Once the database passwords have been changed, you will need to add this section to the jde.ini file:
[DSPWD]
JDE=new_password
For example, if you are changing the JDE user's password to apples, your section would look like this:
[DSPWD]
JDE=apples
Note:
You must also logon to JDEPLAN using the changed password, otherwise database connections will fail. Using the above example of a changed password, you would logon using these credentials:User = JDE
Password = apples
Environment = JDEPLAN
Caution:
The Installation Workbench can only process passwords equal to or less than 10 characters in length. Therefore, you cannot use passwords greater than 10 characters even if your RDBMS allows it.After you change the [DSPWD] section of the jde.ini file, logon to OneWorld in the JDEPLAN environment on the Deployment Server with the new password in the correct case.
Whenever you change the password on your database, as recommended for security purposes, you must also ensure that your security settings in the Enterprise Server jde.ini file match that of your database. Refer to Chapter 12, "Working With Signon Security" in this guide for applicable instructions.
You should secure the jde.ini file on the Deployment Server to prevent unauthorized access.
You should delete the [DSPWD] section once the install or upgrade is complete.
Note:
If you are upgrading from JD Edwards EnterpriseOne Releases 8.10 or 8.11, you should consider disabling the legacy user, which is PSFT.