4 Configuring Subscribers in JD Edwards EnterpriseOne
This chapter discusses the configuration of JMS Queue and JMS Topic subscribers in JD Edwards EnterpriseOne.
This chapter includes these tasks:
-
Section 4.2, "Configuring Subscriber JMS Queue/Topic in WebSphere Application Server"
-
Section 4.4, "Creating JMS Queues in WebSphere Using a Non-Transaction Server Container"
4.1 Prerequisites
These prerequisites must be met prior to configuring JMS topic in JD Edwards EnterpriseOne and WebSphere:
-
Your WebSphere Application Server must be installed. Supported versions of WebSphere are listed in the Certifications. For instructions on accessing Certifications, refer to the chapter of this guide entitled: Section 1.2, "Certifications (Formerly Known as Minimum Technical Requirements)".
-
The JD Edwards EnterpriseOne Transaction Server components are installed, deployed, and functioning properly. You can use Server Manager to perform these tasks.
-
Your WebSphere Application Server must be configured for the corresponding JMS Queue/Topic as described in the following tasks in this section entitled: Section 4.2, "Configuring Subscriber JMS Queue/Topic in WebSphere Application Server".
4.2 Configuring Subscriber JMS Queue/Topic in WebSphere Application Server
JD Edwards EnterpriseOne supports JMSQUEUE and JMSTOPIC subscribers of JMS type. To use these subscribers, you must create an appropriate Queue and Topic in the WebSphere Application Server. It is recommended that you create the Queue and Topic in a container other than the RTE Server container; however subscriber Queue and Topic on RTE Server container is also supported.
4.3 Creating JMS Queues in a Transaction Server container Installed in WebSphere Application Server
To create a JMS queue in a Transaction Server container installed in WebSphere Application Server:
-
Start the Transaction Server from the Server Manager Management Console.
-
Open the WebSphere Administrative Console.
-
Expand the Resources node in the left panel.
-
Expand the JMS node.
-
Click the link for JMS Providers.
-
Click the Default messaging provider whose scope contains this value:
server=RTE_Container
-
Under Additional Properties, click Queue connection factories.
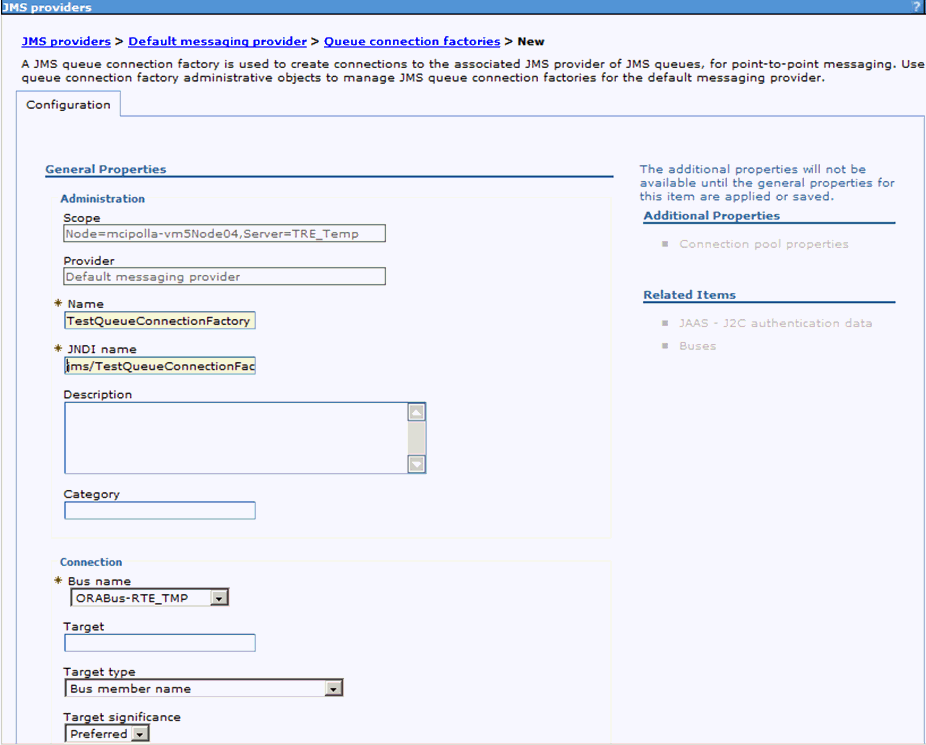
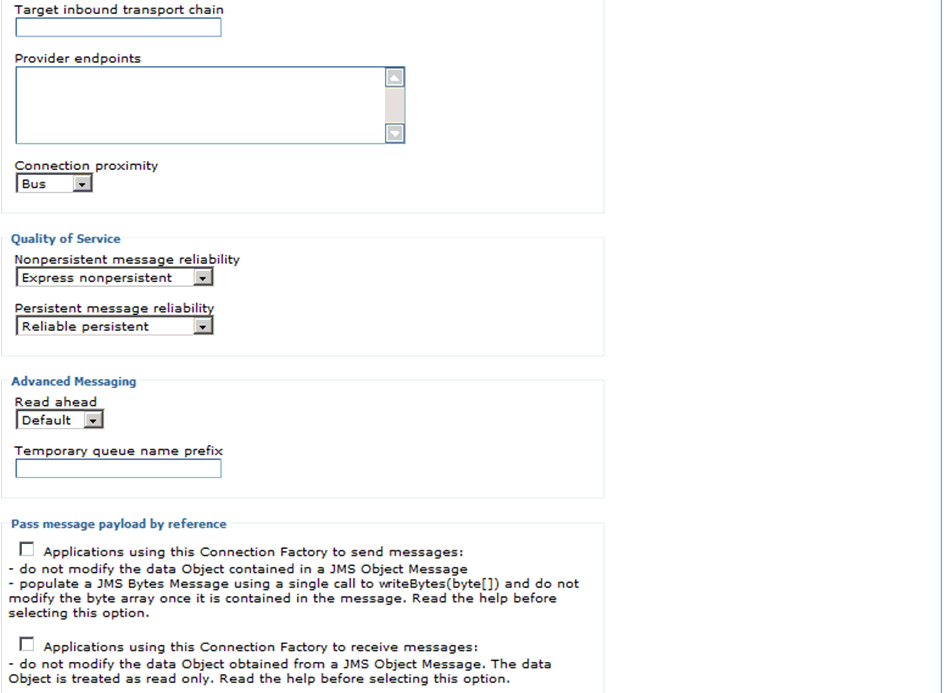
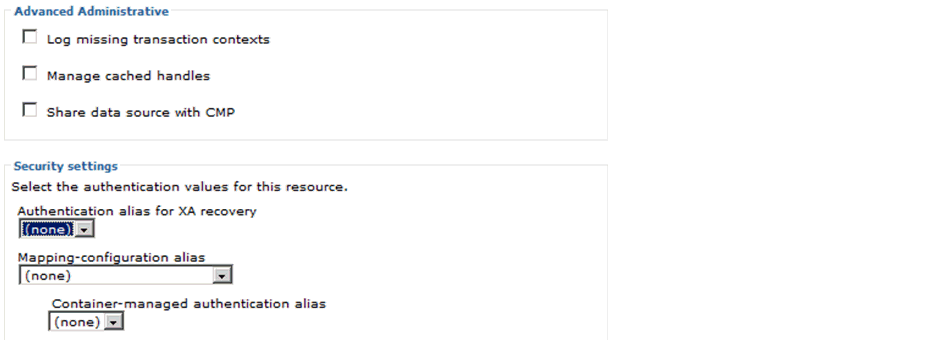
The following sequence of screens shows the fields and values on the JMS providers screen in WebSphere:
-
On the WebSphere Queue Connection Factories page, click the New button and complete these fields:
Field Value Name TestQueueConnectionFactory JNDI Name jms/TestQueueConnectionFactory Bus name Select the Bus name created for Transaction Server. -
Click OK to save the details.
-
Click Default messaging provider in the top breadcrumb.
-
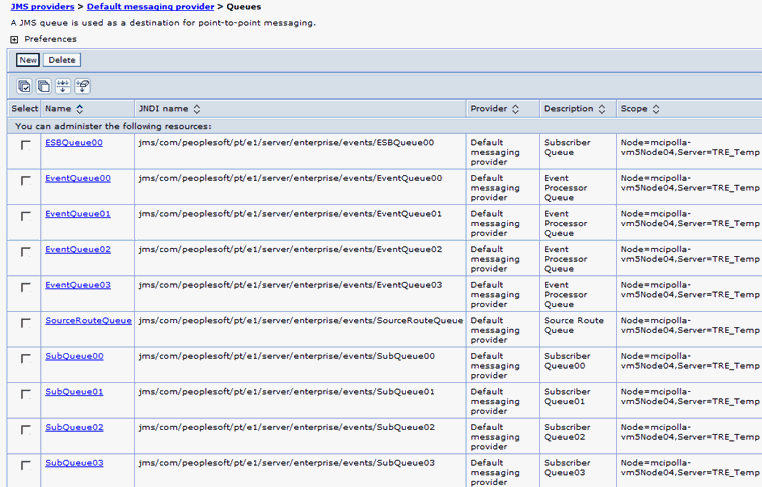
Click Queues under Additional Properties to view a list of queues available for the Transaction Server.
The following screen shows an example of a Queues screen in WebSphere.
-
Click the New button and complete the required fields as shown in the following screens:
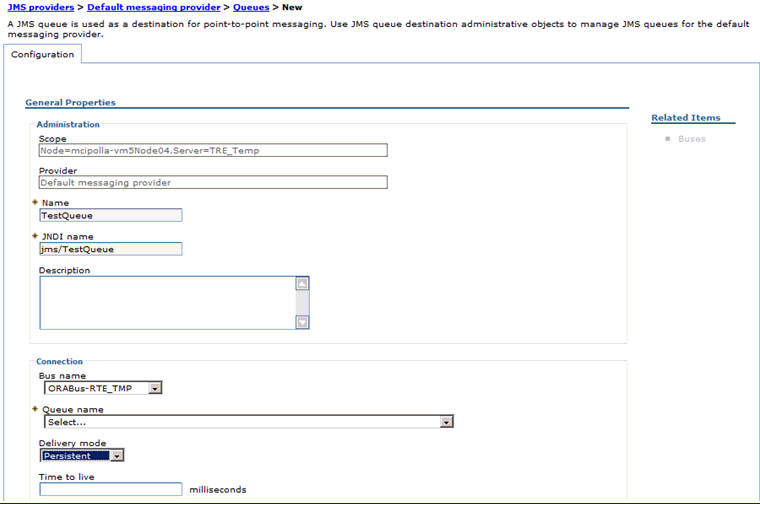
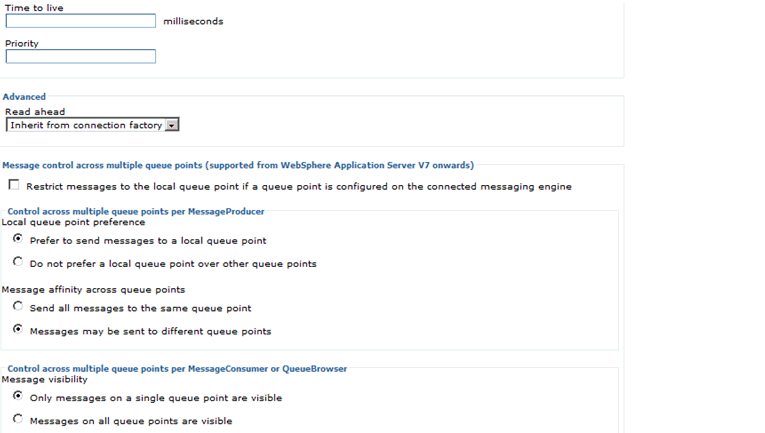
-
For the Queue name field, use the pulldown to select the option Create Service Integration Bus Destination as shown in the following screen:
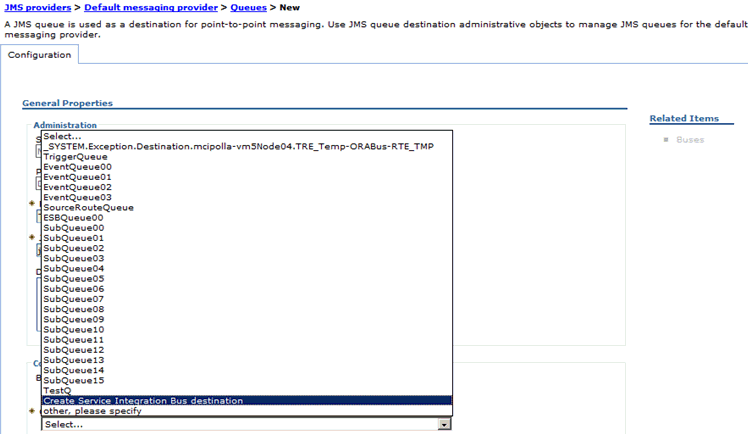
After you select Create Service Integration Bus destination from the pulldown, the following Create new queue dialog is displayed:

-
On Create New Queue - Step 1: Set queue attributes, enter a value for the required Identifier field and click the Next button.

-
On Create New Queue - Step 2: Assign the queue to a bus member, use the pulldown to select The Transaction Server container as the Bus Member.
-
Click the Next button.
-
After creating the bus destination, the newly created bus destination is set as the queue name for the configured Queue. The newly created bus destination can be verified by using this navigation:
Service Integration > Buses > <BUS_NAME> Destinations
Note:
If any available unused bus destination is available in the Queue list, then it can be selected from the dropdown rather than creating a new bus destination.Note:
The values specified in the table below for Name and JDNI name are samples only. Any unique value can be given. All other values should remain the same as the defaults.Field Value Name TestQueue JNDI Name jms/TestQueue Queue name Create Service Integration Bus destination (TestQueue) Persistence Persistent -
Click the OK button to save the settings and view the newly created queue.
4.4 Creating JMS Queues in WebSphere Using a Non-Transaction Server Container
To create JMS queues in WebSphere Application Server, perform these tasks:
4.4.1 Create the Service Integration Bus (SIB)
To create the Service Integration Bus for the JMS queues:
-
Navigate to Service Integration > Buses.
-
Click the New button.

-
On Create a new bus, enter this value in the Name field:
ORABus
-
Click the Next button.

-
On Confirm create of new bus, review your changes and click the Finish button.

-
On Buses, click the link for the service integration bus that you just created (in this example, the link is ORABus.
-
Under Topology, click the Bus Members link.
-
Click the Add button.

-
On Add a new bus member, select the Server radio button.
-
Select the default server value server1 for the server.
-
Click the Next button.
-
Select Data Store.
-
Click the Next button.
-
Select Create default data source with generated JNDI name.
-
Click the Next button.
-
Select the Change heap sizes radio button to modify the heap sizes to the proposed values.
On machines with low amounts of physical memory size or large numbers of application server instances, it may be necessary to reduce the proposed values accordingly.
-
Review your changes and click the Finish button.
-
Click the Save link at the top of the page to save the changes.
4.4.2 Create the JMS Queue Connection Factory
To create the JMS Queue Connection Factory:
-
Navigate to Resources > JMS and select JMS Providers.
-
Click the Default Messaging Provider link which includes Server1 in the scope.
-
Click Connection Factories.
-
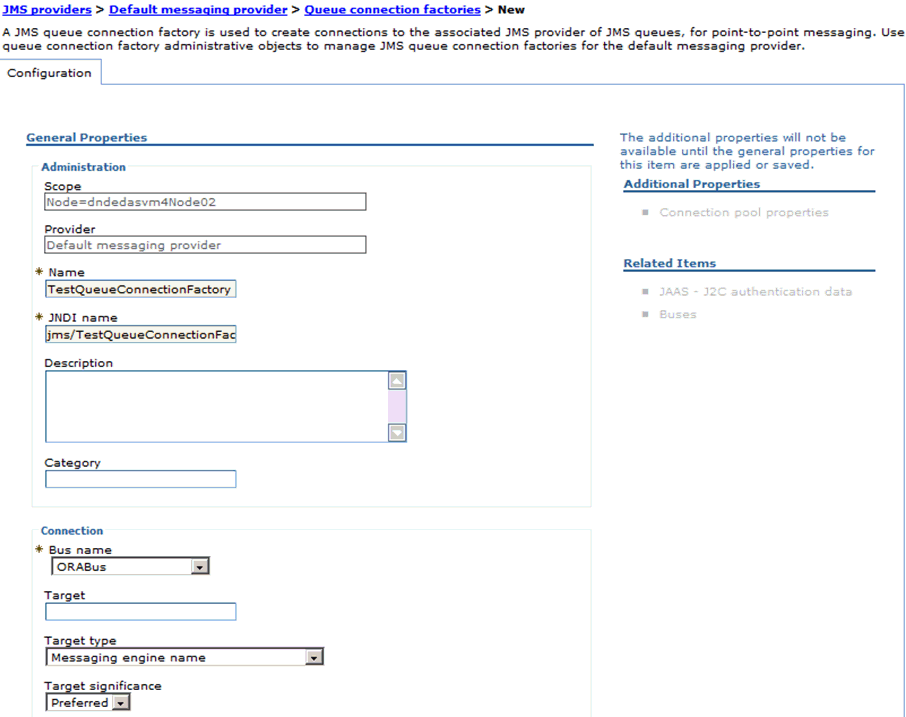
Click the New button.
-
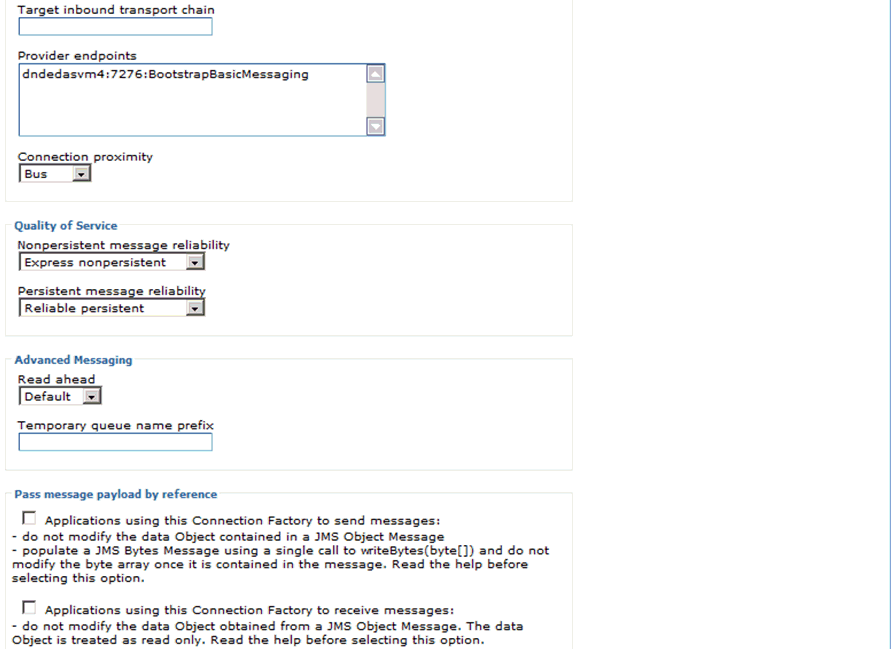
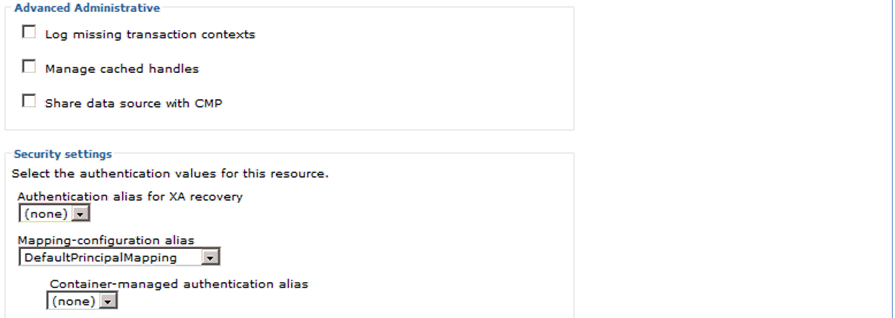
On Queue connection factories, New, complete these fields:
Field Value Name ESBQueueConnectionFactory JNDI name jms/ESBQueueConnectionFactory Bus name ESBBus Target Type Messaging Engine Name Provider end points <System-name>:7276:BootstrapBasicMessaging Connection Proximity Bus Note:
Leave the default value for the rest of the parameters. -
Click the OK button.
-
Click the Save link at the top of the page to save the changes.
4.4.3 Create the SIB JMS Destinations
To create the JMS queue destinations:
-
Navigate to Service Integration > Buses.
-
Click the ORABus link.
-
Under Destination Resources, click Destinations.
-
Click the New button.

-
On Step 1: Set queue attributes, in the Identifier field, enter TestQueue.
-
Click the Next button.

-
On Step 2: Assign queue to a bus member, use the pulldown to assign the queue to a bus member.
-
Click the Next button.
-
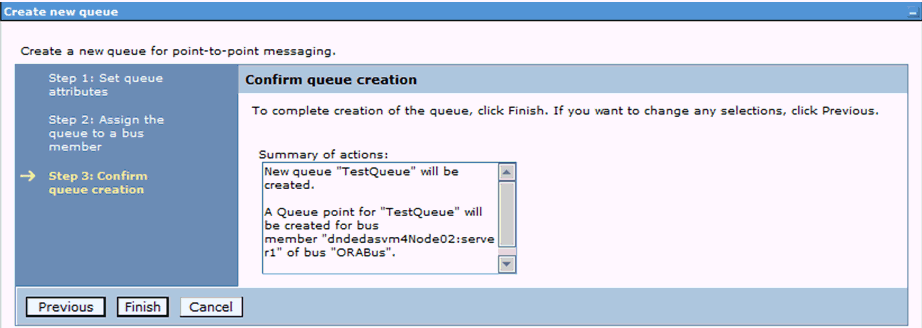
On Step 3: Confirm queue creation, click the Finish button.
-
Click the Save link at the top of the page to save the changes.