76 Set Up Payment Instruments
This chapter contains these topics:
76.1 Setting Up Payment Instruments
You must define your payment instruments. Payment instruments can be checks (of different sizes), tapes, drafts, BACS, and so on. Clients outside the U.S. must set up automatic payments for country-specific payment instruments. You determine the format of each payment instrument by choosing the programs that produce its component parts:
-
Payment - This is the printed copy or tape table for the payment.
-
Payment register - This is the printed list of payments.
-
Attachment - This is a printed report that contains the detail information that does not fit on a payment stub.
-
Debit statement - This is a printed list of debit balances. It shows net amounts that are either a credit or that zero out a voucher.
76.2 Verifying and Assigning Programs to a Payment Instrument
From Accounts Payable (G04), enter 29
From Accounts Payable Setup (G0441), choose Automatic Payment Setup
From Automatic Payment Setup (G04411), choose Payment Instrument Defaults
You choose the programs that produce each component part of a payment instrument. Typically, you set up the most commonly used payment instrument as the default so you do not have to define a payment instrument for each supplier.
You can limit a payment instrument by assigning a specific bank account to it. For example, you can set up two payment instruments for drafts (payment instrument D) with each drawn on a different bank account.
To verify and assign programs to a payment instrument
On Payment Instrument Defaults
Figure 76-1 Payment Instrument Defaults screen
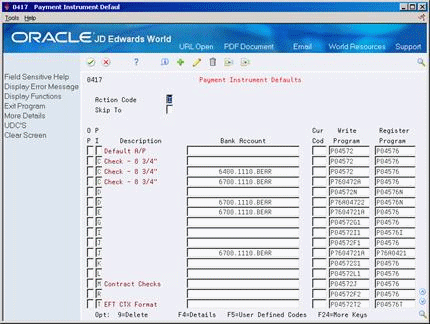
Description of "Figure 76-1 Payment Instrument Defaults screen"
-
Complete the following optional fields:
-
Bank Account
-
Currency Code (will display when Currency processing is activated)
-
-
Verify the following fields:
-
Write Program
-
Register Program
-
-
Access the detail area (F4).
Figure 76-2 Payment Instrument Defaults screen (Details area)
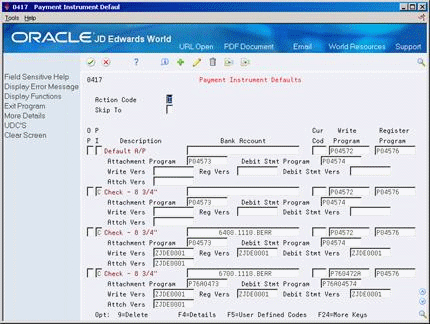
Description of "Figure 76-2 Payment Instrument Defaults screen (Details area)"
-
Verify the following fields:
-
Attachment Program
-
Debit Statement Program
-
Specific version to be called for the Write, Register, Attachment and Debit Statement programs. If left blank, the ZJDE0001 version of the respective program will be called.
-
-
To change a program, access the field level help for a list of choices.
76.2.1 What You Should Know About
76.3 Defining Formats of Payment Instruments
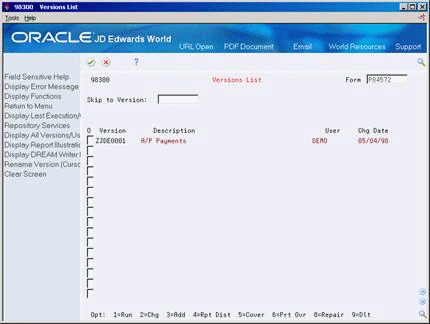
To access the versions list, enter VL on the command line of any menu.
Each program associated with a payment instrument has processing options that further define the format of each component of a payment instrument. Review these processing options before using each program.
To define the format of a payment instrument
-
Complete the following field and press Enter:
-
Form
-
-
Figure 76-4 DREAM Writer Version Inquiry screen
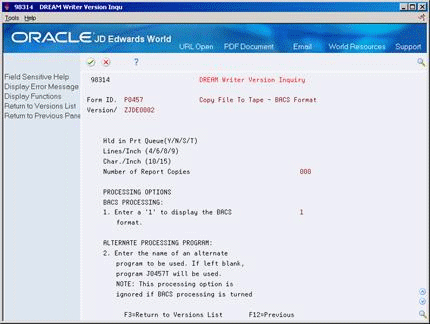
Description of "Figure 76-4 DREAM Writer Version Inquiry screen"
-
On Processing Options Revisions, complete changes to the processing options, if necessary.
76.4 Assigning Payment Instruments to Suppliers
From Accounts Payable (G04), choose Supplier & Voucher Entry
From Supplier & Voucher Entry (G0411), choose Supplier Master Information
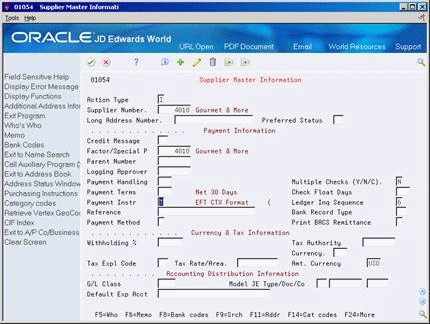
When you print payments, the system uses the payment instrument defined in the supplier record. If the payment instrument is not defined, the system uses the default payment instrument.
To assign a payment instrument to a supplier
On Supplier Master Information
Figure 76-5 Supplier Master Information screen
Description of "Figure 76-5 Supplier Master Information screen"
-
Locate the supplier.
-
Complete the following fields:
-
Payment Instrument
-
76.5 Setting Up Debit Statements
From Accounts Payable (G04), enter 29
From Accounts Payable Setup (G0441), choose Automatic Payment Setup
From Automatic Payment Setup (G04411), choose Payment Instrument Defaults
You can create debit statements to notify your suppliers that you have overpaid them. To handle debit statements, you can:
-
Print a separate debit statement form
-
Include a debit memo amount with a payment
On Payment Instrument Defaults
-
Access the detail area.
-
Complete the following field with a debit statement program:
-
Debit Statement Program
-
Version (optional)
-
-
Choose User Defined Codes.
-
On User Defined Code Revisions, change the following field to 04:
-
System Code
-
-
Change the following field to PD and press Enter.
-
User Defined Codes
-
-
To add a debit statement program, complete the following fields:
-
10 Character Code
-
Description
-
76.6 Processing Options for Payment Programs
The following payment program processing options are representative of a hard-copy payment (P04572) and an electronic format (P04572T1). There are several specific electronic formats for you to choose from depending on the ACH format or country for which you are creating EFT payments. Inquire on the specific payment program to review the processing options for each program.
76.6.1 Processing Options
See Section 110.2, "A/P Payments (P04572)"
See Section 110.3, "A/P Payments - PPD Bank Tape (P04572T1)"
