10 Installing IBM HTTP Server 7.0
This chapter contains the following sections:
-
Section 10.2, "Installing IHS 7.0 with WebSphere Application Server on the Local Server"
Note:
Keep in mind the following:-
This chapter is for WebSphere 7.0. If you are installing on WebSphere 8.0 or 8.5, see Chapter 9, "Installing IBM HTTP Server 8.0 and 8.5."
-
In this chapter, IBM HTTP Server is referred to as "IHS." WebSphere Application Server is referred to as "WAS."
-
10.1 IBM HTTP Server 7.0 Installation Steps
-
Download the correct file, WebSphere Plugins, for your IBM operating system.
-
Extract the file to a temporary directory.
-
On UNIX:
tar -xvf <file name>For example:
gzip -d C87XTML_Plugins.tar.gztar -xvf C87XTML_Plugins.tar -
On Windows:
unzip <file name>For example:
unzip C87XTML_Plugins.zip
-
-
Change the directory to
IHS/.For example:
cd IHS/ -
Run the installer:
-
For UNIX:
./install -
For Windows:
install.exe
-
-
The "GUI" installer appears (Figure 10-1). Click Next.
Figure 10-1 IBM HTTP Server - Welcome Screen
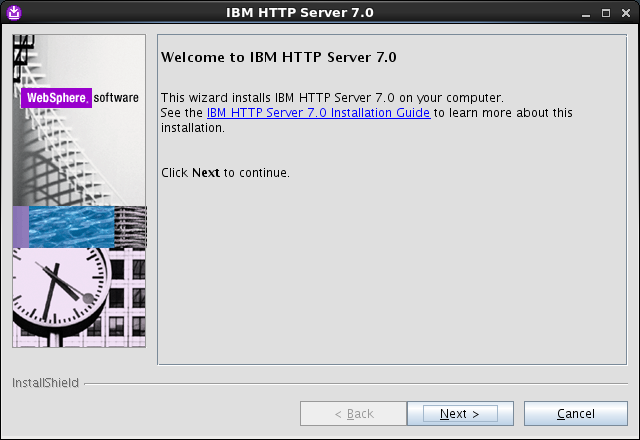
Description of ''Figure 10-1 IBM HTTP Server - Welcome Screen''
-
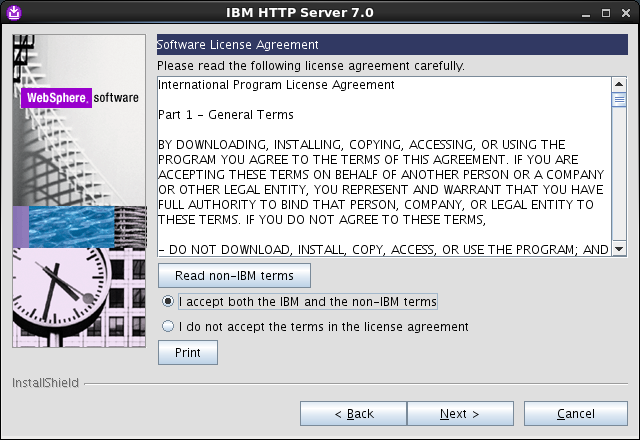
Click the radio button I accept the IBM and non-IBM terms, to accept the license agreement (Figure 10-2) and click Next.
-
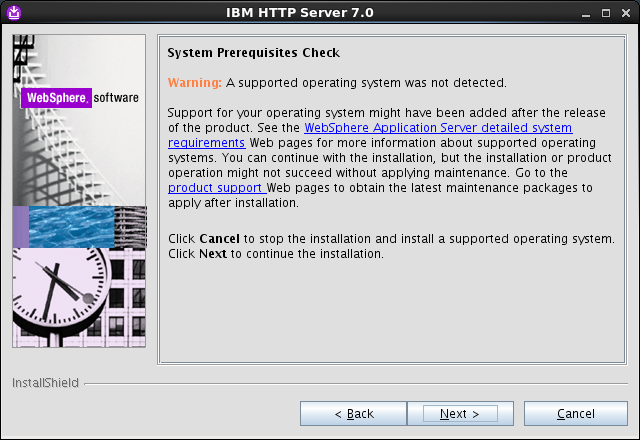
In the "System prerequisites check" screen (Figure 10-3) click Next.
-
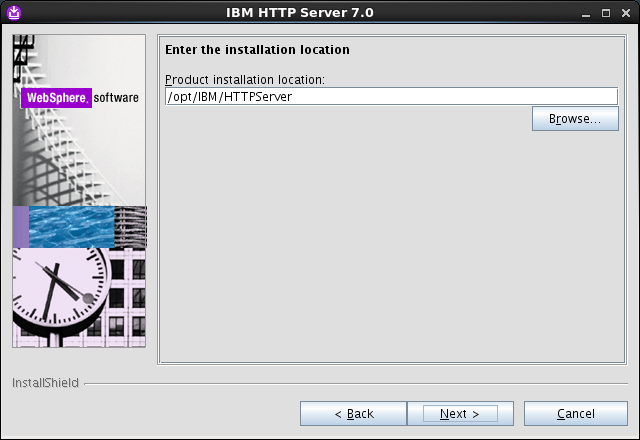
In the "Enter the Install location" screen (Figure 10-4), select a location to install IHS 6.1 by using the Browse button, then click Next.
-
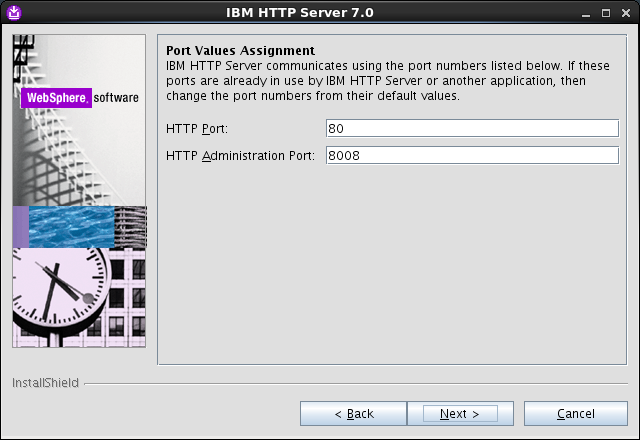
In the "Port Values Assignment" screen (Figure 10-5), enter the ports on which you wish to run IHS. Then click Next.
Note:
We assume throughout this chapter that you are using the default ports:80and8008. If you have changed them, replace the values given with the ports you have selected. -
In the "HTTP Administration Server Authentication" (Figure 10-6) screen:
-
Select Create a user ID for IBM administration server authentication.
-
Fill in the fields:
-
User ID:
admin -
Password:
<enter and confirm>
-
-
Click Next.
Figure 10-6 HTTP Administration Server Authentication
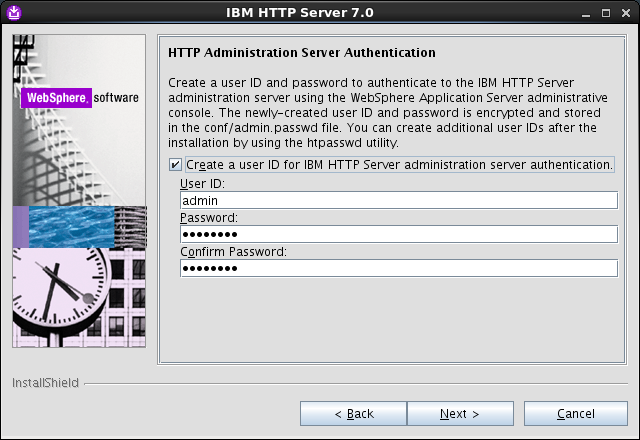
Description of ''Figure 10-6 HTTP Administration Server Authentication''
-
-
In the "Setup HTTP Administration Server" screen:
-
Select:
-
Set up IBM HTTP administration server to administer IBM HTTP Server
-
Create a unique ID and Group for the IBM HTTP Server administration
-
-
Fill in the fields. For example:
-
User ID:
ihs7 -
Group:
ihs7Note:
Record the unique name for the User ID and Group. They are needed to integrate with WAS. The User ID and Group can be anything you choose;ihs61is only an example.
-
-
Click Next (Figure 10-7).
Figure 10-7 Setup of IBM HTTP Server Administration Server
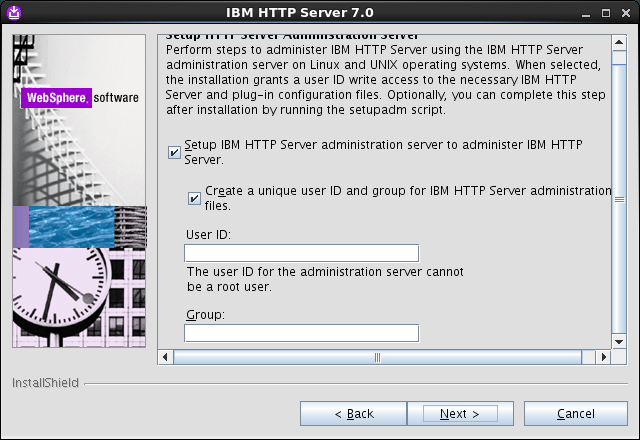
Description of ''Figure 10-7 Setup of IBM HTTP Server Administration Server''
-
-
In the "IBM HTTP Server Plugin for IBM WebSphere Application Server" screen:
-
Select Install the IBM HTTP Server Plug-in for IBM WebSphere Application Server.
-
Fill in the fields:
-
Web server definition:
webserver1 -
Host name: Enter the hostname on which the application server is found.
-
-
Click Next (Figure 10-8).
Figure 10-8 IBM HTTP Server Plug - In For IBM WebSphere Application Server
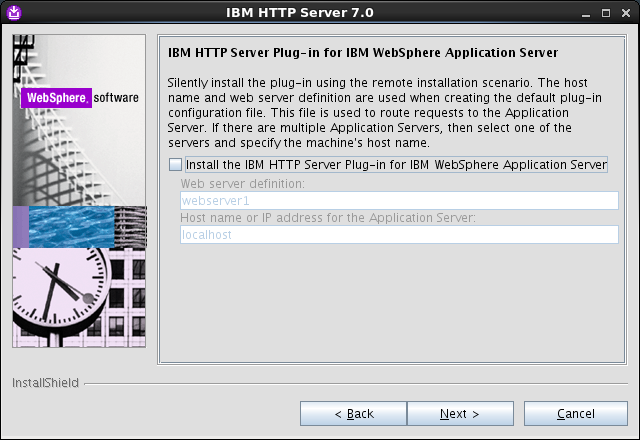
Description of ''Figure 10-8 IBM HTTP Server Plug - In For IBM WebSphere Application Server''
-
-
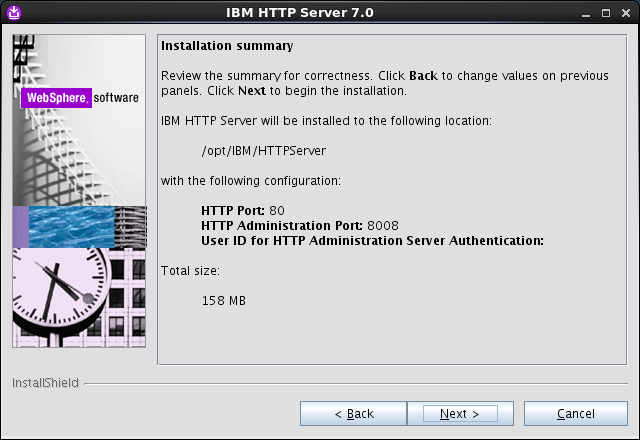
In the "Installation summary" screen (Figure 10-9), click Next.
-
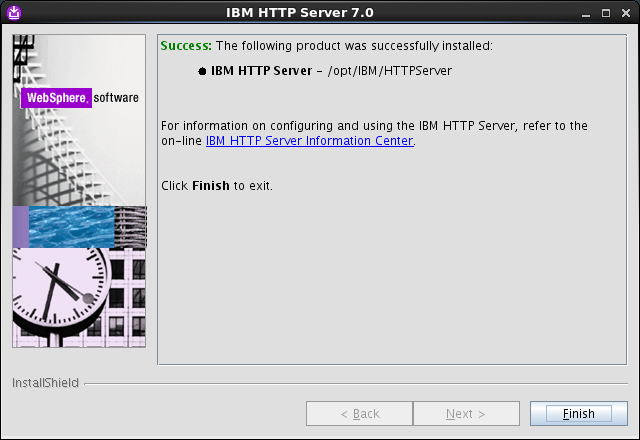
Allow the installer to finish.
-
When the installation is complete (Figure 10-10), click Finish.
Note:
Now, you will need to use the update installer to patch IBM HTTP Server to the same version as WebSphere. Information on using the update installer can be found on the IBM site when you download updates.You will need to update both the IHS server and the IHS plugins separately. To do so, you will need the WebSphere and the plugin fixpacks.
10.2 Installing IHS 7.0 with WebSphere Application Server on the Local Server
Note:
It is preferable to perform this installation after WebCenter Sites is already installed. Then the plugin,cfg.xml, is automatically updated to include WebCenter Sites.-
Browse to the WAS management console, for example:
http://<DM_host>:<DM_console_port>/ibm/consolewhere
<DM_host>is the host name or IP address of the Deployment Manager host and<DM_console_port>is the port number on which the Deployment Manager console is listening for connections. -
Log in to the Admin Site.
-
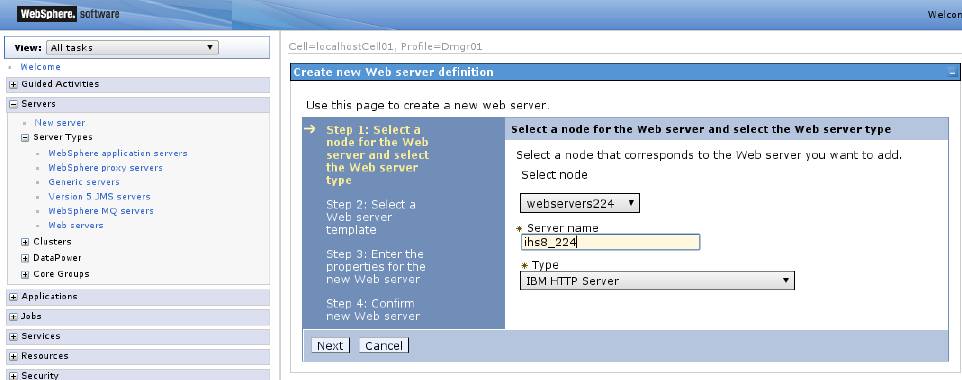
Select: Servers > Web Servers (Figure 10-11).
-
Click New.
-
To link IHS to WAS:
-
Fill in the fields:
-
Select node: Select the node that you want to federate with (normally this is the node of the application server or cluster on which WebCenter Sites is installed).
-
Server name: Enter the unique name for this web server, which was entered when you installed IHS.
-
Type: Keep the type as IBM HTTP Server.
-
-
Click Next (Figure 10-12).
-
-
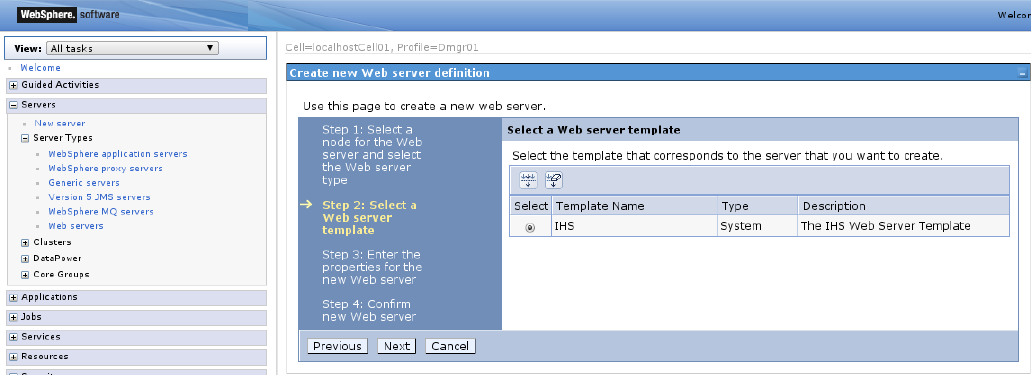
In the "Select a Web server template" screen (Figure 10-13) click Next.
-
On the "Property Page" (Figure 10-14):
-
Ensure that all entries are correct. The only entries that typically need to be changed are the locations for the IHS server and the Plugin Directory.
-
Click Next.
Figure 10-14 Properties for the New Web Server
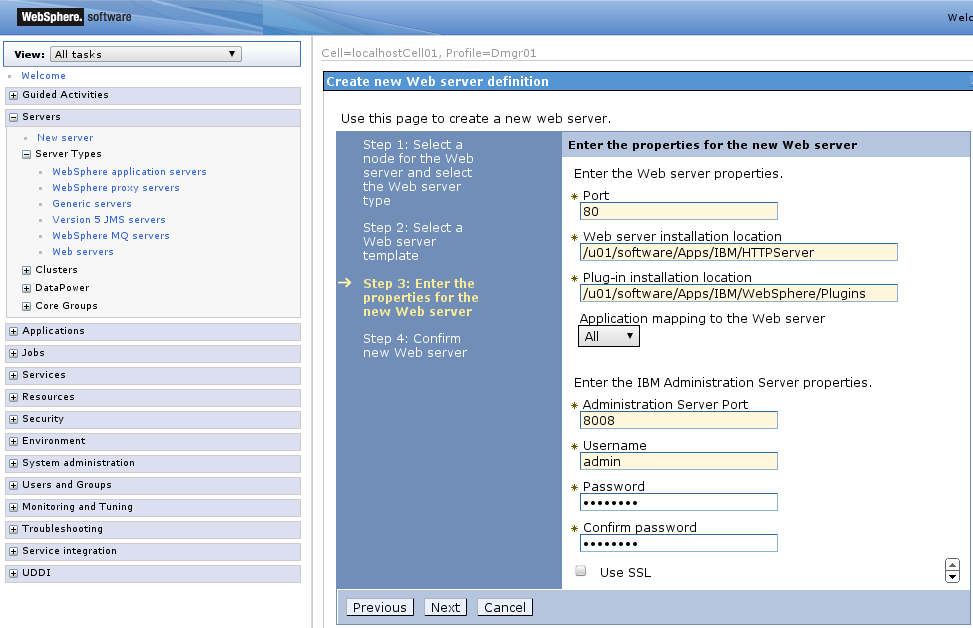
Description of ''Figure 10-14 Properties for the New Web Server''
-
-
Confirm the new Web server (Figure 10-15), then click Finish.
Figure 10-15 New Web Server Confirmation
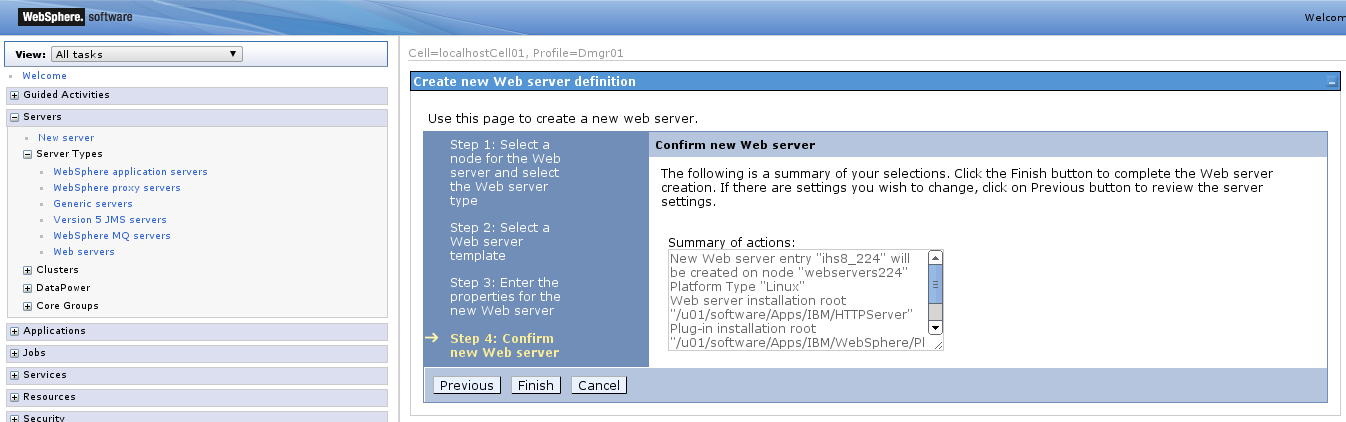
Description of ''Figure 10-15 New Web Server Confirmation''
-
Save the changes as requested (Figure 10-16).
Figure 10-16 Save the Changes to the Web Server
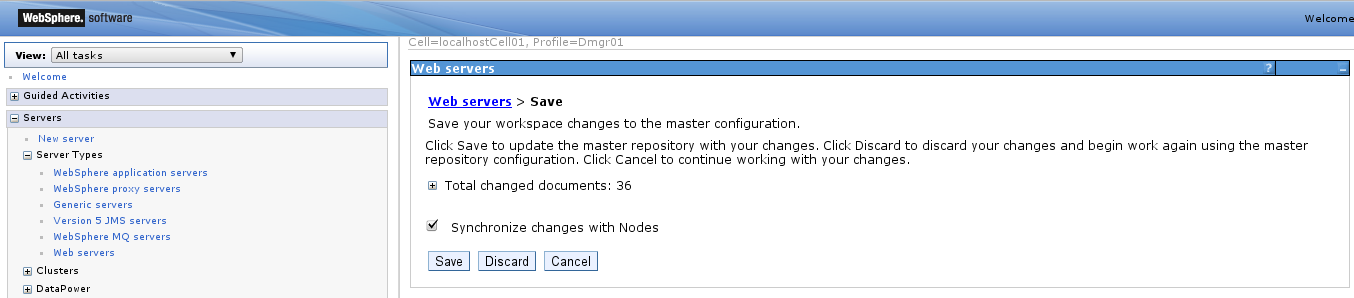
Description of ''Figure 10-16 Save the Changes to the Web Server''
-
You can now start and stop the web server from the WAS console, using the Web servers selection.