9 Installing IBM HTTP Server 8.0 and 8.5
This chapter contains the following sections:
-
Section 9.1, "IBM HTTP Server 8.0 and 8.5 Installation Steps"
-
Section 9.2, "WebServer Plugin Configuration"
Note:
Keep in mind the following:-
This chapter is for WebSphere 8.0 and 8.5. If you are installing on WebSphere 7.0, see Chapter 10, "Installing IBM HTTP Server 7.0."
-
In this chapter, IBM HTTP Server is referred to as "IHS." WebSphere Application Server is referred to as "WAS."
-
9.1 IBM HTTP Server 8.0 and 8.5 Installation Steps
To install the IBM HTTP Server, complete the following steps:
Note:
There installation instructions assume you have installed IBM Installation Manager (IIM). If you do not have IIM installed, you must do so.-
Download the IBM HTTP Server installer files from the IBM website and extract the contents to a folder of your choice. Refer to the Oracle WebCenter Sites Certification Matrix for supported versions with WebCenter Sites here:
http://www.oracle.com/technetwork/middleware/webcenter/sites/downloads/index.html -
In the IIM, select File, then select Preferences, then select Add Repository to configure an IBM HTTP Server repository.
Test the connection to the new repository.
-
Check for the latest available versions by clicking the Check for other Versions, Fixes and Extensions button.
-
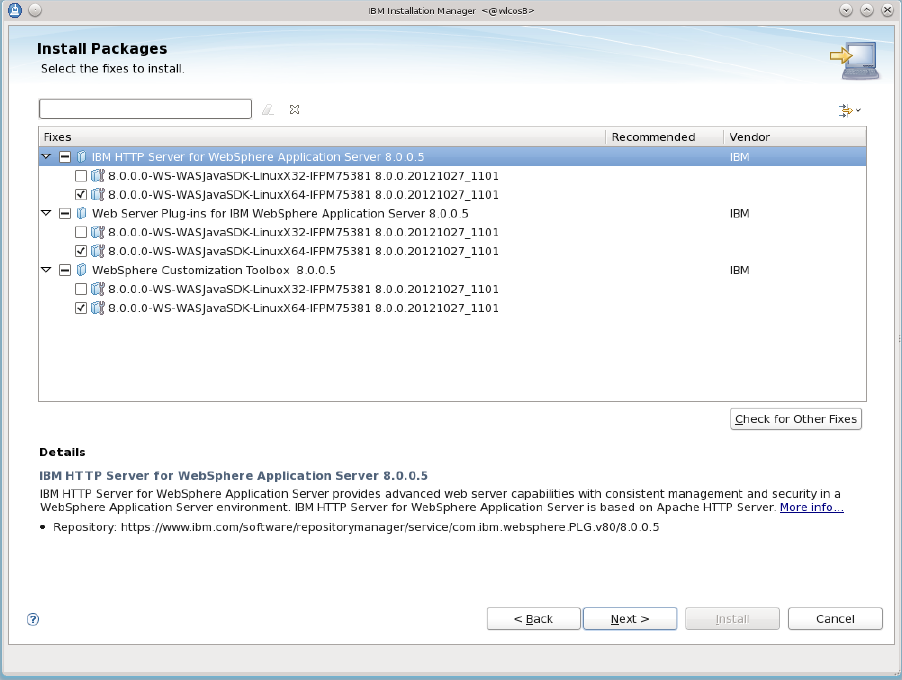
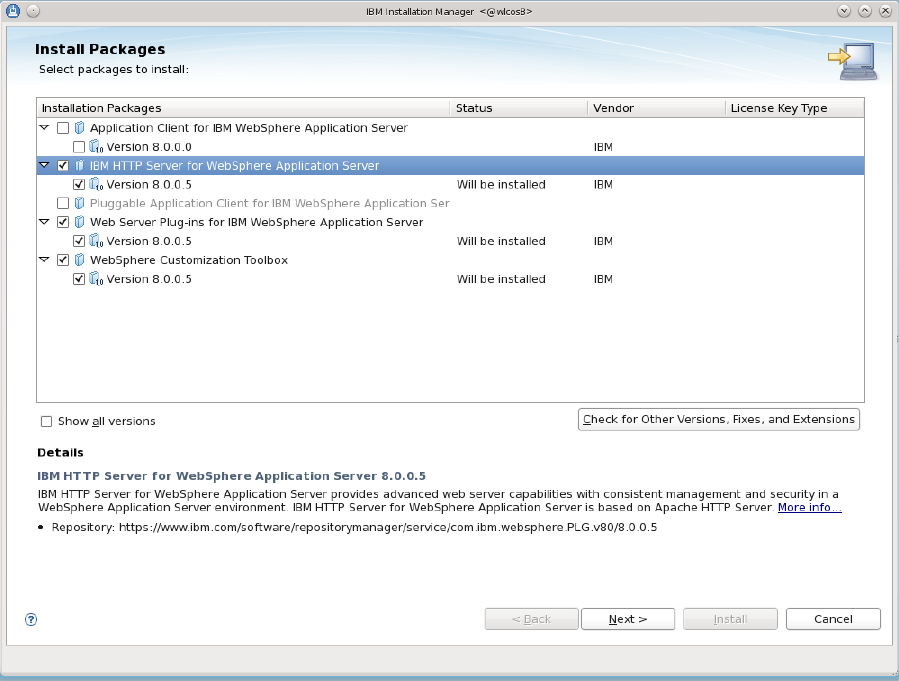
From the list of available Install Package items, select IBM HTTP Server for WebSphere Application Server, Web Server Plug-ins for IBM WebSphere Application Server, and WebSphere Customization Toolbox. See Figure 9-1 for details:
-
Select the appropriate version of the SDK (Figure 9-2), and click Next.
Figure 9-2 Selecting SDK for Installation
Description of ''Figure 9-2 Selecting SDK for Installation''
-
Read and accept the license agreement (Figure 9-3). Click Next.
-
If necessary, change the installation directory location (Figure 9-4). Click Next.
Figure 9-4 Installation Directory Location
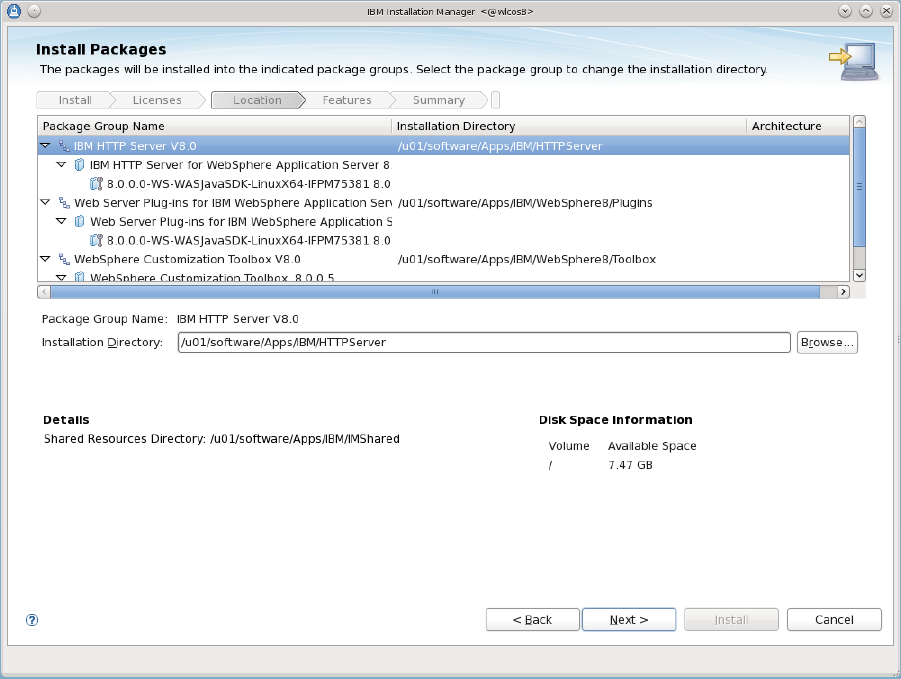
Description of ''Figure 9-4 Installation Directory Location''
-
Review the features to be installed (Figure 9-5), and click Next.
Figure 9-5 Reviewing Installation Packages
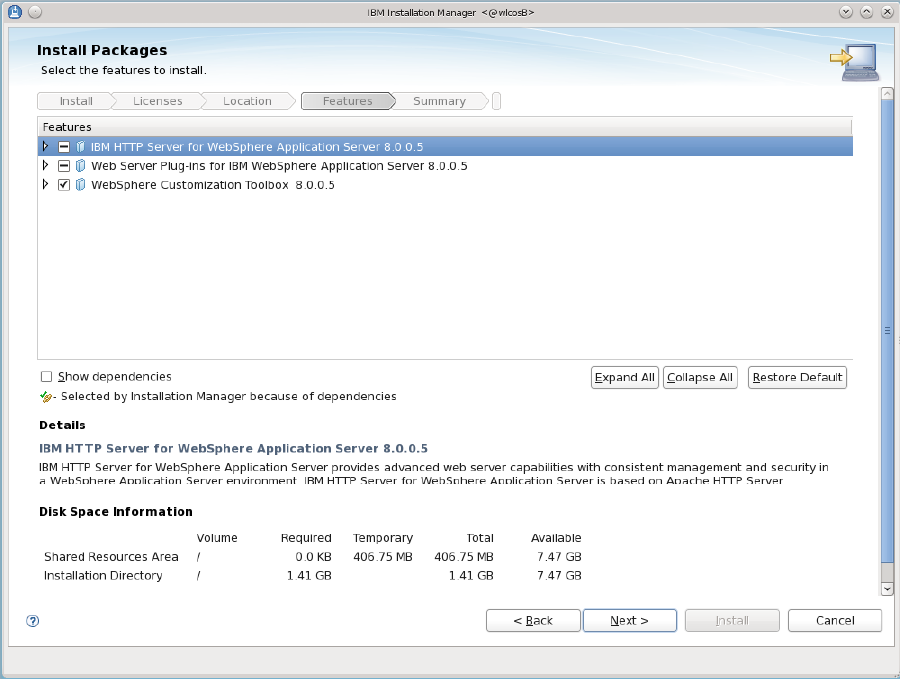
Description of ''Figure 9-5 Reviewing Installation Packages''
-
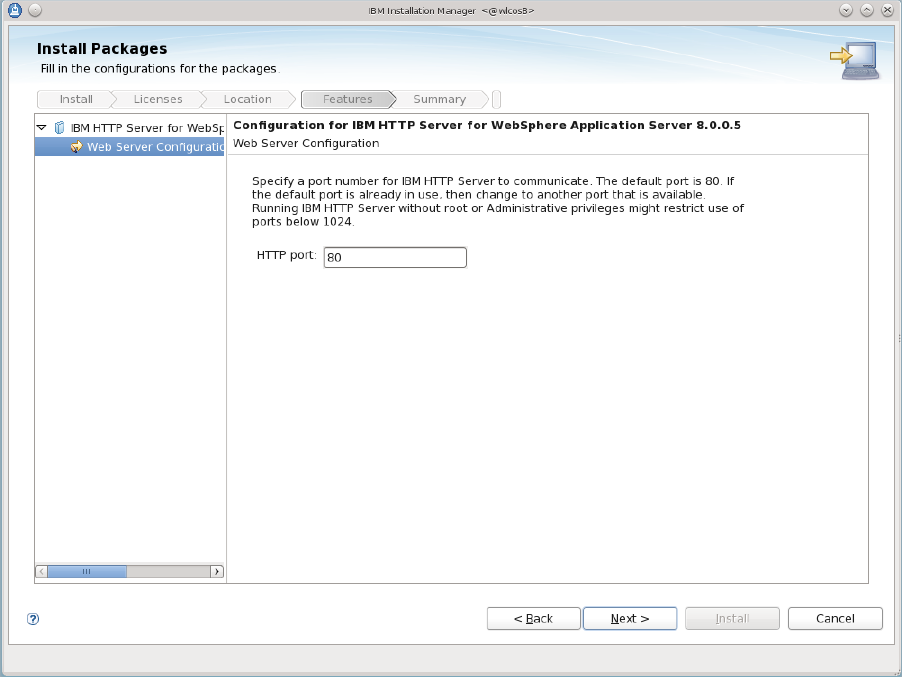
Set the port in the HTTP port field (Figure 9-6). The default port is 80.
-
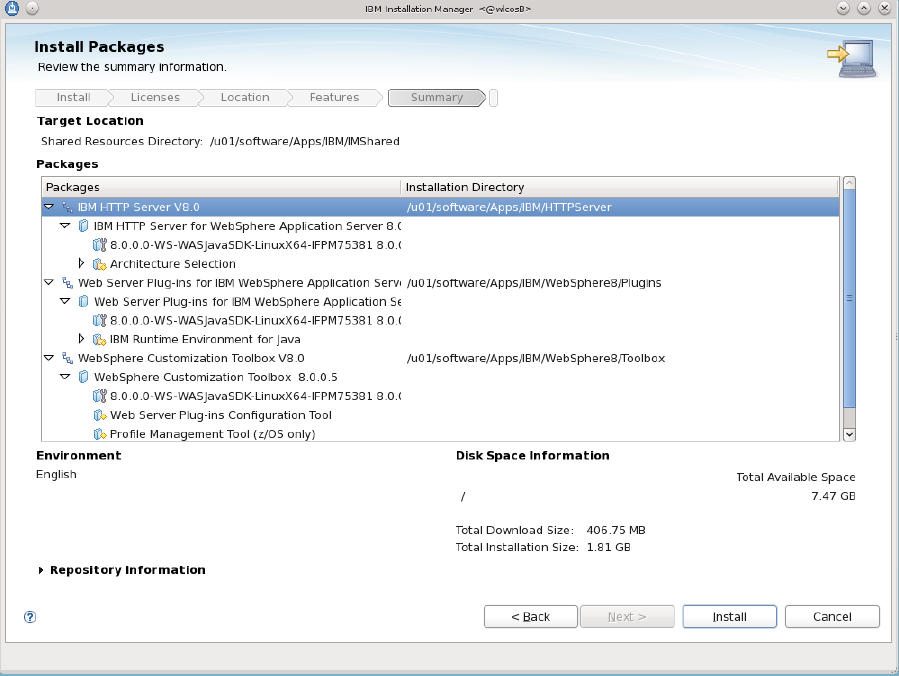
Summary information is displayed (Figure 9-7). Review the summary information, and click Install.

The packages will install. Once complete, move on to Section 9.2, "WebServer Plugin Configuration."
9.2 WebServer Plugin Configuration
Once the IIM has installed the IHS, you can then configure the WebServer plugin.
To configure the WebServer plugin, complete the following steps:
-
Run the WebSphere Customization Toolbox.
-
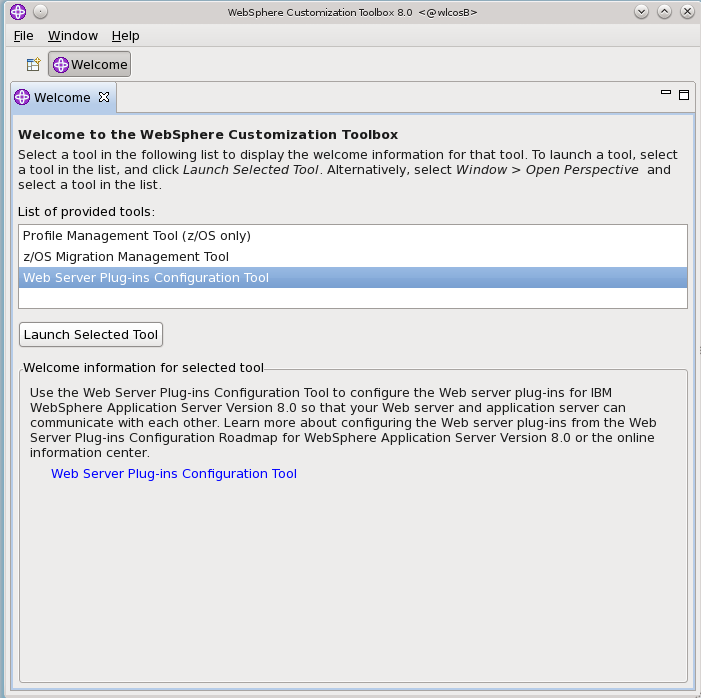
In the List of provided tools listbox (Figure 9-8), select Web Server Plug-ins Configuration Tool and click Launch Selected Tool.
Figure 9-8 Launching Web Server Configuration Tool
Description of ''Figure 9-8 Launching Web Server Configuration Tool''
This tool will help you configure the Web server plugins.
-
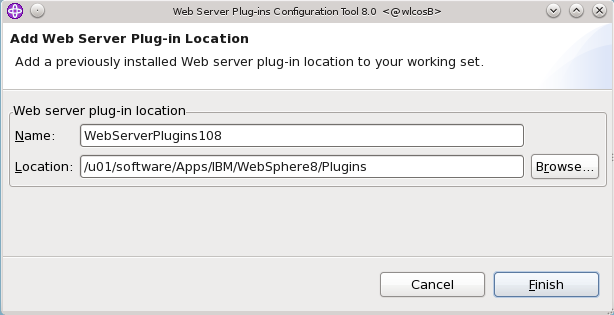
In the Add Web Server Plug-In screen (Figure 9-9), click Browse. Select the same plugin location selected in step 7 of Section 9.1, "IBM HTTP Server 8.0 and 8.5 Installation Steps."
Click Finish.
-
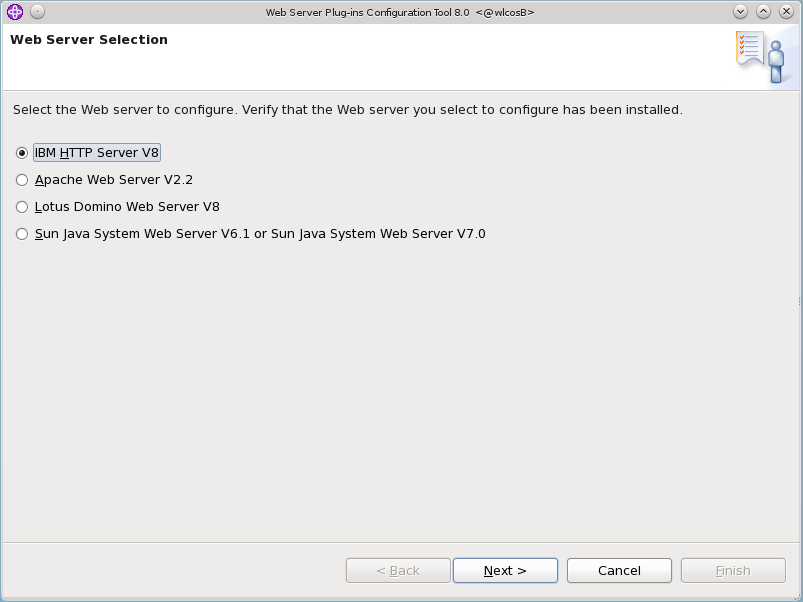
On the Web Server Selection screen, select IBM HTTP Server V8 (Figure 9-10). Click Next.
-
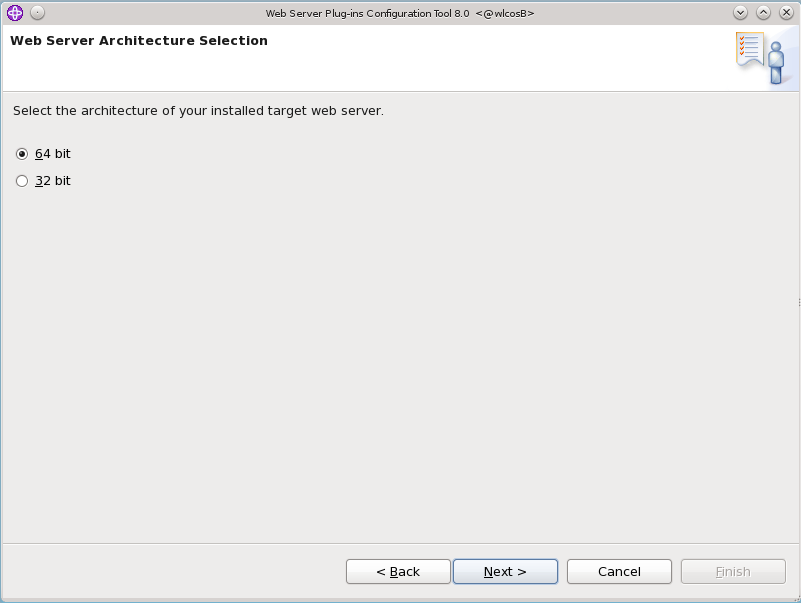
Select the architecture (Figure 9-11). Click Next.
-
In the Web Server Configuration File Selection screen (Figure 9-12), click Browse. Browse to the
httpd.conffile of the IBM HTTP Server that you installed. The configuration tool will make changes to this file and include the plugins needed by WebSphere Application Server.Figure 9-12 Selecting the httpd.conf File

Description of ''Figure 9-12 Selecting the httpd.conf File''
-
Set up the IBM HTTP Server Administration Server by completing the fields (Figure 9-13). Click Next.
Figure 9-13 HTTP Server Administration Server Setup
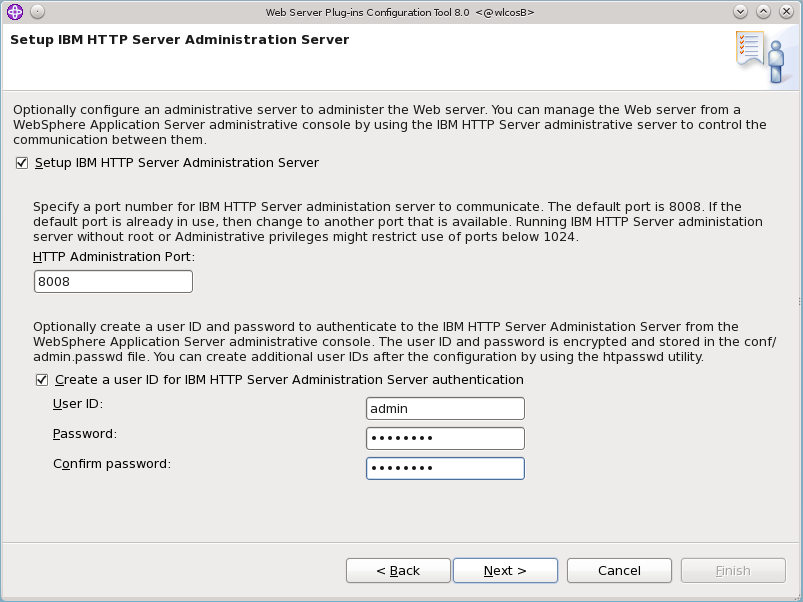
Description of ''Figure 9-13 HTTP Server Administration Server Setup''
-
Enter the User ID and Group to access the administration server (Figure 9-14). Click Next.
Figure 9-14 Entering User ID and Group for Access
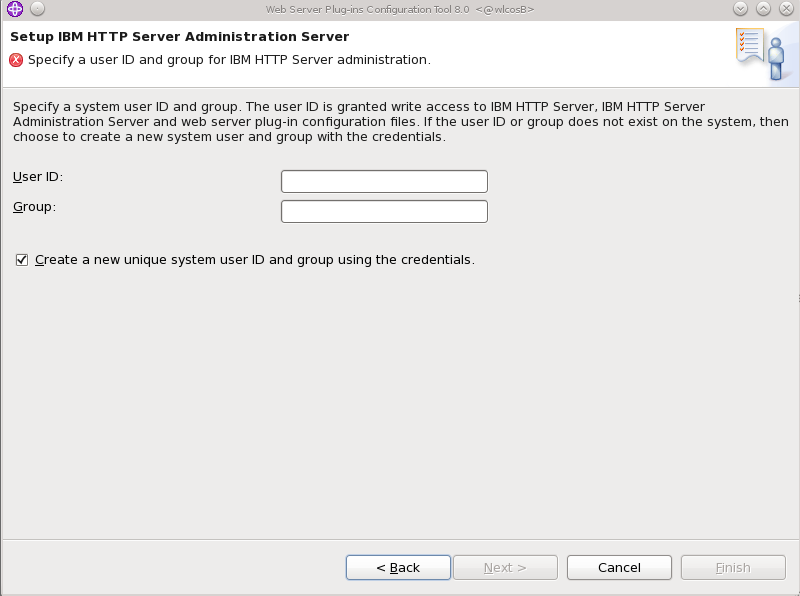
Description of ''Figure 9-14 Entering User ID and Group for Access''
-
Specify a unique web server definition name (Figure 9-15). Click Next.
Figure 9-15 Entering a Unique Web Server Definition Name
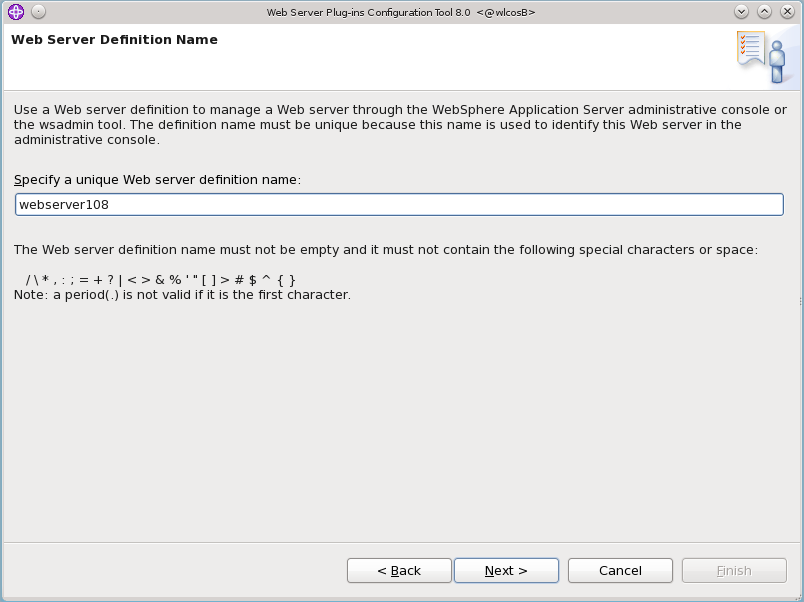
Description of ''Figure 9-15 Entering a Unique Web Server Definition Name''
-
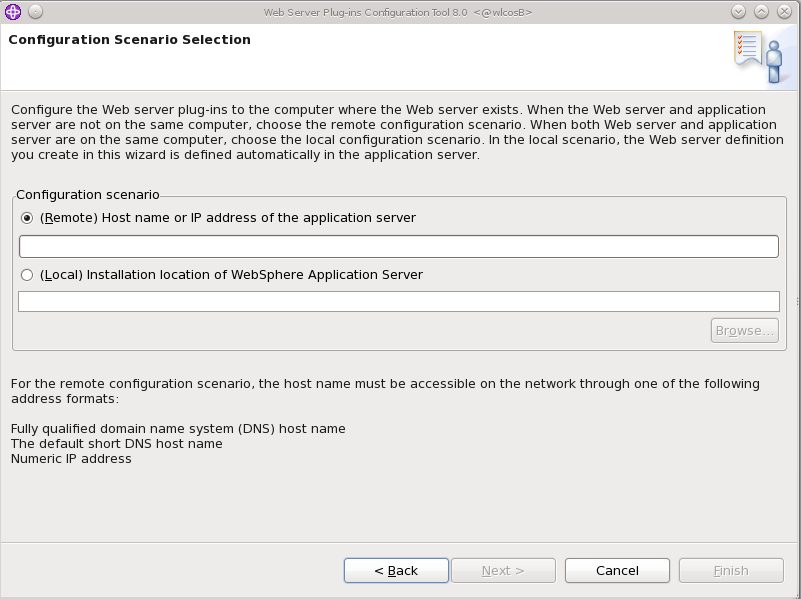
Based on your configuration, select either Remote or Local installation location (Figure 9-16). For a Remote installation location, enter a host name or IP address. For a Local installation location, click Browse and select the installation location.
Click Next.
-
Review the Configuration Summary (Figure 9-17). Click Configure.
Figure 9-17 Plug-In Configuration Summary
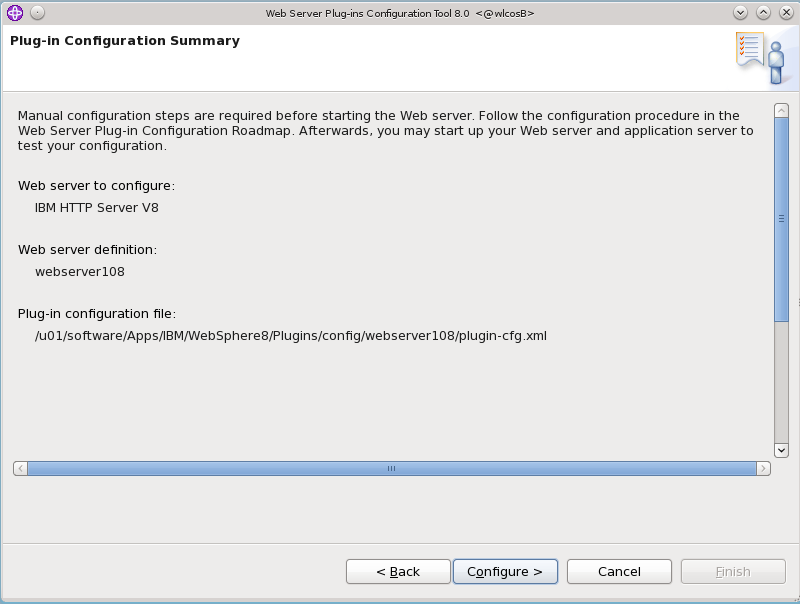
Description of ''Figure 9-17 Plug-In Configuration Summary''
-
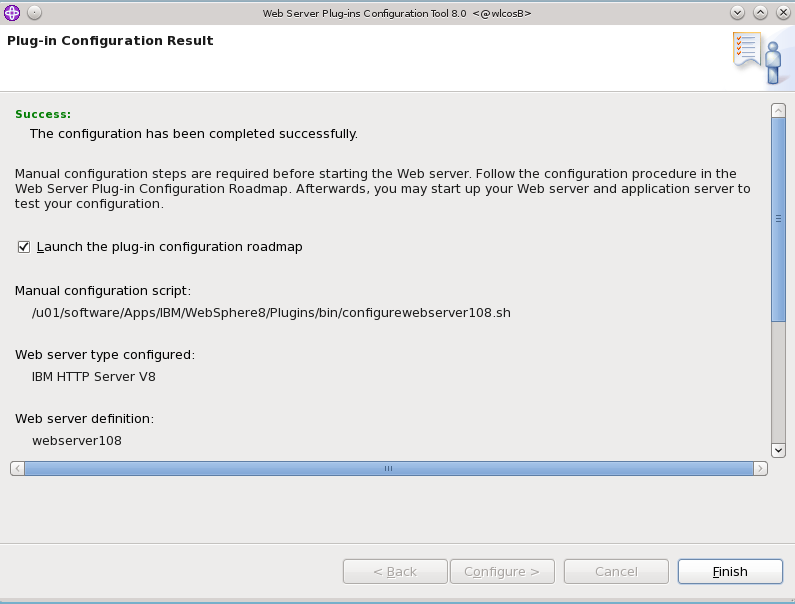
If you selected to install a local configuration (Figure 9-18), click Finish.
-
If you selected to install a remote configuration, additional steps are needed to complete the configuration. These steps are listed in the configuration roadmap:
-
Select the Launch the plug-in configuration roadmap checkbox (Figure 9-18).
-
Click Finish.
-