- 13.2.1 How to Centralize Sun Ray Client Configurations (.parms)
- 13.2.2 Sun Ray Client Hot Keys
- 13.2.3 How to Change Sun Ray Client Audio and Display Settings (Sun Ray Settings GUI)
- 13.2.4 How to Modify Screen Resolutions
- 13.2.5 How to Power Cycle a Sun Ray Client
- 13.2.6 How to Enable or Disable XRender
- 13.2.7 How to Configure Screen Rotation
- 13.2.8 How to Disable Screen Blanking on a Sun Ray Client
- 13.2.9 How to Enable the NumLock Key for All Sun Ray Sessions
- 13.2.10 Keyboard Country Codes
- 13.2.11 Sun Ray Client Boot Process
This chapter provides information about managing Sun Ray Clients and provides a list of typical procedures when using a Sun Ray Client. To start a session on a Sun Ray Client once it is properly configured, all you need to do is power on the Sun Ray Client, log in after it boots, and wait for the desktop to display.
The following chapters also provide more specific administration information for Sun Ray Clients:
Once a Sun Ray Client discovers the firmware server, it
downloads its corresponding *.parms file.
This file contains the firmware revision, which is checked
against the client to make sure its firmware is up-to-date. The
.parms file can also be used to centralize
and provide other Sun Ray Client configuration values, such as
the servers keyword used to specify the Sun
Ray servers if the sunray-servers DNS entry
isn't used. See
Table 13.4, “Sun Ray Client Configuration Parameters (.parms)” for the list
of configuration values.
By default, utsetup creates an initial set of
.parms files for each Sun Ray model type.
You can use the -i option of the
utfwadm command and a template file to
centralized updates for all the .parms
file. The key/value entries in the template will be appended to
each model-specific .parms file.
Steps
Become superuser on the Sun Ray server.
Change directory to the TFTP home directory.
This example uses the
/tftpbootdirectory as the TFTP home directory.# mkdir /tftpboot
Create the template for the
.parmsfile.This template is a text file with key/value pairs, and it can be located anywhere on your file system. It is common practice to store it in the TFTP home directory. In this example, the file is named
srsconfig, and it resides in the/tftpbootdirectory.# vi /tftpboot/srconfig
See Table 13.4, “Sun Ray Client Configuration Parameters (.parms)” for the list of key/value pairs that you can add to the
.parmsfile.Use the utfwadm command to update the
.parmsfiles.The utfwadm command automatically uses the latest firmware installed on the Sun Ray server. Again, the following example uses
/tftpboot/srsconfigfor the template file location.# /opt/SUNWut/sbin/utfwadm -AaV -i /tftpboot/srconfig
You can also update the .parms file for a
specific Sun Ray Client using the -e
option.
MAC_address
Table 13.4, “Sun Ray Client Configuration Parameters (.parms)” lists the key/value pairs.
Additional key/value pairs included in the
.parms files are in
key=value
format, with case sensitivity and no spaces allowed. Options
that take values of 0 or 1
have a default value of 0 if not specified.
The following table lists the options that are allowed. For
details on the options that can be used to configure the
.parms files, see the
utfwadm man page.
Table 13.4 Sun Ray Client Configuration Parameters (.parms)
Key | Description |
|---|---|
bandwidth= | Sets the maximum bandwidth limit used by the Sun Ray Client, in bits per second. |
cmdcashsize= | Sets the command cache used to store the list of recent commands, in Kbytes. Default value is 512 Kbytes, maximum value is 8192 Kbytes, and a zero value disables the command cache. |
compress={0 | 1} | When set to 1, forces compression on. Default is 1 (compression on). |
fastload={0 | 1} | When set to 1, forces the maximum TFTP transfer size if the TFTP server supports it. The default is 512-byte packets. Over a high latency connection, using this setting typically doubles the speed of firmware downloads. |
fulldup={0 | 1} | When set to 1, forces full duplex setting. |
enablegui={force | none |
disablegui={force | none |
| Enables or disables the Configuration GUI. These keywords should be changed only with the utfwadm -G or utfwadm -g command, respectively. See Chapter 14, Sun Ray Client Firmware for details. |
excludedev= | Disables the Sun Ray Client's local USB HID driver for a specific USB device and makes the device available only to the Windows connector's USB redirection feature. You should use this option only if you need to make a non-standard device function (that does not function using the local HID driver) while connected to an Oracle VM VirtualBox VRDP port.
You must specify both the USB device's vendor
identifier ( Vendor identifiers are assigned by the USB standards organization and each vendor manages their own device identifiers. |
kbcountry= | Forces the keyboard country code number (keyboard map) for a non-U.S. USB keyboard that reports a country code value of 0. This value can also be set on the Advanced menu of the Configuration GUI. See Section 13.2.10, “Keyboard Country Codes” for the list of code numbers. |
Log |
Sets the logging level for various classes of logging
events, where
When using a shared network (LAN) with external DHCP
server support (configured network using
utadm -L on), logging for each
event type is disabled unless the
Log |
LogHost= |
The Sun Ray server where logging output is saved when
one or more Log |
lossless={0 | 1]} | When set to 1, does not permit lossy compression to be used. |
MTU= | Sets the network MTU. The value used is the minimum of those supplied from various sources. |
orient1={0 | 90 | 180 | 270} orient2={0 | 90 | 180 | 270} |
Specifies the clockwise physical rotation, in degrees,
of the monitors attached to the Sun Ray Client.
This setting is used to provide the screen orientation to Xnewt, which in turn provides the value to the utscreenresize and xrandr commands to set a session's screen orientation accordingly.
Note that video acceleration with Windows sessions is
not currently supported with non-default screen
orientations and should be disabled. You can use the
|
poweroff= |
Sets how much time a Sun Ray 3 Series Client will be
idle before it turns off. The default power off time
is 30 minutes. Setting
For example, |
select={inorder | random} |
Permissible values are |
servers= | Specifies a comma-separated mixture of host names or IP addresses indicating the available session servers. |
stopkeys={ | Specifies an alternative combination of modifier keys to perform the same function as the Stop key (Oracle Type 7 keyboard) or the Ctrl-Pause key sequence. By default, this alternative combination is Ctrl-Shift-Alt-Meta. See Section 13.2.2, “Sun Ray Client Hot Keys” for details.
The value of
If this parameter is set to Note that the Meta key has different names on different keyboards: on a PC keyboard, it is the "Windows" key, and on a Mac keyboard, it is the "Command" key. |
stopqon={0 | 1} | When set to 1, enables the Stop-Q key sequence to be used to disconnect a Sun Ray Client from a server, in particular, if it's using a VPN connection. |
utloadoff={0 | 1} | When set to 1, disables the ability to use the utload program to force a Sun Ray Client to load firmware. |
videoindisable={0 | 1} | When set to 1, disables the input source on the front of a Sun Ray 270 Client, and it locks the monitor into displaying only the client output. |
For a Sun Ray Client, there are a number of predefined hot keys that can trigger an activity or event on a client, which are shown in Table 13.5, “Sun Ray Client Hot Keys”. The key sequences can be either an Oracle-specific key combination (using keys that might exist only on Oracle keyboards) or by an alternative key combination that does not require Oracle-specific keys.
The activities controlled by these hot keys are specific to a Sun Ray Client. Desktop software running in the Sun Ray session might provide a separate keyboard shortcut facility that provides additional hot keys for desktop activities, perhaps including the ability to launch certain programs.
By default, the alternative prefix key combinations for the Stop
key (Oracle Type 7 keyboard) are Ctrl-Pause and
Ctrl-Shift-Alt-Meta. The Ctrl-Pause key sequence is used
throughout this documentation. The Ctrl-Shift-Alt-Meta key
combination can be changed through the Advanced menu of the
Configuration GUI (Enter Alternative STOP modifiers) or the
stopkeys keyword in the
.parms file. It can be set to any
combination of the four keys, but at least two must be used.
The Meta key has different names on different keyboards: on a PC keyboard, it is the "Windows" key, and on a Mac keyboard, it is the "Command" key.
Table 13.5 Sun Ray Client Hot Keys
Oracle Type 7 Keyboard Hot Key | Oracle SK-9025 Keyboard Hot Key | Action |
|---|---|---|
Mute | Mute or Ctrl-Pause-CursorDown | Mute and unmute audio. |
Softer | Softer or Ctrl-Pause-CursorLeft | Decreases the audio volume. |
Louder | Louder or Ctrl-Pause-CursorRight | Increases the audio volume. |
Stop-A or Ctrl-Power | Ctrl-Pause-A or Ctrl-Power | Power cycles the Sun Ray Client. On an Oracle keyboard, the Power key has a crescent moon glyph. |
Stop-C | Ctrl-Pause-C | Clears any local configuration data on the Sun Ray Client. |
Stop-K | Ctrl-Pause-K | Displays Encryption Information menu |
Stop-N or Mute-Softer-Louder | Ctrl-Pause-N or Mute-Softer-Louder | Displays the Sun Ray Client's MAC and IP addresses and server IP address. |
Stop-O | Ctrl-Pause-O | Enables or disables the On-Screen Display (OSD) troubleshooting icons when a Sun Ray Client boots. |
Stop-S or Stop-M | Ctrl-Pause-S or Ctrl-Pause-M | Opens the Configuration GUI to modify how to initialize the client. The Configuration GUI must be enabled on the client. |
Stop-V | Ctrl-Pause-V | Displays the Sun Ray Client's model, MAC address, and firmware version. |
Ctrl-Alt-Bksp-Bksp | Ctrl-Alt-Bksp-Bksp | Terminates a session. This hot key cannot be reconfigured to another value, but it can be disabled. For details, see the utxconfig man page. |
The Ctrl-Pause key sequences listed for the Oracle SK-9025 keyboard can be used with standard PC keyboards.
There are also hot keys used to launch the
utsettings or utdetach Sun
Ray utilities. You can configure these hot key sequences through
your $HOME/.utslaunch.properties file, or
they can be set by the administrator per a site-wide basis. See
Section 13.2.2.1, “How to Configure the Utility Hot Keys” for details.
Hot keys can be configured to launch the utsettings or utdetach Sun Ray utilities. The scopes for these hot keys are as follows:
System-wide default setting
User default setting
System-wide mandatory setting
To support these levels of customization, the Sun Ray Client at session startup examines the following property files in the order shown in Table 13.6, “Sun Ray Settings Property Files”.
Table 13.6 Sun Ray Settings Property Files
File | Scope | Description |
|---|---|---|
| System | This file contains the default properties. Any properties specified override any defaults built into the application itself. |
| User | This file contains the user's preferred values, which override any application or system-wide defaults. |
| System | This file contains system-wide mandatory settings that cannot be overridden by the user. These properties override any application, system-wide, or user defaults. |
If your policy is for all users to use the same standard hot key, modify the system-wide mandatory defaults file to specify this standard key. This setting prevents users from specifying their own hot key preferences.
The format of the hot key entry in these property files is
utility_name.hotkey=valueutility_name_is the name of
the utility (currently either utsettings or
utdetach) and
value is a valid X keysym name
preceded by one or more of the supported modifiers
(Ctrl, Shift,
Alt, Meta) in any order.
Default values are shown in
Table 13.7, “Defaults for Configurable Hot Key Values”.
Table 13.7 Defaults for Configurable Hot Key Values
Configuration Property Name | Default Hot Key | Action |
|---|---|---|
| Shift-Props | Invokes the Sun Ray Settings GUI. The Shift-Props default hot key works only with the Oracle Type 7 keyboard. You must change the default if other keyboards are used. |
| Shift-Pause | Detaches the session from this Sun Ray Client. (Often used to detach a non-smart card mobility session.) |
If you don't want your users to use the default hot keys to launch the utilities, you can set up the system-wide defaults file to specify different hot keys. Users can still specify their preferences in the user defaults file.
As superuser, open the
/etc/opt/SUNWut/utslaunch_defaults.propertiesfile in a text editor.NoteIf you want to make the change mandatory for all users even if they have user defaults set, change the value in the
/etc/opt/SUNWut/utslaunch_mandatory.propertiesfile.Locate the original hot key entry for the utility you want to change and place a
#in front of it to comment it out.For example:
# utdetach.hotkey=Shift Pause
Type the new hot key property after the first statement.
For example:
utdetach.hotkey=Alt F9
Save the
utslaunch_defaults.propertiesfile.Log out and log back in to enable the new hot key.
A user's hot key settings override any system-wide default settings, unless they are mandatory.
In the user's home directory, create the
.utslaunch.propertiesfile.NoteMake sure that the user owns and can read this file.
Add a line to the
.utslaunch.propertiesfile with the value for the hot key.For example:
utsettings.hotkey=Shift F8
Save the
.utslaunch.propertiesfile.Log out and log back in to enable the new hot key.
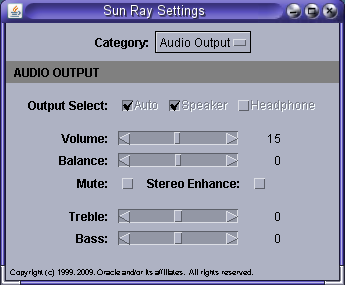
The Sun Ray Settings GUI enables you to view and change the
audio and display settings for a Sun Ray Client that you are
currently logged into. The utset command
provides a non-GUI mechanism for reporting and modifying Sun Ray
Client settings. For details, refer to the
utset man page.
Press the Settings hot key or run the utsettings command.
The default Settings hot key combination is Shift-Props, but this assignment can be reconfigured as described in Section 13.2.2.1, “How to Configure the Utility Hot Keys”.
The Sun Ray Settings GUI is displayed, as shown in Figure 13.1, “Sun Ray Settings GUI”.
Use the Category menu to view the Audio Output, Audio Input, Display, or Video settings panels.
To change a setting, move the appropriate scroll bar, checkbox, or pull-down menu.
Changes to the monitor signal timing through the Resolution/Refresh Rate setting require confirmation before and after the change is applied to the client. All other changes take effect immediately.
Dismiss the Sun Ray Settings GUI.
If the window was launched by the Settings hot key, press the hot key again or apply the window manager's close action to that window.
If the window was launched by invoking utsettings directly, apply the window manager's close action to that window.
You can modify a Sun Ray Client's screen resolution settings by invoking the utsettings command.
Any resolution selection made within a session remains effective whenever the session is displayed on that particular Sun Ray Client. The selection is not lost if the unit goes into power-save mode or is power-cycled; however, the resolution settings selected through the utsettings command apply only to the client where the command is run.
When you move to another Sun Ray Client, the resolution settings do not accompany you to the new client, but the settings remain effective for your session on the original client if you return to the session through hotdesking.
If the session is associated with a personal mobile token, such as a smart card or an NSCM credential, a message displays offering to make the selected timing permanent. If you accept that offer, then the timing is retained and reused on your subsequent personal mobile token sessions on the same client.
In addition, an administrator can use the utresadm command to arrange for particular monitor timing to be used in the following situations:
Whenever a specific token is presented on a specific client
On a specific client regardless of the token that is presented at the client
On all clients regardless of the token that is presented at the client
Any conflict among settings is resolved in favor of the most specific configuration rule. That is, a configuration record for a specific token at a specific Sun Ray Client takes precedence over a record for any token at that specific client, and a configuration record for any token at a specific client takes precedence over a record for any token at any client.
For further details, see the utsettings and
utresadm man pages.
To power cycle a Sun Ray Client with a hard reset:
Disconnect and then reconnect the power cord.
Press the power button if one is available.
To power cycle a Sun Ray Client with a soft reset, press Stop-A, Ctrl-Power, or Ctrl-Pause-A.
The Power key on an Oracle keyboard has a crescent moon icon. Therefore, the soft reset key sequence is often called Ctrl-Moon.
Sun Ray Software includes the Xserver process, Xnewt, as the default Xserver. Xnewt also includes the capability to use the X Rendering Extension (Render), which allows applications on a client to use a rendering model based on Porter-Duff compositing. XRender is enabled by default because many new X applications require XRender to improve performance or to even function properly.
However, some applications use of XRender may conflict with optimizations in the Sun Ray protocol and create an increase in both CPU loading and network bandwidth consumption. In these instances, the applications may see a performance benefit by disabling the XRender extension.
By default, XRender is enabled. If a Sun Ray Client experiences performance degradation with a particular application, use the following procedure to disable XRender.
After enabling or disabling XRender, you must restart your current Sun Ray session (Ctrl-Alt-Bksp-Bksp) for the change to take affect. Or, you can log out from your current session and log back in.
To disable XRender on a client:
% utxconfig -n off
To enable XRender on a client:
% utxconfig -n on
You can use the -A option to supersede all
user configured and system default settings.
You can configure the orientation of the monitors connected to a Sun Ray Client, so a session's screen automatically rotates to the appropriate monitor orientation. For example, if the connected monitors are in portrait mode, setting the orientation for these monitors will ensure that the session's screen will automatically output in portrait mode. The default orientation is the standard landscape position.
The On-Screen Display (OSD) icons will not automatically
rotate if a non-default orientation is configured. Also, video
acceleration with Windows sessions is not currently supported
with non-default screen orientations and should be disabled.
You can use the -B off, -F
off, and -M off options of the
uttsc command to disable video
acceleration.
See Section 13.2.1, “How to Centralize Sun Ray Client Configurations (.parms)” for
details on using the orient1 and
orient2 keywords to configure monitor
orientation.
There may be times when you do not want your Sun Ray Client in power saving mode, during which the screen goes blank after a specific period of non use. Power management is a feature of the Sun Ray Software and it is enabled by default.
You may also want to disable the desktop's power management or screensaver feature.
To Disable Screen Blanking at the Sun Ray Client Level
Set the Advanced > Video >
Blanking parameter to 0 in the
Configuration GUI, if enabled. For more details, see
Section 14.5, “How to Modify a Sun Ray Client's Local Configuration (Configuration GUI)”.
To Disable Screen Blanking at the Desktop Level
Refer to your desktop documentation about how to disable the power management feature or screensaver feature.
Here are some examples:
Use the xset s noblank;xset s 0 0;xset -dpms;xset s off command.
For Oracle Solaris, make sure that xscreensaver is disabled or configured to not blank or lock the screen. If active, xscreensaver overrides any settings you have made using the xset command. See the
xscreensaver(1) man page for details.Here is a sample
.xscreensaverconfiguration file that you can add to the root of your home directory to disable xscreensaver.# Parameters to disable Xscreensaver timeout: 0 cycle: 0 lock: False dpmsEnabled: False mode: offFor Oracle Linux, make sure that gnome-screensaver is disabled or configured to not blank or lock the screen. You can use the gnome-screensaver-command --exit command to disable the screensaver for the current session or add it to a session script. See the
gnome-screensaver-command(1) man page for details.You can also use the following script to permanently disable gnome-screensaver for a user through the
GConfsettings.#!/bin/sh # Script to disable gnome-screensaver, including keybindings, # and power management UI icon theGConf="/usr/bin/gconftool-2";export theGConf BOOL="--type bool --set";export BOOL STRING="--type string --set";export STRING INT="--type int --set";export INT UNSET="--recursive-unset";export UNSET $theGConf $UNSET /apps/gnome_settings_daemon/keybindings/screensaver $theGConf $BOOL /apps/gnome-screensaver/embedded_keyboard_enabled false $theGConf $STRING /apps/gnome-screensaver/mode "blank-only" $theGConf $BOOL /apps/gnome-screensaver/lock_enabled false $theGConf $BOOL /apps/gnome-screensaver/idle_activation_enabled false $theGConf $INT /apps/gnome-screensaver/lock_delay "0" $theGConf $STRING /apps/gnome-power-manager/ui/icon_policy "never" $theGConf $INT /apps/gnome-power-manager/ac_sleep_display "0"
The following procedure describes how to disable screen blanking for all Sun Ray sessions.
This configuration works for all kiosk sessions, but it does not work for sessions using the GNOME Display Manager through a regular session mode.
Become superuser on the Sun Ray server.
Change directory to the session initialization directory.
Oracle Solaris 10:
# cd /usr/dt/config/Xsession.d
Oracle Linux or Oracle Solaris 11:
# cd /etc/X11/xinit/xinitrc.d
Create the following customized script (the script is called
0050.utblank.shin this procedure).#!/bin/sh # This script disables the X Server from blanking # for both Oracle Solaris and Oracle Linux # Check for OS and add the path to xset for Oracle Solaris TheOS=`uname` if [ "$TheOS" = "SunOS" ];then PATH=$PATH:/usr/openwin/bin;export PATH fi # Disable the Xserver from screen blanking and # disable Display Power Management Signaling xset s 0 0 xset s noblank xset -dpms xset s off # End of Script
NoteThe script name should have the
0050.prefix to make sure it is run at the appropriate time.NoteFor Oracle Linux and Oracle Solaris 11, the script name must have the
.shextension, otherwise the script will not get sourced.Save the script and make the script executable for everyone.
# chmod 775 0050.utblank.sh
Start a new session, so the script gets sourced.
The utkeylock command can modify the state of certain locking modifier keys on a user's keyboard. Currently, only the NumLock key is supported. This command may be useful to invoke during session creation to enable NumLock for users who expect NumLock to be on by default, which is typical for Windows PCs. By default, the NumLock key is disabled on a Sun Ray Client.
This configuration works for all kiosk sessions, but it does not work for sessions using the GNOME Display Manager through a regular session mode.
The following procedure describes how to enable the NumLock key for all Sun Ray sessions.
Become superuser on the Sun Ray server.
Change directory to the session initialization directory.
Oracle Solaris 10:
# cd /usr/dt/config/Xsession.d
Oracle Linux or Oracle Solaris 11:
# cd /etc/X11/xinit/xinitrc.d
Create one of the following customized scripts based on the result you want (the script is called
0050.utnumlock.shin this procedure).Enable the NumLock key when a session initializes.
#!/bin/sh

# Enable NumLock key for each session
/opt/SUNWut/bin/utkeylock -n on
Enable the NumLock key when a session initializes and on all subsequent connections through hotdesking.
#!/bin/sh

# Enable NumLock key on and make sure it stays on each time a user hotdesks
/opt/SUNWut/bin/utaction -i -c "/opt/SUNWut/bin/utkeylock -n on" &
NoteThe script name should have the
0050.prefix to make sure it is run at the appropriate time.NoteFor Oracle Linux and Oracle Solaris 11, the script name must have the
.shextension, otherwise the script will not get sourced.Save the script and make the script executable for everyone.
# chmod 775 0050.utnumlock.sh
Start a new session, so the script gets sourced.
A keyboard country code is a number representing a specific USB keyboard map that can be set in the Sun Ray Client firmware to provide better non-US keyboard support. This code is needed if the keyboard returns a country code of 0.
The code can be set through the Configuration GUI or the
.parms file.
There is currently no way to get the keyboard type information for a Sun Ray Client.
This is the list of valid keyboard country codes.
1 Arabic
2 Belgian
3 Canada_Bi
4 French-Canadian
5 Czech
6 Denmark
7 Finnish
8 France
9 Germany
10 Greek
12 Hungarian
14 Italy
15 Japan
16 Korea
17 Latin-American
18 Netherland
19 Norway
21 Polish
22 Portugal
23 Russia
24 Slovakian
25 Spain
26 Sweden
27 Switzerland
28 Switzerland_Ge
30 Taiwan
31 TurkeyQ
32 UK-English
33 US-English
35 TurkeyF
This process flow shows how a Sun Ray Client obtains its basic network parameters, firmware server, and session server. Many of the configuration options listed in this process flow are described in Chapter 19, Alternate Network Configurations.
The Configuration GUI must be enabled on the client for the user to locally configure the Sun Ray parameters. Locally configured parameter values override network values with the exception of MTU, which is always the minimum of the values seen.
Power unit on.
Read local configuration (from Configuration GUI), if present.
netType = STATIC IP OR DHCP OR Auto-config (IPv6)
If netType is STATIC IP, use locally configured values for
IP Address
Net mask
Broadcast address
Router
MTU
Bring up the network interface.
If any networking values missing, then perform DHCP.
If AuthSrvr value is not defined, then perform DHCP_INFORM request.
Merge any local values, DHCP vendor options, and DHCP_INFORM values (local values override DHCP except MTU, which is minimum of values seen).
If XDispMgr was given by DHCP AND no AltAuth vendor option was found, then set AltAuth to XDispMgr (option 49) values.
Read Configuration Parameter file (
model.parmsTry to find the firmware servers that contain
.parmsfile, in order:Locally configured value
DHCP vendor option (FWSrvr)
Option 66 (TftpSrvr) IP Address or DNS name
DNS lookup of "sunray-config-servers" (if mapped to multiple addresses, choose one randomly)
Download the
.parmsfile.Search for SunRayPx.
MAC.parms.Search for SunRayPx.parms.
Parse the
.parmsfile.parms.version = firmware version
parms.revision = max supported hardware revision
parms.barrier = barrier value of server firmware
parms.BarrierLevel = barrier override value
parms.servers = server list
parms.select = inorder | random
If
.parmsfile was successfully parsed OR firmware server was obtained by locally configured value, then go to Step 5.NoteIf a locally configured firmware server is unreachable or the correct configuration parameter file does not exist, the Sun Ray Client will not attempt any of the other methods in Step 4 to locate configuration parameter files. This setup prevents the unintentional loading of a different firmware version than is provided by the locally designated firmware server.
If no
.parmsfile found AND not at end of firmware server list, then go to Step 4 and pick next firmware server on the list.If no firmware servers left to try, then set following values:
parms.version = DHCP vendor option NewTVer (set to NULL string if none provided by DHCP)
parms.BarrierLevel = DHCP BarrierLevel (set to current_barrier if none provided by DHCP)
set parms.revision to current_revision
set parms.barrier to current_barrier
set parms.select = inorder
Determine if there is new firmware to load.
If:
parms.version is not equal to the current firmware version
AND parms.version is not equal to "_NONE_"
AND parms.revision is >= to current hardware revision
AND either parms.barrier is >= to parms.BarrierLevel or parms.barrier is >= current firmware's barrier level
Then:
Download firmware.
Write firmware to flash.
Reboot.
Else:
No firmware is loaded.
Determine a Sun Ray server to connect to.
If AlthAuth/AuthSrvr/parms.servers are all empty, then set server_list to "sunray-servers". Otherwise set server_list to parms.servers.
If untried server_list addresses are left, then:
Select a name in order (or randomly if parms.select=random).
Translate the name to a list of IP addresses (either DNS lookup, or IP address notation).
Select an address from the list in order (or randomly if parms.select=random).
Set that the broadcast address was seen if the selected address is the broadcast address, and select the next address.
Go to Step 6h.
If untried AltAuth addresses are left, then:
Select an address in order (or randomly if parms.select=random).
Set that the broadcast address was seen if the selected address is the broadcast address, and select the next address
Go to Step 6h.
If AuthSrvr is defined, then:
Set address to AuthSrvr.
Go to Step 6h.
If broadcast address was seen, then perform broadcast protocol.
If broadcast response received, then:
Set selected address to responder.
Go to Step 6h.
Timeout in 30 seconds and reboot.
Try to connect to selected address.
If connection fails, then go to Step 6b.
Sun Ray Client is connected.