| Oracle Virtual Operator Panel User's Guide Release 2.1 E48640-01 |
|


 Previous |
 Next |
This chapter describes how to use the LTO Virtual Operator Panel (VOP) with a single encryption-enabled HP or IBM Linear Tape Open (LTO) Ultrium LTO-4, LTO-5, or LTO-6 tape drive.
Designed for ease of use, the LTO VOP Graphical User Interface (GUI) allows you to do the following:
Monitor tape drive status
Monitor tape drive status
Perform tape drive service tasks
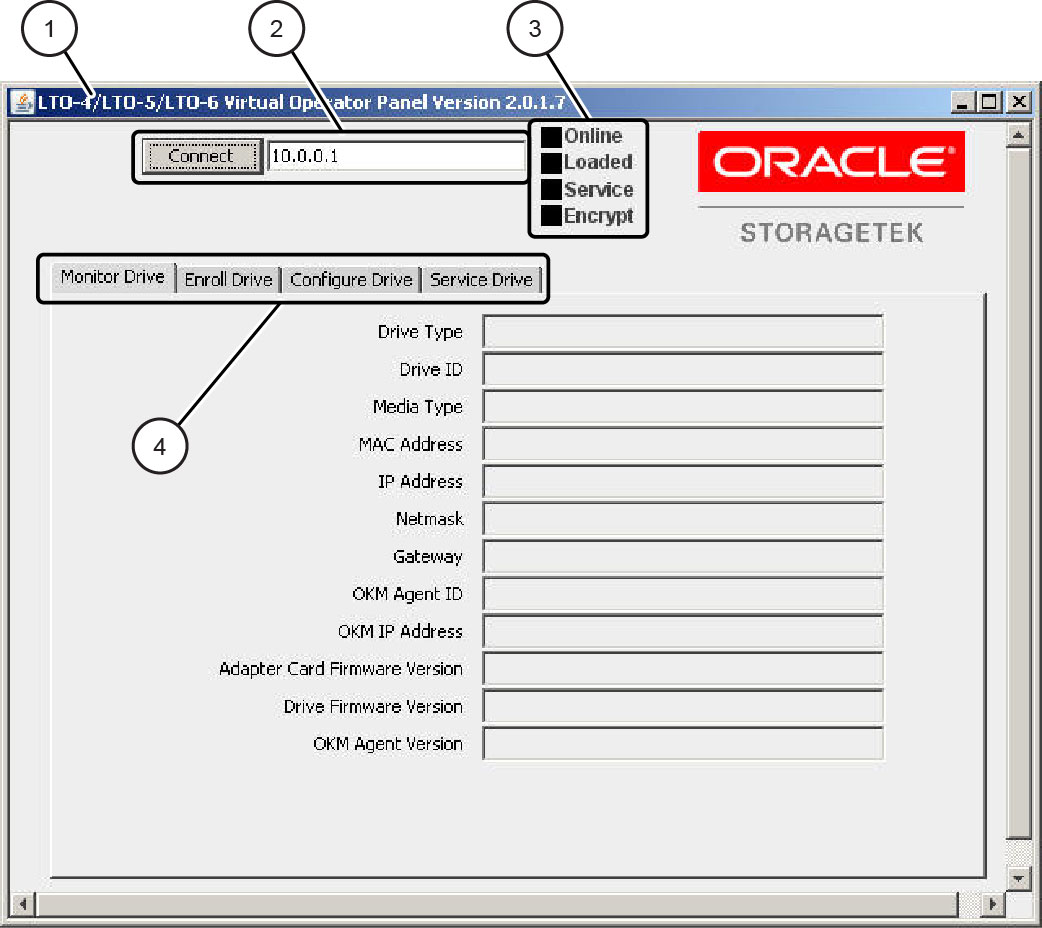
Figure 11-1 shows the LTO VOP main interface:
Legend:
1. Title Bar (Includes Menus)
2. Connect Button
3. Tape Drive Status Indicators
4. Function Tabs
As shown in Figure 11-1, the LTO VOP interface includes the following:
Title Bar
Click the icon in the title bar to access a basic menu you can use to re-size the window and close the application.
Connect Button
Enter the IP address of your LTO tape drive in the accompanying field and click the Connect button.
Tape Drive Status Indicators
These indicators show the current drive state:
The Online/Offline status indicator indicates whether the Ethernet adapter card is online. When you bring a tape drive online, this status indicator changes from grey to blue, and indicates Online.
The Empty/Loaded status indicator indicates whether a tape cartridge is loaded in the tape drive. When you load a cartridge in the tape drive, this status indicator changes from grey to blue, and indicates Loaded.
The Service status indicator indicates whether the Ethernet card is communicating with the tape drive.
The Encryption status indicator indicates whether the tape drive is enrolled for encryption.
|
Note: You can click directly on certain status indicators to toggle the state of the monitored tape drive item. |
Function Tabs
These tabs provide functions used to configure, monitor, and service the tape drive. See "LTO VOP Function Tabs" for more information.
During the course of selected operations, the message pane located on the Service Drive tab displays a transcript of LTO VOP actions and prompts for additional input.
Certain LTO VOP functions require the tape drive to be offline.
Do the following:
Determine the current drive state.
View the Online/Offline status indicator. If the tape drive is online, proceed with the next step. If the tape drive is offline, stop.
Change the drive state to Offline using one of the following methods:
Click the first status indicator.
Click the Enroll Drive tab and then click the Set Offline button.
Click the Configure Drive tab and then click the Set Offline button.
Verify that the tape drive is offline.
The first Online/Offline status indicator is grey and is labeled Offline. In addition, the button in the Enroll Drive tab is labeled Set Online.
Depending on conditions, certain LTO VOP functions result in error conditions. For example, an error occurs if you attempt to place the tape drive (adapter card) offline while a tape cartridge is loaded.
LTO VOP includes the following tabs used to perform various functions on the tape drive:
These function tabs are described in the following sections.
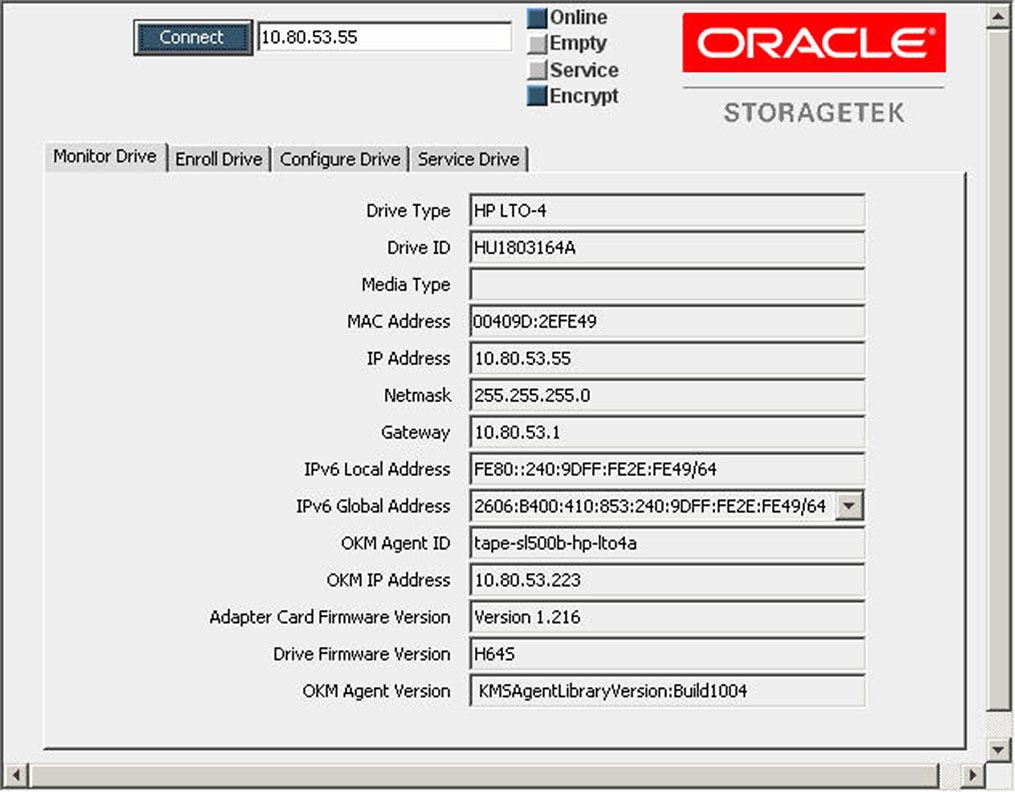
Click this tab to display a list of tape drive, cartridge, and OKM agent attributes and values for those attributes. Some attributes require an additional action, such as tape drive enrollment for encryption, before the associated data appears.
Figure 11-2 shows an example of the Monitor Drive page:
As shown in Figure 11-2, this page lists the following tape drive attributes:
Drive Type
Drive ID
Media Type
MAC Address
IP Address
Netmask
Gateway
IPv6 Local Address
OKM Agent ID
OKM IP Address
Adapter Card Firmware Version
Drive Firmware Version
OKM Agent Version
|
Note: Refer to your encryption documentation before using this page. The sequence for using the Configure Drive and Enroll Drive tabs is critical to success. |
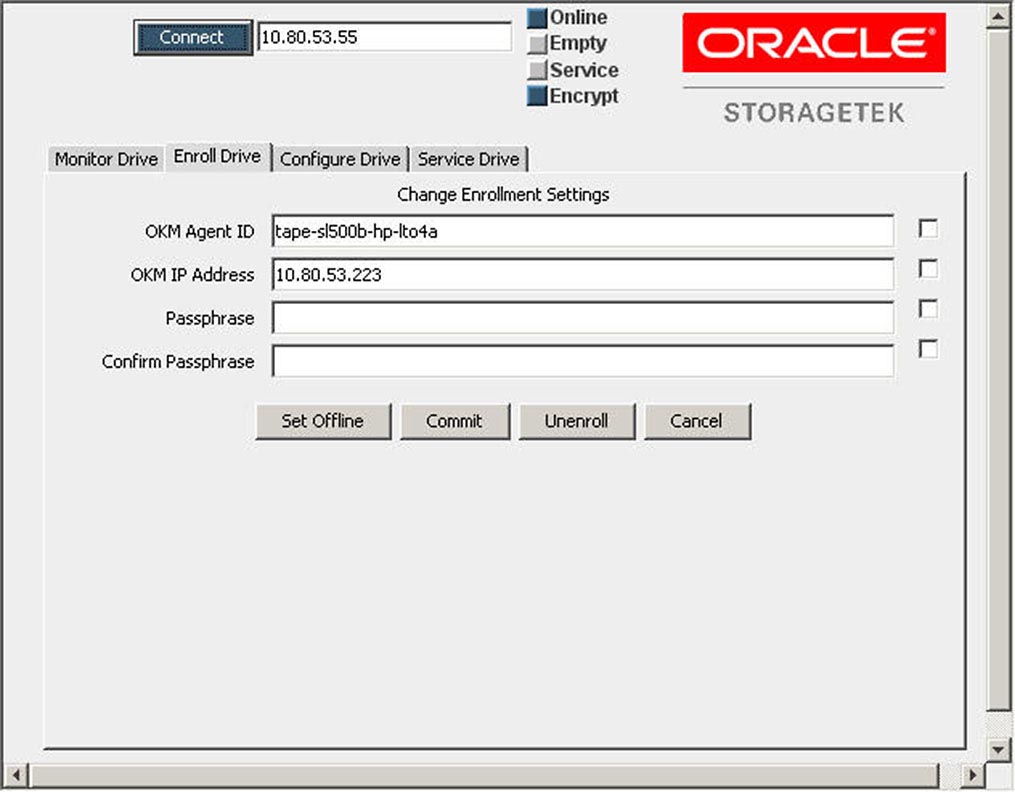
Click this tab to access functions used to specify enrollment settings and enroll the tape drive adapter card.
Figure 11-3 shows an example of the Enroll Drive page:
As shown in Figure 11-3, this page includes fields to specify enrollment settings, and buttons to perform related operations.
To change a setting, enter a new value in a field. The accompanying Update check box is automatically selected to indicate a change.
The Enroll Drive page includes the following fields:
KMA Agent ID
The KMA agent defined in OKM.
KMA IP Address
The KMA service network address.
Passphrase
The KMA agent passphrase defined in OKM.
Confirm Passphrase
Confirmation of the KMA agent passphrase.
|
Note: Before you enroll a tape drive, you must create the agent with the passphrase assigned in the OKM. The OKM must be able to communicate with the adapter card and tape drive. |
The Enroll Drive page includes the following buttons:
Set Offline
Click this button to set the tape drive offline.
The label on this button changes depending on the current drive state (for example, the label is Set Offline when the drive state is Online).
Commit
Click this button to save the enrollment settings in NVRAM. The Ethernet card does not reboot if you only change the enrollment settings.
When you click the Commit button, only those fields with an active check box are updated.
Enroll
After you commit your enrollment settings, click this button to enroll the drive.
Cancel
Click this button to cancel all pending setting changes.
|
Note: Refer to your encryption documentation before using this page. The sequence for using the Configure Drive and Enroll Drive tabs is critical to success. |
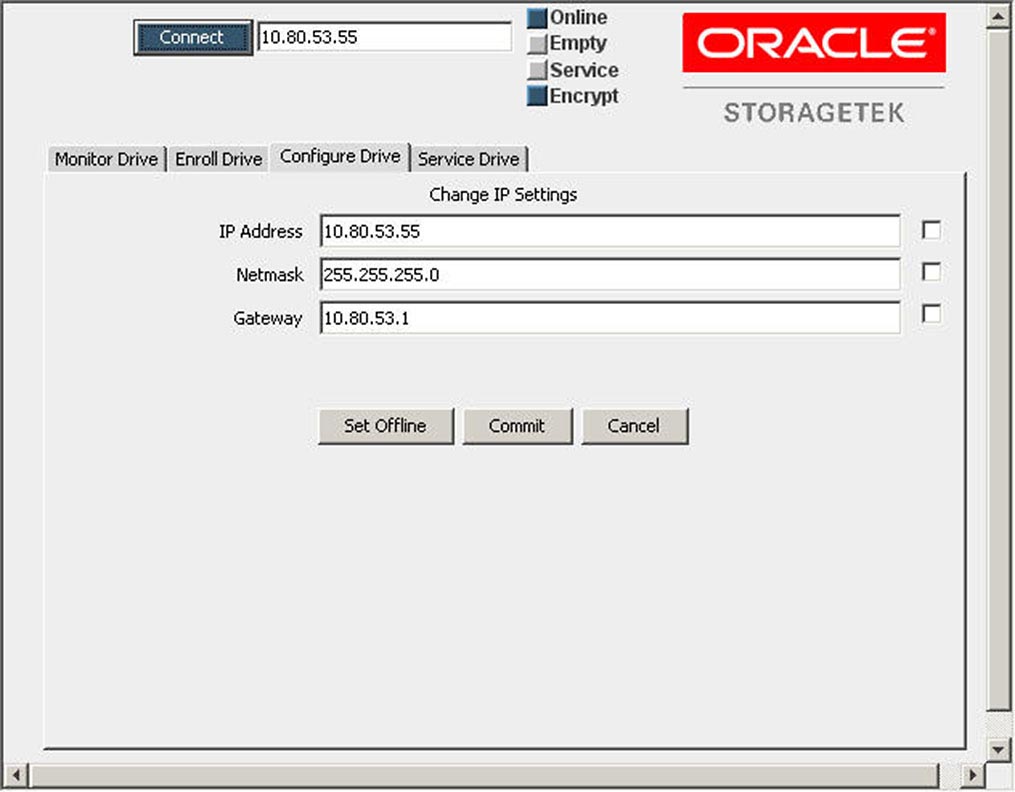
Click this tab to access functions used to specify IP settings for the tape drive. This page is typically used by the service representative to configure the tape drive to use settings other than those set during the manufacturing process.
Figure 11-4 shows an example of the Configure Drive page:
As shown in Figure 11-4, this page includes fields to specify IP settings, and buttons to perform related operations.
To change a setting, enter a new value in a field. The accompanying Update check box is automatically selected to indicate a change.
The Configure Drive page includes the following fields:
IP Address
Enter the IP address for the tape drive.
Netmask
Enter the Netmask for the tape drive.
Gateway
Enter the Gateway for the tape drive.
The Configure Drive page includes the following buttons:
Set Offline
Click this button to set the tape drive (adapter card) offline.
The label on this button changes depending on the current drive state (for example, the label is Set Offline when the drive state is Online).
Commit
Click this button to save the IP settings in NVRAM. The Ethernet card reboots when you change an IP setting. When you click the Commit button, only those fields with an active check box are updated.
Cancel
Click this button to unselect all pending setting changes.
|
Note: Refer to your encryption documentation before using this page. |
Click this tab to access functions used to perform service functions on the tape drive. These functions are primarily intended for the service representative.
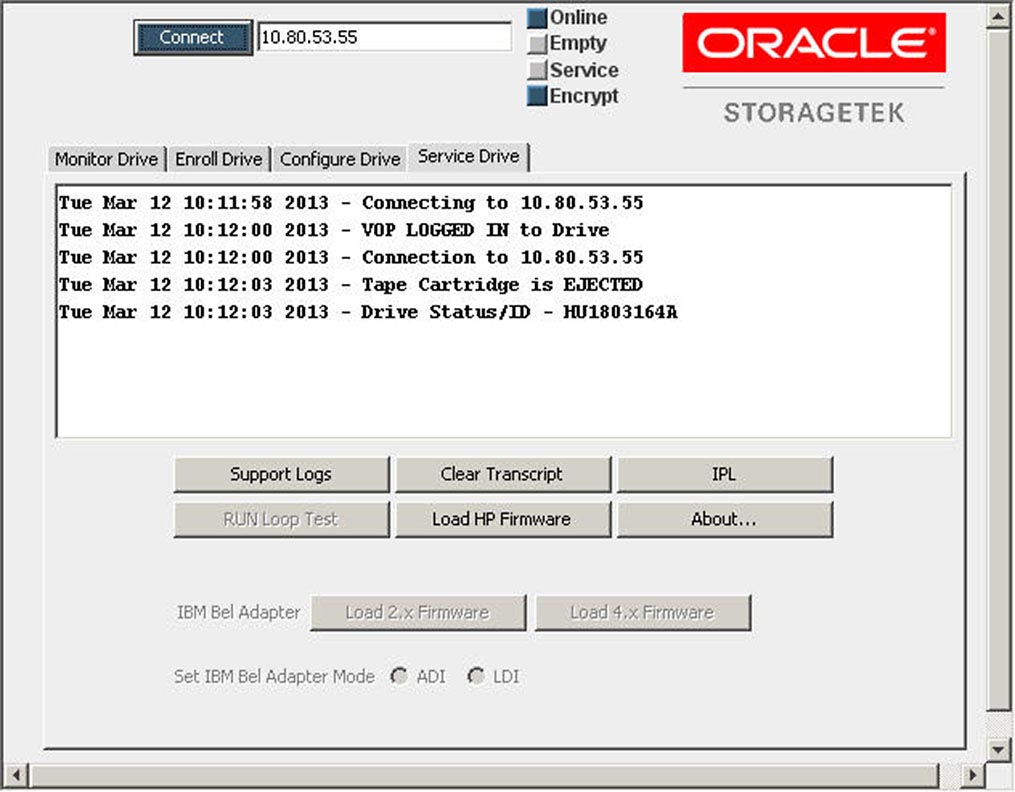
Figure 11-5 shows an example of the Service Drive page:
As shown in Figure 11-5, this page contains a text-based transcript area and the following buttons:
Support Logs
Saves log files to a specified location.
Clear Transcript
Erases the content displayed in the text pane.
IPL
Performs an Initial Program Load (IPL) of the Ethernet card.
RUN Loop Test
Performs an internal loopback test on the tape drive.
Load HP Firmware
Starts the Ethernet card firmware update procedure. You are prompted to identify the directory that contains the Ethernet card firmware files.
IBM Bel Adapter
Click one of the following buttons to specify the IBM Bel Adapter code version:
Load 2.x Firmware (LDI only)
Load 4.x Firmware (ADI or LDI)
You must power cycle the drive after the adapter firmware update is complete.
Set IBM Bel Adapter Mode
This option is only available when running version 4.x of the Adapter firmware.
Click one of the following radio buttons to specify the IBM Bel Adapter mode:
ADI (Analog/Digital Interface)
LDI (Library/Drive Interface)
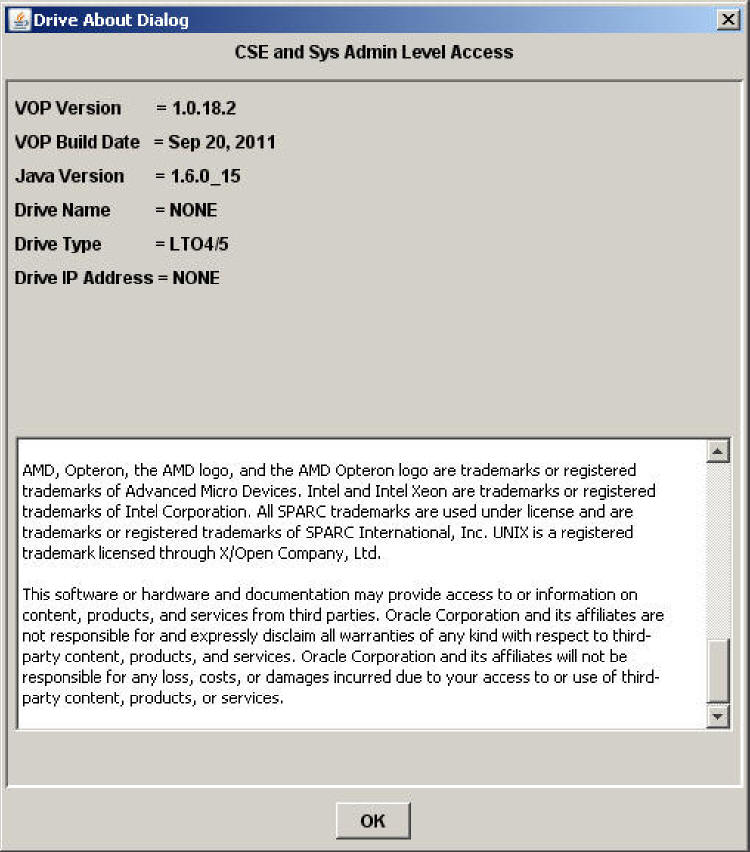
Displays LTO VOP version, basic tape drive information, and copyright information. For example:
|
 Copyright © 2014, Oracle and/or its affiliates. All rights reserved. Legal Notices |
|