The application uses a simple Java class to store the data and displays a list of employees on one page and a graph of salaries on another. As you build the application, you will add MAF layout components to further control and customize the behavior of the application.
In Part 2 of the tutorial, you add specific device integration to your application. In Part 3, you add a call to a public stock quote web service.
| Assumptions: |
|---|
To complete this tutorial you must have installed JDeveloper 12.1.3 and have installed the 2.2 MAF Extension. You may deploy to either an Android emulator (SDK version 5.0.x API level 21) or iOS simulator (Xcode 6.1.x). If you decide, you may deploy the application to a connected Android device. The tutorial demonstrates deploying the application to an Android emulator, which must be running before deploying. You launch the emulator using the Android Virtual Device (AVD) Manager, which is part of Android SDK Tools. If you are using an iOS environment, you can use the following tutorial to set up the development environment: Set Up and Configure an iOS Environment. If you are using an Android environment, you can use the following tutorial: Set Up and Configure an Android Environment. |
When you work in JDeveloper, you organize your work in projects within an application. JDeveloper provides several templates that you can use to create an application and projects. The templates are pre-configured with a basic set of technologies that are needed for developing various types of applications, and you create a working environment by selecting the template that fits your needs. You can then configure it to add any other technologies you plan to use.
In this first section, you create an application by using the MAF application template. You then create a couple of mobile features that will hold the application you are be building.
-
Open JDeveloper 12.1.3.
-
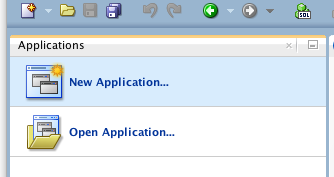
In the Application Navigator, click New Application.
-
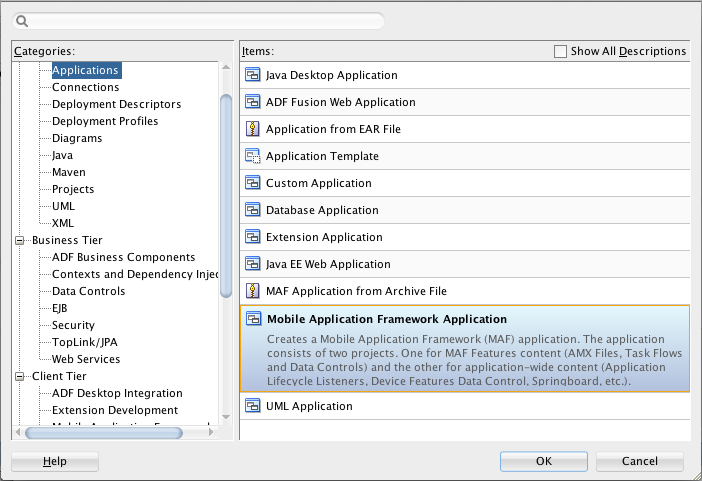
In the New Gallery, select General > Applications > Mobile Application Framework Application and click OK.
-
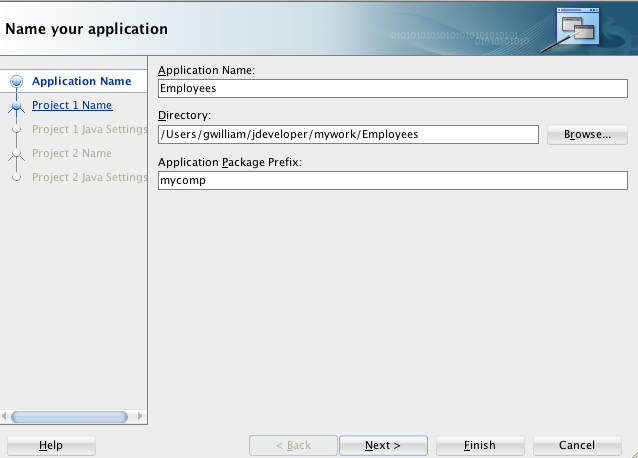
In the Create Mobile Application Framework Application wizard, name the application Employees, and set the Application Package Prefix to mycomp. Click Next.
-
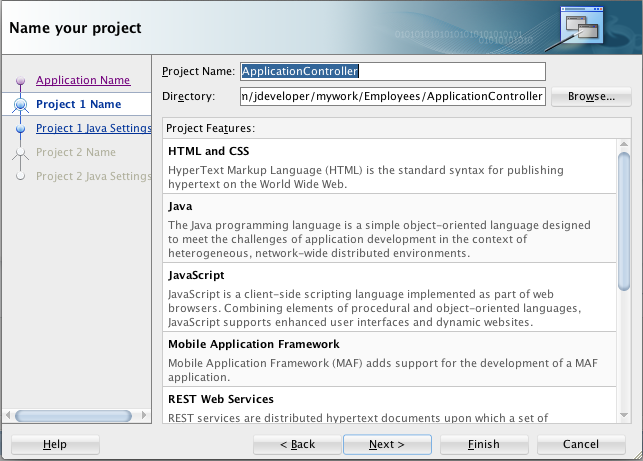
Click Next to accept the default Project Name (ApplicationController).
-
Notice the default package and click Next to accept the default value and continue.
-
Click Next to accept the Project Name for the second project.
-
On the last step of the wizard, notice the Default Package name and click Finish to create the application.
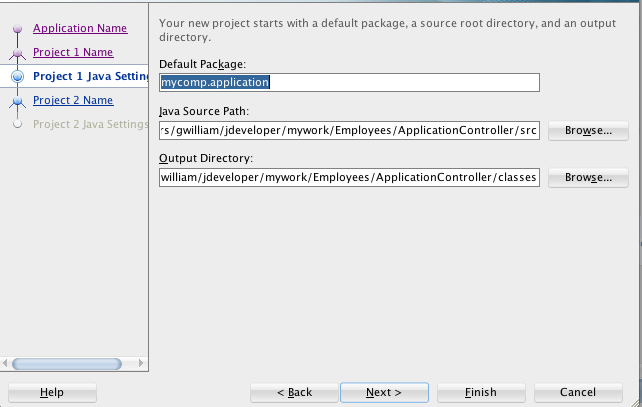
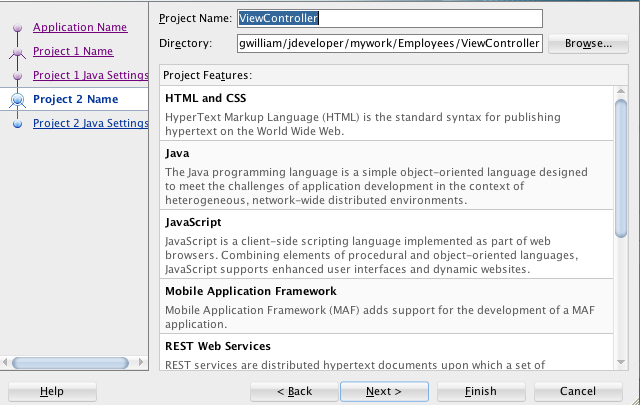
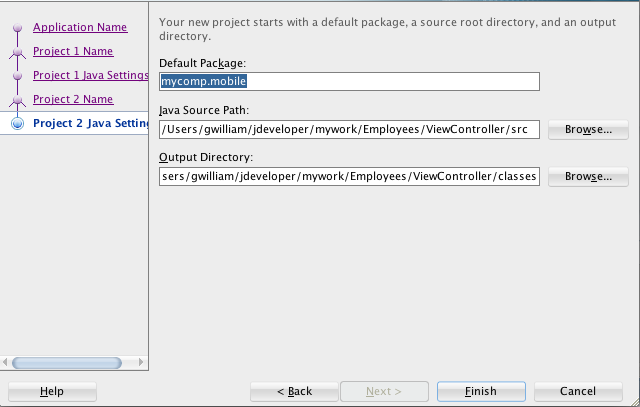
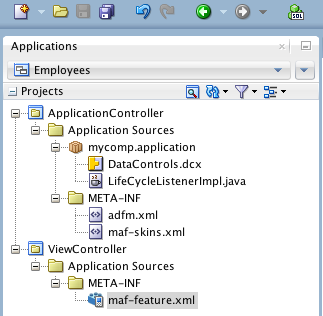
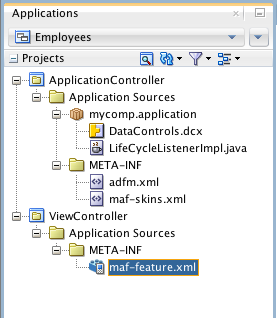
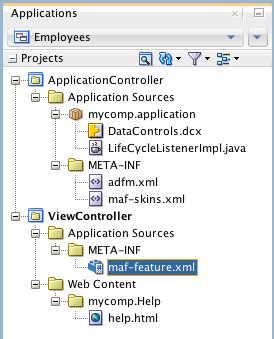
JDeveloper creates the application and opens it in the Application Navigator. The Application Navigator should look something like the following:
When you deploy an Oracle MAF application, the application will be a single application on the mobile device. The application may consist of several parts. For example, there may be a search component, a document (like a help page), a data entry form, or even a list. Each of these parts is defined as a feature within the application. In this section of the tutorial, you create the features that you will deploy as part of your application.
-
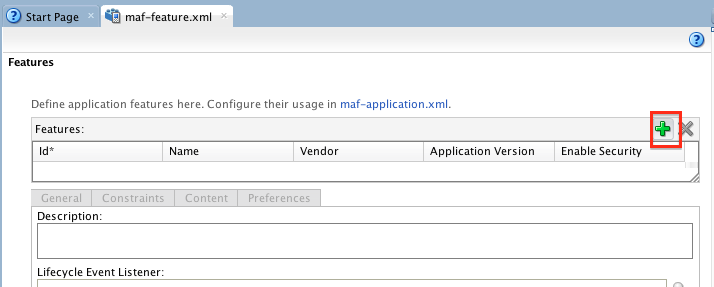
The features of a MAF application are defined in the maf-feature.xml file. If the file is not already open, double-click the file to open it in the editor.
-
In maf-features.xml, click the green plus sign
 in the Features table to create a new feature.
 -
Name the new feature Employees and click OK. Ensure the Add a corresponding feature reference to maf-application.xml checkbox is selected.
-
Click the green plus sign
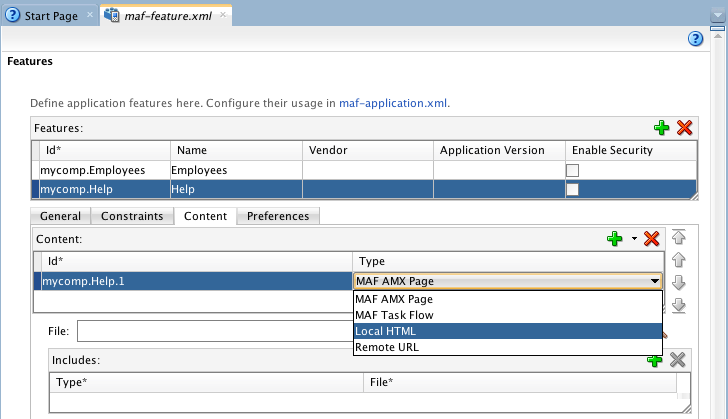
 again, in the Features table to create another new feature. Set the Feature Name to Help, then click OK.
 -
In the Features table, select the Help feature. Under the Features table, click the Content tab. Set the Type to Local HTML.
-
Next to the URL property, click the Create (green plus sign
 ) icon to create the local HTML file.
 -
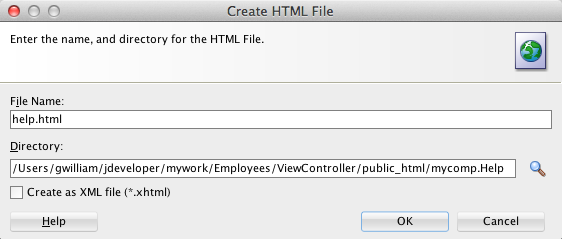
Set the File Name to help.html and click OK.
-
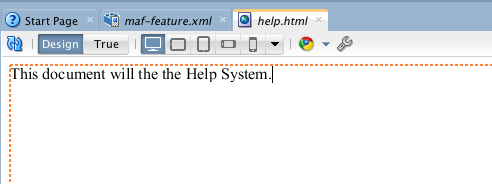
JDeveloper creates the file and opens it in the editor. Enter "This document will be the Help System" in the help.html file.
-
Save your work.



In this section you create a MAF task flow that will be consumed by the Employees feature. A MAF task flow contains multiple pages that interact with one another. The task flow provides structure to the interaction.
-
If it is not already open, double-click maf-feature.xml in the Application Navigator to open it in the editor. If it is already open, you can click the tab named maf-feature.xml.
-
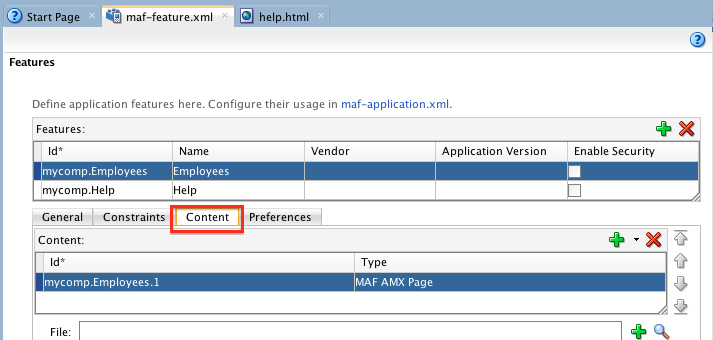
In the editor, select the Employees feature, and click the Content tab.
-
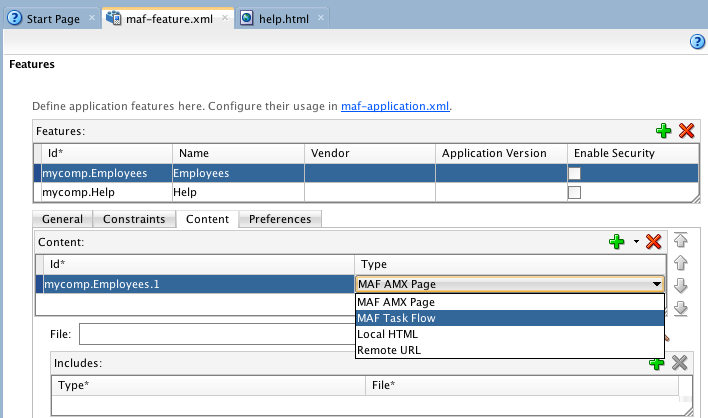
On the Content tab for the Employees Feature, use the Type dropdown to select MAF Task Flow.
-
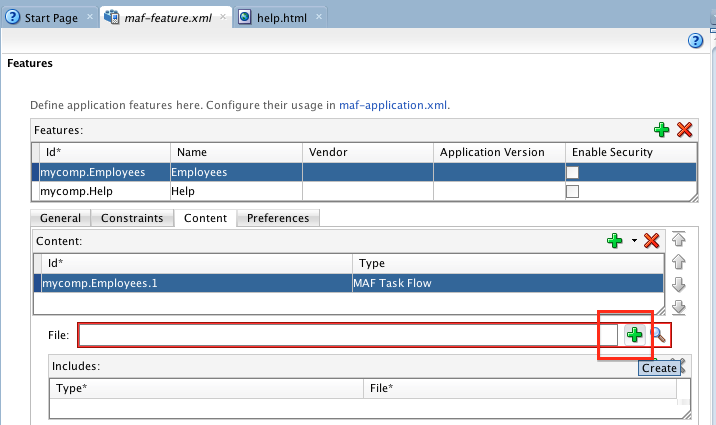
Click the Add icon
 next to the File field.
 -
In the Create dialog box, set the File Name property to EmpsTaskFlow.xml and click OK.
-
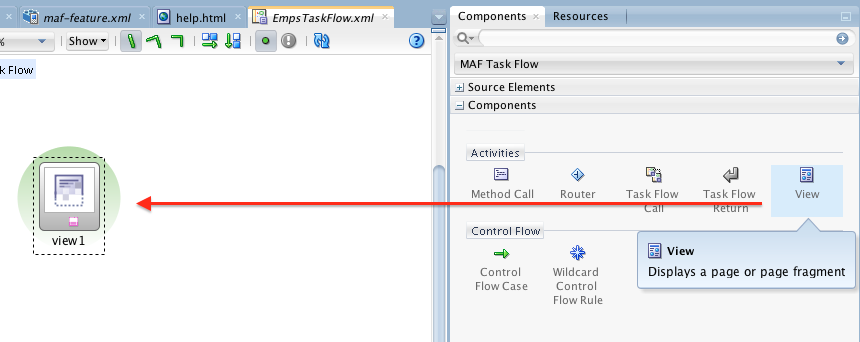
Notice the Component Palette located in the upper-right corner of JDeveloper. From that palette, drag a view activity to the task flow.
-
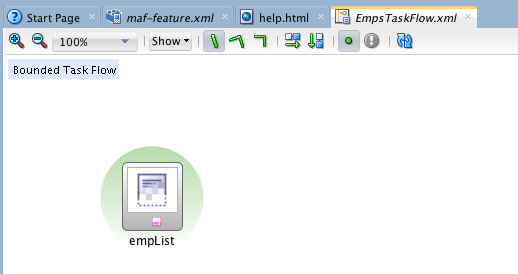
Change the name the view activity to empList.
-
Drag a second view activity to the task flow and name this one graph.
-
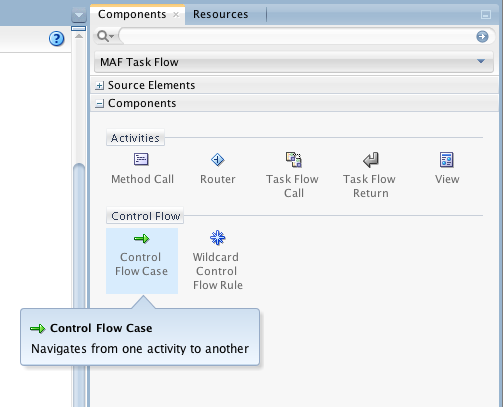
Click Control Flow Case on the Component Window.
-
After you have selected the control flow case, click the empList view activity and then click the graph view activity.
-
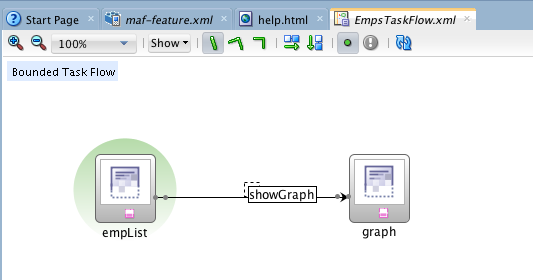
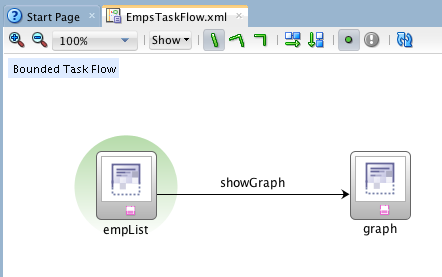
Set the name of the control flow case to showGraph.
-
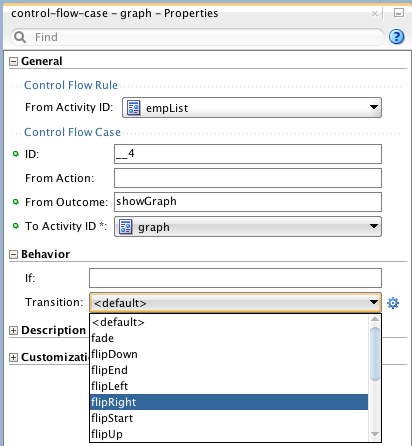
Select the showGraph control flow case and in the Property Window under Behavior, set the Transition property to flipRight.
-
Save your work.
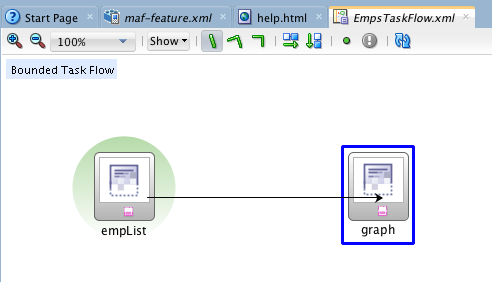
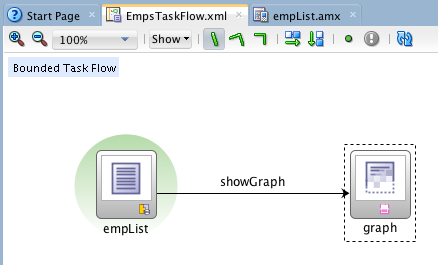
The EmpsTaskFlow should look something like the following:
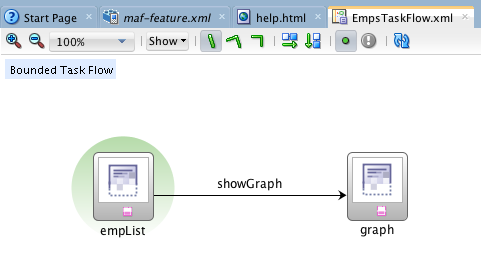
Remember that the view activities you have created are merely pointers to pages. You create the underlying pages later in this tutorial.

JDeveloper creates the task flow, and opens it in the editor.
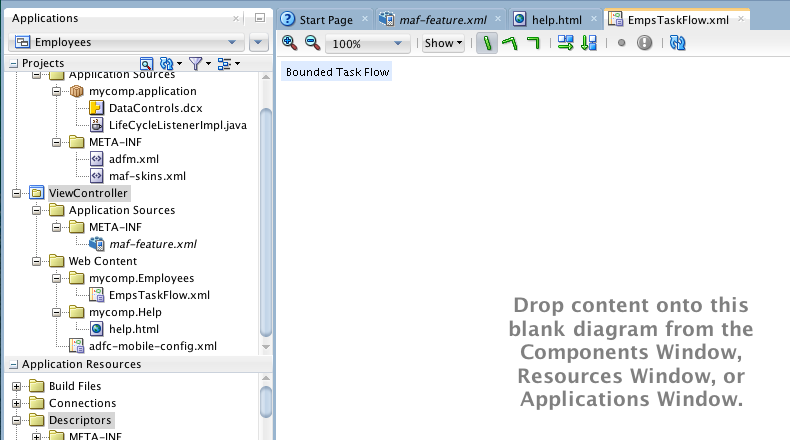
You can now add content to the task flow. The content will consist of view activities (pointers to pages), and control flow cases (navigation controls).
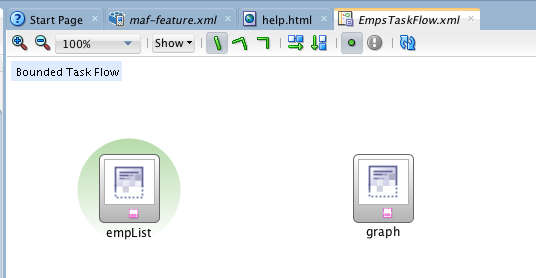
You now have two view activities on the task flow. The next step is to create navigation rules, or control flow cases, between the view activities.
MAF provides an application layer that manages data so that the UI can consume the data without concern about where or how the data is stored. This layer is called the data control layer.
This tutorial uses POJOs (Plain Old Java Objects) for the application data source. In this section, you learn how to create Java classes and generate data controls that are based on the classes. The user interface portion of the application uses the data controls to present data to the user.
-
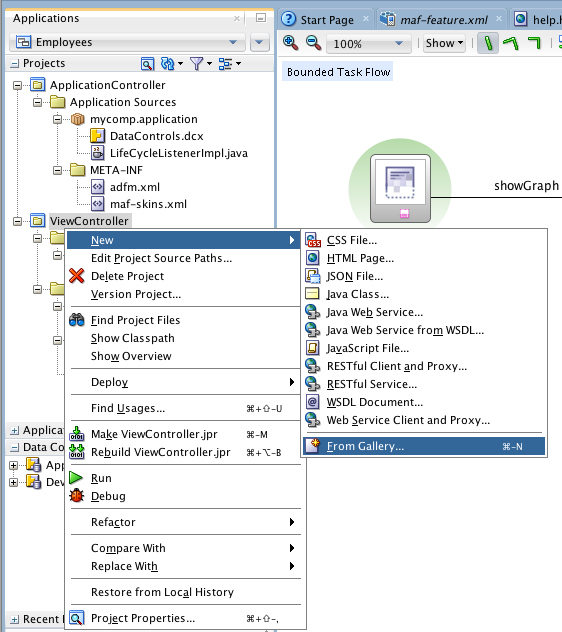
Right-click the ViewController project and select New > From Gallery .
-
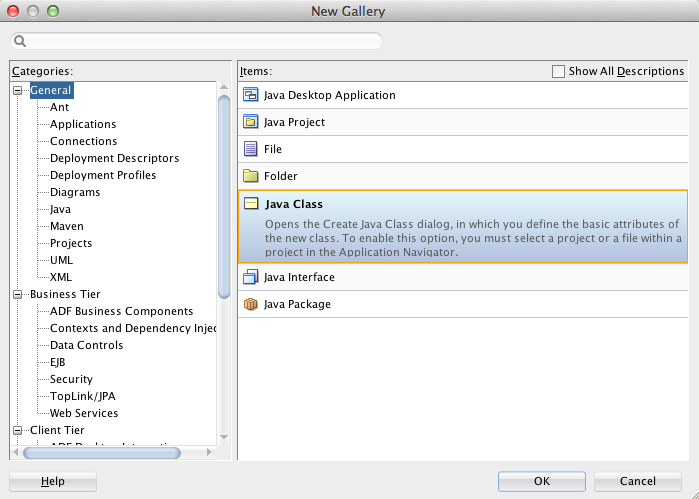
In the New Gallery, select Java Class and click OK.
-
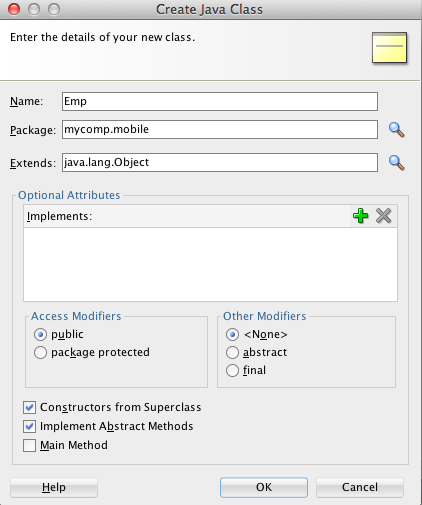
Name the class Emp and click OK to accept the other default values.
-
Add the following private variables. When you add Date hiredate, JDeveloper will prompt you to add an import. Choose java.util.Date for the import.
private String name;
private String email;
private int salary;
private Date hireDate; -
Add two constructors as follows:
public Emp(String name, String email) {
super();
this.name = name;
this.email = email;
}
public Emp(String name, String email, int salary, Date hireDate) {
super();
this.name = name;
this.email = email;
this.salary = salary;
this.hireDate = hireDate;
} -
Right-click inside the code editor and select Generate Accessors. This will create the getters and setters for the variables you choose.
-
Select Emp to select all the included methods, select the Notify listeners when property changes check box, and click OK.
-
Save your work.
In the next few steps you create a class needed that contains the employee data.
-
Just as you did a few steps earlier, create a Java class and name it Emps. (HINT: Right-click ViewController and select New; choose Java Class.)
-
The following code is the complete code for the Emps class. Replace all of the code in the editor.
-
Save your work.
-
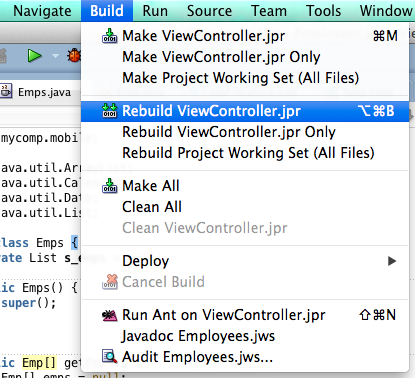
From the Build menu, select Rebuild ViewController.jpr. This rebuilds all of the class files for the project.
-
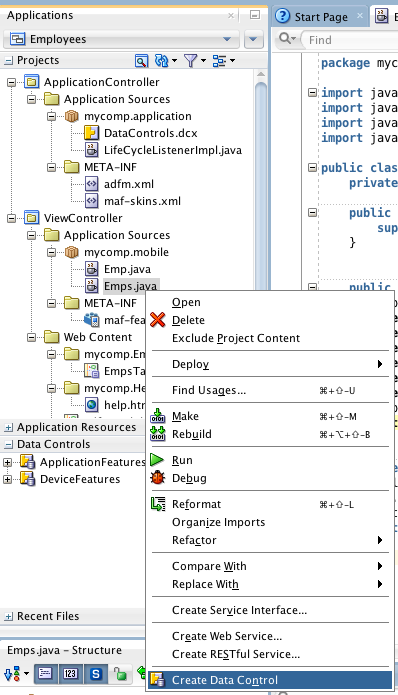
In the Application Navigator, right-click Emps.java and select Create Data Control.
-
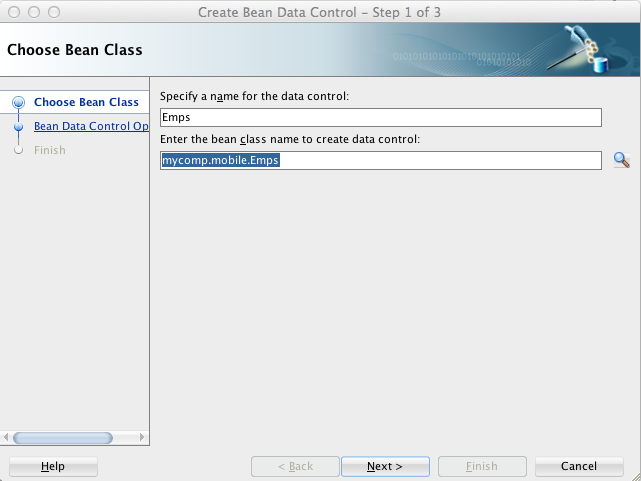
In the wizard, accept the name and class name property values, then click Next.
-
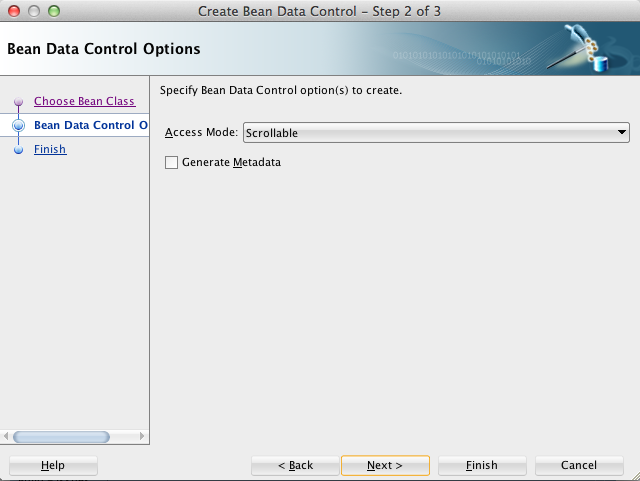
In Step 2, accept the default values and click Finish.
-
Save your work.
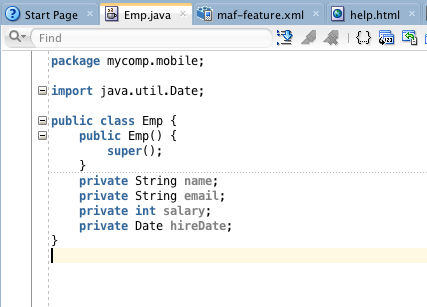
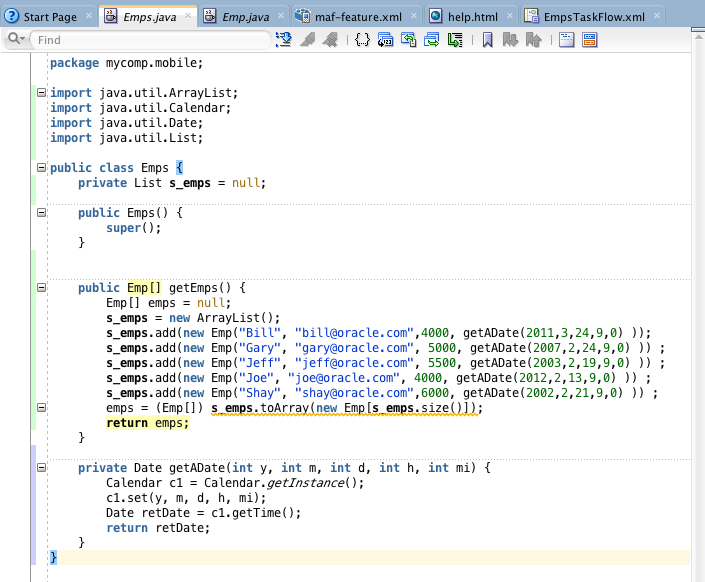
The code should look something like:
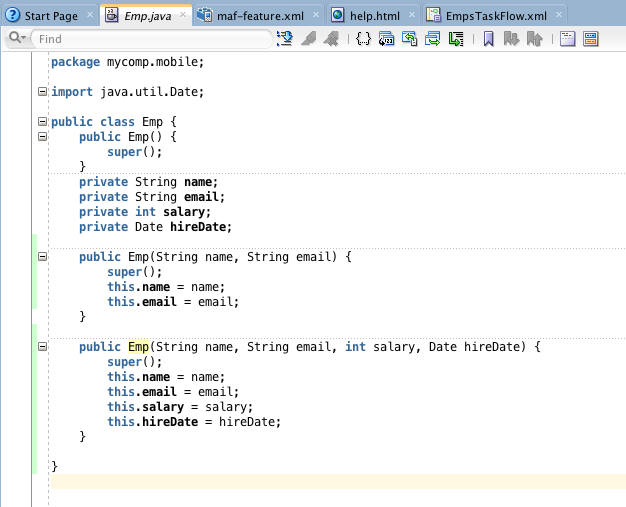
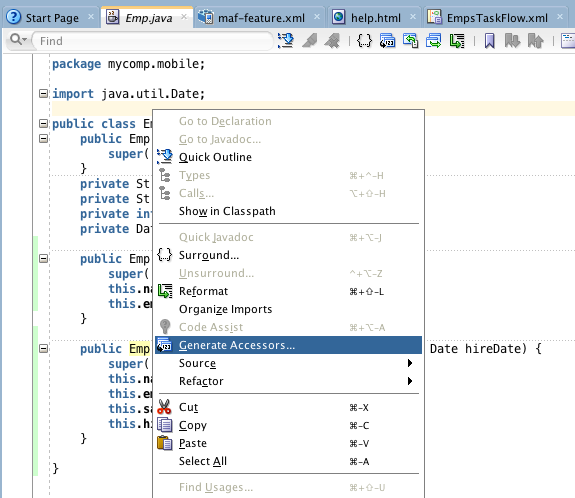
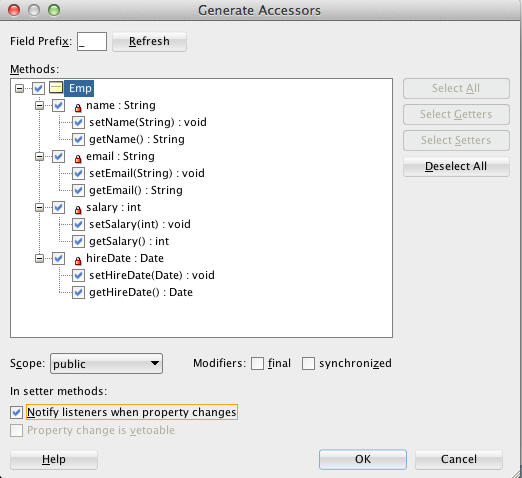
JDeveloper generates all of the getters and setters (accessors) for your class.
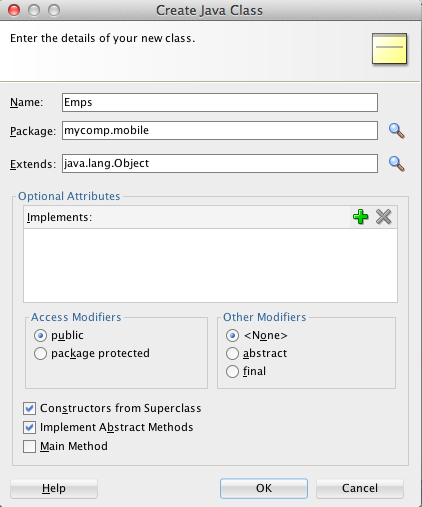
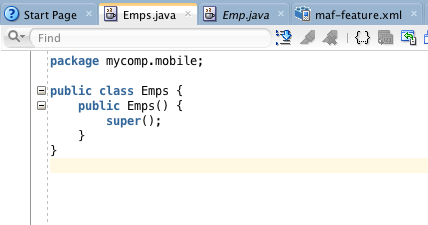
The class will look like:
package mycomp.mobile;
import java.util.ArrayList;
import java.util.Calendar;
import java.util.Date;
import java.util.List;
public class Emps {
private List s_emps = null;
public Emps() {
super();
}
public Emp[] getEmps() {
//This Method gets a list of the employees and their emails
Emp[] emps = null;
s_emps = new ArrayList();
s_emps.add(new Emp("Bill", "bill@oracle.com",4000, getADate(2011,3,24,9,0) )) ;
s_emps.add(new Emp("Gary", "gary@oracle.com", 5000, getADate(2007,2,24,9,0) )) ;
s_emps.add(new Emp("Jeff", "jeff@oracle.com", 5500, getADate(2003,2,19,9,0) )) ;
s_emps.add(new Emp("Joe", "joe@oracle.com", 4000, getADate(2012,2,13,9,0) )) ;
s_emps.add(new Emp("Shay", "shay@oracle.com",6000, getADate(2002,2,21,9,0) )) ;
emps = (Emp[]) s_emps.toArray(new Emp[s_emps.size()]);
return emps;
}
private Date getADate(int y,int m, int d,int h, int mi) {
Calendar c1 = Calendar.getInstance();
c1.set(y, m, d, h, mi);
Date retDate = c1.getTime();
return retDate;
}
}
The code should look like:
You now have a Java class that is the data source. Next you create an MAF data control that the application will use to consume the data.
Now that you have a data control defined, you can begin creating the UI portion of the application.
In this section, you create the pages that are associated with the view activities you created on the task flow. You have already created the navigation rules, so you will now create the pages and add buttons for the application navigation.
-
Open EmpsTaskFlow.xml in the editor. (HINT: The tab should still be open, but if not, double-click EmpsTaskFlow.xml in the Application Navigator.)
-
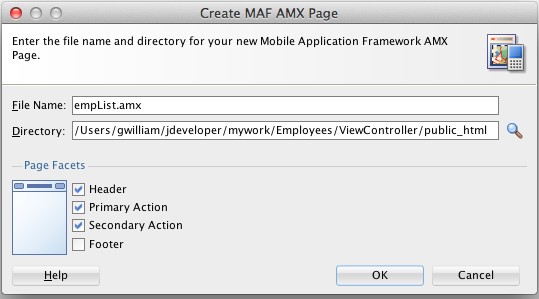
Double-click empList and select all of the page facets, except the Footer. Click OK to create the page.
-
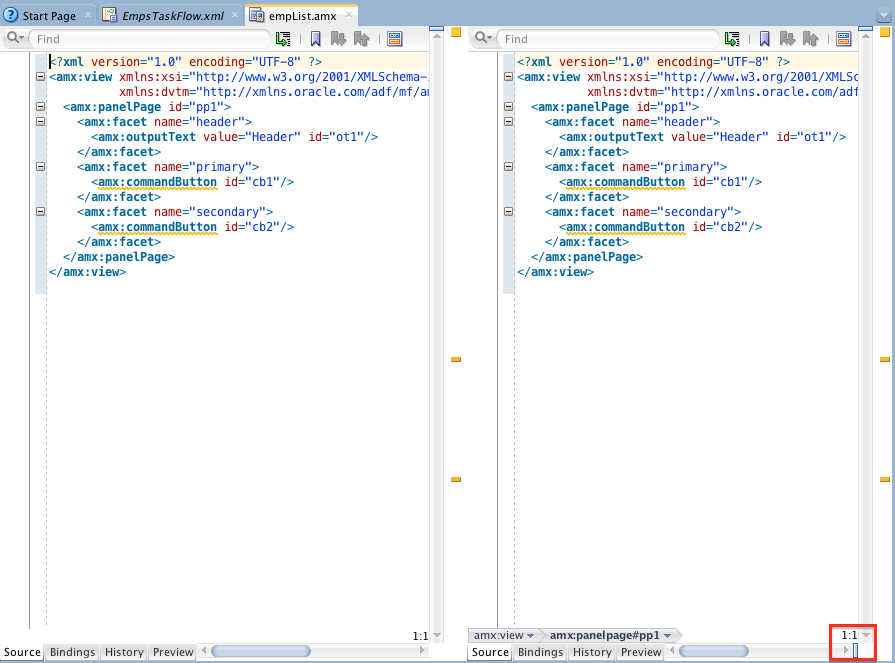
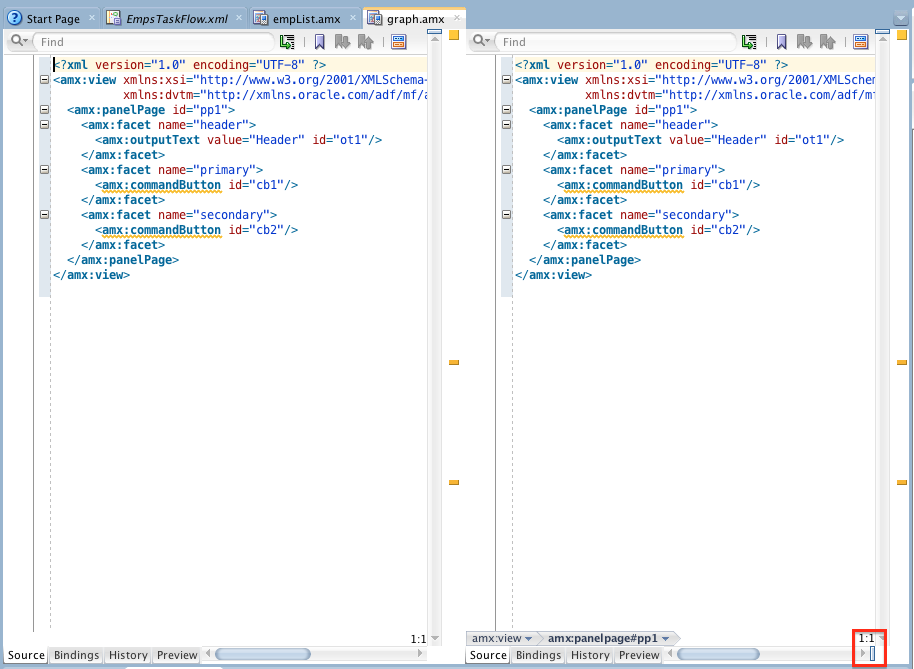
Use the drag bar to split the editor into two sections. The drag bar is the small vertical bar to the right of the bottom scroll bar in the editor.
-
In the editor, click the Preview tab at the bottom of the right pane to preview the UI. Set the device to Android High and the Zoom factor to 75%. Note that this is for the preview pane only and does not affect your code or application.
-
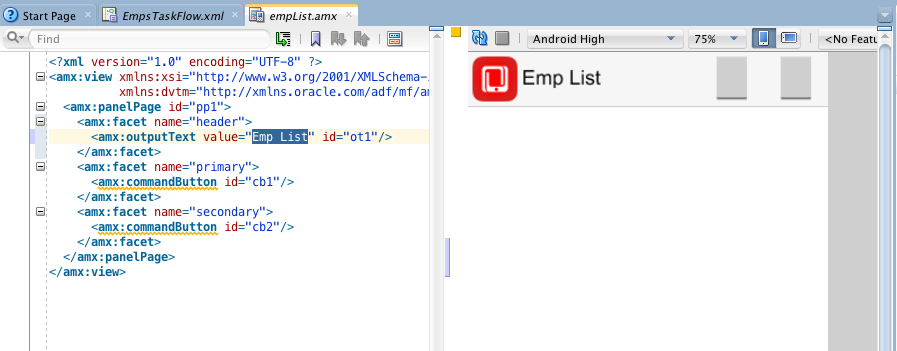
In the code section, within the header facet, click the outputText component and set the value property to Emp List.
-
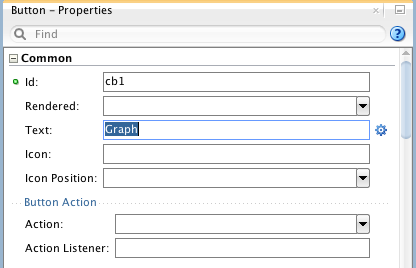
In the source editor, select the button in the primary facet and in the Property Inspector, set the Text property to Graph. When the user clicks this button, the application will display a graph of employee data.
-
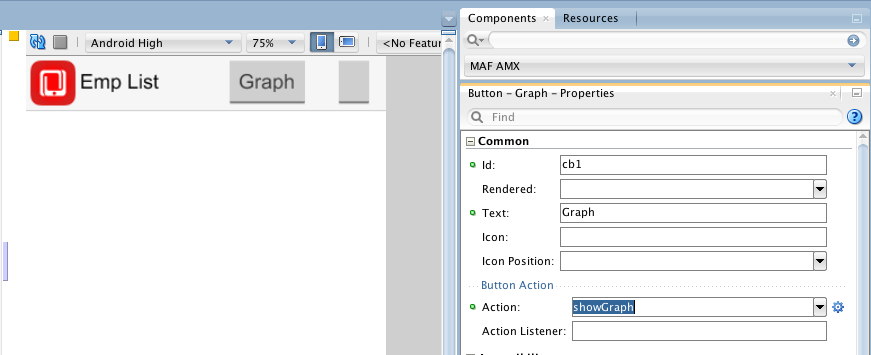
Set the Action property to showGraph, which is the navigation case to navigate to the Graph page.
-
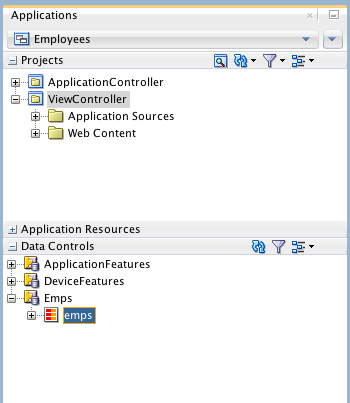
Expand the Data Controls palette to see the Emps data control.
If needed, click the blue circled arrow icon to refresh the data controls. -
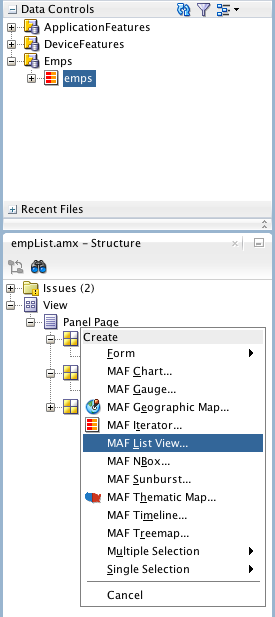
Drag the emps collection from within the Emps data control to the Panel Page node in the Structure window and drop the collection as a MAF List View. The Structure window provides an easy to read hierarchical view of the current page. The hierarchical view makes it easier for you to select components and move them around on the page. Because the structure window and editor operate on the same code, the are always in sync.
The data controls you created include collections and attributes. The emps collection is the one with the red table icon. Make sure you've selected the AMX page, otherwise you will not see anything in the Structure window. -
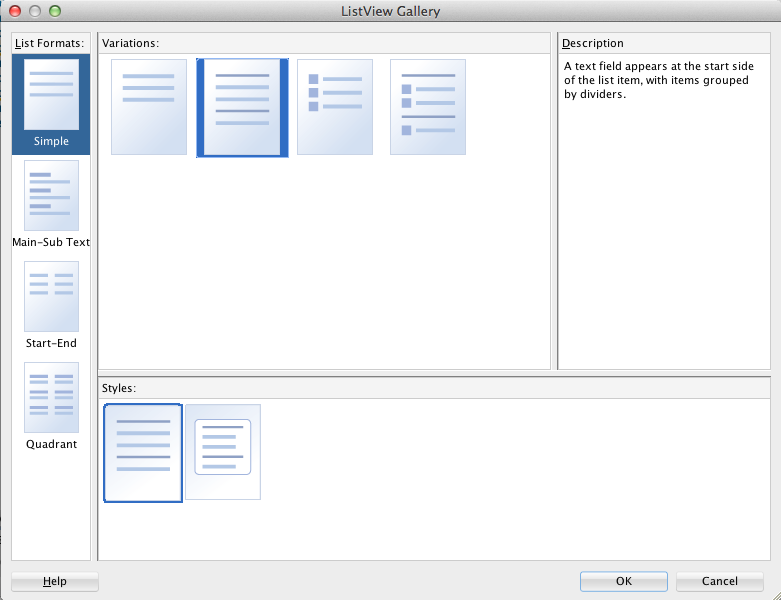
Under List Formats, select Simple, then under Variations, select the variation with text items grouped by dividers. Under Styles, verify that the first style in the list is selected and click OK.
-
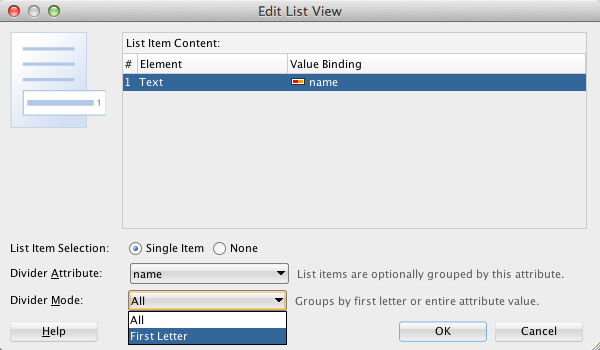
In the Edit List View dialog box, set the Divider Mode to First Letter and click OK.
-
Save your work.
-
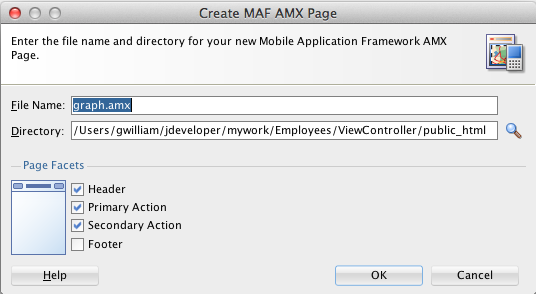
Just as you did before, double-click the graph view activity on the EmpsTaskFlow.
-
Make sure that all the page facets are selected, except the Footer, and click OK.
-
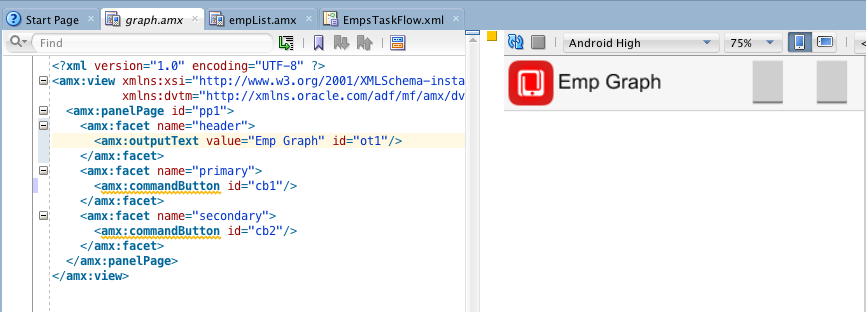
Use the drag bar and split the editor window to show two views. Remember, the drag bar is the small vertical bar to the right of the bottom scroll bar in the editor.
-
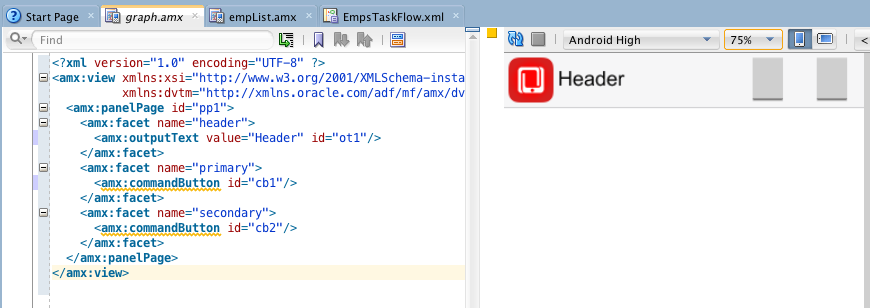
In editor, click the Preview tab at the bottom of the right pane to preview the UI. Set the Device to Android High and the Zoom factor to 75%.
-
In the code section, within the header facet, click the outputText component and set the value property to Emp Graph.
-
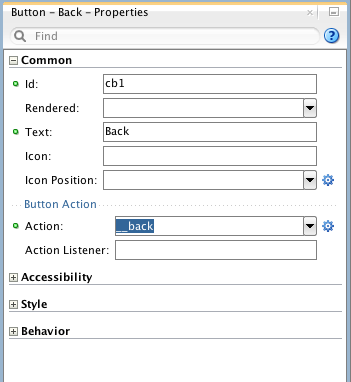
In the code section, select the commandButton in the primary facet and in the Property Inspector, set the Text to Back and the Action to __back.
-
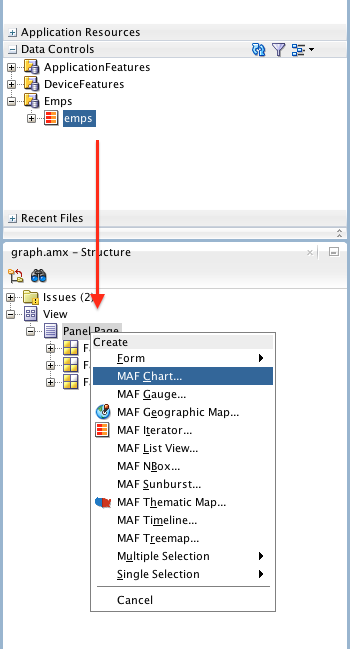
Just as you did for the empList page, drag the emps collection from within the Emps data control to the Panel Page node in the Structure window, but this time, drop it as a MAF Chart.
Make sure you've selected the AMX page, otherwise you will not see anything in the Structure window. -
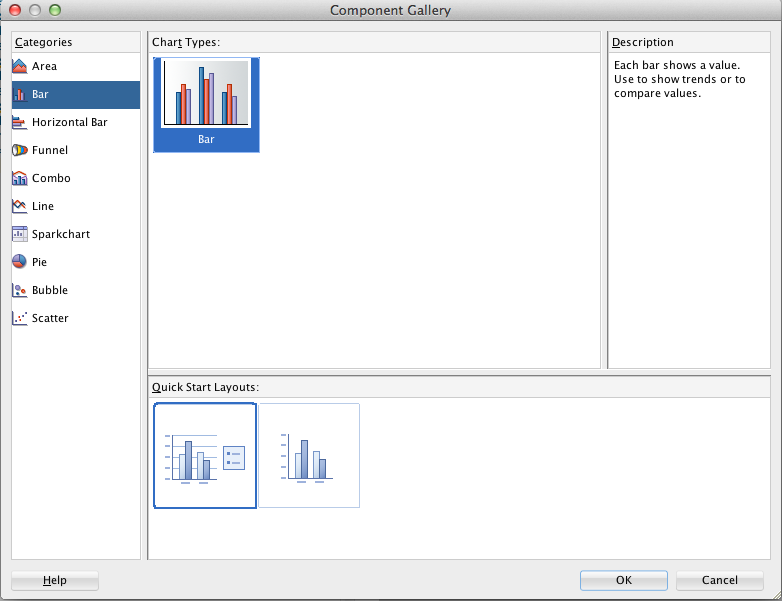
In the Component Gallery, select Bar and the first Quick Start Layout, and click OK.
-
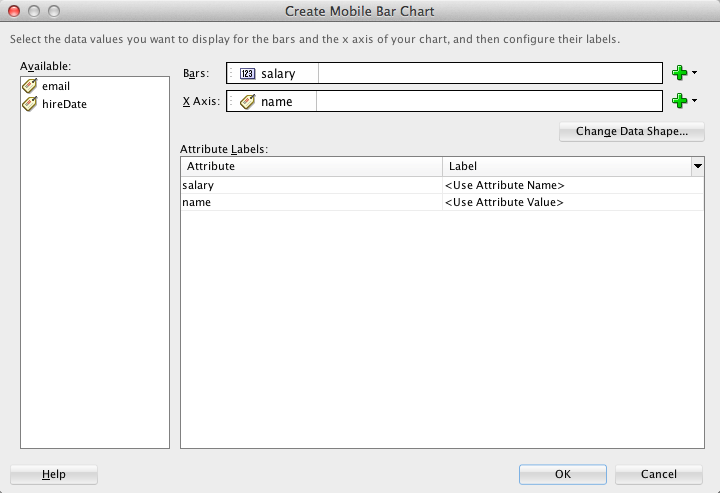
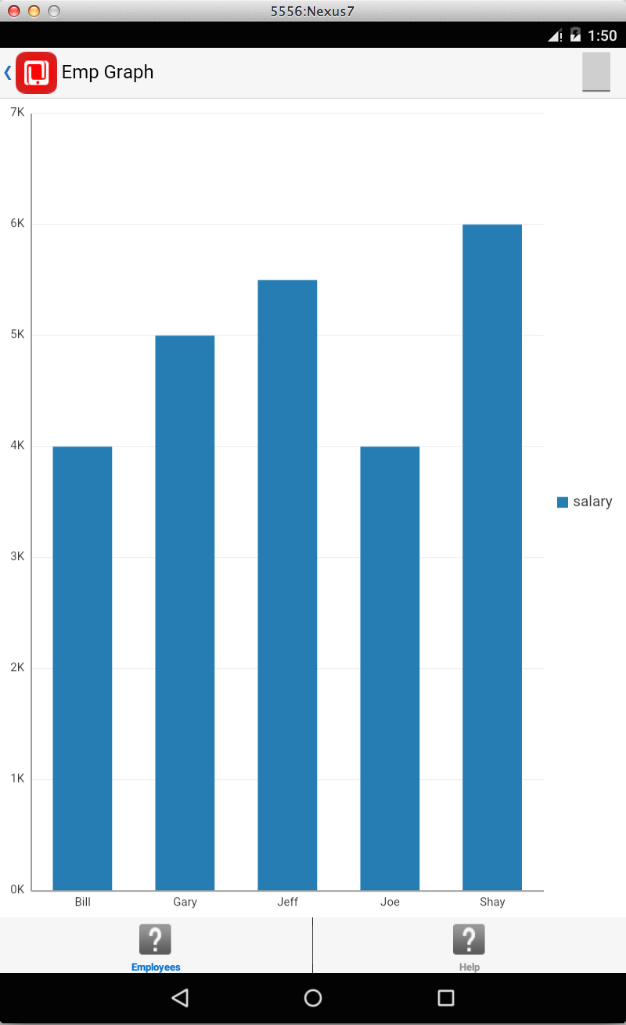
In the Create Mobile Bar Chart wizard, drag salary to the Bars field and then drag name to the X Axis field. Click OK.
-
Save your work.

In the next few steps, you add data components to the page from the data controls you created earlier.
That finishes the first page for now. Next, you create the page that will house the graph.
You now have a working application. In the next section you deploy and test the application.
When you deploy a MAF application, you can improve performance by using Release mode. This mode causes the application to be deployed with an optimized JVM and minimal JavaScript libraries, thereby significantly improving the performance of the application.
For iOS, you select Release mode when you create the deployment profile, which you will do shortly. If you are using an iOS environment, you can skip the first 7 instructions and continue at instruction 8. From the Application menu, select Deploy > New Deployment Profile.
For Android, you have to create a local keystore before you can use Release mode.
The next few steps set up the keystore for Android deployment.
For iOS deployment you can skip to instruction 18.
-
Open a terminal or command window. Navigate to the JDK\bin directory used by JDeveloper. If you are not sure where to find this directory, use Help > About > Properties > java.home to see the JDK or JRE that JDeveloper is using. For Windows 7 make sure you open the command window as Administrator. To open the command window as Administrator Click Start, in the Start Search box, type cmd and then press CTRL + SHIFT + ENTER.
-
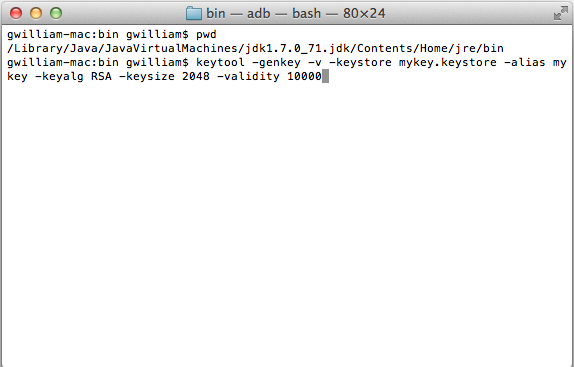
Enter the following command but substitute a name of your choosing for the Keystore Name and Alias Name. In the screen shot below, we used employees for both. After you type the command, press enter. NOTE: You will need to type the command into the a command window instead of using copy and paste. NOTE: If you are on a mac, you may need to check permissions.
keytool –genkey –v –keystore <Keystore Name>.keystore –alias <Alias Name> -keyalg RSA –keysize 2048 –validity 10000
-
You will be prompted for several values including a password, your name, city, State, and so on. Enter values for those variables.
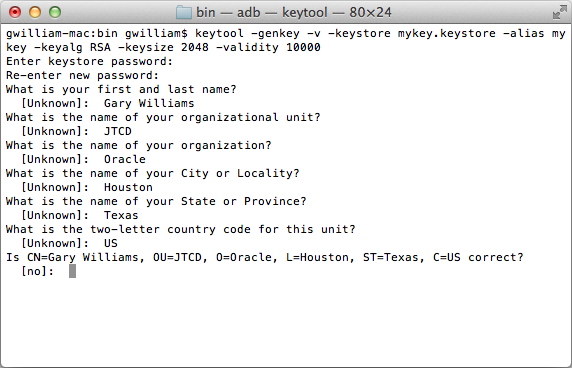
-
Confirm the information you entered, then enter a password as the last prompt:
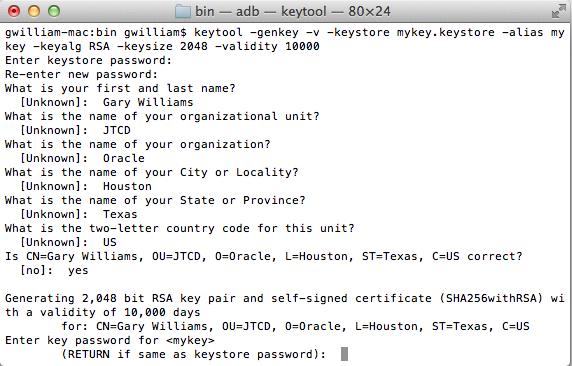
-
In the JDeveloper menu, select Tools > Preferences (on Windows) or JDeveloper > Preferences (on iOS).
-
Expand Mobile Application Framework and select Android Platforms. In the Signing Credentials section, click the Release tab.
-
In the Keystore Location property, enter the Keystore Location of the keystore you just created and then enter the Keystore Password, Key Alias,and Key Password. Click OK.
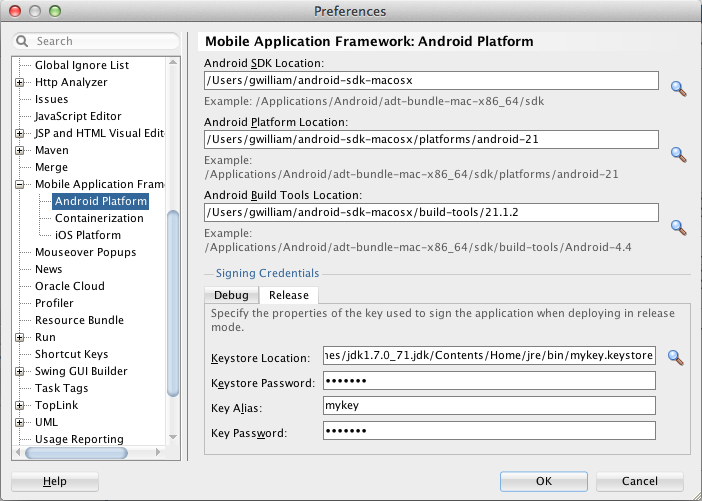
-
From the Application Navigator dropdown menu, select Deploy > New Deployment Profile.
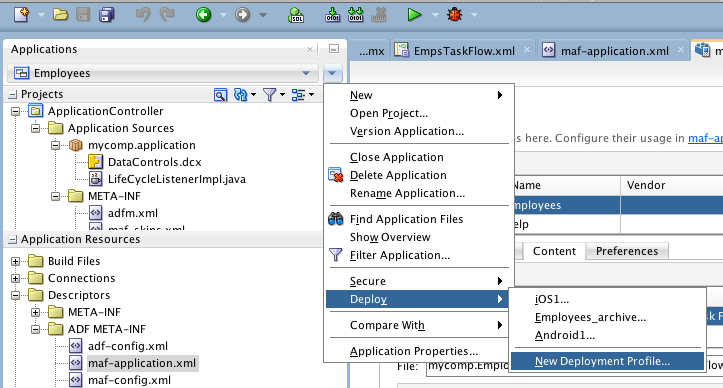
-
Select MAF for Android and click OK.
-
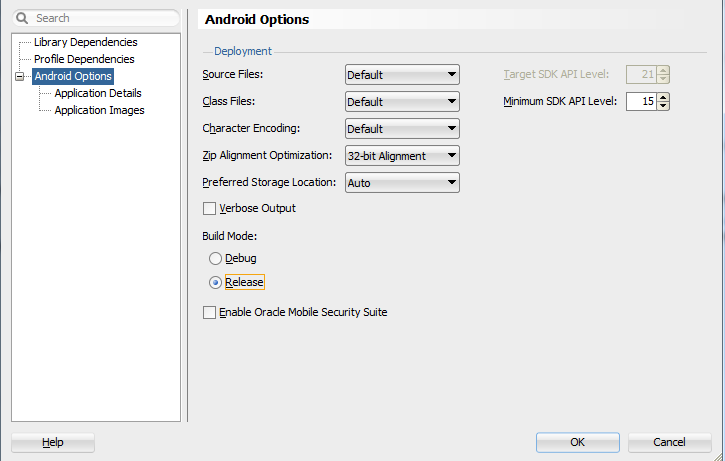
Click Android Options and select Release for the Build Mode. Then click OK.
-
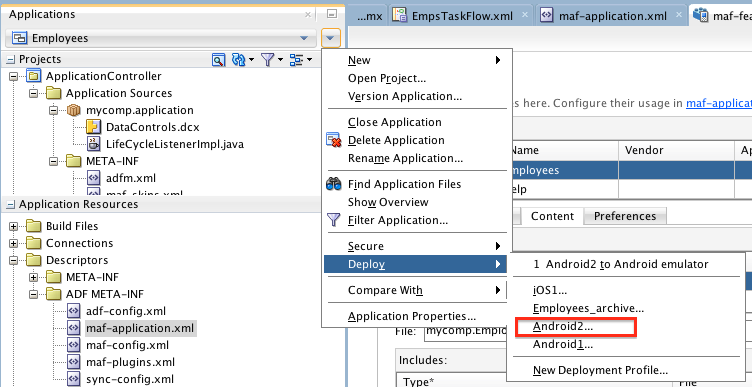
To deploy the application, from the Application menu, select Deploy > Android2.
-
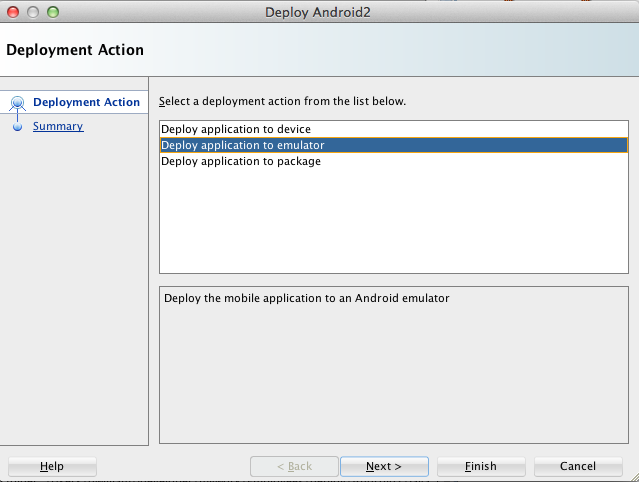
Select Deploy application to emulator and click Next.
-
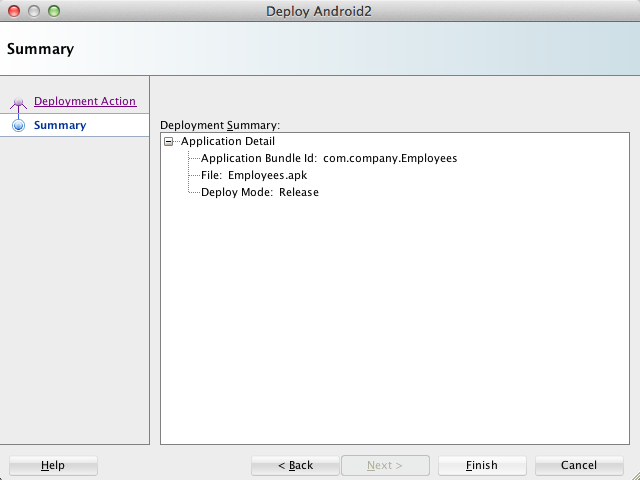
Click Finish to begin the deployment. Make sure your Android emulator is up and running.
-
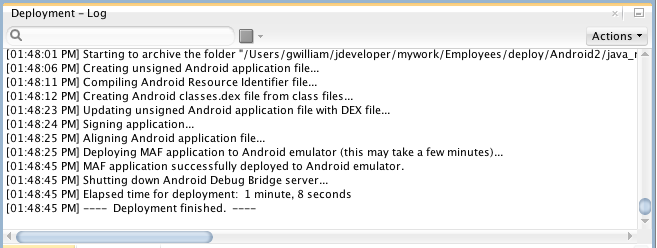
In the Log window, click the Deployment tab to see the deployment messages.
-
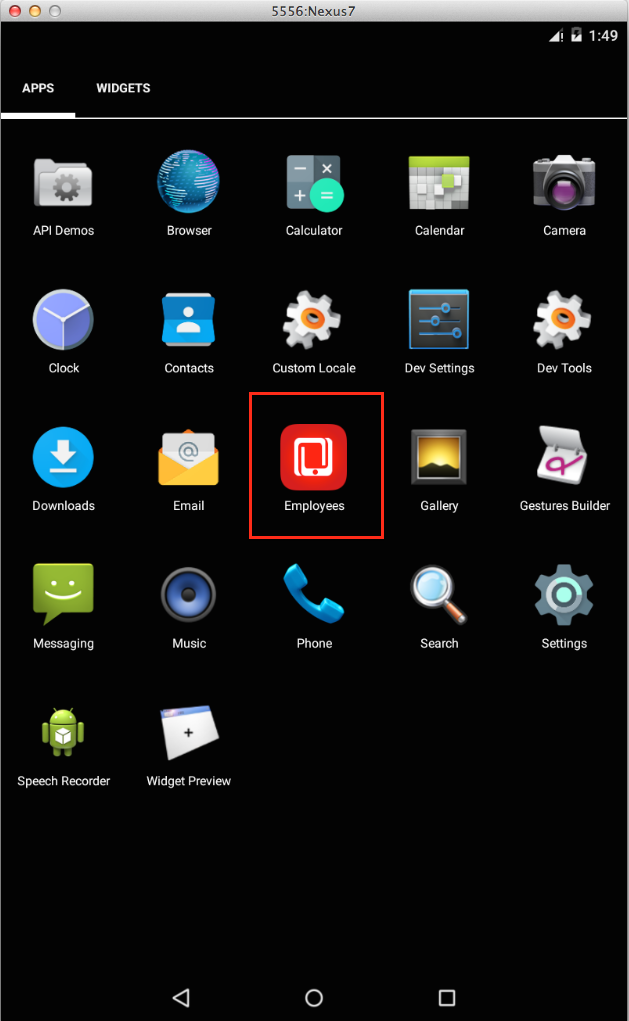
After the deployment is complete, switch windows to the Android emulator. and select the home icon, then find the Employees icon. Start the application.
If prompted, click OK for sending notifications. -
Notice the Emp List which shows all of the employees from your data source. NOTE: The emulator may be slower than an actual device and it may take a while for the application to load.
-
Click the Graph button to navigate to the Graph page.
The following steps are for iOS deployment.
-
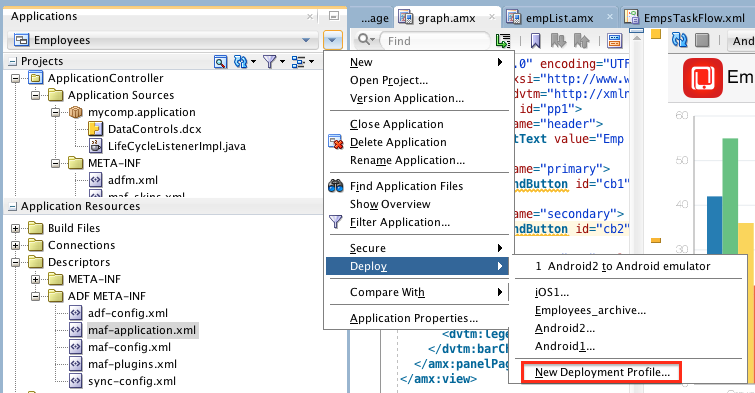
From the Application Navigator dropdown menu, select Deploy > New Deployment Profile.
-
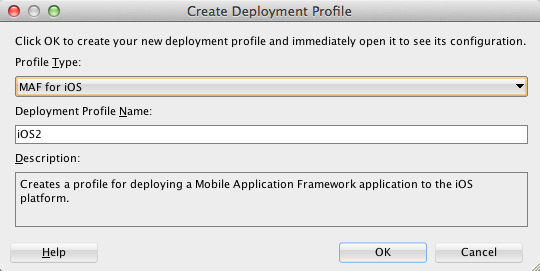
Select MAF for iOS as the Profile Type and click OK.
-
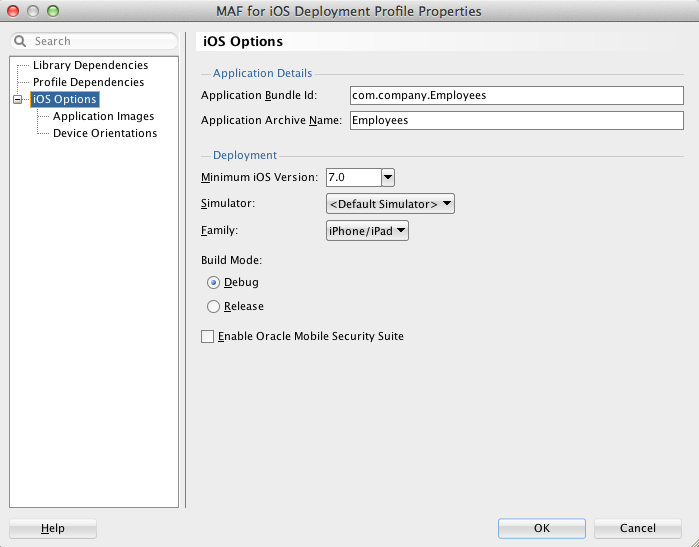
In the Deployment Profile Properties, select iOS options.
-
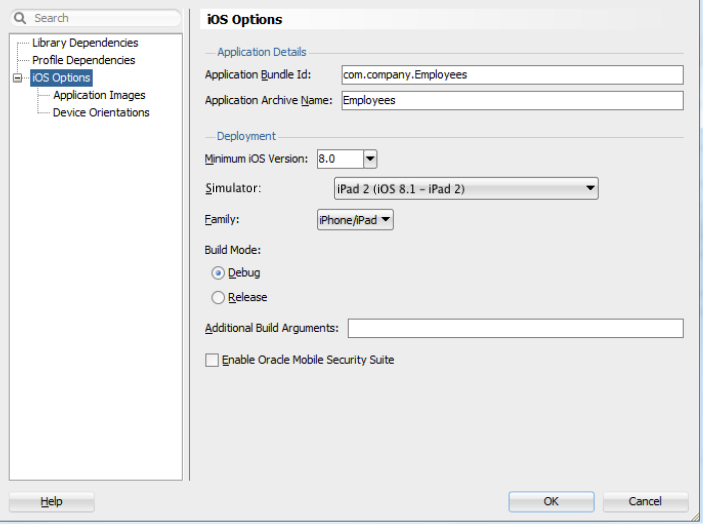
For Simulator, select iPad 2 (iOS 8.1 - iPad 2) and click OK.
-
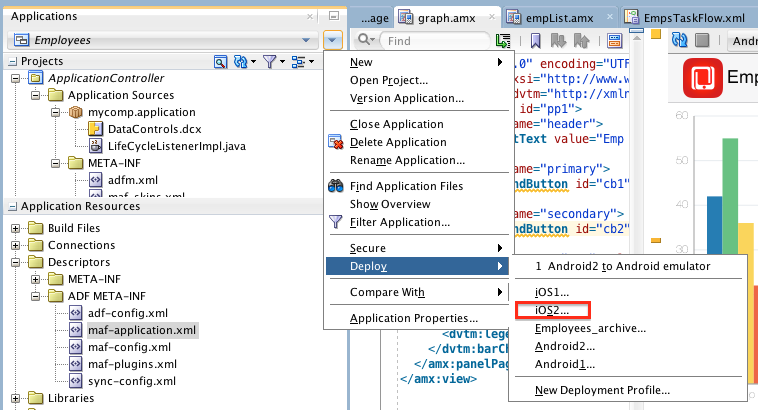
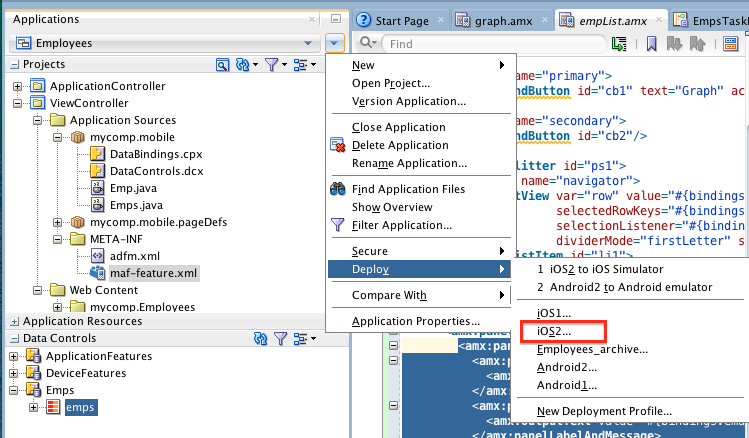
From the Application Navigator dropdown menu, select Deploy > iOS2.
-
In the Deployment dialog, select Deploy application to simulator and click Finish.
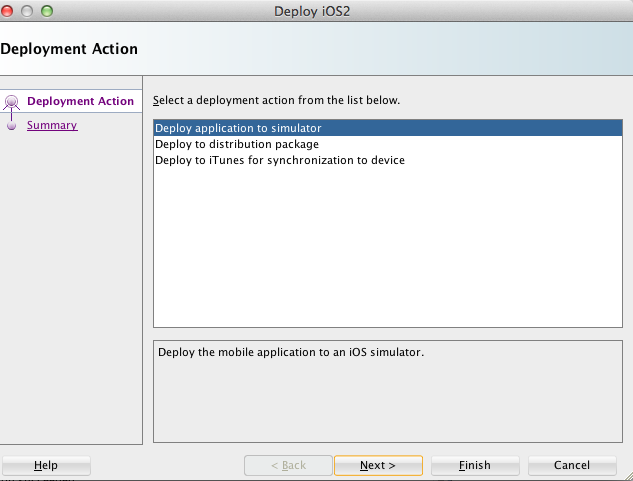
When you deploy to the iOS Simulator, the application is deployed and opened on the simulator. If prompted, click OK for sending notifications.
-
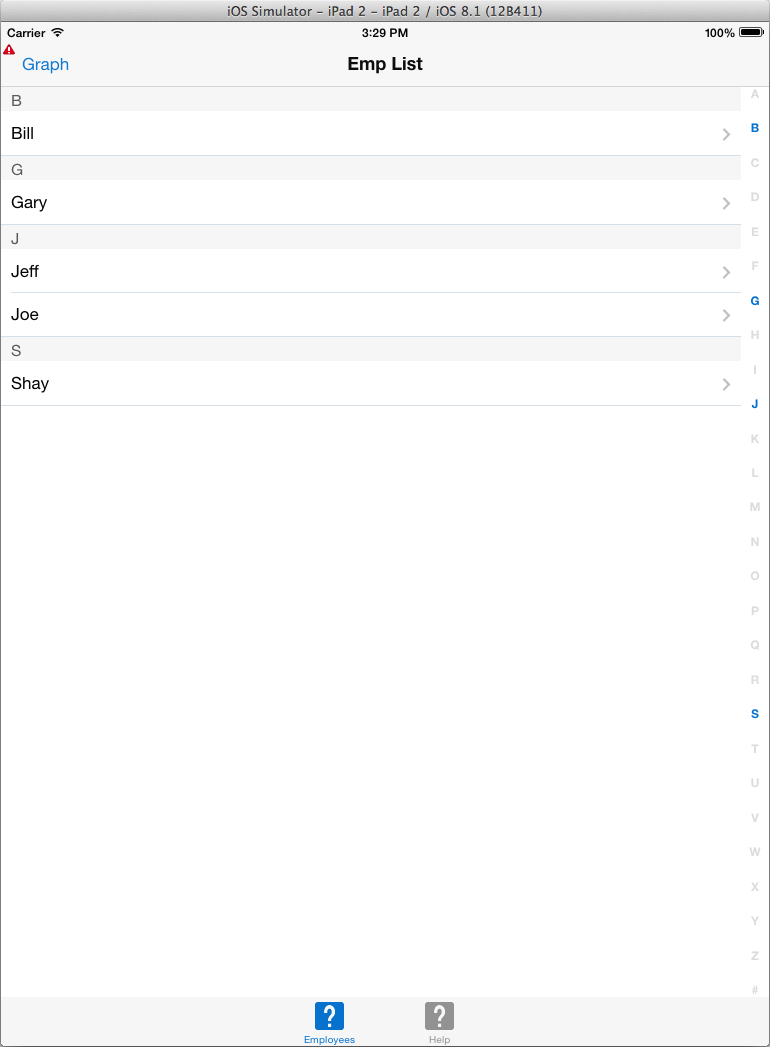
Notice the Emp List which shows all of the employees from your data source. Click Graph to see the graph page.
-
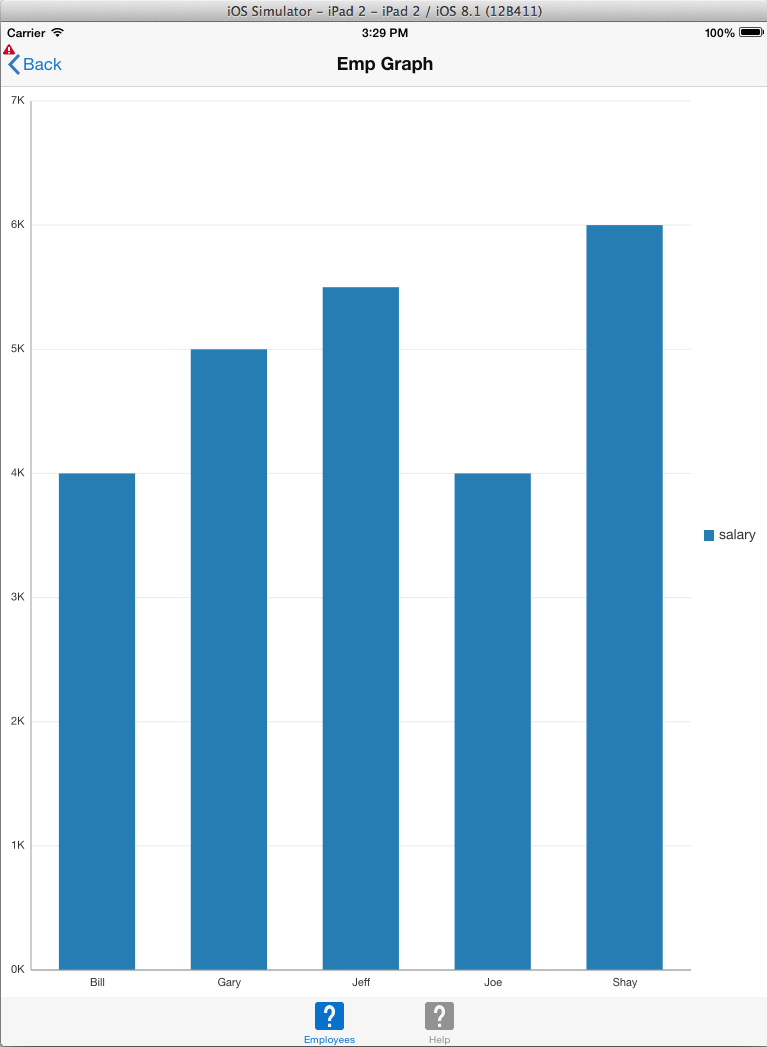
You now see the graph page. In iOS, you navigate back to the home page using the Simulator menu options Hardware > Home.
When the command finishes, the keystore is ready to use. Next you configure JDeveloper to use the keystore.
Now that JDeveloper knows about the keystore, you can use Release mode in the deployment profiles.
In the next few steps, you create a deployment profile.
NOTE: Remember that before you can deploy an Android application, you need to have started the emulator. Instructions are in the the tutorial Set Up and Configure an Android Environment.
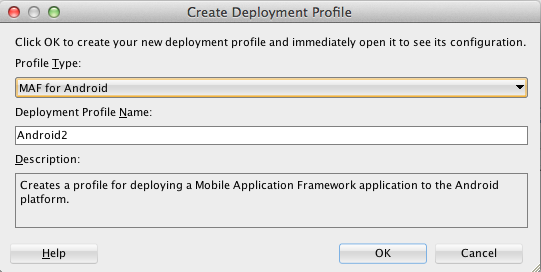
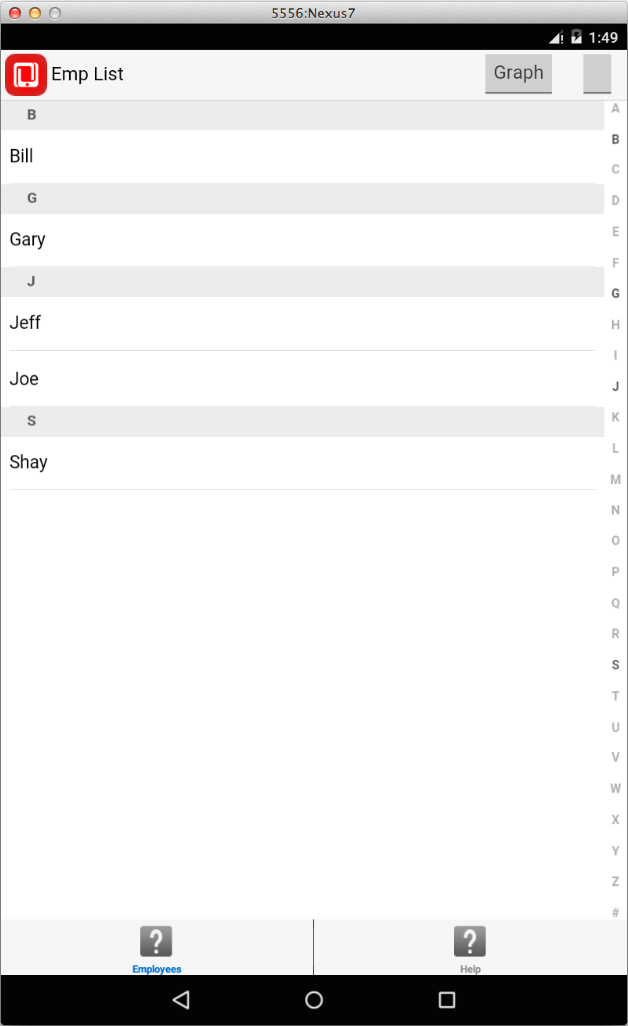
You now have a working MAF application that you have deployed to either an Android emulator or the iOS simulator. Now that the deployment profiles are complete, you should be able to deploy your application to either environment by using just a few quick steps. You will be doing just that throughout the remainder of this tutorial.
Now that you have a working application, you refine the user interface to take advantage of some of the MAF layout components.
In the next few steps, you move the list of employees to a navigator pane. You also add a read-only form that shows employee details that you did not show in the employee list. As you recall, the employee list shows only the employee name. You also split the page in to two parts: an employee list, and an employee form.
-
In JDeveloper open the empList.amx page. (HINT: Either find the page in the Application Navigator and double-click it, or use the EmpsTaskFlow and double-click the empList view component)
-
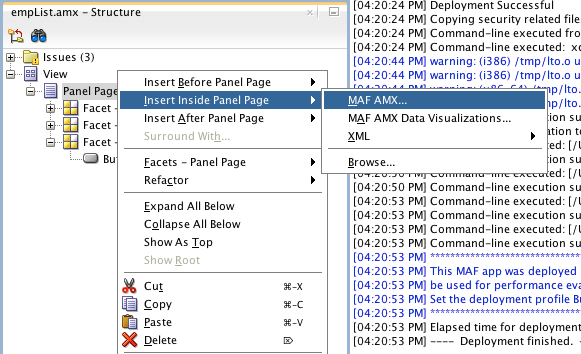
In the Structure window, right-click Panel Page and select Insert Inside Panel Page > MAF AMX.
-
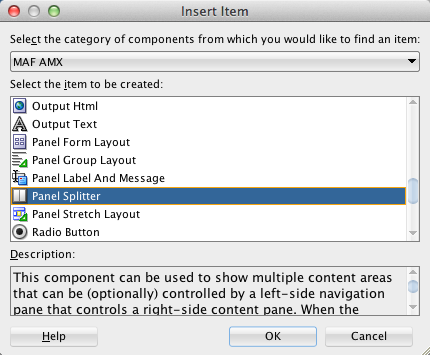
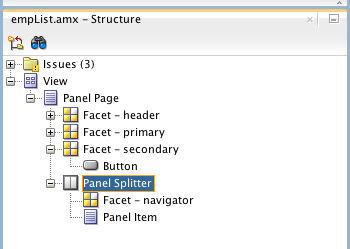
Select Panel Splitter and click OK.
-
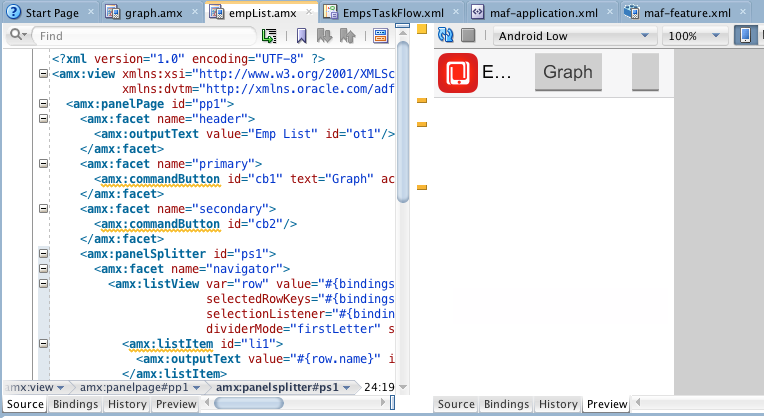
In the Structure window, expand the Panel Splitter to expose the Facet - navigator and the Panel Item component.
-
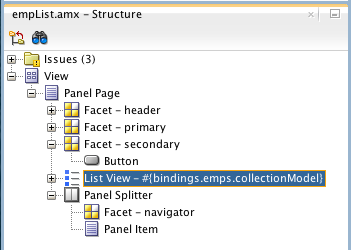
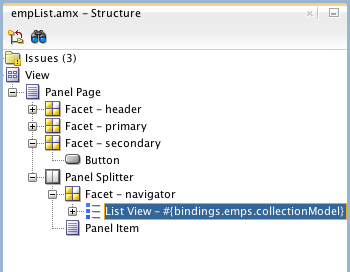
You want the list to display as part of the new Panel Splitter so within the Structure window, drag the List View component down to the Facet - navigator.
-
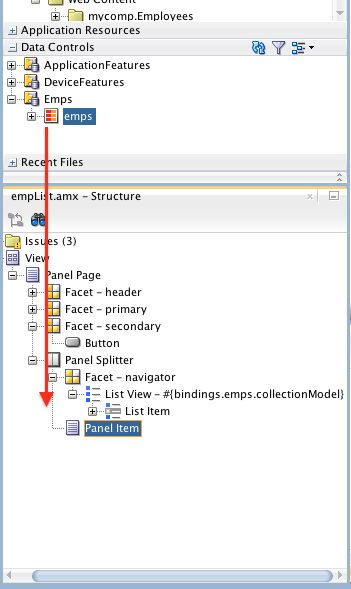
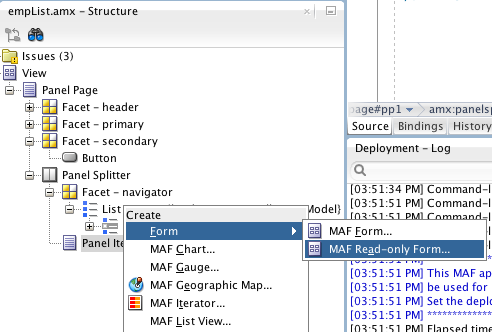
From the Data Controls palette, drag the emps data control to the the Panel Item in the Structure window and drop it as an MAF Read Only Form.
-
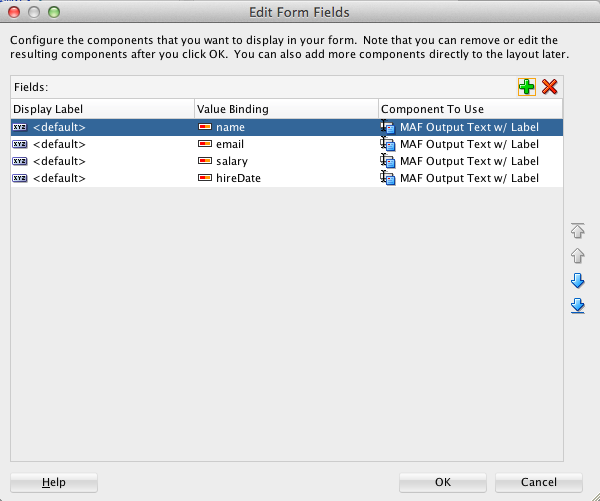
Click OK to accept the default labels and components for the form.
-
Re-deploy the application. In the following steps, you will use the iOS Simulator. If you are using the Android emulator, the steps are similar. If you need a refresher, go to the deployment steps above.
From the Application menu in JDeveloper, select Deploy > iOS2 Deploy and select the simulator as the target. -
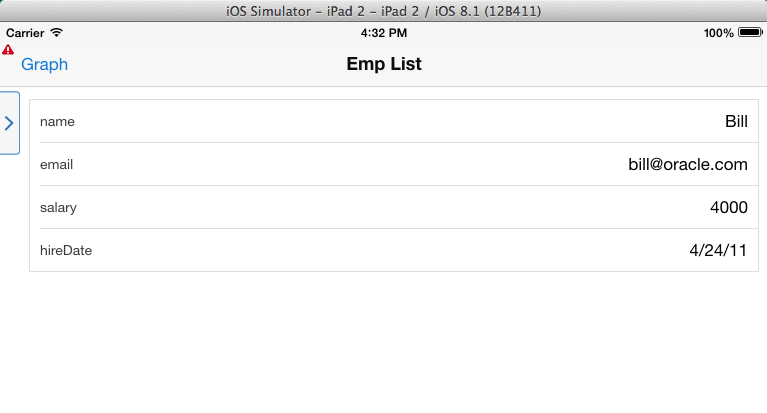
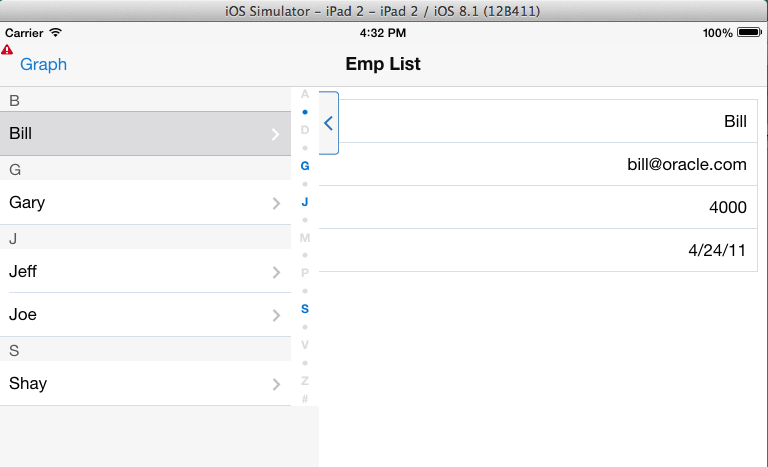
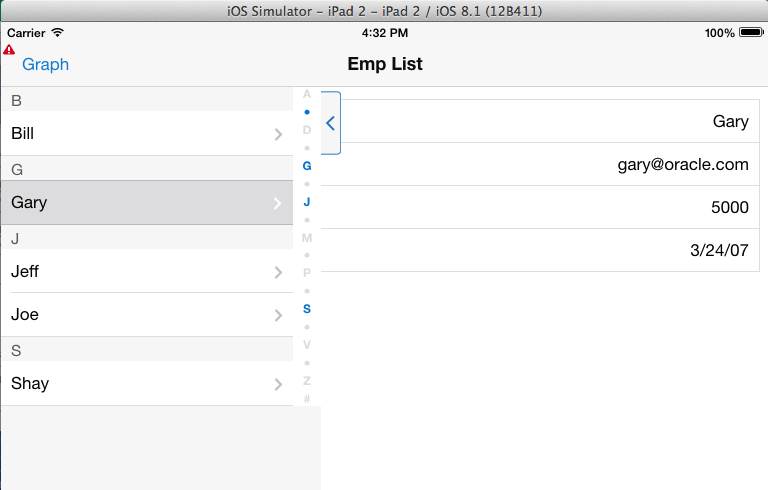
After the application is deployed, run it as you did before and notice that the page shows employee details and that there is an arrow on the left side of the page.
-
Click the arrow to expand the splitter and show the employee list.
-
Click any other employee to show that employee's details.
-
Click the arrow to hide the employee list and just show the employee details.
There are several ways to add components to a page. You can drag a component from the Component Palette to either the source code of the page, or to the Structure window. You can also right-click the component in the Structure window and select Insert Inside from the context menu, then select the new component.
You should try the different techniques to see which one you find the easiest.
Now you have two sections on the page: one to show the employee list and another to display an individual employee.
You have now completed the first part of this tutorial. In the next part, you add a feature that uses two built in device features.

 Expand all | Hide all

 Part 2: Integrating with Device Features
