 Part 1: Creating a Mobile Application Framework application

-
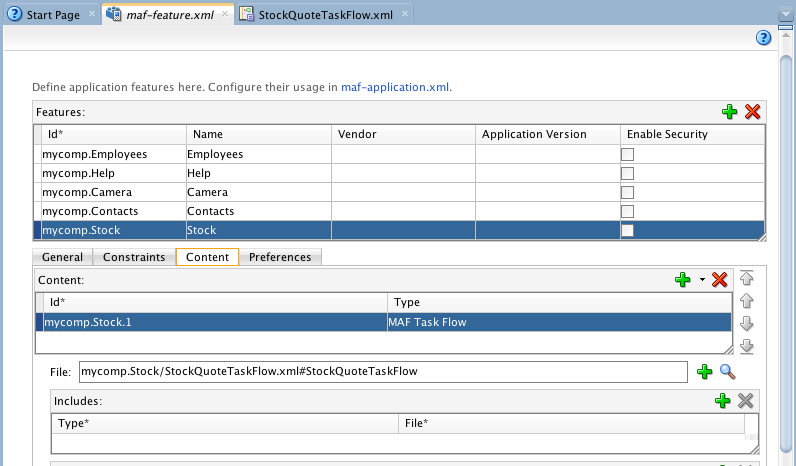
In the adfmf-feature.xml file, add a new feature named Stock and create its content to be a task flow named Stock-Quote-task-flow.xml.
-
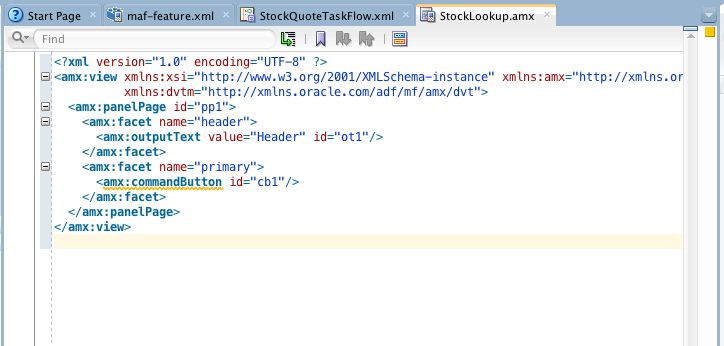
Add a view activity to the task flow page named, StockLookup and create a MAF AMX Page from it with the header and primary action facets included

In the next few steps you create a data control that will consume a REST/XML web service.
-
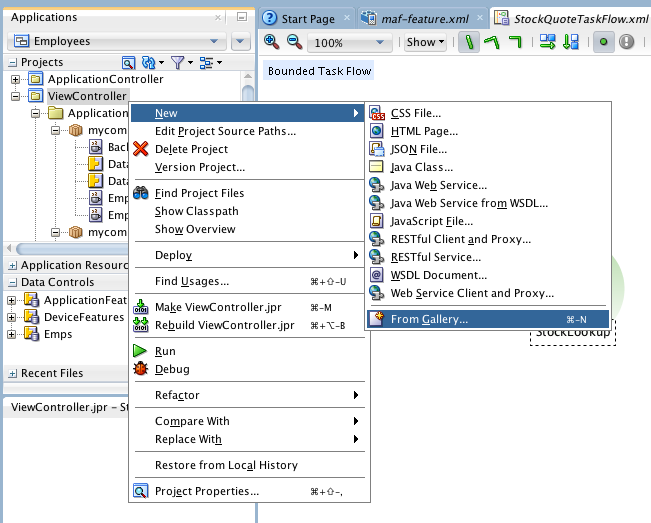
In the Application Navigator, right-click ViewController and select New > From Gallery.
-
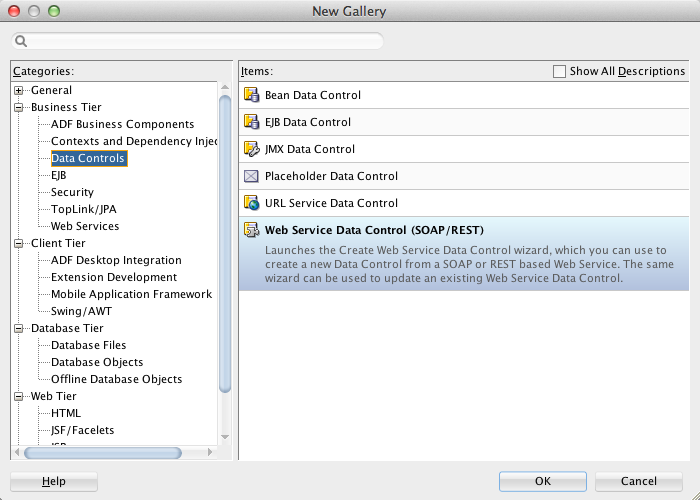
Under Business Tier > Data Controls, select the Web Service Data Control (SOAP/REST) item, and then click OK.
-
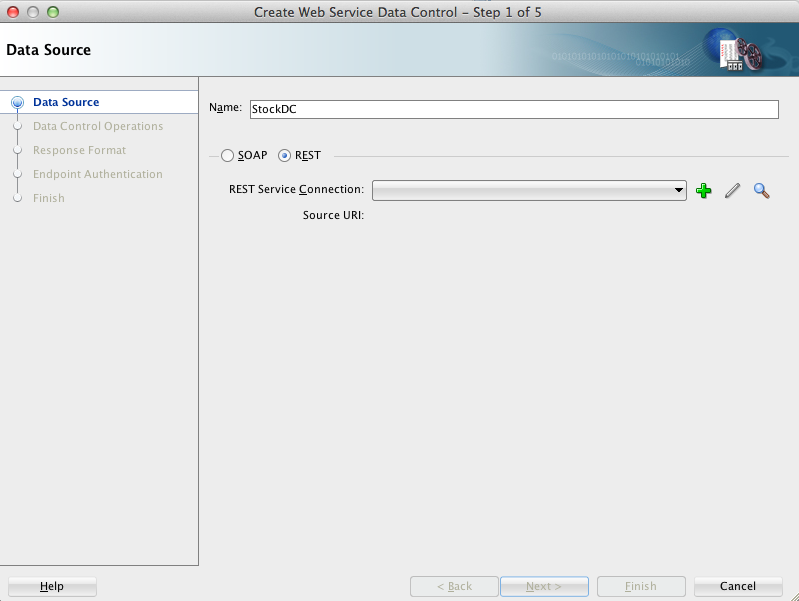
In step one, set the Name to StockDC and select the REST radio button.
-
Click the green plus sign next to the REST Service Connection dropdown to create a connection. Then, enter these values.
Name = StockDC
URI Endpoint = http://dev.markitondemand.com/Api/v2
If you click the Test Connection button it will fail since there is no resource included in the URL.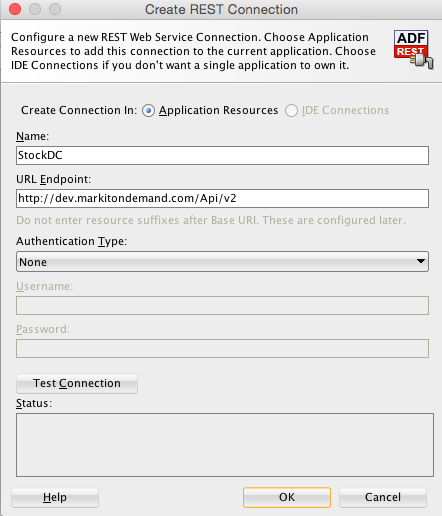
-
Click OK to create the connection.
-
The REST Service Connection is populated with your new connection.
Click Next.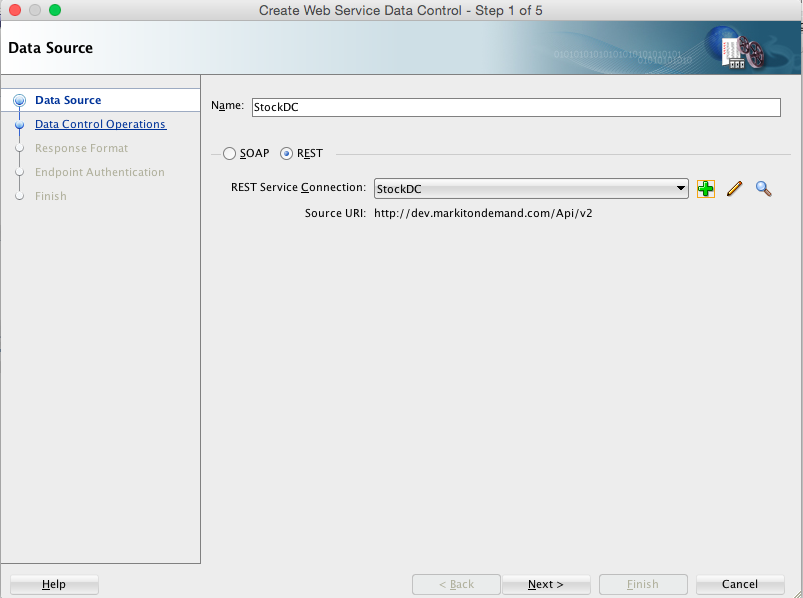
-
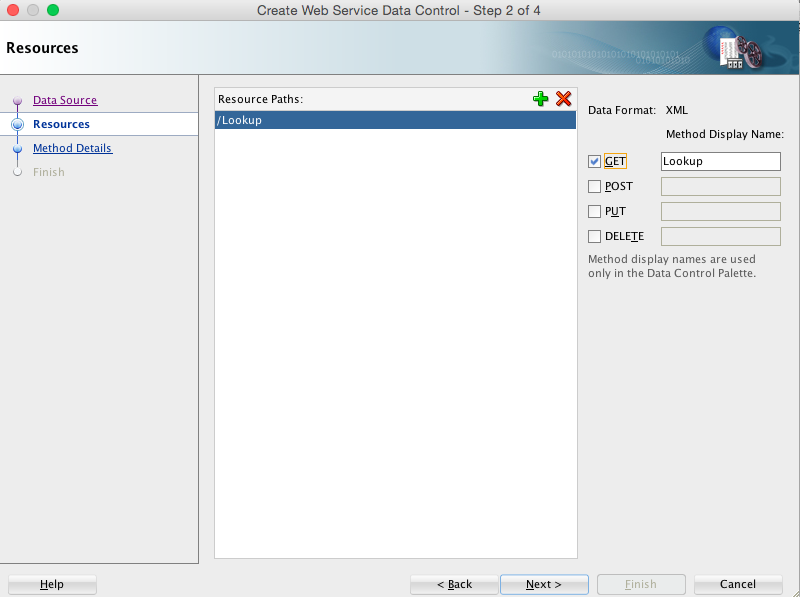
Here you add a path that will be used in the URI to access the service.
Click the green plus sign and set the path to /Lookup.
Click the GET checkbox on the right, and set the Method Display Name to Lookup.
-
Click Next.
-
Next, you specify the parameter to be used when sending the service request.
In the Resource Methods property, select the branch node (second instance) of Lookup.
Click the green plus sign by the URI Parameters property and set the following properties.
Name = input
Default Value = Oracle (only used for testing)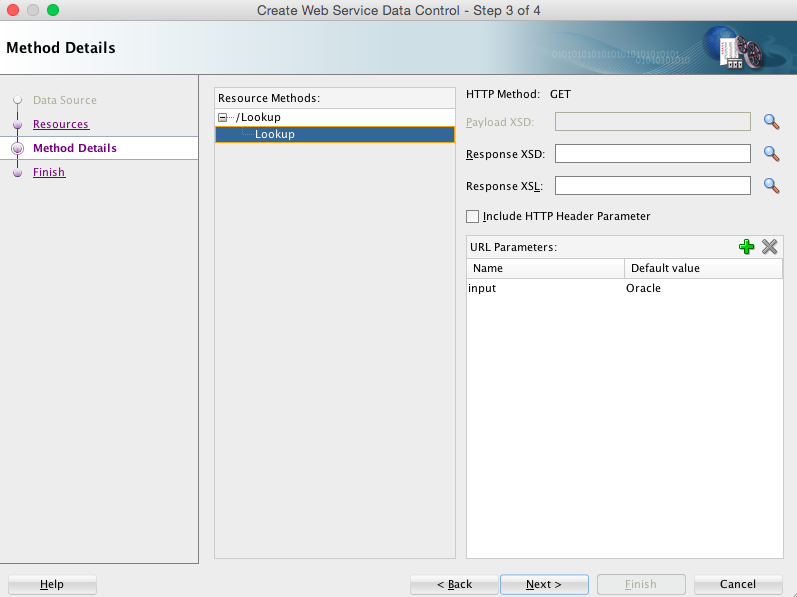
-
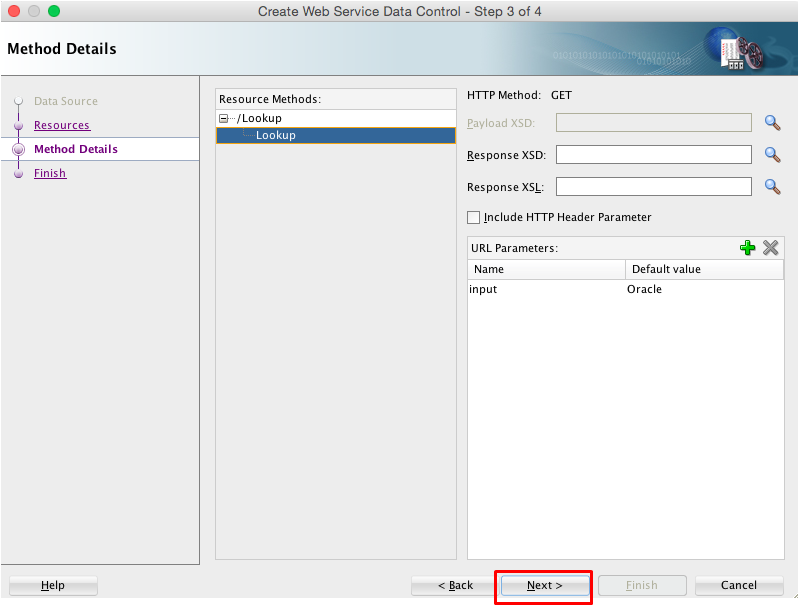
Click Next.
-
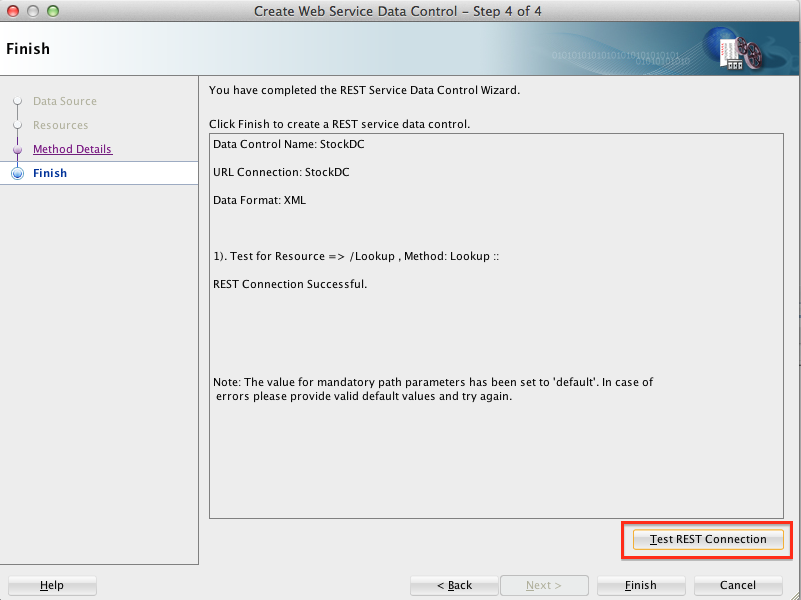
Test the REST connection to make sure it is reachable, by clicking Test REST Connection ,button in the lower right of the pane. When the test is successful, click Finish.
-
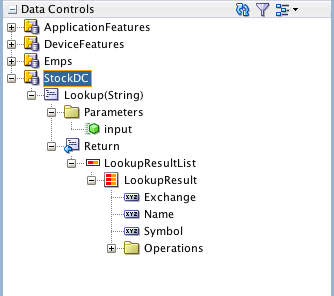
Open the Data Control window and expand StockDC completely. Notice the Lookup method, the input parameter and the three return attributes (Exchange, Name and & Symbol) along with other default operations.
In the next few steps, you develop the UI page.
-
Click the StockLookup.amx tab to open the page editor.
-
In the data control window, drag the Lookup(String) operation onto the Structure window and drop it on the Panel Page as a MAF Parameter Form.
In the popup menu, select MAF Parameter Form…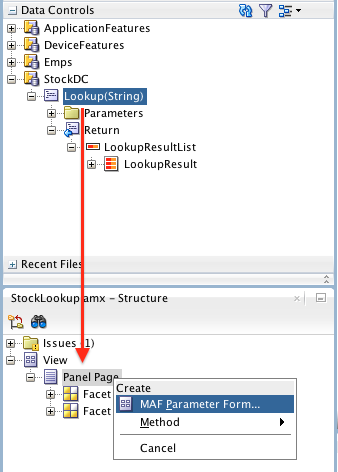
-
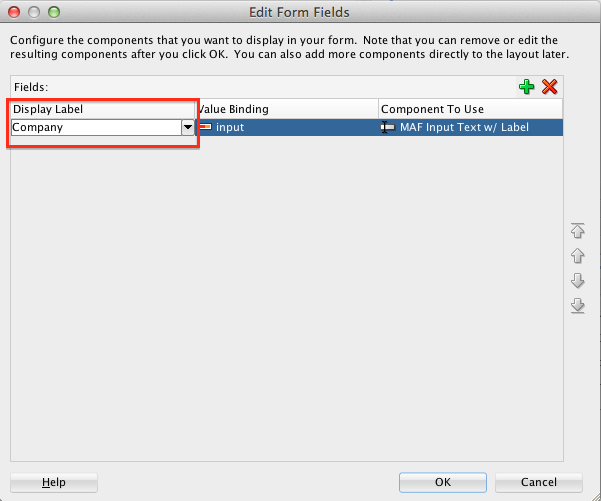
In the Edit Form Fields dialog, set the Display Label to Company and click OK.
-
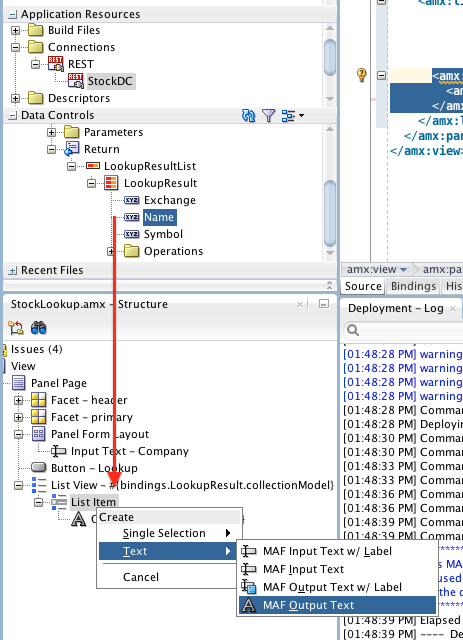
Next add the return attributes to the page. In the Data Controls window, expand the StockDC > Lookup(String) > Return > LookupResultList node.
Select the LookupResult collection, drag it onto the Structure window and drop it on the Panel Page as a MAF List View.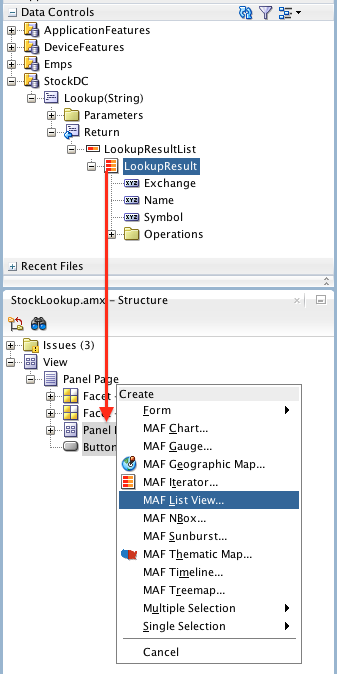
-
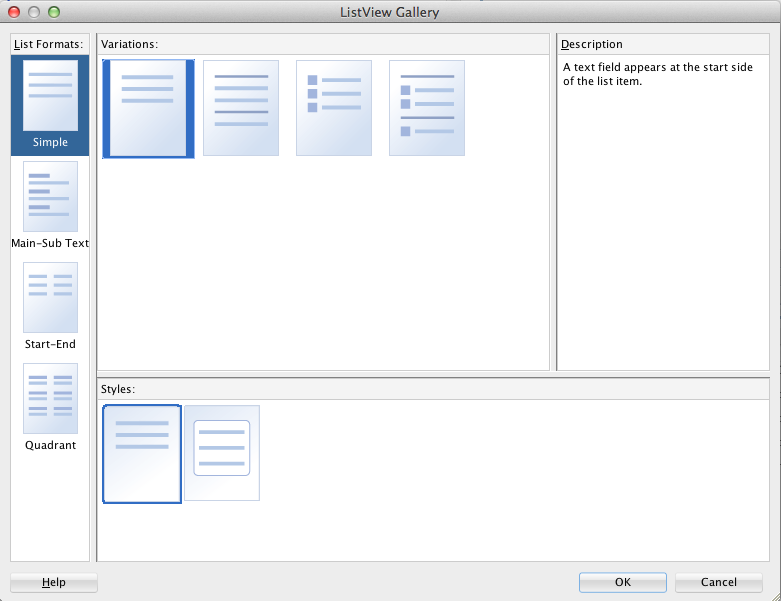
In the ListView Gallery, select the Simple list format, and the first variation and style options and click OK.
-
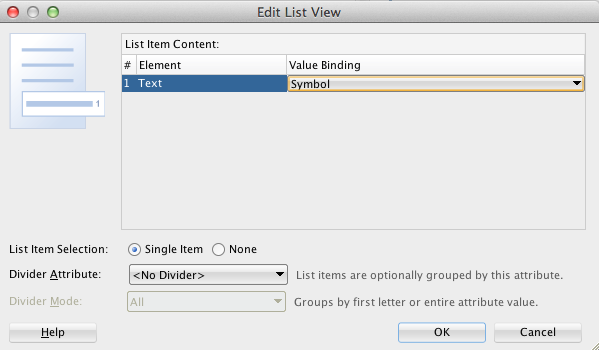
Click OK to accept symbol as the Value Binding.
-
Drag Name from the Data Control palette to List Item in the Structure window and drop it as an Output Text component.
When you put the paramter form that calls the web service, and the result list on the same page, the application will automatically call the web service when the page is loaded. If the webservice requires a parameter, then the service will fail with an exception. One way to solve this is to set the iterator to execute only where the parameter is present.
-
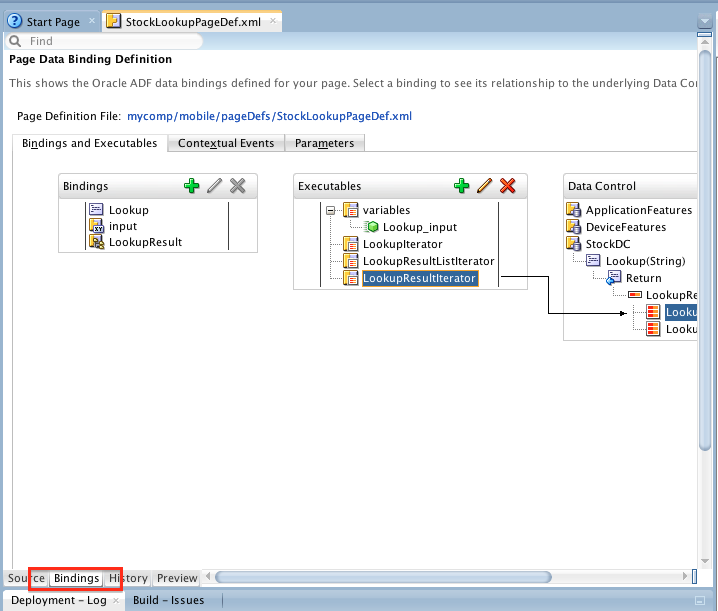
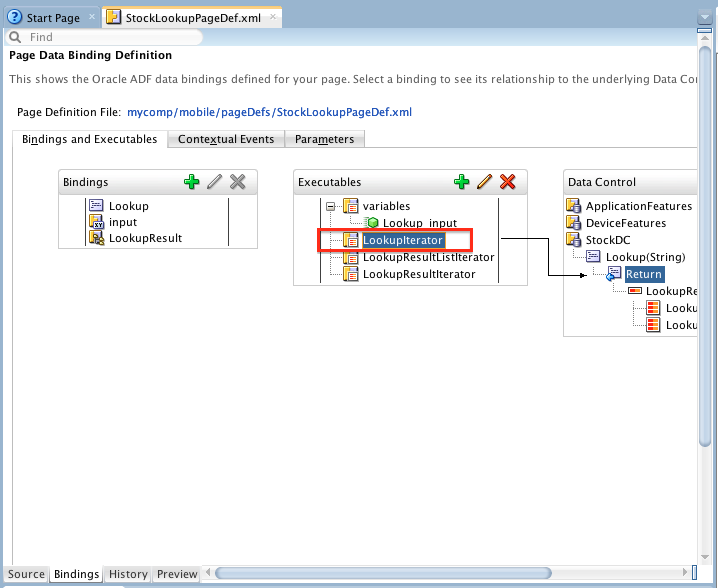
On the StockLookup.amx page, click the Bindings tab.
-
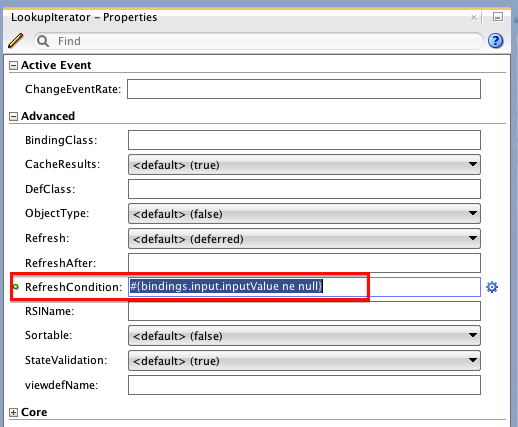
Select LookupIterator and set the RefreshCondition to #{bindings.input.inputValue ne null} . This will check that there is a value in the input field before the iterator is executed. If it is null, then the iterator is not executed.
-
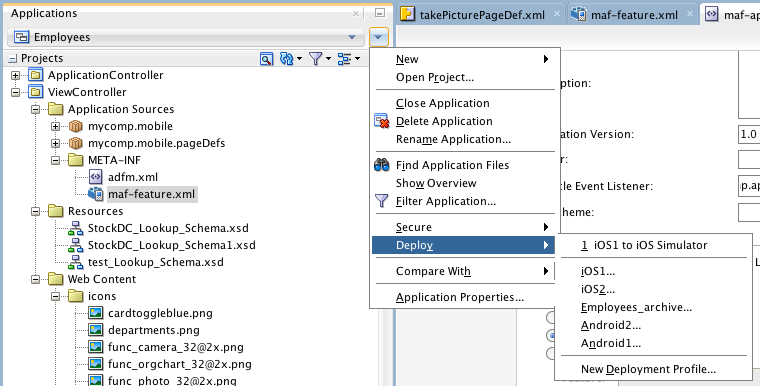
Deploy the application as usual.
-
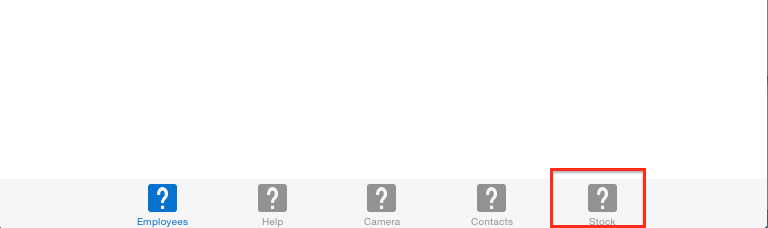
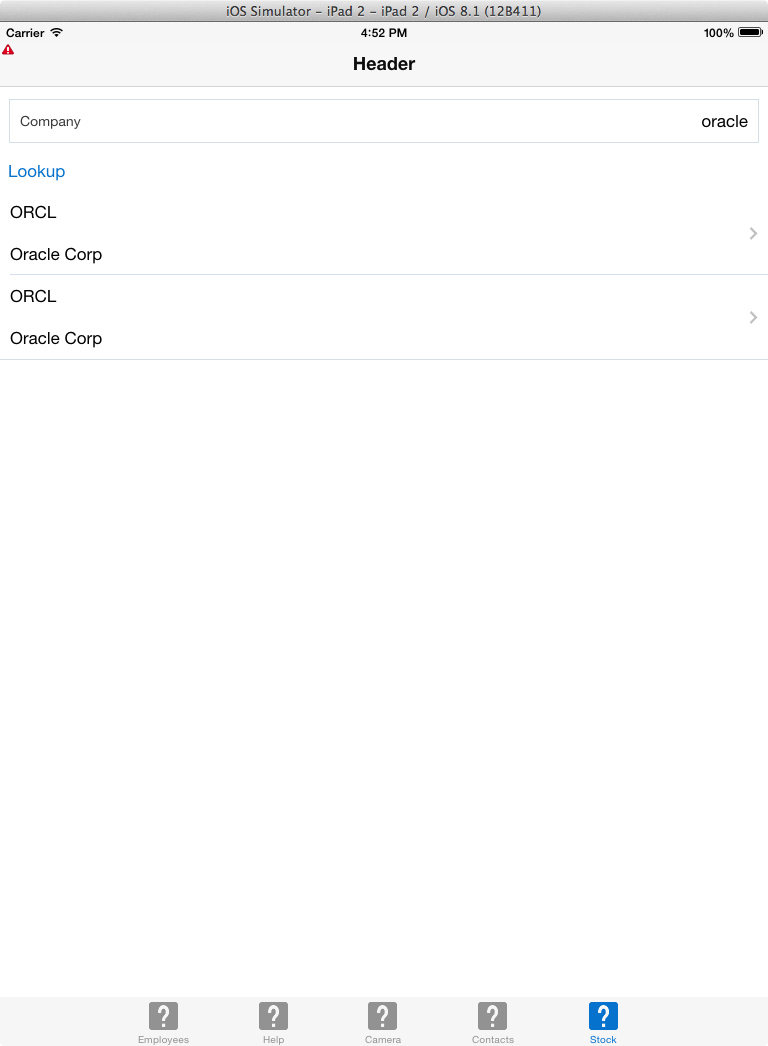
Click the Stock Icon.
-
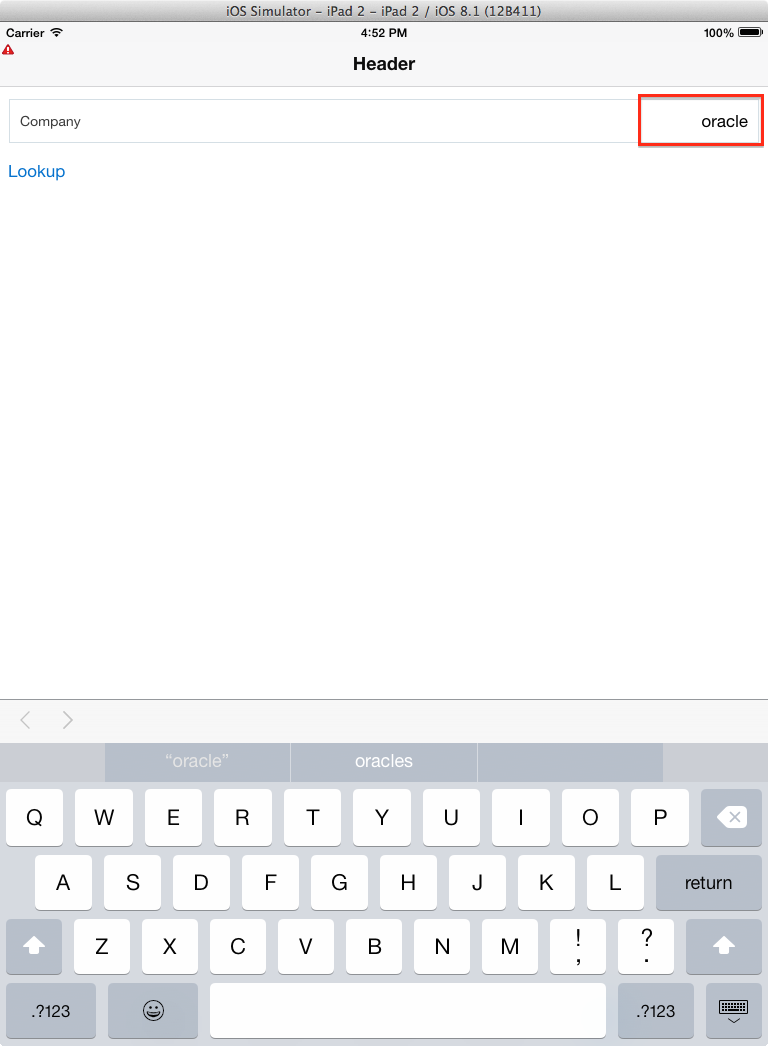
Click the Company field and enter a company name (Oracle) and click Lookup.
-
The results will show in the ListView you created earlier.
You now have an application with several features. The last thing you need to do is to work on the look of the Navigation items.
In this section, you create a Feature, task flow, and page that will consume the Stock web service.
In this section, you add icons to the Features in your application. The images are in a zip file that you download in the first step of this section.
-
Download icons.zip from here.
-
Unzip the icons.zip file into <mywork>/Employees/ViewController/public_html.
-
Open maf-features.xml.

-
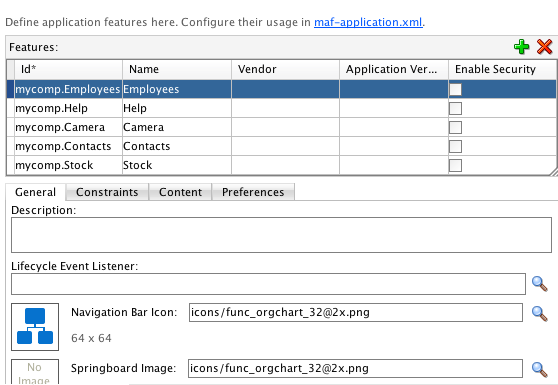
Select the Employees feature and set the Navigation Bar Icon and the Springboard Image to icons/func_orgchart_32@2x.png.
-
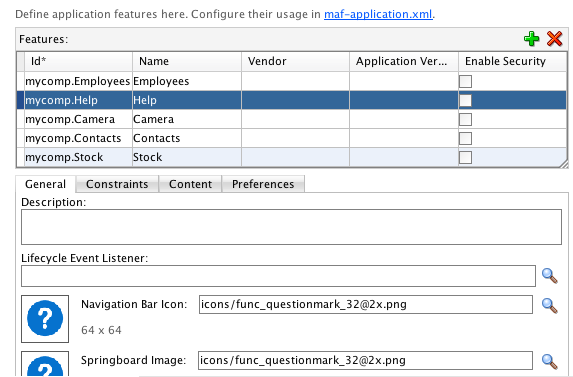
Select the Help feature and set the Navigation Bar Icon and the Springboard Image to icons/func_questionmark_32@2x.png.
-
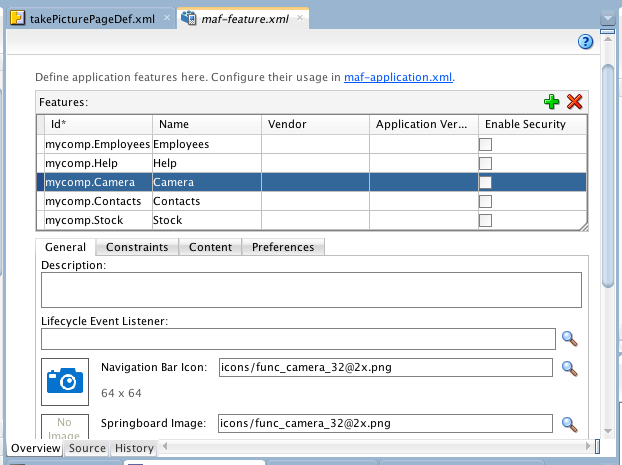
Select the Camera feature and set the Navigation Bar Icon and the Springboard Image to icons/func_camera_32@2x.png.
-
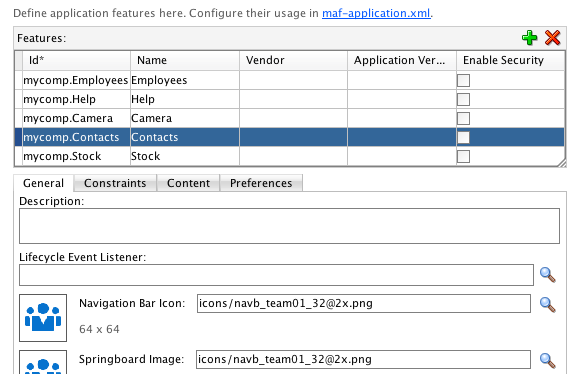
Select the Contacts feature and set the Navigation Bar Icon and the Springboard Image to icons/navb_team01_32@2x.png.
-
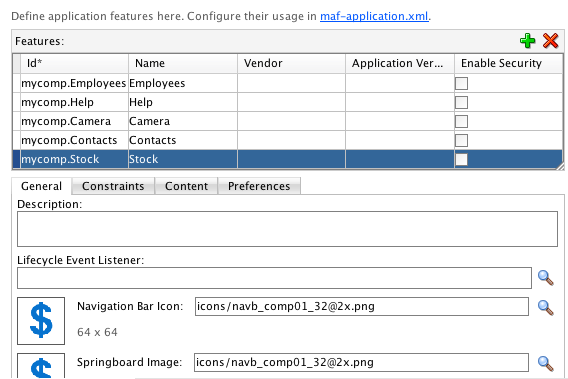
Select the Stock feature and set the Navigation Bar Icon and the Springboard Image to icons/navb_comp01_32@2x.png.
-
Save your work.
-
Deploy the application and test as usual.
-
Notice the icons displayed above the feature names.
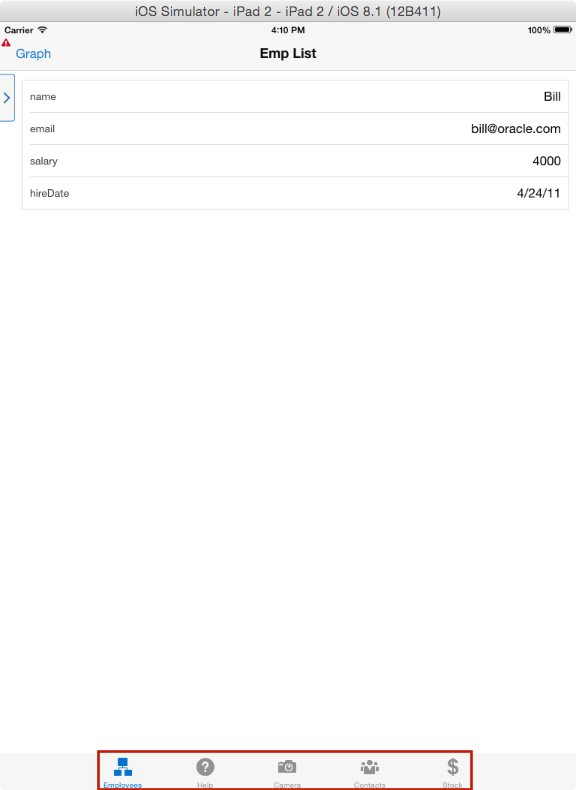
The images you just added are dislayed on the Navigation bar at the bottom of the application. This next few steps add a Springboard to your application.
-
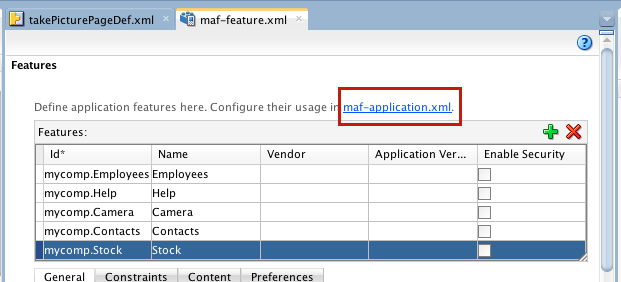
In maf-feature, click the maf-application.xml link.
-
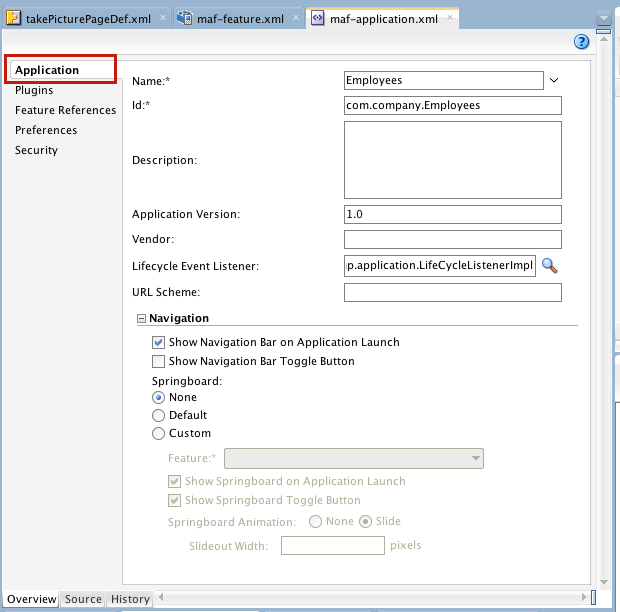
Click the Applications node.
-
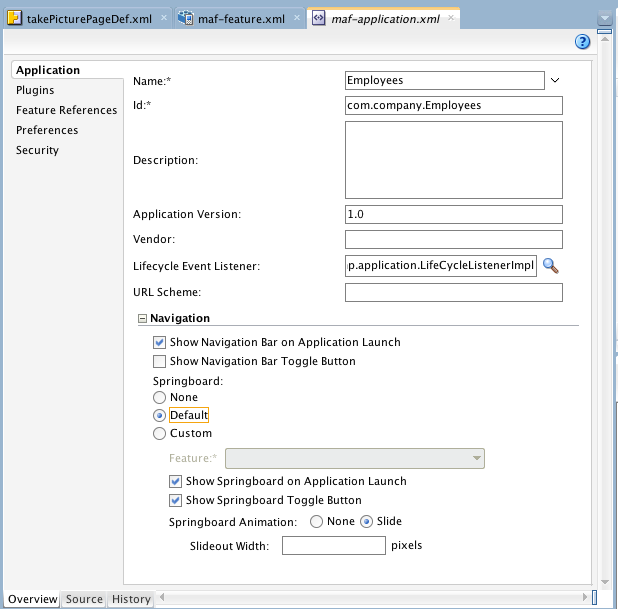
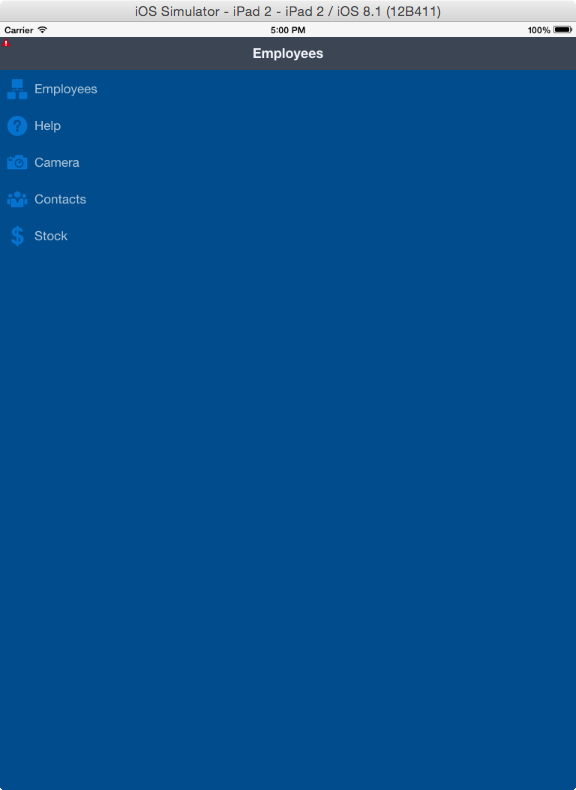
In the Navigation section, select Default for the Springboard. Make sure both Show Springboard options are selected.
-
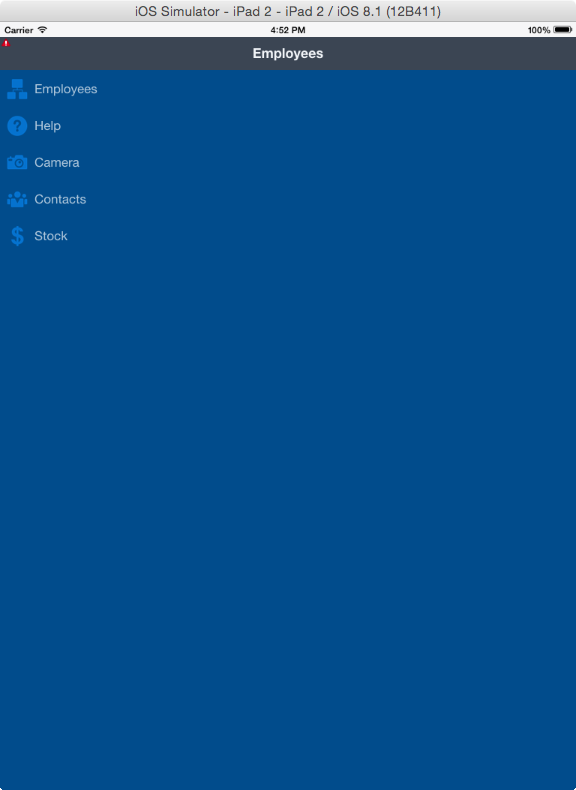
Deploy and test the application as usual. Notice the application launches to the Springboard now.
-
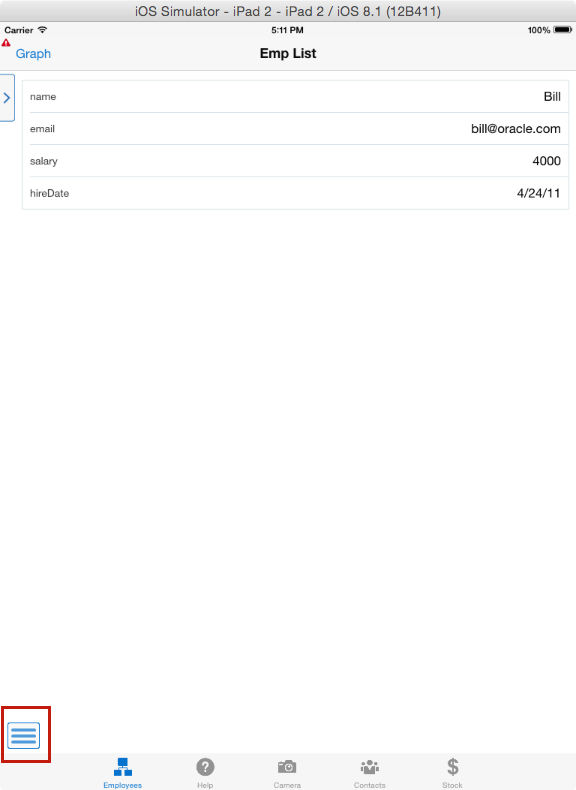
Click Employees.Notice that at the bottom left of the application, there is now a menu icon.
-
Clickthe menu icon to navigate back to the Springboard
You now have a Data Control that is based on the SalaryService web service. In the next few steps, you create the SalaryUpgrade page for the view activity you added earlier. You also add navigation to the EmpsList page.
You have now successfully added MAF controls to your application that consume a web service.

 Expand all | Hide all