 Part 1: Building the REST Service

 Read more...
In Mobile Application Framework version 2.3.1, Oracle has released Client Data Model (CDM), the new cross-platform development framework for mobile applications. This CDM adds significant value to Oracle MAF: it allows easy consumption of RESTful services, and provides a complete persistence layer that allows you to use the mobile application in offline mode using a SQLite database. You can read and write data while not connected to the internet, and synchronize any pending data changes later when you are online again.
The CDM consists of a design-time component and a runtime component. This tutorial teaches you to install the accelerator and use design-time functionality to consume REST services and build a default MAF feature, task flow and data bound pages.
It is strongly recommended to communicate through REST-JSON services with your back-end applications. The reason for this is simplicity and performance. The REST architectural pattern is very easy to work with. The performance overhead with SOAP web services is bigger. XML payloads are more verbose than JSON, which means the size of the data packets sent over the wire is bigger. In the mobile client, XML parsing is a relatively expensive task compared to JSON payloads that can be used directly in JavaScript. So, if you have existing SOAP-based web services you want to consume in a mobile application, we recommend to transform these web services to RESTful services using Oracle Service Bus (OSB) 12c. For new web services that you still need to build, you might consider using JAX-RS which is a standard Java API that makes it fast and easy to disclose your back-end data and business logic through a RESTful API.
If you are interested in upgrading APMA environments to CDM, then view this blog: Migrating AMPA Apps to Oracle MAF 2.3.1 Client Data Model
This tutorial was developed with JDeveloper 12.2.1.0.0 and MAF 2.3.1. Please only use JDeveloper that is certified with MAF, otherwise it may not work as described.
| Assumptions: |
|---|
To complete this tutorial you must have installed JDeveloper 12.2.1.0.0 and have installed the MAF 2.3.1 Extension. If you are using an iOS environment, you can use the following tutorial to set up the development environment: Set Up and Configure an iOS Environment. If you are using an Android environment, you can use the following tutorial: Set Up and Configure an Android Environment. You must have access to an Oracle enterprise or XE database that has the Oracle HR sample schema installed and unlocked.
|
If you use the EclipseLink or TopLink JPA implementation that comes with JDeveloper 12c to build your back-end persistence layer, you get a ready-to-use RESTful API for free. In this next section you'll create a new application and then develop TopLink JPA entities that may be accessed via a REST web service.
If you are not interested in learning how to develop REST service and just wish to deploy it, you may click here and download a completed HRRest application. Once you've downloaded the file complete these 3 steps:
1:
Unzip the file to your hard drive and in JDeveloper, open the HRRest.jws application
2:
Modify the HRRESTConn connection to use your HR schema specifications
3: Skip the first two steps and move to Step 3: Deploy and Test the Service
If you want to learn how to build Java classes that connect with the HR schema, then continue with Step 1 and complete this part of the tutorial.
You must deploy the REST service, regardless if it's created from scratch or you download the completed one.
In this step, create a Java EE application add classes to support the Employees and Departments tables.
-
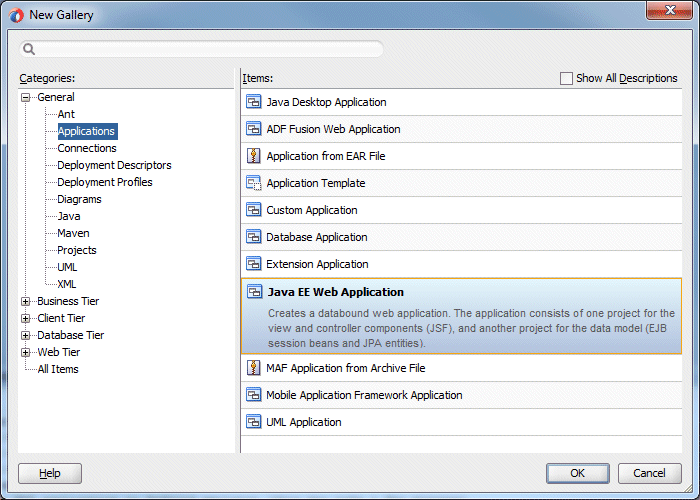
Select File > New from the menu.
In the New Gallery, expand the General category and select the Applications node.
Then, double click the Java EE Web Application.
-
Name the application, HRRest and leave the rest of the properties at their default.
Then click Next.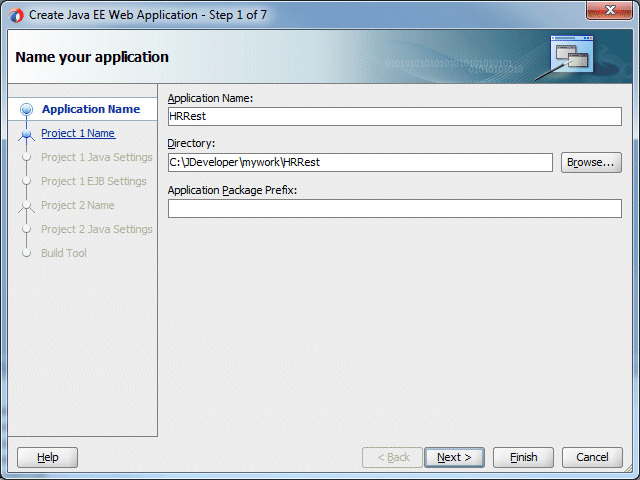
-
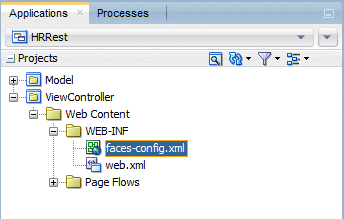
Leave the rest of the values in the wizard at their default and click the Finish button. The Applications window should display the application and it's two projects.
-
Create two entities to interact with the Departments and Employees table. (You must have unlocked access to complete this task.)
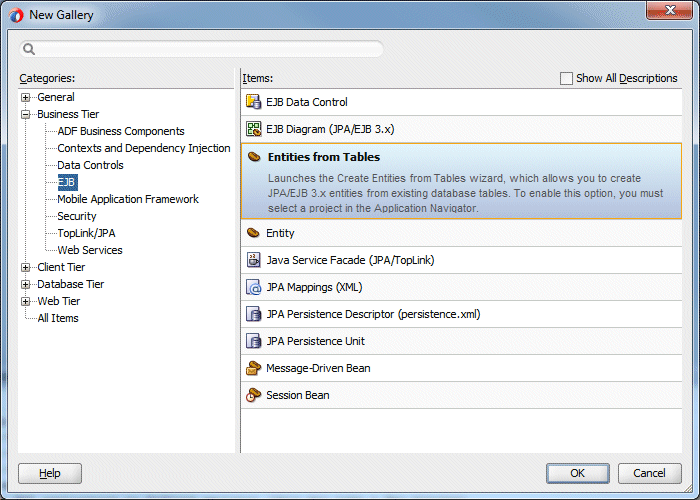
In the Applications window, select the Model project
Then, invoke the New Gallery and expand the Business Tier category and select the EJB node.
Then double click the Entities from Tables item.
-
In, Persistence Unit step, keep the default and click Next.
In Step 3 (Type of Connection ), for the type of connection make sure Online Database Connection is selected and click Next.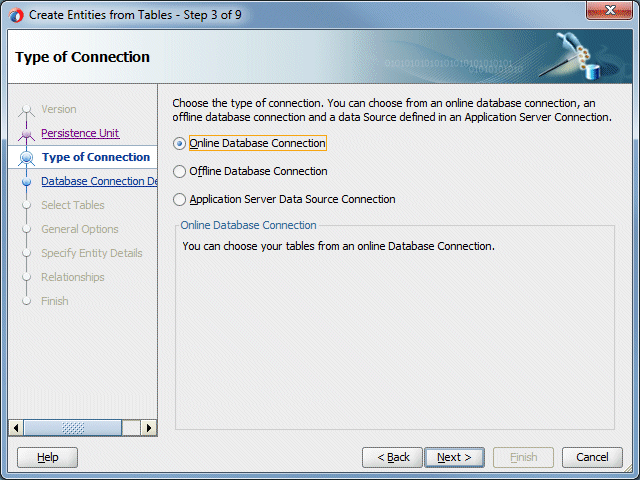
-
In the database connection details, click the green plus sign
 to create a new connection to the HR schema.
Set the following properties:
Connection Name to HRConn
Username = hr
Password = hr (or what ever you've set it to)
Then click the Test Connection button to confirm the database is available.
If it is successful, click OK to return to the wizard.
-
Back in the Database Connection Details step, ensure the Connection is set to HRConn.
Then click Next.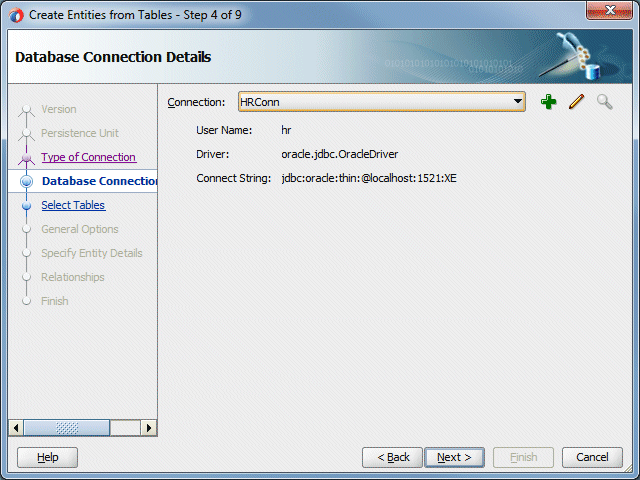
-
In Step 5, Select Tables, click the Query button to see all the tables in the HR schema.
Select and shuttle the DEPARTMENT and EMPLOYEES tables to the right.
Then click Next.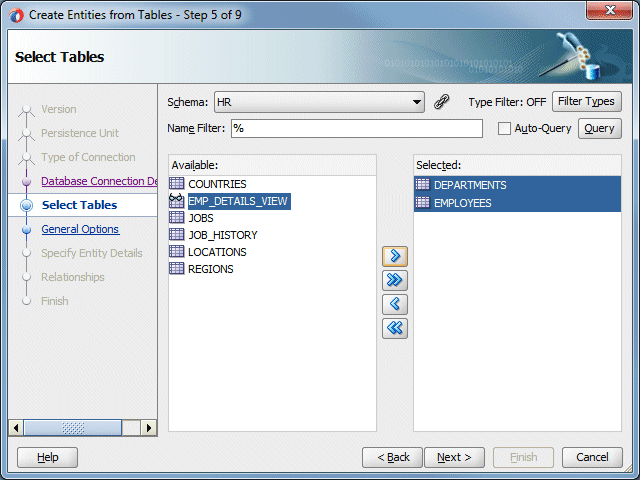
-
In Step 6 of the wizard, keep the default values and click Next.
In Step 7, Specify the Entity Details, set the Entity Name for the HR.DEPARTMENTS table to Department (singular) and notice the Entity Class is changed to model.Department (also singular).
-
Then select the HR.EMPLOYEES table and set the Entity Name to Employee and notice the Entity Class is also changed to a singular value
(model.Employee).
Then, click Next.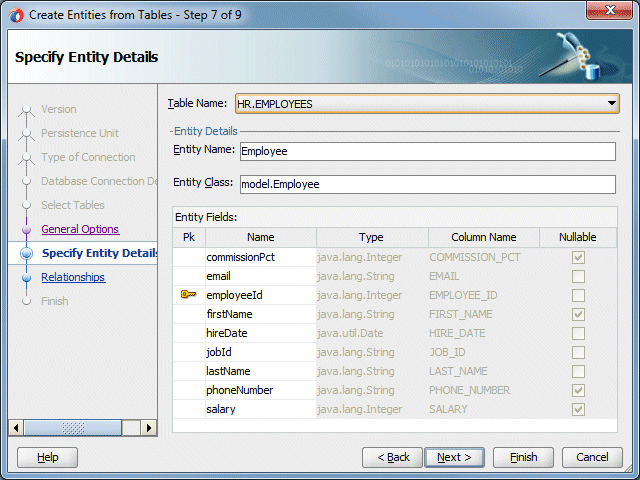
-
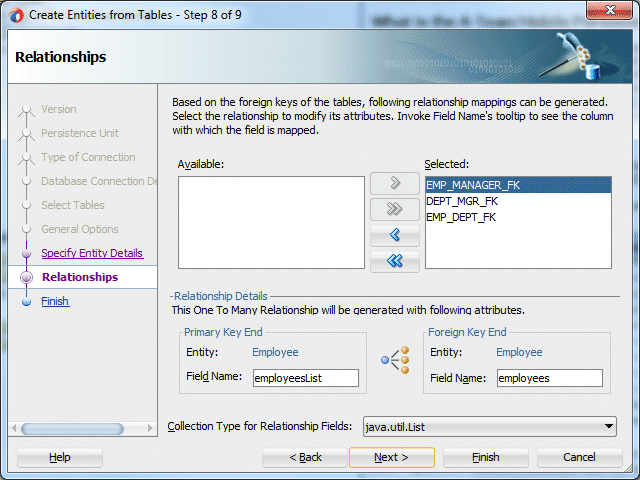
In Step 8, Relationships, keep their values at the default and click Finish.
-
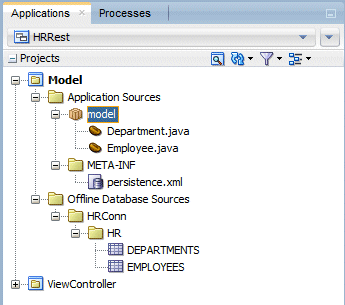
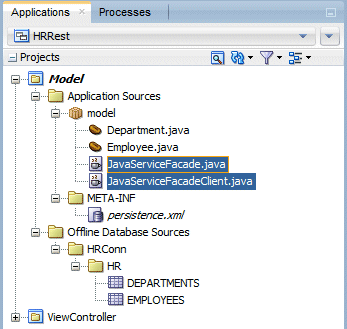
The Model project should now include the java and xml files to support accessing the database.
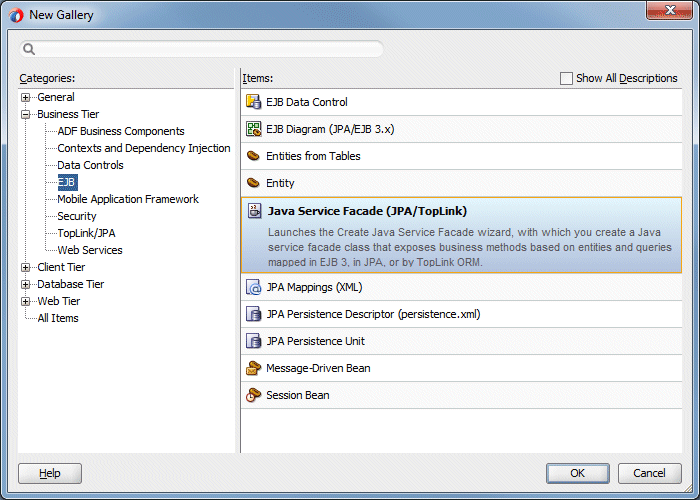
In this next section you'll wrap the two entities (Department & Employee) in a service facade.
-
Still working in the Model project, from the New Gallery, select the EJB category and then double click the Java Service Facade (JPA/TopLink).
-
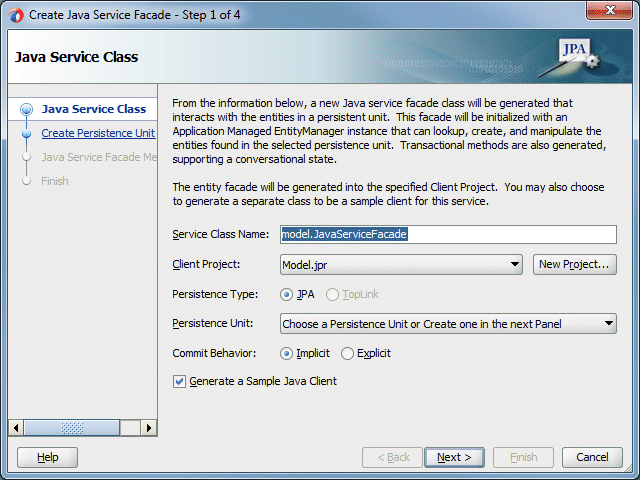
In Step 1, Java Service Class, keep the default values and click Next .
-
In Step 2, Create Persistence Unit, ensure the connection is set to the one used when creating the entities.
Notice the value of the Persistence Unit, Model-1. This value will be used when constructing the URL to access the REST service.
Then, click Next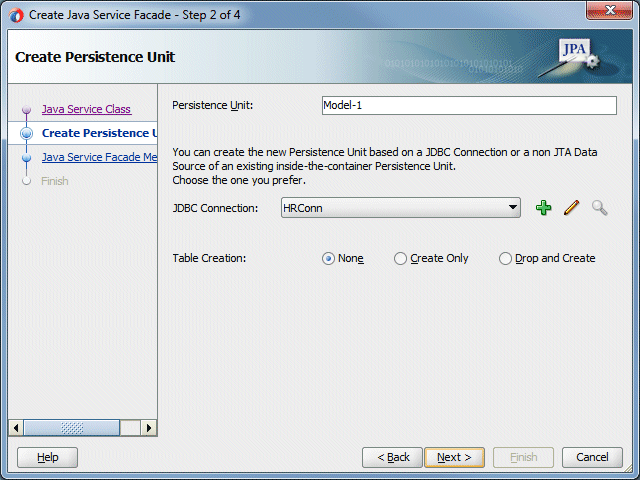
-
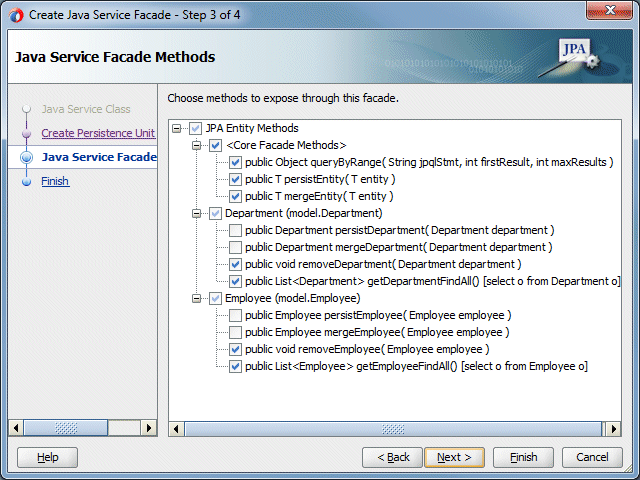
In Step 3 , Java Service Facade Methods, keep all the default values and click Finish.
-
The Applications window now includes the two classes to support the service facade.
Save your work.
In this step, modify the project to include a library, make the URL simpler, deploy and test the service.
-
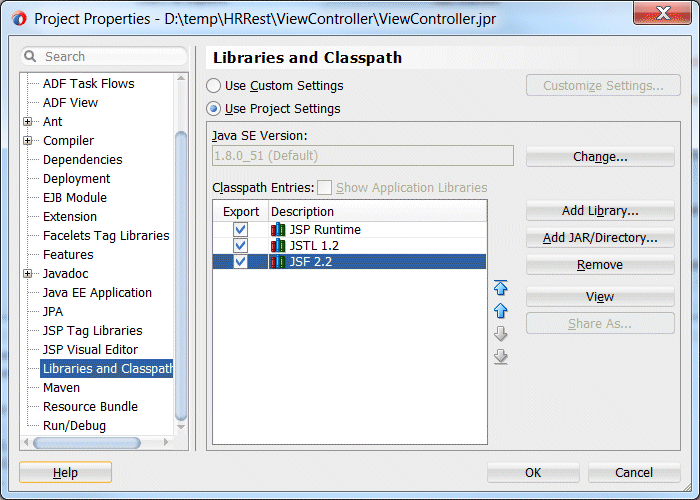
Add a library to enable data services. In the Application window, double click the ViewController project. Then, click on the Libraries and Classpath node.
-
Click the Add JAR/Directory... button and navigate to the <JDEV_HOME>\oracle_common\modules\oracle.toplink\ directory and select the Toplink-dataservices-web.jar file.
Then, click Open and the jar will be added to the classpath.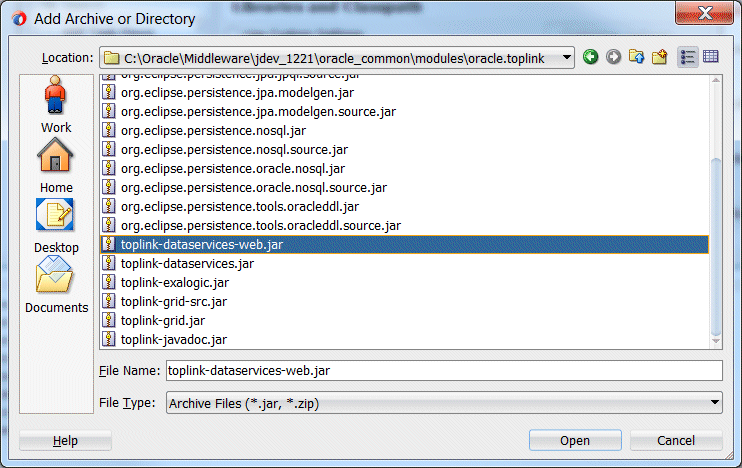
-
Next, make the URL to invoke the service, simpler.
While still in the ViewController Project Properties, select the Java EE Application node and set the Java EE Web Context Root property to HRRest.
Then click OK and save all your work.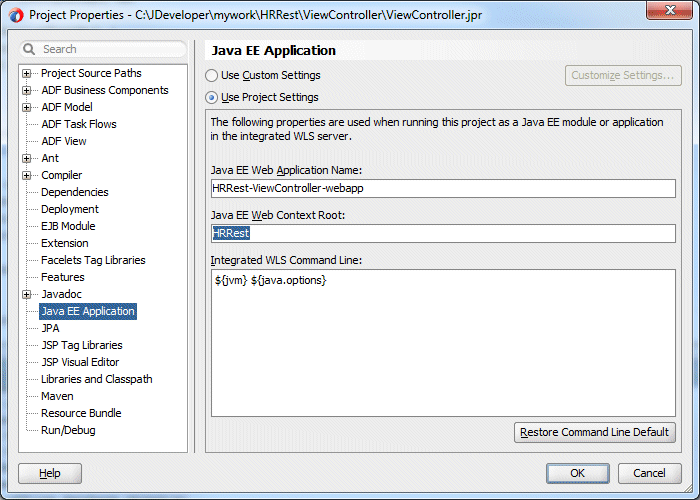
-
Ensure the web server you'll use is up and running.
Deploy the project using the default deployment profile in the ViewController project.
In the Applications window, right click the ViewController project and select Deploy > HRRest_ViewController_webapp...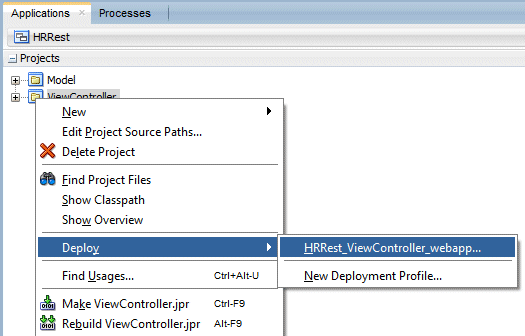
-
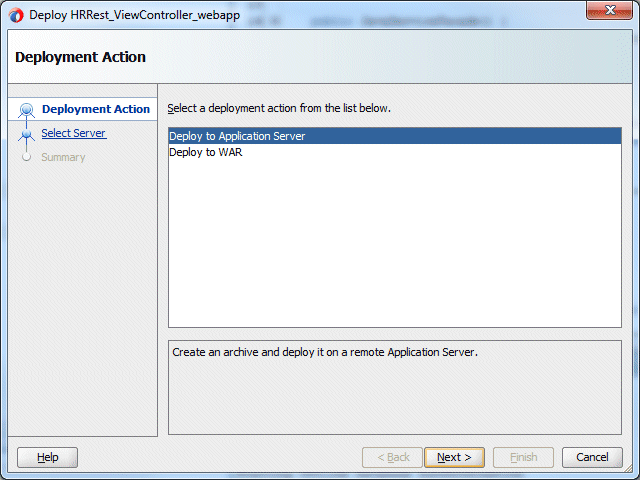
In the Deploy Action dialog, select Deploy to Application Server, then click Next.
-
Ensure the IntegratedWebLogicServer is selected as the server to deploy to and click Next.
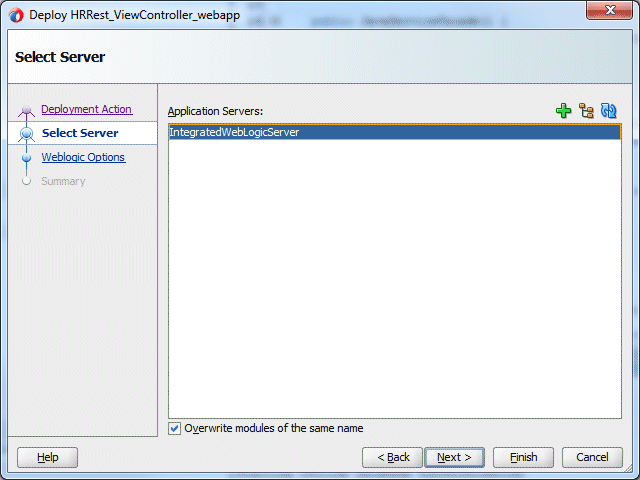
-
In the Weblogic Options dialog, select the Deploy to selected instances in the domain, and then select the DefaultServer.
Then click Finish to deploy the service.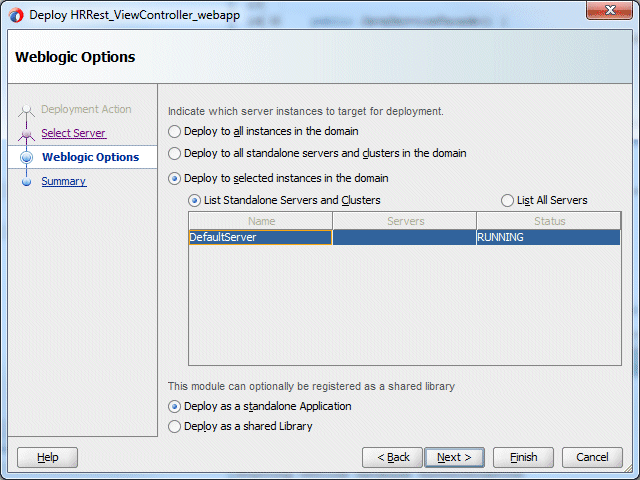
-
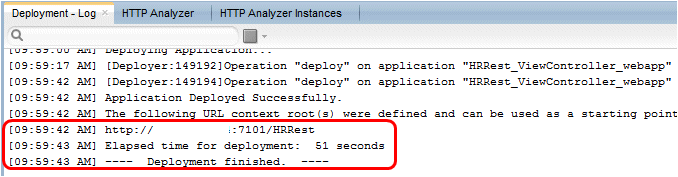
The Deployment - Log window will confirm the service is deployed.
-
Next, open a browser and test the service is available.
Use this URL to access the service, and substitute your I.P. address. Save this URL as you'll use it later when consuming the data from the service.
http://<your_ip>:7101/HRRest/persistence/v1.0/Model-1/query/Department.findAll
You should see the first department (10 - Administration) returned along with all the other departments in the HR schema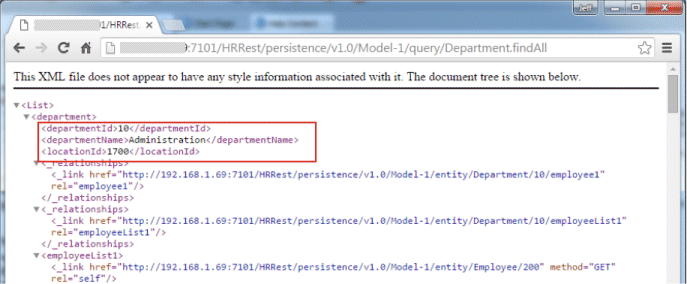
-
As you can see the above output is in XML format. The Toplink RESTful data services API supports both XML and JSON, and you'll need to include the Content-Type header parameter to get the payload in JSON format.
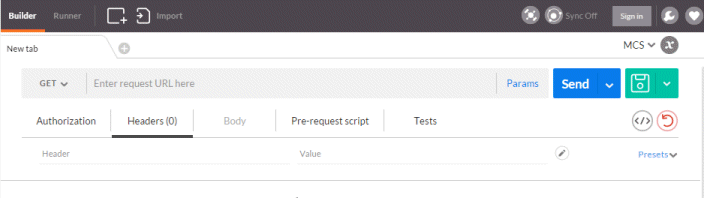
To test the service and see the results in JSON format, you can use a Postman REST client. It is good for testing any RESTful service and available from the Chrome Web Store.
Click here to install the application.
-
Once the extension is installed, launch Postman client application in your browser.
-
When the application starts, enter the URL for your REST service.
http://<your_ip>:7101/HRRest/persistence/v1.0/Model-1/query/Department.findAll
Then click the blue Send button to see the data in a JSON format.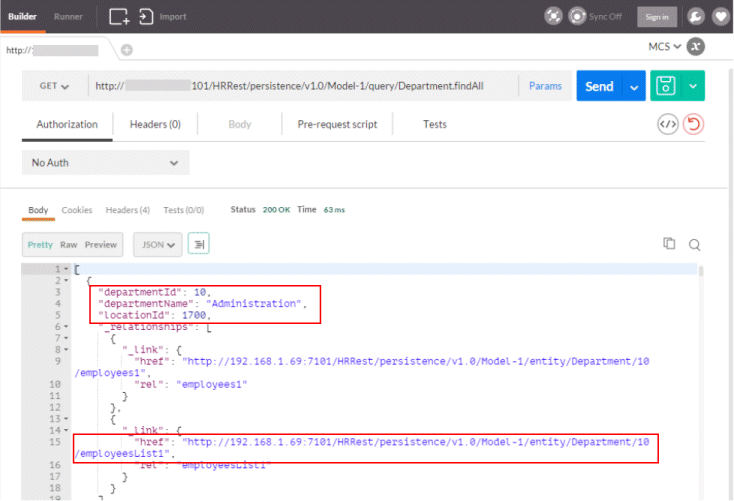
-
Notice the relationships included with the department attributes. This is a typical pattern in RESTful services where the resource is self-describing, it provides subsequent resource paths with the return payload that you might want to traverse to get additional data.
Click the employeesList1 link to get the employees within department 10. You may need to click the Send button to see the results.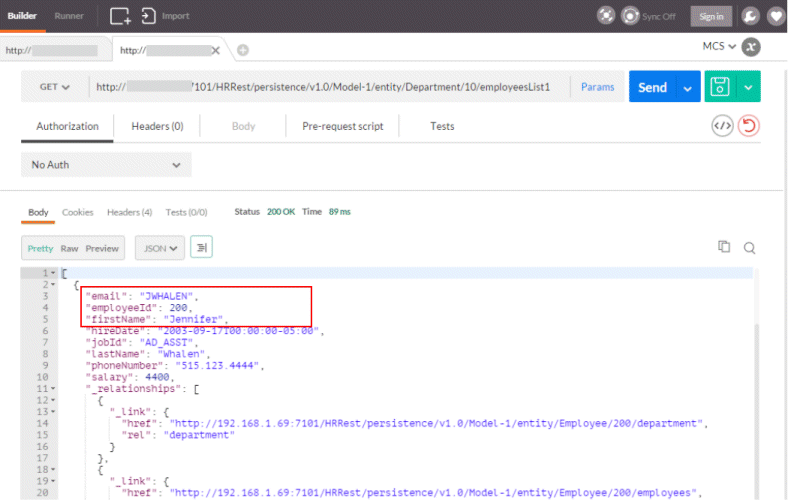
You now have a REST/JSON service you can consume with the persistence accelerator. In the next part, you create a MAF application and use the service to develop a user interface.

 Expand all |
Hide all
Expand all |
Hide all