 Part 1: Set Up and Configure an iOS Environment

This tutorial is written for those for want to work with Android on a Mac OSX environment. Basically the instructions are the same as a PC environment with some minor variations.
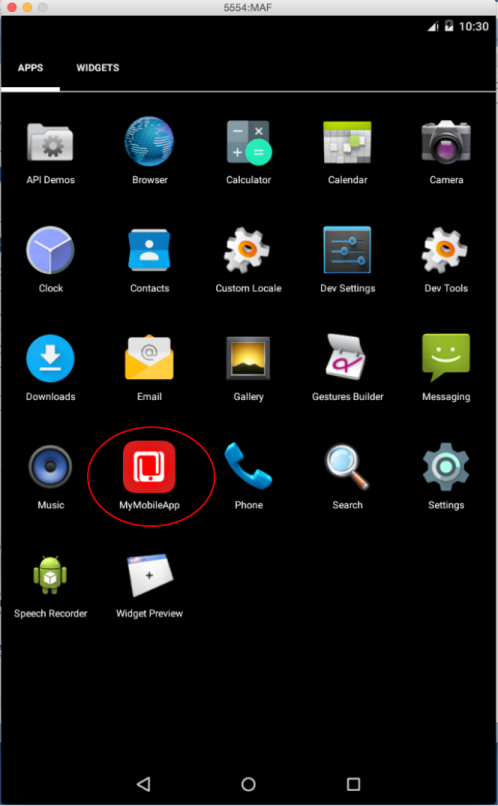
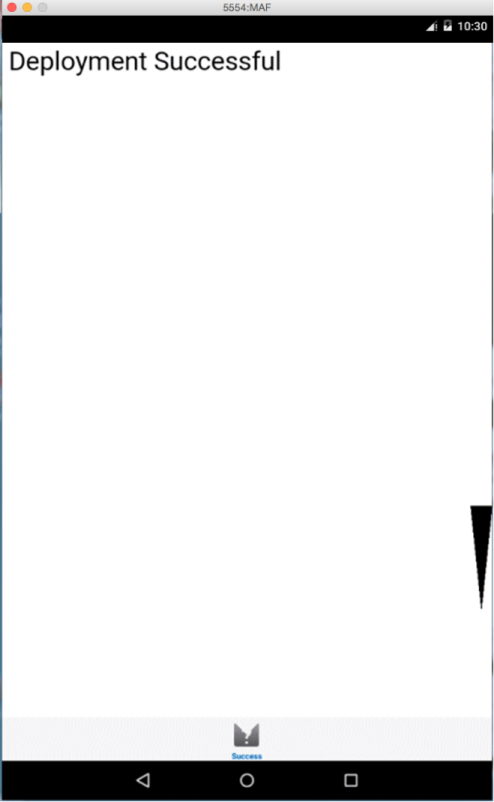
The images below show you what your emulator will look like when you successfully complete the tutorial.
-
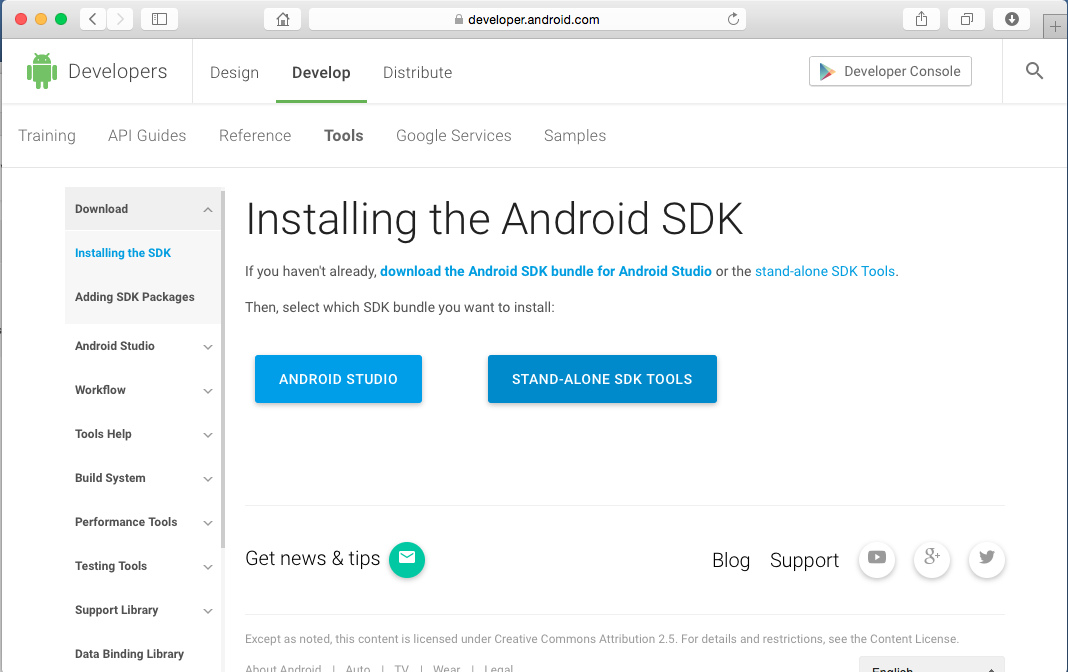
Download and install the Android Stand-alone SDK Tools from http://developer.android.com/sdk/installing/index.html.
You will need to accept the terms and conditions before you download the SDK. Do not install the SDK into a directory path cotnainign with spaces.
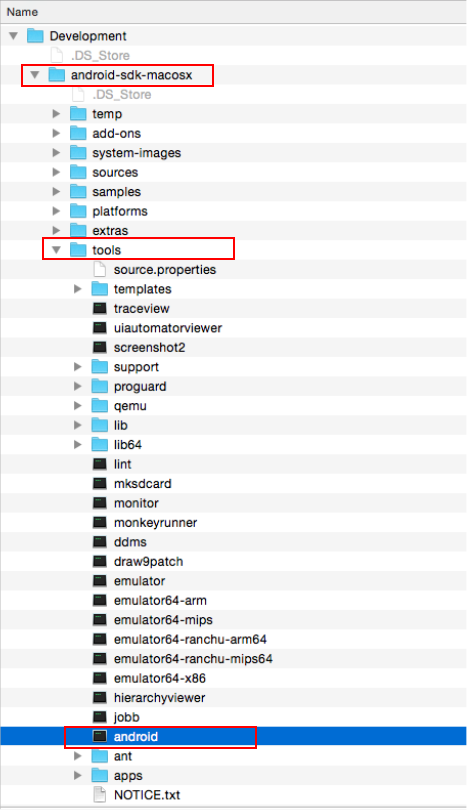
Save the zip file, then extract it to a directory, like Development.
-
Navigate to the the \<android_sdk_home>\tools and double click the android file to start the SDK Manager.
-
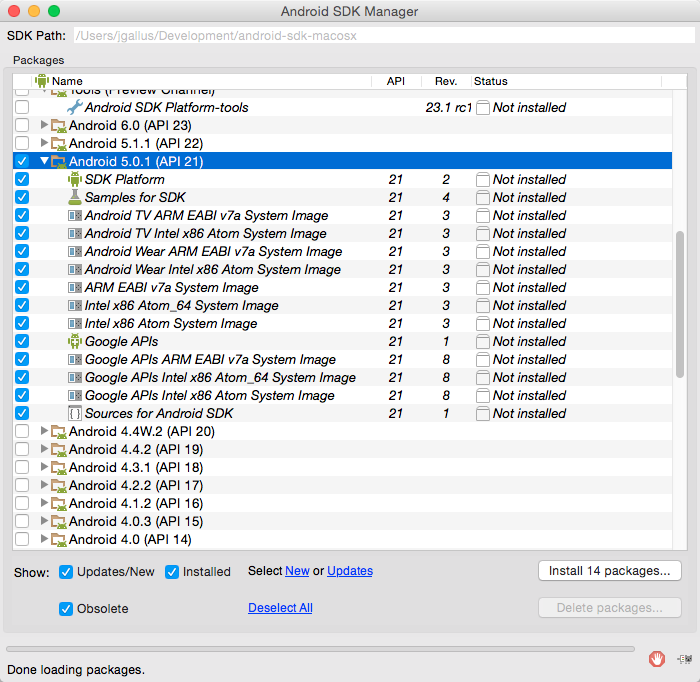
Select the top level Android 5.0.1 (API 21) option which will select all the children nodes, then the Install Packages button..
-
Select the top node, and then select Accept License radio button. Then click the Install button. If you are behind a corporate firewall this can be configured via the SDK Manager's Preferences in the Apple menu.

The download and install process will start. In may take a while to complete, depending on your internet speed. Let it complete.

-
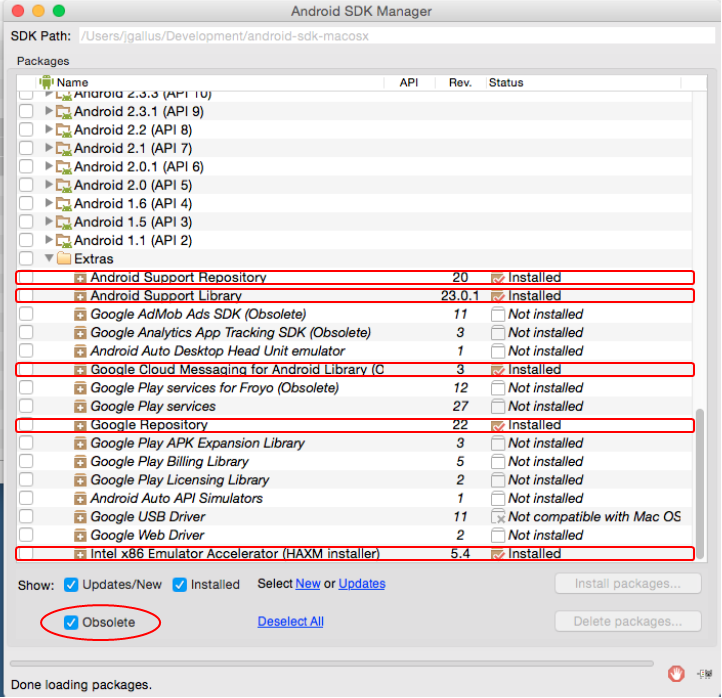
You also need to download and install some extra packages. Scroll toward the bottom of the SDK Manager, and expand the Extras node.
Select and install the Android Support Repository and Android Support Library packages.
Select and install the Google Cloud Messaging for Android Library package. To see this option you must first select the Obsolete check box at the bottom of the window.
Select and install the Google Repository package.
Select and install the Intel x86 Emulator Accelerator (HAXM) Installer package for the emulator (unless it is already installed).
When you are done, the following packages should be installed:
-
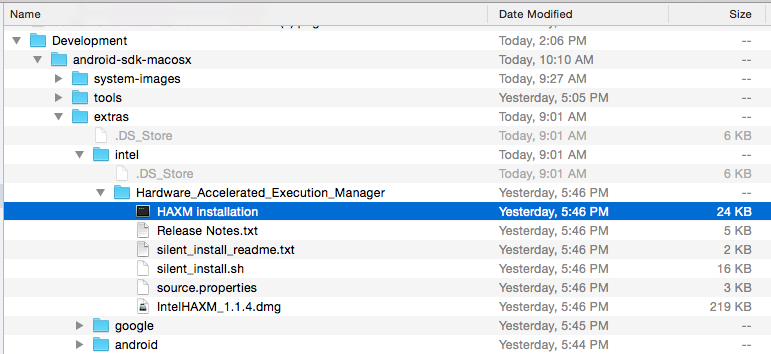
To use the Intel x86 Emulator Accelerator, once downloaded, you then must then install the drivers.
Navigate to iOS Finder and locate the <android_sdk_home>\extras\intel\Hardware_Accelerated_Execution_Manager\HAXM Installation application file. Double click it and you can use the defaults while it installs.
-
You will need to have installed JDeveloper Studio Edition (version 12.2.1.0). You can download JDeveloper from the Oracle JDeveloper 12c home page. Once there, click the Downloads tab to see the JDeveloper download. If you need help installing JDeveloper, follow these instructions. Warning - Do not install JDeveloper into a directory path containing spaces.
-
Install the MAF extension by using the JDeveloper Update Center. Start JDeveloper, and then select the menu item Help - Check for Updates.
-
Click Next at the Welcome dialog.
-
Ensure the Search Update Center radio button is selected and click Next.
-
In the Available Updates select the check box for the Mobile Application Framework extension.
Then click Next.
-
Accept the licensing agreements by clicking I Agree.
Then, click Next and the download will start. Once the completes, click Finish.
-
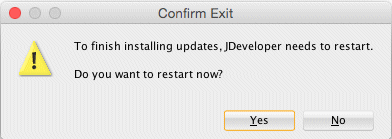
JDeveloper needs to restart. Click Yes to shut down and restart JDeveloper.
Might take a minute or two, be patient..
-
When JDeveloper is restarted, select Studio Developer (All Features) to be able to use the MAF extension.
When prompted, do not import any preferences from previous versions of JDeveloper.
-
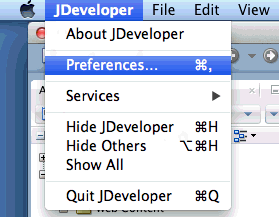
Then, you must configure JDeveloper + MAF preferences to use the Android SDK.
-
On the left side of the Preferences screen, click and expand the Mobile Application Framework node. If you are using the Mobile Application Framework extension for the first time, you may need to click the Load Extension button.
-
After the extension is loaded, select Android Platform.
-
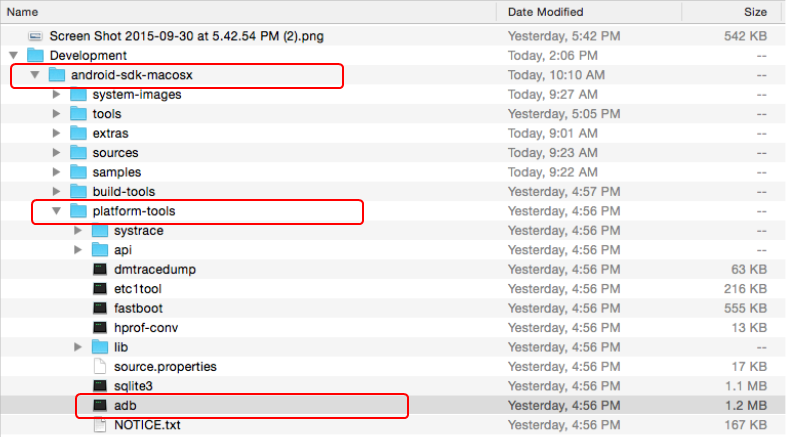
Update all entries with the correct directory locations. Then you can click on the magnifying glass next to the input list, and navigate to the Android SDK Directory (where you unzipped it earlier) as recommended in the image or your installation location.
Set the Android Platform Location to the path you see below. Also, set the Android Build Tools Location to point to the directory containing the aapt file.
There is a default password for the debug Key and Keystore. You can ignore those values for now.
-
Click OK to dismiss the Preferences pane.
-
Reopen the Android SDK Manager and create and start an Android emulator to use for your mobile deployment.
-
In the Android SDK Manager menu bar, select Tools - Manage AVDs...
The Android Virtual Device Manager dialog is displayed.

-
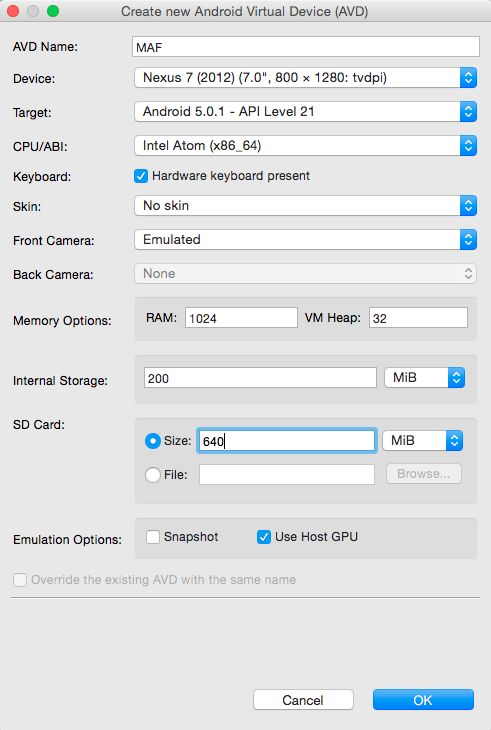
On the upper right, click the Create button and specify the following values to the properties.
You may have another emulator already created in the list. Do not use this one, make sure to create a new one according to the specifications below.
AVD Name = MAF
Device = Nexus 7 (2012) (7.0", 800 x 1280: tvdpi)
Target = Android 5.0.1 - API Level 21
CPU/ABI = Intel Atom (x86_64)
Internal Storage = 200 MiB
Skin = No Skin
Front Camera = Emulated
Back Camera = None
Memory Options Ram = 1024
SD Card = 640 MiB
Use Host GPU = Selected
For the remainder, keep the defaults and click the OK button.
You may choose another device type, keeping in mind that newer devices have greater resource demands and you may run into RAM issues on your own machine
-
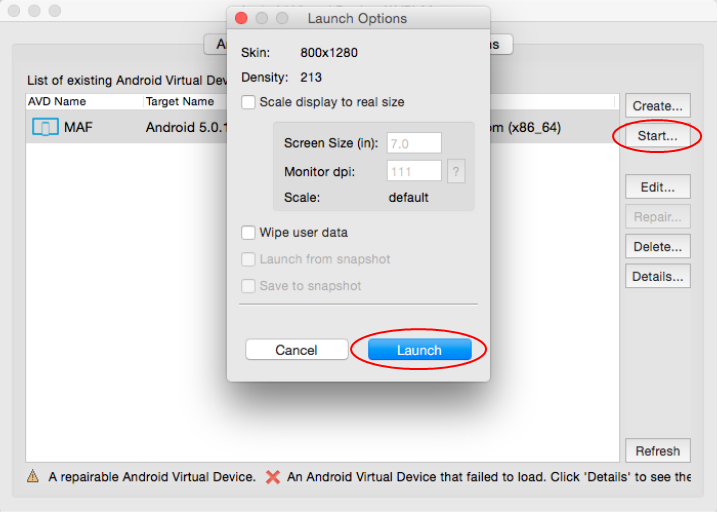
Select the new AVD and click the Start button.
-
It may take a few minutes for the emulator to be invoked and start running. Once it's running, you may continue, create, deploy and test a MAF application.
-
In this part, you first create a “Hello World” MAF application, and then deploy this starter application to your Android Emulator.
Preparing Mobile Application Framework applications for deployment is primarily comprised of creating platform-specific deployment profiles. Read more...
A deployment profile defines how an application is packaged into the archive that will be deployed to either a device or emulator. The deployment profile:
- Specifies the format and contents of the archive.
- Lists the source files, deployment descriptors, and other auxiliary files that will be packaged into the archive file.
- Describes the type and name of the archive file to be created.
- Highlights dependency information, platform-specific instructions, and other information.
In the Applications Window click New Application to start the New Gallery dialog box.
-
In the New Gallery expand the General - Applications nodes and select Mobile Application Framework Application
Then click OK.
-
In the Name your application page, enter MyMobileApp in the Application Name field, and click Next.
-
Examine the Project Features for your first project, the ApplicationController.
-
Click Next twice and in the Name your project page, leave the default project name. Examine the Project Features for the ViewController project. Notice that the project uses Mobile Application Framework, HTML and CSS, Java, and JavaScript project features.
-
Click Next and Finish. You should see a new MAF application created in Applications window.
-
Right-click on the ViewController project and select New > From Gallery
In the New Gallery, select Web Tier - HTML and then the HTML Page item.
Then click OK.
-
Accept the default File Name and Directory, then click OK.
-
Using the Editor, in the body of the document, enter the following text "Deployment Successful".
-
Save all your work.
-
In the Structure Window, select the body component.
Then in the Properties Window, expand the Style node and set the Font Size to xx-large.
Save your work.
-
In this section, you configure a new feature so the user can access the newly defined AMX pages from the native application container. You will need to perform this task when ever you add pages or task flows to your application.
After you complete an Mobile Application Framework application project, JDeveloper adds both project and application level artifacts.Read more...
Among these artifacts is an MAF framework model project and the view-controller project (with the default name, ViewController) that has the MAF framework feature application resources. These resources include the configuration file for applications features, maf-feature.xml. The configuration file is a stub XML descriptor file that enables you to define feature applications that will be seen when the application runs. The maf-feature.xml defines details of each feature - for example, its icon, content type, starting point, etc.This file is configured with a default application, Hello, that you ran earlier.
The maf-application.xml file defines the details of the application itself, including reference to features. These feature applications, when packaged into a JAR file known as a Feature Archive file (FAR), provide the reusable content that can be consumed by other MAF applications. One reason for this distinction is to allow developers to create feature archives (which may contain one or more features referenced in the maf-feature.xml), and then create applications by simply pulling in feature archives. Of course each app would only have one maf-application.xml.
A FAR is essentially a self-contained collection of everything that a feature requires, such as icon images, resource bundles, HTML, JavaScript, or other implementation-specific files. The FAR includes a single maf-feature.xml file, which identifies each of the packaged feature applications by a unique ID. You can edit this file to update feature properties. For example, you can specify the content implementation (local or remote HTML files, AMX pages, or a native application written in platform-specific language). You can also control the display of content based on such factors as user roles and privileges, or device properties. A mobile application can reference one FAR, several of them, or none at all.
In the Application Navigator, expand the ViewController project. Locate and expand the Application Sources folder. Then expand the META-INF folder. You will see the maf-feature.xml file as shown.
-
Double click on the maf-feature.xml file to open the Feature editor.
-
Add a new feature by clicking the green plus sign on the Features table near top of the editor. If you cannot see the plus sign, scroll the Feature editor to the right (the plus sign is on the far right side of the Feature editor).
-
In the Create MAF Feature dialog, modify the following values:
- Feature Name: Success
- Feature ID: oracle.success
- Confirm the Add a corresponding feature reference to maf-application.xml check box is selected, and then click OK.
-
In the Features table, select the newly created feature oracle.success. Under the Features table, click the Content tab, and locate the Content table. Notice that the content item oracle.success.1 is created by default.
-
Confirm the Id field of the content item is set to oracle.success.1.
-
In the Content area, set the Type property is set to Local HTML .
-
In the Content section, find the URL text box.
On the right side of the URL text box, click the magnifying glass icon.
-
In the Open window, select the html page you created earlier. In this case, untitled1.html. Then click Open.

-
The resulting definition should look like the image below.
Save all your work.
-
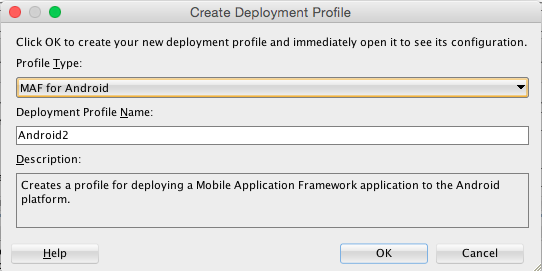
In the Application menu, select Deploy - New Deployment Profile to start the Create Deployment Profile dialog box.
There are three other predefined deployment profiles you can use. One for an default iOS deployment, another for a default Android deployment. The third type is used to create a mobile application archive. This archive includes everything, files, icons, reference links but not any signing certificates. It would be used if you wanted to transport an application and install and deploy it using different credentials.
For our purposes, lets examine what we get when we go through the whole process.
-
In the Profile Type drop-down list, ensure MAF for Android is selected and then click OK. Leave the Profile Name at the default value (Android2).
-
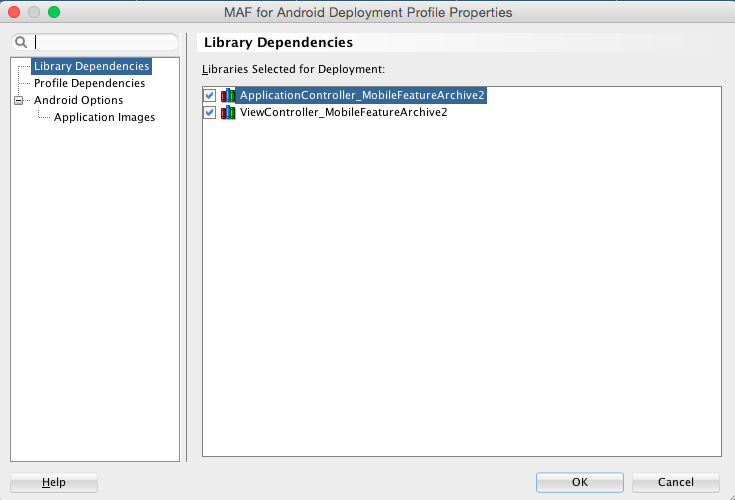
In the MAF for Android Deployment Profile Properties dialog box, examine the deployment options.
-
Select the Android Options node and confirm your values look like the ones below.
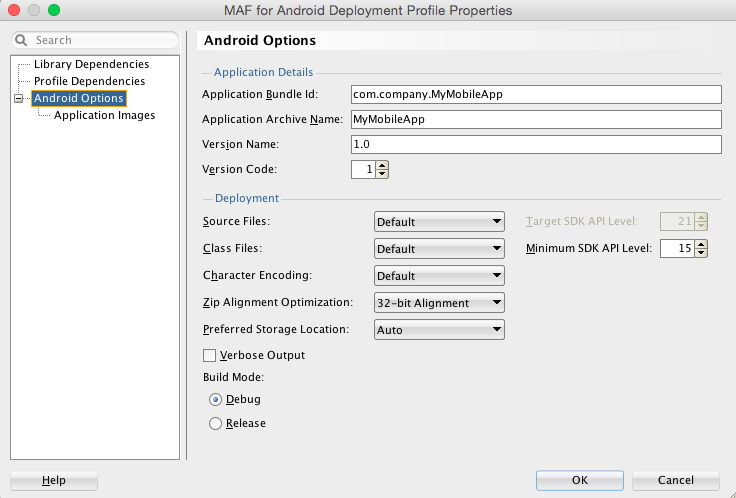
Click OK, and then save all your work. -
Make sure your AVD (Android Virtual Device) is up and running. If not, the deployment will fail.
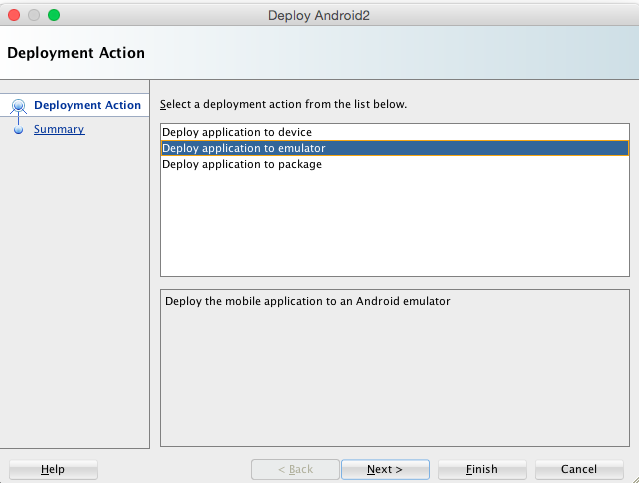
In the Application menu, select Deploy > Android 2 deployment profile.
In the subsequent dialog box, select Deploy application to emulator , and click Finish.
There are two approaches to testing an MAF application:Read more...
1. Testing on a mobile device: This method always provides the most accurate behavior, and is also necessary to gauge the performance of your application. However, you may not have access to all the devices on which you wish to test, making device testing impractical.
2. Testing on a mobile device emulator or simulator: This method usually offers better performance and faster deployment, as well as convenience. However, even though a device emulator or simulator closely approximates the corresponding physical device, there might be differences in behavior and limitations on the capabilities that can be emulated.
Typically, a combination of both approaches yields the best results.
-
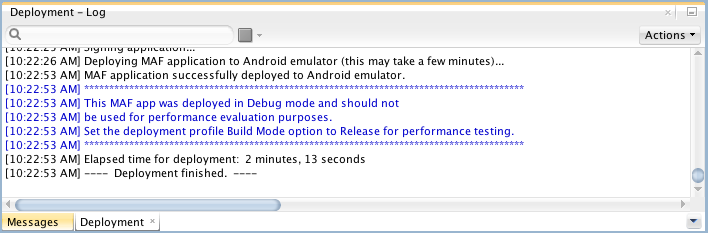
In the Deployment Log the Cordova plugman will be installed to support the Cordova plugins. If the Log window is not viewable, select Window > Log from the JDeveloper menu.
Watch the Deployment Log window for any errors. If the compilation and deployment process completes as expected, you should see the Deployment Log window as shown below.
-
Go back to the emulator and open the applications page. Find and start the MyMobileApp application.
A popup notification will appear asking if you would like send notifications. Click OK.
-
The MyMobileApp application currently contains your HTML page running inside the MAF application. Because there is only one feature in the application currently, you'll only see one option at the bottom of the page.