25 Create a Version
This chapter contains these topics:
25.1 Creating a Version
When you create a version in DREAM Writer, you assign the specifications for your report by following the five steps of DREAM Writer. The following table details the steps in the DREAM Writer program:
| Step | Description |
|---|---|
| Version Identification | Designate a title for your version. You have the option of designating a series of lines to further describe the records in your report. Your title displays at the top of your report. |
| Additional Parameters | Set the version control parameters to determine various job specifications such as:
|
| Processing Option Values | Control the characteristics of a printed report. For example, when you select a report format, choose the following:
|
| Data Selection Values | Select information from the Data Selection screen to print only the records pertinent to your needs. Keep in mind the following considerations:
|
| Data Sequencing Values | Organize the records in your report to clearly represent your data. |
To create a version, complete the following:
-
Copying an Existing Version
-
Identifying a Version
-
Revising Parameters
-
Revising Processing Options
-
Selecting Your Data
-
Arranging Data in Sequence
25.1.1 What You Should Know About
| DREAM Writers | Description |
|---|---|
| Using function exits in DREAM Writer | The following functions are screen specific function exits in the DREAM Writer program:
|
| Pressing Enter in DREAM Writer | When you press Enter in DREAM Writer, you are informing the program that you are finished with the current step. You should enter all the information for each step before you press Enter. |
25.2 Copying an Existing Version
When you copy, you add a new version based on an existing version. Copying an existing version is the simplest way to create a new version in DREAM Writer.
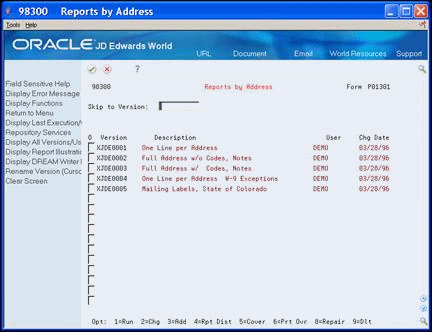
From Address Book (G01), choose Report and Labels
From Periodic Processes (G121), choose Reports by Address
-
On Reports by Address, enter 3 in the Option (O) field for the version you want to copy.
-
On Dream Writer Versions Copy, complete the following field:
-
New Version
Figure 25-2 DREAM Writer Versions Copy screen
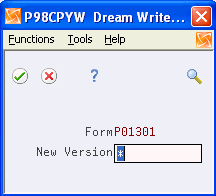
Description of "Figure 25-2 DREAM Writer Versions Copy screen"
-
-
Press Enter to confirm your version title and to move on to the next step of DREAM Writer.
25.2.1 What You Should Know About
| Prefixes | Description |
|---|---|
| Assigning a number only | If you did not assign a user prefix, an asterisk appears in the New Version field. Press Enter and the system assigns the next available version number with no prefix. |
| Assigning a version prefix | If you want a unique prefix for your version, enter the prefix followed by an asterisk. The system appends the next version number to your prefix. |
25.3 Identifying a Version
You can assign a version title to any report version. On the versions list, the title appears in the Description field next to the version number.
-
On Version Identification, complete the following field:
Figure 25-3 Version Identification screen
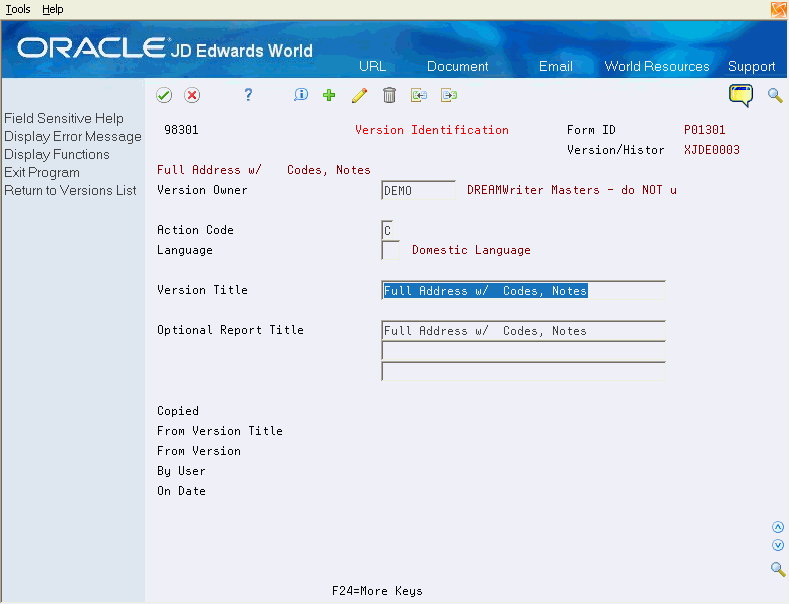
Description of "Figure 25-3 Version Identification screen"
-
Complete the following optional fields:
-
Language
-
Optional Report Title
-
-
Press Enter to confirm the information and to move on to the next step of DREAM Writer.
| Field | Explanation |
|---|---|
| Language | A user defined code (system 01/type LP) that specifies a language to use in screens and printed reports.
If you leave the Language field blank, the system uses the language that you specify in your user preferences. If you do not specify a language in your user preferences, the system uses the default language for the system. Before any translations can become effective, a language code must exist at either the system level or in your user preferences. Screen-specific information A user defined code that specifies the language used for the title of this version. The allowed values are found in system 01, user defined code type LP. |
| Version Title | A description of the version that appears next to the version number. The version title is different from the report title. |
| Optional Report Title | The title that appears at the top of the report. It can include up to three lines with 40 characters each. The lines are automatically centered on the report. |
25.4 Revising Parameters
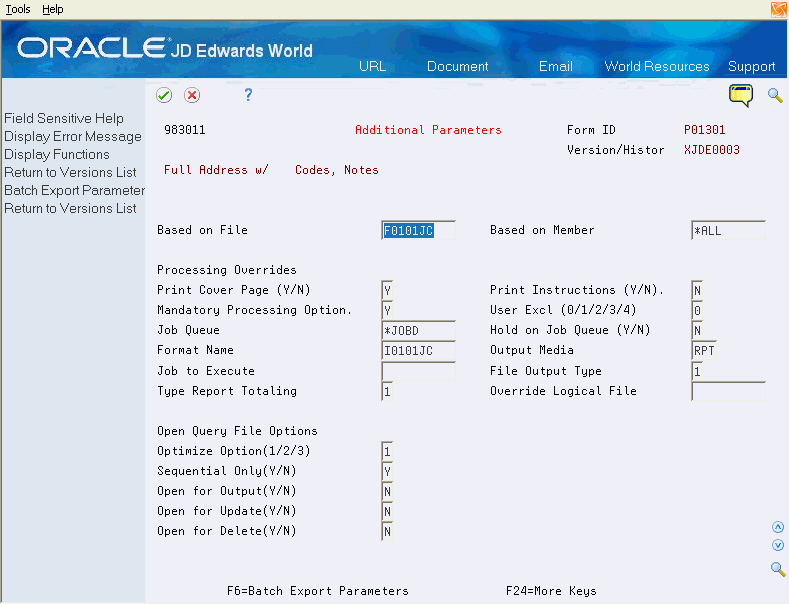
Use the Additional Parameters screen to set up the processing route for your report version. You can also specify if you want processing options to display each time you submit this version.
The following graphic illustrates how the valid values for the Mandatory Processing Option field interact with your report version.
Figure 25-4 How Mandatory Processing Option Field Values Interact with Your Report Version
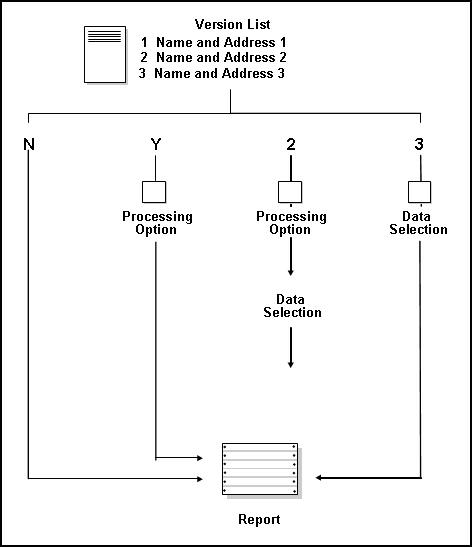
Description of "Figure 25-4 How Mandatory Processing Option Field Values Interact with Your Report Version"
Note:
Do not set a mandatory processing option if you wish to submit your job as an unattended night process.-
On Additional Parameters, if necessary, change the following fields:
-
Print Cover Page (Y/N)
-
Print Instructions (Y/N)
-
Mandatory Processing Option
-
User Exclusive (Y/N)
-
Job Queue
-
Hold on Job Queue (Y/N)
-
-
Press enter to confirm the information and to move on to the next step of DREAM Writer.
| Field | Explanation |
|---|---|
| Print Cover Page (Y/N) | A code that controls whether to print the cover page for the version.
Y – Print cover page N – Do not print cover page For STAR reporting this code controls the printing of a separate specifications report. Screen-specific information Note: You can use 1 for Y and 0 (zero) for N. |
| Print Instructions (Y/N) | Specifies whether to print the help instructions to accompany the requested report.
Y – Print the help instructions N – Do not print the help instructions Note: You can use 1 for Y and 0 (zero) for N. |
| User Exclusive (0/1/2/3) | This field allows you to restrict user access for a report version.
The valid values are: 0 – No security. Anyone can change, copy, delete, or run the version. This is the default when adding a new version. 1 – Medium security. Only the user who created the version can change or delete it. All users can copy or run the version. This is how the JD Edwards World Demo versions are delivered. 2 – Medium to full security. Only the user who created the version can change, delete, or run it. All users can copy the version. 3 – Full security. Only the user who created the version can change, delete, copy, or run it. |
| Mandatory Processing Option | A code used to designate whether a data item may optionally be selected by the user.
Screen-specific information A code to designate whether processing options or data selection appear before execution of the job. Values are: Y – Mandatory display of processing options screen at runtime. 2 – Displays both Processing Option and Data Selection screens at runtime. 3 – Mandatory displays Data Selection screen at runtime. N – Immediate submission to batch. Note: You can use 1 for Y and 0 (zero) for N. |
| Hold on Job Queue (Y/N) | A code used to indicate whether to hold the submitted job in the job queue. Values are:
Y – Yes N – No |
Caution:
When you run your report, you will receive unpredictable results in your version if you alter the Based on File field.25.5 Revising Processing Options
You must complete the processing options to create your report version. Processing options determine the format of the printed copy of your version. Any changes you make on a version affect all users.
-
On Processing Options Revisions, enter the appropriate changes.
Figure 25-6 Processing Options Revisions screen
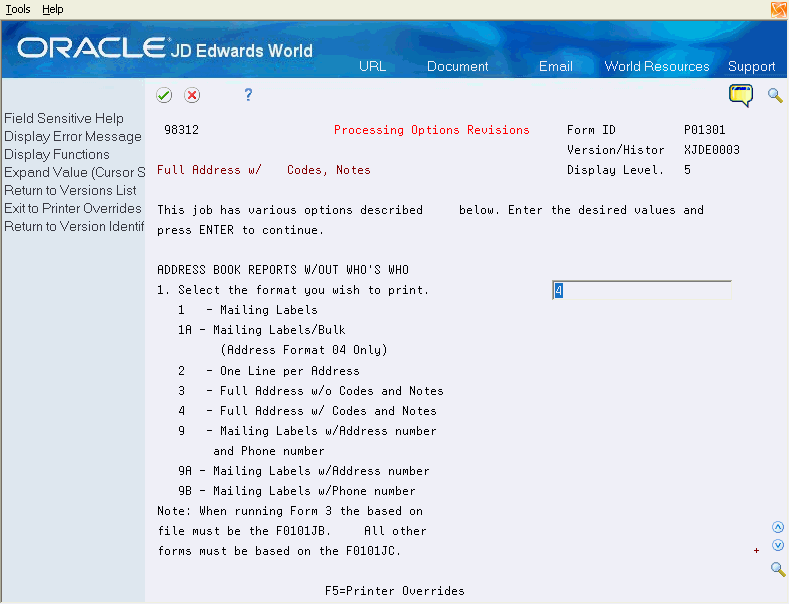
Description of "Figure 25-6 Processing Options Revisions screen"
-
Perform one of the following to view more processing options:
-
Use the Page Up and Page Down keys
-
Click the up and down arrows
-
-
Press Enter to confirm the information and to move on to the next step of DREAM Writer.
25.6 Selecting Your Data
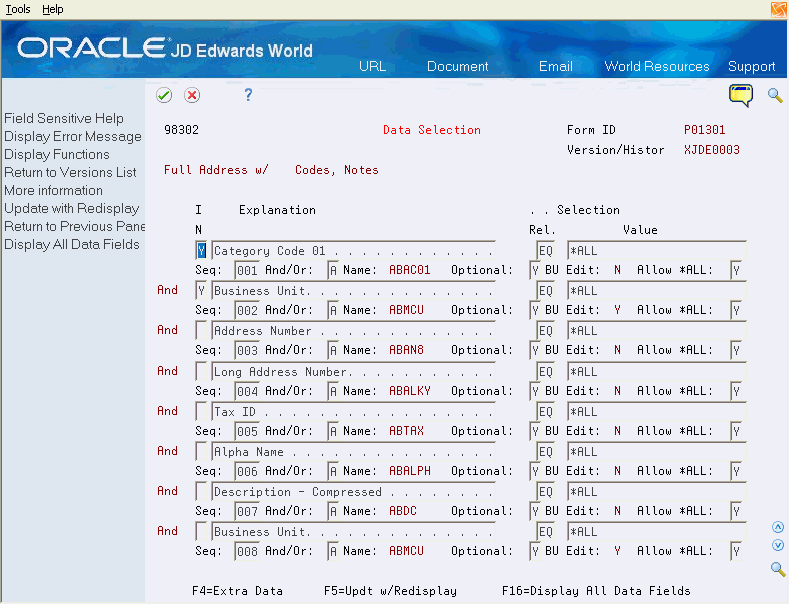
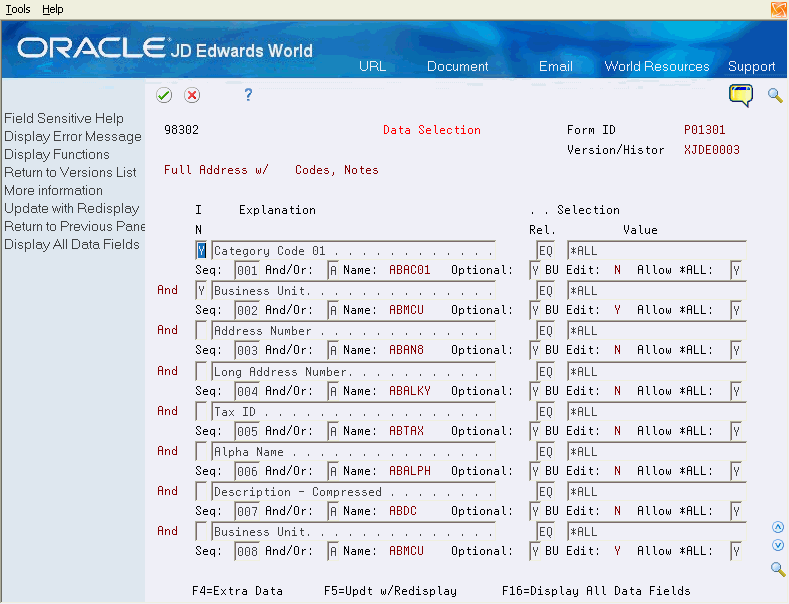
Select the data you want to print on your report. Use a data relationship expression and And/Or logic to determine the parameters of the data in your version. The And/Or field is available in the hidden detail area. To determine which records to include, use the *VALUE and *RANGE commands to select a series of data items within a certain limit. If you do not choose any data to define the boundaries of your version, the report will print every record.
The following example portrays reports that show various relationships between search criteria.
Figure 25-7 Search Criteria Relationships
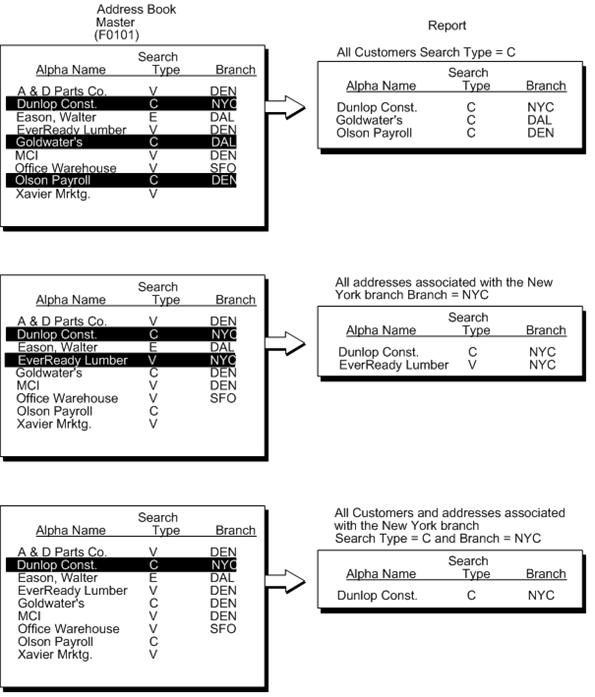
Description of "Figure 25-7 Search Criteria Relationships"
To select your data, complete the following tasks:
-
Select your data
-
Determine data for *VALUE
-
Determine data for *RANGE
-
Specify hidden criteria
-
On Data Selection, choose Display All Data Fields (F16) to display a full list of data items.
-
If necessary, change the following fields:
-
IN (Include in Selection)
-
Selection Rel. (Relationship)
-
Selection Value
-
-
Perform one of the following to view all data items.
-
Use the Page Up and Page Down keys
-
Click the up and down arrows
-
-
Choose Update with Redisplay (F5) to update selections.
| Field | Explanation |
|---|---|
| I N | A code used to designate whether a data item may optionally be selected by the user.
Screen-specific information Specifies whether to use the data field as part of the selection criteria. Y – Includes the field as part of the selection criteria. N – Deselects a field that was previously selected. blank – Not included in the selection. |
| Selection Rel | A code that indicates the relationship between the range of variances that you display. Valid codes are:
EQ – Equal to LT – Less than LE – Less than or equal to GT – Greater than GE – Greater than or equal to NE – Not equal to NL – Not less than NG – Not greater than CT – Contains (only allowed in selection for Open Query File function) CU – Same as "CT" but converts all input data to uppercase letters Screen-specific information For Configuration Management, you cannot use codes CT and CU. The NE operand must appear first in the selection criteria if you are using NE with the *RANGE or *VALUE parameters and File Output Type is a standard logical file. |
| Value | The data selection value. A special facility has been provided to allow selection of multiple specific values. By entering '*VALUES' in the selection field, a special display screen will be displayed allowing the entry of up to 45 specific values. If you specify '*VALUES' in multiple selections of the original display, you will be prompted for multiple values lists.
Enter the value '*BLANKS' if you are searching on a blank value. You cannot leave the values field blank to search on blanks, it will default to '*ALL'. Enter the value '*ZEROS' when searching for amounts equal to zero. The '*RANGE' keyword will display a special display screen which will allow the entry of a range of values (i.e., from 1 to 50). The first value MUST be LESS than the second value. If it is equal or greater than, it will not work. If you want to select all values for a field, enter '*ALL'. |
-
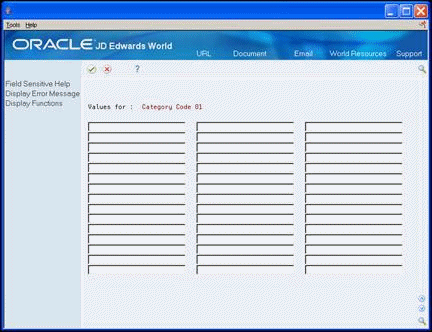
On Data Selection, type *VALUE in the following field.
-
Value
-
-
Enter the user defined code for each value you want to include for *VALUE.
Note:
You can not use F1 on the Values screen.25.6.1 What You Should Know About
| Valid Values | Description |
|---|---|
| Displaying a list of valid values | Choose Prompt for valid field values (F1) in the Value field on the Data Selection screen to display a list of user defined codes from which to choose the values to include in your version. |
-
On Data Selection, type *RANGE in the Value field.
-
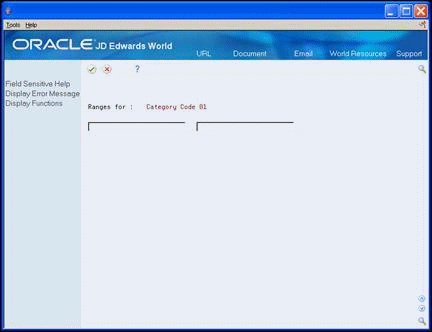
Press Enter to access the Ranges screen.
-
Enter the limits for your range.
Note:
You can not use F1 on the Ranges screen.25.6.2 What You Should Know About
| Valid Values | Description |
|---|---|
| Displaying a list of valid values | Choose Prompt for valid field values (F1) in the Value field on the Data Selection screen to display a list of user defined codes from which to choose the values to include in your version. |
-
On Data Selection, choose More Information (F4) to access the detail area.
-
Complete the following optional fields:
-
Sequence
-
And/Or
-
Allow *ALL
-
-
Press Enter to confirm the information and to move on to the next step of DREAM Writer.
| Field | Explanation |
|---|---|
| Seq: | This number is used to control the sequence of Processing Options, DDS Selection values and DDS Key sequences.
The sequence number is relative, meaning that the sequence need not start 001, 002, etc. A sequence of 003 and 005 sorts the report with the 003 field before the 005 field. For Financial Reports, company MUST be sequence 001 in order to access the specific company Automatic Accounting Instruction (AAI) records. If company is not sequence 001, company 00000 AAIs are used. |
| And/Or: | A code that determines whether compound data selection logic is based on an A = AND condition or an O = OR condition.
Screen-specific information For valid codes for DREAM Writer Data Selection are: A – And O – Or |
| Allow *ALL: | This code is used to indicate to the DDS Generator whether or not a value of *ALL is allowed for this selection. |
25.7 Arranging Data in Sequence
When you sequence data, you avoid confusion by presenting your information in a clear, logical manner. In the following example, the report lines are listed in alphabetical order by name.
Figure 25-12 Information Displayed in Alphabetical Order

Description of "Figure 25-12 Information Displayed in Alphabetical Order"
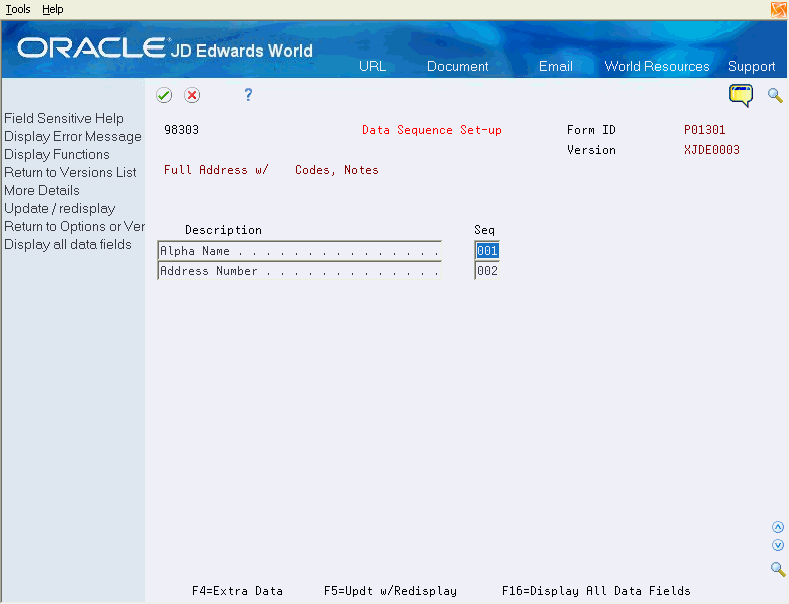
Use the Data Sequence Setup screen to determine the order in which records appear on the report. For example, to list each data item in a report in alphabetical order, choose Alpha Name to be first in sequence. If you would like to display data items in order of address number, choose Address Number to be first. The following graphic displays samples with alternate data sequences:
Figure 25-13 Comparing Information Display Orders
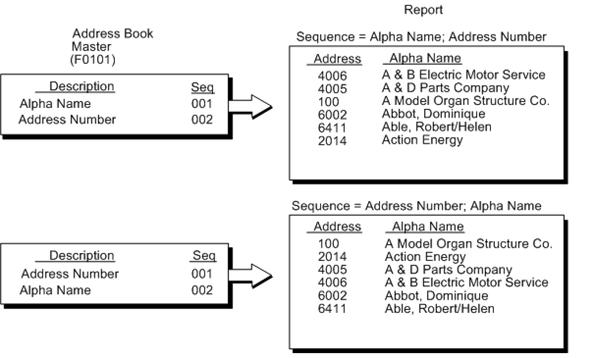
Description of "Figure 25-13 Comparing Information Display Orders"
-
On Data Sequence Setup, for each data item, complete the following field:
-
Sequence
-
-
Press Enter to return to the versions list.
25.7.1 What You Should Know About
| Data Sequence | Description |
|---|---|
| Changing the sequence of data | Some reports contain a built-in sequence. If you change the sequence on such a report, you might receive unpredictable results. This is especially true when running batch jobs that update files. To determine if you should not change the data sequencing, review the online help. |
