2 Discovering Exalytics Targets
The following sections describe how to discover the Exalytics In-Memory System and Machine and other supported targets:
-
Once you have discovered the Exalytics System target in Enterprise Manager Cloud Control, complete the instructions outlined in Post Discovery Configuration and Verification.
Note:
The Oracle TimesTen In-Memory Database is part of most Exalytics systems. See the Oracle® Enterprise Manager System Monitoring Plug-in for Oracle TimesTen In-Memory Database User's Guide for complete installation, discovery, and configuration details:
http://docs.oracle.com/cd/E24628_01/timesten.121/e28645/toc.htm
2.1 Prerequisites
Complete the following prerequisites before beginning the discovery process:
2.1.1 Create the em-context.info File
Before the Exalytics host can be discovered by Enterprise Manager Cloud Control, there are some configuration step that must first be completed and the em-context.info file, which provides Enterprise Manager with the system identifier of your Exalytics System, must be created. To make sure this file is available:
2.1.2 Prerequisites for Virtualized Exalytics
Before proceeding to discovery, verify that the following prerequisites are met for your virtualized Exalytics Machine:
2.1.2.1 Export NFS Directory
A directory should be NFS exported before it can be mounted on other host. Follow the steps below as the root user:
2.1.2.2 Other Virtualized Exalytics Machine Prerequisites
For a virtualized Exalytics machine, follow these instructions from the Oracle® Enterprise Manager Cloud Administration Guide for:
-
Registering the Oracle VM Manager:
http://docs.oracle.com/cd/E24628_01/doc.121/e28814/cloud_iaas_setup.htm#CEGICIFE
-
Synchronizing the Oracle VM Manager Targets.
http://docs.oracle.com/cd/E24628_01/doc.121/e28814/cloud_iaas_setup.htm#BABBGACI
-
Discovering a Virtual Server.
http://docs.oracle.com/cd/E24628_01/doc.121/e28814/cloud_iaas_setup.htm#CEGGJHAD
-
Rediscovering a Virtual Server.
http://docs.oracle.com/cd/E24628_01/doc.121/e28814/cloud_iaas_setup.htm#BABIFBBG
2.1.3 Discover Fusion Middleware Domain
Generally, Oracle Fusion Middleware domains do not remain static. Instead, membership in the domain changes regularly, for example: New Java EE applications are deployed, WebLogic Server instances are created or removed, clusters are added, and so on.
By default, Enterprise Manger Cloud Control is not automatically aware of changes made to the domains, which have been configured as managed targets. However the application does provide the ability to discover and uptake new or modified domain members.
For details about discovering Fusion Middleware domains (including new, modified, and multiple domains), see the "Discovering Middleware Targets" chapter of the Oracle® Enterprise Manager Cloud Control Getting Started with Oracle Fusion Middleware Management:
http://docs.oracle.com/cd/E25178_01/install.1111/e24215/fmw_discovery.htm
2.1.3.1 Automatic Discovery
You can enable a pre-defined Cloud Control job named "WebLogic Domain Refresh" to automatically discover new domain members and add them as managed targets.
-
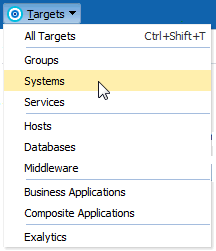
From the Targets menu, select Middleware.
-
Click on the WebLogic Domain you want to enable the job for in the Middleware home page.
-
In the General region of the page, click the timestamp link next to the WebLogic Domain Refreshed property. The Refresh WebLogic Domain dialog opens.
-
Check the Enable Automatic Refresh box in the Refresh WebLogic Domain dialog, then click OK.
Once enabled, the job will check for new domain members once every 24 hours by default. To change the job settings, including the frequency at which it is run:
- Click the Jobs tab.
- Click the job title in the Job Activity page.
- Click Edit.
2.1.4 Prerequisites for Cisco Monitoring
Cisco monitoring in 13c target uses the System Infrastructure Plug-in, where the Agent requires SSH access to Cisco Switch.
12c Target Type: Can monitor Cisco switch via SNMP. SSH access is not mandatory.
13c Target Type: SSH access information is required when adding this target type.
-
You will need to have your Cisco IOS and SNMP credentials available.
2.2 Discovering the Exalytics System Target
An Exalytics system consists of multiple Exalytics machines that are clustered. For monitoring, there are two targets in Enterprise Manager:
-
The Exalytics Machine target that represents one physical machine.
-
The Exalytics System target which represents multiple machines that are clustered and need to be monitored as a whole.
Regardless of the target type to be monitored, you will always select an Exalytics System for discovery - even if there is only one Exalytics Machine.
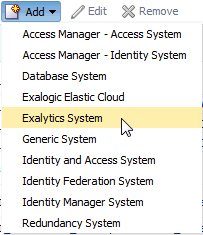
To discover an Exalytics System target:

