Managing and editing custom objects
Note: Opportunity, Purchase History, and Oracle CX Sales Leads custom objects are available for all trims. You can only create new custom objects with the Standard or Enterprise trims, or by purchasing the Oracle Eloqua Data Tools Cloud Service add-on. If you do not have the default custom objects, log in to My Oracle Support and create a service request.
Once a custom object is created, you are able to modify custom object record fields, modify field mapping, copy the custom object, add/upload/view/search records, and check dependencies.
To manage and edit a custom object:
-
Navigate to Audience
 , then click Custom Objects.
 -
Click a custom object in the left-hand panel to open it.
The main menu for the custom object opens.
You have a significant number of menus and options for modifying the custom object, adding custom object records, or running reports on the custom object.
-
Click Custom Object in the upper-right corner, and select the desired option:
- Custom Object Record Fields: Modify or remove existing custom object record fields or add new ones.
- Copy Custom Object: Copy the current custom object and give it a new name. You can specify the destination folder.
- Custom Object Record Services: Add, edit, enable or disable automated record services. See Managing custom object record services for additional information.
- New Custom Object Record: Create a new custom object record by manually adding a participant's information and map it to a contact (or account).
- Upload Custom Object Records: Use this option to upload or update multiple custom object records using the Custom Object Record Upload Wizard. You can upload records from a file on your machine, or set up a routine file transfer from an FTP site.
- Search For Custom Object Records: View existing custom object records. You can edit the record and map it to a contact or account.
- Check Dependency: Identify, edit, or delete current dependencies for this custom object.
-
Click Header Fields in the upper-right corner, and select the desired option:
- New Header: Create a new header field.
- Add Standard Header: Add a standard header field.
-
Click Reporting in the upper-right corner, and select the desired report. See Viewing custom object record reports for more information.
-
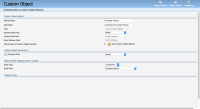
Modify any Custom Object Details as needed:
- Rename the Custom Object in the Display name field.
- Add or modify a brief description in the Description field.
- Click View Custom Object Record
 to search for and view any existing records in the custom object.
-
Modify any Custom Object parameters as needed:
-
Select a field from the Group By Field drop-down list.
Note: A Group By field should be used if there is more than 1 session, to indicate how sessions are grouped. For example, if you want to aggregate multiple form submissions from a single contact by the Email Address or similar field.
-
-
Modify the Default Entity Mapping used in an upload as needed:
-
Select whether the custom object will map to contacts or accounts from the Entity Type drop-down list.
Important: While you can select contact and account fields in your custom object fields, a custom object can only link its records to accounts or contacts, and not both at the same time.
- Select the key field by which to map your records to contacts from the Entity Field drop-down-list.
-
-
Modify any current Header Fields as needed:
- Click the drop-down arrow next to any existing header fields, and select whether to edit or delete the field.
- Select a field to group the header fields from the Group By Field value drop-down list.
- Click Save in the lower-right corner at any time.
