Uploading custom object records
You can use the upload wizard to create or update custom object records using an upload file.
Note: The upload wizard uses the legacy terminology data card and data card set. A data card is a custom object record. A data card set is a custom object.
Before you begin:
- If you are uploading from a file, create your upload file (.txt, .csv, .xls, .xlsx). The upload file should only contain the custom object records that you want to update.
- Separate contact fields in a .csv or .txt file using a comma (,), pipe (|), tab, or semi-colon (;).
- Any field may be quoted (with double quotes).
- Fields containing a line-break, double-quote or the selected delimiter must be quoted.
- If double-quotes are used to enclose fields, then a double-quote in a field must be represented by two double-quote characters.
- The first line or row of the file must be the source fields. Use similar naming conventions for the custom object record fields in your import file, to those in Oracle Eloqua. This will make mapping easier.
- If you are updating custom object records, include the record's unique code in the upload file. Oracle Eloqua will generate a unique code for any new custom object records without the unique code. You can retrieve the unique code by opening the custom object, and clicking View Custom Object Record.
- The Unique Code field has a limit of 100 characters. Values with more than 100 characters will be cut off at 100 characters.
Note: This may result in values that are no longer unique within the upload. If this occurs, only one of the "duplicate" records will be uploaded. If there is an existing record with the shortened unique code, the new record may overwrite some values. Avoid this by keeping the unique code within the 100-character limit.
- If you have a Secure File Transfer Protocol (SFTP) server set up, you can upload your file to the SFTP server. Uploads to Oracle Eloqua from an SFTP server cannot exceed 5 GB.
To upload multiple custom object records:
- Navigate to Audience
 , then click Custom Objects.
 - Open the custom object you want to upload to.
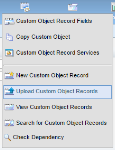
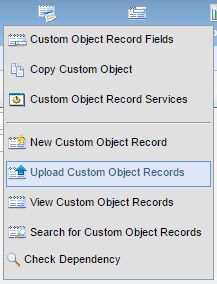
- Click the Custom Object menu and then click Upload Custom Object Records.
- Complete the Upload Details and select the Source of Custom Object Record data. Click Next.
- Select the file in Step 2 Upload Data Source.
 If you are uploading a file from your local computer
- Click Choose File and browse to the upload file. Click Upload and Preview Data.
- Click Next when you're ready.
If you uploading a file via a remote file transfer over SFTP- Select the file format from the Choose file type drop-down list.
- Type the Host, File Path, and User Name.
- Select either to use a password or an SSH key for authentication.
- Click Upload and Preview Data. Click Next when you are ready.
- Map the fields from the source file to fields in Oracle Eloqua in Step 3 Field Mapping and then click Next.
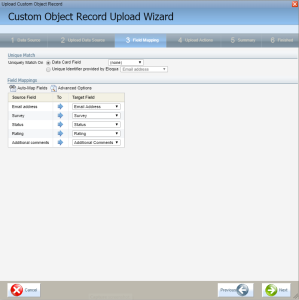
Use the following to help complete this step:
- If you are updating existing custom object records, select the custom object field to use to match custom object records on from the Uniquely Match On options. If no matches are found, new records are created.
If you want to create a new record for each row in your upload file, choose Data Card Field and use the (none) option. Use the Unique Identifier provided by Eloqua option if you customized the Unique Code Field when you created the custom object.
- To have Oracle Eloqua attempt to match source fields to the best possible target fields, click Auto-Map Fields.
- To change when values are updated (for example, update the value if it is blank or not blank) or to set constant values, click Advanced Options.
- If you are updating existing custom object records, select the custom object field to use to match custom object records on from the Uniquely Match On options. If no matches are found, new records are created.
- Configure how the uploaded fields will be translated into custom object record fields in Step 4 Upload Actions and then click Next.
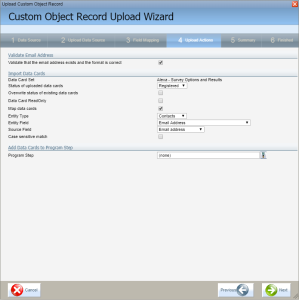
Use the following to help complete this step:
- To validate that email addresses exist in the upload and the format is correct, select the Validate Email Address check box. Clear the option if it does not apply.
- To set the status of uploaded custom object records, select an option from the Status of uploaded data cards drop-down list. The status of a custom object record options are: Registered, In Progress, or On Hold. You can use these status options however you like.
- To update the status of existing custom object records, select the Overwrite status of existing data cards check box.
- To make the custom object records read-only, select the Data Card ReadOnly check box.
- To map new custom object records to existing contact or account records, select the Map data cards check box. You must then select the Entity Type, Entity Field, and Source Field options.
- If the Entity Field data and Source Field data do not match, the custom object record will not be linked to an existing contact or account.
- If the Entity Type is contacts and the Entity Field is Email Address a new contact will be created if there is no match.
- To determine the type of entities in the upload and determine what field identifies them, select the options from the Entity Type, Entity Field, and Source Field drop-down lists.
- To have Oracle Eloqua perform a case sensitive match when comparing to existing contacts, select the Case-sensitive match check box. For example, some CRM fields might be case sensitive.
- To send your custom object records to a step in a Program Builder program, click the Program Step field.
-
Finalize your upload in Step 5 Summary and click Finish.
- Enter the email address to be notified when the upload completes. If you are using multiple email addresses, separate each with a comma.
- To use these upload settings in another upload, select Save these settings for re-use. Otherwise, select Run the upload once using these settings.


If custom object records didn't update
If there are issues with the upload, review the following:
- If you're using a file transfer via SFTP, reach out to your IT team to make sure the SFTP IP address is allowed for your POD. For further information, see Setting up SSH keys.
- If a custom object record's unique code was greater than 100 characters, the shortened code may have become a duplicate of another custom object record. This may cause the duplicate not to upload. If this occurs, shorten the unique code to 100 characters or ensure the first 100 characters are unique.
- If the linkage was not created between a contact or account record and the custom object record, on step 4 of the wizard, select the Map data cards check box. You must then select the Entity Type, Entity Field, and Source Field options. If the Entity Field data and Source Field data do not match, the custom object record will not be linked to an existing contact or account.
- If you used the Remote file over FTP upload option, this can cause the upload wizard to stop responding. Oracle Eloqua 10 does not support the Remote file over FTP option. You must use Remote File over SFTP instead.
- If duplicates are found in the upload, they are merged into a single custom object record.