Chapter 6 Storage Tab
Use the Storage tab to manage, discover and edit file servers and SAN servers (storage arrays), physical disks, access groups and volume groups.
Figure 6.1, “Storage tab” shows the Storage tab.

The Storage tab contains the Perspectives set out in Table 6.1, “Storage Tab Perspective”. The Perspectives available in any particular view vary depending on the item selected in the navigation tree. This table provides a quick reference for all of the available perspectives in the Storage tab. Each perspective provides a different view of your configuration and also includes its own toolbar.
|
Management Pane Perspective |
Description |
|---|---|
Lists the file servers which contain file-based storage. Use this tab to register, edit, delete and discover file-based storage. Select File Servers in the navigation tree to display this tab. See What Types of Storage Can be Used? for more information on file-based storage. |
|
Lists the file systems available on the file server. Use this tab to discover edit, refresh, delete and display events for file systems. Use the Name Filter input field to specify search criteria to filter the displayed results. See Section 1.16, “Name Filters” for more information. Select a file server in the navigation tree and then select File Systems in the Perspective drop-down list to display this tab. |
|
Lists the local file systems available on the file server. Use this tab to refresh and delete local file systems. Select the Local File Systems folder in the navigation tree to display this tab. |
|
| Shared File Systems | Lists all of the shared file systems available within Oracle VM Manager within
the management pane. Use this tab to edit, refresh and
delete shared files systems.
Select the Shared File Systems folder in the navigation tree to display this tab. |
Lists the SAN servers (storage arrays). Use this tab to register, edit, delete, refresh and discover SAN servers. Use the Name Filter input field to specify search criteria to filter the displayed results. See Section 1.16, “Name Filters” for more information. Select SAN Servers in the navigation tree to display this tab. See What Types of Storage Can be Used? for more information on storage arrays. |
|
Lists the physical disks on the storage array. Use this tab to create, edit, clone, delete, refresh, display servers using a physical disk, and display events for physical disks. Select a storage array in the navigation tree and then select Physical Disks in the Perspective drop-down list to display this tab. |
|
Lists the access groups for the storage array. Use this tab to create, edit, delete, present/unpresent and display events for storage array access groups. Also use this tab to grant access to physical disks in the storage array to Oracle VM Servers using the access groups. Select a storage array in the navigation tree and then select Access Groups in the Perspective drop-down list to display this tab. |
|
Lists the volume groups for the storage array. Use this tab to create, edit and delete storage array volume groups. Also use this tab to grant access to physical disks in the storage array to Oracle VM Servers using the volume groups. Select a storage array in the navigation tree and then select Volume Groups in the Perspective drop-down list to display this tab. |
|
|
Info |
Displays a high-level view of the selected object. The Info pane contents change to reflect information about the object selected in the navigation tree. You can use this pane to view information about repositories in your environment. Select Info in the Perspective drop-down list to display the Info pane. |
|
Events |
Events are displayed for each object in the navigation tree and displays events related to that object. Select Events in the Perspective drop-down list to display the Events pane. |
6.1 Toolbar
The navigation pane includes its own toolbar that provides quick access to the most commonly used configuration tools for the Storage tab. Clicking on any of the icons provided in the toolbar opens a dialog or wizard that can guide you through the configuration process for that item. The following tools are available in this toolbar:
6.1.1 Discover File Server
-
Make sure that your storage server exposes a writable file system to the storage network of your server pool.
-
Select the Storage tab.
-
Click Discover File Server
 in the toolbar to start the Discover a
File Server wizard.
in the toolbar to start the Discover a
File Server wizard.
-
The File Server Parameters step is displayed in the wizard, where you enter the information necessary for Oracle VM Manager to discover the external storage mount points.
Enter the storage information:
-
Storage Plug-in: The Oracle VM Storage Connect plug-in corresponding to the type of file server (generic NFS or vendor-specific). As Oracle VM Storage Connect plug-in are located on the Oracle VM Servers, this field is only populated if you have already performed Server Discovery. You cannot add storage without taking this step first.
-
Name: The name you wish to use to identify the file server.
-
Access Host (IP) Address: The host name or IP address of the server offering the file system.
-
Uniform Exports: If all Oracle VM Servers in all server pools have access to the same exports on the file server, leave this as the default (checked). If the file server is configured to offer different exports to different server pools, this box should be unchecked and, once you have completed the steps in the wizard, you need to configure Access Groups so that Oracle VM Manager can be made aware of export permissions. See Section 6.4.4, “Access Groups Perspective” for more information.
ImportantNon-uniform exports are not intended for servers within the same server pool. Your NFS server should be configured to, at least, provide the same exports to all of the servers that belong to a particular clustered server pool.
-
Description: Optional information you would like to add about this file server.
If you are adding a non-generic file server, for example a Sun ZFS Storage Appliance, also enter the additional plug-in options to enable Oracle VM Manager to access the file server's configuration management functions:
-
Admin Host: The host name or IP address where administrative access to the file server is allowed with appropriate credentials.
-
Admin User Name: A user name with administrator access to the file server.
-
Admin Password: The administrator password for the user name you entered.
Click Next.
-
-
The Add Admin Servers step is displayed in the wizard. If you are working with a non-clustered server pool, you may skip this step. Admin servers are designated Oracle VM Servers that are capable of logging into a storage array or file server to perform administrative functions such as extending a file system or creating a new LUN. In the case of an NFS file server, admin servers are only used to validate the file server. For backward compatibility reasons, admin servers are also capable of being used to perform file server refreshes in much the same way as refresh servers.
Use the arrow buttons to move the required Oracle VM Servers from the Available Admin Server(s) box to the Selected Admin Server(s) box.
Click Next.
-
If you are using non-uniform file system exports (as selected in the first dialog of this wizard), the Select Refresh Servers step is displayed in the wizard. Refresh server are designated Oracle VM Servers that have visibility of one or more file systems on an NFS file server. These servers are used for file system refreshing across server pools.
Each file system must be assigned at least one refresh server to allow for file system refreshing. During the refresh of a file server, the refresh servers are used to refresh all file systems used across all pools. For this reason it is critical that your refresh server list contains at least one server from each server pool.
ImportantIn some environments, it is plausible to expect that the file server is configured to provide different file system exports to different server pools. Therefore, it is possible that no single server has access to all of the exports provided by a file server. By assigning a server from each server pool to handle file system refreshes, Oracle VM can ensure that all file systems are refreshed across all server pools. If your environment is set up in such a way, you need to configure Access Groups so that the manager can be made aware of export permissions. See Section 6.4.4, “Access Groups Perspective” for more information.
If you select the Refresh All option available in the context menu for Server Pools on the Servers and VMs tab, the configured refresh servers specified for each file system are used to perform a comprehensive file system refresh and you are not provided with an option to use one or more alternate refresh servers.
In this dialog, you must include at least one server from each server pool that you intend to create. You may select more than one server from each server pool in order to ensure high availability, but adding more than two servers is superfluous.
NoteIf you defined a group of admin servers in the previous step, for backward compatibility reasons, these servers are added to the refresh server list, and can be used to perform file server refreshes as well. This is not apparent in the Oracle VM Manager Web Interface.
-
If you are using non-uniform file system exports (as selected in the first dialog of this wizard), click Finish to complete the wizard. A message is displayed to inform you that you should now create access groups for the file server. See Section 6.4.4, “Access Groups Perspective” for information on creating an access group. When at least one access group is configured, you should then refresh the file systems on the file server to make them available for use in Oracle VM Manager. Section 6.3.1.4, “Refresh File Server” for information on refreshing a file server.
If you are using uniform file system exports, click Next to proceed to the Select File Systems step of the wizard. If any file systems contain existing virtual machine resources, select the corresponding check boxes to have Oracle VM Manager add the existing resources to the environment.
At the top of the dialog box there is an option to provide a Name Filter. You can use this filter to specify search criteria to limit the objects displayed. See Section 1.16, “Name Filters” for more information.
Click Finish to complete the file server registration.
The new file server appears in the navigation pane, under File Servers.
NoteIf you created shares to be used as server pool file systems, these are discovered in the same process. Since these file systems are relatively small, be sure to keep those available for the server pools and create storage repositories on the higher capacity file systems.
At the end of the file server discovery a refresh operation is triggered to make sure all file systems available on the file server appear in Oracle VM Manager. When the operation is complete, and if you select the file server in the navigation pane, the available file systems appear in the File Systems overview table in the management pane.
WarningIf a server is unable to mount the file system for some reason, such as a permissions related issue, Oracle VM Manager does not report the failure as this would stop any further mounting. If a server is unable to access a file system the reason is reported in the
/var/log/ovs-agent.loglog file on the server.


6.1.2 Discover SAN Server
This first phase covers the discovery and registration part, meaning how you discover the container of the storage elements you intend to use in your environment.
Depending on the selected storage type and plug-in, you may be required to enter additional information than shown in this example (which uses an ISCSI SAN server) when registering your storage array, as shown in the following table.
|
Information Field Required |
Generic iSCSI |
Vendor-specific iSCSI |
Generic Fibre Channel |
Vendor-specific Fibre Channel |
|---|---|---|---|---|
|
Access host and port |
Yes |
Yes |
No |
No |
|
Access credentials/CHAP |
No |
Optional |
No |
No |
|
Administration information |
No |
Yes |
No |
Yes |
|
Plug-in private data |
No |
Optional |
No |
Optional |
-
Make sure that your storage server exposes raw disks (Fibre Channel SAN volumes, iSCSI targets and LUNs) to the storage network of your server pool.
-
Select the Storage tab.
-
Click Discover SAN Server
 to start the
Discover SAN Server wizard.
to start the
Discover SAN Server wizard.
-
The Discover SAN Server step is displayed in the wizard, where you enter the information necessary for Oracle VM Manager to discover the external storage elements.
Enter the SAN storage information:
-
Name: The name you wish to use to identify the SAN server.
-
Description: Optional information you would like to add about this SAN server.
-
Storage Type: The array is either a fibre channel or an iSCSI storage server.
-
Storage Plug-in: The storage plug-in corresponding to the type of storage array, which is either generic iSCSI, or a vendor-specific iSCSI or fibre channel plug-in. As Oracle VM Storage Connect plug-in are located on the Oracle VM Servers, this field is only populated if you have already performed Server Discovery. You cannot add storage without taking this step first.
-
Plugin Private Data: Any vendor-specific Oracle VM Storage Connect plug-in data that may be required. This is not available to generic storage.
NoteWhen registering a vendor-specific storage array, be sure to double-check the information you entered in the plug-in private data field. Once the storage array is registered, this field can no longer be modified. If you need to update the plug-in private data, you must unregister and re-register the storage array.
-
Admin Host: The host name or IP address of the administration host. This is not available to generic storage.
-
Admin Username: The admin host username. This is not available to generic storage.
-
Admin Password: The password for the admin user. This is not available to generic storage.
Click Next.
-
-
The Access Information step is displayed in the wizard.
NoteThis is not applicable to Fibre Channel storage arrays. Although Fibre Channel storage arrays have a host, they do not have an access host IP address defined in Oracle VM Manager, and as a result, specifying access information is not required.
An access host is the IP address of the network interface that has access to the SAN server and creates a network path to the storage. In this dialog enter one or more access hosts to create network paths to the storage. To add multiple paths (for multipathing), add multiple access hosts. You must have at least one access host to the storage. On some ISCSI servers, only one access host is supported, so your screen may differ from the example in this step. If so, enter the access host IP address, access port and optionally the CHAP authentication details on the screen that you see, and the remaining parts of this step are not required to perform.
If you want to use CHAP authentication to connect to the SAN server, check the Use CHAP check box.
Click Create New Access Host
 to add access hosts for the SAN server.
The Create Access Host dialog box is displayed.

Enter the IP address and access port of the host that has access to the SAN server. The default access port for iSCSI is 3260. If you checked CHAP authentication in the previous dialog, enter the username and password to access the storage. Click OK.
Repeat this step for each access host, for example, you may have access hosts such as 10.172.76.130, 10.172.76.131, 10.172.77.130, and 10.172.77.131 to enable multipathing.
When you have entered all access hosts, click Next.
-
For most SAN servers the wizard moves straight to the Add Admin Servers step. However, if you have vendor-specific storage hardware with an admin host handling more than one storage array, such as certain HP EVAs and EMC arrays, you must enter the name of the array to be used for the new SAN server. The wizard recognizes this type of storage and displays the Set Storage Name step when applicable. Enter the storage name and click Next.
-
The Add Admin Servers step is displayed in the wizard. If you are working with a non-clustered server pool, you may skip this step.
Use the arrow buttons to move the required Oracle VM Servers from the Available Server(s) box to the Selected Server(s) box. This selects which Oracle VM Servers are to be made available to perform Oracle VM related admin operations on the SAN server. Click Next.
-
The Manage Access Group step is displayed in the wizard.
This final phase of the wizard offers you the access group configuration functionality. Within an access group you add the storage initiators to Oracle VM Servers to complete the storage configuration.
ImportantYou must add a storage initiator to an access group for each Oracle VM Server that you want to access the SAN server. If you do not add any storage initiators, Oracle VM cannot log in to the storage array and no LUNs can be accessed.
A default access group may be created during the discovery process.
-
If no access group exists, you can create one from this dialog by clicking Create Access Group
 .
.
-
If you want to modify an existing access group for use with this SAN server, select it from the list and click Edit Access Group
 .
.
-
If necessary, you can delete an access group by clicking Delete Access Group

This example uses a generic ISCSI SAN server, so a default access group is created. Select the default access group in the table and click Edit Access Group
, then select the
Storage Initiators tab in the
Edit Access Group dialog box.
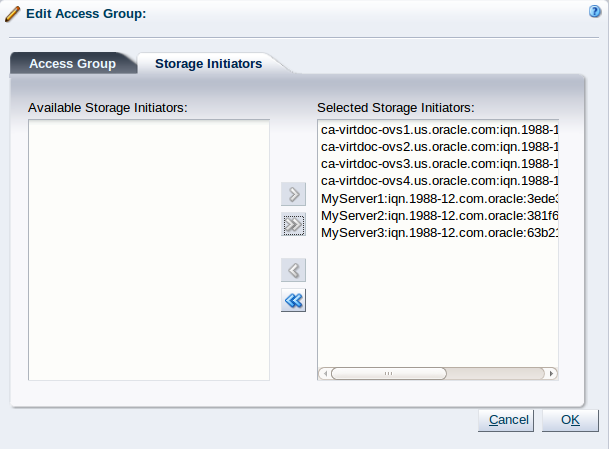
Select and move the Oracle VM Servers into the Selected Storage Initiators box to add storage initiators to each Oracle VM Server. Click OK.
The access group management functionality is also available outside this wizard. To access it, you must go to the Storage tab, select a SAN server in the navigation pane, and change the Perspective field in the management pane to Access Groups, as described in Section 6.6.4, “Access Groups Perspective”. Access group management for an individual Oracle VM Server is also described in Section 3.5.7.1, “View Access Groups for Selected Initiator”.
Click Finish to complete the SAN server discovery operation.
The new storage array appears in the navigation pane, under SAN Servers. Prior to the access group configuration, the Oracle VM Storage Connect plug-in established a link to the storage location. By configuring the access group(s), you grant one or more Oracle VM Servers access to the storage array, so that the storage elements or physical disks offered by the SAN server appear in Oracle VM Manager. Access group configuration and management is described in detail in the next section. The exception to the rule is the fibre channel storage array, which does not use the concept of access groups but offers its LUNs to all Oracle VM Servers connected to the fibre channel storage network.
NoteIf you configured CHAP authentication for your SAN server and CHAP is not properly configured on your SAN storage device, or the authentication credentials that you provide for your Access Groups are incorrect, none of the LUNs or physical disks available on your SAN server are discovered and no error message is returned. You may need to check the logs on your SAN server to evaluate the required action that should be taken.
-


6.3 File Servers Folder
The File Servers navigation folder contains each file server that has been configured within the environment. The structure of the navigation provided in the navigation tree is discussed in more detail in Section 6.2, “Summary”.
Clicking on the File Servers navigation folder in the navigation tree allows you to access different perspectives in the management pane. Each perspective provides its own view of all of the file servers within Oracle VM Manager. Most of the perspectives also include separate perspective toolbars that enable you to perform various configuration or management tasks specific to the view currently displayed within the management pane. The File Servers navigation folder offers the following perspectives within the management pane:
6.3.1 File Servers Perspective
The File Servers perspective lists the different file servers configured in your environment. The following columns are displayed in the management pane:
-
Name: The name that has been configured for the file server.
-
Description: A description entered for the file server when it was created or edited.
This perspective includes a toolbar that consists of the following options:
|
Toolbar Icon Option |
Icon |
Description |
|---|---|---|
|
|
Displays the Discover File Server wizard. Use this option to discover a new file server. |
|
|
|
Displays the Edit File Server dialog box. |
|
|
|
Displays the Delete Confirmation dialog box. Use this option to delete the selected file server. |
|
|
|
Refreshes the list of storage elements made available by the selected file server. Use this option to rescan a file server after making changes to its configuration. This updates the storage information known to Oracle VM Manager. Since refreshing storage may be time consuming, a confirmation dialog box is displayed before the operation is launched. |
|
|
|
Generate an XML report on one or more file servers. |
|
|
|
Displays context sensitive help. |
6.3.1.1 Discover File Server
-
Make sure that your storage server exposes a writable file system to the storage network of your server pool.
-
Select the Storage tab.
-
Click Discover File Server
in the toolbar to start the Discover a
File Server wizard.
-
The File Server Parameters step is displayed in the wizard, where you enter the information necessary for Oracle VM Manager to discover the external storage mount points.
Enter the storage information:
-
Storage Plug-in: The Oracle VM Storage Connect plug-in corresponding to the type of file server (generic NFS or vendor-specific). As Oracle VM Storage Connect plug-in are located on the Oracle VM Servers, this field is only populated if you have already performed Server Discovery. You cannot add storage without taking this step first.
-
Name: The name you wish to use to identify the file server.
-
Access Host (IP) Address: The host name or IP address of the server offering the file system.
-
Uniform Exports: If all Oracle VM Servers in all server pools have access to the same exports on the file server, leave this as the default (checked). If the file server is configured to offer different exports to different server pools, this box should be unchecked and, once you have completed the steps in the wizard, you need to configure Access Groups so that Oracle VM Manager can be made aware of export permissions. See Section 6.4.4, “Access Groups Perspective” for more information.
ImportantNon-uniform exports are not intended for servers within the same server pool. Your NFS server should be configured to, at least, provide the same exports to all of the servers that belong to a particular clustered server pool.
-
Description: Optional information you would like to add about this file server.
If you are adding a non-generic file server, for example a Sun ZFS Storage Appliance, also enter the additional plug-in options to enable Oracle VM Manager to access the file server's configuration management functions:
-
Admin Host: The host name or IP address where administrative access to the file server is allowed with appropriate credentials.
-
Admin User Name: A user name with administrator access to the file server.
-
Admin Password: The administrator password for the user name you entered.
Click Next.
-
-
The Add Admin Servers step is displayed in the wizard. If you are working with a non-clustered server pool, you may skip this step. Admin servers are designated Oracle VM Servers that are capable of logging into a storage array or file server to perform administrative functions such as extending a file system or creating a new LUN. In the case of an NFS file server, admin servers are only used to validate the file server. For backward compatibility reasons, admin servers are also capable of being used to perform file server refreshes in much the same way as refresh servers.
Use the arrow buttons to move the required Oracle VM Servers from the Available Admin Server(s) box to the Selected Admin Server(s) box.
Click Next.
-
If you are using non-uniform file system exports (as selected in the first dialog of this wizard), the Select Refresh Servers step is displayed in the wizard. Refresh server are designated Oracle VM Servers that have visibility of one or more file systems on an NFS file server. These servers are used for file system refreshing across server pools.
Each file system must be assigned at least one refresh server to allow for file system refreshing. During the refresh of a file server, the refresh servers are used to refresh all file systems used across all pools. For this reason it is critical that your refresh server list contains at least one server from each server pool.
ImportantIn some environments, it is plausible to expect that the file server is configured to provide different file system exports to different server pools. Therefore, it is possible that no single server has access to all of the exports provided by a file server. By assigning a server from each server pool to handle file system refreshes, Oracle VM can ensure that all file systems are refreshed across all server pools. If your environment is set up in such a way, you need to configure Access Groups so that the manager can be made aware of export permissions. See Section 6.4.4, “Access Groups Perspective” for more information.
If you select the Refresh All option available in the context menu for Server Pools on the Servers and VMs tab, the configured refresh servers specified for each file system are used to perform a comprehensive file system refresh and you are not provided with an option to use one or more alternate refresh servers.
In this dialog, you must include at least one server from each server pool that you intend to create. You may select more than one server from each server pool in order to ensure high availability, but adding more than two servers is superfluous.
NoteIf you defined a group of admin servers in the previous step, for backward compatibility reasons, these servers are added to the refresh server list, and can be used to perform file server refreshes as well. This is not apparent in the Oracle VM Manager Web Interface.
-
If you are using non-uniform file system exports (as selected in the first dialog of this wizard), click Finish to complete the wizard. A message is displayed to inform you that you should now create access groups for the file server. See Section 6.4.4, “Access Groups Perspective” for information on creating an access group. When at least one access group is configured, you should then refresh the file systems on the file server to make them available for use in Oracle VM Manager. Section 6.3.1.4, “Refresh File Server” for information on refreshing a file server.
If you are using uniform file system exports, click Next to proceed to the Select File Systems step of the wizard. If any file systems contain existing virtual machine resources, select the corresponding check boxes to have Oracle VM Manager add the existing resources to the environment.
At the top of the dialog box there is an option to provide a Name Filter. You can use this filter to specify search criteria to limit the objects displayed. See Section 1.16, “Name Filters” for more information.
Click Finish to complete the file server registration.
The new file server appears in the navigation pane, under File Servers.
NoteIf you created shares to be used as server pool file systems, these are discovered in the same process. Since these file systems are relatively small, be sure to keep those available for the server pools and create storage repositories on the higher capacity file systems.
At the end of the file server discovery a refresh operation is triggered to make sure all file systems available on the file server appear in Oracle VM Manager. When the operation is complete, and if you select the file server in the navigation pane, the available file systems appear in the File Systems overview table in the management pane.
WarningIf a server is unable to mount the file system for some reason, such as a permissions related issue, Oracle VM Manager does not report the failure as this would stop any further mounting. If a server is unable to access a file system the reason is reported in the
/var/log/ovs-agent.loglog file on the server.
6.3.1.2 Edit File Server
It is possible to edit the configuration for an existing file server. The steps and options to do so are described below.
-
If you need to modify a file server, select the File Servers folder in the navigation pane, select the file servers in the management pane table.
-
Click the
Edit File Server icon in the
toolbar.
-
A dialog opens to allow you to reconfigure the file server. The dialog has three separate tabs:
-
Configuration: This tab allows you to edit the following information:
-
Name: The name of the file server in Oracle VM Manager.
-
Access Host: The host name or IP address of the server offering the file system.
-
Uniform Exports: If all Oracle VM Servers in all server pools have access to the same exports on the file server, leave this as the default (checked). If the file server is configured to offer different exports to different server pools, this box should be unchecked and, once you have completed the steps in the wizard, you need to configure Access Groups so that Oracle VM Manager can be made aware of export permissions. See Section 6.4.4, “Access Groups Perspective” for more information.
ImportantNon-uniform exports are not intended for servers within the same server pool. Your NFS server should be configured to, at least, provide the same exports to all of the servers that belong to a particular clustered server pool.
If you change the file server from non-uniform to uniform file system exports, all refresh servers will be removed. A confirmation dialog is displayed before the action can be completed.
-
Description: Optional information you would like to add about this file server.
-
Admin Host: The host name or IP address where administrative access to the file server is allowed with appropriate credentials. (Only available for non-generic file servers).
-
Admin User Name: A user name with administrator access to the file server. (Only available for non-generic file servers).
-
Admin Password: The administrator password for the user name you entered. (Only available for non-generic file servers).
-
-
Admin Servers: This tab allows you to manage which servers are delegated as Admin servers. Admin servers are Oracle VM Servers that are capable of logging into a storage array or file server to perform administrative functions such as extending a file system or creating a new LUN. In the case of an NFS file server, admin servers are only used to validate the file server.
-
Refresh Servers:
NoteThe Refresh Servers tab is only available if you are using non-uniform file system exports (the uniform exports check box on the Configuration tab is unchecked).
This tab allows you to manage which servers are delegated as Refresh servers. Each file system must be assigned at least one refresh server to allow for file system refreshing. During the refresh of a file server, the refresh servers are used to refresh all file systems used across all pools. For this reason it is critical that your refresh server list contains at least one server from each server pool.
-
-
When you have finished editing the file server, click OK to save the changes, or Cancel to exit out of the dialog without saving any changes.
6.3.1.3 Delete File Server
It is possible to delete an existing file server if it is no longer in use by any servers within any server pools and the Oracle VM Storage Connect plug-in that you are using supports this operation. The steps and options to do so are described below.
-
If you need to delete a file server, select the File Servers folder in the navigation pane and select one or more file servers in the management pane table.
-
Click on the
Delete File Server icon in
the toolbar.
-
The Delete Confirmation dialog box is displayed. Click OK to delete the file server.
6.3.1.4 Refresh File Server
When changes are made to the disks, file systems or exports on a file server, it is useful to refresh the configuration of your file servers to make Oracle VM Manager aware of the changes.
-
Select the File Servers folder in the navigation pane, select one or more file servers in the management pane table.
-
Click on the
 Refresh File Server option in
the toolbar.
Refresh File Server option in
the toolbar.
-
The selected file servers are refreshed and their configurations are updated within Oracle VM Manager.
6.3.1.5 Generate Report
You can generate an XML report on one or more file servers. For more information about object reporting, see Section 7.1, “Reports”.
-
Select the File Servers folder in the navigation pane.
-
Select one or more file servers in the management pane table.
-
Click
 Generate Report in the
management pane toolbar.
Generate Report in the
management pane toolbar.
-
The report is generated and sent to the browser.
6.4 File Server Item
Each File Server navigation item is listed underneath the Section 6.3, “File Servers Folder” when it has been expanded. The structure of the navigation provided in the navigation tree is discussed in more detail in Section 6.2, “Summary”.
Clicking on a File Server navigation item in the navigation tree allows you to access different perspectives in the management pane. Each perspective provides its own view of the file server within Oracle VM Manager. Most of the perspectives also include separate perspective toolbars that enable you to perform various configuration or management tasks specific to the view currently displayed within the management pane. A File Server navigation item offers the following perspectives within the management pane:
6.4.1 Info Perspective
The Info perspective is common to many elements within the Oracle VM Manager Web Interface. This perspective always shows the individually configured parameters for an item that is currently selected in the navigation tree. Some of these configured parameters may be automatically populated through a discovery process, while others may have been configured manually during the creation of the object that is selected.
The Info perspective or dialog contains a perspective toolbar with the following options:
|
Toolbar Icon Option |
Icon |
Description |
|---|---|---|
|
|
Displays context sensitive help. |
This perspective includes information reported by the NFS File Server based on information returned by the Oracle VM Storage Connect plug-in in use. Some fields may not be populated, if the plug-in does not support them. The information and fields available may vary depending on the plug-in that you are using. The Generic File Server plug-in returns the following information:
-
File Server Name: The configured name for the file server.
-
Description: The configured description for the file server.
-
Storage Name: The storage server controller name specified when the storage server was created. Uniquely identifies the correct controller if the storage server manager supports multiple controllers.
-
Status: The status of the file server as reported by the file server.
-
Validated: Whether or not the file server has been validated by Oracle VM Manager. No special storage operations supported by the Oracle VM Storage Connect plug-in may occur until the storage server is validated by Oracle VM Manager.
-
Storage Plug-In: The name of the Oracle VM Storage Connect plug-in that is used to connect to the file server.
-
Storage Plug-In Version: The version number of the Oracle VM Storage Connect plug-in used to connect to the file server.
-
Plug-in Private Data: Additional parameters passed to the Oracle VM Storage Connect plug-in.
-
Total Size (GiB): The total size, in GiB, reported by the file server.
-
Free Size (GiB): The available free size, GiB, reported by the file server.
-
Used Size (GiB): The amount of used space, in GiB, reported by the file server.
Additional fields may be listed to indicate the support status for various storage related functions as reported by the Oracle VM Storage Connect plug-in in use.
6.4.2 Events Perspective
The Events perspective is common to many elements within the Oracle VM Manager Web Interface. The Events perspective generally appears as an option within the Perspectives drop-down menu on the management pane of tabs that include a navigation tree. In this case, the Events perspective displays events specific to the item selected in the navigation tree and presents these in the management pane.
The Events perspective may also appear within a dialog that is
triggered from a Display Selected
Events... ![]() perspective toolbar option. In this case,
the Events perspective dialog displays events specific to one
or more elements selected in the management pane.
perspective toolbar option. In this case,
the Events perspective dialog displays events specific to one
or more elements selected in the management pane.
If an object has an error event associated with it you must acknowledge the event to clear the error and return the object to normal operations. For example, this can occur if an Oracle VM Server or virtual machine appear as Stopped (Error) in the status. The object in error is flagged with a red icon in the navigation tree. Oracle VM Servers, virtual machines, repositories and storage objects can have error events associated with them.
Since Oracle VM Manager attempts to resolve issues automatically as much as possible, not all events can be acknowledged by a user within the Oracle VM Manager Web Interface. Therefore, a flag is set for events that are user acknowledgeable. If an event does not have this flag set, you are unable to acknowledge it, since it is handled internally by Oracle VM Manager.
The Events perspective or dialog contains a table with the following columns of information for each event:
-
Severity: The severity level assigned to the event.
-
Timestamp: The date and time that the event occurred.
-
Modify Time: The last recorded date and time that the event was modified.
-
Type: The type of event according to Oracle VM Manager's event categorization model.
-
Summary: A summary description of the event.
-
Acknowledged: Whether an error event has been acknowledged.
-
User Acknowledgeable: Whether or not an event can be acknowledged by the user.
Event Descriptions
An arrow displays next to each event in the table. Click the arrow to expand and view the Description section that provides additional details for the event.
The Events perspective or dialog contains a perspective toolbar with the following options:
|
Toolbar Icon Option |
Icon |
Description |
|---|---|---|
|
Acknowledge |
|
Acknowledge a selected error event to clear the error and return the object to normal operations. Note that this option is only available for user acknowledgeable events. |
|
Acknowledge All |
|
Acknowledge all error events associated with an object to clear the errors and return the object to normal operations. Note that only user acknowledgeable events are cleared. This button is always clickable, even if there are no user acknowledgeable events. Clicking it when there are no user acknowledgeable events results in an error dialog. |
|
Display Count |
A drop-down menu that allows you to select the number of events that should be displayed in the management pane, while you are currently in this perspective. |
Acknowledging Events/Errors
If an object has an error event associated with it you must acknowledge the event to clear the error and return the object to normal operations. For example, this can occur if an Oracle VM Server or virtual machine appear as Stopped (Error) in the status. The object in error is flagged with a red icon in the navigation tree. Oracle VM Servers, virtual machines, repositories and storage objects can have error events associated with them. The following procedures show you how to clear errors and return the object to normal operations.
-
Click the Servers and VMs tab.
-
Select the Oracle VM Server in the navigation tree.
-
Select Events from the Perspective drop-down list in the management pane.
-
Select the user acknowledgeable error event and click Acknowledge
 , or click
Acknowledge All
, or click
Acknowledge All
 to clear all user acknowledgeable
errors.
to clear all user acknowledgeable
errors.
-
Click the Servers and VMs tab.
-
Select the server pool, or Oracle VM Server on which the virtual machine resides in the navigation tree.
-
Select Virtual Machines from the Perspective drop-down list in the management pane.
-
Select the virtual machine in the management pane table. Click Display Selected VM Events...
 .
.
-
The Events dialog box is displayed. Select the user acknowledgeable error event and click Acknowledge
, or click
Acknowledge All
to clear all user acknowledgeable
errors. Click
Close.
-
Click the Repositories tab.
-
Select the repository in the navigation tree.
-
Select Events from the Perspective drop-down list in the management pane.
-
Select the error event and click Acknowledge
, or click
Acknowledge All
to clear all errors.
-
Click the Storage tab.
-
Select File Servers, SAN Servers, or a storage server in the navigation tree.
-
Select Events from the Perspective drop-down list in the management pane.
-
Select the user acknowledgeable error event and click Acknowledge
, or click
Acknowledge All
to clear all user acknowledgeable
errors.
6.4.3 File Systems Perspective
The File Systems perspective lists the different file systems configured in your environment and running on an NFS file server. The following columns are displayed in the management pane:
-
Name: The name that has been configured for the file system.
-
Event Severity: The event level severity for each file system.
-
Refreshed: Whether or not the file system has been refreshed.
-
Size (GiB): A grouping that consists of the following columns:
-
Free: The size of the file system, in GiB, that is currently free.
-
Used: The size of the file system, in GiB, that is currently in use.
-
Total: The total size, in GiB, of the file system.
-
-
Used By: The server pool or servers that are making use of the file system.
-
Description: A description entered for the file system when it was created or edited.
Note that the sizing data represented for any file system is most accurate immediately after a file system refresh has been performed. The sizing data for file systems that are in use to host repositories or server pool cluster data may be updated automatically at regular intervals if the file system statistics collection service is configured. See Section 7.4, “Preferences” for more information on configuring this service and Section 2.4, “File System Statistics” for more information on how this service gathers data.
This perspective includes a toolbar that consists of the following options:
|
Toolbar Icon Option |
Icon |
Description |
|---|---|---|
|
|
Displays the Edit File System dialog box. |
|
|
|
Displays the Delete Confirmation dialog box. Use this option to delete the selected file system. | |
|
|
Refreshes the file systems made available by the selected file server. Use this option to rescan the file systems after making changes to its configuration. This updates the storage information known to Oracle VM Manager. |
|
|
|
Display the Events dialog box which contains the job event associated with the selected file systems. |
|
|
|
Displays context sensitive help. |
6.4.3.1 Edit File System
It is possible to edit the configuration for an existing file system. The steps and options to do so are described below.
-
If you need to modify an NFS file system, select a file server item contained the File Servers folder in the navigation pane, change perspective to the File Systems perspective. Select the file system that you wish to edit in the management pane table.
-
Click on the
Edit File System icon in the
toolbar.
-
A dialog opens to allow you to reconfigure the file system. You can edit the following parameters:
-
Name: The name of the file system in Oracle VM Manager.
-
Description: Optional information you would like to add about this file system.
-
-
When you have finished editing the file system, click OK to save the changes, or Cancel to exit out of the dialog without saving any changes.
6.4.3.2 Delete File System
It is possible to delete an existing file system on an NFS File Server if it is no longer in use by any servers within any server pools. The steps and options to do so are described below.
-
If you need to delete an NFS file system, select a file server item contained the File Servers folder in the navigation pane, change perspective to the File Systems perspective. Select the file system or file systems that you wish to delete in the management pane table.
-
Click on the
Delete File System icon in
the toolbar.
-
The Delete Confirmation dialog box is displayed. Click OK to delete the file system.
6.4.3.3 Refresh File System
When changes are made to the file systems or exports on a file server, it is useful to refresh the configuration of your file systems to make Oracle VM Manager aware of the changes.
-
Select a file server item contained the File Servers folder in the navigation pane, change perspective to the File Systems perspective. Select the file system or file systems that you wish to refresh in the management pane table.
-
Click on the
Refresh File System option in
the toolbar.
-
The selected file systems are refreshed and their configurations are updated within Oracle VM Manager.
6.4.3.4 Display Events
The Events perspective is common to many elements within the Oracle VM Manager Web Interface. The Events perspective generally appears as an option within the Perspectives drop-down menu on the management pane of tabs that include a navigation tree. In this case, the Events perspective displays events specific to the item selected in the navigation tree and presents these in the management pane.
The Events perspective may also appear within a dialog that is
triggered from a Display Selected
Events... ![]() perspective toolbar option. In this case,
the Events perspective dialog displays events specific to one
or more elements selected in the management pane.
perspective toolbar option. In this case,
the Events perspective dialog displays events specific to one
or more elements selected in the management pane.
If an object has an error event associated with it you must acknowledge the event to clear the error and return the object to normal operations. For example, this can occur if an Oracle VM Server or virtual machine appear as Stopped (Error) in the status. The object in error is flagged with a red icon in the navigation tree. Oracle VM Servers, virtual machines, repositories and storage objects can have error events associated with them.
Since Oracle VM Manager attempts to resolve issues automatically as much as possible, not all events can be acknowledged by a user within the Oracle VM Manager Web Interface. Therefore, a flag is set for events that are user acknowledgeable. If an event does not have this flag set, you are unable to acknowledge it, since it is handled internally by Oracle VM Manager.
The Events perspective or dialog contains a table with the following columns of information for each event:
-
Severity: The severity level assigned to the event.
-
Timestamp: The date and time that the event occurred.
-
Modify Time: The last recorded date and time that the event was modified.
-
Type: The type of event according to Oracle VM Manager's event categorization model.
-
Summary: A summary description of the event.
-
Acknowledged: Whether an error event has been acknowledged.
-
User Acknowledgeable: Whether or not an event can be acknowledged by the user.
Event Descriptions
An arrow displays next to each event in the table. Click the arrow to expand and view the Description section that provides additional details for the event.
The Events perspective or dialog contains a perspective toolbar with the following options:
|
Toolbar Icon Option |
Icon |
Description |
|---|---|---|
|
Acknowledge |
|
Acknowledge a selected error event to clear the error and return the object to normal operations. Note that this option is only available for user acknowledgeable events. |
|
Acknowledge All |
|
Acknowledge all error events associated with an object to clear the errors and return the object to normal operations. Note that only user acknowledgeable events are cleared. This button is always clickable, even if there are no user acknowledgeable events. Clicking it when there are no user acknowledgeable events results in an error dialog. |
|
Display Count |
A drop-down menu that allows you to select the number of events that should be displayed in the management pane, while you are currently in this perspective. |
Acknowledging Events/Errors
If an object has an error event associated with it you must acknowledge the event to clear the error and return the object to normal operations. For example, this can occur if an Oracle VM Server or virtual machine appear as Stopped (Error) in the status. The object in error is flagged with a red icon in the navigation tree. Oracle VM Servers, virtual machines, repositories and storage objects can have error events associated with them. The following procedures show you how to clear errors and return the object to normal operations.
-
Click the Servers and VMs tab.
-
Select the Oracle VM Server in the navigation tree.
-
Select Events from the Perspective drop-down list in the management pane.
-
Select the user acknowledgeable error event and click Acknowledge
, or click
Acknowledge All
to clear all user acknowledgeable
errors.
-
Click the Servers and VMs tab.
-
Select the server pool, or Oracle VM Server on which the virtual machine resides in the navigation tree.
-
Select Virtual Machines from the Perspective drop-down list in the management pane.
-
Select the virtual machine in the management pane table. Click Display Selected VM Events...
.
-
The Events dialog box is displayed. Select the user acknowledgeable error event and click Acknowledge
, or click
Acknowledge All
to clear all user acknowledgeable
errors. Click
Close.
-
Click the Repositories tab.
-
Select the repository in the navigation tree.
-
Select Events from the Perspective drop-down list in the management pane.
-
Select the error event and click Acknowledge
, or click
Acknowledge All
to clear all errors.
-
Click the Storage tab.
-
Select File Servers, SAN Servers, or a storage server in the navigation tree.
-
Select Events from the Perspective drop-down list in the management pane.
-
Select the user acknowledgeable error event and click Acknowledge
, or click
Acknowledge All
to clear all user acknowledgeable
errors.
6.4.4 Access Groups Perspective
Usually an NFS server is configured to export the same file systems to different server pools. This setup is described as having uniform exports. If, however, your NFS server is configured to export different file systems to different server pools, no single server in any server pool has full access to all of the exports available on the NFS server. This setup is described as having non-uniform exports. In these cases, in order for Oracle VM Manager to properly handle file system refreshes, you need to configure Access Groups to define the permissions available to each server pool. If your exports are uniform across all server pools, you do not need to perform this operation.
It is important to understand that when describing uniform and non-uniform exports, we are describing how the NFS server is configured to present exports to all of the servers belonging to a particular server pool. Within any clustered server pool, all of the servers must have access to the same exports on the NFS server.
The Access Groups perspective lists the different Access Groups configured in your environment. The following columns are displayed in the management pane:
-
Name: The name that has been configured for the access group.
-
Event Severity: The event level severity associated with the access group.
-
File Server: The file server that the access group applies to.
-
Servers: The servers that belong to the access group.
-
Description: A description entered for the access group when it was created or edited.
This perspective includes a toolbar that consists of the following options:
|
Toolbar Icon Option |
Icon |
Description |
|---|---|---|
|
|
Displays the Create an Access Group dialog box. Use this option to create a new access group. |
|
|
|
Displays the Edit Access Group dialog box. Use this option to edit access group settings such as name, description, file systems belonging to the Access Group and the servers that have access to these file systems. |
|
|
|
Displays the Delete Confirmation dialog box. Use this option to delete the selected access group. |
|
|
|
Display the Events dialog box which contains the job event associated with the selected access groups. |
|
|
|
Displays context sensitive help. |
6.4.4.1 Create Access Group
-
In the Storage tab, expand the File Servers folder in the navigation pane and select a file server listed here. In the management pane, select the Access Groups perspective from the drop down.
-
To add a new Access Group, click the Create an Access Group icon
. -
The Create an Access Group wizard appears. Enter a meaningful name and description for the Access Group that you are creating. The group defines the set of file systems that are available to a particular set of servers. Click Next.
-
In the Select File Systems step, identify the file systems that are accessible via the set of servers that you are going to assign to the Access Group. Use the arrow buttons to move them into the Selected File System(s) panel. Click Next.
-
In the Select Servers step, select either the individual servers or the server pools that have access to the file system exports that you selected in the previous step. Use the arrow buttons to move them into the Selected Server(s)/Selected Server Pool(s) panel. The option to add an entire server pool to the access group is a convenience and simply adds all of the servers that belong to a particular server pool at the time that you perform the action. If you add or remove a server from a server pool after you have created the access group, the access group configuration is not automatically updated.
-
Click Finish to complete the process of defining a new Access Group.
-
A file system may only be associated with one Access Group. If you create a new Access Group for a file system that is already associated with an existing Access Group, the file system is disassociated from the original Access Group.
6.4.4.2 Edit Access Group
-
In the Storage tab, expand the File Servers folder in the navigation pane and select a file server listed here. In the management pane, select the Access Groups perspective from the drop down.
-
To edit an existing Access Group, click the Edit Access Group icon
. The Edit Access Group dialog
opens. Tabs are provided to allow you to change the Access Group details, File Systems and
Servers.
6.4.4.3 Delete Access Groups
-
On the Storage tab, expand the File Servers folder in the navigation pane and select a file server listed here. In the management pane, select the Access Groups perspective from the drop down.
-
To delete an existing Access Group, click the Delete Access Group icon
. A confirmation dialog is displayed before the action can be
completed.
6.4.4.4 Display Events
The Events perspective is common to many elements within the Oracle VM Manager Web Interface. The Events perspective generally appears as an option within the Perspectives drop-down menu on the management pane of tabs that include a navigation tree. In this case, the Events perspective displays events specific to the item selected in the navigation tree and presents these in the management pane.
The Events perspective may also appear within a dialog that is
triggered from a Display Selected
Events... ![]() perspective toolbar option. In this case,
the Events perspective dialog displays events specific to one
or more elements selected in the management pane.
perspective toolbar option. In this case,
the Events perspective dialog displays events specific to one
or more elements selected in the management pane.
If an object has an error event associated with it you must acknowledge the event to clear the error and return the object to normal operations. For example, this can occur if an Oracle VM Server or virtual machine appear as Stopped (Error) in the status. The object in error is flagged with a red icon in the navigation tree. Oracle VM Servers, virtual machines, repositories and storage objects can have error events associated with them.
Since Oracle VM Manager attempts to resolve issues automatically as much as possible, not all events can be acknowledged by a user within the Oracle VM Manager Web Interface. Therefore, a flag is set for events that are user acknowledgeable. If an event does not have this flag set, you are unable to acknowledge it, since it is handled internally by Oracle VM Manager.
The Events perspective or dialog contains a table with the following columns of information for each event:
-
Severity: The severity level assigned to the event.
-
Timestamp: The date and time that the event occurred.
-
Modify Time: The last recorded date and time that the event was modified.
-
Type: The type of event according to Oracle VM Manager's event categorization model.
-
Summary: A summary description of the event.
-
Acknowledged: Whether an error event has been acknowledged.
-
User Acknowledgeable: Whether or not an event can be acknowledged by the user.
Event Descriptions
An arrow displays next to each event in the table. Click the arrow to expand and view the Description section that provides additional details for the event.
The Events perspective or dialog contains a perspective toolbar with the following options:
|
Toolbar Icon Option |
Icon |
Description |
|---|---|---|
|
Acknowledge |
|
Acknowledge a selected error event to clear the error and return the object to normal operations. Note that this option is only available for user acknowledgeable events. |
|
Acknowledge All |
|
Acknowledge all error events associated with an object to clear the errors and return the object to normal operations. Note that only user acknowledgeable events are cleared. This button is always clickable, even if there are no user acknowledgeable events. Clicking it when there are no user acknowledgeable events results in an error dialog. |
|
Display Count |
A drop-down menu that allows you to select the number of events that should be displayed in the management pane, while you are currently in this perspective. |
Acknowledging Events/Errors
If an object has an error event associated with it you must acknowledge the event to clear the error and return the object to normal operations. For example, this can occur if an Oracle VM Server or virtual machine appear as Stopped (Error) in the status. The object in error is flagged with a red icon in the navigation tree. Oracle VM Servers, virtual machines, repositories and storage objects can have error events associated with them. The following procedures show you how to clear errors and return the object to normal operations.
-
Click the Servers and VMs tab.
-
Select the Oracle VM Server in the navigation tree.
-
Select Events from the Perspective drop-down list in the management pane.
-
Select the user acknowledgeable error event and click Acknowledge
, or click
Acknowledge All
to clear all user acknowledgeable
errors.
-
Click the Servers and VMs tab.
-
Select the server pool, or Oracle VM Server on which the virtual machine resides in the navigation tree.
-
Select Virtual Machines from the Perspective drop-down list in the management pane.
-
Select the virtual machine in the management pane table. Click Display Selected VM Events...
.
-
The Events dialog box is displayed. Select the user acknowledgeable error event and click Acknowledge
, or click
Acknowledge All
to clear all user acknowledgeable
errors. Click
Close.
-
Click the Repositories tab.
-
Select the repository in the navigation tree.
-
Select Events from the Perspective drop-down list in the management pane.
-
Select the error event and click Acknowledge
, or click
Acknowledge All
to clear all errors.
-
Click the Storage tab.
-
Select File Servers, SAN Servers, or a storage server in the navigation tree.
-
Select Events from the Perspective drop-down list in the management pane.
-
Select the user acknowledgeable error event and click Acknowledge
, or click
Acknowledge All
to clear all user acknowledgeable
errors.
6.5 SAN Servers Folder
The SAN Servers navigation folder contains each SAN server that has been configured within the environment. The structure of the navigation provided in the navigation tree is discussed in more detail in Section 6.2, “Summary”.
Clicking on the SAN Servers navigation folder in the navigation tree allows you to access different perspectives in the management pane. Each perspective provides its own view of all of the SAN servers within Oracle VM Manager. Most of the perspectives also include separate perspective toolbars that enable you to perform various configuration or management tasks specific to the view currently displayed within the management pane. The File Servers navigation folder offers the following perspectives within the management pane:
6.5.1 SAN Servers Perspective
The SAN Servers perspective lists the different SAN servers configured in your environment. The following columns are displayed in the management pane:
-
Name: The name that has been configured for the SAN server.
-
Status: The status of the SAN server (whether or not the disk is online).
-
Size (GiB): A grouping that consists of the following columns:
-
Allocated: The total size available for use by the SAN server.
-
Free: The size of the SAN server, in GiB, that is currently free.
-
Used: The size of the SAN server, in GiB, that is currently in use.
-
Total: The total size, in GiB, of the SAN server.
-
-
Description: A description entered for the SAN server when it was created or edited.
This perspective includes a toolbar that consists of the following options:
|
Toolbar Icon Option |
Icon |
Description |
|---|---|---|
|
|
Displays the Discover SAN Server wizard. Use this option to discover a new SAN server. |
|
|
|
Displays the Edit SAN Server dialog box. |
|
|
|
Displays the Delete Confirmation dialog box. Use this option to delete the selected SAN server. | |
|
|
Refreshes the list of storage elements made available by the selected SAN server. Use this option to rescan a SAN server after making changes to its configuration. This updates the storage information known to Oracle VM Manager. Since refreshing storage may be time consuming, a confirmation dialog box is displayed before the operation is launched. |
|
|
|
Generate an XML report on one or more SAN servers. |
|
|
|
Displays context sensitive help. |
6.5.1.1 Discover SAN Server
This first phase covers the discovery and registration part, meaning how you discover the container of the storage elements you intend to use in your environment.
Depending on the selected storage type and plug-in, you may be required to enter additional information than shown in this example (which uses an ISCSI SAN server) when registering your storage array, as shown in the following table.
|
Information Field Required |
Generic iSCSI |
Vendor-specific iSCSI |
Generic Fibre Channel |
Vendor-specific Fibre Channel |
|---|---|---|---|---|
|
Access host and port |
Yes |
Yes |
No |
No |
|
Access credentials/CHAP |
No |
Optional |
No |
No |
|
Administration information |
No |
Yes |
No |
Yes |
|
Plug-in private data |
No |
Optional |
No |
Optional |
-
Make sure that your storage server exposes raw disks (Fibre Channel SAN volumes, iSCSI targets and LUNs) to the storage network of your server pool.
-
Select the Storage tab.
-
Click Discover SAN Server
to start the
Discover SAN Server wizard.
-
The Discover SAN Server step is displayed in the wizard, where you enter the information necessary for Oracle VM Manager to discover the external storage elements.
Enter the SAN storage information:
-
Name: The name you wish to use to identify the SAN server.
-
Description: Optional information you would like to add about this SAN server.
-
Storage Type: The array is either a fibre channel or an iSCSI storage server.
-
Storage Plug-in: The storage plug-in corresponding to the type of storage array, which is either generic iSCSI, or a vendor-specific iSCSI or fibre channel plug-in. As Oracle VM Storage Connect plug-in are located on the Oracle VM Servers, this field is only populated if you have already performed Server Discovery. You cannot add storage without taking this step first.
-
Plugin Private Data: Any vendor-specific Oracle VM Storage Connect plug-in data that may be required. This is not available to generic storage.
NoteWhen registering a vendor-specific storage array, be sure to double-check the information you entered in the plug-in private data field. Once the storage array is registered, this field can no longer be modified. If you need to update the plug-in private data, you must unregister and re-register the storage array.
-
Admin Host: The host name or IP address of the administration host. This is not available to generic storage.
-
Admin Username: The admin host username. This is not available to generic storage.
-
Admin Password: The password for the admin user. This is not available to generic storage.
Click Next.
-
-
The Access Information step is displayed in the wizard.
NoteThis is not applicable to Fibre Channel storage arrays. Although Fibre Channel storage arrays have a host, they do not have an access host IP address defined in Oracle VM Manager, and as a result, specifying access information is not required.
An access host is the IP address of the network interface that has access to the SAN server and creates a network path to the storage. In this dialog enter one or more access hosts to create network paths to the storage. To add multiple paths (for multipathing), add multiple access hosts. You must have at least one access host to the storage. On some ISCSI servers, only one access host is supported, so your screen may differ from the example in this step. If so, enter the access host IP address, access port and optionally the CHAP authentication details on the screen that you see, and the remaining parts of this step are not required to perform.
If you want to use CHAP authentication to connect to the SAN server, check the Use CHAP check box.
Click Create New Access Host
to add access hosts for the SAN server.
The Create Access Host dialog box is displayed.
Enter the IP address and access port of the host that has access to the SAN server. The default access port for iSCSI is 3260. If you checked CHAP authentication in the previous dialog, enter the username and password to access the storage. Click OK.
Repeat this step for each access host, for example, you may have access hosts such as 10.172.76.130, 10.172.76.131, 10.172.77.130, and 10.172.77.131 to enable multipathing.
When you have entered all access hosts, click Next.
-
For most SAN servers the wizard moves straight to the Add Admin Servers step. However, if you have vendor-specific storage hardware with an admin host handling more than one storage array, such as certain HP EVAs and EMC arrays, you must enter the name of the array to be used for the new SAN server. The wizard recognizes this type of storage and displays the Set Storage Name step when applicable. Enter the storage name and click Next.
-
The Add Admin Servers step is displayed in the wizard. If you are working with a non-clustered server pool, you may skip this step.
Use the arrow buttons to move the required Oracle VM Servers from the Available Server(s) box to the Selected Server(s) box. This selects which Oracle VM Servers are to be made available to perform Oracle VM related admin operations on the SAN server. Click Next.
-
The Manage Access Group step is displayed in the wizard.
This final phase of the wizard offers you the access group configuration functionality. Within an access group you add the storage initiators to Oracle VM Servers to complete the storage configuration.
ImportantYou must add a storage initiator to an access group for each Oracle VM Server that you want to access the SAN server. If you do not add any storage initiators, Oracle VM cannot log in to the storage array and no LUNs can be accessed.
A default access group may be created during the discovery process.
-
If no access group exists, you can create one from this dialog by clicking Create Access Group
.
-
If you want to modify an existing access group for use with this SAN server, select it from the list and click Edit Access Group
.
-
If necessary, you can delete an access group by clicking Delete Access Group
This example uses a generic ISCSI SAN server, so a default access group is created. Select the default access group in the table and click Edit Access Group
, then select the
Storage Initiators tab in the
Edit Access Group dialog box.
Select and move the Oracle VM Servers into the Selected Storage Initiators box to add storage initiators to each Oracle VM Server. Click OK.
The access group management functionality is also available outside this wizard. To access it, you must go to the Storage tab, select a SAN server in the navigation pane, and change the Perspective field in the management pane to Access Groups, as described in Section 6.6.4, “Access Groups Perspective”. Access group management for an individual Oracle VM Server is also described in Section 3.5.7.1, “View Access Groups for Selected Initiator”.
Click Finish to complete the SAN server discovery operation.
The new storage array appears in the navigation pane, under SAN Servers. Prior to the access group configuration, the Oracle VM Storage Connect plug-in established a link to the storage location. By configuring the access group(s), you grant one or more Oracle VM Servers access to the storage array, so that the storage elements or physical disks offered by the SAN server appear in Oracle VM Manager. Access group configuration and management is described in detail in the next section. The exception to the rule is the fibre channel storage array, which does not use the concept of access groups but offers its LUNs to all Oracle VM Servers connected to the fibre channel storage network.
NoteIf you configured CHAP authentication for your SAN server and CHAP is not properly configured on your SAN storage device, or the authentication credentials that you provide for your Access Groups are incorrect, none of the LUNs or physical disks available on your SAN server are discovered and no error message is returned. You may need to check the logs on your SAN server to evaluate the required action that should be taken.
-
6.5.1.2 Edit SAN Server
It is possible to edit the configuration for an existing SAN server. The steps and options to do so are described below.
-
Select the SAN Servers folder in the navigation tree, select the SAN Servers option in the Perspective drop-down list, select the SAN server that you wish to edit in the table.
-
Click on the
Edit SAN
server icon in the toolbar.
-
A dialog opens to allow you to reconfigure the SAN server. The dialog has three separate tabs:
-
Configuration: A tab containing a form allowing you to edit the following information:
-
Name: The name of the SAN server in Oracle VM Manager.
-
Description: Optional information you would like to add about this SAN server.
-
Enable LIP Scan: A Loop Initialization Protocol (LIP) scan is optional and is only applicable when modifying an Unmanaged FibreChannel Storage Array:
-
Disabled: This is the default scanning mechanism. When you refresh the storage array, the SCSI bus is scanned.
-
Enabled: A LIP, issued to an Oracle VM Server connected to a fabric, causes the Host Bus Adapter (HBA) driver to reset the SCSI bus, and therefore may also cause the target to reset. When LIP has completed, the SCSI bus is scanned.
Note-
If an Unmanaged FibreChannel Storage Array has admin servers lower than Release 3.4.5, then LIP Scan cannot be enabled.
-
If an Unmanaged FibreChannel Storage Array has LIP Scan enabled, then no servers lower than Release 3.4.5 can be added to the list of admin servers.
-
LIP scans are supported on the
lpfcandqla2xxxFibre Channel HBA drivers.
-
-
-
Storage Plugin: The Oracle VM Storage Connect plug-in used to access the SAN Server. A full list of available plug-ins is only displayed if the SAN server uses a non-generic Oracle VM Storage Connect plug-in.
-
Storage Name: The storage name used by an Oracle VM Storage Connect plug-in that requires it.
-
Admin Host: The host name or IP address where administrative access to the SAN server is allowed with appropriate credentials. (Only available for non-generic SAN servers).
-
Admin User Name: A user name with administrator access to the file server. (Only available for non-generic SAN servers).
-
Change Password: To modify the admin password, you must select the Change Password check box.
-
Admin Password: The administrator password for the user name you entered. (Only available for non-generic SAN servers).
-
-
Access: A tab allowing you to manage the IP addresses, port numbers and user credentials to use for each access host that is available for the SAN server. This tab is not available for Fibre Channel SAN servers.
-
Admin Servers: A tab allowing you to manage which servers are delegated as Admin servers. Admin servers are Oracle VM Servers that are capable of logging into a storage array or file server to perform administrative functions such as extending a file system or creating a new LUN.
-
-
When you have finished editing the SAN server, click OK to save the changes, or Cancel to exit out of the dialog without saving any changes.
6.5.1.3 Delete SAN Server
It is possible to delete an existing SAN server if it is no longer in use by any Oracle VM Servers within any server pools and the Oracle VM Storage Connect plug-in that you are using supports this operation. The steps and options to do so are described below.
-
If you need to delete a SAN server, select the SAN Servers folder in the navigation tree, select the SAN Servers option in the Perspective drop-down list, select one or more SAN servers in the table
-
Click on the
Delete SAN server icon in the
toolbar.
-
The Delete Confirmation dialog box is displayed. Click OK to delete the SAN server.
6.5.1.4 Refresh SAN Server
When changes are made to the disks or file systems on a SAN server, it is useful to refresh the configuration of your SAN servers to make Oracle VM Manager aware of the changes. This option is not available for unmanaged SAN servers.
-
Select the SAN Servers folder in the navigation tree, select the SAN Servers option in the Perspective drop-down list, select one or more SAN servers in the table
-
Click on the
Refresh SAN server option in
the toolbar.
-
The selected SAN servers are refreshed and their configurations are updated within Oracle VM Manager.
6.5.1.5 Generate Report
You can generate an XML report on one or more SAN servers. For more information about object reporting, see Section 7.1, “Reports”.
-
Select the SAN Servers folder in the navigation pane.
-
Select one or more SAN servers in the management pane table.
-
Click
Generate Report in the
management pane toolbar.
-
The report is generated and sent to the browser.
6.6 SAN Server Item
Each SAN Server navigation item is listed underneath the Section 6.5, “SAN Servers Folder” when it has been expanded. The structure of the navigation provided in the navigation tree is discussed in more detail in Section 6.2, “Summary”.
Clicking on a SAN Server navigation item in the navigation tree allows you to access different perspectives in the management pane. Each perspective provides its own view of the SAN server within Oracle VM Manager. Most of the perspectives also include separate perspective toolbars that enable you to perform various configuration or management tasks specific to the view currently displayed within the management pane. A SAN Server navigation item offers the following perspectives within the management pane:
6.6.1 Info Perspective
The Info perspective is common to many elements within the Oracle VM Manager Web Interface. This perspective always shows the individually configured parameters for an item that is currently selected in the navigation tree. Some of these configured parameters may be automatically populated through a discovery process, while others may have been configured manually during the creation of the object that is selected.
The Info perspective or dialog contains a perspective toolbar with the following options:
|
Toolbar Icon Option |
Icon |
Description |
|---|---|---|
|
|
Displays context sensitive help. |
This perspective includes the following information:
-
SAN Server Name: The configured name for the SAN server.
-
Admin Host: The configured admin host to access this SAN server.
-
Admin Username: The configured admin username to access this SAN server.
-
Storage Name: The name of storage array as returned by the Oracle VM Storage Connect plug-in.
-
Storage Type: The storage type for the storage array.
-
Description: The configured description for the SAN server.
-
SAN Server's Storage Description: The description returned for the SAN server as returned by the Oracle VM Storage Connect plug-in.
-
Status: The status of the SAN server as reported by the SAN server.
-
Validated: Whether or not the SAN server has been validated by Oracle VM Manager. No special storage operations supported by the Oracle VM Storage Connect plug-in may occur until the storage server is validated by Oracle VM Manager.
-
Storage Plug-In: The name of the Oracle VM Storage Connect plug-in used to connect to the SAN server.
-
Storage Plug-In Version: The version number of the Oracle VM Storage Connect plug-in used to connect to the SAN server.
-
Plug-in Private Data: Additional parameters passed to the Oracle VM Storage Connect plug-in.
-
Total Size (GiB): The total size, in GiB, reported by the SAN server.
-
Free Size (GiB): The available free size, in GiB, reported by the SAN server.
-
Used Size (GiB): The amount of used space reported by the SAN server.
Additional fields may be listed to indicate the support status for various storage related functions as reported by the Oracle VM Storage Connect plug-in in use.
6.6.2 Events Perspective
The Events perspective is common to many elements within the Oracle VM Manager Web Interface. The Events perspective generally appears as an option within the Perspectives drop-down menu on the management pane of tabs that include a navigation tree. In this case, the Events perspective displays events specific to the item selected in the navigation tree and presents these in the management pane.
The Events perspective may also appear within a dialog that is
triggered from a Display Selected
Events... ![]() perspective toolbar option. In this case,
the Events perspective dialog displays events specific to one
or more elements selected in the management pane.
perspective toolbar option. In this case,
the Events perspective dialog displays events specific to one
or more elements selected in the management pane.
If an object has an error event associated with it you must acknowledge the event to clear the error and return the object to normal operations. For example, this can occur if an Oracle VM Server or virtual machine appear as Stopped (Error) in the status. The object in error is flagged with a red icon in the navigation tree. Oracle VM Servers, virtual machines, repositories and storage objects can have error events associated with them.
Since Oracle VM Manager attempts to resolve issues automatically as much as possible, not all events can be acknowledged by a user within the Oracle VM Manager Web Interface. Therefore, a flag is set for events that are user acknowledgeable. If an event does not have this flag set, you are unable to acknowledge it, since it is handled internally by Oracle VM Manager.
The Events perspective or dialog contains a table with the following columns of information for each event:
-
Severity: The severity level assigned to the event.
-
Timestamp: The date and time that the event occurred.
-
Modify Time: The last recorded date and time that the event was modified.
-
Type: The type of event according to Oracle VM Manager's event categorization model.
-
Summary: A summary description of the event.
-
Acknowledged: Whether an error event has been acknowledged.
-
User Acknowledgeable: Whether or not an event can be acknowledged by the user.
Event Descriptions
An arrow displays next to each event in the table. Click the arrow to expand and view the Description section that provides additional details for the event.
The Events perspective or dialog contains a perspective toolbar with the following options:
|
Toolbar Icon Option |
Icon |
Description |
|---|---|---|
|
Acknowledge |
|
Acknowledge a selected error event to clear the error and return the object to normal operations. Note that this option is only available for user acknowledgeable events. |
|
Acknowledge All |
|
Acknowledge all error events associated with an object to clear the errors and return the object to normal operations. Note that only user acknowledgeable events are cleared. This button is always clickable, even if there are no user acknowledgeable events. Clicking it when there are no user acknowledgeable events results in an error dialog. |
|
Display Count |
A drop-down menu that allows you to select the number of events that should be displayed in the management pane, while you are currently in this perspective. |
Acknowledging Events/Errors
If an object has an error event associated with it you must acknowledge the event to clear the error and return the object to normal operations. For example, this can occur if an Oracle VM Server or virtual machine appear as Stopped (Error) in the status. The object in error is flagged with a red icon in the navigation tree. Oracle VM Servers, virtual machines, repositories and storage objects can have error events associated with them. The following procedures show you how to clear errors and return the object to normal operations.
-
Click the Servers and VMs tab.
-
Select the Oracle VM Server in the navigation tree.
-
Select Events from the Perspective drop-down list in the management pane.
-
Select the user acknowledgeable error event and click Acknowledge
, or click
Acknowledge All
to clear all user acknowledgeable
errors.
-
Click the Servers and VMs tab.
-
Select the server pool, or Oracle VM Server on which the virtual machine resides in the navigation tree.
-
Select Virtual Machines from the Perspective drop-down list in the management pane.
-
Select the virtual machine in the management pane table. Click Display Selected VM Events...
.
-
The Events dialog box is displayed. Select the user acknowledgeable error event and click Acknowledge
, or click
Acknowledge All
to clear all user acknowledgeable
errors. Click
Close.
-
Click the Repositories tab.
-
Select the repository in the navigation tree.
-
Select Events from the Perspective drop-down list in the management pane.
-
Select the error event and click Acknowledge
, or click
Acknowledge All
to clear all errors.
-
Click the Storage tab.
-
Select File Servers, SAN Servers, or a storage server in the navigation tree.
-
Select Events from the Perspective drop-down list in the management pane.
-
Select the user acknowledgeable error event and click Acknowledge
, or click
Acknowledge All
to clear all user acknowledgeable
errors.
6.6.3 Physical Disks Perspective
The Physical Disks perspective lists the different physical disks configured in your environment and running on a SAN storage array. The following columns are displayed in the management pane:
-
Name: The name that has been configured for the physical disk
-
Event Severity: The event level severity for the physical disk.
-
Size (GiB): The size, in GiB, of the physical disk.
-
Volume Group: The volume group that the physical disk belongs to.
-
Server: The servers that have access to the physical disk.
-
Status: The status of the physical disk (whether or not the disk is online).
-
Shareable: Whether the physical disk is shareable or not.
-
Description: A description entered for the physical disk when it was created or edited.
-
VM(s): Virtual machines using the physical disk.
Alongside each physical disk entry in the table, there is an arrow that allows you to expand the view for each entry. This exposes further information:
-
Name: The user-specified alias for the physical disk. The name can be changed without changing the name of the physical disk on the storage array.
-
User Friendly Name: The name of the physical disk on the storage array. The name was specified when the disk was created and cannot be changed.
-
SAN Server: The SAN server that the physical disk belongs to.
-
Thin Provision: Whether or not thin provisioning is supported by the physical disk.
-
Type: The type of storage that the physical disk is a part of (for example, iSCSI or Fibre Channel).
-
Reserved by Server(s): Whether or not the physical disk is unavailable for use by Oracle VM Manager.
-
Storage Targets: The endpoint provided by the storage server through which the server may direct commands to the physical disk. The storage target provides access to the physical disk.
-
Server Pool: The server pool that the physical disk belongs to.
-
Repository: The repository that the physical disk belongs to.
-
VM(s): Virtual machines using the physical disk.
-
ID: The UUID for the physical disk. The UUID is a universally unique identifier that Oracle VM Manager assigns to the physical disk.
-
Page83 ID: The unique SCSI identifier for the physical disk.
-
Access Groups: The access groups that the physical disk belongs to.
-
Extra Information: Information that is passed to and from the Oracle VM Storage Connect plug-in for use internally by the plug-in.
-
Absolute Path: The absolute path to the location of the disk.
The management functions you can perform on the disk are available as icons in the perspective toolbar. Some management options are only available to SAN server disks that use a non-generic Storage Connect plug-in.
|
Toolbar Icon Option |
Icon |
Description |
|---|---|---|
|
|
Displays the Create Physical Disk dialog box. Use this option to create a new physical disk in the selected volume group of the storage array of your choice. This option is not supported for storage arrays using a generic Oracle VM Storage Connect plug-in. |
|
|
|
Displays the Edit Physical Disk dialog box. Use this option to change the name, size, provisioning and share ability of the selected physical disk. |
|
|
|
Displays the Delete Confirmation dialog box. Use this option to delete the selected physical disk. | |
|
|
Displays the Clone Physical Disk dialog box. Use this option to clone a physical disk to another physical disk or to a disk image on a file server. |
|
|
|
Refreshes the physical disks on a storage array. Use this option to rescan the physical disks after making changes to the configuration of a storage array. This updates the storage information known to Oracle VM Manager. |
|
|
|
Displays the Servers using Physical Disk dialog box. Use this option to view which servers are using a selected physical disk. |
|
|
|
Display the Events dialog box which contains the job event associated with the selected physical disks. |
|
|
|
Displays context sensitive help. |
6.6.3.1 Create Physical Disk (not supported on Generic)
On SAN Servers that are not using a generic Oracle VM Storage Connect plug-in, it is frequently possible to create a new physical disk.
-
Expand the SAN Servers folder in the navigation tree, select a SAN server item contained within the folder. Select the Physical Disks option in the Perspective drop-down list.
-
Click on the
Create Physical Disk option
in the toolbar.
-
The Create Physical Disk dialog is displayed. Enter or select the following:
-
Volume Group: A volume group that you want the physical disk to belong to.
-
Name: A name for the physical disk.
-
Size (GiB): The size of the physical disk, in GiB.
-
Extra Information: Optional information that is passed to and from the Oracle VM Storage Connect plug-in for use internally by the plug-in.
-
Description: An optional description of the physical disk.
-
Shareable: Whether or not the physical disk is shareable.
-
Thin Provision: Whether or not thin provisioning is to be supported by the physical disk.
-
-
When you have finished editing the parameters to define the new physical disk, click OK to save the changes, or Cancel to exit out of the dialog without saving any changes.
6.6.3.2 Edit Physical Disk
It is possible to edit the configuration for a physical disk either available on a SAN server or as local or shared storage. The steps and options to do so are described below.
-
On the Storage tab, expand the SAN Servers folder in the navigation tree, select a SAN server item contained within the folder. Select the Physical Disks option in the Perspective drop-down list. Select the physical disk that you wish to edit in the table presented in the management pane.
To edit the physical disk configuration for a physical disk used by a particular server, on the Servers and VMs tab, expand the Server Pools or Unassigned Servers folder, to select a particular server in the navigation tree. Select the Physical Disks option in the Perspective drop-down list. Select the physical disk that you wish to edit in the table presented in the management pane.
-
Click on the
Edit Physical Disk icon in
the toolbar.
-
A dialog opens to allow you to reconfigure the Physical Disk. The dialog has the following options:
-
ID: A non-editable field containing the physical disk's UUID as it is stored within Oracle VM Manager.
-
Name: A field to change the name of the physical disk within Oracle VM Manager.
-
Current Size(GiB): A non-editable field containing the physical disk's current size, in GiB.
-
New Size(GiB): A field to change the size, in GiB, of the physical disk. The size of the physical disk can only be increased in size.
-
Description: A text field allowing a description of the physical disk.
-
Shareable: A check box that determines whether or not the disk can be shared.
-
Thin Provision: A non-editable field describing whether or not thin provisioning is supported by the disk.
-
-
When you have finished editing the physical disk, click OK to save the changes, or Cancel to exit out of the dialog without saving any changes.
6.6.3.3 Delete Physical Disk
It is possible to delete an existing physical disk if it is no longer used in your Oracle VM environment and the Oracle VM Storage Connect plug-in that you are using supports this operation. Two types of physical disks are used in an Oracle VM environment:
-
Local physical disk - A physical disk installed locally on a specific Oracle VM Server.
-
SAN Server physical disk - A physical disk that is made available to the SAN Server during the discovery process.
Each physical disk type can be deleted using the Oracle VM Manager Web Interface.
-
There are two options available that you can use to delete a physical disk from your Oracle VM environment:
-
To delete a local physical disk:
Expand the Servers and VMs tab, expand the Server Pools or Unassigned Servers folder, and select a particular server in the navigation tree. Select the Physical Disks option in the Perspective drop-down list. Select the physical disk that you want to delete in the table presented in the management pane.
-
To delete a SAN Server physical disk:
Use the instructions in step a or alternatively, expand the Storage tab, expand the SAN Servers folder in the navigation tree, and select a SAN server item contained within the folder. Select the Physical Disks option in the Perspective drop-down list. Select the physical disk that you wish to delete in the table presented in the management pane.
-
-
Click on the
Delete Physical
Disk icon in the toolbar.
-
The Delete Confirmation dialog box is displayed. Click OK to delete the physical disk.
6.6.3.4 Clone Physical Disk
It is possible to clone a physical disk. The steps and options to do so are described below.
-
On the Storage tab, expand the SAN Servers folder in the navigation tree, select a SAN server item contained within the folder. Select the Physical Disks option in the Perspective drop-down list. Select the physical disk that you wish to clone in the table presented in the management pane.
To clone a physical disk used by a particular server, on the Servers and VMs tab, expand the Server Pools or Unassigned Servers folder, to select a particular server in the navigation tree. Select the Physical Disks option in the Perspective drop-down list. Select the physical disk that you wish to clone in the table presented in the management pane.
-
Click on the
 Clone Physical Disk icon in
the toolbar.
Clone Physical Disk icon in
the toolbar.
-
A dialog opens to allow you to clone the Physical Disk. The dialog has the following options:
-
Name: A field to set the name of the physical disk clone that you are going to create within Oracle VM Manager.
-
Clone Target Type: A drop-down menu allowing you to select the type of storage to be used for the physical disk clone:
-
Physical Disk: Copies the data from one physical disk to another.
-
Repository: Copies the data from the physical disk into a virtual disk image in an existing repository.
-
-
Clone Target: A searchable field to allow you to select the target location where the clone is to be stored.
-
Clone Type: A drop-down menu allowing you to select the type of clone to create:
-
Sparse Copy: Copies only the written data from the physical disk to the target clone.
-
Non-sparse Copy: Performs a block copy of the physical disk to the target clone.
-
-
-
When you have finished setting the clone parameters for the physical disk, click OK to begin the clone job, or Cancel to exit out of the dialog without saving any changes.
6.6.3.5 Refresh Physical Disk
When changes are made to the physical disks on a SAN server or Oracle VM Server, it is useful to refresh the configuration of your physical disks to make Oracle VM Manager aware of the changes.
-
Expand the SAN Servers folder in the navigation tree, select a SAN server item contained within the folder. Select the Physical Disks option in the Perspective drop-down list. Select the physical disk or disks that you wish to refresh in the table presented in the management pane.
To refresh physical disks used by a particular server, on the Servers and VMs tab, expand the Server Pools or Unassigned Servers folder, to select a particular server in the navigation tree. Select the Physical Disks option in the Perspective drop-down list. Select the physical disk that you wish to refresh in the table presented in the management pane.
-
Click on the
Refresh Physical Disk option
in the toolbar.
-
The selected physical disks are refreshed and their configurations are updated within Oracle VM Manager.
If you encounter an error, when refreshing a physical disk with a repository located on it, similar to the following:
OVMAPI_7281E Cannot perform operation on file system...
You may need to ensure that the repository is under the ownership of the Oracle VM Manager instance that you are using. See Section 4.3.1.2, “Edit Repository” for more information.
6.6.3.6 Display Servers Using a Physical Disk
It is possible to display the Oracle VM Servers that are using a physical disk available on a SAN server. The steps and options to do so are described below.
-
Expand the SAN Servers folder in the navigation tree, select a SAN server item contained within the folder. Select the Physical Disks option in the Perspective drop-down list. Select the physical disk that you wish to view in the table presented in the management pane.
-
Click on the
 Display Servers using Physical
Disk icon in the toolbar.
Display Servers using Physical
Disk icon in the toolbar.
-
A dialog opens to display the Oracle VM Servers that are configured to use the Physical Disk. The dialog provides the following information in tabular format:
-
Name: The name of the Oracle VM Server.
-
Description: The configured description for the Oracle VM Server.
-
Status: The running status of the Oracle VM Server.
-
Utilization (%): The percentage of the disk that is utilized by the Oracle VM Server.
-
Maintenance Mode: Whether or not the Oracle VM Server is in maintenance mode.
-
Owned: Whether or not the current instance of Oracle VM Manager has ownership of the Oracle VM Server.
-
-
When you have finished viewing the list of servers with access to the physical disk, click Close to exit out of the dialog.
6.6.3.7 Display Events
The Events perspective is common to many elements within the Oracle VM Manager Web Interface. The Events perspective generally appears as an option within the Perspectives drop-down menu on the management pane of tabs that include a navigation tree. In this case, the Events perspective displays events specific to the item selected in the navigation tree and presents these in the management pane.
The Events perspective may also appear within a dialog that is
triggered from a Display Selected
Events... ![]() perspective toolbar option. In this case,
the Events perspective dialog displays events specific to one
or more elements selected in the management pane.
perspective toolbar option. In this case,
the Events perspective dialog displays events specific to one
or more elements selected in the management pane.
If an object has an error event associated with it you must acknowledge the event to clear the error and return the object to normal operations. For example, this can occur if an Oracle VM Server or virtual machine appear as Stopped (Error) in the status. The object in error is flagged with a red icon in the navigation tree. Oracle VM Servers, virtual machines, repositories and storage objects can have error events associated with them.
Since Oracle VM Manager attempts to resolve issues automatically as much as possible, not all events can be acknowledged by a user within the Oracle VM Manager Web Interface. Therefore, a flag is set for events that are user acknowledgeable. If an event does not have this flag set, you are unable to acknowledge it, since it is handled internally by Oracle VM Manager.
The Events perspective or dialog contains a table with the following columns of information for each event:
-
Severity: The severity level assigned to the event.
-
Timestamp: The date and time that the event occurred.
-
Modify Time: The last recorded date and time that the event was modified.
-
Type: The type of event according to Oracle VM Manager's event categorization model.
-
Summary: A summary description of the event.
-
Acknowledged: Whether an error event has been acknowledged.
-
User Acknowledgeable: Whether or not an event can be acknowledged by the user.
Event Descriptions
An arrow displays next to each event in the table. Click the arrow to expand and view the Description section that provides additional details for the event.
The Events perspective or dialog contains a perspective toolbar with the following options:
|
Toolbar Icon Option |
Icon |
Description |
|---|---|---|
|
Acknowledge |
|
Acknowledge a selected error event to clear the error and return the object to normal operations. Note that this option is only available for user acknowledgeable events. |
|
Acknowledge All |
|
Acknowledge all error events associated with an object to clear the errors and return the object to normal operations. Note that only user acknowledgeable events are cleared. This button is always clickable, even if there are no user acknowledgeable events. Clicking it when there are no user acknowledgeable events results in an error dialog. |
|
Display Count |
A drop-down menu that allows you to select the number of events that should be displayed in the management pane, while you are currently in this perspective. |
Acknowledging Events/Errors
If an object has an error event associated with it you must acknowledge the event to clear the error and return the object to normal operations. For example, this can occur if an Oracle VM Server or virtual machine appear as Stopped (Error) in the status. The object in error is flagged with a red icon in the navigation tree. Oracle VM Servers, virtual machines, repositories and storage objects can have error events associated with them. The following procedures show you how to clear errors and return the object to normal operations.
-
Click the Servers and VMs tab.
-
Select the Oracle VM Server in the navigation tree.
-
Select Events from the Perspective drop-down list in the management pane.
-
Select the user acknowledgeable error event and click Acknowledge
, or click
Acknowledge All
to clear all user acknowledgeable
errors.
-
Click the Servers and VMs tab.
-
Select the server pool, or Oracle VM Server on which the virtual machine resides in the navigation tree.
-
Select Virtual Machines from the Perspective drop-down list in the management pane.
-
Select the virtual machine in the management pane table. Click Display Selected VM Events...
.
-
The Events dialog box is displayed. Select the user acknowledgeable error event and click Acknowledge
, or click
Acknowledge All
to clear all user acknowledgeable
errors. Click
Close.
-
Click the Repositories tab.
-
Select the repository in the navigation tree.
-
Select Events from the Perspective drop-down list in the management pane.
-
Select the error event and click Acknowledge
, or click
Acknowledge All
to clear all errors.
-
Click the Storage tab.
-
Select File Servers, SAN Servers, or a storage server in the navigation tree.
-
Select Events from the Perspective drop-down list in the management pane.
-
Select the user acknowledgeable error event and click Acknowledge
, or click
Acknowledge All
to clear all user acknowledgeable
errors.
6.6.4 Access Groups Perspective
The Access Groups perspective lists the different Access Groups configured in your environment. The following columns are displayed in the management pane:
-
Name: The name that has been configured for the access group.
-
Event Severity: The event level severity associated with the access group.
-
SAN Server: The SAN server that the access group applies to.
-
Description: A description entered for the access group when it was created or edited.
This perspective includes a toolbar that consists of the following options:
|
Toolbar Icon Option |
Icon |
Description |
|---|---|---|
|
|
Displays the Create an Access Group dialog box. Use this option to create a new access group. This option is only available for non-generic storage arrays. |
|
|
|
Displays the Edit Access Group dialog box. Use this option to edit access group settings such as name, description and the storage initiators that have access to the SAN Server. |
|
|
|
Displays the Delete Confirmation dialog box. Use this option to delete the selected access group. This option is only available for non-generic storage arrays. This option is only available for non-generic storage arrays. |
|
|
|
Display the Events dialog box which contains the job event associated with the selected access groups. |
|
|
|
Displays context sensitive help. |
6.6.4.1 Create Access Group
Except for generic storage arrays, it is possible to create multiple access groups in order to arrange and restrict physical disk access according to your requirements. The generic iSCSI storage arrays have a single access group available by default, where you can simply add or remove storage initiators from your Oracle VM Servers.
Generic fibre channel storage has no access groups and is always listed under the Unmanaged Fibre Channel Storage Array folder.
-
Expand the SAN Servers folder in the navigation tree, select a SAN server item contained within the folder. Select the Access Groups option in the Perspective drop-down list.
-
Click Create Access Group
to start the Create an Access
Group wizard.
-
The Create Access Group step is displayed in the wizard. Enter a name for your new access group and optionally provide a description. Click Next.
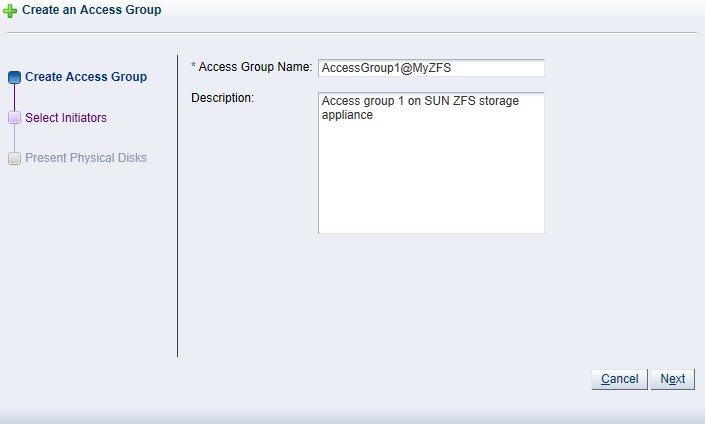
-
The Select Initiators step is displayed in the wizard. It contains the available storage initiators for this type of storage on the Oracle VM Servers in your environment. Use the arrow buttons to move the required initiators from the Available Storage Initiators box to the Selected Storage Initiators box. Click Next.
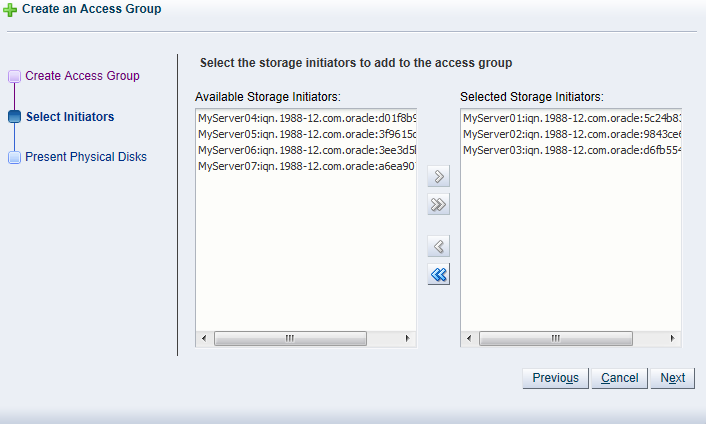 Note
NoteYou can also use the Storage Initiators perspective in the Servers and VMs tab to view and configure storage initiators on an individual Oracle VM Server. See Section 3.5.7.1, “View Access Groups for Selected Initiator” for more information on using this method.
ImportantIf you have both iSCSI and Fibre Channel storage array types in your environment, you must ensure that the storage initiators that you are adding for the access group, match the storage type that you are defining this access group for. See What are Access Groups? in the Oracle VM Concepts Guide for more information on Access Groups.
-
The Present Physical Disks step is displayed in the wizard. It contains the available storage elements on the storage array you are registering.
NoteIf this is the first time you are configuring access to this storage array, the list of available physical disks may be empty. You may have to edit the access group afterwards to select physical disks.
Use the arrow buttons to move the required disks from the Available Physical Disks box to the Selected Physical Disks box. These disks are presented to the Oracle VM Servers that have the iSCSI initiator that belongs to the access group. Click Finish to create the new access group with the selected initiators and physical disks.
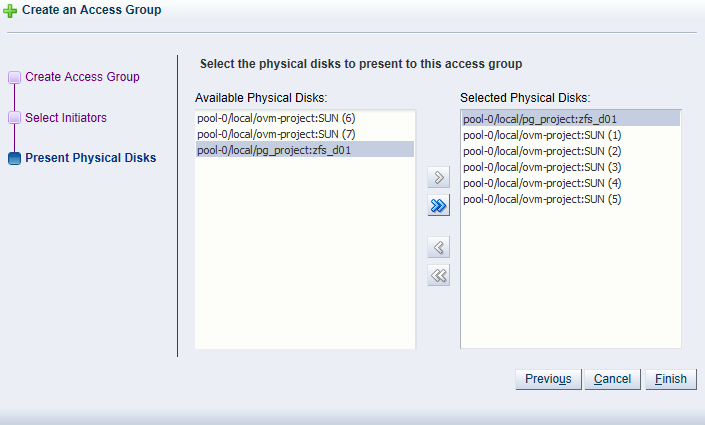
The new access group now appears in the Access Groups table. If you change the Perspective of the management pane to Physical Disks, the list of presented physical disks appear in the table.
After configuring the access group it is advisable to refresh the SAN server to make sure that the current storage layout and access rules are in effect. The selected physical disks in your non-generic storage array are now available to the Oracle VM Servers in this access group.
6.6.4.2 Edit Access Group
It is possible to edit an existing Access Group for a SAN Server. This option is also possible for a generic iSCSI storage array, although you are only able to edit the default access group that is created when you discover the SAN Server, since it is not possible to create additional access groups for generic Oracle VM Storage Connect plug-ins.
-
Expand the SAN Servers folder in the navigation tree, select a SAN server item contained within the folder. Select the Access Groups option in the Perspective drop-down list.
-
Select the access group that you wish to edit (a default access group is always present) and click Edit Access Group
. The Edit Access Group
dialog box is displayed.
-
In the Access Group tab, you can edit the Name on Array and Access Group Name for storage arrays that use a non-generic Oracle VM Storage Connect plug-in. When you have a generic plug-in, these items are greyed out. You can also provide or edit a description for the access group.
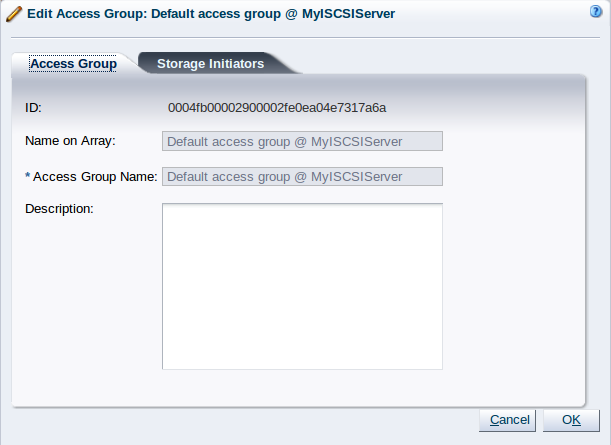
-
Select the Storage Initiators tab. It contains the available storage initiators for this type of storage on the Oracle VM Servers in your environment.
-
Use the arrow buttons to move the required initiators to the Selected Storage Initiators box.
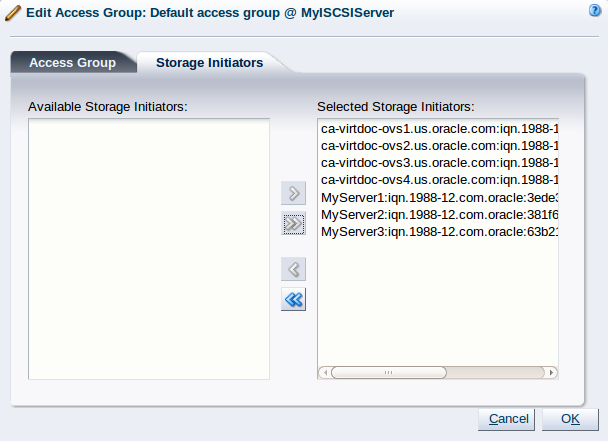 Note
NoteYou can also use the Storage Initiators perspective in the Servers and VMs tab to view and configure storage initiators on an individual Oracle VM Server. See Section 3.5.7.1, “View Access Groups for Selected Initiator” for more information on using this method.
ImportantIf you have both iSCSI and Fibre Channel storage array types in your environment, you must ensure that the storage initiators that you are adding for the access group, match the storage type that you are defining this access group for. See What are Access Groups? in the Oracle VM Concepts Guide for more information on Access Groups.
For a generic storage array you cannot select which physical disks are added; all disks are automatically presented to the selected Oracle VM Servers.
-
Click OK to save your changes to the default access group. If you change the Perspective of the management pane to Physical Disks, the list of presented physical disks appears in the table.
-
After configuring the access group it is advisable to refresh the storage array to make sure that the current storage layout and access rules are in effect.

The Oracle VM Servers in this access group now have the necessary permissions to use the physical disks of the storage array; they can be deployed either as disks for virtual machines (VMs) or for storage repositories. To create storage repositories on your physical disks, see Chapter 4, Repositories Tab.
6.6.4.3 Delete Access Group
Except for generic storage arrays, it is possible to delete additional access groups that you may have defined apart from the default access group.
-
Expand the SAN Servers folder in the navigation tree, select a SAN server item contained within the folder. Select the Access Groups option in the Perspective drop-down list. Select the access group or groups, that you wish to delete, from the items listed in the management pane.
-
Click on the
Delete Access Group icon in
the toolbar.
-
The Delete Confirmation dialog box is displayed. Click OK to delete the access group.
6.6.4.4 Display Events
The Events perspective is common to many elements within the Oracle VM Manager Web Interface. The Events perspective generally appears as an option within the Perspectives drop-down menu on the management pane of tabs that include a navigation tree. In this case, the Events perspective displays events specific to the item selected in the navigation tree and presents these in the management pane.
The Events perspective may also appear within a dialog that is
triggered from a Display Selected
Events... ![]() perspective toolbar option. In this case,
the Events perspective dialog displays events specific to one
or more elements selected in the management pane.
perspective toolbar option. In this case,
the Events perspective dialog displays events specific to one
or more elements selected in the management pane.
If an object has an error event associated with it you must acknowledge the event to clear the error and return the object to normal operations. For example, this can occur if an Oracle VM Server or virtual machine appear as Stopped (Error) in the status. The object in error is flagged with a red icon in the navigation tree. Oracle VM Servers, virtual machines, repositories and storage objects can have error events associated with them.
Since Oracle VM Manager attempts to resolve issues automatically as much as possible, not all events can be acknowledged by a user within the Oracle VM Manager Web Interface. Therefore, a flag is set for events that are user acknowledgeable. If an event does not have this flag set, you are unable to acknowledge it, since it is handled internally by Oracle VM Manager.
The Events perspective or dialog contains a table with the following columns of information for each event:
-
Severity: The severity level assigned to the event.
-
Timestamp: The date and time that the event occurred.
-
Modify Time: The last recorded date and time that the event was modified.
-
Type: The type of event according to Oracle VM Manager's event categorization model.
-
Summary: A summary description of the event.
-
Acknowledged: Whether an error event has been acknowledged.
-
User Acknowledgeable: Whether or not an event can be acknowledged by the user.
Event Descriptions
An arrow displays next to each event in the table. Click the arrow to expand and view the Description section that provides additional details for the event.
The Events perspective or dialog contains a perspective toolbar with the following options:
|
Toolbar Icon Option |
Icon |
Description |
|---|---|---|
|
Acknowledge |
|
Acknowledge a selected error event to clear the error and return the object to normal operations. Note that this option is only available for user acknowledgeable events. |
|
Acknowledge All |
|
Acknowledge all error events associated with an object to clear the errors and return the object to normal operations. Note that only user acknowledgeable events are cleared. This button is always clickable, even if there are no user acknowledgeable events. Clicking it when there are no user acknowledgeable events results in an error dialog. |
|
Display Count |
A drop-down menu that allows you to select the number of events that should be displayed in the management pane, while you are currently in this perspective. |
Acknowledging Events/Errors
If an object has an error event associated with it you must acknowledge the event to clear the error and return the object to normal operations. For example, this can occur if an Oracle VM Server or virtual machine appear as Stopped (Error) in the status. The object in error is flagged with a red icon in the navigation tree. Oracle VM Servers, virtual machines, repositories and storage objects can have error events associated with them. The following procedures show you how to clear errors and return the object to normal operations.
-
Click the Servers and VMs tab.
-
Select the Oracle VM Server in the navigation tree.
-
Select Events from the Perspective drop-down list in the management pane.
-
Select the user acknowledgeable error event and click Acknowledge
, or click
Acknowledge All
to clear all user acknowledgeable
errors.
-
Click the Servers and VMs tab.
-
Select the server pool, or Oracle VM Server on which the virtual machine resides in the navigation tree.
-
Select Virtual Machines from the Perspective drop-down list in the management pane.
-
Select the virtual machine in the management pane table. Click Display Selected VM Events...
.
-
The Events dialog box is displayed. Select the user acknowledgeable error event and click Acknowledge
, or click
Acknowledge All
to clear all user acknowledgeable
errors. Click
Close.
-
Click the Repositories tab.
-
Select the repository in the navigation tree.
-
Select Events from the Perspective drop-down list in the management pane.
-
Select the error event and click Acknowledge
, or click
Acknowledge All
to clear all errors.
-
Click the Storage tab.
-
Select File Servers, SAN Servers, or a storage server in the navigation tree.
-
Select Events from the Perspective drop-down list in the management pane.
-
Select the user acknowledgeable error event and click Acknowledge
, or click
Acknowledge All
to clear all user acknowledgeable
errors.
6.6.5 Volume Groups Perspective
The Volume Groups perspective lists the different Volume Groups configured for each SAN Server in your environment. The following columns are displayed in the management pane:
-
Name: The name that has been configured for the volume group.
-
Size (GiB): A grouping that consists of the following columns:
-
Free: The size of the volume, in GiB, that is currently free.
-
Used: The size of the volume, in GiB, that is currently in use.
-
Total: The total size, in GiB, of the volume.
-
-
Description: A description entered for the volume group when it was created or edited.
This perspective includes a toolbar that consists of the following options:
|
Toolbar Icon Option |
Icon |
Description |
|---|---|---|
|
|
Displays the Edit Volume Group dialog box. Use this option to edit volume group settings such as name and description. |
|
|
|
Displays context sensitive help. |
6.6.5.1 Edit Volume Group
It is possible to edit the configuration for a Volume Group available on a SAN server. The steps and options to do so are described below.
-
Expand the SAN Servers folder in the navigation tree, select a SAN server item contained within the folder. Select the Volume Groups option in the Perspective drop-down list. Select the volume group that you wish to edit in the table presented in the management pane.
-
Click on the
Edit Volume Group icon in the
toolbar.
-
A dialog opens to allow you to reconfigure the Volume Group. The dialog has the following options:
-
ID: A non-editable field containing the volume group's UUID as it is stored within Oracle VM Manager.
-
Name: A field to change the name of the volume group within Oracle VM Manager.
-
Description: A text field allowing a description of the volume group.
-
-
When you have finished editing the volume group, click OK to save the changes, or Cancel to exit out of the dialog without saving any changes.
6.7 Volume Group Item
Each Volume Group navigation item is listed underneath the Section 6.6, “SAN Server Item” when it has been expanded. The structure of the navigation provided in the navigation tree is discussed in more detail in Section 6.2, “Summary”.
Clicking on a Volume Group navigation item in the navigation tree allows you to access different perspectives in the management pane. Each perspective provides its own view of the Volume Group within Oracle VM Manager. Most of the perspectives also include separate perspective toolbars that enable you to perform various configuration or management tasks specific to the view currently displayed within the management pane. A Volume Group navigation item offers the following perspectives within the management pane:
6.7.1 Info Perspective
The Info perspective is common to many elements within the Oracle VM Manager Web Interface. This perspective always shows the individually configured parameters for an item that is currently selected in the navigation tree. Some of these configured parameters may be automatically populated through a discovery process, while others may have been configured manually during the creation of the object that is selected.
The Info perspective or dialog contains a perspective toolbar with the following options:
|
Toolbar Icon Option |
Icon |
Description |
|---|---|---|
|
|
Displays context sensitive help. |
This perspective includes the following information:
-
Volume Group Name: The configured name for the volume group.
6.7.2 Physical Disks Perspective
The Physical Disks perspective lists the different physical disks configured in your environment and running on a SAN storage array. The following columns are displayed in the management pane:
-
Name: The name that has been configured for the physical disk
-
Event Severity: The event level severity for the physical disk.
-
Size (GiB): The size, in GiB, of the physical disk.
-
Volume Group: The volume group that the physical disk belongs to.
-
Server: The servers that have access to the physical disk.
-
Status: The status of the physical disk (whether or not the disk is online).
-
Shareable: Whether the physical disk is shareable or not.
-
Description: A description entered for the physical disk when it was created or edited.
-
VM(s): Virtual machines using the physical disk.
Alongside each physical disk entry in the table, there is an arrow that allows you to expand the view for each entry. This exposes further information:
-
Name: The user-specified alias for the physical disk. The name can be changed without changing the name of the physical disk on the storage array.
-
User Friendly Name: The name of the physical disk on the storage array. The name was specified when the disk was created and cannot be changed.
-
SAN Server: The SAN server that the physical disk belongs to.
-
Thin Provision: Whether or not thin provisioning is supported by the physical disk.
-
Type: The type of storage that the physical disk is a part of (for example, iSCSI or Fibre Channel).
-
Reserved by Server(s): Whether or not the physical disk is unavailable for use by Oracle VM Manager.
-
Storage Targets: The endpoint provided by the storage server through which the server may direct commands to the physical disk. The storage target provides access to the physical disk.
-
Server Pool: The server pool that the physical disk belongs to.
-
Repository: The repository that the physical disk belongs to.
-
VM(s): Virtual machines using the physical disk.
-
ID: The UUID for the physical disk. The UUID is a universally unique identifier that Oracle VM Manager assigns to the physical disk.
-
Page83 ID: The unique SCSI identifier for the physical disk.
-
Access Groups: The access groups that the physical disk belongs to.
-
Extra Information: Information that is passed to and from the Oracle VM Storage Connect plug-in for use internally by the plug-in.
-
Absolute Path: The absolute path to the location of the disk.
The management functions you can perform on the disk are available as icons in the perspective toolbar. Some management options are only available to SAN server disks that use a non-generic Storage Connect plug-in.
|
Toolbar Icon Option |
Icon |
Description |
|---|---|---|
|
|
Displays the Create Physical Disk dialog box. Use this option to create a new physical disk in the selected volume group of the storage array of your choice. This option is not supported for storage arrays using a generic Oracle VM Storage Connect plug-in. |
|
|
|
Displays the Edit Physical Disk dialog box. Use this option to change the name, size, provisioning and share ability of the selected physical disk. |
|
|
|
Displays the Delete Confirmation dialog box. Use this option to delete the selected physical disk. | |
|
|
Displays the Clone Physical Disk dialog box. Use this option to clone a physical disk to another physical disk or to a disk image on a file server. |
|
|
|
Refreshes the physical disks on a storage array. Use this option to rescan the physical disks after making changes to the configuration of a storage array. This updates the storage information known to Oracle VM Manager. |
|
|
|
Displays the Servers using Physical Disk dialog box. Use this option to view which servers are using a selected physical disk. |
|
|
|
Display the Events dialog box which contains the job event associated with the selected physical disks. |
|
|
|
Displays context sensitive help. |
6.7.2.1 Create Physical Disk (not supported on Generic)
On SAN Servers that are not using a generic Oracle VM Storage Connect plug-in, it is frequently possible to create a new physical disk.
-
Expand the SAN Servers folder in the navigation tree, select a SAN server item contained within the folder. Select the Physical Disks option in the Perspective drop-down list.
-
Click on the
Create Physical Disk option
in the toolbar.
-
The Create Physical Disk dialog is displayed. Enter or select the following:
-
Volume Group: A volume group that you want the physical disk to belong to.
-
Name: A name for the physical disk.
-
Size (GiB): The size of the physical disk, in GiB.
-
Extra Information: Optional information that is passed to and from the Oracle VM Storage Connect plug-in for use internally by the plug-in.
-
Description: An optional description of the physical disk.
-
Shareable: Whether or not the physical disk is shareable.
-
Thin Provision: Whether or not thin provisioning is to be supported by the physical disk.
-
-
When you have finished editing the parameters to define the new physical disk, click OK to save the changes, or Cancel to exit out of the dialog without saving any changes.
6.7.2.2 Edit Physical Disk
It is possible to edit the configuration for a physical disk either available on a SAN server or as local or shared storage. The steps and options to do so are described below.
-
On the Storage tab, expand the SAN Servers folder in the navigation tree, select a SAN server item contained within the folder. Select the Physical Disks option in the Perspective drop-down list. Select the physical disk that you wish to edit in the table presented in the management pane.
To edit the physical disk configuration for a physical disk used by a particular server, on the Servers and VMs tab, expand the Server Pools or Unassigned Servers folder, to select a particular server in the navigation tree. Select the Physical Disks option in the Perspective drop-down list. Select the physical disk that you wish to edit in the table presented in the management pane.
-
Click on the
Edit Physical Disk icon in
the toolbar.
-
A dialog opens to allow you to reconfigure the Physical Disk. The dialog has the following options:
-
ID: A non-editable field containing the physical disk's UUID as it is stored within Oracle VM Manager.
-
Name: A field to change the name of the physical disk within Oracle VM Manager.
-
Current Size(GiB): A non-editable field containing the physical disk's current size, in GiB.
-
New Size(GiB): A field to change the size, in GiB, of the physical disk. The size of the physical disk can only be increased in size.
-
Description: A text field allowing a description of the physical disk.
-
Shareable: A check box that determines whether or not the disk can be shared.
-
Thin Provision: A non-editable field describing whether or not thin provisioning is supported by the disk.
-
-
When you have finished editing the physical disk, click OK to save the changes, or Cancel to exit out of the dialog without saving any changes.
6.7.2.3 Delete Physical Disk
It is possible to delete an existing physical disk if it is no longer used in your Oracle VM environment and the Oracle VM Storage Connect plug-in that you are using supports this operation. Two types of physical disks are used in an Oracle VM environment:
-
Local physical disk - A physical disk installed locally on a specific Oracle VM Server.
-
SAN Server physical disk - A physical disk that is made available to the SAN Server during the discovery process.
Each physical disk type can be deleted using the Oracle VM Manager Web Interface.
-
There are two options available that you can use to delete a physical disk from your Oracle VM environment:
-
To delete a local physical disk:
Expand the Servers and VMs tab, expand the Server Pools or Unassigned Servers folder, and select a particular server in the navigation tree. Select the Physical Disks option in the Perspective drop-down list. Select the physical disk that you want to delete in the table presented in the management pane.
-
To delete a SAN Server physical disk:
Use the instructions in step a or alternatively, expand the Storage tab, expand the SAN Servers folder in the navigation tree, and select a SAN server item contained within the folder. Select the Physical Disks option in the Perspective drop-down list. Select the physical disk that you wish to delete in the table presented in the management pane.
-
-
Click on the
Delete Physical
Disk icon in the toolbar.
-
The Delete Confirmation dialog box is displayed. Click OK to delete the physical disk.
6.7.2.4 Clone Physical Disk
It is possible to clone a physical disk. The steps and options to do so are described below.
-
On the Storage tab, expand the SAN Servers folder in the navigation tree, select a SAN server item contained within the folder. Select the Physical Disks option in the Perspective drop-down list. Select the physical disk that you wish to clone in the table presented in the management pane.
To clone a physical disk used by a particular server, on the Servers and VMs tab, expand the Server Pools or Unassigned Servers folder, to select a particular server in the navigation tree. Select the Physical Disks option in the Perspective drop-down list. Select the physical disk that you wish to clone in the table presented in the management pane.
-
Click on the
Clone Physical Disk icon in
the toolbar.
-
A dialog opens to allow you to clone the Physical Disk. The dialog has the following options:
-
Name: A field to set the name of the physical disk clone that you are going to create within Oracle VM Manager.
-
Clone Target Type: A drop-down menu allowing you to select the type of storage to be used for the physical disk clone:
-
Physical Disk: Copies the data from one physical disk to another.
-
Repository: Copies the data from the physical disk into a virtual disk image in an existing repository.
-
-
Clone Target: A searchable field to allow you to select the target location where the clone is to be stored.
-
Clone Type: A drop-down menu allowing you to select the type of clone to create:
-
Sparse Copy: Copies only the written data from the physical disk to the target clone.
-
Non-sparse Copy: Performs a block copy of the physical disk to the target clone.
-
-
-
When you have finished setting the clone parameters for the physical disk, click OK to begin the clone job, or Cancel to exit out of the dialog without saving any changes.
6.7.2.5 Refresh Physical Disk
When changes are made to the physical disks on a SAN server or Oracle VM Server, it is useful to refresh the configuration of your physical disks to make Oracle VM Manager aware of the changes.
-
Expand the SAN Servers folder in the navigation tree, select a SAN server item contained within the folder. Select the Physical Disks option in the Perspective drop-down list. Select the physical disk or disks that you wish to refresh in the table presented in the management pane.
To refresh physical disks used by a particular server, on the Servers and VMs tab, expand the Server Pools or Unassigned Servers folder, to select a particular server in the navigation tree. Select the Physical Disks option in the Perspective drop-down list. Select the physical disk that you wish to refresh in the table presented in the management pane.
-
Click on the
Refresh Physical Disk option
in the toolbar.
-
The selected physical disks are refreshed and their configurations are updated within Oracle VM Manager.
If you encounter an error, when refreshing a physical disk with a repository located on it, similar to the following:
OVMAPI_7281E Cannot perform operation on file system...
You may need to ensure that the repository is under the ownership of the Oracle VM Manager instance that you are using. See Section 4.3.1.2, “Edit Repository” for more information.
6.7.2.6 Display Servers Using a Physical Disk
It is possible to display the Oracle VM Servers that are using a physical disk available on a SAN server. The steps and options to do so are described below.
-
Expand the SAN Servers folder in the navigation tree, select a SAN server item contained within the folder. Select the Physical Disks option in the Perspective drop-down list. Select the physical disk that you wish to view in the table presented in the management pane.
-
Click on the
Display Servers using Physical
Disk icon in the toolbar.
-
A dialog opens to display the Oracle VM Servers that are configured to use the Physical Disk. The dialog provides the following information in tabular format:
-
Name: The name of the Oracle VM Server.
-
Description: The configured description for the Oracle VM Server.
-
Status: The running status of the Oracle VM Server.
-
Utilization (%): The percentage of the disk that is utilized by the Oracle VM Server.
-
Maintenance Mode: Whether or not the Oracle VM Server is in maintenance mode.
-
Owned: Whether or not the current instance of Oracle VM Manager has ownership of the Oracle VM Server.
-
-
When you have finished viewing the list of servers with access to the physical disk, click Close to exit out of the dialog.
6.7.2.7 Display Events
The Events perspective is common to many elements within the Oracle VM Manager Web Interface. The Events perspective generally appears as an option within the Perspectives drop-down menu on the management pane of tabs that include a navigation tree. In this case, the Events perspective displays events specific to the item selected in the navigation tree and presents these in the management pane.
The Events perspective may also appear within a dialog that is
triggered from a Display Selected
Events... ![]() perspective toolbar option. In this case,
the Events perspective dialog displays events specific to one
or more elements selected in the management pane.
perspective toolbar option. In this case,
the Events perspective dialog displays events specific to one
or more elements selected in the management pane.
If an object has an error event associated with it you must acknowledge the event to clear the error and return the object to normal operations. For example, this can occur if an Oracle VM Server or virtual machine appear as Stopped (Error) in the status. The object in error is flagged with a red icon in the navigation tree. Oracle VM Servers, virtual machines, repositories and storage objects can have error events associated with them.
Since Oracle VM Manager attempts to resolve issues automatically as much as possible, not all events can be acknowledged by a user within the Oracle VM Manager Web Interface. Therefore, a flag is set for events that are user acknowledgeable. If an event does not have this flag set, you are unable to acknowledge it, since it is handled internally by Oracle VM Manager.
The Events perspective or dialog contains a table with the following columns of information for each event:
-
Severity: The severity level assigned to the event.
-
Timestamp: The date and time that the event occurred.
-
Modify Time: The last recorded date and time that the event was modified.
-
Type: The type of event according to Oracle VM Manager's event categorization model.
-
Summary: A summary description of the event.
-
Acknowledged: Whether an error event has been acknowledged.
-
User Acknowledgeable: Whether or not an event can be acknowledged by the user.
Event Descriptions
An arrow displays next to each event in the table. Click the arrow to expand and view the Description section that provides additional details for the event.
The Events perspective or dialog contains a perspective toolbar with the following options:
|
Toolbar Icon Option |
Icon |
Description |
|---|---|---|
|
Acknowledge |
|
Acknowledge a selected error event to clear the error and return the object to normal operations. Note that this option is only available for user acknowledgeable events. |
|
Acknowledge All |
|
Acknowledge all error events associated with an object to clear the errors and return the object to normal operations. Note that only user acknowledgeable events are cleared. This button is always clickable, even if there are no user acknowledgeable events. Clicking it when there are no user acknowledgeable events results in an error dialog. |
|
Display Count |
A drop-down menu that allows you to select the number of events that should be displayed in the management pane, while you are currently in this perspective. |
Acknowledging Events/Errors
If an object has an error event associated with it you must acknowledge the event to clear the error and return the object to normal operations. For example, this can occur if an Oracle VM Server or virtual machine appear as Stopped (Error) in the status. The object in error is flagged with a red icon in the navigation tree. Oracle VM Servers, virtual machines, repositories and storage objects can have error events associated with them. The following procedures show you how to clear errors and return the object to normal operations.
-
Click the Servers and VMs tab.
-
Select the Oracle VM Server in the navigation tree.
-
Select Events from the Perspective drop-down list in the management pane.
-
Select the user acknowledgeable error event and click Acknowledge
, or click
Acknowledge All
to clear all user acknowledgeable
errors.
-
Click the Servers and VMs tab.
-
Select the server pool, or Oracle VM Server on which the virtual machine resides in the navigation tree.
-
Select Virtual Machines from the Perspective drop-down list in the management pane.
-
Select the virtual machine in the management pane table. Click Display Selected VM Events...
.
-
The Events dialog box is displayed. Select the user acknowledgeable error event and click Acknowledge
, or click
Acknowledge All
to clear all user acknowledgeable
errors. Click
Close.
-
Click the Repositories tab.
-
Select the repository in the navigation tree.
-
Select Events from the Perspective drop-down list in the management pane.
-
Select the error event and click Acknowledge
, or click
Acknowledge All
to clear all errors.
-
Click the Storage tab.
-
Select File Servers, SAN Servers, or a storage server in the navigation tree.
-
Select Events from the Perspective drop-down list in the management pane.
-
Select the user acknowledgeable error event and click Acknowledge
, or click
Acknowledge All
to clear all user acknowledgeable
errors.
6.7.3 Events Perspective
The Events perspective is common to many elements within the Oracle VM Manager Web Interface. The Events perspective generally appears as an option within the Perspectives drop-down menu on the management pane of tabs that include a navigation tree. In this case, the Events perspective displays events specific to the item selected in the navigation tree and presents these in the management pane.
The Events perspective may also appear within a dialog that is
triggered from a Display Selected
Events... ![]() perspective toolbar option. In this case,
the Events perspective dialog displays events specific to one
or more elements selected in the management pane.
perspective toolbar option. In this case,
the Events perspective dialog displays events specific to one
or more elements selected in the management pane.
If an object has an error event associated with it you must acknowledge the event to clear the error and return the object to normal operations. For example, this can occur if an Oracle VM Server or virtual machine appear as Stopped (Error) in the status. The object in error is flagged with a red icon in the navigation tree. Oracle VM Servers, virtual machines, repositories and storage objects can have error events associated with them.
Since Oracle VM Manager attempts to resolve issues automatically as much as possible, not all events can be acknowledged by a user within the Oracle VM Manager Web Interface. Therefore, a flag is set for events that are user acknowledgeable. If an event does not have this flag set, you are unable to acknowledge it, since it is handled internally by Oracle VM Manager.
The Events perspective or dialog contains a table with the following columns of information for each event:
-
Severity: The severity level assigned to the event.
-
Timestamp: The date and time that the event occurred.
-
Modify Time: The last recorded date and time that the event was modified.
-
Type: The type of event according to Oracle VM Manager's event categorization model.
-
Summary: A summary description of the event.
-
Acknowledged: Whether an error event has been acknowledged.
-
User Acknowledgeable: Whether or not an event can be acknowledged by the user.
Event Descriptions
An arrow displays next to each event in the table. Click the arrow to expand and view the Description section that provides additional details for the event.
The Events perspective or dialog contains a perspective toolbar with the following options:
|
Toolbar Icon Option |
Icon |
Description |
|---|---|---|
|
Acknowledge |
|
Acknowledge a selected error event to clear the error and return the object to normal operations. Note that this option is only available for user acknowledgeable events. |
|
Acknowledge All |
|
Acknowledge all error events associated with an object to clear the errors and return the object to normal operations. Note that only user acknowledgeable events are cleared. This button is always clickable, even if there are no user acknowledgeable events. Clicking it when there are no user acknowledgeable events results in an error dialog. |
|
Display Count |
A drop-down menu that allows you to select the number of events that should be displayed in the management pane, while you are currently in this perspective. |
Acknowledging Events/Errors
If an object has an error event associated with it you must acknowledge the event to clear the error and return the object to normal operations. For example, this can occur if an Oracle VM Server or virtual machine appear as Stopped (Error) in the status. The object in error is flagged with a red icon in the navigation tree. Oracle VM Servers, virtual machines, repositories and storage objects can have error events associated with them. The following procedures show you how to clear errors and return the object to normal operations.
-
Click the Servers and VMs tab.
-
Select the Oracle VM Server in the navigation tree.
-
Select Events from the Perspective drop-down list in the management pane.
-
Select the user acknowledgeable error event and click Acknowledge
, or click
Acknowledge All
to clear all user acknowledgeable
errors.
-
Click the Servers and VMs tab.
-
Select the server pool, or Oracle VM Server on which the virtual machine resides in the navigation tree.
-
Select Virtual Machines from the Perspective drop-down list in the management pane.
-
Select the virtual machine in the management pane table. Click Display Selected VM Events...
.
-
The Events dialog box is displayed. Select the user acknowledgeable error event and click Acknowledge
, or click
Acknowledge All
to clear all user acknowledgeable
errors. Click
Close.
-
Click the Repositories tab.
-
Select the repository in the navigation tree.
-
Select Events from the Perspective drop-down list in the management pane.
-
Select the error event and click Acknowledge
, or click
Acknowledge All
to clear all errors.
-
Click the Storage tab.
-
Select File Servers, SAN Servers, or a storage server in the navigation tree.
-
Select Events from the Perspective drop-down list in the management pane.
-
Select the user acknowledgeable error event and click Acknowledge
, or click
Acknowledge All
to clear all user acknowledgeable
errors.
6.8 Unmanaged Fibre Channel Storage Array Item
An Unmanaged Fibre Channel Storage Array navigation item is listed underneath the Section 6.5, “SAN Servers Folder” when it has been expanded. The structure of the navigation provided in the navigation tree is discussed in more detail in Section 6.2, “Summary”.
Clicking on a Unmanaged Fibre Channel Storage Array navigation item in the navigation tree allows you to access different perspectives in the management pane. Each perspective provides its own view of any unmanaged Fibre Channel storage arrays within Oracle VM Manager. Most of the perspectives also include separate perspective toolbars that enable you to perform various configuration or management tasks specific to the view currently displayed within the management pane. The Unmanaged Fibre Channel Storage Array navigation item offers the following perspectives within the management pane:
6.8.1 Info Perspective
The Info perspective is common to many elements within the Oracle VM Manager Web Interface. This perspective always shows the individually configured parameters for an item that is currently selected in the navigation tree. Some of these configured parameters may be automatically populated through a discovery process, while others may have been configured manually during the creation of the object that is selected.
The Info perspective or dialog contains a perspective toolbar with the following options:
|
Toolbar Icon Option |
Icon |
Description |
|---|---|---|
|
|
Displays context sensitive help. |
This perspective usually includes the following information depending on what information is returned by the Oracle VM Storage Connect plug-in:
-
Storage Name: The name of the storage array as returned by the Oracle VM Storage Connect plug-in.
-
Storage Type: The type of storage array as returned by the Oracle VM Storage Connect plug-in.
-
Description: The configured description for the storage array.
-
SAN Server's Storage Description: The description returned for the storage array as returned by the Oracle VM Storage Connect plug-in.
-
Status: The status of the storage array as returned by the Oracle VM Storage Connect plug-in.
-
Validated: Whether or not the storage array has been validated by Oracle VM Manager. No special storage operations supported by the Oracle VM Storage Connect plug-in may occur until the storage server is validated by Oracle VM Manager.
-
LIP Scan: Whether a Loop Initialization Protocol (LIP) scan is enabled or not for an Unmanaged FibreChannel Storage Array.
-
Storage Plug-In: The name of the Oracle VM Storage Connect plug-in used to access the storage array.
-
Storage Plug-In Version: The version number of the SOracle VM Storage Connect plug-in used to access the storage array.
-
Plug-in Private Data: Additional parameters passed to the Oracle VM Storage Connect plug-in.
-
Total Size (GiB): The total size, in GiB, reported by the Oracle VM Storage Connect plug-in.
-
Free Size (GiB): The available free space, in GiB, reported by the Oracle VM Storage Connect plug-in.
-
Used Size (GiB): The amount of used space, in GiB, reported by the Oracle VM Storage Connect plug-in.
Additional fields may be listed to indicate the support status for various storage related functions as reported by the Oracle VM Storage Connect plug-in in use.
6.8.2 Events Perspective
The Events perspective is common to many elements within the Oracle VM Manager Web Interface. The Events perspective generally appears as an option within the Perspectives drop-down menu on the management pane of tabs that include a navigation tree. In this case, the Events perspective displays events specific to the item selected in the navigation tree and presents these in the management pane.
The Events perspective may also appear within a dialog that is
triggered from a Display Selected
Events... ![]() perspective toolbar option. In this case,
the Events perspective dialog displays events specific to one
or more elements selected in the management pane.
perspective toolbar option. In this case,
the Events perspective dialog displays events specific to one
or more elements selected in the management pane.
If an object has an error event associated with it you must acknowledge the event to clear the error and return the object to normal operations. For example, this can occur if an Oracle VM Server or virtual machine appear as Stopped (Error) in the status. The object in error is flagged with a red icon in the navigation tree. Oracle VM Servers, virtual machines, repositories and storage objects can have error events associated with them.
Since Oracle VM Manager attempts to resolve issues automatically as much as possible, not all events can be acknowledged by a user within the Oracle VM Manager Web Interface. Therefore, a flag is set for events that are user acknowledgeable. If an event does not have this flag set, you are unable to acknowledge it, since it is handled internally by Oracle VM Manager.
The Events perspective or dialog contains a table with the following columns of information for each event:
-
Severity: The severity level assigned to the event.
-
Timestamp: The date and time that the event occurred.
-
Modify Time: The last recorded date and time that the event was modified.
-
Type: The type of event according to Oracle VM Manager's event categorization model.
-
Summary: A summary description of the event.
-
Acknowledged: Whether an error event has been acknowledged.
-
User Acknowledgeable: Whether or not an event can be acknowledged by the user.
Event Descriptions
An arrow displays next to each event in the table. Click the arrow to expand and view the Description section that provides additional details for the event.
The Events perspective or dialog contains a perspective toolbar with the following options:
|
Toolbar Icon Option |
Icon |
Description |
|---|---|---|
|
Acknowledge |
|
Acknowledge a selected error event to clear the error and return the object to normal operations. Note that this option is only available for user acknowledgeable events. |
|
Acknowledge All |
|
Acknowledge all error events associated with an object to clear the errors and return the object to normal operations. Note that only user acknowledgeable events are cleared. This button is always clickable, even if there are no user acknowledgeable events. Clicking it when there are no user acknowledgeable events results in an error dialog. |
|
Display Count |
A drop-down menu that allows you to select the number of events that should be displayed in the management pane, while you are currently in this perspective. |
Acknowledging Events/Errors
If an object has an error event associated with it you must acknowledge the event to clear the error and return the object to normal operations. For example, this can occur if an Oracle VM Server or virtual machine appear as Stopped (Error) in the status. The object in error is flagged with a red icon in the navigation tree. Oracle VM Servers, virtual machines, repositories and storage objects can have error events associated with them. The following procedures show you how to clear errors and return the object to normal operations.
-
Click the Servers and VMs tab.
-
Select the Oracle VM Server in the navigation tree.
-
Select Events from the Perspective drop-down list in the management pane.
-
Select the user acknowledgeable error event and click Acknowledge
, or click
Acknowledge All
to clear all user acknowledgeable
errors.
-
Click the Servers and VMs tab.
-
Select the server pool, or Oracle VM Server on which the virtual machine resides in the navigation tree.
-
Select Virtual Machines from the Perspective drop-down list in the management pane.
-
Select the virtual machine in the management pane table. Click Display Selected VM Events...
.
-
The Events dialog box is displayed. Select the user acknowledgeable error event and click Acknowledge
, or click
Acknowledge All
to clear all user acknowledgeable
errors. Click
Close.
-
Click the Repositories tab.
-
Select the repository in the navigation tree.
-
Select Events from the Perspective drop-down list in the management pane.
-
Select the error event and click Acknowledge
, or click
Acknowledge All
to clear all errors.
-
Click the Storage tab.
-
Select File Servers, SAN Servers, or a storage server in the navigation tree.
-
Select Events from the Perspective drop-down list in the management pane.
-
Select the user acknowledgeable error event and click Acknowledge
, or click
Acknowledge All
to clear all user acknowledgeable
errors.
6.8.3 Physical Disks Perspective
The Physical Disks perspective lists the different physical disks configured in your environment and running on a SAN storage array. The following columns are displayed in the management pane:
-
Name: The name that has been configured for the physical disk
-
Event Severity: The event level severity for the physical disk.
-
Size (GiB): The size, in GiB, of the physical disk.
-
Volume Group: The volume group that the physical disk belongs to.
-
Server: The servers that have access to the physical disk.
-
Status: The status of the physical disk (whether or not the disk is online).
-
Shareable: Whether the physical disk is shareable or not.
-
Description: A description entered for the physical disk when it was created or edited.
-
VM(s): Virtual machines using the physical disk.
Alongside each physical disk entry in the table, there is an arrow that allows you to expand the view for each entry. This exposes further information:
-
Name: The user-specified alias for the physical disk. The name can be changed without changing the name of the physical disk on the storage array.
-
User Friendly Name: The name of the physical disk on the storage array. The name was specified when the disk was created and cannot be changed.
-
SAN Server: The SAN server that the physical disk belongs to.
-
Thin Provision: Whether or not thin provisioning is supported by the physical disk.
-
Type: The type of storage that the physical disk is a part of (for example, iSCSI or Fibre Channel).
-
Reserved by Server(s): Whether or not the physical disk is unavailable for use by Oracle VM Manager.
-
Storage Targets: The endpoint provided by the storage server through which the server may direct commands to the physical disk. The storage target provides access to the physical disk.
-
Server Pool: The server pool that the physical disk belongs to.
-
Repository: The repository that the physical disk belongs to.
-
VM(s): Virtual machines using the physical disk.
-
ID: The UUID for the physical disk. The UUID is a universally unique identifier that Oracle VM Manager assigns to the physical disk.
-
Page83 ID: The unique SCSI identifier for the physical disk.
-
Access Groups: The access groups that the physical disk belongs to.
-
Extra Information: Information that is passed to and from the Oracle VM Storage Connect plug-in for use internally by the plug-in.
-
Absolute Path: The absolute path to the location of the disk.
The management functions you can perform on the disk are available as icons in the perspective toolbar. Some management options are only available to SAN server disks that use a non-generic Storage Connect plug-in.
|
Toolbar Icon Option |
Icon |
Description |
|---|---|---|
|
|
Displays the Create Physical Disk dialog box. Use this option to create a new physical disk in the selected volume group of the storage array of your choice. This option is not supported for storage arrays using a generic Oracle VM Storage Connect plug-in. |
|
|
|
Displays the Edit Physical Disk dialog box. Use this option to change the name, size, provisioning and share ability of the selected physical disk. |
|
|
|
Displays the Delete Confirmation dialog box. Use this option to delete the selected physical disk. | |
|
|
Displays the Clone Physical Disk dialog box. Use this option to clone a physical disk to another physical disk or to a disk image on a file server. |
|
|
|
Refreshes the physical disks on a storage array. Use this option to rescan the physical disks after making changes to the configuration of a storage array. This updates the storage information known to Oracle VM Manager. |
|
|
|
Displays the Servers using Physical Disk dialog box. Use this option to view which servers are using a selected physical disk. |
|
|
|
Display the Events dialog box which contains the job event associated with the selected physical disks. |
|
|
|
Displays context sensitive help. |
6.8.3.1 Create Physical Disk (not supported on Generic)
On SAN Servers that are not using a generic Oracle VM Storage Connect plug-in, it is frequently possible to create a new physical disk.
-
Expand the SAN Servers folder in the navigation tree, select a SAN server item contained within the folder. Select the Physical Disks option in the Perspective drop-down list.
-
Click on the
Create Physical Disk option
in the toolbar.
-
The Create Physical Disk dialog is displayed. Enter or select the following:
-
Volume Group: A volume group that you want the physical disk to belong to.
-
Name: A name for the physical disk.
-
Size (GiB): The size of the physical disk, in GiB.
-
Extra Information: Optional information that is passed to and from the Oracle VM Storage Connect plug-in for use internally by the plug-in.
-
Description: An optional description of the physical disk.
-
Shareable: Whether or not the physical disk is shareable.
-
Thin Provision: Whether or not thin provisioning is to be supported by the physical disk.
-
-
When you have finished editing the parameters to define the new physical disk, click OK to save the changes, or Cancel to exit out of the dialog without saving any changes.
6.8.3.2 Edit Physical Disk
It is possible to edit the configuration for a physical disk either available on a SAN server or as local or shared storage. The steps and options to do so are described below.
-
On the Storage tab, expand the SAN Servers folder in the navigation tree, select a SAN server item contained within the folder. Select the Physical Disks option in the Perspective drop-down list. Select the physical disk that you wish to edit in the table presented in the management pane.
To edit the physical disk configuration for a physical disk used by a particular server, on the Servers and VMs tab, expand the Server Pools or Unassigned Servers folder, to select a particular server in the navigation tree. Select the Physical Disks option in the Perspective drop-down list. Select the physical disk that you wish to edit in the table presented in the management pane.
-
Click on the
Edit Physical Disk icon in
the toolbar.
-
A dialog opens to allow you to reconfigure the Physical Disk. The dialog has the following options:
-
ID: A non-editable field containing the physical disk's UUID as it is stored within Oracle VM Manager.
-
Name: A field to change the name of the physical disk within Oracle VM Manager.
-
Current Size(GiB): A non-editable field containing the physical disk's current size, in GiB.
-
New Size(GiB): A field to change the size, in GiB, of the physical disk. The size of the physical disk can only be increased in size.
-
Description: A text field allowing a description of the physical disk.
-
Shareable: A check box that determines whether or not the disk can be shared.
-
Thin Provision: A non-editable field describing whether or not thin provisioning is supported by the disk.
-
-
When you have finished editing the physical disk, click OK to save the changes, or Cancel to exit out of the dialog without saving any changes.
6.8.3.3 Delete Physical Disk
It is possible to delete an existing physical disk if it is no longer used in your Oracle VM environment and the Oracle VM Storage Connect plug-in that you are using supports this operation. Two types of physical disks are used in an Oracle VM environment:
-
Local physical disk - A physical disk installed locally on a specific Oracle VM Server.
-
SAN Server physical disk - A physical disk that is made available to the SAN Server during the discovery process.
Each physical disk type can be deleted using the Oracle VM Manager Web Interface.
-
There are two options available that you can use to delete a physical disk from your Oracle VM environment:
-
To delete a local physical disk:
Expand the Servers and VMs tab, expand the Server Pools or Unassigned Servers folder, and select a particular server in the navigation tree. Select the Physical Disks option in the Perspective drop-down list. Select the physical disk that you want to delete in the table presented in the management pane.
-
To delete a SAN Server physical disk:
Use the instructions in step a or alternatively, expand the Storage tab, expand the SAN Servers folder in the navigation tree, and select a SAN server item contained within the folder. Select the Physical Disks option in the Perspective drop-down list. Select the physical disk that you wish to delete in the table presented in the management pane.
-
-
Click on the
Delete Physical
Disk icon in the toolbar.
-
The Delete Confirmation dialog box is displayed. Click OK to delete the physical disk.
6.8.3.4 Clone Physical Disk
It is possible to clone a physical disk. The steps and options to do so are described below.
-
On the Storage tab, expand the SAN Servers folder in the navigation tree, select a SAN server item contained within the folder. Select the Physical Disks option in the Perspective drop-down list. Select the physical disk that you wish to clone in the table presented in the management pane.
To clone a physical disk used by a particular server, on the Servers and VMs tab, expand the Server Pools or Unassigned Servers folder, to select a particular server in the navigation tree. Select the Physical Disks option in the Perspective drop-down list. Select the physical disk that you wish to clone in the table presented in the management pane.
-
Click on the
Clone Physical Disk icon in
the toolbar.
-
A dialog opens to allow you to clone the Physical Disk. The dialog has the following options:
-
Name: A field to set the name of the physical disk clone that you are going to create within Oracle VM Manager.
-
Clone Target Type: A drop-down menu allowing you to select the type of storage to be used for the physical disk clone:
-
Physical Disk: Copies the data from one physical disk to another.
-
Repository: Copies the data from the physical disk into a virtual disk image in an existing repository.
-
-
Clone Target: A searchable field to allow you to select the target location where the clone is to be stored.
-
Clone Type: A drop-down menu allowing you to select the type of clone to create:
-
Sparse Copy: Copies only the written data from the physical disk to the target clone.
-
Non-sparse Copy: Performs a block copy of the physical disk to the target clone.
-
-
-
When you have finished setting the clone parameters for the physical disk, click OK to begin the clone job, or Cancel to exit out of the dialog without saving any changes.
6.8.3.5 Refresh Physical Disk
When changes are made to the physical disks on a SAN server or Oracle VM Server, it is useful to refresh the configuration of your physical disks to make Oracle VM Manager aware of the changes.
-
Expand the SAN Servers folder in the navigation tree, select a SAN server item contained within the folder. Select the Physical Disks option in the Perspective drop-down list. Select the physical disk or disks that you wish to refresh in the table presented in the management pane.
To refresh physical disks used by a particular server, on the Servers and VMs tab, expand the Server Pools or Unassigned Servers folder, to select a particular server in the navigation tree. Select the Physical Disks option in the Perspective drop-down list. Select the physical disk that you wish to refresh in the table presented in the management pane.
-
Click on the
Refresh Physical Disk option
in the toolbar.
-
The selected physical disks are refreshed and their configurations are updated within Oracle VM Manager.
If you encounter an error, when refreshing a physical disk with a repository located on it, similar to the following:
OVMAPI_7281E Cannot perform operation on file system...
You may need to ensure that the repository is under the ownership of the Oracle VM Manager instance that you are using. See Section 4.3.1.2, “Edit Repository” for more information.
6.8.3.6 Display Servers Using a Physical Disk
It is possible to display the Oracle VM Servers that are using a physical disk available on a SAN server. The steps and options to do so are described below.
-
Expand the SAN Servers folder in the navigation tree, select a SAN server item contained within the folder. Select the Physical Disks option in the Perspective drop-down list. Select the physical disk that you wish to view in the table presented in the management pane.
-
Click on the
Display Servers using Physical
Disk icon in the toolbar.
-
A dialog opens to display the Oracle VM Servers that are configured to use the Physical Disk. The dialog provides the following information in tabular format:
-
Name: The name of the Oracle VM Server.
-
Description: The configured description for the Oracle VM Server.
-
Status: The running status of the Oracle VM Server.
-
Utilization (%): The percentage of the disk that is utilized by the Oracle VM Server.
-
Maintenance Mode: Whether or not the Oracle VM Server is in maintenance mode.
-
Owned: Whether or not the current instance of Oracle VM Manager has ownership of the Oracle VM Server.
-
-
When you have finished viewing the list of servers with access to the physical disk, click Close to exit out of the dialog.
6.8.3.7 Display Events
The Events perspective is common to many elements within the Oracle VM Manager Web Interface. The Events perspective generally appears as an option within the Perspectives drop-down menu on the management pane of tabs that include a navigation tree. In this case, the Events perspective displays events specific to the item selected in the navigation tree and presents these in the management pane.
The Events perspective may also appear within a dialog that is
triggered from a Display Selected
Events... ![]() perspective toolbar option. In this case,
the Events perspective dialog displays events specific to one
or more elements selected in the management pane.
perspective toolbar option. In this case,
the Events perspective dialog displays events specific to one
or more elements selected in the management pane.
If an object has an error event associated with it you must acknowledge the event to clear the error and return the object to normal operations. For example, this can occur if an Oracle VM Server or virtual machine appear as Stopped (Error) in the status. The object in error is flagged with a red icon in the navigation tree. Oracle VM Servers, virtual machines, repositories and storage objects can have error events associated with them.
Since Oracle VM Manager attempts to resolve issues automatically as much as possible, not all events can be acknowledged by a user within the Oracle VM Manager Web Interface. Therefore, a flag is set for events that are user acknowledgeable. If an event does not have this flag set, you are unable to acknowledge it, since it is handled internally by Oracle VM Manager.
The Events perspective or dialog contains a table with the following columns of information for each event:
-
Severity: The severity level assigned to the event.
-
Timestamp: The date and time that the event occurred.
-
Modify Time: The last recorded date and time that the event was modified.
-
Type: The type of event according to Oracle VM Manager's event categorization model.
-
Summary: A summary description of the event.
-
Acknowledged: Whether an error event has been acknowledged.
-
User Acknowledgeable: Whether or not an event can be acknowledged by the user.
Event Descriptions
An arrow displays next to each event in the table. Click the arrow to expand and view the Description section that provides additional details for the event.
The Events perspective or dialog contains a perspective toolbar with the following options:
|
Toolbar Icon Option |
Icon |
Description |
|---|---|---|
|
Acknowledge |
|
Acknowledge a selected error event to clear the error and return the object to normal operations. Note that this option is only available for user acknowledgeable events. |
|
Acknowledge All |
|
Acknowledge all error events associated with an object to clear the errors and return the object to normal operations. Note that only user acknowledgeable events are cleared. This button is always clickable, even if there are no user acknowledgeable events. Clicking it when there are no user acknowledgeable events results in an error dialog. |
|
Display Count |
A drop-down menu that allows you to select the number of events that should be displayed in the management pane, while you are currently in this perspective. |
Acknowledging Events/Errors
If an object has an error event associated with it you must acknowledge the event to clear the error and return the object to normal operations. For example, this can occur if an Oracle VM Server or virtual machine appear as Stopped (Error) in the status. The object in error is flagged with a red icon in the navigation tree. Oracle VM Servers, virtual machines, repositories and storage objects can have error events associated with them. The following procedures show you how to clear errors and return the object to normal operations.
-
Click the Servers and VMs tab.
-
Select the Oracle VM Server in the navigation tree.
-
Select Events from the Perspective drop-down list in the management pane.
-
Select the user acknowledgeable error event and click Acknowledge
, or click
Acknowledge All
to clear all user acknowledgeable
errors.
-
Click the Servers and VMs tab.
-
Select the server pool, or Oracle VM Server on which the virtual machine resides in the navigation tree.
-
Select Virtual Machines from the Perspective drop-down list in the management pane.
-
Select the virtual machine in the management pane table. Click Display Selected VM Events...
.
-
The Events dialog box is displayed. Select the user acknowledgeable error event and click Acknowledge
, or click
Acknowledge All
to clear all user acknowledgeable
errors. Click
Close.
-
Click the Repositories tab.
-
Select the repository in the navigation tree.
-
Select Events from the Perspective drop-down list in the management pane.
-
Select the error event and click Acknowledge
, or click
Acknowledge All
to clear all errors.
-
Click the Storage tab.
-
Select File Servers, SAN Servers, or a storage server in the navigation tree.
-
Select Events from the Perspective drop-down list in the management pane.
-
Select the user acknowledgeable error event and click Acknowledge
, or click
Acknowledge All
to clear all user acknowledgeable
errors.
6.8.4 Access Groups Perspective
The Access Groups perspective lists the different Access Groups configured in your environment. The following columns are displayed in the management pane:
-
Name: The name that has been configured for the access group.
-
Event Severity: The event level severity associated with the access group.
-
SAN Server: The SAN server that the access group applies to.
-
Description: A description entered for the access group when it was created or edited.
This perspective includes a toolbar that consists of the following options:
|
Toolbar Icon Option |
Icon |
Description |
|---|---|---|
|
|
Displays the Create an Access Group dialog box. Use this option to create a new access group. This option is only available for non-generic storage arrays. |
|
|
|
Displays the Edit Access Group dialog box. Use this option to edit access group settings such as name, description and the storage initiators that have access to the SAN Server. |
|
|
|
Displays the Delete Confirmation dialog box. Use this option to delete the selected access group. This option is only available for non-generic storage arrays. This option is only available for non-generic storage arrays. |
|
|
|
Display the Events dialog box which contains the job event associated with the selected access groups. |
|
|
|
Displays context sensitive help. |
6.8.4.1 Create Access Group
Except for generic storage arrays, it is possible to create multiple access groups in order to arrange and restrict physical disk access according to your requirements. The generic iSCSI storage arrays have a single access group available by default, where you can simply add or remove storage initiators from your Oracle VM Servers.
Generic fibre channel storage has no access groups and is always listed under the Unmanaged Fibre Channel Storage Array folder.
-
Expand the SAN Servers folder in the navigation tree, select a SAN server item contained within the folder. Select the Access Groups option in the Perspective drop-down list.
-
Click Create Access Group
to start the Create an Access
Group wizard.
-
The Create Access Group step is displayed in the wizard. Enter a name for your new access group and optionally provide a description. Click Next.
-
The Select Initiators step is displayed in the wizard. It contains the available storage initiators for this type of storage on the Oracle VM Servers in your environment. Use the arrow buttons to move the required initiators from the Available Storage Initiators box to the Selected Storage Initiators box. Click Next.
NoteYou can also use the Storage Initiators perspective in the Servers and VMs tab to view and configure storage initiators on an individual Oracle VM Server. See Section 3.5.7.1, “View Access Groups for Selected Initiator” for more information on using this method.
ImportantIf you have both iSCSI and Fibre Channel storage array types in your environment, you must ensure that the storage initiators that you are adding for the access group, match the storage type that you are defining this access group for. See What are Access Groups? in the Oracle VM Concepts Guide for more information on Access Groups.
-
The Present Physical Disks step is displayed in the wizard. It contains the available storage elements on the storage array you are registering.
NoteIf this is the first time you are configuring access to this storage array, the list of available physical disks may be empty. You may have to edit the access group afterwards to select physical disks.
Use the arrow buttons to move the required disks from the Available Physical Disks box to the Selected Physical Disks box. These disks are presented to the Oracle VM Servers that have the iSCSI initiator that belongs to the access group. Click Finish to create the new access group with the selected initiators and physical disks.
The new access group now appears in the Access Groups table. If you change the Perspective of the management pane to Physical Disks, the list of presented physical disks appear in the table.
After configuring the access group it is advisable to refresh the SAN server to make sure that the current storage layout and access rules are in effect. The selected physical disks in your non-generic storage array are now available to the Oracle VM Servers in this access group.
6.8.4.2 Edit Access Group
It is possible to edit an existing Access Group for a SAN Server. This option is also possible for a generic iSCSI storage array, although you are only able to edit the default access group that is created when you discover the SAN Server, since it is not possible to create additional access groups for generic Oracle VM Storage Connect plug-ins.
-
Expand the SAN Servers folder in the navigation tree, select a SAN server item contained within the folder. Select the Access Groups option in the Perspective drop-down list.
-
Select the access group that you wish to edit (a default access group is always present) and click Edit Access Group
. The Edit Access Group
dialog box is displayed.
-
In the Access Group tab, you can edit the Name on Array and Access Group Name for storage arrays that use a non-generic Oracle VM Storage Connect plug-in. When you have a generic plug-in, these items are greyed out. You can also provide or edit a description for the access group.
-
Select the Storage Initiators tab. It contains the available storage initiators for this type of storage on the Oracle VM Servers in your environment.
-
Use the arrow buttons to move the required initiators to the Selected Storage Initiators box.
NoteYou can also use the Storage Initiators perspective in the Servers and VMs tab to view and configure storage initiators on an individual Oracle VM Server. See Section 3.5.7.1, “View Access Groups for Selected Initiator” for more information on using this method.
ImportantIf you have both iSCSI and Fibre Channel storage array types in your environment, you must ensure that the storage initiators that you are adding for the access group, match the storage type that you are defining this access group for. See What are Access Groups? in the Oracle VM Concepts Guide for more information on Access Groups.
For a generic storage array you cannot select which physical disks are added; all disks are automatically presented to the selected Oracle VM Servers.
-
Click OK to save your changes to the default access group. If you change the Perspective of the management pane to Physical Disks, the list of presented physical disks appears in the table.
-
After configuring the access group it is advisable to refresh the storage array to make sure that the current storage layout and access rules are in effect.
The Oracle VM Servers in this access group now have the necessary permissions to use the physical disks of the storage array; they can be deployed either as disks for virtual machines (VMs) or for storage repositories. To create storage repositories on your physical disks, see Chapter 4, Repositories Tab.
6.8.4.3 Delete Access Group
Except for generic storage arrays, it is possible to delete additional access groups that you may have defined apart from the default access group.
-
Expand the SAN Servers folder in the navigation tree, select a SAN server item contained within the folder. Select the Access Groups option in the Perspective drop-down list. Select the access group or groups, that you wish to delete, from the items listed in the management pane.
-
Click on the
Delete Access Group icon in
the toolbar.
-
The Delete Confirmation dialog box is displayed. Click OK to delete the access group.
6.8.4.4 Present/Unpresent Physical Disks
6.8.4.5 Display Events
The Events perspective is common to many elements within the Oracle VM Manager Web Interface. The Events perspective generally appears as an option within the Perspectives drop-down menu on the management pane of tabs that include a navigation tree. In this case, the Events perspective displays events specific to the item selected in the navigation tree and presents these in the management pane.
The Events perspective may also appear within a dialog that is
triggered from a Display Selected
Events... ![]() perspective toolbar option. In this case,
the Events perspective dialog displays events specific to one
or more elements selected in the management pane.
perspective toolbar option. In this case,
the Events perspective dialog displays events specific to one
or more elements selected in the management pane.
If an object has an error event associated with it you must acknowledge the event to clear the error and return the object to normal operations. For example, this can occur if an Oracle VM Server or virtual machine appear as Stopped (Error) in the status. The object in error is flagged with a red icon in the navigation tree. Oracle VM Servers, virtual machines, repositories and storage objects can have error events associated with them.
Since Oracle VM Manager attempts to resolve issues automatically as much as possible, not all events can be acknowledged by a user within the Oracle VM Manager Web Interface. Therefore, a flag is set for events that are user acknowledgeable. If an event does not have this flag set, you are unable to acknowledge it, since it is handled internally by Oracle VM Manager.
The Events perspective or dialog contains a table with the following columns of information for each event:
-
Severity: The severity level assigned to the event.
-
Timestamp: The date and time that the event occurred.
-
Modify Time: The last recorded date and time that the event was modified.
-
Type: The type of event according to Oracle VM Manager's event categorization model.
-
Summary: A summary description of the event.
-
Acknowledged: Whether an error event has been acknowledged.
-
User Acknowledgeable: Whether or not an event can be acknowledged by the user.
Event Descriptions
An arrow displays next to each event in the table. Click the arrow to expand and view the Description section that provides additional details for the event.
The Events perspective or dialog contains a perspective toolbar with the following options:
|
Toolbar Icon Option |
Icon |
Description |
|---|---|---|
|
Acknowledge |
|
Acknowledge a selected error event to clear the error and return the object to normal operations. Note that this option is only available for user acknowledgeable events. |
|
Acknowledge All |
|
Acknowledge all error events associated with an object to clear the errors and return the object to normal operations. Note that only user acknowledgeable events are cleared. This button is always clickable, even if there are no user acknowledgeable events. Clicking it when there are no user acknowledgeable events results in an error dialog. |
|
Display Count |
A drop-down menu that allows you to select the number of events that should be displayed in the management pane, while you are currently in this perspective. |
Acknowledging Events/Errors
If an object has an error event associated with it you must acknowledge the event to clear the error and return the object to normal operations. For example, this can occur if an Oracle VM Server or virtual machine appear as Stopped (Error) in the status. The object in error is flagged with a red icon in the navigation tree. Oracle VM Servers, virtual machines, repositories and storage objects can have error events associated with them. The following procedures show you how to clear errors and return the object to normal operations.
-
Click the Servers and VMs tab.
-
Select the Oracle VM Server in the navigation tree.
-
Select Events from the Perspective drop-down list in the management pane.
-
Select the user acknowledgeable error event and click Acknowledge
, or click
Acknowledge All
to clear all user acknowledgeable
errors.
-
Click the Servers and VMs tab.
-
Select the server pool, or Oracle VM Server on which the virtual machine resides in the navigation tree.
-
Select Virtual Machines from the Perspective drop-down list in the management pane.
-
Select the virtual machine in the management pane table. Click Display Selected VM Events...
.
-
The Events dialog box is displayed. Select the user acknowledgeable error event and click Acknowledge
, or click
Acknowledge All
to clear all user acknowledgeable
errors. Click
Close.
-
Click the Repositories tab.
-
Select the repository in the navigation tree.
-
Select Events from the Perspective drop-down list in the management pane.
-
Select the error event and click Acknowledge
, or click
Acknowledge All
to clear all errors.
-
Click the Storage tab.
-
Select File Servers, SAN Servers, or a storage server in the navigation tree.
-
Select Events from the Perspective drop-down list in the management pane.
-
Select the user acknowledgeable error event and click Acknowledge
, or click
Acknowledge All
to clear all user acknowledgeable
errors.
6.8.5 Volume Groups Perspective
The Volume Groups perspective lists the different Volume Groups configured for each SAN Server in your environment. The following columns are displayed in the management pane:
-
Name: The name that has been configured for the volume group.
-
Size (GiB): A grouping that consists of the following columns:
-
Free: The size of the volume, in GiB, that is currently free.
-
Used: The size of the volume, in GiB, that is currently in use.
-
Total: The total size, in GiB, of the volume.
-
-
Description: A description entered for the volume group when it was created or edited.
This perspective includes a toolbar that consists of the following options:
|
Toolbar Icon Option |
Icon |
Description |
|---|---|---|
|
|
Displays the Edit Volume Group dialog box. Use this option to edit volume group settings such as name and description. |
|
|
|
Displays context sensitive help. |
6.8.5.1 Edit Volume Group
It is possible to edit the configuration for a Volume Group available on a SAN server. The steps and options to do so are described below.
-
Expand the SAN Servers folder in the navigation tree, select a SAN server item contained within the folder. Select the Volume Groups option in the Perspective drop-down list. Select the volume group that you wish to edit in the table presented in the management pane.
-
Click on the
Edit Volume Group icon in the
toolbar.
-
A dialog opens to allow you to reconfigure the Volume Group. The dialog has the following options:
-
ID: A non-editable field containing the volume group's UUID as it is stored within Oracle VM Manager.
-
Name: A field to change the name of the volume group within Oracle VM Manager.
-
Description: A text field allowing a description of the volume group.
-
-
When you have finished editing the volume group, click OK to save the changes, or Cancel to exit out of the dialog without saving any changes.
6.9 Unmanaged iSCSI Storage Array Item
An Unmanaged iSCSI Storage Array navigation item is listed underneath the Section 6.5, “SAN Servers Folder” when it has been expanded. The structure of the navigation provided in the navigation tree is discussed in more detail in Section 6.2, “Summary”.
Clicking on a Unmanaged iSCSI Storage Array navigation item in the navigation tree allows you to access different perspectives in the management pane. Each perspective provides its own view of any unmanaged iSCSI storage arrays within Oracle VM Manager. Most of the perspectives also include separate perspective toolbars that enable you to perform various configuration or management tasks specific to the view currently displayed within the management pane. The Unmanaged iSCSI Storage Array navigation item offers the following perspectives within the management pane:
6.9.1 Info Perspective
The Info perspective is common to many elements within the Oracle VM Manager Web Interface. This perspective always shows the individually configured parameters for an item that is currently selected in the navigation tree. Some of these configured parameters may be automatically populated through a discovery process, while others may have been configured manually during the creation of the object that is selected.
The Info perspective or dialog contains a perspective toolbar with the following options:
|
Toolbar Icon Option |
Icon |
Description |
|---|---|---|
|
|
Displays context sensitive help. |
This perspective usually includes the following information depending on what information is returned by the Oracle VM Storage Connect plug-in:
-
Admin Host: The configured admin host to access this storage array.
-
Admin Username: The configured admin username to access this storage array.
-
Storage Name: The name of the storage array as returned by the Oracle VM Storage Connect plug-in.
-
Storage Type: The type of storage array as returned by the Oracle VM Storage Connect plug-in.
-
Description: The configured description for the storage array.
-
SAN Server's Storage Description: The description returned for the storage array as returned by the Oracle VM Storage Connect plug-in.
-
Status: The status of the storage array as returned by the Oracle VM Storage Connect plug-in.
-
Validated: Whether or not the storage array has been validated by Oracle VM Manager. No special storage operations supported by the Oracle VM Storage Connect plug-in may occur until the storage server is validated by Oracle VM Manager.
-
Storage Plug-In: The name of the Oracle VM Storage Connect plug-in used to access the storage array.
-
Storage Plug-In Version: The version number of the Oracle VM Storage Connect plug-in used to access the storage array.
-
Plug-in Private Data: Additional parameters passed to the Oracle VM Storage Connect plug-in.
-
Total Size (GiB): The total size, in GiB, reported by the Oracle VM Storage Connect plug-in.
-
Free Size (GiB): The available free space, in GiB, reported by the Oracle VM Storage Connect plug-in.
-
Used Size (GiB): The amount of used space, in GiB, reported by the Oracle VM Storage Connect plug-in.
Additional fields may be listed to indicate the support status for various storage related functions as reported by the Oracle VM Storage Connect plug-in in use.
6.9.2 Events Perspective
The Events perspective is common to many elements within the Oracle VM Manager Web Interface. The Events perspective generally appears as an option within the Perspectives drop-down menu on the management pane of tabs that include a navigation tree. In this case, the Events perspective displays events specific to the item selected in the navigation tree and presents these in the management pane.
The Events perspective may also appear within a dialog that is
triggered from a Display Selected
Events... ![]() perspective toolbar option. In this case,
the Events perspective dialog displays events specific to one
or more elements selected in the management pane.
perspective toolbar option. In this case,
the Events perspective dialog displays events specific to one
or more elements selected in the management pane.
If an object has an error event associated with it you must acknowledge the event to clear the error and return the object to normal operations. For example, this can occur if an Oracle VM Server or virtual machine appear as Stopped (Error) in the status. The object in error is flagged with a red icon in the navigation tree. Oracle VM Servers, virtual machines, repositories and storage objects can have error events associated with them.
Since Oracle VM Manager attempts to resolve issues automatically as much as possible, not all events can be acknowledged by a user within the Oracle VM Manager Web Interface. Therefore, a flag is set for events that are user acknowledgeable. If an event does not have this flag set, you are unable to acknowledge it, since it is handled internally by Oracle VM Manager.
The Events perspective or dialog contains a table with the following columns of information for each event:
-
Severity: The severity level assigned to the event.
-
Timestamp: The date and time that the event occurred.
-
Modify Time: The last recorded date and time that the event was modified.
-
Type: The type of event according to Oracle VM Manager's event categorization model.
-
Summary: A summary description of the event.
-
Acknowledged: Whether an error event has been acknowledged.
-
User Acknowledgeable: Whether or not an event can be acknowledged by the user.
Event Descriptions
An arrow displays next to each event in the table. Click the arrow to expand and view the Description section that provides additional details for the event.
The Events perspective or dialog contains a perspective toolbar with the following options:
|
Toolbar Icon Option |
Icon |
Description |
|---|---|---|
|
Acknowledge |
|
Acknowledge a selected error event to clear the error and return the object to normal operations. Note that this option is only available for user acknowledgeable events. |
|
Acknowledge All |
|
Acknowledge all error events associated with an object to clear the errors and return the object to normal operations. Note that only user acknowledgeable events are cleared. This button is always clickable, even if there are no user acknowledgeable events. Clicking it when there are no user acknowledgeable events results in an error dialog. |
|
Display Count |
A drop-down menu that allows you to select the number of events that should be displayed in the management pane, while you are currently in this perspective. |
Acknowledging Events/Errors
If an object has an error event associated with it you must acknowledge the event to clear the error and return the object to normal operations. For example, this can occur if an Oracle VM Server or virtual machine appear as Stopped (Error) in the status. The object in error is flagged with a red icon in the navigation tree. Oracle VM Servers, virtual machines, repositories and storage objects can have error events associated with them. The following procedures show you how to clear errors and return the object to normal operations.
-
Click the Servers and VMs tab.
-
Select the Oracle VM Server in the navigation tree.
-
Select Events from the Perspective drop-down list in the management pane.
-
Select the user acknowledgeable error event and click Acknowledge
, or click
Acknowledge All
to clear all user acknowledgeable
errors.
-
Click the Servers and VMs tab.
-
Select the server pool, or Oracle VM Server on which the virtual machine resides in the navigation tree.
-
Select Virtual Machines from the Perspective drop-down list in the management pane.
-
Select the virtual machine in the management pane table. Click Display Selected VM Events...
.
-
The Events dialog box is displayed. Select the user acknowledgeable error event and click Acknowledge
, or click
Acknowledge All
to clear all user acknowledgeable
errors. Click
Close.
-
Click the Repositories tab.
-
Select the repository in the navigation tree.
-
Select Events from the Perspective drop-down list in the management pane.
-
Select the error event and click Acknowledge
, or click
Acknowledge All
to clear all errors.
-
Click the Storage tab.
-
Select File Servers, SAN Servers, or a storage server in the navigation tree.
-
Select Events from the Perspective drop-down list in the management pane.
-
Select the user acknowledgeable error event and click Acknowledge
, or click
Acknowledge All
to clear all user acknowledgeable
errors.
6.9.3 Physical Disks Perspective
The Physical Disks perspective lists the different physical disks configured in your environment and running on a SAN storage array. The following columns are displayed in the management pane:
-
Name: The name that has been configured for the physical disk
-
Event Severity: The event level severity for the physical disk.
-
Size (GiB): The size, in GiB, of the physical disk.
-
Volume Group: The volume group that the physical disk belongs to.
-
Server: The servers that have access to the physical disk.
-
Status: The status of the physical disk (whether or not the disk is online).
-
Shareable: Whether the physical disk is shareable or not.
-
Description: A description entered for the physical disk when it was created or edited.
-
VM(s): Virtual machines using the physical disk.
Alongside each physical disk entry in the table, there is an arrow that allows you to expand the view for each entry. This exposes further information:
-
Name: The user-specified alias for the physical disk. The name can be changed without changing the name of the physical disk on the storage array.
-
User Friendly Name: The name of the physical disk on the storage array. The name was specified when the disk was created and cannot be changed.
-
SAN Server: The SAN server that the physical disk belongs to.
-
Thin Provision: Whether or not thin provisioning is supported by the physical disk.
-
Type: The type of storage that the physical disk is a part of (for example, iSCSI or Fibre Channel).
-
Reserved by Server(s): Whether or not the physical disk is unavailable for use by Oracle VM Manager.
-
Storage Targets: The endpoint provided by the storage server through which the server may direct commands to the physical disk. The storage target provides access to the physical disk.
-
Server Pool: The server pool that the physical disk belongs to.
-
Repository: The repository that the physical disk belongs to.
-
VM(s): Virtual machines using the physical disk.
-
ID: The UUID for the physical disk. The UUID is a universally unique identifier that Oracle VM Manager assigns to the physical disk.
-
Page83 ID: The unique SCSI identifier for the physical disk.
-
Access Groups: The access groups that the physical disk belongs to.
-
Extra Information: Information that is passed to and from the Oracle VM Storage Connect plug-in for use internally by the plug-in.
-
Absolute Path: The absolute path to the location of the disk.
The management functions you can perform on the disk are available as icons in the perspective toolbar. Some management options are only available to SAN server disks that use a non-generic Storage Connect plug-in.
|
Toolbar Icon Option |
Icon |
Description |
|---|---|---|
|
|
Displays the Create Physical Disk dialog box. Use this option to create a new physical disk in the selected volume group of the storage array of your choice. This option is not supported for storage arrays using a generic Oracle VM Storage Connect plug-in. |
|
|
|
Displays the Edit Physical Disk dialog box. Use this option to change the name, size, provisioning and share ability of the selected physical disk. |
|
|
|
Displays the Delete Confirmation dialog box. Use this option to delete the selected physical disk. | |
|
|
Displays the Clone Physical Disk dialog box. Use this option to clone a physical disk to another physical disk or to a disk image on a file server. |
|
|
|
Refreshes the physical disks on a storage array. Use this option to rescan the physical disks after making changes to the configuration of a storage array. This updates the storage information known to Oracle VM Manager. |
|
|
|
Displays the Servers using Physical Disk dialog box. Use this option to view which servers are using a selected physical disk. |
|
|
|
Display the Events dialog box which contains the job event associated with the selected physical disks. |
|
|
|
Displays context sensitive help. |
6.9.3.1 Create Physical Disk (not supported on Generic)
On SAN Servers that are not using a generic Oracle VM Storage Connect plug-in, it is frequently possible to create a new physical disk.
-
Expand the SAN Servers folder in the navigation tree, select a SAN server item contained within the folder. Select the Physical Disks option in the Perspective drop-down list.
-
Click on the
Create Physical Disk option
in the toolbar.
-
The Create Physical Disk dialog is displayed. Enter or select the following:
-
Volume Group: A volume group that you want the physical disk to belong to.
-
Name: A name for the physical disk.
-
Size (GiB): The size of the physical disk, in GiB.
-
Extra Information: Optional information that is passed to and from the Oracle VM Storage Connect plug-in for use internally by the plug-in.
-
Description: An optional description of the physical disk.
-
Shareable: Whether or not the physical disk is shareable.
-
Thin Provision: Whether or not thin provisioning is to be supported by the physical disk.
-
-
When you have finished editing the parameters to define the new physical disk, click OK to save the changes, or Cancel to exit out of the dialog without saving any changes.
6.9.3.2 Edit Physical Disk
It is possible to edit the configuration for a physical disk either available on a SAN server or as local or shared storage. The steps and options to do so are described below.
-
On the Storage tab, expand the SAN Servers folder in the navigation tree, select a SAN server item contained within the folder. Select the Physical Disks option in the Perspective drop-down list. Select the physical disk that you wish to edit in the table presented in the management pane.
To edit the physical disk configuration for a physical disk used by a particular server, on the Servers and VMs tab, expand the Server Pools or Unassigned Servers folder, to select a particular server in the navigation tree. Select the Physical Disks option in the Perspective drop-down list. Select the physical disk that you wish to edit in the table presented in the management pane.
-
Click on the
Edit Physical Disk icon in
the toolbar.
-
A dialog opens to allow you to reconfigure the Physical Disk. The dialog has the following options:
-
ID: A non-editable field containing the physical disk's UUID as it is stored within Oracle VM Manager.
-
Name: A field to change the name of the physical disk within Oracle VM Manager.
-
Current Size(GiB): A non-editable field containing the physical disk's current size, in GiB.
-
New Size(GiB): A field to change the size, in GiB, of the physical disk. The size of the physical disk can only be increased in size.
-
Description: A text field allowing a description of the physical disk.
-
Shareable: A check box that determines whether or not the disk can be shared.
-
Thin Provision: A non-editable field describing whether or not thin provisioning is supported by the disk.
-
-
When you have finished editing the physical disk, click OK to save the changes, or Cancel to exit out of the dialog without saving any changes.
6.9.3.3 Delete Physical Disk
It is possible to delete an existing physical disk if it is no longer used in your Oracle VM environment and the Oracle VM Storage Connect plug-in that you are using supports this operation. Two types of physical disks are used in an Oracle VM environment:
-
Local physical disk - A physical disk installed locally on a specific Oracle VM Server.
-
SAN Server physical disk - A physical disk that is made available to the SAN Server during the discovery process.
Each physical disk type can be deleted using the Oracle VM Manager Web Interface.
-
There are two options available that you can use to delete a physical disk from your Oracle VM environment:
-
To delete a local physical disk:
Expand the Servers and VMs tab, expand the Server Pools or Unassigned Servers folder, and select a particular server in the navigation tree. Select the Physical Disks option in the Perspective drop-down list. Select the physical disk that you want to delete in the table presented in the management pane.
-
To delete a SAN Server physical disk:
Use the instructions in step a or alternatively, expand the Storage tab, expand the SAN Servers folder in the navigation tree, and select a SAN server item contained within the folder. Select the Physical Disks option in the Perspective drop-down list. Select the physical disk that you wish to delete in the table presented in the management pane.
-
-
Click on the
Delete Physical
Disk icon in the toolbar.
-
The Delete Confirmation dialog box is displayed. Click OK to delete the physical disk.
6.9.3.4 Clone Physical Disk
It is possible to clone a physical disk. The steps and options to do so are described below.
-
On the Storage tab, expand the SAN Servers folder in the navigation tree, select a SAN server item contained within the folder. Select the Physical Disks option in the Perspective drop-down list. Select the physical disk that you wish to clone in the table presented in the management pane.
To clone a physical disk used by a particular server, on the Servers and VMs tab, expand the Server Pools or Unassigned Servers folder, to select a particular server in the navigation tree. Select the Physical Disks option in the Perspective drop-down list. Select the physical disk that you wish to clone in the table presented in the management pane.
-
Click on the
Clone Physical Disk icon in
the toolbar.
-
A dialog opens to allow you to clone the Physical Disk. The dialog has the following options:
-
Name: A field to set the name of the physical disk clone that you are going to create within Oracle VM Manager.
-
Clone Target Type: A drop-down menu allowing you to select the type of storage to be used for the physical disk clone:
-
Physical Disk: Copies the data from one physical disk to another.
-
Repository: Copies the data from the physical disk into a virtual disk image in an existing repository.
-
-
Clone Target: A searchable field to allow you to select the target location where the clone is to be stored.
-
Clone Type: A drop-down menu allowing you to select the type of clone to create:
-
Sparse Copy: Copies only the written data from the physical disk to the target clone.
-
Non-sparse Copy: Performs a block copy of the physical disk to the target clone.
-
-
-
When you have finished setting the clone parameters for the physical disk, click OK to begin the clone job, or Cancel to exit out of the dialog without saving any changes.
6.9.3.5 Refresh Physical Disk
When changes are made to the physical disks on a SAN server or Oracle VM Server, it is useful to refresh the configuration of your physical disks to make Oracle VM Manager aware of the changes.
-
Expand the SAN Servers folder in the navigation tree, select a SAN server item contained within the folder. Select the Physical Disks option in the Perspective drop-down list. Select the physical disk or disks that you wish to refresh in the table presented in the management pane.
To refresh physical disks used by a particular server, on the Servers and VMs tab, expand the Server Pools or Unassigned Servers folder, to select a particular server in the navigation tree. Select the Physical Disks option in the Perspective drop-down list. Select the physical disk that you wish to refresh in the table presented in the management pane.
-
Click on the
Refresh Physical Disk option
in the toolbar.
-
The selected physical disks are refreshed and their configurations are updated within Oracle VM Manager.
If you encounter an error, when refreshing a physical disk with a repository located on it, similar to the following:
OVMAPI_7281E Cannot perform operation on file system...
You may need to ensure that the repository is under the ownership of the Oracle VM Manager instance that you are using. See Section 4.3.1.2, “Edit Repository” for more information.
6.9.3.6 Display Servers Using a Physical Disk
It is possible to display the Oracle VM Servers that are using a physical disk available on a SAN server. The steps and options to do so are described below.
-
Expand the SAN Servers folder in the navigation tree, select a SAN server item contained within the folder. Select the Physical Disks option in the Perspective drop-down list. Select the physical disk that you wish to view in the table presented in the management pane.
-
Click on the
Display Servers using Physical
Disk icon in the toolbar.
-
A dialog opens to display the Oracle VM Servers that are configured to use the Physical Disk. The dialog provides the following information in tabular format:
-
Name: The name of the Oracle VM Server.
-
Description: The configured description for the Oracle VM Server.
-
Status: The running status of the Oracle VM Server.
-
Utilization (%): The percentage of the disk that is utilized by the Oracle VM Server.
-
Maintenance Mode: Whether or not the Oracle VM Server is in maintenance mode.
-
Owned: Whether or not the current instance of Oracle VM Manager has ownership of the Oracle VM Server.
-
-
When you have finished viewing the list of servers with access to the physical disk, click Close to exit out of the dialog.
6.9.3.7 Display Events
The Events perspective is common to many elements within the Oracle VM Manager Web Interface. The Events perspective generally appears as an option within the Perspectives drop-down menu on the management pane of tabs that include a navigation tree. In this case, the Events perspective displays events specific to the item selected in the navigation tree and presents these in the management pane.
The Events perspective may also appear within a dialog that is
triggered from a Display Selected
Events... ![]() perspective toolbar option. In this case,
the Events perspective dialog displays events specific to one
or more elements selected in the management pane.
perspective toolbar option. In this case,
the Events perspective dialog displays events specific to one
or more elements selected in the management pane.
If an object has an error event associated with it you must acknowledge the event to clear the error and return the object to normal operations. For example, this can occur if an Oracle VM Server or virtual machine appear as Stopped (Error) in the status. The object in error is flagged with a red icon in the navigation tree. Oracle VM Servers, virtual machines, repositories and storage objects can have error events associated with them.
Since Oracle VM Manager attempts to resolve issues automatically as much as possible, not all events can be acknowledged by a user within the Oracle VM Manager Web Interface. Therefore, a flag is set for events that are user acknowledgeable. If an event does not have this flag set, you are unable to acknowledge it, since it is handled internally by Oracle VM Manager.
The Events perspective or dialog contains a table with the following columns of information for each event:
-
Severity: The severity level assigned to the event.
-
Timestamp: The date and time that the event occurred.
-
Modify Time: The last recorded date and time that the event was modified.
-
Type: The type of event according to Oracle VM Manager's event categorization model.
-
Summary: A summary description of the event.
-
Acknowledged: Whether an error event has been acknowledged.
-
User Acknowledgeable: Whether or not an event can be acknowledged by the user.
Event Descriptions
An arrow displays next to each event in the table. Click the arrow to expand and view the Description section that provides additional details for the event.
The Events perspective or dialog contains a perspective toolbar with the following options:
|
Toolbar Icon Option |
Icon |
Description |
|---|---|---|
|
Acknowledge |
|
Acknowledge a selected error event to clear the error and return the object to normal operations. Note that this option is only available for user acknowledgeable events. |
|
Acknowledge All |
|
Acknowledge all error events associated with an object to clear the errors and return the object to normal operations. Note that only user acknowledgeable events are cleared. This button is always clickable, even if there are no user acknowledgeable events. Clicking it when there are no user acknowledgeable events results in an error dialog. |
|
Display Count |
A drop-down menu that allows you to select the number of events that should be displayed in the management pane, while you are currently in this perspective. |
Acknowledging Events/Errors
If an object has an error event associated with it you must acknowledge the event to clear the error and return the object to normal operations. For example, this can occur if an Oracle VM Server or virtual machine appear as Stopped (Error) in the status. The object in error is flagged with a red icon in the navigation tree. Oracle VM Servers, virtual machines, repositories and storage objects can have error events associated with them. The following procedures show you how to clear errors and return the object to normal operations.
-
Click the Servers and VMs tab.
-
Select the Oracle VM Server in the navigation tree.
-
Select Events from the Perspective drop-down list in the management pane.
-
Select the user acknowledgeable error event and click Acknowledge
, or click
Acknowledge All
to clear all user acknowledgeable
errors.
-
Click the Servers and VMs tab.
-
Select the server pool, or Oracle VM Server on which the virtual machine resides in the navigation tree.
-
Select Virtual Machines from the Perspective drop-down list in the management pane.
-
Select the virtual machine in the management pane table. Click Display Selected VM Events...
.
-
The Events dialog box is displayed. Select the user acknowledgeable error event and click Acknowledge
, or click
Acknowledge All
to clear all user acknowledgeable
errors. Click
Close.
-
Click the Repositories tab.
-
Select the repository in the navigation tree.
-
Select Events from the Perspective drop-down list in the management pane.
-
Select the error event and click Acknowledge
, or click
Acknowledge All
to clear all errors.
-
Click the Storage tab.
-
Select File Servers, SAN Servers, or a storage server in the navigation tree.
-
Select Events from the Perspective drop-down list in the management pane.
-
Select the user acknowledgeable error event and click Acknowledge
, or click
Acknowledge All
to clear all user acknowledgeable
errors.
6.9.4 Access Groups Perspective
The Access Groups perspective lists the different Access Groups configured in your environment. The following columns are displayed in the management pane:
-
Name: The name that has been configured for the access group.
-
Event Severity: The event level severity associated with the access group.
-
SAN Server: The SAN server that the access group applies to.
-
Description: A description entered for the access group when it was created or edited.
This perspective includes a toolbar that consists of the following options:
|
Toolbar Icon Option |
Icon |
Description |
|---|---|---|
|
|
Displays the Create an Access Group dialog box. Use this option to create a new access group. This option is only available for non-generic storage arrays. |
|
|
|
Displays the Edit Access Group dialog box. Use this option to edit access group settings such as name, description and the storage initiators that have access to the SAN Server. |
|
|
|
Displays the Delete Confirmation dialog box. Use this option to delete the selected access group. This option is only available for non-generic storage arrays. This option is only available for non-generic storage arrays. |
|
|
|
Display the Events dialog box which contains the job event associated with the selected access groups. |
|
|
|
Displays context sensitive help. |
6.9.4.1 Create Access Group
Except for generic storage arrays, it is possible to create multiple access groups in order to arrange and restrict physical disk access according to your requirements. The generic iSCSI storage arrays have a single access group available by default, where you can simply add or remove storage initiators from your Oracle VM Servers.
Generic fibre channel storage has no access groups and is always listed under the Unmanaged Fibre Channel Storage Array folder.
-
Expand the SAN Servers folder in the navigation tree, select a SAN server item contained within the folder. Select the Access Groups option in the Perspective drop-down list.
-
Click Create Access Group
to start the Create an Access
Group wizard.
-
The Create Access Group step is displayed in the wizard. Enter a name for your new access group and optionally provide a description. Click Next.
-
The Select Initiators step is displayed in the wizard. It contains the available storage initiators for this type of storage on the Oracle VM Servers in your environment. Use the arrow buttons to move the required initiators from the Available Storage Initiators box to the Selected Storage Initiators box. Click Next.
NoteYou can also use the Storage Initiators perspective in the Servers and VMs tab to view and configure storage initiators on an individual Oracle VM Server. See Section 3.5.7.1, “View Access Groups for Selected Initiator” for more information on using this method.
ImportantIf you have both iSCSI and Fibre Channel storage array types in your environment, you must ensure that the storage initiators that you are adding for the access group, match the storage type that you are defining this access group for. See What are Access Groups? in the Oracle VM Concepts Guide for more information on Access Groups.
-
The Present Physical Disks step is displayed in the wizard. It contains the available storage elements on the storage array you are registering.
NoteIf this is the first time you are configuring access to this storage array, the list of available physical disks may be empty. You may have to edit the access group afterwards to select physical disks.
Use the arrow buttons to move the required disks from the Available Physical Disks box to the Selected Physical Disks box. These disks are presented to the Oracle VM Servers that have the iSCSI initiator that belongs to the access group. Click Finish to create the new access group with the selected initiators and physical disks.
The new access group now appears in the Access Groups table. If you change the Perspective of the management pane to Physical Disks, the list of presented physical disks appear in the table.
After configuring the access group it is advisable to refresh the SAN server to make sure that the current storage layout and access rules are in effect. The selected physical disks in your non-generic storage array are now available to the Oracle VM Servers in this access group.
6.9.4.2 Edit Access Group
It is possible to edit an existing Access Group for a SAN Server. This option is also possible for a generic iSCSI storage array, although you are only able to edit the default access group that is created when you discover the SAN Server, since it is not possible to create additional access groups for generic Oracle VM Storage Connect plug-ins.
-
Expand the SAN Servers folder in the navigation tree, select a SAN server item contained within the folder. Select the Access Groups option in the Perspective drop-down list.
-
Select the access group that you wish to edit (a default access group is always present) and click Edit Access Group
. The Edit Access Group
dialog box is displayed.
-
In the Access Group tab, you can edit the Name on Array and Access Group Name for storage arrays that use a non-generic Oracle VM Storage Connect plug-in. When you have a generic plug-in, these items are greyed out. You can also provide or edit a description for the access group.
-
Select the Storage Initiators tab. It contains the available storage initiators for this type of storage on the Oracle VM Servers in your environment.
-
Use the arrow buttons to move the required initiators to the Selected Storage Initiators box.
NoteYou can also use the Storage Initiators perspective in the Servers and VMs tab to view and configure storage initiators on an individual Oracle VM Server. See Section 3.5.7.1, “View Access Groups for Selected Initiator” for more information on using this method.
ImportantIf you have both iSCSI and Fibre Channel storage array types in your environment, you must ensure that the storage initiators that you are adding for the access group, match the storage type that you are defining this access group for. See What are Access Groups? in the Oracle VM Concepts Guide for more information on Access Groups.
For a generic storage array you cannot select which physical disks are added; all disks are automatically presented to the selected Oracle VM Servers.
-
Click OK to save your changes to the default access group. If you change the Perspective of the management pane to Physical Disks, the list of presented physical disks appears in the table.
-
After configuring the access group it is advisable to refresh the storage array to make sure that the current storage layout and access rules are in effect.
The Oracle VM Servers in this access group now have the necessary permissions to use the physical disks of the storage array; they can be deployed either as disks for virtual machines (VMs) or for storage repositories. To create storage repositories on your physical disks, see Chapter 4, Repositories Tab.
6.9.4.3 Delete Access Group
Except for generic storage arrays, it is possible to delete additional access groups that you may have defined apart from the default access group.
-
Expand the SAN Servers folder in the navigation tree, select a SAN server item contained within the folder. Select the Access Groups option in the Perspective drop-down list. Select the access group or groups, that you wish to delete, from the items listed in the management pane.
-
Click on the
Delete Access Group icon in
the toolbar.
-
The Delete Confirmation dialog box is displayed. Click OK to delete the access group.
6.9.4.4 Present/Unpresent Physical Disks
6.9.4.5 Display Events
The Events perspective is common to many elements within the Oracle VM Manager Web Interface. The Events perspective generally appears as an option within the Perspectives drop-down menu on the management pane of tabs that include a navigation tree. In this case, the Events perspective displays events specific to the item selected in the navigation tree and presents these in the management pane.
The Events perspective may also appear within a dialog that is
triggered from a Display Selected
Events... ![]() perspective toolbar option. In this case,
the Events perspective dialog displays events specific to one
or more elements selected in the management pane.
perspective toolbar option. In this case,
the Events perspective dialog displays events specific to one
or more elements selected in the management pane.
If an object has an error event associated with it you must acknowledge the event to clear the error and return the object to normal operations. For example, this can occur if an Oracle VM Server or virtual machine appear as Stopped (Error) in the status. The object in error is flagged with a red icon in the navigation tree. Oracle VM Servers, virtual machines, repositories and storage objects can have error events associated with them.
Since Oracle VM Manager attempts to resolve issues automatically as much as possible, not all events can be acknowledged by a user within the Oracle VM Manager Web Interface. Therefore, a flag is set for events that are user acknowledgeable. If an event does not have this flag set, you are unable to acknowledge it, since it is handled internally by Oracle VM Manager.
The Events perspective or dialog contains a table with the following columns of information for each event:
-
Severity: The severity level assigned to the event.
-
Timestamp: The date and time that the event occurred.
-
Modify Time: The last recorded date and time that the event was modified.
-
Type: The type of event according to Oracle VM Manager's event categorization model.
-
Summary: A summary description of the event.
-
Acknowledged: Whether an error event has been acknowledged.
-
User Acknowledgeable: Whether or not an event can be acknowledged by the user.
Event Descriptions
An arrow displays next to each event in the table. Click the arrow to expand and view the Description section that provides additional details for the event.
The Events perspective or dialog contains a perspective toolbar with the following options:
|
Toolbar Icon Option |
Icon |
Description |
|---|---|---|
|
Acknowledge |
|
Acknowledge a selected error event to clear the error and return the object to normal operations. Note that this option is only available for user acknowledgeable events. |
|
Acknowledge All |
|
Acknowledge all error events associated with an object to clear the errors and return the object to normal operations. Note that only user acknowledgeable events are cleared. This button is always clickable, even if there are no user acknowledgeable events. Clicking it when there are no user acknowledgeable events results in an error dialog. |
|
Display Count |
A drop-down menu that allows you to select the number of events that should be displayed in the management pane, while you are currently in this perspective. |
Acknowledging Events/Errors
If an object has an error event associated with it you must acknowledge the event to clear the error and return the object to normal operations. For example, this can occur if an Oracle VM Server or virtual machine appear as Stopped (Error) in the status. The object in error is flagged with a red icon in the navigation tree. Oracle VM Servers, virtual machines, repositories and storage objects can have error events associated with them. The following procedures show you how to clear errors and return the object to normal operations.
-
Click the Servers and VMs tab.
-
Select the Oracle VM Server in the navigation tree.
-
Select Events from the Perspective drop-down list in the management pane.
-
Select the user acknowledgeable error event and click Acknowledge
, or click
Acknowledge All
to clear all user acknowledgeable
errors.
-
Click the Servers and VMs tab.
-
Select the server pool, or Oracle VM Server on which the virtual machine resides in the navigation tree.
-
Select Virtual Machines from the Perspective drop-down list in the management pane.
-
Select the virtual machine in the management pane table. Click Display Selected VM Events...
.
-
The Events dialog box is displayed. Select the user acknowledgeable error event and click Acknowledge
, or click
Acknowledge All
to clear all user acknowledgeable
errors. Click
Close.
-
Click the Repositories tab.
-
Select the repository in the navigation tree.
-
Select Events from the Perspective drop-down list in the management pane.
-
Select the error event and click Acknowledge
, or click
Acknowledge All
to clear all errors.
-
Click the Storage tab.
-
Select File Servers, SAN Servers, or a storage server in the navigation tree.
-
Select Events from the Perspective drop-down list in the management pane.
-
Select the user acknowledgeable error event and click Acknowledge
, or click
Acknowledge All
to clear all user acknowledgeable
errors.
6.9.5 Volume Groups Perspective
The Volume Groups perspective lists the different Volume Groups configured for each SAN Server in your environment. The following columns are displayed in the management pane:
-
Name: The name that has been configured for the volume group.
-
Size (GiB): A grouping that consists of the following columns:
-
Free: The size of the volume, in GiB, that is currently free.
-
Used: The size of the volume, in GiB, that is currently in use.
-
Total: The total size, in GiB, of the volume.
-
-
Description: A description entered for the volume group when it was created or edited.
This perspective includes a toolbar that consists of the following options:
|
Toolbar Icon Option |
Icon |
Description |
|---|---|---|
|
|
Displays the Edit Volume Group dialog box. Use this option to edit volume group settings such as name and description. |
|
|
|
Displays context sensitive help. |
6.9.5.1 Edit Volume Group
It is possible to edit the configuration for a Volume Group available on a SAN server. The steps and options to do so are described below.
-
Expand the SAN Servers folder in the navigation tree, select a SAN server item contained within the folder. Select the Volume Groups option in the Perspective drop-down list. Select the volume group that you wish to edit in the table presented in the management pane.
-
Click on the
Edit Volume Group icon in the
toolbar.
-
A dialog opens to allow you to reconfigure the Volume Group. The dialog has the following options:
-
ID: A non-editable field containing the volume group's UUID as it is stored within Oracle VM Manager.
-
Name: A field to change the name of the volume group within Oracle VM Manager.
-
Description: A text field allowing a description of the volume group.
-
-
When you have finished editing the volume group, click OK to save the changes, or Cancel to exit out of the dialog without saving any changes.
6.10 Local File Systems Item
Clicking on the Local File Systems navigation item in the navigation tree allows you to view a list of all of the local file systems available within Oracle VM Manager within the management pane. There are no perspectives available for this item.
The following information is displayed within the table in the management pane:
-
Name: The name that has been configured for the file system.
-
Storage Device: The storage device mapping where the file system is located.
-
Event Severity: The event level severity for each file system.
-
Size (GiB): A grouping that consists of the following columns:
-
Free: The size of the file system, in GiB, that is currently free.
-
Used: The size of the file system, in GiB, that is currently in use.
-
Total: The total size, in GiB, of the file system.
-
-
Location: The location of the file system if reported by the Oracle VM Storage Connect plug-in used.
-
Description: A description entered for the file system when it was created or edited.
This perspective includes a toolbar that consists of the following options:
|
Toolbar Icon Option |
Icon |
Description |
|---|---|---|
|
|
Displays the Edit File System dialog box. |
|
|
|
Refreshes the file systems to update the storage information known to Oracle VM Manager. |
|
|
|
Displays the Delete Confirmation dialog box. Use this option to delete the selected file system. | |
|
|
Display the Events dialog box which contains the job event associated with the selected file systems. |
|
|
|
Displays context sensitive help. |
6.10.1 Edit File System
It is possible to edit the configuration for an existing file system. The steps and options to do so are described below.
-
If you need to modify a file system stored on a local disk, select the file system item contained the Local File Systems or Shared File Systems folder in the navigation pane. Select the file system that you wish to edit in the management pane table.
-
Click on the
Edit File System icon in the
toolbar.
-
A dialog opens to allow you to reconfigure the file system. You can edit the following parameters:
-
Name: The name of the file system in Oracle VM Manager.
-
Description: Optional information you would like to add about this file system.
-
-
When you have finished editing the file system, click OK to save the changes, or Cancel to exit out of the dialog without saving any changes.
6.10.2 Refresh File System
When changes are made to the file systems or disks on local or shared storage, it is useful to refresh the configuration of your file systems to make Oracle VM Manager aware of the changes.
-
Click on either the Local File Systems or Shared File Systems folder in the navigation tree, depending on which type of file system you wish to refresh. Select the file system that you wish to refresh in the table presented in the management pane.
-
Click on the
Refresh File System option in
the toolbar.
-
The selected file systems are refreshed and their configurations are updated within Oracle VM Manager.
6.10.3 Delete File System
It is possible to delete the file system on local and shared storage devices, and on a physical disk attached to an Oracle VM Server.
-
Select the Storage tab.
-
Click on either the Local File Systems or Shared File Systems folder in the navigation tree.
-
Select the file system to delete in the table in the management pane.
-
Click the
Delete File System icon in
the toolbar. If the icon is greyed out it means that the file
system is used by a repository and it cannot be deleted. You
must first delete the repository. See
Section 4.3.1.3, “Delete Repository”.
-
The Delete Confirmation dialog box is displayed. Click OK to delete the file system.
-
Select the Servers and VMs tab.
-
Select the Oracle VM Server in the navigation tree.
-
Select Physical Disks in the Perspective drop-down list.
-
Select the physical disk in the table in the management pane.
-
Click on the
 Delete File System icon in
the toolbar. If the icon is greyed out, there is no file
system on the disk so it cannot be deleted.
Delete File System icon in
the toolbar. If the icon is greyed out, there is no file
system on the disk so it cannot be deleted.
-
The Delete Confirmation dialog box is displayed. Click OK to delete the file system.
6.10.4 Show Events
The Events perspective is common to many elements within the Oracle VM Manager Web Interface. The Events perspective generally appears as an option within the Perspectives drop-down menu on the management pane of tabs that include a navigation tree. In this case, the Events perspective displays events specific to the item selected in the navigation tree and presents these in the management pane.
The Events perspective may also appear within a dialog that is
triggered from a Display Selected
Events... ![]() perspective toolbar option. In this case,
the Events perspective dialog displays events specific to one
or more elements selected in the management pane.
perspective toolbar option. In this case,
the Events perspective dialog displays events specific to one
or more elements selected in the management pane.
If an object has an error event associated with it you must acknowledge the event to clear the error and return the object to normal operations. For example, this can occur if an Oracle VM Server or virtual machine appear as Stopped (Error) in the status. The object in error is flagged with a red icon in the navigation tree. Oracle VM Servers, virtual machines, repositories and storage objects can have error events associated with them.
Since Oracle VM Manager attempts to resolve issues automatically as much as possible, not all events can be acknowledged by a user within the Oracle VM Manager Web Interface. Therefore, a flag is set for events that are user acknowledgeable. If an event does not have this flag set, you are unable to acknowledge it, since it is handled internally by Oracle VM Manager.
The Events perspective or dialog contains a table with the following columns of information for each event:
-
Severity: The severity level assigned to the event.
-
Timestamp: The date and time that the event occurred.
-
Modify Time: The last recorded date and time that the event was modified.
-
Type: The type of event according to Oracle VM Manager's event categorization model.
-
Summary: A summary description of the event.
-
Acknowledged: Whether an error event has been acknowledged.
-
User Acknowledgeable: Whether or not an event can be acknowledged by the user.
Event Descriptions
An arrow displays next to each event in the table. Click the arrow to expand and view the Description section that provides additional details for the event.
The Events perspective or dialog contains a perspective toolbar with the following options:
|
Toolbar Icon Option |
Icon |
Description |
|---|---|---|
|
Acknowledge |
|
Acknowledge a selected error event to clear the error and return the object to normal operations. Note that this option is only available for user acknowledgeable events. |
|
Acknowledge All |
|
Acknowledge all error events associated with an object to clear the errors and return the object to normal operations. Note that only user acknowledgeable events are cleared. This button is always clickable, even if there are no user acknowledgeable events. Clicking it when there are no user acknowledgeable events results in an error dialog. |
|
Display Count |
A drop-down menu that allows you to select the number of events that should be displayed in the management pane, while you are currently in this perspective. |
Acknowledging Events/Errors
If an object has an error event associated with it you must acknowledge the event to clear the error and return the object to normal operations. For example, this can occur if an Oracle VM Server or virtual machine appear as Stopped (Error) in the status. The object in error is flagged with a red icon in the navigation tree. Oracle VM Servers, virtual machines, repositories and storage objects can have error events associated with them. The following procedures show you how to clear errors and return the object to normal operations.
-
Click the Servers and VMs tab.
-
Select the Oracle VM Server in the navigation tree.
-
Select Events from the Perspective drop-down list in the management pane.
-
Select the user acknowledgeable error event and click Acknowledge
, or click
Acknowledge All
to clear all user acknowledgeable
errors.
-
Click the Servers and VMs tab.
-
Select the server pool, or Oracle VM Server on which the virtual machine resides in the navigation tree.
-
Select Virtual Machines from the Perspective drop-down list in the management pane.
-
Select the virtual machine in the management pane table. Click Display Selected VM Events...
.
-
The Events dialog box is displayed. Select the user acknowledgeable error event and click Acknowledge
, or click
Acknowledge All
to clear all user acknowledgeable
errors. Click
Close.
-
Click the Repositories tab.
-
Select the repository in the navigation tree.
-
Select Events from the Perspective drop-down list in the management pane.
-
Select the error event and click Acknowledge
, or click
Acknowledge All
to clear all errors.
-
Click the Storage tab.
-
Select File Servers, SAN Servers, or a storage server in the navigation tree.
-
Select Events from the Perspective drop-down list in the management pane.
-
Select the user acknowledgeable error event and click Acknowledge
, or click
Acknowledge All
to clear all user acknowledgeable
errors.
6.11 Shared File Systems Item
Clicking on the Shared File Systems navigation item in the navigation tree allows you to view a list of all of the shared file systems available within Oracle VM Manager within the management pane. There are no perspectives available for this item.
The following information is displayed within the table in the management pane:
-
Name: The name that has been configured for the file system.
-
Storage Device: The storage device mapping where the file system is located.
-
Event Severity: The event level severity for each file system.
-
Size (GiB): A grouping that consists of the following columns:
-
Free: The size of the file system, in GiB, that is currently free.
-
Used: The size of the file system, in GiB, that is currently in use.
-
Total: The total size, in GiB, of the file system.
-
-
Location: The location of the file system if reported by the Oracle VM Storage Connect plug-in used.
-
Description: A description entered for the file system when it was created or edited.
This perspective includes a toolbar that consists of the following options:
|
Toolbar Icon Option |
Icon |
Description |
|---|---|---|
|
|
Displays the Edit File System dialog box. |
|
|
|
Refreshes the file systems to update the storage information known to Oracle VM Manager. |
|
|
|
Displays the Delete Confirmation dialog box. Use this option to delete the selected file system. | |
|
|
Display the Events dialog box which contains the job event associated with the selected file systems. |
|
|
|
Displays context sensitive help. |
6.11.1 Edit File System
It is possible to edit the configuration for an existing file system. The steps and options to do so are described below.
-
If you need to modify a file system stored on a local disk, select the file system item contained the Local File Systems or Shared File Systems folder in the navigation pane. Select the file system that you wish to edit in the management pane table.
-
Click on the
Edit File System icon in the
toolbar.
-
A dialog opens to allow you to reconfigure the file system. You can edit the following parameters:
-
Name: The name of the file system in Oracle VM Manager.
-
Description: Optional information you would like to add about this file system.
-
-
When you have finished editing the file system, click OK to save the changes, or Cancel to exit out of the dialog without saving any changes.
6.11.2 Refresh File System
When changes are made to the file systems or disks on local or shared storage, it is useful to refresh the configuration of your file systems to make Oracle VM Manager aware of the changes.
-
Click on either the Local File Systems or Shared File Systems folder in the navigation tree, depending on which type of file system you wish to refresh. Select the file system that you wish to refresh in the table presented in the management pane.
-
Click on the
Refresh File System option in
the toolbar.
-
The selected file systems are refreshed and their configurations are updated within Oracle VM Manager.
6.11.3 Delete File System
It is possible to delete the file system on local and shared storage devices, and on a physical disk attached to an Oracle VM Server.
-
Select the Storage tab.
-
Click on either the Local File Systems or Shared File Systems folder in the navigation tree.
-
Select the file system to delete in the table in the management pane.
-
Click the
Delete File System icon in
the toolbar. If the icon is greyed out it means that the file
system is used by a repository and it cannot be deleted. You
must first delete the repository. See
Section 4.3.1.3, “Delete Repository”.
-
The Delete Confirmation dialog box is displayed. Click OK to delete the file system.
-
Select the Servers and VMs tab.
-
Select the Oracle VM Server in the navigation tree.
-
Select Physical Disks in the Perspective drop-down list.
-
Select the physical disk in the table in the management pane.
-
Click on the
Delete File System icon in
the toolbar. If the icon is greyed out, there is no file
system on the disk so it cannot be deleted.
-
The Delete Confirmation dialog box is displayed. Click OK to delete the file system.
6.11.4 Show Events
The Events perspective is common to many elements within the Oracle VM Manager Web Interface. The Events perspective generally appears as an option within the Perspectives drop-down menu on the management pane of tabs that include a navigation tree. In this case, the Events perspective displays events specific to the item selected in the navigation tree and presents these in the management pane.
The Events perspective may also appear within a dialog that is
triggered from a Display Selected
Events... ![]() perspective toolbar option. In this case,
the Events perspective dialog displays events specific to one
or more elements selected in the management pane.
perspective toolbar option. In this case,
the Events perspective dialog displays events specific to one
or more elements selected in the management pane.
If an object has an error event associated with it you must acknowledge the event to clear the error and return the object to normal operations. For example, this can occur if an Oracle VM Server or virtual machine appear as Stopped (Error) in the status. The object in error is flagged with a red icon in the navigation tree. Oracle VM Servers, virtual machines, repositories and storage objects can have error events associated with them.
Since Oracle VM Manager attempts to resolve issues automatically as much as possible, not all events can be acknowledged by a user within the Oracle VM Manager Web Interface. Therefore, a flag is set for events that are user acknowledgeable. If an event does not have this flag set, you are unable to acknowledge it, since it is handled internally by Oracle VM Manager.
The Events perspective or dialog contains a table with the following columns of information for each event:
-
Severity: The severity level assigned to the event.
-
Timestamp: The date and time that the event occurred.
-
Modify Time: The last recorded date and time that the event was modified.
-
Type: The type of event according to Oracle VM Manager's event categorization model.
-
Summary: A summary description of the event.
-
Acknowledged: Whether an error event has been acknowledged.
-
User Acknowledgeable: Whether or not an event can be acknowledged by the user.
Event Descriptions
An arrow displays next to each event in the table. Click the arrow to expand and view the Description section that provides additional details for the event.
The Events perspective or dialog contains a perspective toolbar with the following options:
|
Toolbar Icon Option |
Icon |
Description |
|---|---|---|
|
Acknowledge |
|
Acknowledge a selected error event to clear the error and return the object to normal operations. Note that this option is only available for user acknowledgeable events. |
|
Acknowledge All |
|
Acknowledge all error events associated with an object to clear the errors and return the object to normal operations. Note that only user acknowledgeable events are cleared. This button is always clickable, even if there are no user acknowledgeable events. Clicking it when there are no user acknowledgeable events results in an error dialog. |
|
Display Count |
A drop-down menu that allows you to select the number of events that should be displayed in the management pane, while you are currently in this perspective. |
Acknowledging Events/Errors
If an object has an error event associated with it you must acknowledge the event to clear the error and return the object to normal operations. For example, this can occur if an Oracle VM Server or virtual machine appear as Stopped (Error) in the status. The object in error is flagged with a red icon in the navigation tree. Oracle VM Servers, virtual machines, repositories and storage objects can have error events associated with them. The following procedures show you how to clear errors and return the object to normal operations.
-
Click the Servers and VMs tab.
-
Select the Oracle VM Server in the navigation tree.
-
Select Events from the Perspective drop-down list in the management pane.
-
Select the user acknowledgeable error event and click Acknowledge
, or click
Acknowledge All
to clear all user acknowledgeable
errors.
-
Click the Servers and VMs tab.
-
Select the server pool, or Oracle VM Server on which the virtual machine resides in the navigation tree.
-
Select Virtual Machines from the Perspective drop-down list in the management pane.
-
Select the virtual machine in the management pane table. Click Display Selected VM Events...
.
-
The Events dialog box is displayed. Select the user acknowledgeable error event and click Acknowledge
, or click
Acknowledge All
to clear all user acknowledgeable
errors. Click
Close.
-
Click the Repositories tab.
-
Select the repository in the navigation tree.
-
Select Events from the Perspective drop-down list in the management pane.
-
Select the error event and click Acknowledge
, or click
Acknowledge All
to clear all errors.
-
Click the Storage tab.
-
Select File Servers, SAN Servers, or a storage server in the navigation tree.
-
Select Events from the Perspective drop-down list in the management pane.
-
Select the user acknowledgeable error event and click Acknowledge
, or click
Acknowledge All
to clear all user acknowledgeable
errors.