1 Installing on the ST Micro STM32429I-EVAL Board
This chapter contains the following sections:
Required Software and Hardware Items
The following items are required for developing on the ST Micro STM32429I-EVAL board:
-
An ST Micro STM32429I-EVAL Embedded Board
-
The Oracle Java ME Embedded Software Distribution for the ST Micro STM32429I-EVAL board, Version 8.3
Note:
There are two components in the Java ME Embedded Software Distribution for the STM32429I-EVAL board,java/deploy.batandbootloader/deploy.bat, that must be deployed into the STM32429I-EVALboard in the order described in Installing the Firmware on the Evaluation Board. -
A desktop computer running Windows 7 or later with at least one USB port
-
A 2GB or greater MicroSD card (with an SD adapter, if necessary, for connecting to the desktop computer)
-
A USB-A to USB-B cable to flash the embedded board
-
A networking LAN cable with RJ-45 interface, if you wish to communicate with the embedded board over a TCP/IP network
-
A USB-A to MicroUSB cable, if you wish to communicate with the embedded board over a serial connection
-
A terminal emulation program, such as PuTTY
Downloading and Installing the MDK-ARM Lite Development Kit
To install the Oracle Java ME Embedded software on the reference board, first download and install version 5.12 or above of the MDK-ARM development kit. The MDK-ARM Core Version 5 development kit can be obtained from the following site:
http://www2.keil.com/mdk5/install
Once downloaded, install the MDK-ARM tool by double-clicking on the executable. Example projects do not need to be installed. If the application starts after installation, close it down.
WARNING:
The MDK-ARM Development Kit must be installed in a new directory, or previous versions of the software must be removed. Otherwise, the software may not be able to read older driver pack descriptions.
Next, install the ST-Link drivers to connect to the board. This is mandatory if the drivers are not already installed on your system. The ST-Link drivers can be obtained from the following site:
http://www.st.com/web/catalog/tools/FM147/SC1887/PF258168#
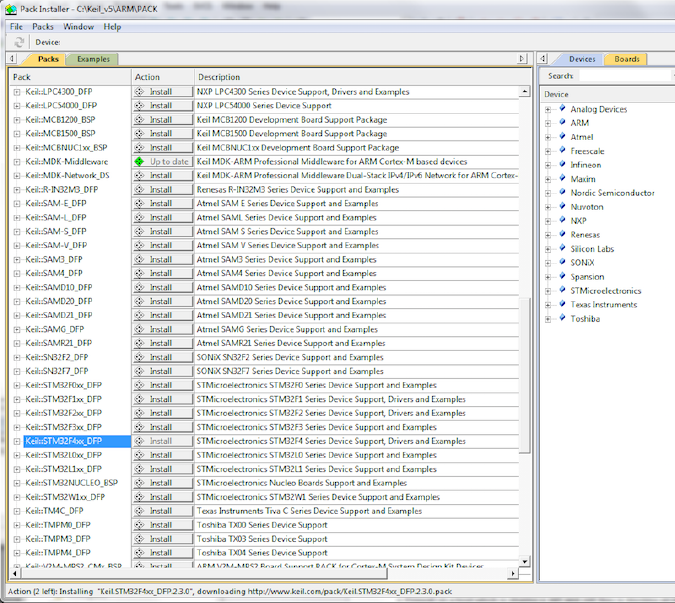
When the installation of both packages is complete, run the Keil uVision 5 application. Open the Pack Installer tool by clicking the Project menu, then Manage, and then Pack Installer menu item, if it does not appear automatically, and install the Keil::STM32F4xx_DFP driver pack, as shown in Figure 1-1. Once this is completed, shut down the Keil uVision 5 application.
Figure 1-1 Driver Pack for the STM32429I-EVAL Embedded Board.

Description of "Figure 1-1 Driver Pack for the STM32429I-EVAL Embedded Board."
Downloading and Installing the PuTTY Terminal Emulator Program
Download the PuTTY Terminal Emulator Program (putty.exe) from the following site:
The terminal emulator executable is directly downloadable as putty.exe. The terminal emulator is used to connect to two separate sockets: one for the command-line interface (CLI) that issues commands to the board, and one for the logging or system output provided by the board.
Preparing the ST Micro STM32429I-EVAL Board
In order to use the ST Micro STM32429I-EVAL board for Java development, first prepare the board using the following steps:
-
Set the JP12 jumper to the "PSU" state, which indicates that the board will be powered from the external adapter "PSU DC5V".
-
Set the JP8 jumper to 3V3 position and ensure the LI-ION battery is inserted into the board's socket. Otherwise the system time and log setting will be reset every time the board is turned off.
-
Connect the board to the computer using a USB-A to USB-B cable, connecting to the USB port next to the power connector.
-
Connect an ethernet cable to the RJ-45 port on the board.
-
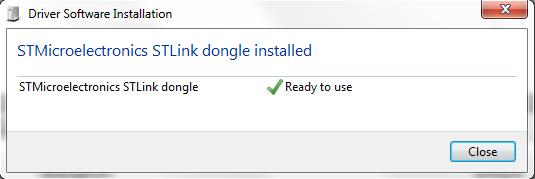
Plug in the external power adapter delivered with the board to the "PSU DC5V" connector. The board should power up, and the LEDs and display should turn on. At this point, Windows will attempt to locate a compatible ST Link device driver. After searching the Windows Update drivers, it should eventually locate the version installed on the disk and present the dialog shown in Figure 1-2.
Figure 1-2 ST Link Dongle Driver Installation

Description of "Figure 1-2 ST Link Dongle Driver Installation" -
Finally, ensure that the "STMicroelectronics STLink dongle" device appears in Windows Device Manager under Universal Serial Bus controllers or devices. The Device Manager can be accessed using the Windows Control Panel.
Connecting the ST Micro STM32429I-EVAL Board to the Computer
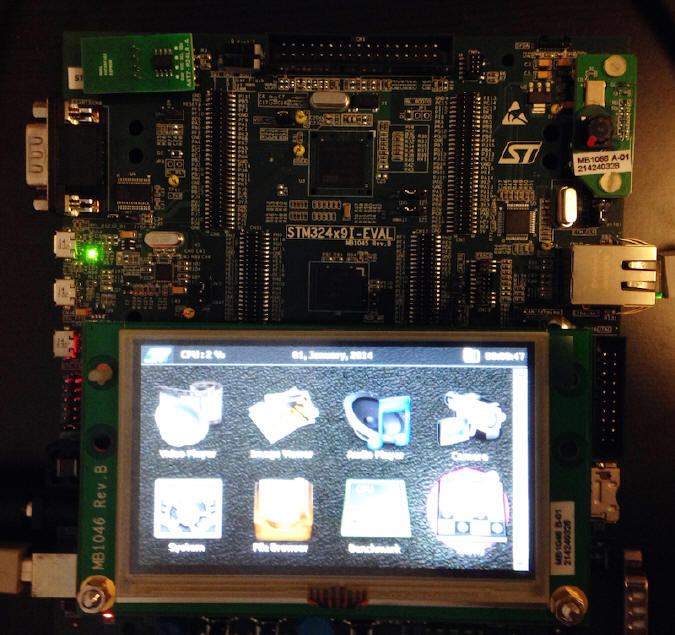
Ensure that the board is receiving power by verifying that the touchscreen is active. See Figure 1-3.
Figure 1-3 The ST Micro STM32429I-EVAL Board

Description of "Figure 1-3 The ST Micro STM32429I-EVAL Board"
When the board is first powered on, the touchscreeen may request a calibration from the user. It is not necessary to complete this calibration in order to use Java ME Embedded on the board.
Oracle Java ME Distribution Bundle
Unzip the Oracle Java ME Embedded Distribution for the STM32429I-EVAL Embedded Board. The distribution bundle contains the following important files:
/java/deploy.bat-
The
deploy.batfile is a Windows script file that invokes the uVision MDK-ARM tool to flash the board with the contents of the Oracle Java ME Emebedded binary file. You must edit this file to point to the installation directory of the Keil MDK-ARM tools directory (typicallyC:\Keil_v5) before flashing the embedded board. /java/java.uvoptx,/java/java.uvprojx-
These are uVision project files that are used by the Keil uVision MDK-ARM tool. You should not modify these files.
/java/jmee.axf-
This is the Oracle Java ME Embedded binary file that will be flashed on the ST Micro board, stored in an ARM executable format. Do not modify this file.
/bootloader/deploy.bat-
The
deploy.batfile is a Windows script file that invokes the uVision MDK-ARM tool to flash the board with the contents of the Oracle Java ME bootloader. You must edit this file to point to the installation directory of the Keil MDK-ARM tools directory (typicallyC:\Keil_v5) before flashing the embedded board. /lib/classes.zip-
This ZIP file contains the Java class structures for all publicly reachable classes used by the Java ME executable.
/sd_card/java/jwc_properties.ini-
This is the main properties file for the Java ME binary executable. Modify this file before copying the
/sd_carddirectory to the SD card that is inserted into the embedded board to control various runtime elements of the Oracle Java ME Embedded binary. /sd_card/java/appdb/_main.ks-
This the Java security keystore file that is used by the Java ME binary executable on the board. Do not attempt to modify this file directly. Instead, use the CLI keystore commands to access keys and certificates in this file. See Chapter 2 for more information on using the CLI proxy.
/sd_card/java/appdb/_policy.txt-
This is the security policy file that defines policy groups for the Java ME binary executable on the board. Modify this file as needed to create your own security policies.
/sd_card/java/appdb/root-
The root filesystem is a user-accessible directory that can be used to store and retrieve files and data through programs running on the board. Note that data above this directory is inaccessible by user programs.
/util/proxy.jar-
This is an executable JAR file that can be used to connect to the CLI proxy to issue commands to the board. See Chapter 2 for more information on using the CLI proxy.
Setting Up the MicroSD Card
The MicroSD card contains configuration files used by the Java ME Embedded native distribution, including the initialization properties and security policy files. Ensure that you are using an SD card that is compatible with the embedded board.
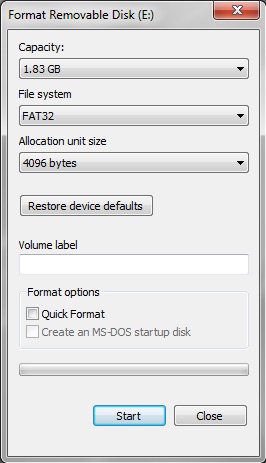
Follow these steps to prepare the card:
Note that the Oracle Java ME Embedded runtime only supports 8.3 filenames on the SD card of the device.
Network Configuration
When the board boots, basic network initialization is performed using DHCP. However, if you wish to specify your own network configuration, you can modify the following parameters in the java/jwc_prop.ini file on the SD card.
Table 1-1 Ethernet Initialization Parameters
| Parameter | Description |
|---|---|
|
|
The MAC address that is assigned to the connected Ethernet device |
|
|
The method of obtaining an IP address for the configuration of the Ethernet interface, one of " |
|
|
The IP address which is assigned to the device if a static IP method is chosen |
|
|
The IP address mask which is assigned to the Ethernet device if a static IP method is chosen |
|
|
The IP address of gateway which is assigned to Ethernet device if a static IP method is chosen. By default, the current IP address is used; |
|
|
The DNS server IP address which is used to resolve DNS requests during network activities, such as |
|
|
An alternative DNS server IP address used to resolve DNS requests during network activities, such as |
Setting the Runtime Clock
To set up the Runtime Clock (RTC) in STM32429I-EVAL board, the rtc.time.value property in the java/jwc_prop.ini file on the SD card must be set in the following format:
rtc.time.value = 2013/12/22 12:25:33 GMT
Note:
Due to the persistent character of information storage in the RTC registers (including RTC settings), the board may occasionally hang during RTC initialization. To solve the problem, it is necessary to do the following when installing Java ME to the board:
-
Switch J8 jumper to the 3V3 position
-
Switch the STM32429I-EVAL board off
-
Disconnect all cables from the board (this is necessary as the board may take its power supply from the signal lines).
-
Wait 5 seconds
-
Reconnect all necessary cables and switch the board on again. Note that you may need to reset the time again.
Installing the Firmware on the Evaluation Board
The Java ME Embedded distribution contains a utility that uses the MDK-ARM software to erase and flash the Oracle Java ME Embedded binary and Java ME bootloader onto the evaluation board. Use the following procedure to prepare the SD card and install the firmware:
Figure 1-5 The ST Micro STM32429I-EVAL Touchscreen After Installing Java ME Embedded

Description of "Figure 1-5 The ST Micro STM32429I-EVAL Touchscreen After Installing Java ME Embedded"
About Connecting to Logging Ports
This section contains the following topics:
Enabling Logging
To enable logging from the board, set the log.method setting in the jwc_properties.ini file in the /java directory of the SD card.
Logging Methods
The possible values for this property are the default value of NONE, as well as UART and ITM. Table 1-2 gives a description of each of the values. Note that the UART and ITM values are mutually exclusive; only one method may be used at a time.
Table 1-2 Logging Methods for the STM32429I-EVAL
| Log Method Value | Description |
|---|---|
|
|
No logging information is produced |
|
|
Logging information is sent using the RS-232 connector marked CN8 on the board |
|
|
Logging information is sent using the RS-232 ITM (Instrument Trace Macrocell). |
The log method value is obtained using the following procedure:
-
The Oracle Java ME Embedded runtime will first read the setting from backup SRAM powered from Vbat (if possible) and then initialize the logging with that value. Note that JP8 must be properly set to use Vbat, otherwise the settings will be lost. In the event of data loss, the Oracle Java ME Embedded runtime uses
ITMfor this stage as a default. -
The Oracle Java ME Embedded runtime will read the setting from the
jwc_prop.ini fileand compare it with the value loaded from SRAM. If the values do not match, or there is no saved setting, then the current value is changed to what was read from thejwc_prop.inifile. The SRAM value is then rewritten to this value in all cases.
If you wish to use UART logging, either connect an RS-232 cable or a USB-to-Serial adapter to the DB9 connector labeled CN8 on the STM32 board (which uses an RS-232 voltage level). Do not connect to the DB9 connected labeled CN22 on the board. Once the serial connection is made, use PuTTY to connect to the appropriate COM port using the following configuration:
-
Speed 115200
-
8 bits
-
No parity
-
1 stop bit
If you are using a USB-to-Serial adapter, you may be required to install a USB-to-COM driver that will map the USB port to a virtual COM port.
To use the ITM option, you will need either an external hardware debugger or the STM32 ST-LINK utility, which uses a Serial Wire Output (SWO) interface in conjunction with a built-in debugger.
About Using the Display
The Oracle Java ME Embedded runtime can be used to display text only on the touchscreen display of the STM32429I-EVAL board. Access to the display can be obtained using the javax.microedition.lui package, with the following constraints:
-
The
idis "LCD Display" -
Vertical and horizontal scrolling are not supported
-
Adjustments to the lighting are not supported
-
The default background color is black
-
The default text color is green
-
The number of lines supported is 15
-
The maximum number of characters per line is 52
