7 Using Oracle JDeveloper to Generate an Oracle Enterprise Scheduler Application
This chapter is a tutorial that describes how to create and run an application that uses Oracle Enterprise Scheduler to run job requests and demonstrates how to work with Oracle JDeveloper to create an application using Oracle Enterprise Scheduler.
The chapter then shows a variation on the sample application using two split applications — a job submission application, a submitter, and a job execution application, a hosting application.
Note:
For Oracle Enterprise Scheduler sample code, be sure to see the sample site at https://java.net/projects/oraclesoasuite12c.
This chapter includes the following sections:
7.1 How to Start JDeveloper to Support Building Oracle Enterprise Scheduler Applications
Some aspects of developing Oracle Enterprise Scheduler applications with Oracle JDeveloper require that you set the Middleware Home environment variable to the installation location of Oracle JDeveloper itself. Before you begin using Oracle JDeveloper to develop Oracle Enterprise Scheduler applications, be sure to set this variable.
JDeveloper provides accessibility options, such as support for screen readers, screen magnifiers, and standard shortcut keys for keyboard navigation. You can also customize JDeveloper for better readability, including the size and color of fonts and the color and shape of objects. For information and instructions on configuring accessibility in JDeveloper, see "Oracle JDeveloper Accessibility Information" in Developing Applications with Oracle JDeveloper.
To set an environment for building Oracle Enterprise Scheduler applications:
7.2 Understanding Oracle Enterprise Scheduler Application Support Created by Oracle JDeveloper
As you create projects in Oracle JDeveloper for developing Oracle Enterprise Scheduler applications, you add underlying support for application functionality by specifying support for particular project technologies.
For more on creating Oracle Enterprise Scheduler applications, see Building a Combined Oracle Enterprise Scheduler Application and Building Split Submitting and Hosting Applications.
When you create an application using Oracle JDeveloper, you select from the following technologies, depending on your application requirements:
ESS Host Support for developing a hosting application, including:
Updating weblogic-application.xml for application support.
Updating EJB deployment profile for project support.
Updating EAR deployment profile for application support.
Adding the Oracle Enterprise Scheduler library.
Adding context menu to project (accessed by right-clicking and selecting Enterprise Scheduler Properties), which allows the following ejb-jar.xml properties to be modified: Logical Application Name, Application Policy Stripe, JPS Interceptor Application Name.
ESS Client Support for developing a client application, including:
Updating weblogic-application.xml for application support.
Updating EJB deployment profile for project support.
Adding the Oracle Enterprise Scheduler library.
Adds context menu to project (accessed by right-clicking and selecting Enterprise Scheduler Properties), which allows the following ejb-jar.xml properties to be modified: JPS Interceptor Application Name.
ESS Job Support for developing scheduler applications, including:
Creating or updating a MAR profile.
Creating a JAR deployment profile for project support.
Adding the Oracle Enterprise Scheduler library.
7.3 Building a Combined Oracle Enterprise Scheduler Application
The EssDemoApp sample application you build in this tutorial includes a complete application that you build with Oracle JDeveloper using Oracle Enterprise Scheduler APIs.
In this example, you'll create a hosting application and a simple Java job implementation. Though the example here is simple, its job class implements the Executable interface from which a more complex Java job might call out to other code as part of its work.
To create an application that schedules job requests you do the following:
Create the Java class that specifies the logic you want to schedule and run with Oracle Enterprise Scheduler.
Specify Oracle Enterprise Scheduler metadata and the characteristics for job requests.
Define the Java application that uses Oracle Enterprise Scheduler APIs to specify and submit job requests. The application consists of two projects: one for hosting jobs and another for submitting them.
Assemble and deploy the Java application that uses Oracle Enterprise Scheduler APIs.
Run the Java application that uses Oracle Enterprise Scheduler APIs.
Note:
The instructions in this chapter assume that you are using a new Oracle JDeveloper that you installed without previously saved projects or other saved Oracle JDeveloper state. If you have previously used Oracle JDeveloper, some of the instructions may not match the exact steps shown in this chapter, or you may be able to shorten procedures or perform the same action in fewer steps. In some cases Oracle JDeveloper does not show certain dialogs based on your past use of Oracle JDeveloper.
When you use Oracle Enterprise Scheduler the application metadata is stored with MDS. To use MDS you need to have access to a database with MDS user and schema configured.
You also need a WebLogic Server instance to which Oracle Enterprise Scheduler is deployed in standalone mode. You should have access to a database with the Oracle Enterprise Scheduler schema installed.
This section includes the following subsections:
7.3.1 Creating the Application and Projects for EssDemoApp Application
Using Oracle JDeveloper you create an application and projects within the application that contains the code and supporting files for the application. To create the sample application you need to do the following:
Create an application in Oracle JDeveloper.
Create projects in Oracle JDeveloper. You create two projects -- one in which to develop "Hello World"-style Java job and another in which to develop a client that submits requests with the job.
7.3.1.1 How to Create the EssDemoApp Application and Host Project
To work with Oracle Enterprise Scheduler, you first create an application in Oracle JDeveloper. You'll also create a hosting application to support job execution.
To create the EssDemoApp application and hosting project:
Start Oracle JDeveloper as described in How to Start JDeveloper to Support Building Oracle Enterprise Scheduler Applications.
In the Select Role dialog, select the Default Role, then click OK.
Click the Application menu, then click New and select the From Gallery option.
In the Name your application window enter the name and location for the new application.
In the New Gallery window, select Custom Application listed under the General Categories Applications item, then click OK.
In the Application Name field, enter an application name. For this sample application, enter
EssDemoApp.In the Directory field, accept the default.
Enter an application package prefix or accept the default, no prefix.
The prefix, followed by a period, applies to objects created in the initial project of an application.
Click Next.
In the Name your project window, enter the name for the host project you're creating and select supporting technologies. See Figure 7-1.
In the Project Name field, enter a name for your hosting project. For this sample application, enter
EssHost.On the Project Features tab, under Available, double-click ESS Host Support and ESS Job Support so that they are both listed under Selected on the right side of the dialog box.
For more on these, see Understanding Oracle Enterprise Scheduler Application Support Created by Oracle JDeveloper.
Click Next.
In the Configure Java settings window, in the Default Package field, enter
oracle.esshost.Click Next.
In the Configure EJB settings window, select the following:
Under EJB Version, select the Enterprise JavaBeans 3.0 option button.
Under EJB Version 3.x, select the Generate ejb-jar.xml in this project check box.
Click Next.
In the Configure ESS Host Support settings window, in the Application Id field, enter
EssDemoApp.Click Finish.
This displays the EssDemoApp Overview page. You can use sections of this page to get information about aspects of the application you're creating, as well as to manage its development progress. For now, though, you'll move on to creating project artifacts to support creating jobs.

7.3.1.2 How to Create the Client Project
In the preceding step, you created a project in which to develop the application to host your jobs. In this section, you'll use Oracle JDeveloper to create another project in the EssDemoApp application. This second project provides support for client interaction with the hosting application.
To create the client project:
Click the File menu, then click New > Project.
In the New Gallery, under Categories, expand General, then click Projects.
Under Items, click Custom Project, then click OK.
In the Name your project window, enter the name for the client project you're creating and select supporting technologies. See Figure 7-2.
In the Project Name field, enter a name for your client project. For this sample application, enter
EssClient.On the Project Features tab, under Available, double-click the following items so that they are listed under Selected on the right side of the dialog box:
ESS Client Support
HTML & CSS
JSF
SP and Servlets
XML
For more on this, see Understanding Oracle Enterprise Scheduler Application Support Created by Oracle JDeveloper.
Click Next.
In the Configure Java settings window, in the Default Package field, enter
oracle.essclient.Click Next.
In the Configure EJB settings window, select the following:
Under EJB Version, select the Enterprise JavaBeans 3.0 option button.
Click Next.
In the Configure ESS Client Support settings window, in the Application Id field, ensure the
EssDemoAppis displayed there.Click Finish.

7.3.2 Creating Metadata and an Implementation Class for the EssDemoApp Application
For a Java job, which is what you'll be adding here, an implementation class implements the logic of your job -- the code that does job's actual work. The class implements the oracle.as.scheduler.Executable interface. The interface's execute method provides a place where you can add the job's logic. Though the code in this example is very simple, the execute method can also serve as a starting place for processing that continues into code to which the Java job has access.
As with other job types, including PL/SQL and process jobs, a Java job's work is guided by metadata. This metadata forms a job-specific context that can include Oracle Enterprise Scheduler-defined system properties, properties you create, and control of who has access to the metadata. For example, metadata might be a way for you to collect and pass instance data to downstream code.
To use the EssDemoApp sample application to submit a job request, you need to create:
Metadata in the form of a job definition that is the basic unit of work that defines a job request in Oracle Enterprise Scheduler.
A Java job implementation class.
7.3.2.1 How to Create Metadata for the EssDemoApp Application
In this section, you use Oracle JDeveloper to create job definition metadata and a simple implementation class for a Java job.
To create metadata for the application:
In the Application Navigator, select the EssHost project.
Press Ctrl-N. This displays the New Gallery.
In the Categories area expand Business Tier and select Enterprise Scheduler Metadata.
In the Items area, select Job Definition as shown in Figure 7-3.
Figure 7-3 Adding Job Type Metadata to the Sample Application

Click OK. This displays the Create Job Definition dialog.
In the Create Job Definition dialog, specify the following:
In the Name field, enter a name for the job definition. For this example, enter the name:
HelloWorldJobDefinition.In the Package field, enter a package name. For this example, enter
/oracle/esshost/metadata.Note that you should use slashes, rather than dots, to delimit names in metadata package names. A metadata package ending in ".metadata" is not visible in Oracle JDeveloper.
In the Job Type field, from the dropdown list select /oracle/as/ess/core/JavaJobType.
If job types are not listed in the dropdown, ensure that you started Oracle JDeveloper as described in How to Start JDeveloper to Support Building Oracle Enterprise Scheduler Applications.
Ensure that the Create Java Class check box and the Synchronous option button are selected.
By selecting the Create Java Class check box, you're asking that a Java class for your Java job be created, saving you the trouble of creating one later. Selecting the Synchronous option specifies that this is a synchronous Java job.
Under Java Class, specify details for the Java class you're creating. In the Java Package field, enter its package name -- here, enter
oracle.esshost.impl. In the Class Name field, enter a name for the class -- here, enterHelloWorldImplas shown in Figure 7-4Figure 7-4 Creating a Job Definition with the Job Definition Creation Wizard

Click OK.
This creates the Java class you requested, along with the
HelloWorldJobDefinition.xmlfile. Oracle JDeveloper displays XML file's contents in the Job Definition page.On the Job Definition page, you can edit job definition metadata, including properties that specify parameters for the job, access to this metadata, and a resource bundle to use for localization.
In the Job Definition page, in the Description field enter a description for the job type. For this example enter:
Sample Java Job Definition.Leave the rest of the metadata unchanged.
In the Application Navigator, locate the class you created by expanding the items in the projects panel to EssHost > Application Sources > oracle.esshost.impl > HelloWorldImpl.java.
Open HelloWorldImpl.java in the source editor.
In the source editor, add simple code to implement the execute method. The execute method is where execution for a Java job begins. Your HelloWorldImpl class should look something like Example 7-1.
Save and close HelloWorldImpl.java.
Example 7-1 HelloWorldImpl with Execute Method Implemented
public class HelloWorldImpl implements Executable, Cancellable
{
  public void execute(RequestExecutionContext ctx, RequestParameters params)
    throws ExecutionErrorException, ExecutionWarningException,
           ExecutionCancelledException, ExecutionPausedException
  {
      System.out.println("**** Sample Job Running, Request ID: " +
          ctx.getRequestId());
  }

  public void cancel()
  {
  }
}
7.3.3 Adding Application Code to Submit Job Requests
In an Oracle Enterprise Scheduler application you use the Oracle Enterprise Scheduler APIs to submit job requests from any component in the application. The EssDemoApp sample application provides a Java servlet for a servlet-based user interface for submitting job requests (using Oracle Enterprise Scheduler).
7.3.3.1 How to Add Application Code to Submit Job Requests
In this section, you'll create a servlet for receiving job submission requests.
To add a servlet to support job request submissions:
In the Application Navigator, select the EssClient project.
Press Ctrl-N. This displays the New Gallery.
In the New Gallery, in the Categories area, expand Web Tier and select Servlets.
In the Items area, select HTTP Servlet as shown in Figure 7-5.
Figure 7-5 Adding Job Type Metadata to the Sample Application

Click OK. This displays the Create HTTP Servlet wizard.
In the Welcome page, click Next.
In the Create HTTP Servlet - Step 2 of 4: Servlet Information page, specify the following:
In the Class field, enter a name for the servlet class. For this example, enter the name:
EssDemo.In the Package field, enter a package name. For this example, enter
oracle.essclient.servlet.In the Generate Content Type field, from the dropdown list ensure the HTML is selected.
In the Implement Methods area, select the doGet() and doPost() check boxes, as shown in Figure 7-6.
Figure 7-6 Creating a Servlet -- Step 2 of 4

In the Registration area, select the Configuration file (web.xml) radio button.
Click Next.
In the Create HTTP Servlet - Step 3 of 4: Mapping Information page, specify the following:
In the Name field, enter a name for the servlet. For this example, enter the name:
EssDemo.In the URL Pattern field, enter a URL for servlet mapping. For this example, enter
/essdemo/*.Click Finish.
The supplied EssDemo application includes the completed servlet. You need to copy the source code into your project. To do this, in Oracle JDeveloper replace the contents of the servlet with the contents of the file EssDemo.java supplied with the sample application.
7.3.4 Setting Oracle Enterprise Scheduler Properties
With Oracle Enterprise Scheduler properties, you set values for settings used in the ejb-jar.xml file associated with the application. These properties include the following:
Logical Application Name
Specifies the logical name used to identify this application. Separate from the application name used when deploying the application to the container, this value lets you safely hard code the logical application name in source code.
Application Policy Stripe
Specifies which JPS security stripe (or "security context") should be used to perform security checks.
JPS Interceptor Application Name
Specifies the application stripe name used at runtime to determine which set of security policies are applicable.
7.3.4.1 How to Set Oracle Enterprise Scheduler Properties for the Application
In this section, you'll set default values for Oracle Enterprise Scheduler properties.
To set values for Oracle Enterprise Scheduler properties:
- In the Application Navigator, right-click the EssHost project, then click Enterprise Scheduler Properties.
- In the Enterprise Scheduler Properties dialog, enter
EssDemoAppfor all three of the fields provided: Logical Application Name, Application Policy Stripe, and JPS Interceptor Application Name. - Click OK.
Figure 7-7 Set Values for Oracle Enterprise Scheduler Properties

Description of "Figure 7-7 Set Values for Oracle Enterprise Scheduler Properties"
7.3.5 Assembling the EssDemoApp Application
After you create the sample application you use Oracle JDeveloper to assemble the application.
To assemble the application you do the following:
Create the EJB JAR files.
Create the application MAR file.
Create the application EAR file.
Update WAR file options.
7.3.5.1 How to Create the EJB-JAR Deployment Profile for the EssDemoApp
The sample application must contain the required EJB descriptors. You need to create the ejb-jar.xml and weblogic-ejb-jar.xml files and include these files with any Java implementation class that you create.
Oracle Enterprise Scheduler requires an application to assemble and provide an EJB JAR so that Oracle Enterprise Scheduler can find its entry point in the application while running job requests on behalf of the application. This EJB jar should have its required EJB descriptors in ejb-jar.xml and weblogic-ejb-jar, as well as any Java class implementations that are going to be submitted to Oracle Enterprise Scheduler. The descriptor files ejb-jar.xml and weblogic-ejb-jar must contain descriptions for the Oracle Enterprise Scheduler EJBs and should not be modified.
To create the EJB-JAR deployment profile:
- Click OK.
Figure 7-8 Create the EJB-JAR Deployment Profile

Description of "Figure 7-8 Create the EJB-JAR Deployment Profile"
7.3.5.2 How To Update the WAR Archive Options
In this section, you specify information that Oracle JDeveloper can use to generate a WAR file.
To update the WAR archive options:
- In the Contributors window, select the following check boxes as shown in Figure 7-9:
Project Output Directory
Project HTML Root Directory
Project Source Path

7.3.5.4 How to Update the EAR Options
In this section, you'll prepare an EAR file that assembles the EssDemoApp sample application. The EAR archive consists of the following:
EJB JAR including the Oracle Enterprise Scheduler Java job implementation.
WAR archive with the EssDemo servlet.
To update the EAR options:
Figure 7-10 Update the EAR Archive Options

Description of "Figure 7-10 Update the EAR Archive Options"
7.3.5.5 Configure Security for the Application
You must create a user that is assigned to the EssApplicationRole role. The following steps describe how to configure security for the back-end hosting application:
- Click the Application Roles navigation tab to open the Application Roles window as shown in Figure 7-11.

7.3.5.6 Add Resource Grants for ESS Application Role in the Job Definition
The following steps describe how to update the job definition by adding resource grants for the ESS application role.
- In the HelloWorldJobDefinition.xml Job Definition page, in the Description field, enter
HelloWorld Example. - In the System Properties section, click the Add button.
- In the Add System Property dialog, from the Name dropdown menu, select SYS_effectiveApplication.
- In the Initial Value field, enter
EssDemoApp. - Click OK.
- In the Access Control section, click the Add button.
- In the Add Access Control dialog, from the Role dropdown menu, select EssApplicationRole. This is the role that you created Configure Security for the Application.
- Select the Read and Execute actions.
- Click OK.
- Verify that the contents of the generated file are identical to Example 7-2.
Example 7-2 jazn-data.xml
<?xml version = '1.0' encoding = 'UTF-8' standalone = 'yes'?>
<jazn-data xmlns:xsi="http://www.w3.org/2001/XMLSchema-instance"
xsi:noNamespaceSchemaLocation="http://xmlns.oracle.com/oracleas/schema/jazn-data.xsd">
  <jazn-realm default="jazn.com">
   <realm>
    <name>>Username / password is: EssUser / welcome1</name>
     <users>
      <user>
       <name>EssUser</name>
       <credentials>{903}LmqEdVs3zO0/QmP90tihXv4nRq5YqYSL</credentials>
      </user>
     </users>
    </realm>
   </jazn-realm>
   <policy-store>
    <applications>
     <application>
      <name>EssDemoApp</name>
      <app-roles>
       <app-role>
        <name>EssApplicationRole</name>
        <class>oracle.security.jps.service.policystore.ApplicationRole</class>
        <members>
         <member>
        <class>oracle.security.jps.internal.core.principals.JpsXmlUserImpl</class>
          <name>EssUser</name>
         </member>
        </members>
       </app-role>
      </app-roles>
     <jazn-policy>
      <grant>
       <grantee>
        <principals>
         <principal>
          <class>oracle.security.jps.service.policystore.ApplicationRole</class>
          <name>EssApplicationRole</name>
         </principal>
        </principals>
       </grantee>
       <permissions>
        <permission>
                    <class>oracle.as.scheduler.security.MetadataPermission</class>
        <name>oracle.esshost.metadata.JobDefinition.HelloWorldJobDefinition</name>
         <actions>Read,Update,Delete,Execute</actions>
        </permission>
       </permissions>
      </grant>
     </jazn-policy>
    </application>
   </applications>
  </policy-store>
 <system-policy/>
</jazn-data>
7.3.5.7 Configure the weblogic-application.xml File
Use the source editor to remove the following lines from weblogic-application.xml:
<library-ref>
  <library-name>oracle.applcp.runtime</library-name>
</library-ref>
<library-ref>
  <library-name>oracle.xdo.runtime</library-name>
</library-ref>
7.3.5.8 Update the EssHost MANIFEST File
Replace the content of the EssHost META-INF/MANIFEST.INF file with the following lines:
Manifest-Version: 1.0
Weblogic-Application-Version: 3.0
Extension-List: essruntime
essruntime-Extension-Name: oracle.ess.runtime
essruntime-Specification-Version: 12
7.3.5.9 Change the Realm Field
Navigate to EssClient > Web Content > WEB-INF > web.xml as shown in Figure 7-12. Change the value in the Security window Realm field from:
jazn.com
to:
Username / password is: EssUser / welcome1

7.3.5.10 Edit the adf-config.xml File for the EssDemoApp Application
- In the Application Resources panel, expand Descriptors, expand ADF META-INF, and double-click adf-config.xml.
- In the source editor, replace the contents of the
adf-config.xmlfile with the XML code shown in Example 7-3.
Example 7-3 adf-config.xml File for a EssDemoApp Application
<?xml version="1.0" encoding="UTF-8" ?>
<adf-config xmlns="http://xmlns.oracle.com/adf/config" xmlns:sec="http://xmlns.oracle.com/adf/security/config">
  <sec:adf-security-child xmlns="http://xmlns.oracle.com/adf/security/config">
    <CredentialStoreContext credentialStoreClass="oracle.adf.share.security.providers.jps.CSFCredentialStore"                         credentialStoreLocation="../../src/META-INF/jps-config.xml"/>
    <sec:JaasSecurityContext initialContextFactoryClass="oracle.adf.share.security.JAASInitialContextFactory"                            jaasProviderClass="oracle.adf.share.security.providers.jps.JpsSecurityContext"
    authorizationEnforce="false" authenticationRequire="true"/>
  </sec:adf-security-child>
  <adf-mds-config xmlns="http://xmlns.oracle.com/adf/mds/config">
    <mds-config version="11.1.1.000" xmlns="http://xmlns.oracle.com/mds/config">
      <persistence-config>
        <metadata-namespaces>
          <namespace path="/oracle/as/ess/core" metadata-store-usage="ess-core"/>
        </metadata-namespaces>
        <metadata-store-usages>
          <metadata-store-usage id="ess-core" deploy-target="false"                 default-cust-store="false">
            <metadata-store                class-name="oracle.mds.persistence.stores.db.DBMetadataStore">
              <property name="jndi-datasource" value="jdbc/mds-ESS_MDS_DS"/>
              <property name="repository-name" value="mds-ESS_MDS_DS"/>
              <property name="partition-name" value="essapp-internal-partition"/>
            </metadata-store>
          </metadata-store-usage>
        </metadata-store-usages>
      </persistence-config>
    </mds-config>
  </adf-mds-config>
</adf-config>
7.3.6 Deploying and Running the EssDemoApp Application
After you complete the steps to build and assemble the EssDemoApp application you need to deploy the application to Oracle WebLogic Server. After you successfully deploy an application you can run the application. For the EssDemoApp sample application you use a browser to run the EssDemo servlet to submit job requests to Oracle Enterprise Scheduler running on Oracle WebLogic Server.
7.3.6.1 How to Deploy the EssDemoApp Application
To deploy the EssDemoApp application you need a properly configured and running Oracle WebLogic Server, and you need an active metadata server. When you deploy the application Oracle JDeveloper brings up the Deployment Configuration page. Select your repository from the dropdown list and Enter a partition name (the partition name defaults to application name).
To deploy the EssDemoApp application:
Check to make sure the Oracle WebLogic Server is up and running. If the Oracle WebLogic Server is not running, start the server. Make sure Oracle JDeveloper has a connection to the server (for this example, "MyConnection").
In the Application Navigator, select the EssDemoApp application.
In the Application Navigator from the Application Menu select Deploy > EAR_EssDemoApp > to > MyConnection.
Oracle JDeveloper shows the Deployment Configuration page. Select the appropriate options for your Metadata Repository.
Make the following choices when prompted during deployment. In the Metadata Repository section choose the repository and partition names as follows and shown in Figure 7-13:
Repository Name: mds-ESS_MDS_DS
Partition Name:
essUserMetadata
Figure 7-13 Oracle Deployment Configuration Window

Description of "Figure 7-13 Oracle Deployment Configuration Window"Click Deploy.
Verify the deployment using the Deployment Log.
7.3.6.2 How to Run the EssDemoApp Sample Application
To run the EssDemoApp sample application you access the EssDemo servlet in a browser.
To access the EssDemo servlet:
- Enter the following URL in a browser:
http://host:http-port/context-root/essdemo
For example,
http://myserver.example.com:7101/EssDemoApp/essdemo
This shows the EssDemo servlet, as shown in Figure 7-14.
Figure 7-14 Running EssDemo Servlet for Oracle Enterprise Scheduler Sample Application

- Refresh the browser to see the progress of the job in the Request Status area, as shown in Figure 7-15.
Figure 7-15 Running EssDemo Servlet with Request Status for Submitted Requests

7.3.6.3 How to Purge Jobs in the EssDemoApp Sample Application
Using the EssDemoApp sample application and the EssDemo servlet you can remove completed jobs from the Request Status list.
To remove completed jobs:
- Click Purge to purge a request.
- Click Cancel to cancel a request that is either
RUNNINGorWAITING.
7.4 Building Split Submitting and Hosting Applications
When you build and deploy Oracle Enterprise Scheduler applications, you can use two split applications -- a job submission application, a submitter, and a job execution application, a hosting application. Using this design, you need to configure and deploy each application with options that support such a split configuration. In addition, some Oracle Enterprise Scheduler deployments use a separate Oracle WebLogic Server for the hosting and the submitting applications; for this deployment option the submitting application and the hosting application are deployed to separate Oracle WebLogic Servers. When the submitter application and the hosting application for Oracle Enterprise Scheduler run on separate Oracle WebLogic Servers, you need to configure the Oracle WebLogic Server for the hosting application so that the submitting application can find the hosting application.
Note:
This section creates a new application. If you have created EssDemoApp with the sections beginning with Creating the Application and Projects for EssDemoApp Application, note that this section creates a project of the same name. You'll need to choose a different location for the application or delete the previous application in order to use the EssDemoApp application name in this section.
To build the sample split applications, you do the following:
- Build a back-end hosting application that includes the code to be scheduled and run.
- Build a front-end submitter application initiates the job requests.
This section includes the following subsections:
7.4.1 How to Create the Back-End Hosting Application for EssDemoApp
Using Oracle JDeveloper you create the back-end application. To create the EssDemoApp back-end sample application you do the following:
Create a back-end application and project.
Configure security.
Define the deployment descriptors.
Create the Java class that implements the Oracle Enterprise Scheduler executable interface.
Create the Oracle Enterprise Scheduler metadata to describe the job
Assemble the application.
Deploy the application.
7.4.1.1 Creating the Back-End Hosting Application
To work with Oracle Enterprise Scheduler with a split application you use Oracle JDeveloper to create the back-end application and project, and to add Oracle Enterprise Scheduler extensions to the project.
To create the back-end hosting application:
From JDeveloper choose File > New from the main menu.
In the New Gallery, expand General, select Applications and then Custom Application, and click OK.
In the Name your application page of the Create Generic Application wizard, set the Application Name field to
EssDemoApp.Click Next.
In the Name your project window, enter the name for the host project you're creating and select supporting technologies. This project is where you create and save the Oracle Enterprise Scheduler metadata
In the Project Name field, enter a name for your hosting project. For this sample application, enter
SuperEss.On the Project Features tab, under Available, double-click ESS Host Support and ESS Job Support so that both are listed under Selected on the right side of the dialog box.
For more on these, see Understanding Oracle Enterprise Scheduler Application Support Created by Oracle JDeveloper.
Click Next.
Figure 7-16 Create the Back-End Hosting Application

Description of "Figure 7-16 Create the Back-End Hosting Application"In the Configure Java Settings page, change the default package to
oracle.apps.ess.howto, then click Next.In the Configure EJB Settings page, select Generate ejb-jar.xml in this project and click Next.
In the Configure ESS Host Support settings page, in the Application Id field, enter EssDemoApp.
Click Finish.
7.4.1.2 Configuring Security for the Back-End Hosting Application
You need to create a user that is assigned to the EssDempAppRole role.
To configure security for the back-end hosting application:
- Select
EssDemoAppUserand click OK.

7.4.1.3 Defining Metadata for the Back-End Hosting Application
To use the Oracle Enterprise Scheduler split application to submit a job request you need to create metadata that defines a job request, including the following:
A job type: this specifies an execution type and defines a common set of parameters for a job request.
A job definition: this is the basic unit of work that defines a job request in Oracle Enterprise Scheduler.
To create metadata for the back-end hosting application:
In the Application Navigator, select the SuperEss project.
Press Ctrl-N. This displays the New Gallery.
In the Categories area expand Business Tier and select Enterprise Scheduler Metadata.
In the Items area, select Job Definition as shown in Figure 7-18.
Figure 7-18 Adding Job Definition to the Sample Application

Click OK. This displays the Create Job Definition dialog.
In the Create Job Definition dialog, specify the following as shown in Figure 7-19:
In the Name field, enter a name for the job definition. For this example, enter the name:
HelloWorldJobDef.In the Package field, enter a package name. For this example, enter
oracle/apps/ess/howto/metadata.In the Job Type field, from the dropdown list select /oracle/as/ess/core/JavaJobType.
If job types are not listed in the dropdown, ensure that you started Oracle JDeveloper as described in How to Start JDeveloper to Support Building Oracle Enterprise Scheduler Applications.
Ensure that the Create Java Class check box and the Synchronous option button are selected.
By selecting the Create Java Class check box, you're asking that a Java class for your Java job be created, saving you the trouble of creating one later. Selecting the Synchronous option specifies that this is a synchronous Java job.
Under Java Class, specify details for the Java class you're creating. In the Java Package field, enter its package name -- here, enter
oracle.apps.ess.howto. In the Class Name field, enter a name for the class -- here, enterHelloWorldJob.Click OK.
This creates the Java class you requested, along with the
HelloWorldJobDefinition.xmlfile. Oracle JDeveloper displays XML file's contents in the Job Definition page.On the Job Definition page, you can edit job definition metadata, including properties that specify parameters for the job, access to this metadata, and a resource bundle to use for localization.
In the HelloWorldJobDef.xml Job Definition page, in the Description field, enter
HelloWorld Example.In the System Properties section, click the Add button.
In the Add System Property dialog, from the Name dropdown, select SYS_effectiveApplication.
In the Initial Value field, enter
EssDemoApp.Click OK.
In the Access Control section, click the Add button.
In the Add Access Control dialog, from the Role dropdown, ensure that EssDemoAppRole is selected. This is the role that you created during Configuring Security for the Back-End Hosting Application.
Select the Read and Execute actions as shown in Figure 7-20.
Click OK.


7.4.1.4 Creating a Java Implementation Class in the Back-End Hosting Application
To define an application that runs a Java class under control of Oracle Enterprise Scheduler you need to create the Java class that implements the Oracle Enterprise Scheduler Executable interface. The Executable interface specifies the contract that allows you to use Oracle Enterprise Scheduler to invoke a Java class.
To implement the execute method:
- In the Application Navigator, locate the class you created by expanding the items in the projects panel to SuperEss > Application Sources > oracle.apps.ess > howto > HelloWorldJob.java.
- Open HelloWorldJob.java in the source editor.
- In the source editor, add the following code to implement the
executemethod. Theexecutemethod is where execution for a Java job begins. The code inside your method should look something like Example 7-4.
Example 7-4 HelloWorldJob Execute Method Code
StringBuilder sb = new StringBuilder(1000);
sb.append("\n==================================");
sb.append("\n= EssDemoApp request is now running");
long myRequestId = ctx.getRequestId();
sb.append("\n= Request Id = " + myRequestId);
sb.append("\n= Request Properties:");
for (String paramKey : params.getNames()) {
    Object paramValue = params.getValue(paramKey);
    sb.append("\n=\t(" + paramKey + ", " + paramValue + ")");
}
sb.append("\n=");
sb.append("\n==================================");
Logger logger = Logger.getLogger("oracle.apps.ess.howto");
logger.info(sb.toString());
7.4.1.5 Setting Oracle Enterprise Scheduler Properties
With Oracle Enterprise Scheduler properties, you set values for settings used in the ejb-jar.xml file associated with the application. These properties include the following:
Logical Application Name
Specifies the logical name used to identify this application. Separate from the application name used when deploying the application to the container, this value lets you safely hard code the logical application name in source code.
Application Policy Stripe
Specifies which JPS security stripe (or "security context") should be used to perform security checks.
JPS Interceptor Application Name
Specifies the application stripe name used at runtime to determine which set of security policies are applicable.
To set values for Oracle Enterprise Scheduler properties:
- In the Application Navigator, right-click the EssHost project, then click Enterprise Scheduler Properties.
- In the Enterprise Scheduler Properties dialog, enter
EssDemoAppfor all three of the fields provided: Logical Application Name, Application Policy Stripe, and JPS Interceptor Application Name. - Click OK.
7.4.1.6 Assembling the Back-End Hosting Application for Oracle Enterprise Scheduler
After you create the back-end sample application you use Oracle JDeveloper to assemble the application.
To assemble the back-end application you do the following:
Create the EJB Java Archive
Create the application MAR and EAR files
7.4.1.6.1 How to Assemble the EJB JAR File for the Back-End Hosting Application
The EJB Java archive file includes descriptors for the Java job implementations.
To create the EJB-JAR deployment profile:
7.4.1.6.2 How to Assemble the MAR and EAR Files for the Back-End Hosting Application
In this section, you'll prepare an EAR file that assembles the EssDemoApp sample application. The EAR archive consists of the EJB JAR including the Oracle Enterprise Scheduler Java job implementation.
To update the EAR options:
- In the Application Assembly window, ensure that all check boxes are selected as shown in Figure 7-21.
Figure 7-21 Edit EAR Deployment Profile Properties

Description of "Figure 7-21 Edit EAR Deployment Profile Properties"
7.4.1.7 Update the SuperEss MANIFEST File
Replace the content of the SuperEss META-INF/MANIFEST.INF file with the following lines:
Manifest-Version: 1.0
Weblogic-Application-Version: 3.0
Extension-List: essruntime
essruntime-Extension-Name: oracle.ess.runtime
essruntime-Specification-Version: 12
7.4.1.8 Configure the weblogic-application.xml File
Use the source editor to remove the following lines from weblogic-application.xml:
<library-ref>
  <library-name>oracle.applcp.runtime</library-name>
</library-ref>
<library-ref>
  <library-name>oracle.xdo.runtime</library-name>
</library-ref>
7.4.1.9 Deploying the Back-End Hosting Application
After assembling the application, you can deploy it to the server.
To deploy the back-end hosting application:
- From the main menu, choose Application > Deploy > EAR_EssDemoAppEar...
- Set up and deploy the application to a container.
- When the Deployment Configuration dialog appears, make a note of the default values, but do not change them.
7.4.1.10 Edit the adf-config.xml File for the EssDemoApp Application
In the Application Resources panel:
- Expand Descriptors.
- Expand ADF META-INF.
- Double-click adf-config.xml.
- In the source editor, replace the contents of the
adf-config.xmlfile with the XML shown in Example 7-5.
Example 7-5 adf-config.xml File
<?xml version="1.0" encoding="UTF-8" ?>
<adf-config xmlns="http://xmlns.oracle.com/adf/config" xmlns:config="http://xmlns.oracle.com/bc4j/configuration">
  <adf-security-child xmlns="http://xmlns.oracle.com/adf/security/config">
    <JaasSecurityContext initialContextFactoryClass="oracle.adf.share.security.JAASInitialContextFactory"           jaasProviderClass="oracle.adf.share.security.providers.jps.JpsSecurityContext"
         authorizationEnforce="false" authenticationRequire="true"/>
  </adf-security-child>
  <adf-adfm-config xmlns="http://xmlns.oracle.com/adfm/config">
    <defaults changeEventPolicy="ppr" useBindVarsForViewCriteriaLiterals="true"            useBindValuesInFindByKey="true"/>
    <startup>
       <amconfig-overrides>
         <config:Database jbo.locking.mode="optimistic"/>
      </amconfig-overrides>
    </startup>
  </adf-adfm-config>
   <adf-mds-config xmlns="http://xmlns.oracle.com/adf/mds/config">
    <mds-config version="11.1.1.000" xmlns="http://xmlns.oracle.com/mds/config">
      <persistence-config>
        <metadata-namespaces>
          <namespace path="/oracle/as/ess/core" metadata-store-usage="ess-core"/>
        </metadata-namespaces>
        <metadata-store-usages>
          <metadata-store-usage id="ess-core" deploy-target="false"             default-cust-store="false">
            <metadata-store                     class-name="oracle.mds.persistence.stores.db.DBMetadataStore">
              <property name="jndi-datasource" value="jdbc/mds-ESS_MDS_DS"/>
              <property name="repository-name" value="mds-ESS_MDS_DS"/>
              <property name="partition-name" value="essapp-internal-partition"/>
            </metadata-store>
          </metadata-store-usage>
        </metadata-store-usages>
      </persistence-config>
    </mds-config>
  </adf-mds-config>
</adf-config>
7.4.2 How to Create the Front-End Submitter Application for Oracle Enterprise Scheduler
In an Oracle Enterprise Scheduler split application you use the Oracle Enterprise Scheduler APIs to submit job requests from a front-end application. The EssDemoAppUI application provides a Java servlet for a servlet based user interface for submitting job requests (using Oracle Enterprise Scheduler).
To create the front-end submitter sample application you do the following:
Create a front-end application and project.
Configure the
ejb-jar.xmlfile.Create the web project
Configure security.
Create the HTTP servlet.
Edit the
web.xmlfile.Edit the
weblogic-application.xmlfile.Edit the
adf-configfile.Assemble the application.
Deploy the application.
7.4.2.1 Creating the Front-End Submitter Application
You use JDeveloper to build the front-end submitter application using similar steps as you used for the back-end hosting application.
To create the front-end submitter application:
- Complete the steps in Creating the Back-End Hosting Application but this time use
ESSDemoAppUIas the name of the application. When you configure ESS host support settings, in the Application Id field, be sure to enter EssDemoApp.
7.4.2.2 Creating the SuperWeb Project
You need to create a web project for the servlet.
To create the SuperWeb project:
Right-click the SuperEss project and choose New.
In the New Gallery, expand General, select Projects and then Custom Project, and click OK.
In the Name your project window, enter the name for the host project you're creating and select supporting technologies. This project is where you create and save the Oracle Enterprise Scheduler metadata
In the Project Name field, enter a name for your hosting project. For this sample application, enter
SuperWeb.On the Project Features tab, under Available, double-click ESS Client Support, JSP and Servlets, so that both are listed under Selected on the right side of the dialog box.
For more on ESS Client Support, see Understanding Oracle Enterprise Scheduler Application Support Created by Oracle JDeveloper.
Click Next.
In the Default Package field of the Configure Java settings window, enter
oracle.apps.ess.howto. Click Finish.In the Configure EJB Settings window, under EJB Version, select the Enterprise JavaBeans 3.0 option button.
In the Configure EJB Settings window, under EJB Version 3.x, select the Generate ejb-jar.xml in this project check box.
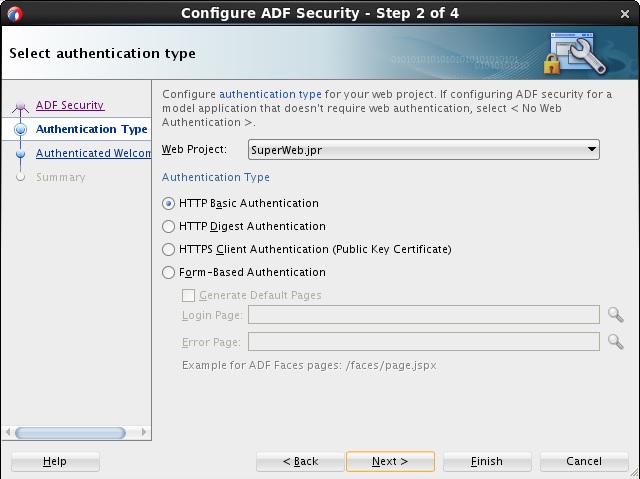
7.4.2.3 Configuring Security for the Front-End Submitter Application
You need to configure security for the application. You do not have to create any users or roles as the EssDemoAppUI application simply shares the users and roles created by the EssDemoApp application.
To configure security for the front-end submitter application:
- Select HTTP Basic Authentication.
Figure 7-22 Configure ADF Security
7.4.2.4 Creating the HTTP Servlet for the Front-End Submitter Application
Normally, more complex user interfaces that are built on heavy weight frameworks such as Oracle Application Development Framework are employed, but for the sake of simplicity, you use a basic HTTP servlet for the submitter application.
To create the HTTP Servlet for the front-end submitter application:
- Right-click the SuperEss project and choose New.
- In the New Gallery, expand Web Tier, select Servlets and then HTTP Servlet, and click OK.
- In the Create HTTP Servlet - Step 1 of 3: Servlet Information page, enter
EssDemoAppServletin the Class field. - Change the selection from Annotation to Configuration File(web.xml).
- Enter
oracle.apps.ess.howtoin the Package field and click Next. - Click Finish.
- In the source editor, replace the contents of
ESSDemoAppServlet.javawith the code in Example 7-6.
Example 7-6 HTTP Servlet Code for the Front-End Submitter Application
package oracle.apps.ess.howto;
import java.io.IOException;
import java.io.PrintWriter;
import java.io.StringWriter;
import java.util.ArrayList;
import java.util.Calendar;
import java.util.Enumeration;
import java.util.HashSet;
import java.util.Iterator;
import java.util.List;
import java.util.ListIterator;
import java.util.Map;
import java.util.Set;
import java.util.SortedSet;
import java.util.TreeSet;
import java.util.logging.Level;
import java.util.logging.Logger;
import java.util.regex.Pattern;
import javax.servlet.ServletConfig;
import javax.servlet.ServletException;
import javax.servlet.http.HttpServlet;
import javax.servlet.http.HttpServletRequest;
import javax.servlet.http.HttpServletResponse;
import javax.servlet.http.HttpSession;
import oracle.as.scheduler.MetadataObjectId;
import oracle.as.scheduler.MetadataObjectId.MetadataObjectType;
import oracle.as.scheduler.MetadataService;
import oracle.as.scheduler.MetadataService.QueryField;
import oracle.as.scheduler.MetadataServiceHandle;
import oracle.as.scheduler.RequestDetail;
import oracle.as.scheduler.RequestParameters;
import oracle.as.scheduler.RuntimeService;
import oracle.as.scheduler.RuntimeServiceHandle;
import oracle.as.scheduler.State;
import oracle.as.scheduler.core.JndiUtil;
public class EssDemoAppServlet extends HttpServlet {
@SuppressWarnings("compatibility:4685800289380934682")
private static final long serialVersionUID = 1L;
private static final String CONTENT_TYPE = "text/html; charset=UTF-8";
private static final String MESSAGE_KEY = "Message";
private static final String PATH_SUBMIT = "/submitRequest";
private static final String PATH_ALTER = "/alterRequest";
private static final String MDO_SEP = ";";
private static final String ACTION_CANCEL = "Cancel";
private static final String ESS_UNAVAIL_MSG =
"<p>Enterprise Scheduler Service is currently unavailable. Cause: %s</p>";
private enum PseudoScheduleChoices {
Immediately(0),
InTenSeconds(10),
InTenMinutes(10 * 60);
@SuppressWarnings("compatibility:-5637079380819677366")
private static final long serialVersionUID = 1L;
private int m_seconds;
private PseudoScheduleChoices(int seconds) {
m_seconds = seconds;
}
public int getSeconds() {
return m_seconds;
}
}
public EssDemoAppServlet() throws ServletException {
super();
}
@Override
public void init(ServletConfig config) throws ServletException {
super.init(config);
}
@Override
public void doGet(HttpServletRequest request, HttpServletResponse response)
throws ServletException, IOException
{
response.setContentType(CONTENT_TYPE);
HttpSession session = request.getSession(true);
String lastMessage = String.valueOf(session.getAttribute(MESSAGE_KEY));
if ("null".equals(lastMessage)) {
lastMessage = "";
}
try {
RuntimeLists runtimeLists = getRuntimeLists();
MetadataLists metadataLists = getMetadataLists();
renderResponse(metadataLists, runtimeLists,
request, response, lastMessage);
} catch (ServletException se) {
throw se;
} catch (Exception e) {
throw new ServletException(e);
}
}
@Override
public void doPost(HttpServletRequest request,
HttpServletResponse response)
throws ServletException, IOException
{
response.setContentType(CONTENT_TYPE);
request.setCharacterEncoding("UTF-8");
HttpSession session = request.getSession(true);
String pathInfo = request.getPathInfo();
// Clear the message on every post request
StringBuilder message = new StringBuilder("");
try {
// Select each handler based on the form action
if ("".equals(pathInfo)) {
// No processing
} else if (PATH_SUBMIT.equals(pathInfo)) {
postSubmitRequest(request, message);
} else if (PATH_ALTER.equals(pathInfo)) {
postAlterRequest(request, message);
} else {
message.append(String.format("<p>No handler for pathInfo=%s</p>",
pathInfo));
}
}
catch (ServletException se) {
Throwable t = se.getCause();
String cause = (t == null) ? se.toString() : t.toString();
message.append (String.format(ESS_UNAVAIL_MSG, cause));
}
// Storing the messages in the session allows them to persist
// through the redirect and across refreshes.
session.setAttribute(MESSAGE_KEY, message.toString());
// render the page by redirecting to doGet(); this intentionally
// strips the actions and post data from the request.
response.sendRedirect(request.getContextPath() +
request.getServletPath());
}
/**
* Handle the job submission form.
* @param request
* @param message
* @throws ServletException
*/
private void postSubmitRequest(HttpServletRequest request,
StringBuilder message)
throws ServletException
{
String jobDefName = request.getParameter("job");
String scheduleDefName = request.getParameter("schedule");
// Various required args for submission
Calendar start = Calendar.getInstance();
start.add(Calendar.SECOND, 2);
// Launch the job based on form contents
if (jobDefName == null || scheduleDefName == null) {
message.append("Both a job name and a schedule name must be specified\n");
} else {
PseudoScheduleChoices pseudoSchedule = null;
// See if schedule given is actually a pseudo schedule
try {
pseudoSchedule = PseudoScheduleChoices.valueOf(scheduleDefName);
} catch (IllegalArgumentException e) {
// The string is not a valid member of the enum
pseudoSchedule = null;
}
MetadataObjectId scheduleDefId = null;
String scheduleDefNamePart = null;
MetadataObjectId jobDefId = stringToMetadataObjectId(jobDefName);
// Don't look up schedules that aren't real
if (pseudoSchedule != null) {
scheduleDefNamePart = scheduleDefName;
start.add(Calendar.SECOND, pseudoSchedule.getSeconds());
} else {
scheduleDefId = stringToMetadataObjectId(scheduleDefName);
scheduleDefNamePart = scheduleDefId.getNamePart();
}
String jobDefNamePart = jobDefId.getNamePart();
String requestDesc = jobDefNamePart + "@" + scheduleDefNamePart;
Logger logger = getLogger();
long requestId = submitRequest(pseudoSchedule, requestDesc,
jobDefId, scheduleDefId, start, logger);
// Populate the message block based on results
message.append(String.format("<p>New request %d launched using %s</p>",
requestId, requestDesc));
}
}
private Long submitRequest(final PseudoScheduleChoices pseudoSchedule,
final String requestDesc,
final MetadataObjectId jobDefId,
final MetadataObjectId scheduleDefId,
final Calendar start,
final Logger logger)
throws ServletException
{
RuntimeServicePayload<Long> myPayload = new RuntimeServicePayload<Long>() {
@Override
Long execute(RuntimeService service,
RuntimeServiceHandle handle,
Logger logger)
throws Exception
{
RequestParameters params = new RequestParameters();
return (null != pseudoSchedule)
? service.submitRequest(handle, requestDesc, jobDefId,
start, params)
: service.submitRequest(handle, requestDesc, jobDefId,
scheduleDefId, null,
start, null, params);
}
};
try {
return performOperation(myPayload, logger);
} catch (Exception e) {
throw new ServletException("Error submitting request using job: " +
jobDefId + " and schedule: " +
scheduleDefId, e);
}
}
/**
* Handle the "Cancel" and "Purge" actions from the form enclosing
* the Request Status table.
* @param request
* @param message
* @throws ServletException
*/
private void postAlterRequest(HttpServletRequest request,
StringBuilder message)
throws ServletException
{
String cancelID = null;
/*
* there are a few assumptions going on here...
* the HTTP button being used to transmit the action and
* request is backwards from its normal usage (eg. the name
* should be invariable, and the value variable). Because we
* want to display either "Purge" or "Cancel" on the button, and
* transmit the reqId with it, we are reversing the map entry
* to get the key (which in this case is the reqID), and
* match it to the value (Purge or Cancel).
* Assumptions are that there is only one entry in the map
* per request (one purge or cancel). Also, that the datatypes
* for the key and value are those documented for
* ServletRequest (<K,V> = <String, String[]>).
*/
Map requestMap = request.getParameterMap();
Iterator mapIter = requestMap.entrySet().iterator();
while (mapIter.hasNext()) {
Map.Entry entry = (Map.Entry)mapIter.next();
String key = (String)entry.getKey();
String[] values = (String[])entry.getValue();
if (ACTION_CANCEL.equals(values[0])) {
cancelID = key;
}
}
if (cancelID != null) {
try {
final String cancelId2 = cancelID;
RuntimeServicePayload<Void> myPayload = new RuntimeServicePayload<Void>() {
@Override
Void execute(RuntimeService service,
RuntimeServiceHandle handle,
Logger logger)
throws Exception
{
service.cancelRequest(handle, Long.valueOf(cancelId2));
return null;
}
};
Logger logger = getLogger();
performOperation(myPayload, logger);
message.append
(String.format("<p>Cancelled request %s</p>", cancelID));
} catch (Exception e) {
throw new ServletException
("Error canceling or purging request", e);
}
} else {
message.append("<p>No purge or cancel action specified</p>");
}
}
private String metadataObjectIdToString(MetadataObjectId mdoID)
throws ServletException {
String mdoString =
mdoID.getType().value() + MDO_SEP + mdoID.getPackagePart() +
MDO_SEP + mdoID.getNamePart();
return mdoString;
}
private MetadataObjectId stringToMetadataObjectId(String mdoString)
throws ServletException {
String[] mdoStringParts = mdoString.split(Pattern.quote(MDO_SEP));
if (mdoStringParts.length != 3) {
throw new ServletException(String.format("Unexpected number of components %d found " +
"when converting %s to MetadataObjectID",
mdoStringParts.length,
mdoString));
}
MetadataObjectType mdType =
MetadataObjectType.getMOType(mdoStringParts[0]);
String mdPackage = mdoStringParts[1];
String mdName = mdoStringParts[2];
MetadataObjectId mdoID =
MetadataObjectId.createMetadataObjectId(mdType, mdPackage, mdName);
return mdoID;
}
/**
* this changes the format used in this class for job definitions to the one
* which is used in the runtime query.
* @param strMetadataObject
* @return string representing object in runtime store
* @throws ServletException
*/
private String fixMetadataString(String strMetadataObject)
throws ServletException {
String fslash = "/";
String[] mdoStringParts =
strMetadataObject.split(Pattern.quote(MDO_SEP));
if (mdoStringParts.length != 3) {
throw new ServletException(String.format("Unexpected number of components %d found " +
"when converting %s to MetadataObjectID",
mdoStringParts.length,
strMetadataObject));
}
String[] trimStringParts = new String[mdoStringParts.length];
for (int i = 0; i < mdoStringParts.length; i++) {
String mdoStringPart = mdoStringParts[i];
trimStringParts[i] = mdoStringPart.replaceAll(fslash, " ").trim();
}
MetadataObjectType mdType =
MetadataObjectType.getMOType(trimStringParts[0]);
String mdPackage = fslash + trimStringParts[1];
String mdName = trimStringParts[2];
MetadataObjectId metadataObjId =
MetadataObjectId.createMetadataObjectId(mdType, mdPackage, mdName);
return metadataObjId.toString();
}
private Set<String> getSetFromMetadataEnum(Enumeration<MetadataObjectId> enumMetadata)
throws ServletException {
Set<String> stringSet = new HashSet<String>();
while (enumMetadata.hasMoreElements()) {
MetadataObjectId objId = enumMetadata.nextElement();
String strNamePart = objId.getNamePart();
stringSet.add(strNamePart);
}
return stringSet;
}
//****************************************************************************
//
// HTML Rendering Methods
//
//****************************************************************************
/**
* Rendering code for the page displayed.
* In a real application this would be done using JSP, but this approach
* keeps everything in one file to make the example easier to follow.
* @param response The response object from the main request.
* @param message Text that appears in the message panel, may contain HTML
* @throws IOException
*/
private void renderResponse(MetadataLists ml,
RuntimeLists rl,
HttpServletRequest request,
HttpServletResponse response,
String message)
throws IOException, ServletException
{
response.setContentType(CONTENT_TYPE);
PrintWriter out = response.getWriter();
String urlBase = request.getContextPath() + request.getServletPath();
// Indents maintained for clarity
out.println("<html>");
out.println("<head><title>EssDemo</title></head>");
out.println("<body>");
out.println("<table align=\"center\"><tbody>");
out.println(" <tr><td align=\"center\"><h1>Oracle Enterprise Scheduler Tutorial</h1></td></tr>");
out.println(" <tr><td align=\"center\"><table cellspacing=6><tr>");
// Job launch form
out.println(" <td align=\"center\">");
out.println(" <h2>Launch Job</h2>");
renderLaunchJobForm(ml, out, urlBase);
out.println(" </td>");
out.println(" <td align=\"center\" bgcolor=\"blue\" width=\"2\"/>");
out.println(" </tr></table></td></tr>");
out.println(" <tr><td bgcolor=\"red\"/></tr>");
// Message panel
out.println(" <tr><td align=\"center\"><h3>Messages</h3></td></tr>");
out.println(" <tr><td>");
out.println(message);
out.println(" </td></tr>");
out.println(" <tr><td bgcolor=\"red\"/></tr>");
// Request status
out.println(" <tr><td align=\"center\">");
out.println(" <form name=\"attrs\" action=\"" + urlBase +
PATH_ALTER + "\" method=\"post\">");
out.println(" <h2>Request Status</h2>");
out.println(" <table border=2><tbody>");
out.println(" <th>reqID</th>");
out.println(" <th>Description</th>");
out.println(" <th>Scheduled time</th>");
out.println(" <th>State</th>");
out.println(" <th>Action</th>");
renderStatusTable(out, rl.requestDetails);
out.println(" </tbody></table>");
out.println(" </form>");
out.println(" </td></tr>");
out.println("</tbody></table>");
out.println("</body></html>");
out.close();
}
private void renderLaunchJobForm(MetadataLists ml, PrintWriter out, String urlBase)
throws ServletException {
out.println(" <form name=\"attrs\" action=\"" + urlBase +
PATH_SUBMIT + "\" method=\"post\">");
out.println(" <table><tbody>");
out.println(" <tr><td align=\"right\">");
out.println(" <b>Job:</b>");
out.println(" <select name=\"job\">");
renderMetadataChoices(out, ml.jobDefList, false);
renderMetadataChoices(out, ml.jobSetList, false);
out.println(" </select>");
out.println(" </td></tr>");
out.println(" <tr><td align=\"right\">");
out.println(" <b>Schedule:</b>");
out.println(" <select name=\"schedule\">");
renderPseudoScheduleChoices(out);
renderMetadataChoices(out, ml.scheduleList, false);
out.println(" </select>");
out.println(" </td></tr>");
out.println(" <tr><td align=\"center\">");
out.println(" <input name=\"submit\" value=\"Submit\" type=\"submit\">");
out.println(" </td></tr>");
out.println(" </tbody></table>");
out.println(" </form>");
}
/**
*
* @param out - printwriter
* @param jobChoices -- metadata to be displayed
* @param bBlankFirst -- blank first (so that this param is not required)
* @throws ServletException
*/
private void renderMetadataChoices(PrintWriter out,
Enumeration<MetadataObjectId> jobChoices,
boolean bBlankFirst)
throws ServletException
{
if (jobChoices == null)
return;
boolean bFirst = true;
while (jobChoices.hasMoreElements()) {
MetadataObjectId job = jobChoices.nextElement();
String strJob = metadataObjectIdToString(job);
String strNamePart = job.getNamePart();
if (strNamePart.compareTo("BatchPurgeJob") == 0) {
continue;
} else {
if (bFirst && bBlankFirst) {
out.printf("<option value=\"%s\">%s</option>", "", "");
bFirst = false;
}
out.printf("<option value=\"%s\">%s</option>", strJob,
strNamePart);
}
}
}
/**
* helper method for rendering choices based on strings, adding an empty
* string to the beginning of the list
* @param out
* @param choices
*/
private void renderStringChoices(PrintWriter out, Set<String> choices) {
if (choices == null)
return;
choices.add("");
SortedSet<String> sorted = new TreeSet<String>(choices);
Iterator choiceIter = sorted.iterator();
while (choiceIter.hasNext()) {
String choice = (String)choiceIter.next();
out.printf("<option value=\"%s\">%s</option>", choice, choice);
}
}
private void renderPseudoScheduleChoices(PrintWriter out) {
for (PseudoScheduleChoices c : PseudoScheduleChoices.values()) {
out.printf("<option value=\"%s\">%s</option>", c, c);
}
}
private void renderStatusTable
(PrintWriter out, List<RequestDetail> reqDetails)
{
if (reqDetails == null) {
return;
}
for (RequestDetail reqDetail : reqDetails) {
State state = reqDetail.getState();
Calendar scheduledTime = reqDetail.getScheduledTime();
String scheduledTimeString = null;
if (scheduledTime == null) {
scheduledTimeString = "null scheduled time";
} else {
scheduledTimeString = String.valueOf(scheduledTime.getTime());
}
final String actionButton;
if (!state.isTerminal()) {
String action = ACTION_CANCEL;
String reqId = String.valueOf(reqDetail.getRequestId());
actionButton = String.format
("<button type=submit value=%s name=\"%s\">%s</button>",
action, reqId, action);
} else {
actionButton = " ";
}
out.printf("<tr><td>%d</td><td>%s</td><td>%s</td><td>%s</td><td>%s</td></tr>\n",
reqDetail.getRequestId(), reqDetail.getDescription(),
scheduledTimeString, state, actionButton);
}
}
private MetadataService getMetadataService() throws Exception {
return JndiUtil.getMetadataServiceEJB();
}
private RuntimeService getRuntimeService() throws Exception {
return JndiUtil.getRuntimeServiceEJB();
}
private abstract class Payload<SERVICE, HANDLE, RETURN> {
abstract SERVICE getService() throws Exception;
abstract HANDLE getHandle(SERVICE service) throws Exception;
abstract void closeHandle(SERVICE service,
HANDLE handle,
boolean abort)
throws Exception;
abstract RETURN execute(SERVICE service, HANDLE handle, Logger logger)
throws Exception;
}
private abstract class MetadataServicePayload<T>
extends Payload<MetadataService, MetadataServiceHandle, T>
{
@Override
MetadataService getService() throws Exception {
return getMetadataService();
}
@Override
MetadataServiceHandle getHandle(MetadataService service)
throws Exception
{
return service.open();
}
@Override
void closeHandle(MetadataService service,
MetadataServiceHandle handle,
boolean abort)
throws Exception
{
service.close(handle, abort);
}
}
private abstract class RuntimeServicePayload<T>
extends Payload<RuntimeService, RuntimeServiceHandle, T>
{
@Override
RuntimeService getService() throws Exception {
return getRuntimeService();
}
@Override
RuntimeServiceHandle getHandle(RuntimeService service)
throws Exception
{
return service.open();
}
@Override
void closeHandle(RuntimeService service,
RuntimeServiceHandle handle,
boolean abort)
throws Exception
{
service.close(handle, abort);
}
}
private <S, H, R> R performOperation
(Payload<S, H, R> payload, Logger logger)
throws Exception
{
S service = payload.getService();
H handle = payload.getHandle(service);
Exception origException = null;
try {
return payload.execute(service, handle, logger);
} catch (Exception e2) {
origException = e2;
throw e2;
} finally {
if (null != handle) {
try {
boolean abort = (null != origException);
payload.closeHandle(service, handle, abort);
} catch (Exception e2) {
if (null != origException) {
logger.log(Level.WARNING, "An error occurred while " +
"closing handle, however, a previous failure was " +
"detected. The following error will be logged " +
"but not reported: " + stackTraceToString(e2));
}
}
}
}
}
private final String stackTraceToString(Exception e) {
StringWriter sw = new StringWriter();
PrintWriter pw = new PrintWriter(sw);
e.printStackTrace(pw);
pw.flush();
pw.close();
return sw.toString();
}
private Logger getLogger() {
return Logger.getLogger(this.getClass().getName());
}
private class MetadataLists {
private final Enumeration<MetadataObjectId> jobDefList;
private final Enumeration<MetadataObjectId> jobSetList;
private final Enumeration<MetadataObjectId> scheduleList;
private final Enumeration<MetadataObjectId> jobTypeList;
private MetadataLists(Enumeration<MetadataObjectId> jobDefList,
Enumeration<MetadataObjectId> jobSetList,
Enumeration<MetadataObjectId> scheduleList,
Enumeration<MetadataObjectId> jobTypeList)
{
this.jobDefList = jobDefList;
this.jobSetList = jobSetList;
this.scheduleList = scheduleList;
this.jobTypeList = jobTypeList;
}
}
private class RuntimeLists {
private final List<RequestDetail> requestDetails;
private final Set<String> applicationChoices;
private final Set<String> stateChoices;
private final Set<MetadataObjectId> jobDefMDOChoices;
private RuntimeLists(List<RequestDetail> requestDetails,
Set<String> applicationChoices,
Set<String> stateChoices,
Set<MetadataObjectId> jobDefMDOChoices)
{
super();
this.requestDetails = requestDetails;
this.applicationChoices = applicationChoices;
this.stateChoices = stateChoices;
this.jobDefMDOChoices = jobDefMDOChoices;
}
}
/**
* Retrieve lists of jobs, schedules, and status for use by the renderer
* @throws ServletException
*/
private MetadataLists getMetadataLists() throws Exception {
Logger logger = getLogger();
MetadataServicePayload<MetadataLists> myPayload =
new MetadataServicePayload<MetadataLists>()
{
@Override
MetadataLists execute(MetadataService service,
MetadataServiceHandle handle,
Logger logger)
throws Exception
{
Enumeration<MetadataObjectId> jobDefs =
service.queryJobDefinitions(handle, null, QueryField.NAME, true);
Enumeration<MetadataObjectId> jobSets =
service.queryJobSets(handle, null, QueryField.NAME, true);
Enumeration<MetadataObjectId> schedules =
service.querySchedules(handle, null, QueryField.NAME, true);
Enumeration<MetadataObjectId> jobTypes =
service.queryJobTypes(handle, null, QueryField.NAME, true);
return new MetadataLists(jobDefs, jobSets, schedules, jobTypes);
}
};
MetadataLists ml = performOperation(myPayload, logger);
return ml;
}
private RuntimeLists getRuntimeLists() throws Exception {
Logger logger = getLogger();
RuntimeServicePayload<List<RequestDetail>> myPayload2 =
new RuntimeServicePayload<List<RequestDetail>>()
{
@Override
List<RequestDetail> execute(RuntimeService service,
RuntimeServiceHandle handle,
Logger logger)
throws Exception
{
List<RequestDetail> reqDetails =
new ArrayList<RequestDetail>(10);
Enumeration requestIds = service.queryRequests
(handle, null, RuntimeService.QueryField.REQUESTID, true);
while (requestIds.hasMoreElements()) {
Long reqId = (Long)requestIds.nextElement();
RequestDetail detail = service.getRequestDetail(handle, reqId);
reqDetails.add(detail);
}
return reqDetails;
}
};
List<RequestDetail> reqDetails = performOperation(myPayload2, logger);
RuntimeLists rl = getRuntimeLists(reqDetails);
return rl;
}
private RuntimeLists getRuntimeLists(List<RequestDetail> reqDetails) {
Set<String> applicationSet = new HashSet<String>(10);
Set<String> stateSet = new HashSet<String>(10);
Set<MetadataObjectId> jobDefMOSet = new HashSet<MetadataObjectId>(10);
if (reqDetails != null) {
ListIterator detailIter = reqDetails.listIterator();
while (detailIter.hasNext()) {
RequestDetail detail = (RequestDetail)detailIter.next();
applicationSet.add(detail.getDeployedApplication());
State state = detail.getState();
if (state.isTerminal())
stateSet.add(state.name());
jobDefMOSet.add(detail.getJobDefn());
}
}
RuntimeLists rl = new RuntimeLists
(reqDetails, applicationSet, stateSet, jobDefMOSet);
return rl;
}
}
7.4.2.5 Editing the web.xml File for the Front-End Submitter Application
You need to edit the web.xml file to and Oracle Enterprise Scheduler metadata and runtime EJB references.
To edit the web.xml file for the front-end submitter application:
7.4.2.6 Editing the weblogic-application.xml file for the Front-End Submitter Application
You need to create and edit the weblogic-application.xml file.
To edit the weblogic-application.xml file for the front-end submitter application:
- In Application Navigator, right-click the SuperEss project and select New.
- In the New Gallery, expand General, select Deployment Descriptors and then Weblogic Deployment Descriptor, and click OK.
- In the Select Descriptor page select weblogic-application.xml.
- Click Next, click Next again, and click Finish.
- In the source editor, replace the contents of the
weblogic-application.xmlfile that you just created with the XML shown in Example 7-7.
Example 7-7 Contents to Copy to weblogic-application.xml for a Front-End Submitter Application
<?xml version = '1.0' encoding = 'UTF-8'?>
<weblogic-application xmlns:xsi="http://www.w3.org/2001/XMLSchema-instance"
                      xsi:schemaLocation="http://www.bea.com/ns/weblogic/weblogic-application

http://www.bea.com/ns/weblogic/weblogic-application/1.0/weblogic-application.xsd"
                      xmlns="http://www.bea.com/ns/weblogic/weblogic-application">

    <!-- The following application parameter tells JPS which stripe it should
       - use to upload the jazn-data.xml policy.  If this parameter is not
       - specified, it uses the Java EE deployment name plus the version
       - number (e.g. EssDemoApp#V2.0).
      -->
    <application-param>
        <param-name>jps.policystore.applicationid</param-name>
        <param-value>EssDemoAppUI</param-value>
    </application-param>

    <!-- This listener allows JPS to configure itself and upload the
       - jazn-data.xml policy to the appropriate stripe
      -->
    <listener>
        <listener-class>oracle.security.jps.wls.listeners.JpsApplicationLifecycleListener</listener-class>
    </listener>

    <!-- This listener allows MDS to configure itself and upload any metadata
       - as defined by the MAR profile and adf-config.xml
      -->
    <listener>
        <listener-class>oracle.mds.lcm.weblogic.WLLifecycleListener</listener-class>
    </listener>

    <!-- This listener allows Oracle Enterprise Scheduler to configure itself
      -->
    <listener>
        <listener-class>oracle.as.scheduler.platform.wls.deploy.ESSApplicationLifecycleListener</listener-class>
    </listener>

    <!-- This shared library contains all the Oracle Enterprise Scheduler classes
      -->
    <library-ref>
        <library-name>oracle.ess.client</library-name>
    </library-ref>
    <library-ref>
        <library-name>adf.oracle.domain</library-name>
    </library-ref>
</weblogic-application>
7.4.2.7 Editing the adf-config file for the Front-End Submitter Application
You need to edit the adf-config.xml file to tell the application to share the metadata that was created in the hosting application.
To edit the adf-config.xml file for the front-end submitter application:
- From the Application Resources panel, expand Descriptors, expand ADF META-INF, and double-click adf-config.xml.
- In the source editor, replace the contents of the
adf-config.xmlfile with the XML shown in Example 7-8.
Example 7-8 Contents to Copy to adf-config.xml for a Front-End Submitter Application
<?xml version="1.0" encoding="UTF-8" ?>
<adf-config xmlns="http://xmlns.oracle.com/adf/config">
  <adf-security-child xmlns="http://xmlns.oracle.com/adf/security/config">
    <JaasSecurityContext initialContextFactoryClass="oracle.adf.share.security.JAASInitialContextFactory"
                         jaasProviderClass="oracle.adf.share.security.providers.jps.JpsSecurityContext"
                         authorizationEnforce="false"
                         authenticationRequire="true"/>
  </adf-security-child>
  <adf-mds-config xmlns="http://xmlns.oracle.com/adf/mds/config">
    <mds-config xmlns="http://xmlns.oracle.com/mds/config" version="11.1.1.000">
      <persistence-config>
        <metadata-namespaces>
          <namespace metadata-store-usage="ess_shared_metadata"                  path="/oracle/apps/ess/howto"/>
        </metadata-namespaces>
        <metadata-store-usages>
          <metadata-store-usage default-cust-store="false" deploy-target="false" id="ess_shared_metadata"/>
        </metadata-store-usages>
      </persistence-config>
    </mds-config>
  </adf-mds-config>
</adf-config>
7.4.2.8 Assembling the Front-End Submitter Application for Oracle Enterprise Scheduler
After you create the front-end sample application you use Oracle JDeveloper to assemble the application.
To assemble the back-end application you do the following:
Create the EJB Java Archive
Create the WAR file
Create the application MAR and EAR files
7.4.2.8.1 How to Assemble the EJB JAR File for the Front-End Submitter Application
The EJB Java archive file includes descriptors for the Java job implementations.
To assemble the EJB JAR File for the front-end submitter application:
- In Application Navigator, right-click the SuperEss project and choose New.
- In the New Gallery, expand General, select Deployment Profiles and then EJB JAR File, and click OK.
- In the Create Deployment Profile dialog, set the Deployment Profile Name to
JAR_SuperEssEjbJar. - On the Edit EJB JAR Deployment Profile Properties dialog, click OK.
- Delete the other JAR profiles created by default. Only include EJB and WAR.
- On the Project Properties dialog, click OK.
7.4.2.8.2 How to Assemble the WAR File for the Front-End Submitter Application
You need to create a web archive file for the web application.
To assemble the WAR file for the front-end submitter application
- In Application Navigator, right-click the SuperWeb project and choose New.
- In the New Gallery, expand General, select Deployment Profiles and then WAR File, and click OK.
- In the Create Deployment Profile dialog, set the Deployment Profile Name to
WAR_SuperWebWar. - On the Edit WAR Deployment Profile Properties dialog, click the General navigation tab, select Specify Java EE Web Context Root, and enter
ESSDemoApp. - Click OK.
- On the Project Properties dialog, click OK.
7.4.2.8.3 How to Assemble the MAR and EAR Files for the Front-End Hosting Application
The sample application must contain the MAR profile and the EAR file that assembles the EssDemoApp back-end application.
To create the MAR and EAR files for the front-end submitter application:
- From the main menu, choose Application Menu > Application Properties...
- In the Application Properties dialog, click the Deployment navigation tab and click New.
- In the Create Deployment Profile dialog, select MAR File from the Profile Type dropdown list.
- In the Name field, enter
MAR_EssDemoAppUIMarand click OK. - Click OK.
- In the Deployment page of the Application Properties dialog, click New.
- In the Create Deployment Profile dialog, select EAR File from the Profile Type dropdown list.
- In the Name field, enter
EAR_EssDemoAppUIEarand click OK. - In the Edit EAR Deployment Profile dialog, click the General navigation tab and enter
EssDemoAppUIin the Application Name field. - Click the Application Assembly navigation tab, then select
MAR_ESSDemoAppUIMarand selectJAR_SuperEssEjbJar. - Click OK.
- In the Application Properties dialog, click OK.
7.4.2.8.4 Add ADF Libraries
Navigate to the Project Properties > Libraries and Classpath window. Use the Add Library button to add the following libraries:
ADF Common Runtime
ADF Faces Runtime11
ADF Common Web Runtime
ADF Page FlowRuntime
ADF Controller Schema
ADF Controller Runtime
7.4.2.9 Configure the weblogic-application.xml File
Use the source editor to remove the following lines from weblogic-application.xml:
<library-ref
  <library-name>oracle.xdo.runtime</library-name>
</library-ref>
<library-ref>
 <library-name>oracle.applcp.runtime</library-name>
</library-ref>
7.4.2.10 Deploying the Front-End Submitter Application
After assembling the application, you can deploy it to the server.
To deploy the front-end submitter application:
- On the Deployment Configuration dialog, there should be two entries in the Shared Metadata Repositories panel. Find the shared repository mapped to the
/oracle/apps/ess/howtoname space. Change its partition to the partition used when deployingEssDemoApp. If you used the default value, this should be EssDemoApp_V2.0.Figure 7-23 Oracle Deployment Configuration Window

Description of "Figure 7-23 Oracle Deployment Configuration Window"
7.4.2.11 Update the EssHost MANIFEST File
Replace the contents of the EssHost META-INF/MANIFEST.INF file with the following lines:
Manifest-Version:1.0 Weblogic-Application-Version: 3.0
Extension-List: essruntime
essruntime-Extension-Name: oracle.ess.runtime
essruntime-Specification-Version: 12