9 Using the Asset Editor
This chapter describes how to use the Asset Editor in Oracle Enterprise Repository to configure categories, relationships, rejection reasons, repositories, and vendors.
This chapter includes the following sections:
9.1 Overview
The Asset Editor is used to administer assets and to configure assets and types. Categories, relationships, rejection reasons, repositories, and vendors are also configured within the Asset Editor.
The specifics of configuration depend on your organization's guidelines and may differ slightly from the options discussed here.
9.2 Launching the Asset Editor
This procedure is performed on the Oracle Enterprise Repository Assets screen.
Note:
The Asset Editor requires Java Web Start. See Section 1.10, "Install Java Web Start" for more information about installing and configuring Java Web Start.-
Click Edit/Manage Assets. The Asset Editor is displayed, as shown in Figure 9-1.
9.3 Configuring System Options
A number of system options can be configured from the Actions menu in the Asset Editor.
9.3.1 Configure Acceptable Value Lists
Defines/identifies the single- and multiple-selection lists used as metadata elements in asset displays.
-
Select Configure Acceptable Value Lists from the Actions menu. The Configure Acceptable Value Lists dialog is displayed, as shown in Figure 9-2.
Figure 9-2 Configure Acceptable Value Lists
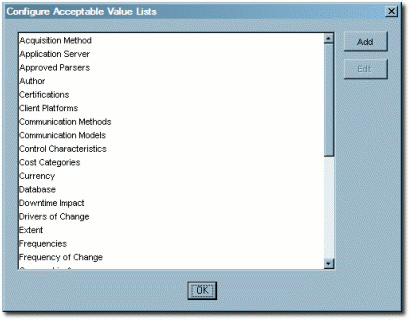
Description of ''Figure 9-2 Configure Acceptable Value Lists''
-
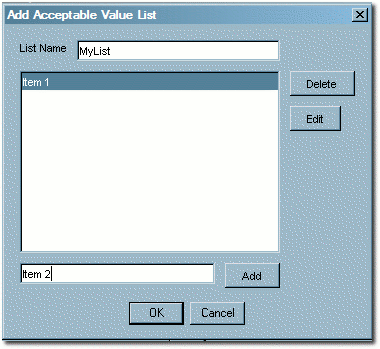
Click Add. The Add Acceptable Value List dialog is displayed, as shown in Figure 9-3.
-
Enter an appropriate name in the List Name text box.
Figure 9-3 Add Acceptable Value List Dialog
Description of ''Figure 9-3 Add Acceptable Value List Dialog''
-
Enter an appropriate list item name in the text box next to the Add button.
-
Click Add.
-
Repeat Steps 4 and 5 as necessary to add additional list items.
-
When finished, click OK. The new list appears in the Configure Acceptable Value Lists window.
-
To edit any Acceptable Value List, select the list from the Configure Acceptable Value Lists window.
-
Click Edit. The Edit Acceptable Value List dialog is displayed. (Same form as the Add Acceptable Value List window.)
-
Make changes as necessary.
-
Click OK.
9.3.2 Configure Artifact Stores
Determines where the files relevant to assets in Oracle Enterprise Repository are stored.
-
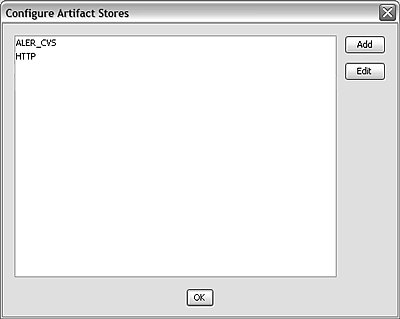
Select Configure Artifact Stores from the Actions menu. The Configure Artifact Stores dialog is displayed, as shown in Figure 9-4.
Figure 9-4 Configure Artifact Stores Dialog
Description of ''Figure 9-4 Configure Artifact Stores Dialog''
-
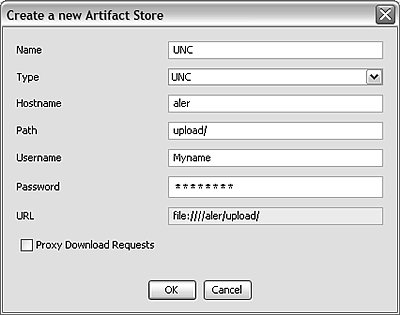
Click Add. The Create a New Artifact Store dialog is displayed, as shown in Figure 9-5.
Figure 9-5 Create a New Artifact Store Dialog
Description of ''Figure 9-5 Create a New Artifact Store Dialog''
-
Enter a name for the artifact store.
-
In the Type list, select a type for the artifact store.
-
Default Types:
-
FTP
Accesses files on an FTP server
-
HTTP
Accesses files on a web server
-
HTTPS
Accesses files on a secure web server
-
UNC
Accesses files using a Windows or Samba share
-
Raw URI
Access files through a raw URI.
-
Raw SCM
Access files through a raw SCM. Enables the selection of SCM Types, including CVS, Perforce, and Other. The selected SCM type automatically populates the Download Path URI Suffix field, but the field can be modified however necessary.
-
-
-
Enter a hostname and path for the server.
-
(Optional) Enter a username and password. Exercising this option enables automatic login.
-
When finished, click OK.
-
To edit any Artifact Store, locate it in the list in the Configure Artifact Stores window.
-
Click Edit. The Edit Artifact Store dialog is displayed. (Same form as the Create a new Artifact Store window.)
-
Make changes as necessary.
-
Click OK.
9.3.3 Selecting a New Artifact Store
After configuring an artifact store, you must select it using the Submission Upload Artifact Store system setting on the Oracle Enterprise Repository Admin page.
-
Open the Oracle Enterprise Repository Admin page.
-
In the left panel, click System Settings.
-
Locate the Upload Area section in the Server Settings group of system settings. See Section 2.5.2, "Server Settings" for more information.
-
Use the Submission Upload Artifact Store list to select the newly created artifact store.
-
Click Save.
9.3.4 Configure Categorizations
Categorizations determine how assets are organized and viewed. They can also be applied in a similar fashion to projects.
-
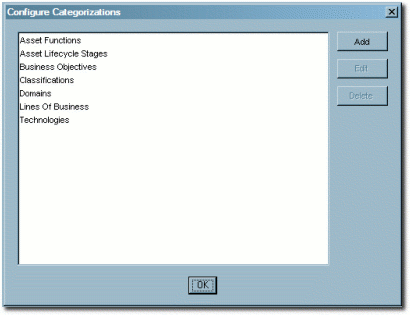
Select Configure Categorizations from the Actions menu. The Configure Categorizations dialog is displayed, as shown in Figure 9-6.
Figure 9-6 Configure Categorizations Dialog
Description of ''Figure 9-6 Configure Categorizations Dialog''
-
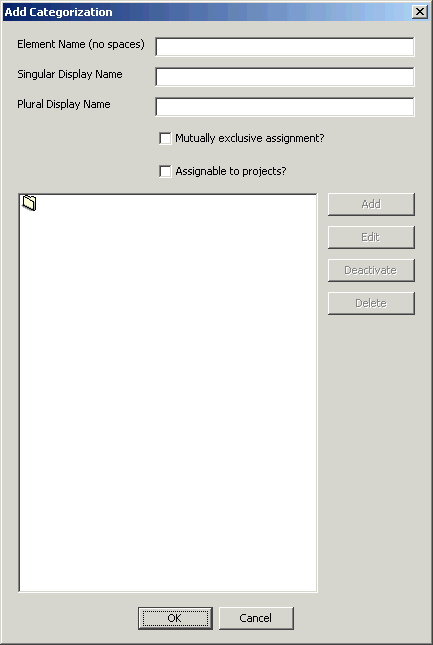
Click Add. The Add Categorizations dialog is displayed, as shown in Figure 9-7.
-
Enter the appropriate information in each of the text boxes.
-
Select the Mutually exclusive assignment? option if assets can be assigned to only one of the categorizations in this categorization type.
-
Select the Assignable to Projects? option (if this option has been enabled by your Oracle Enterprise Repository Administrator) so categorizations can be assigned to projects, and not to assets.
-
If UDDI is enabled for your environment, then Oracle Enterprise Repository automatically creates tModelKeys for categorizations. If required, an administrator can assign specific UDDI Version 2 or Version 3 tModelKeys to any categorization.
-
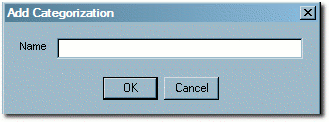
Click Add to add sub-categorizations. The Add Categorizations dialog is displayed, as shown in Figure 9-8.
-
When finished, click OK. The new categorization appears in the Configure Categorizations window.
-
To edit any Categorization, locate it in the list in the Configure Categorizations window.
-
Click Edit. The Edit Categorization dialog is displayed. (Same form as the Add Categorizations window.)
-
Make changes as necessary.
-
Click OK.
9.3.5 Configure Relationships
Relationships define the connection, interaction, or interdependence between assets. If so configured, assets subject to a specific relationship to an asset that has been selected for use (that is, the Use - Download button has been clicked) can also be downloaded.
-
Select Configure Relationships from the Actions menu. The Configure Relationships dialog is displayed, as shown in Figure 9-9.
Figure 9-9 Configure Relationships Dialog
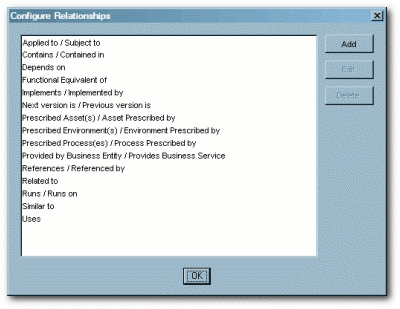
Description of ''Figure 9-9 Configure Relationships Dialog''
-
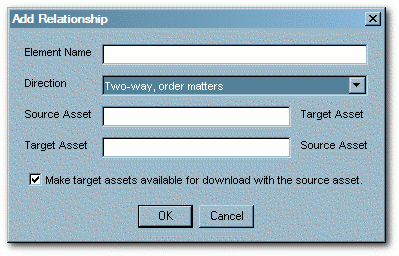
Click Add. The Add Relationships dialog is displayed, as shown in Figure 9-10.
-
Enter the appropriate information in each of the text boxes.
-
Make the appropriate selection in the Direction list.
The selected direction affects the information displayed in the Source Asset and Target Asset text boxes. For example, in a two-way relationship, the target and source are interdependent, whereas Two-way -- order matters can be used to describe the relationship between sequential versions of an asset, for example, the relationship between Asset v0.90 and Asset v1.0.
-
Make the appropriate selection in the Make target assets available for download with the source asset check box.
-
When finished, click OK.
-
To edit any Relationship, locate it in the list in the Configure Relationships window.
-
Click Edit. The Edit Relationships dialog is displayed. (Same form as the Add Relationship window.)
-
Make changes as necessary.
-
Click OK.
9.3.5.1 Configure System-Supplied Relationships
There are also system-supplied relationships in Oracle Enterprise Repository with limited read-only functionality to end users. Unlike standard asset relationships, system-supplied relationships are used in a context that requires their name and direction to be immutable. Therefore, these relationships cannot be added, deleted, or modified by users, except where otherwise noted.
9.3.6 Configure Rejection Reasons
Determines the selection of Rejection Reasons available to users who reject previously used/downloaded assets. Rejection Reasons provide valuable local community feedback on assets.
-
Select Configure Rejection Reasons from the Actions menu. The Configure Rejection Reasons dialog is displayed, as shown in Figure 9-11.
Figure 9-11 Configure Rejection Reasons Dialog
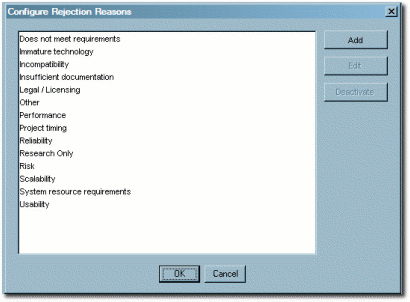
Description of ''Figure 9-11 Configure Rejection Reasons Dialog''
-
Click Add. The Edit Rejection Reasons dialog is displayed, as shown in Figure 9-12.
Figure 9-12 Edit Rejection Reason Dialog
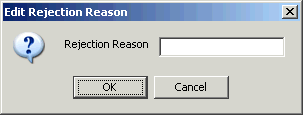
Description of ''Figure 9-12 Edit Rejection Reason Dialog''
-
Enter the appropriate text in the Rejection Reason text box.
-
When finished, click OK.
-
To edit any Rejection Reason, locate it in the list in the Configure Rejection Reasons window.
-
Click Edit. The Edit Rejection Reasons dialog is displayed.
-
Make changes as necessary.
-
Click OK.
9.3.7 Configure Vendors
Defines/identifies vendors providing assets to the repository.
-
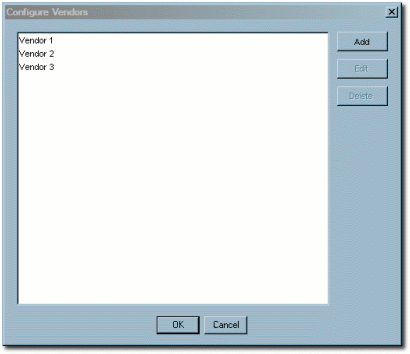
Select Configure Vendors from the Actions menu. The Configure Vendors dialog is displayed, as shown in Figure 9-13.
-
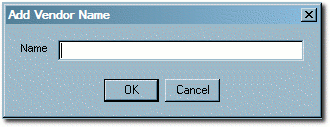
Click Add. The Add Vendor Name dialog is displayed, as shown in Figure 9-14.
-
Enter the appropriate information in the Name text box.
-
When finished, click OK.
-
To edit any Vendor, locate it in the list in the Configure Vendors window.
-
Click Edit. The Edit Vendor Name window opens. (Same form as the Add Vendor Name window.)
-
Make changes as necessary.
-
Click OK.
9.4 Advanced Asset Submission
This function enables a user (with the appropriate privileges) to submit assets through the Asset Editor rather that through the Web Console. This enables the user to enter more asset details upon submission. This procedure is performed in the Asset Editor. (Access to the Asset Editor is determined by the role to which the user is assigned.)
-
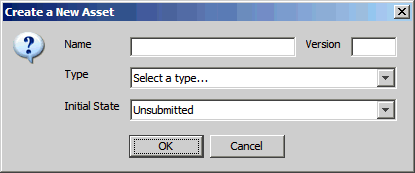
Open the File menu in the Asset Editor and select New. The Create a New Asset dialog is displayed, as shown in Figure 9-15.
-
Enter the appropriate information in the Name and Version text boxes.
-
Select the appropriate Type template from the Type list, as shown in Figure 9-16.
Figure 9-16 Create a New Asset Dialog - Type List
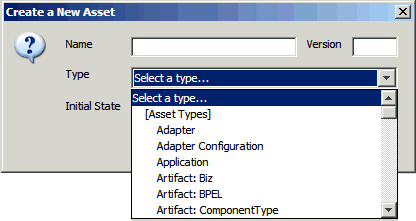
Description of ''Figure 9-16 Create a New Asset Dialog - Type List''
-
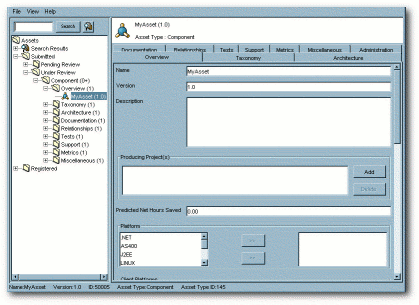
Click OK. The new asset appears in the Asset Editor, as shown in Figure 9-17.
The asset is submitted for review and registration.
9.5 Asset/Compliance Template/Policy Migration
Migration refers to the transfer of metadata and files from one asset, compliance template, or Policy to another, usually of the same type. Since it is easier to edit metadata than to recreate it, this function enables users to quickly create different versions of assets, compliance templates, or policies. For example, to create JavaComponent v1.0, one would migrate the metadata and files from JavaComponent v0.90, then make the necessary changes in the metadata for the v1.0 asset. When migrating an asset the new asset must have a different name, version number, or both. Migration does NOT remove the original asset from Oracle Enterprise Repository.
It is also possible to migrate an asset, compliance template, or policy to a different type. However, differing metadata elements does not transfer. For example, if the originating asset type uses a table on one of its tabs and is migrated to an asset type that does not have the same table element, the table and its metadata does not migrate. The table metadata element would have to be created in the new asset type.
9.5.1 Migrating an Asset/Compliance Template/Policy
This procedure is performed in the Asset Editor.
-
Use Search or browse the Asset Editor file tree to locate the source asset or compliance template to be migrated, as shown in Figure 9-18.
Figure 9-18 Asset Editor - Search Button
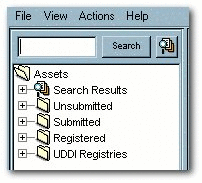
Description of ''Figure 9-18 Asset Editor - Search Button''
-
Select Copy/Migrate in the File menu.
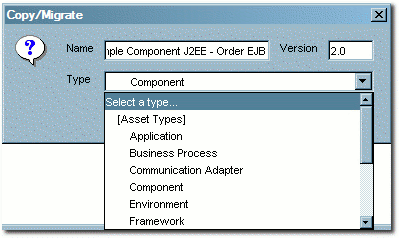
The Copy/Migrate dialog is displayed, as shown in Figure 9-19.
-
Enter the appropriate information in the Name and Version text boxes.
-
Select the destination Type (the type to which the source artifact is to be migrated) in the Type list.
Migrating assets between dissimilar types affects the display of asset information in the asset detail and in the Asset Editor.
-
When finished, click OK.
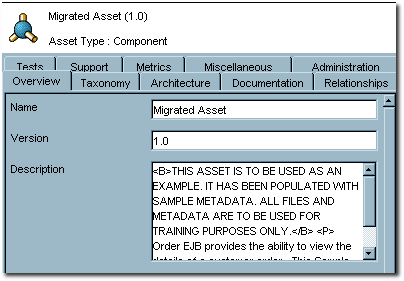
The migrated asset appears in the Asset Editor, as shown in Figure 9-20.
-
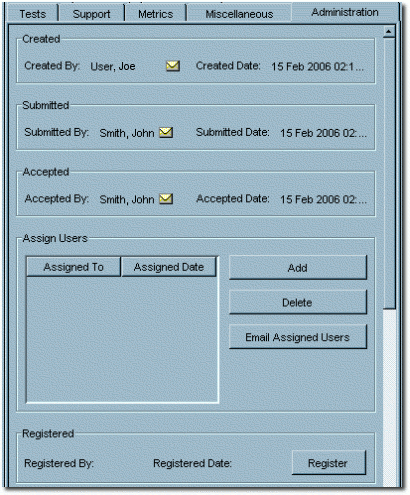
Click the new asset's Administration tab, as shown in Figure 9-21.
-
Register the new asset or assign it to another user for registration.
9.6 Understanding the Asset Registration Process
Assets moving through the registration process are organized and managed via several folders, as displayed in the file tree in the Asset Editor.
An asset begins the registration process in the Submitted folder. Assets can be submitted via the Oracle Enterprise Repository Web Interface, as described in "Performing a Standard Asset Submission" in the Oracle Fusion Middleware Developer's Guide for Oracle Enterprise Repository, or via the Asset Editor, as described in Section 9.4, "Advanced Asset Submission". Once accepted or rejected by the registrar, the asset moves to the Under Review folder, under Submitted.
Pending registrar review and approval of the data on the tabs in the Asset Editor, the asset moves from Under Review to the Registered folder. Users can track the progress of assets by using the Search function, which accesses Submitted, Unsubmitted, and Registered assets, or by using My Stuff.
The registration process includes the following actions:
-
Submission: An asset is submitted by a user and appears in the Pending Review folder under Submitted. An automatic email message alerts the registrar that a new asset has entered the submission queue.
-
Review: The registrar examines the asset and its associated information and makes a decision to enter it into the work queues or reject it.
-
Rejection: If the asset is rejected, the registrar enters a reason for the rejection.
When an asset is rejected from the Submissions folder, it is removed and marked as rejected in the submitter's My Submissions folder in My Stuff.
-
Acceptance: Assets accepted for registration move to the Under Review folder, and the registrar or advanced submitter begins the registration process. The required information is gathered and entered on the appropriate tabs in the Asset Editor. The registrar examines each tab and monitors the workflow. When information for a specific stage of the workflow is acceptable, the registrar approves the data on the appropriate tab. There is no prescribed order in the approval process; the registrar can approve any stage in any order. The registrar also has the option to edit any of the information for any stage of the process.
-
Approval: The registrar grants final approval on the Administration tab, based on organizational standards regarding the information supplied on each of the various tabs. The specific configuration of Asset Editor tabs for any asset is determined by the Type template to which the asset is assigned on submission. Each tab provides various elements for metadata that is used to describe the asset and facilitate its use.
This section describes the following topics:
9.6.1 Accepting a Submitted Asset
Submissions must be accepted and assigned to one or more registrars before assets can be processed and registered in Oracle Enterprise Repository.
This procedure is performed in the Asset Editor. (Requires appropriate permission.)
To accept a submitted asset:
-
Open the Submitted folder.
-
Open the Pending Review folder.
-
Select the asset to be registered.
-
To complete the registration process:
-
To accept without assigning the asset to a user, click Accept. The asset moves to the Under Review folder in the tree, and also appears in each of the workflow folders under the asset. The workflow folders correspond to tabs in the Asset Editor
-
To accept and assign to specific users, click Accept and Assign. The Assigning Users dialog is displayed. Use the arrow buttons to move users between the Available Users and Selected Users columns, and then click OK. The asset moves to the Under Review folder in the tree and is assigned to the selected user/users, who will provide the information required for each of the tabs in the Asset Editor
-
9.6.2 Registering an Asset
After an asset has been accepted, a registrar must review it and register it for use in Oracle Enterprise Repository
This section describes the following topics:
9.6.2.1 Approving an Asset's Tabs
You should review the information on an asset's tabs before registering it.
While certain tabs are common to all asset types, the specific Asset Editor tabs for any asset are determined by the configuration of the Type template to which the asset is assigned on submission. Similarly, the metadata elements that appear on any tab are also determined by the Type configuration. While the specific tabs and elements may vary from Type to Type, the approval process for each tab involves the entry and/or review of the information in each element.
To approve an asset's tabs:
- Task 1 Approve the Overview tab
-
To approve the Overview Tab:
-
Click the Overview tab in the selected asset.
-
Enter the appropriate information in each of the fields.
-
Click Approve. The text in the Overview tab label changes color and the Approve button changes to Unapprove.
Note:
Approval buttons in the Asset Editor are visible only to users with the appropriate permissions.
-
- Task 2 Approve the Taxonomy Tab
-
To approve the Taxonomy Tab:
-
Click the Taxonomy tab in the selected asset. Several Categorizations are displayed.
-
Click the Assign button in the Classification section. The Assign Classifications dialog is displayed.
-
Use the radio buttons to select the appropriate classification. The available options are:
Raw: No assurance of quality or completeness.
Educational: For educational/informational purposes only. Not approved for use in projects.
Approved: Approved by the registrar for use in projects.
Recommended: Approved and successfully deployed in at least one project.
Mandated: Must be used whenever a project requires the functionality the asset provides. This is especially relevant for Web services that access customer data, process payments, etc.
-
Click OK. The selections are listed in the Classifications section.
Note:
Default Categories may be customized to reflect your environment. -
Repeat the process for each section in the Taxonomy tab.
-
Enter appropriate keyword in the text box in the Keywords section, and then click Add. The new keyword appears in the Keywords list. Add other keywords as necessary.
-
When the Taxonomy tab is completed, click Approve. The text in the Overview tab label changes color and the Approve button changes to Unapprove.
-
- Task 3 Approve the Documentation Tab
-
To approve the Documentation Tab:
-
Click the Documentation tab in the selected asset. A number of suggested document titles are listed in the Documentation window. Appropriate documentation may be associated with each of these titles, and new documents may be added to the list.
-
Click Add. The Edit dialog is displayed.
-
Enter the appropriate information in the Name text box.
-
Click the Edit button next to the URL text box. The Edit URL dialog is displayed.
-
Select Repository File or External File, as appropriate.
-
Enter all necessary information in the available text boxes.
-
Click OK. The new document appears in the list.
-
To edit file information for an existing document, select the document, click Edit, and repeat Steps 3-7.
-
When finished, click Approve. The text in the Documentation tab label changes color and the Approve button changes to Unapprove.
-
- Task 4 Approve the Relationships Tab
-
To approve the relationships tab:
-
Click the Relationships tab in the selected asset.
-
Click the Add button. The Add Relationships dialog is displayed.
-
Use the Search or List All Active buttons to display assets in the Asset section of the dialog.
-
Select an asset from the list.
-
Use the Relationship Type list to select the appropriate relationship between the two assets.
-
Click OK.
-
Add other asset relationships as necessary.
-
When finished, click Approve. The text in the Relationships tab label changes color and the Approve button changes to Unapprove.
-
- Task 5 Approve the Administration Tab
-
Every asset in Oracle Enterprise Repository has an Administration tab. Use the Administration tab to:
-
Track the asset Created, Submitted, Accepted workflow.
-
Assign users to review and approve information on the other tabs.
-
Change the asset's status. See Section 9.7, "Understanding Asset Status," for more information.
-
View assets notes and reviews.
To approve the Administration Tab, click the Register button. This asset will be registered after you complete the registration process, as detailed in Section 9.6.2.2, "Completing the Registration Process".
Note:
A registered asset can include unapproved tabs. -
9.6.2.2 Completing the Registration Process
After the tabs have been approved (specifically the Administration tab, as discussed in Task 5, "Approve the Administration Tab"), you complete the registration process by clicking Save from the Asset Editor's File menu. The asset is now registered. Users with appropriate permissions can now discover it via Oracle Enterprise Repository.
9.6.3 Adding a Note to an Asset
You can add notes to assets from the Asset Editor.
To add a note to an asset:
-
Click Add Note in the Asset Editor File menu. The Add a Note for... dialog is displayed.
-
Enter the appropriate information in the text box.
-
Click OK. The note is added to the list in the Logs section on the asset's Administration tab. (It may be necessary to click the Refresh button in the Logs section.)
9.7 Understanding Asset Status
The registrar can assign a status to the asset using the Administration tab in the Asset Editor.
-
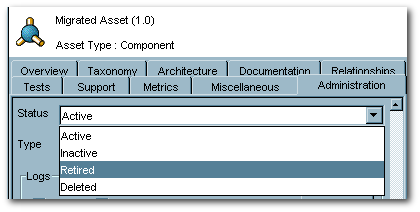
Active
The status assigned to any asset that is available for use.
-
Inactive
The status assigned to any asset in the repository but unavailable for general use. An inactive asset can be re-activated or retired. Inactive assets show up in a search, but cannot be selected for use (the Use - Download button is not displayed).
-
Retired
The status assigned to any asset in the repository that is retired from general use. A retired asset can be re-activated or made inactive. Retired assets cannot be selected for use (the Use - Download button is not displayed), nor do they show up in a search; however, they would be available as related assets to active or inactive assets in the repository.
-
Deleted
The status assigned to any asset that is removed from the repository. Deleted assets cannot be recovered or have their status reassigned.
9.7.1 Assigning or Changing an Asset's Status
This procedure is performed in the Asset Editor. Any changes to an asset's status are automatically saved by the Asset Editor.
-
Use Search or browse the Asset Editor file tree to locate the source asset or compliance template to be modified.
-
Click the Administration tab.
-
In the Status list, select the status to be assigned to the asset, as shown in Figure 9-22.
Note:
Depending on the assigned status, the asset may disappear from the tree (Deleted) or be unavailable for user searches (Retired).
9.8 Deleting an Asset
To delete an asset in Oracle Enterprise Repository, perform the following steps:
Note:
Only users whose role allows them to launch the Asset Editor (users who have been granted the "Launch Asset Editor" permission are able to delete assets that they can view. See "User Role Descriptions" in the Oracle Fusion Middleware Developer's Guide for Oracle Enterprise Repository for more information about user roles and their associated privileges.Note:
This is a new feature in OER 12c. If you are upgrading from a previous version of OER, it is important to understand that users granted the "Launch Asset Editor" permission in previous versions will now be able to delete assets.-
In the left panel, click Assets.
-
Click List All, or search for assets that you want to delete.
-
To delete an asset from the Search Results screen, select the check box next to each asset that you want to delete, and then click Delete. You can delete multiple assets simultaneously using this method:
