12 Extending the Domain with Oracle SOA Suite
This chapter describes how to extend the enterprise deployment domain with the Oracle SOA Suite software.
This chapter contains the following sections:
-
Extending the Enterprise Deployment Domain with Oracle SOA Suite
-
Configuring the Default Persistence Store for Transaction Recovery
-
Propagating the Extended Domain to the Domain Directories and Machines
-
Validating the Oracle SOA Suite URLs Through the Load Balancer
12.1 Variables Used in This Chapter
As you perform the tasks in this chapter, you will be asked to enter the following values for several directory variables defined in Section 7.4, "File System and Directory Variables Used in This Guide".
-
ORACLE_HOME
-
ASERVER_HOME
-
APPLICATION_HOME
-
DEPLOY_PLAN_HOME
-
OHS_ADMIN_CONFIG_DIR
-
JAVA_HOME
In addition, you'll be referencing the following virtual IP (VIP) addresses defined in Section 5.2.3, "Physical and Virtual IP Addresses Required by the Enterprise Topology":
-
ADMINVHN
-
SOAHOST1VHN1
-
SOAHOST2VHN1
Actions in this chapter will be performed on the following host computers:
-
SOAHOST1
-
SOAHOST2
-
WEBHOST1
-
WEBHOST2
12.2 Preparing to Extend the Domain with Oracle SOA Suite
Before you extend the domain to include Oracle SOA Suite, be sure to perform the following tasks:
12.2.1 Verifying the IP Addresses and Virtual Host Names for SOAHOST1 and SOAHOST2
Verify that the required SOAHOST1VHN1 and SOAHOST1VHN2 virtual IP addresses are procured and available. You can do this by performing a network ping of each virtual host name and verifying the ping is successful.
If the virtual IPs are not available, contact your network administrator and make sure the virtual IPs are available before you begin the steps in this chapter.
12.2.2 Synchronizing the System Clocks
Verify that the system clocks on each host computer are synchronized. You can this by running the date command as simultaneously as possible on the hosts in each cluster.
Alternatively, there are third-party and open-source utilities you can use for this purpose.
12.3 Installing Oracle SOA Suite for an Enterprise Deployment
The following sections describe how to install the Oracle SOA Suite software for an enterprise deployment:
12.3.1 Starting the Installation Program
To start the installation program:
-
Log in to SOAHOST1.
-
Go to the directory where you downloaded the installation program.
-
Launch the installation program by invoking the
javaexecutable from the JDK directory on your system, as shown in the examples below.JAVA_HOME/bin/java -d64 -jar fmw_12.1.3.0.0_soa.jarBe sure to replace JDK location in these examples with the actual JDK location on your system.
When the installation program appears, you are ready to begin the installation.
12.3.2 Navigating the Installation Screens
The installation program displays a series of screens, in the order listed in Table 12-1.
If you need additional help with any of the installation screens, click the screen name.
Table 12-1 Oracle SOA Suite Foundation and Business Process Management Install Screens
| Screen | Description |
|---|---|
|
Installation Inventory Screen |
If you did not create a central inventory when you installed the Oracle Fusion Middleware Infrastructure software, then this dialog box appears. Edit the Inventory Directory field so it points to the location of your local inventory, and then click OK. |
|
This screen introduces you to the product installer. |
|
|
Use this screen to specify the location of your Oracle home directory. For more information about Oracle Fusion Middleware directory structure, see "Selecting Directories for Installation and Configuration" in Planning an Installation of Oracle Fusion Middleware. |
|
|
Use this screen to select the type of installation and consequently, the products and feature sets you want to install.
NOTE: The topology in this document does not include the examples, Oracle strongly recommends that you do not install the examples into a production environment. |
|
|
This screen verifies that your system meets the minimum necessary requirements. If there are any warning or error messages, you can refer to one of the following documents in the Roadmap for Verifying Your System Environment section in Planning Your Oracle Fusion Middleware Infrastructure Installation. |
|
|
If you already have an Oracle Support account, use this screen to indicate how you would like to receive security updates. If you do not have one and are sure you want to skip this step, clear the check box and verify your selection in the follow-up dialog box. |
|
|
Use this screen to verify the installation options you selected. Click Install to begin the installation. |
|
|
This screen allows you to see the progress of the installation. Click Next when the progress bar reaches 100% complete. |
|
|
Review the information on this screen, then click Finish to dismiss the installer. |
12.3.3 Installing Oracle SOA Suite on the Other Host Computers
If you have configured a separate shared storage volume or partition for SOAHOST2, then you must also install the software on SOAHOST2. For more information, see Section 7.2, "Shared Storage Recommendations When Installing and Configuring an Enterprise Deployment".
12.3.4 Verifying the Installation
After you complete the installation, you can verify it by successfully completing the following tasks:
12.3.4.1 Reviewing the Installation Log Files
Review the contents of the installation log files to make sure that no problems were encountered. For a description of the log files and where to find them, see "Understanding Installation Log Files" in Installing Software with the Oracle Universal Installer.
12.3.4.2 Checking the Directory Structure
The contents of your installation vary based on the options you selected during the installation.
The addition of SOA will add the following directory and sub-directories:
/u01/oracle/products/fmwnnnn/soa

aiafp
bam
bin
bpm
common
integration
jlib
plugins
soa
For more information about the directory structure you should see after installation, see "What are the Key Oracle Fusion Middleware Directories?" in Understanding Oracle Fusion Middleware.
12.3.4.3 Viewing the Contents of Your Oracle Home
You can also view the contents of your Oracle home using the viewInventory script. For more information, see "Viewing the contents of an Oracle home" in Installing Software with the Oracle Universal Installer.
12.4 Creating the Oracle SOA Suite Database Schemas
Before you can configure an Oracle SOA Suite Foundation domain, you must install the required schemas on a certified database for use with this release of Oracle Fusion Middleware.
Follow the instructions in this section to install the schemas:
-
Section 12.4.1, "Starting the Repository Creation Utility (RCU)"
-
Section 12.4.2, "Navigating the RCU Screens to Create the Schemas"
12.4.1 Starting the Repository Creation Utility (RCU)
To start the Repository Creation Utility (RCU):
-
Navigate to the
ORACLE_HOME/oracle_common/bindirectory on your system. -
Make sure the
JAVA_HOMEenvironment variable is set to the location of a certified JDK on your system. The location should be up to but not including thebindirectory. For example, if your JDK is located in/u01/oracle/products/jdk1.7.0_55:On UNIX operating systems:
export JAVA_HOME=/u01/oracle/products/jdk1.7.0_55
-
Start RCU:
On UNIX operating systems:
./rcu
12.4.2 Navigating the RCU Screens to Create the Schemas
Schema creation involves the following tasks:
- Task 1 Introducing RCU
-
Click Next.
- Task 2 Selecting a Method of Schema Creation
-
If you have the necessary permission and privileges to perform DBA activities on your database, select System Load and Product Load Concurrently. This procedure assumes that you have the necessary privileges.
If you do not have the necessary permission or privileges to perform DBA activities in the database, you must select Prepare Scripts for System Load on this screen. This option will generate a SQL script, which can be provided to your database administrator. See "Understanding System Load and Product Load" in Creating Schemas with the Repository Creation Utility.
- Task 3 Providing Database Connection Details
-
Provide the database connection details for RCU to connect to your database.
In the Host Name field, enter the SCAN address of the Oracle RAC Database.
Enter the DBMS/Service details.
Enter the Schema Owner and Schema Password details.
Click Next to proceed, then click OK on the dialog window confirming that connection to the database was successful.
- Task 4 Specifying a Custom Prefix and Selecting Schemas
-
Select Select existing prefix, and then select the prefix you used when you created the initial domain in Chapter 10.
From the list of schemas, select the SOA Suite schema. This will automatically select SOA Infrastructure, along with the following schemas as dependencies:
-
Metadata Services
-
Audit Services
-
Audit Services Append
-
Audit Services Viewer
-
Oracle Platform Security Services
-
User Messaging Service
The custom prefix is used to logically group these schemas together for use in this domain only; you must create a unique set of schemas for each domain as schema sharing across domains is not supported.
Tip:
For more information about custom prefixes, see "Understanding Custom Prefixes" in Creating Schemas with the Repository Creation Utility.For more information about how to organize your schemas in a multi-domain environment, see "Planning Your Schema Creation" in Creating Schemas with the Repository Creation Utility.
Description of the illustration ''rcu_select_schema_soa.gif''
Tip:
You must make a note of the custom prefix you choose to enter here; you will need this later on during the domain creation process.Click Next to proceed, then click OK on the dialog window confirming that prerequisite checking for schema creation was successful.
-
- Task 5 Specifying Schema Passwords
-
Specify how you want to set the schema passwords on your database, then specify and confirm your passwords.
Tip:
You must make a note of the passwords you set on this screen; you will need them later on during the domain creation process. - Task 6 Specifying Custom Variables
-
Specify the custom variables for the SOA Infrastructure schema.
For the enterprise deployment topology, enter
LARGEfor the Database Profile custom variable andNOfor the Healthcare Integration variable.For more information, see "About the Custom Variables Required for the SOA Suite Schemas" in Installing and Configuring Oracle SOA Suite and Business Process Management.

Description of the illustration ''rcu_custom_variables.gif''
- Task 7 Verifying the Tablespaces for the Required Schemas
-
On the Map Tablespaces screen, review the information, and then click Next to accept the default values.
Click OK in the confirmation dialog box.
- Task 8 Completing Schema Creation
-
Navigate through the remainder of the RCU screens to complete schema creation. When you reach the Completion Summary screen, click Close to dismiss RCU.
- Task 9 Verifying the Schema Creation
-
To verify that the schemas were created successfully, and to verify the database connection details, use SQL*Plus or another utility to connect to the database, using the SOAINFRA schema name and the password you provided.
For example:
./sqlplus

SQL*Plus: Release 11.2.0.4.0 Production on Fri Nov 1 08:44:18 2013

Copyright (c) 1982, 2013, Oracle.  All rights reserved.

Enter user-name: FMW1213_SOAINFRA
Enter password: soainfra_password

Connected to:
Oracle Database 11g Enterprise Edition Release 11.2.0.4.0 - 64bit Production
With the Partitioning, OLAP, Data Mining and Real Application Testing options

SQL>
12.4.3 Configuring SOA Schemas for Transactional Recovery
After you have installed the Oracle SOA Suite schemas successfully, use the procedure in this section to configure the schemas for transactional recovery.
This procedure sets the appropriate database privileges so that the Oracle WebLogic Server transaction manager can query the schemas for transaction state information and issue the appropriate commands, such as commit and rollback, during recovery of in-flight transactions after a WebLogic Server is unexpectedly unavailable.
These privileges should be granted to the owner of the SOAINFRA schema, which you defined when you created the schemas with the Repository Creation Utility.
To configure the SOA schemas for transactional recovery privileges:
-
Log on to SQL*Plus as a user with sysdba privileges. For example:
sqlplus "/ as sysdba"
-
Enter the following commands:
SQL> Grant select on sys.dba_pending_transactions to soa_schema_prefix_soainfra;

Grant succeeded.

SQL> Grant force any transaction to soa_schema_prefix_soainfra;

Grant succeeded.

SQL>
12.5 Extending the Enterprise Deployment Domain with Oracle SOA Suite
This section provides instructions for extending the existing enterprise deployment domain with the Oracle SOA Suite software.
Extending the domain involves the following:
12.5.1 Starting the Configuration Wizard
Note:
If you added any customizations directly to the start scripts in the domain, those will be overwritten by the configuration wizard. To customize server startup parameters that apply to all servers in a domain, you can create a file called setUserOverrides.sh and configure it to, for example, add custom libraries to the WebLogic Server classpath, specify additional java command line options for running the servers, or specify additional environment variables. Any customizations you add to this file are preserved during domain upgrade operations, and are carried over to remote servers when using the pack and unpack commands.To start the Configuration Wizard:
-
Shut down the Administration Server to prevent any configuration locks, saves, or activations from occurring during the configuration of the domain.
For more information, see the instructions for shutting down the Administration Server with Node Manager in Section 11.3.1.
-
Navigate to the following directory and start the WebLogic Server Configuration Wizard.
cd ORACLE_HOME/oracle_common/common/bin
./config.sh
12.5.2 Navigating the Configuration Wizard Screens to Create the Domain
Follow the instructions in this section to create and configure the domain for the topology.
Note:
You can use the same procedure described in this section to extend an existing domain. If your needs do not match the instructions given in the procedure, be sure to make your selections accordingly, or refer to the supporting documentation for additional details.Domain creation and configuration includes the following tasks:
-
Task 1, "Selecting the Domain Type and Domain Home Location"
-
Task 5, "Providing the GridLink Oracle RAC Database Connection Details"
-
Task 15, "Reviewing Your Configuration Specifications and Configuring the Domain"
-
Task 16, "Writing Down Your Domain Home and Administration Server URL"
- Task 1 Selecting the Domain Type and Domain Home Location
-
On the Configuration Type screen, select Update an existing domain.
In the Domain Location field, select the value of the ASERVER_HOME variable, which represents the complete path to the Administration Server domain home you created in Chapter 10.
For more information about the directory location variables, see Section 7.4, "File System and Directory Variables Used in This Guide"
Tip:
More information about the other options on this screen can be found in Configuration Type in Creating WebLogic Domains Using the Configuration Wizard. - Task 2 Selecting the Configuration Template
-
On the Templates screen, make sure Update Domain Using Product Templates is selected, then select the following templates:
-
Oracle SOA Suite - 12.1.3.0 [soa]
In addition, the following additional templates should already be selected, because they were used to create the initial domain in Chapter 10:
-
Oracle Enterprise Manager - 12.1.3.0 [em]
-
Oracle WSM Policy Manager - 12.1.3.0 [oracle_common]
-
Oracle JRF - 12.1.3.0 [oracle_common]
-
WebLogic Coherence Cluster Extension - 12 1.3.0 [wlserver]
-
Oracle HTTP Server (Collocated) - 12.1.3.0 [ohs]
-
Oracle Enterprise Manager Plugin for WebTier 12.1.3.0 [em]
-
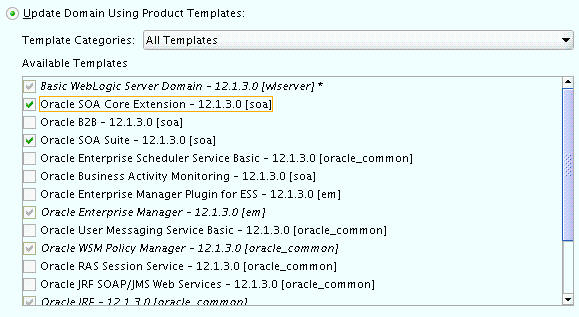
Description of the illustration ''config_soatemplates.jpg''
Tip:
More information about the options on this screen can be found in Templates in Creating WebLogic Domains Using the Configuration Wizard. -
- Task 3 Specifying the Database Configuration Type
-
On the Database Configuration Type screen, select RCU Data.
All fields are pre-populated, because you already configured the domain to reference the Fusion Middleware schemas that are required for the Infrastructure domain.
Verify and ensure that credentials in all the fields are the same that you have provided while configuring Oracle Fusion Middleware Infrastructure.
Click Get RCU Configuration after you finish verifying the database connection information. The following output in the Connection Result Log indicates that the operating succeeded:
Connecting to the database server...OK
Retrieving schema data from database server...OK
Binding local schema components with retrieved data...OK

Successfully Done.
Tip:
For more information about the RCU Data option, see "Understanding the Service Table Schema" in Creating Schemas with the Repository Creation Utility.For more information about the other options on this screen, see "Datasource Defaults" in Creating WebLogic Domains Using the Configuration Wizard.
- Task 4 Specifying JDBC Component Schema Information
-
On the JDBC Component Schema screen, select all the SOA schemas in the table.
When you select the schemas, the fields on the page are activated and the database connection fields are populated automatically.
Click Convert to GridLink and click Next.
- Task 5 Providing the GridLink Oracle RAC Database Connection Details
-
On the GridLink Oracle RAC Component Schema screen, provide the information required to connect to the RAC database and component schemas, as shown in Table 10-3 and in Figure 10-2.
Remember to use the SCAN address for the database for the Service Listener and ONS Host fields.
- Task 6 Testing the JDBC Connections
-
Use the JDBC Component Schema Test screen to test the data source connections you have just configured.
A green check mark in the Status column indicates a successful test. If you encounter any issues, see the error message in the Connection Result Log section of the screen, fix the problem, then try to test the connection again.
Tip:
For more information about the other options on this screen, see "Test Component Schema" in Creating WebLogic Domains Using the Configuration Wizard - Task 7 Selecting Advanced Configuration
-
To complete domain configuration for the topology, select the following options on the Advanced Configuration screen:
-
Managed Server, Clusters and Coherence
-
JMS File Store
-
- Task 8 Configuring Managed Servers
-
On the Managed Servers screen, a new Managed Server for Oracle SOA Suite appears in the list of servers. This server was created automatically by the Oracle SOA Suite configuration template you selected in Task 2.
Perform the following tasks to modify the default Oracle SOA Suite Managed Server and create a second Oracle SOA Suite Managed Server:
-
Rename the default Oracle SOA Suite Managed Server to
WLS_SOA1. -
Click Add to create a new Oracle SOA Suite Managed Server and name it
WLS_SOA2.Tip:
The server names recommended here will be used throughout this document; if you choose different names be sure to replace them as needed. -
Use the information in Table 12-2 to fill in the rest of the columns for each Oracle SOA Suite Managed Server.
Tip:
More information about the options on the Managed Server screen can be found in Managed Servers in Creating WebLogic Domains Using the Configuration Wizard.Table 12-2 Values Required for Each Oracle SOA Suite Managed Server
Server Name Listen Address Listen Port Enable SSL SSL Listen Port Server Groups WLS_WSM1
SOAHOST1
7010
No
Disabled
WSMPM-MAN-SVR, JRF-MAN-SVR, and WSM-CACHE-SVR
WLS_WSM2
SOAHOST2
7010
No
Disabled
WSMPM-MAN-SVR, JRF-MAN-SVR, and WSM-CACHE-SVR
WLS_SOA1
SOAHOST1VHN1
8001
No
Disabled
SOA-MGD-SVRS-ONLY
WLS_SOA2
SOAHOST2VHN1
8001
No
Disabled
SOA-MGD-SVRS-ONLY
-
- Task 9 Configuring a Cluster
-
In this task, you create a cluster of Managed Servers to which you can target the Oracle SOA Suite software.
You will also set the Frontend Host property for the cluster, which ensures that, when necessary, WebLogic Server will redirect Web services callbacks and other redirects to
soa.example.comon the load balancer rather than the address in the HOST header of each request.For more information about the
soa.example.comvirtual server address, see Section 6.1, "Configuring Virtual Hosts on the Hardware Load Balancer".Use the Clusters screen to create a new cluster:
-
Click the Add button.
-
Specify
SOA_Clusterin the Cluster Name field. -
Specify
soa.example.comin the Frontend Host field. -
Specify
80as the Frontend HTTP Port and443as the Frontend HTTPS port.

Description of the illustration ''config_soa_cluster.gif''
A Note About Unicast Versus Multicast:
By default, server instances in a cluster communicate with one another using unicast. If you want to change your cluster communications to use multicast, refer to "Considerations for Choosing Unicast or Multicast" in Administering Clusters for Oracle WebLogic Server.Tip:
More information about the options on this screen can be found in Clusters in Creating WebLogic Domains Using the Configuration Wizard. -
- Task 10 Assigning Managed Servers to the Cluster
-
Use the Assign Servers to Clusters screen to assign
WLS_SOA1andWLS_SOA2to the new clusterSOA_Cluster:-
In the Clusters pane, select the cluster to which you want to assign the servers; in this case,
SOA_Cluster. -
In the Servers pane, assign WLS_SOA1 to
SOA_Clusterby doing one of the following:-
Click once on
WLS_SOA1Managed Server to select it, then click on the right arrow to move it beneath the selected cluster in the Clusters pane. -
Double-click on
WLS_SOA1to move it beneath the selected cluster in the clusters pane.
-
-
Repeat to assign
WLS_SOA2toSOA_Cluster.
Description of the illustration ''soa_server_to_cluster.gif''
Tip:
More information about the options on this screen can be found in Assign Servers to Clusters in Creating WebLogic Domains Using the Configuration Wizard. -
- Task 11 Configuring Coherence Clusters
-
Use the Coherence Clusters screen to configure the Coherence cluster that is automatically added to the domain. Leave the port number value at 9991, as it was defined during the initial Infrastructure domain creation.
Note:
For Coherence licensing information, refer to "Oracle Coherence" in Oracle Fusion Middleware Licensing Information. - Task 12 Verifying the Existing Machines
-
Under the Unix Machine tab, verify the names of the machines you created when creating the initial Infrastructure domain.
Click Next to proceed.
- Task 13 Assigning Servers to Machines
-
Use the Assign Servers to Machines screen to assign the Oracle SOA Suite Managed Servers you just created to the corresponding machines in the domain.
Assign WLS_SOA1 to SOAHOST1, and assign WLS_SOA2 to SOAHOST2.
Description of the illustration ''soa_server_to_machine.gif''
Tip:
More information about the options on this screen can be found in Assign Servers to Machines in Creating WebLogic Domains Using the Configuration Wizard. - Task 14 Configuring the JMS File Store
-
In the JMS File Stores screen, assign the following directory for each of the SOA Persistence stores including UMS and BPM file stores:
ASERVER_HOME/SOA_Cluster/jms
In this example, replace ASERVER_HOME with the value of the variable for you environment. Replace SOA_Cluster with the name you assigned to the SOA cluster.
- Task 15 Reviewing Your Configuration Specifications and Configuring the Domain
-
The Configuration Summary screen contains the detailed configuration information for the domain you are about to create. Review the details of each item on the screen and verify that the information is correct.
You can go back to any previous screen if you need to make any changes, either by using the Back button or by selecting the screen in the navigation pane.
Domain creation will not begin until you click Update.
Tip:
More information about the options on this screen can be found in Configuration Summary in Creating WebLogic Domains Using the Configuration Wizard. - Task 16 Writing Down Your Domain Home and Administration Server URL
-
The Configuration Success screen will show the following items about the domain you just configured:
-
Domain Location
-
Administration Server URL
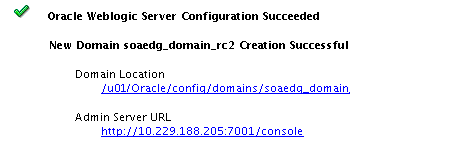
Description of the illustration ''config_success.png''
You must make a note of both items as you will need them later; the domain location is needed to access the scripts used to start the Node Manager and Administration Server, and the URL is needed to access the Administration Server.
Click Finish to dismiss the configuration wizard.
-
- Task 17 Start the Administration Server
-
Start the Administration Server to ensure the changes you have made to the domain have been applied.
12.6 Configuring the Default Persistence Store for Transaction Recovery
Each Managed Server uses a transaction log that stores information about committed transactions that are coordinated by the server and that may not have been completed.
Oracle WebLogic Server uses this transaction log for recovery from system crashes or network failures. To leverage the migration capability of the Transaction Recovery Service for the Managed Servers within a cluster, store the transaction log in a location accessible to the Managed Server and its backup servers.
Note:
To enable migration of the Transaction Recovery Service, specify a location on a persistent storage solution that is available to other servers in the cluster. Both WLS_SOA1 and WLS_SOA2 must be able to access this directory. This directory must also exist before you restart the server.The recommended location is a dual-ported SCSI disk or on a Storage Area Network (SAN).
To set the location for the default persistence stores:
-
Log into the Oracle WebLogic Server Administration Console:
ADMINVHN:7001/console -
In the Change Center section, click Lock & Edit.
-
For each of the WLS_SOA Managed Servers:
-
In the Domain Structure window, expand the Environment node, and then click the Servers node.
The Summary of Servers page appears.
-
Click the name of the server (represented as a hyperlink) in Name column of the table.
The settings page for the selected server appears and defaults to the Configuration tab.
-
On the Configuration tab, click the Services tab.
-
In the Default Store section of the page, enter the path to the folder where the default persistent stores will store its data files.
For the enterprise deployment, Oracle recommends creating a new subdirectory in the Administration Server domain home called
SOA_Cluster. This subdirectory can server as the central, shared location for transaction logs.For example:
ASERVER_HOME/SOA_Cluster/tlogs -
Click Save.
-
-
Shut down the WLS_WSM Managed Servers in the domain:
-
On the Summary of Servers page, select the WLS_WSM Managed Servers; do not select the Administration Server (AdminServer).
-
Click Shutdown and then select When Work Completes or Force Shutdown, depending on whether or not you believe the affected Managed Servers are actively processing requests.
-
-
Click Save and Activate Changes.
-
Start the Managed Servers that you shut down.
Note:
You will validate the location and the creation of the transaction logs later in the configuration procedure. For more information, see Section 12.7.5.12.7 Propagating the Extended Domain to the Domain Directories and Machines
After you have extended the domain with the Oracle SOA Suite instances, and you have restarted the Administration Server on SOAHOST1, you must then propagate the domain changes to the domain directories and machines.
Table 12-3 summarizes the steps required to propagate the changes to all the domain directories and machines.
Note that there is no need to propagate the updated domain to the WEBHOST1 and WEBHOST2 machines, because there are no changes to the Oracle HTTP Server instances on those host computers.
Table 12-3 Summary of Tasks Required to Propagate the Domain Changes to Domain Directories and Machines
| Task | Description | More Information |
|---|---|---|
|
Pack up the Extended Domain on SOAHOST1 |
Use the Pack command to create a new template jar file that contains the new Oracle SOA Suite Managed Servers configuration. When you pack up the domain, create a template jar file called |
Section 11.4.1, "Packing Up the Extended Domain on SOAHOST1" |
|
Unpack the Domain in the Managed Servers Directory on SOAHOST1 |
Unpack the template jar file in the Managed Servers directory on SOAHOST1 local storage. |
Section 12.7.1, "Unpacking the Domain in the Managed Servers Domain Directory on SOAHOST1" |
|
Unpack the Domain on SOAHOST2 |
Unpack the template jar file in the Managed Servers directory on the SOAHOST2 local storage. |
12.7.1 Unpacking the Domain in the Managed Servers Domain Directory on SOAHOST1
To copy the updated domain configuration information from the Administration Server domain directory to the Managed Servers domain directory:
-
Log in to SOAHOST1 if you haven't already.
-
If you haven't already, create the recommended directory structure for the Managed Server domain on the SOAHOST1 local storage device.
Use the examples in Section 7.4, "File System and Directory Variables Used in This Guide" as a guide.
-
Run the unpack command to unpack the template in the domain directory onto the local storage, as follows:
cd ORACLE_COMMON_HOME/common/bin

./unpack.sh -domain=MSERVER_HOME  \
    -template=soadomaintemplateExtSOA.jar \
    -overwrite_domain=true \
    -app_dir=APPLICATION_HOME \
In this example:
-
Replace MSERVER_HOME with the complete path to the domain home to be created on the local storage disk. This is the location where the copy of the domain will be unpacked.
-
soadomaintemplateExtSOA.jaris the directory path and name of the template you created when you ran the pack command to pack up the domain on the shared storage device. -
The
-overwrite_domain=trueargument is necessary when you are unpacking a managed server template into an existing domain and existing applications directories.For any file that is overwritten, a backup copy of the original is created. If any modifications had been applied to the start scripts and ear files in the managed server domain directory, they must be restored after this unpack operation.
-
Replace
APPLICATION_HOMEwith the complete path to the Application directory for the domain on local storage.
Tip:
For more information about the pack and unpack commands, see "Overview of the Pack and Unpack Commands" in Creating Templates and Domains Using the Pack and Unpack Commands. -
-
Change directory to the newly created MSERVER_HOME directory and verify that the domain configuration files were copied to the correct location on the SOAHOST2 local storage device.
12.7.2 Unpacking the Domain on SOAHOST2
To create a template jar file containing the domain configuration information:
-
Log in to SOAHOST2.
-
If you haven't already, create the recommended directory structure for the Managed Server domain on the SOAHOST2 local storage device.
Use the examples in Section 7.4, "File System and Directory Variables Used in This Guide" as a guide.
-
Run the unpack command to unpack the template in the domain directory onto the local storage, as follows:
cd ORACLE_COMMON_HOME/common/bin

./unpack.sh -domain=MSERVER_HOME \
    -template=soadomaintemplateExtSOA.jar \
    -app_dir=APPLICATION_HOME \
    -overwrite_domain=true
In this example:
-
Replace
MSERVER_HOMEwith the complete path to the domain home to be created on the local storage disk. This is the location where the copy of the domain will be unpacked. -
soadomaintemplateExtSOA.jaris the directory path and name of the template you created when you ran the pack command to pack up the domain.Note that if you are using a separate shared storage volume or partition for SOAHOST2 (and redundant Oracle homes), then you must first copy the template to the volume or partition mounted to SOAHOST2.
-
Replace
APPLICATION_HOMEwith the complete path to the Application directory for the domain on shared storage.
Tip:
For more information about the pack and unpack commands, see "Overview of the Pack and Unpack Commands" in Creating Templates and Domains Using the Pack and Unpack Commands. -
-
Change directory to the newly created
MSERVER_HOMEdirectory and verify that the domain configuration files were copied to the correct location on the SOAHOST2 local storage device.
12.7.3 Starting and Validating the WLS_SOA1 Managed Server
Now that you have extended the domain, restarted the Administration Server, and propagated the domain to the other hosts, you can start the newly configured Oracle SOA Suite servers.
This process involves three tasks:
-
Section 12.7.3.2, "Adding the SOAAdmin Role to the SOA Administrators Group"
-
Section 12.7.3.3, "Validating the Managed Server by Logging in to the SOA Infrastructure"
12.7.3.1 Starting the WLS_SOA1 Managed Server
To start the WLS_SOA1 Managed Server:
-
Enter the following URL into a browser to display the Fusion Middleware Control login screen:
http://ADMINVHN:7001/em -
Log in to Fusion Middleware Control using the Administration Server credentials.
-
In the Target Navigation pane, expand the domain to view the Managed Servers in the domain.
Description of the illustration ''fmwc_soacluster.gif''
-
Select only the WLS_SOA1 Managed Server and click Start Up on the Oracle WebLogic Server toolbar.
Note:
SOA Servers depend on the policy access service to be functional. This implies that the WSM-PM Managed Servers in the domain need to be up and running and reachable before the SOA servers are started. -
When the startup operation is complete, navigate to the Domain home page and verify that the WLS_SOA1 Managed Server is up and running.
12.7.3.2 Adding the SOAAdmin Role to the SOA Administrators Group
Before you validate the Oracle SOA Suite configuration on WLS_SOA1 Managed Server, add the SOAAdmin administration role to the enterprise deployment administration group (SOA Administrators).
To perform this task, refer to Section 18.2.1, "Configuring Roles for Administration of Oracle SOA Suite Products".
12.7.3.3 Validating the Managed Server by Logging in to the SOA Infrastructure
After you add the SOAAdmin role to the SOA Administrators group, you can then validate the configuration of the Oracle SOA Suite software on the WLS_SOA1 Managed Server as follows:
-
Use your Web browser to navigate to the following URL:
http://SOAHOST1VHN:8001/soa-infra/ -
Log in using the enterprise deployment administration user credentials (
weblogic_soa).You should see a Web page with the following title:
"Welcome to the Oracle SOA Platform on WebLogic"
12.7.4 Starting and Validating the WLS_SOA2 Managed Server
After you have validated the successful configuration and startup of the WLS_SOA1 Managed Server, you can then start and validate the WLS_SOA2 Managed Server, using the procedure in Section 12.7.3.
For the validation URL, enter the following in your Web browser and log in using the enterprise deployment administration user (weblogic_soa):
http://SOAHOST2VHN1:8001/soa-infra/
12.7.5 Validating the Location and Creation of the Transaction Logs
After WLS_SOA1 and WLS_SOA2 are up and running, verify that the transaction log directory and transaction logs were created as expected, based on the steps you performed in Section 12.6, "Configuring the Default Persistence Store for Transaction Recovery":
ASERVER_HOME/SOA_Cluster/tlogs
-
_WLS_WLS_SOA1000000.DAT -
_WLS_WLS_SOA2000000.DAT
12.8 Configuring Oracle HTTP Server for Oracle SOA Suite
This section contains the following topics:
-
Section 12.8.1, "Configuring Oracle HTTP Server for the WLS_SOA Managed Servers"
-
Section 12.10, "Validating the Oracle SOA Suite URLs Through the Load Balancer"
12.8.1 Configuring Oracle HTTP Server for the WLS_SOA Managed Servers
To configure the Oracle HTTP Server instances in the Web tier so they route requests correctly to the Oracle SOA Suite cluster, use the following procedure to create an additional Oracle HTTP Server configuration file that creates and defines the parameters of the soa.example.com virtual server.
This procedure assumes you performed the Oracle HTTP Server configuration tasks described in Section 11.7, "Configuring Oracle HTTP Server for Administration and Oracle Web Services Manager".
To create the virtual host configuration file so requests are routed properly to the Oracle SOA Suite clusters:
-
Log in to SOAHOST1 and change directory to the configuration directory for the first Oracle HTTP Server instance (OHS_1):
cd ASERVER_HOME/config/fmwconfig/components/OHS/OHS_1/
-
Create the
soa_vh.conffile and add the following directive:<VirtualHost WEBHOST1:7777> ServerName https://soa.example.com:443 ServerAdmin you@your.address RewriteEngine On RewriteOptions inherit </VirtualHost> -
Add the following directives inside the
<VirtualHost>tags:Note:
The URL entry for/workflowis optional. It is for workflow tasks associated with Oracle ADF task forms. The/workflowURL itself can be a different value, depending on the form.<Location /soa-infra> SetHandler weblogic-handler WebLogicCluster SOAHOST1VHN1:8001,SOAHOST2VHN1:8001 WLProxySSL ON WLProxySSLPassThrough ON </Location> # SOA inspection.wsil <Location /inspection.wsil> SetHandler weblogic-handler WebLogicCluster SOAHOST1VHN1:8001,SOAHOST2VHN1:8001 WLProxySSL ON WLProxySSLPassThrough ON </Location> # Worklist <Location /integration> SetHandler weblogic-handler WebLogicCluster SOAHOST1VHN1:8001,SOAHOST2VHN1:8001 WLProxySSL ON WLProxySSLPassThrough ON </Location> # UMS prefs <Location /sdpmessaging/userprefs-ui> SetHandler weblogic-handler WebLogicCluster SOAHOST1VHN1:8001,SOAHOST2VHN1:8001 WLProxySSL ON WLProxySSLPassThrough ON </Location> # Default to-do taskflow <Location /DefaultToDoTaskFlow> SetHandler weblogic-handler WebLogicCluster SOAHOST1VHN1:8001,SOAHOST2VHN1:8001 WLProxySSL ON WLProxySSLPassThrough ON </Location> # Workflow <Location /workflow> SetHandler weblogic-handler WebLogicCluster SOAHOST1VHN1:8001,SOAHOST2VHN1:8001 WLProxySSL ON WLProxySSLPassThrough ON </Location> #Required if attachments are added for workflow tasks <Location /ADFAttachmentHelper> SetHandler weblogic-handler WebLogicCluster SOAHOST1VHN1:8001,SOAHOST2VHN1:8001 WLProxySSL ON WLProxySSLPassThrough ON </Location> # SOA composer application <Location /soa/composer> SetHandler weblogic-handler WebLogicCluster SOAHOST1VHN1:8001,SOAHOST2VHN1:8001 WLProxySSL ON WLProxySSLPassThrough ON </Location> <Location /frevvo> SetHandler weblogic-handler WebLogicCluster SOAHOST1VHN1:8001,SOAHOST2VHN1:8001 WLProxySSL ON WLProxySSLPassThrough ON </Location> </VirtualHost>The
soa_vh.conffile will appear as it does in Example 12-1. -
Copy the
soa_vh.conffile to the configuration directory for the second Oracle HTTP Server instance (OHS_2):ASERVER_HOME/config/fmwconfig/components/OHS_2/
-
Edit the
soa_vh.confand change any references to WEBHOST1 to WEBHOST2 in the<VirtualHost>directives. -
Restart the Administration Server.
-
After the Administration Server is running, review the files in the following directories on both WEBHOST1 and WEBHOST2 to be sure they contain the modifications made in the Administration Server domain directory:
MSERVER_HOME/config/fmwconfig/components/OHS/instances/OHS_1/MSERVER_HOME/config/fmwconfig/components/OHS/instances/OHS_2/ -
Restart both Oracle HTTP servers.
<VirtualHost WEBHOST1:7777>
ServerName https://soa.example.com:443
ServerAdmin you@your.address
RewriteEngine On
RewriteOptions inherit
<Location /soa-infra>
    SetHandler weblogic-handler
    WebLogicCluster SOAHOST1VHN1:8001,SOAHOST2VHN1:8001
    WLProxySSL ON
    WLProxySSLPassThrough ON
</Location>

# SOA inspection.wsil
<Location /inspection.wsil>
    SetHandler weblogic-handler
    WebLogicCluster SOAHOST1VHN1:8001,SOAHOST2VHN1:8001
    WLProxySSL ON
    WLProxySSLPassThrough ON
</Location>

# Worklist
<Location /integration>
    SetHandler weblogic-handler
    WebLogicCluster SOAHOST1VHN1:8001,SOAHOST2VHN1:8001
    WLProxySSL ON
    WLProxySSLPassThrough ON
</Location>

# UMS prefs
<Location /sdpmessaging/userprefs-ui>
    SetHandler weblogic-handler
    WebLogicCluster SOAHOST1VHN1:8001,SOAHOST2VHN1:8001
    WLProxySSL ON
    WLProxySSLPassThrough ON
</Location>

# Default to-do taskflow
<Location /DefaultToDoTaskFlow>
    SetHandler weblogic-handler
    WebLogicCluster SOAHOST1VHN1:8001,SOAHOST2VHN1:8001
    WLProxySSL ON
    WLProxySSLPassThrough ON
</Location>

# Workflow
<Location /workflow>
    SetHandler weblogic-handler
    WebLogicCluster SOAHOST1VHN1:8001,SOAHOST2VHN1:8001
    WLProxySSL ON
    WLProxySSLPassThrough ON
</Location>

#Required if attachments are added for workflow tasks
 <Location /ADFAttachmentHelper>
    SetHandler weblogic-handler
    WebLogicCluster SOAHOST1VHN1:8001,SOAHOST2VHN1:8001
    WLProxySSL ON
    WLProxySSLPassThrough ON
</Location>

# SOA composer application
 <Location /soa/composer>
    SetHandler weblogic-handler
    WebLogicCluster SOAHOST1VHN1:8001,SOAHOST2VHN1:8001
    WLProxySSL ON
    WLProxySSLPassThrough ON
</Location>

 <Location /frevvo>
    SetHandler weblogic-handler
    WebLogicCluster SOAHOST1VHN1:8001,SOAHOST2VHN1:8001
    WLProxySSL ON
    WLProxySSLPassThrough ON
</Location>
</VirtualHost>
Note:
If internal invocations are going to be used in the system, add the appropriate locations to the soainternal virtual host.12.9 Configuring the WebLogic Proxy Plug-In
Set the WebLogic Plug-In Enabled parameter for the SOA cluster.
-
Log in to the Oracle WebLogic Server Administration Console.
-
In the Domain Structure pane, expand the Environment node.
-
Click on Clusters.
-
Select the SOA_Cluster cluster to which you want to proxy requests from Oracle HTTP Server.
The Configuration: General tab is displayed.
-
Scroll down to the Advanced section and expand it.
-
Click Lock and Edit.
-
Set the WebLogic Plug-In Enabled to yes.
-
Click Save and Activate the changes.Restart the SOA servers.
12.10 Validating the Oracle SOA Suite URLs Through the Load Balancer
To validate that the configuration of the Oracle HTTP Server virtual hosts and to verify that the hardware load balancer can route requests through the Oracle HTTP Server instances to the application tier:
-
Verify that the server status is reported as Running in the Administration Console.
If the server is shown as Starting or Resuming, wait for the server status to change to Started. If another status is reported (such as Admin or Failed), check the server output log files for errors.
-
Verify that you can access these URLs:
-
https://soa.example.com:443/soa-infra -
https://soa.example.com:443/integration/worklistapp -
https://soa.example.com:443/sdpmessaging/userprefs-ui -
https://soa.example.com:443/soa/composer
-
-
Verify that Identity Service can be invoked successfully on the application tier by accessing the following load balancer URL:
https://soa.example.com:443/integration/services/IdentityService/identity?WSDL
12.11 Post-Configuration Steps for Oracle SOA Suite
After you install and configure Oracle SOA Suite and Oracle Business Process Management, consider the following post-configuration tasks:
-
Section 12.11.1, "Configuring Oracle Adapters for Oracle SOA Suite"
-
Section 12.11.2, "Enabling SSL Communication Between the SOA Servers and the Hardware Load Balancer"
12.11.1 Configuring Oracle Adapters for Oracle SOA Suite
If the Oracle SOA Suite applications you are developing take advantage of any of the Oracle adapters for Oracle SOA Suite, then you should make sure the adapters are configured to work efficiently and securely in the enterprise topology.
See the following topics for more information:
-
Section 12.11.1.1, "Enabling High Availability for Oracle File and FTP Adapters"
-
Section 12.11.1.2, "Enabling High Availability for Oracle JMS Adapters"
-
Section 12.11.1.3, "Enabling High Availability for the Oracle Database Adapter"
12.11.1.1 Enabling High Availability for Oracle File and FTP Adapters
If the Oracle SOA Suite applications you are developing or deploying require the Oracle File and FTP Adapters, you must configure the adapters for high availability in the enterprise deployment topology.
Use the following sections to complete this task:
-
Section 12.11.1.1.1, "Understanding the Oracle File and FTP Adapter Configuration"
-
Section 12.11.1.1.2, "Configuring the Oracle File Adapter in the Administration Console"
-
Section 12.11.1.1.3, "Editing the JCA File Within the Composite Application"
12.11.1.1.1 Understanding the Oracle File and FTP Adapter Configuration
The Oracle File and FTP adapters enable a BPEL process or an Oracle Mediator to read and write files on private file systems and on remote file systems through the FTP (File Transfer Protocol).
When configured properly, these adapters support high availability for an active-active topology with Oracle BPEL Process Manager and Oracle Mediator service engines for both inbound and outbound operations.
For general information about this task, see "Configuring Oracle File and FTP Adapters" in Understanding Technology Adapters. The instructions provided here are specific to the Oracle SOA Suite enterprise deployment.
Note:
The File Adapter picks up a file from the inbound directory, processes it, and then outputs a file to the output directory. Because the File Adapter is non-transactional, files can be processed twice. As a result, it is possible to get duplicate files when there is failover in the RAC backend or in the SOA managed servers.12.11.1.1.2 Configuring the Oracle File Adapter in the Administration Console
To make the Oracle File Adapter highly available, first modify the Oracle File Adapter deployment descriptor for the connection-instance corresponding to eis/HAFileAdapter.
You can perform this task from the Oracle WebLogic Server console:
-
Navigate to and log into the Oracle WebLogic Server Administration Console.
For example:
http://ADMINVHN:7001/console -
In the left pane of the console, click Deployments.
-
Locate the FileAdapter resource adapter in the Summary of Deployments table.
Description of the illustration ''config_soa_file_adap.gif''
-
Click FileAdapter to display the Settings for FileAdapter page.
-
Click Configuration.
-
Click Outbound Connection Pools.
-
Expand javax.resource.cci.ConnectionFactory to see the configured connection factories.
-
Click eis/HAFileAdapter.
The Outbound Connection Properties for the connection factory appears (Figure 12-1).
Figure 12-1 Oracle WebLogic Server Console - Settings for javax.resource.cci.Connectionfactory
Description of ''Figure 12-1 Oracle WebLogic Server Console - Settings for javax.resource.cci.Connectionfactory''
-
Click Lock & Edit.
The property value column becomes editable (you can click on any of the rows in the Property Value column and modify the value).
-
Enter the values as shown in Table 12-4.
Note:
Update controlDir and check other values against the default values as mentioned in Table 12-4.Table 12-4 Values to Provide for the javax.resource.cci.Connectionfactory
Parameter Description controlDir
Etner the directory where you want the control files to be stored. You must set it to a shared location if multiple WebLogic Server instances run in a cluster. Structure the directory for shared storage as follows:
ASERVER_HOME/SOA_Cluster/fadapterinboundDataSource
Set the value to
jdbc/SOADataSource.outboundDataSource
Set the value to
jdbc/SOADataSource.outboundDataSourceLocal
Set the value to
jdbc/SOALocalTxDataSource. This is the data source where the schemas corresponding to high availability are pre-created.outboundLockTypeForWrite
Set the value to
oracleif you are using Oracle Database. By default the Oracle File and FTP Adapters use an in-memory mutex to lock outbound write operations. You must choose from the following values for synchronizing write operations:-
memory: The Oracle File and FTP Adapters use an in-memory mutex to synchronize access to the file system. -
oracle: The adapter uses Oracle Database sequence. -
db: The adapter uses a pre-created database table (FILEADAPTER_MUTEX) as the locking mechanism. You must use this option only if you are using a schema other than the Oracle Database schema. -
user-defined: The adapter uses a user-defined mutex. To configure the user-defined mutex, you must implement the mutex interface:"oracle.tip.adapter.file.Mutex"and then configure a new binding-property with the name"oracle.tip.adapter.file.mutex"and value as the fully qualified class name for the mutex for the outbound reference.
workingDirectory
Leave this value as "default".
-
-
Click Save after you update the properties. The Save Deployment Plan page appears.
-
Create DEPLOY_PLAN_HOME directory.
mkdir -p DEPLOY_PLAN_HOME/soaedg_domainIn this example, replace DEPLOY_PLAN_HOME with the actual path to the deployment plan directory defined in Section 7.4, "File System and Directory Variables Used in This Guide".
-
Enter a shared storage location for the deployment plan. The directory structure is as follows:
DEPLOY_PLAN_HOME/soaedg_domain/FileAdapterPlan.xml -
Click Save and Activate to save and apply your changes.
-
Verify that the FileAdapter deployment is activated and running:
-
In the Administration Console, click Deployments in the left pane.
-
Locate the FileAdapter deployment in the Deployments table.
-
If it is not in the active state, then select FileAdapter under Summary of Deployments, Select Start, and then Servicing All Requests.
-
12.11.1.1.3 Editing the JCA File Within the Composite Application
After you have configured the FileAdapter deployment in the Administration Console, you can edit the .jca file that is included in the composite applications to be deployed so that they can use the connection factory configured in the previous steps, as shown in Example 12-2.
Example 12-2 Example of the File Adapter .JCA File Modifications for an Enterprise Deployment
<adapter-config name="FlatStructureOut"
                adapter="File Adapter"
                xmlns="http://platform.integration.oracle/blocks/adapter/fw/metadata">
     <connection-factory location="eis/HAFileAdapter" adapterRef=""/>
     <endpoint-interaction portType="Write_ptt"
                           operation="Write">
          <interaction-spec className="oracle.tip.adapter.file.outbound.FileInteractionSpec">
                <property../>
                <property../>
          </interaction-spec>
     </endpoint-interaction>
</adapter-config>
Note:
The location attribute is set toeis/HAFileAdapter for the connection factory.12.11.1.1.4 Configuring the Oracle FTP Adapter
If your application requires an FTP Adapter, then repeat the procedures Section 12.11.1.1.2 and Section 12.11.1.1.3, with the following differences:
-
Select the FtpAdapter deployment in the list of deployments in the Administration Console.
-
Modify the
eis/Ftp/FtpAdapterconnection factory instance for the FTPAdapter deployment. -
Enter a shared storage location for the deployment plan. The directory structure is as follows:
DEPLOY_PLAN_HOME/soaedg_domain/FtpAdapterPlan.xml
12.11.1.2 Enabling High Availability for Oracle JMS Adapters
When the Oracle JMS adapter communicates with multiple servers in a cluster, the adapter's connection factory property FactoryProperties must list available servers. If it does not list servers, the connection establishes to only one random server. If that particular server goes down, no further messages are processed.
To verify the adapter's JCA connection factory:
-
Log into your Oracle WebLogic Server Administration Console using the following URL:
http://ADMINVHN:7001/console -
Click Deployments in the left pane for Domain Structure.
-
Click JmsAdapter under Summary of Deployments on the right pane.
-
Click the Configuration tab.
-
Click the Outbound Connection Pools tab and expand
oracle.tip.adapter.jms.IJmsConnectionFactoryto see the configured connection factories. -
Click the specific instance you are using (for example,
eis/wls/Queue). The Outbound Connection Properties for the connection factory opens. -
Click Lock & Edit.
-
In the FactoryProperties field (click on the corresponding cell under Property value), enter the following:
java.naming.factory.initial=weblogic.jndi.WLInitialContextFactory;java.naming.provider.url=t3://SOAHOST1VHN1:8001,SOAHOST2VHN1:8001;java.naming.security.principal=weblogic;java.naming.security.credentials=mypassword
-
Click Save after you update the properties. The Save Deployment Plan page appears.
-
Enter a shared storage location for the deployment plan. The directory structure is as follows:
DEPLOY_PLAN_HOME/soaedg_domain/JMSAdapterPlan.xml -
Click Save and Activate.
Update the deployment in the console:
-
Click Deployments and select the JMS Adapter.
-
Click Lock & Edit then Update.
-
Select Update this application in place with new deployment plan changes (A deployment plan must be specified for this option.) and select the deployment plan saved in a shared storage location; all servers in the cluster must be able to access the plan).
-
Click Finish.
-
Activate the changes.
12.11.1.3 Enabling High Availability for the Oracle Database Adapter
To ensure High Availability while leveraging the Oracle Database Adapter, the Logical Delete Polling Strategy is used normally as it performs better than a physical delete. However, when you have a clustered environment where multiple nodes are polling for the same data, a single record might get processed more than once. To avoid this problem, Oracle Database Adapter uses a distributed polling technique that uses an Oracle Database feature called skip locking.
If you were using the Logical Delete Polling Strategy approach previously, you can simply remove (in db.jca) or clear (Logical Delete Page of wizard) the MarkReservedValue, and you automatically get skip locking.
The benefits of using skip locking over a reserved value include:
-
Skip locking scales better in a cluster and under load.
-
All work is in one transaction (as opposed to update/reserve, then commit, then select in a new transaction), so the risk of facing a non-recoverable situation in a high availability environment is minimized.
-
No unique MarkReservedValue must be specified. Previously, for this to work you would have to configure a complex variable, such as
R${weblogic.Name-2}-${IP-2}-${instance}.
If you are using Logical Delete polling, and you set MarkReservedValue, skip locking is not used.
For more information, see "Scalability" and "Polling Strategies" in the Oracle Fusion Middleware User's Guide for Technology Adapters.
12.11.2 Enabling SSL Communication Between the SOA Servers and the Hardware Load Balancer
After you extend the domain with Oracle SOA Suite, you should also ensure that the Administration Server and Managed Servers can access the front-end, SSL URL of the hardware load balancer.
This will allow SOA Composite applications and Web services to invoke callbacks and other communications with the front-end, secure URL.
For more information, see Section 18.1.2, "Enabling SSL Communication Between the Middle Tier and the Hardware Load Balancer".
12.12 Enabling Whole Server Migration for Oracle SOA Suite
To ensure that Oracle SOA Suite is configured for high availability, configure the Oracle SOA Suite Managed Servers with Whole Server Migration for failover and zero data loss. Specifically, you should enable server migration for the SOA_Cluster and the WLS_WSM Managed Servers.
For more information on enabling server migration, see Chapter 19, "Using Whole Server Migration and Service Migration in an Enterprise Deployment".