Blending Data that You Added
You might have a project where you added two subject areas. You can blend data from one subject area with the other.
For example, Subject Area B might contain new dimensions that extend the attributes of Subject Area A. Or Subject Area B might contain new facts that you can use alongside the measures that already exist in Subject Area A.
When you add more than one subject area to a project, the system tries to find matches for the data that is added. It automatically matches external dimensions where they share a common name and have a compatible data type with attributes in the existing subject area .
To blend data that you added:
- Add data as described in Adding Data from External Sources.
- In the Data Sources pane, click Source Diagram.
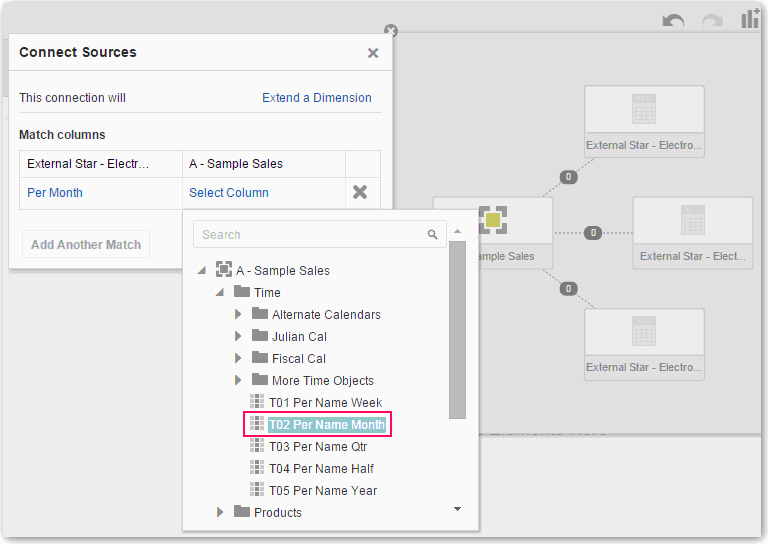
- Click the number along the line that connects the external source to the subject area to display the Connect Sources dialog.
- In the Connect Sources dialog, make changes as necessary.
- Click OK to save the matches from the external source to the data model on the server.
