11 Modifying Running Process Instances in Oracle Business Process Management Workspace
Process owners and Oracle Business Process Management Workspace (Process Workspace) administrators can alter the flow of running process instances in Process Workspace. They can also migrate instances in Process Workspace.
This chapter includes the following sections:
11.1 Altering the Flow of Running Process Instances in Process Workspace
You can move the token of a running process instance from a current activity to another, but only within the following structural constraints:
-
You can move an instance only to an activity defined at the same process level.
-
You cannot move an instance to a boundary event.
-
You cannot move an instance into a boundary event flow unless the boundary event is interrupting and is defined at the same level.You cannot move an instance inside or outside an event subprocess.
-
You cannot move an instance outside a gateway branch. You can, however, move it to the merging gateway to merge that path.
Note:
When using an exclusive gateway, you can move the instance outside the exclusive gateway branch.
11.1.1 How to Alter the Flow of Running Process Instances in Process Workspace
Perform these steps:
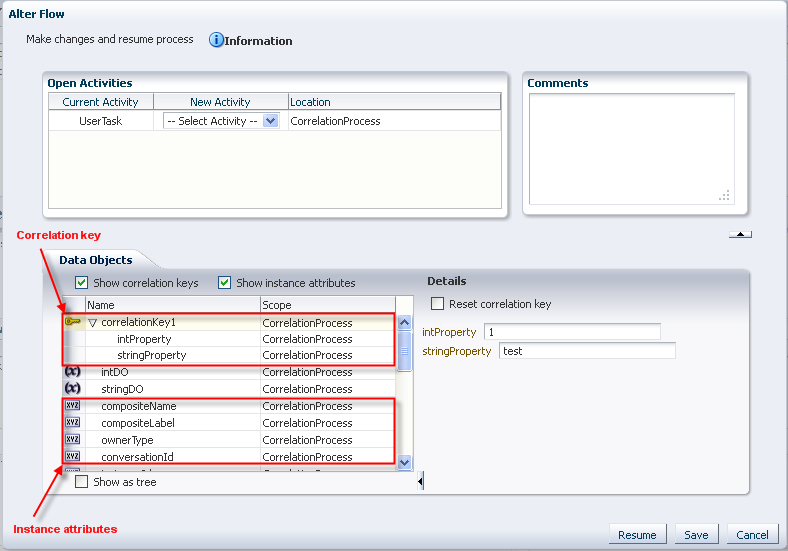
To alter the flow of a running process instance:
Note:
-
If you have opened the Alter Flow dialog box and the session times out before you have taken any action, then the process instance is suspended.
-
If an activity has more than one running token associated with it, you cannot alter the flow to select and move just one of the tokens to another valid target activity. If you alter the flow for that open activity, then all the tokens move.
-
The process instance state may not update to show the new state. Click Refresh in the table toolbar to see the updated state.
11.2 Migrating Process Instances in Process Workspace
If a new implementation of the same composite revision is deployed, and the previously deployed composite has some components with the newer BPM process definition, then the affected components go into a suspended state. To resume a suspended component, either migrate or suspend process instances that are in the pending migration state.
Unless you resume the component—either explicitly or automatically when all pending migration instance are resumed—the new process instances are not created as a result of the token having been moved.
Oracle BPM provides a way to retain the existing running instances for a process when that process is redeployed. To do this, while redeploying the process in Fusion Middleware Control Console, select Keep running instances. If the redeployment succeeds, then the instance goes into pending migration state and the process component is suspended.
Note:
If the composite being redeployed has more than 100 existing instances, only 100 are migrated during the redeployment and the component is suspended. This limit is used to minimize the deployment time.
To migrate the rest of the instances, use Process Management APIs or Process Workspace.
This section details how to migrate a pending migration instance and how to resume a suspended component.
It contains these topics:
Note:
When migrating an environment prior to 11g Release 1 (11.1.1.5.0 Feature Pack), allow any existing active task instances to complete before migrating.
Active task instances in this scenario have their states changed to STALE during the migration.
11.2.1 How to Migrate a Process Instance in Process Workspace
You can migrate a process instance in either of two ways:
-
Migrate as is: Migrate the instance without moving the token or updating the payload
-
Make changes and migrate: Move the token to the new activity you specify, and update the payload as you specify, then migrate the instance
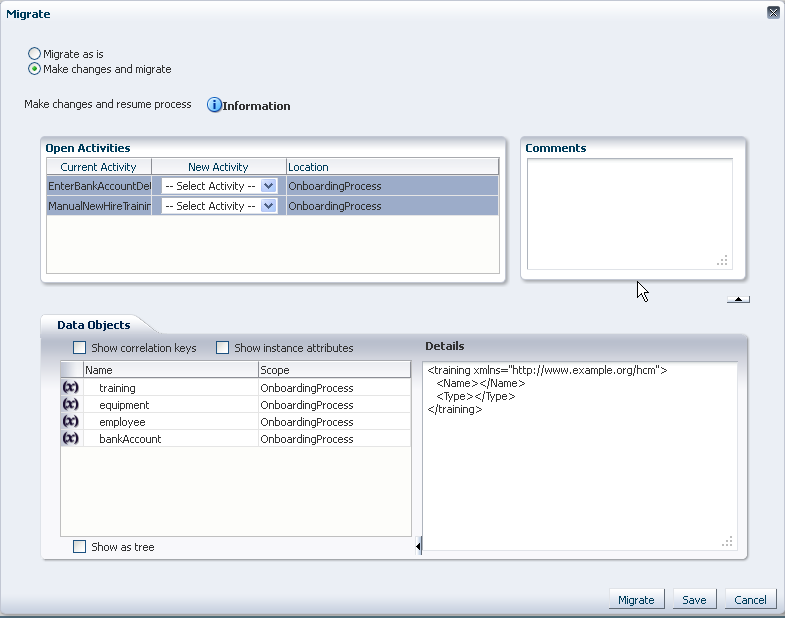
To migrate process instances:
If for some reason the migration fails, then the Migration Confirmation dialog box tells you why, as shown in Figure 11-3.
Figure 11-3 Migration Confirmation: Failure Message

Description of "Figure 11-3 Migration Confirmation: Failure Message"
11.2.2 How to Resume a Suspended Component
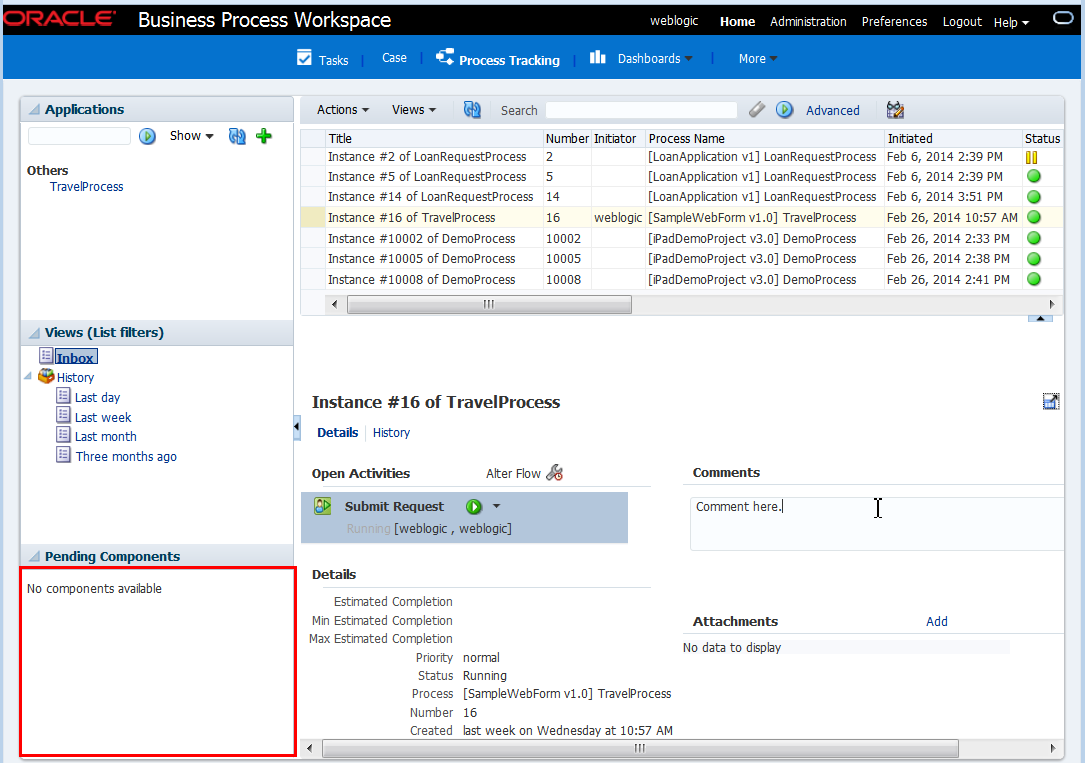
All suspended components are listed in the Pending Components panel, as shown in the example in Figure 11-4.
Figure 11-4 Pending Components Panel in the Process Tracking Tab Page
Description of "Figure 11-4 Pending Components Panel in the Process Tracking Tab Page "
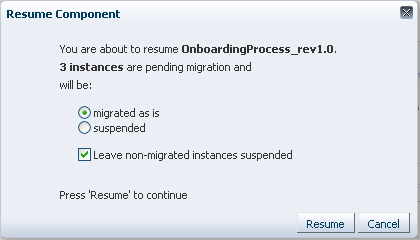
To resume a suspended component:
11.3 What You May Need to Know About Redeploying a Process
If you are redeploying a process, and, during design time, the Keep running instance option is selected, then redeployment fails in the following scenarios:
-
Parallel or inclusive gateway pair is removed
-
Inclusive-complex gateway pair is changed to inclusive-inclusive gateway pair
-
Subprocess is removed or its loop characteristic is changed
-
User task is moved to another branch in gateway pair or outside the gateway pair
-
Activity level is changed, for example, the activity is moved inside a subprocess or gateway structure
-
Subprocess or event subprocess or a call activity is added
-
Event subprocess is changed from interrupting to non-interrupting
-
Boundary event is changed from interrupting to non- interrupting
-
Boundary event is added
-
User task implementation is changed to use another human task
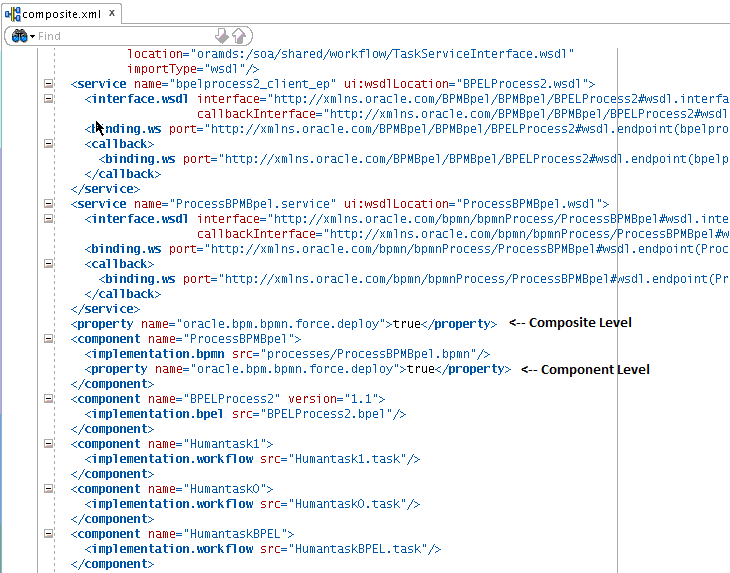
To avoid failure of process redeployment in these scenarios, set the force.deploy flag manually by editing the composite.xml file in Oracle JDeveloper.
Note:
Ensure that the change to the workflow is compatible with the process, before you set the force.deploy flag. If the change to the workflow is not compatible with the process, the deployment process fails and the component is suspended. Resume the suspended component.
To set force.deploy at the component level, enter the following:
<component name="T4">
 <property name="oracle.bpm.bpmn.force.deploy">true</property>
<implementation.bpmn src="processes/T4.bpmn"/>
</component>
To set the force.deploy at the composite level, you can use the same .xml element as a child of the composite element as shown in the example in Figure 11-6.
Figure 11-6 Setting the force.deploy Property in Oracle JDeveloper
Description of "Figure 11-6 Setting the force.deploy Property in Oracle JDeveloper"
11.4 Moving Running Composite Instances from One Revision to Another
Instance Migration enables you to migrate selected composite instances between existing compatible composite revisions or from an existing revision to a new revision. Compatibility is driven by the component compatibility within a composite. After migration is complete, the instance audit trail is visible under the new composite revision.
In contrast to Instance Patching, migration is not a part of deployment. It is a separate activity accomplished through Ant tasks and xml files that provide declarative specification of what instances migrate and what actions should be taken (for example, data and flow updates). You can select which instances to migrate.
This section discusses Instance Migration and includes the following topics:
11.4.1 Important Considerations
These are important considerations you must take into account before performing a migration:
-
The same constraints apply when migrating as when performing instance patching.
For example, you cannot move tokens to a non-interrupting boundary event.
-
During migration, composite revision of a source instance is suspended so instances of that revision do not process incoming requests.
-
This feature is implemented by using Ant commands.
These commands require the following artifact that is part of your installation:
/AS11gR1SOA/bin/ant-composite-instance-migration.xml.Note that this artifact requires
wlfullclient.jarin the following directory:$FMW_HOME/wlserver_10.3/server/libTo generate the Oracle WebLogic Server client library:
cd $fmw.home/wlserver_10.3/server/lib
java -jar wljarbuilder.jar
11.4.2 How to Perform a Migration
This section provides an overview of the steps you must perform to migrate an instance. The steps involved in migrating an instance are:
11.4.3 Restrictions for Components
The composite compatibility depends on the components defined inside the composite. If the change to any component is not compatible, then the composite is not eligible for instance migration. Only compatible changes in BPEL, BPMN, Human Workflow, and Business Rules are accepted. Changes in any other components make the composite ineligible for instance migration.
This section describes the restrictions you must consider for each component. It includes the following topics:
11.4.3.1 BPEL Components
The only eligible BPEL component for migration is sync process. The sync process does not include a durable activity like HumanTask, Wait, or Receive.
For sync process instances, BPEL changes the revision for all the completed instances that are part of a running composite instance.
Any other BPEL process is not compatible for instance migration.
11.4.3.2 BPMN Components
The following changes to BPMN components are compatible with automatic instance migration:
-
Add Script task
-
Change data associations
-
Add new data object
-
Add any new activities except boundary events
The following changes to BPMN components are compatible with manual instance migration using migration plans:
-
Removal of an activity except for sub process, boundary event and merging gateways
The following changes are not compatible with instance migration:
-
Delete Gateway (except Exclusive)
-
Delete Subprocess
-
Update Human Task implementation
-
Update Subprocess Loop Characteristics
-
Add a Boundary Event
-
Update Boundary Event interrupting to non-interrupting
-
Add an Event Subprocess
-
Update Event Subprocess interrupting to non-interrupting
-
Update Activity level (Move an activity inside a Subprocess or Gateway structure)
-
Contains Call Activity
11.4.3.3 Human Task Components
Human workflow supports moving instances for all running and completed human tasks. A human task stores the routing slip after initiating the task, so the task metadata change does not affect the running task.
11.4.3.4 Business Rules Components
There are no restrictions for Business Rules Components because the migration is executed synchronously.
11.4.3.5 Mediator Components
The following restrictions apply to Mediator components:
-
Routing Rules: the older revision of Mediator must have only sequential routing rules.
-
Mediator Instance State: the Mediator instance must be completed or faulted.
-
Message Patterns: the supported message patterns are request only or request response.
11.4.4 Ant Tasks Elements
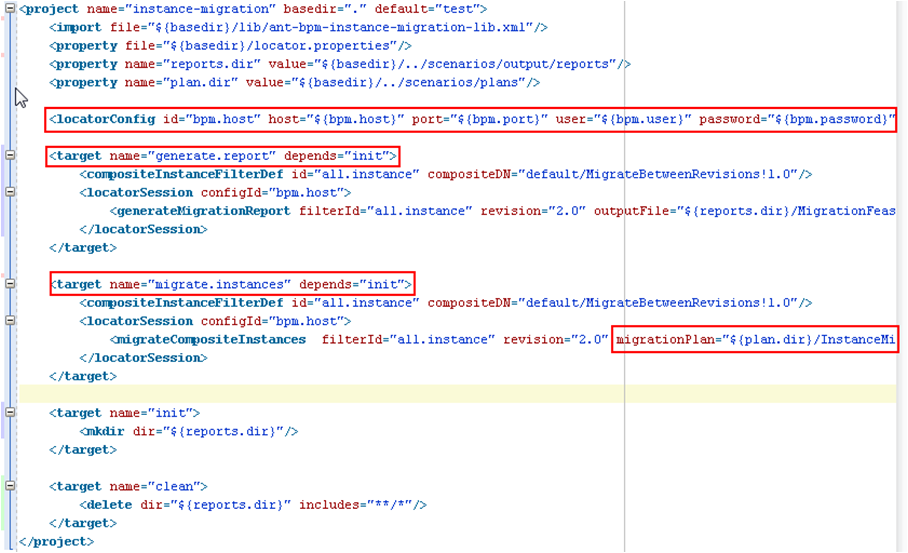
The elements of the Ant Tasks are (see Figure 11-7):
-
CompositeInstanceFilter: specifies the criteria to migrate the instance and defines the scope of the migration. This scope is determined by filtering composite instances based on:-
compositeDN
-
domainName
-
compositeName
-
revision
-
label
-
ecid
-
conversationId
-
compositeInstanceId
-
tenantId
-
title
-
maxCreationDate
-
minCreationDate
-
maxModifyDate
-
minModifyDate
-
like
-
pageStart
-
pageSize
-
-
Task to run feasibility report: The results are Not Possible, Automatic, or Manual. You can review the report and change the criteria to reduce or remove some of the instances from the migration by modifying the
CompositeInstanceFilter. -
Task to run migration.
11.4.5 Migration Elements
The migration elements are:
-
Migration Report: describes the feasibility of migrating the proposed composite instances. The migration report includes:
-
Composite Instance Details
-
Name: Component instance name
-
ID: Component instance Id
-
State: Composite instance state
-
Migrate-ability: Automatic, Migration Plan required (and the required change plan, where applicable)
-
Component Instance Data: Associated component instance details
-
-
Summary Data:
-
The target revision
-
Total number of matching composite instances
-
Number of composite instances that can be automatically migrated
-
Number of composite instances that cannot be automatically migrated
-
-
-
Migration Result: describes the outcome of migrating composite instances:
-
Migration Plan: provides the XML description of what to do with non-trivial composite or component changes. The migration plan is based on the
MigrationPlanXML schema.Migration Plan objects are created using
MigrationPlanFactory.
Note:
For more information on instance migration, navigate to the BPM Suite 11g Samples Web page [http://java.net/projects/oraclebpmsuite11g/pages/Samples] and review the demo samples listed. For a detailed description of the samples, download the PDFs available for each sample.
