Setting Up a Connection to a Web Service

BI Publisher supports Web service data sources that return valid XML data.

Note:

Additional configuration may be required to access external Web services depending on your system's security. If the WSDL URL is outside the company firewall, see Configuring Proxy Settings.

BI Publisher supports Web services that return both simple and complex data types. You must make the distinction between simple and complex when you define the Web service connection. For more information about each Web service connection type, see Adding a Simple Web Service and Adding a Complex Web Service.

If the Web service is protected by Secure Sockets Layer (SSL), see Configuring BI Publisher for Secure Socket Layer (SSL) Communication.

Private Web Service connections are also supported. For more information, see Managing Private Data Sources in Data Modeling Guide for Oracle Business Intelligence Publisher.

Only Basic and Digest authentication is supported for Web service data sources.

Only document/literal Web services are supported.

Adding a Simple Web Service

You add a simple Web service from the Administration page.

To add a Web service as a data source:
  1. From the Administration page, click Web Service Connection to display the list of existing Web service connections.
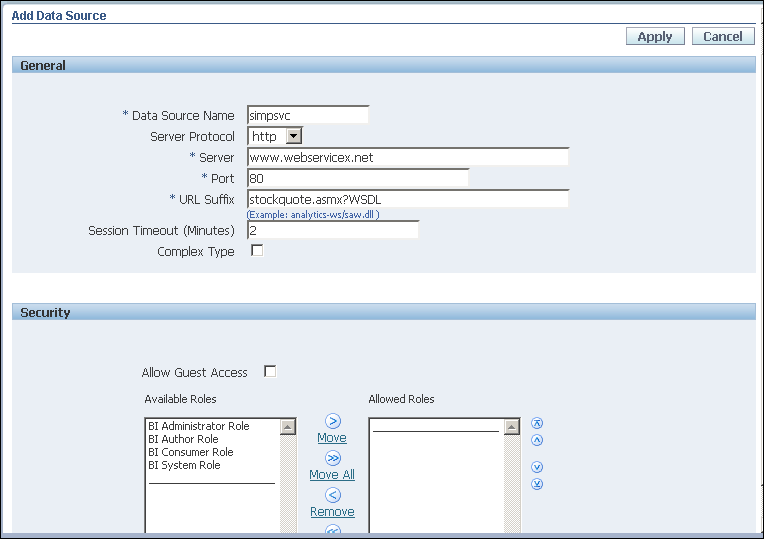
  2. On the Web Services tab, click Add Data Source to display the Add Data Source page as shown in the figure below.
  3. Enter the following fields for the new connection:
    • Data Source Name — Enter a display name for the data source. This name is displayed in the Data Source selection list in the Data Model Editor.

    • Server Protocol — Select the server protocol.

    • Server — Enter the server name.

    • Port — Enter the server port.

    • URL Suffix — Enter the URL suffix for the web service connection.

      For example, stockquote.asmx?WSDL

    • (Optional) Session Timeout (Minutes) — Enter the timeout in minutes. If the BI Publisher server cannot establish a connection to the Web service, the connection attempt will time out after the specified time out period has elapsed.

    • Complex Type — Deselect the check box to designate the connection as a simple Web service.

  4. Define security for this data source by using the shuttle buttons to move roles from the Available Roles list to the Allowed Roles list. Only users assigned the roles on the Allowed Roles list can create or view reports from this data source.
  5. Click Apply to save the data source connection.

Adding a Complex Web Service

You add a complex Web service from the Administration page.

To add a complex Web service as a data source:

  1. From the Administration page, click Web Service Connection to display the list of existing Web service connections.
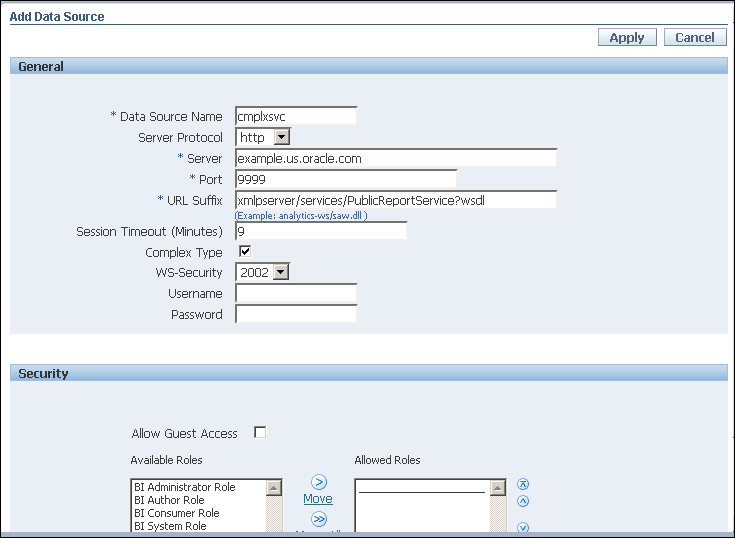
  2. Click Add Data Source to display the Add Data Source page as shown in the figure below.
  3. Enter the following fields for the new connection:
    • Data Source Name — Enter a display name for the data source. This name is displayed in the Data Source selection list in the Data Model Editor.

    • Server Protocol — Select the server protocol.

    • Server — Enter the server name.

    • Port — Enter the server port.

    • URL Suffix — Enter the URL for the Web service connection.

    • (Optional) Session Timeout (Minutes) — Enter the timeout in minutes. If the BI Publisher server cannot establish a connection to the web service, the connection attempt times out after the specified time out period has elapsed.

    • Complex Type — Select the check box to designate the connection as a complex Web service.

    • WS-Security — Select the security header.

      • 2002 — Enables the "WS-Security" Username Token with the 2002 namespace:

        http://docs.oasis-open.org/wss/2004/01/oasis-200401-wss-wssecurity-secext-1.0.xsd
      • 2004 — Enables the "WS-Security" Username Token with the 2004 namespace:

        http://docs.oasis-open.org/wss/2004/01/oasis-200401-wss-username-token-profile-1.0#PasswordText
    • Authentication Type — BI Publisher supports HTTP and SOAP authentication types. SOAP is the default. When HTTP is selected, the user name and password information are passed through HTTP headers. When soap is selected, the user name and password information are passed through XML SOAP envelope headers.

    • Username — Enter the user name for the web service, if required.

    • Password — Enter the password for the web service, if required.

    • WSDL protected by HTTP basic auth — select if access to the WSDL is protected. When the WSDL is protected by user name and password, BI Publisher executes an HTTP call with the username and password to access the WSDL URL. The WSDL can then be downloaded and parsed by BI Publisher.

  4. Define security for this data source. Use the shuttle buttons to move roles from the Available Roles list to the Allowed Roles list. Only users assigned the roles on the Allowed Roles list can create or view reports from this data source.

    The settings defined here are passed down to the backup data source, if one is defined.

  5. Click Apply.