Calculating Data in Essbase

Cloud data source types: Oracle Analytics Cloud - Essbase

On-premise data source types: Oracle Essbase

In Oracle Smart View for Office, you can use a calculation script to calculate a database in Essbase or Oracle Analytics Cloud - Essbase.

Additionally:

  • When launched, a calculation script can prompt you to enter variable information, called runtime prompts. Calculation scripts and runtime prompts are created by your Essbase administrator for your specific system.

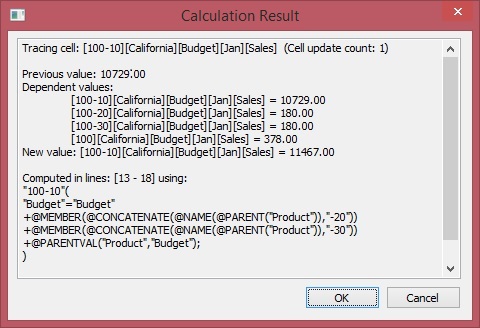
  • Oracle Analytics Cloud - Essbase only: Detailed tracing information is provided in upon execution of a calculation script. The tracing information is displayed only if your Oracle Analytics Cloud - Essbase administrator has configured the calculation script for tracing.

Note:

  • To change the solve order of a member POV before running a calculation, see Changing the Solve Order of a Selected POV.

  • Administrators: To define calculation scripts so that Smart View users can work with runtime prompts, refer to the Oracle Essbase Database Administrator's Guide, "Using Runtime Substitution Variables in Calculation Scripts Run in Smart View."

To select and launch a calculation script:
  1. Connect to the Essbase or Oracle Analytics Cloud - Essbase data source and create an ad hoc query or open an existing report file.
  2. Select the data cell on which you plan to run a calculation script.
  3. From the Essbase ribbon, select Calculate.

    The Calculation Scripts dialog box is displayed.

  4. Under Cube, select a database from the list of databases that belong to this application.
  5. Under Calculation Script, select a script.
  6. If the calculation script includes runtime prompts, enter or select the input type specified by the runtime prompt, summarized in Table 5-1.

    Note:

    Depending on how the runtime prompts have been set up by your Essbase administrator, information for some prompts can be hand-typed. Ensure that the runtime prompt values that you enter are valid. You cannot launch a calculation script until all runtime prompt values are valid.

    Table 5-1 Runtime Prompt Input Types

    Icon Expected Input Type

    runtime prompt icon for one member selection

    One member selection—One member in the dimension can be selected. Click Select Members button to choose a single member in the Member Selection dialog box.

    Alternatively, if the field is enabled for editing, you may manually enter the member name, enclosed in quotation marks; for example:

    "California"
    

    runtime prompt icon for one member selections

    Multiple member selections—Two or more members in the dimension can be selected. Click Select Members button to choose multiple members in the Member Selection dialog box.

    Alternatively, if the field is enabled for editing, you may manually enter the member names, enclosed in quotation marks and separated by a comma; for example:

    "New York", "California"; "West", "Market"
    

    runtime prompt icon for text value

    Text value—A text value; for example:

    MyGrid
    

    Member names must be enclosed in quotation marks, separated by commas, and include a final semicolon (;). For example, type:

    "New York","California","West","Market";
    

    or

    "Oklahoma";
    

    runtime prompt icon for numerical value

    Numeric value—A numeric value; for example, type:

    1000
    

    or

    -2
    

    runtime prompt icon for date value

    Date value—A date value in the format required by your system; for example:

    mm/dd/yyyy
    

    or

    dd/mm/yyyy
    
  7. Click Launch.

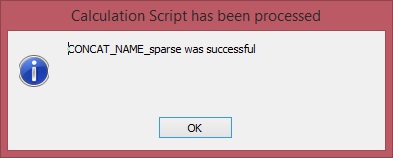
    A status message tells you if the calculation was successful. For example:
    Message dialog box showing the success status of the message.

    If the calculation was not successful, contact your Essbase or Oracle Analytics Cloud - Essbase administrator.

  8. Click OK to close the message box
  9. Oracle Analytics Cloud - Essbase only: If the calculation script was configuring for tracing, then view the information in the Calculation Result dialog box, and then click OK to close the dialog.

    Alternatively, copy and paste the information from the Calculation Result dialog and save it in your favorite text editor.

    The Calculation Result dialog box contains detailed information on the calculation that was executed when the script was launched. For example:


    Calculation Result dialog box containing detailed information on the calculation that was executed.
  10. Note any changed data cells in the ad hoc grid or report.
  11. Click Submit to submit the changed data back to the database.