| Oracle7 Server Manager User's Guide | Library |
Product |
Contents |
Index |
| Oracle7 Server Manager User's Guide | Library |
Product |
Contents |
Index |
![]()
![]()
This chapter introduces Oracle Server Manager and gives you an overview of its major components.
This chapter covers the following topics:
Server Manager is Oracle's database administration tool. The graphical component of Server Manager (Server Manager/GUI) allows you to perform database administration tasks with the convenience of a graphical user interface (GUI). The line mode component of Server Manager (Server Manager/LineMode) provides a line mode interface.
Server Manager is designed to provide administrative functionality via an easy-to-use interface. You can use Server Manager to:
Server Manager is available for multiple GUI environments, yet adopts the native look and feel of the platform on which it is running. So, Server Manager running on Motif looks like a Motif application. And, Server Manager running on Windows looks like a Windows application.
You can use Server Manager to administer any database running Oracle7 release 7.0 or later. You can also simultaneously administer different databases running different releases of Oracle7.
For those environments that do not support a graphical user interface, or for those times when a command line interface is desirable, Server Manager for Line Mode provides a conversational line mode. In line mode, you can explicitly execute commands on a command line.
You may want to use Server Manager in line mode when a graphical device is unavailable (such as when dialing-in from a non-GUI terminal) or when performing unattended operations (such as when running nightly batch jobs or batch scripts that do not require user intervention).
For more information about using Server Manager in line mode, see Chapter 12, "Using Server Manager in Line Mode."
To use Server Manager to administer a database, you must install Server Manager on your personal computer. You must also install several views on the databases you wish to administer
Additional Information: For instructions on installing Server Manager, see your operating system-specific Oracle documentation. For example, for instructions on installing Server Manager on a Windows system, see the Oracle Server Manager for Windows Installation Guide.
You must install the Server Manager views on each database you wish to administer. Even if you use one copy of Server Manager to administer several databases, the Server Manager views must be installed on each database.
The script CATSVRMG.SQL creates the views used by Server Manager, as well as a public synonym called SM$VERSION. SM$VERSION contains the script's version number, which appears in Server Manager's version banner. The CATSVRMG.SQL script is included with Server Manager on your distribution media.
In Oracle7 release 7.1 and later, the CATSVRMG.SQL script is run automatically by CATALOG.SQL.
If you wish to use Server Manager to administer a database running Oracle7 release 7.0, you must run the CATSVRMG.SQL script manually. You can run this script from a SQL Worksheet or while using Server Manager in line mode.
When running the CATSVRMG.SQL script, you must be connected with the schema SYS. So, in a release 7.0 database, you must connect as either SYS or INTERNAL. In a release 7.1 or later database, you can connect with either SYSDBA or SYSOPER privileges.
To verify that the Server Manager views have been installed, you can examine the version banner in the Administration window or query SM$VERSION (SELECT * FROM sm$version). Figure 1 - 1 illustrates the version banner in the Administration window.
The script CATNOSVM.SQL drops all the objects created by CATSVRMG.SQL.
Server Manager also relies on other scripts. For information about Server Manager and the UTLXPLAN.SQL script, see Chapter 7, "Viewing Schema Objects." For information about Server Manager and the UTLMONTR.SQL script, see Chapter 10, "Overview of the System Monitors."
Additional Information: The script names given above are the standard names. On some operating systems, the names and locations of these scripts may differ. See your operating system-specific Oracle documentation for details.
 Figure
1 - 1. Administration Window Version Banner
Figure
1 - 1. Administration Window Version Banner
To perform an operation or task using Server Manager, you must have the appropriate privileges. For example, to create a tablespace using Server Manager, you must have the CREATE TABLESPACE system privilege.
Because many of Server Manager's windows include information selected from data dictionary tables, you need the SELECT ANY TABLE system privilege to fully utilize Server Manager's interface. The SELECT ANY TABLE system privilege is also part of the DBA role.
Server Manager does not enable any additional roles, so any privileges you need must be part of your default role(s) and privileges.
For information about privileges and roles, refer to the Oracle7 Server Concepts and Oracle7 Server Administrator's Guide.
The method for starting up Server Manager depends on your platform.
Additional Information: For information about starting up Server Manager, see your operating system-specific Oracle documentation. For information on starting Server Manager with Windows, see Appendix F, "Windows-Specific Operations."
When you start up Server Manager, the copyright window appears. The copyright window disappears in seven seconds. You can also type any key or click anywhere in the window to make the window disappear immediately.
Next, the Connect dialog box appears. You may connect to an Oracle
instance at this time or close the dialog box. For more information about
connecting to an instance, see "Connecting to an Instance" ![]() .
.
You can start up Server Manager and jump to a specified window in the interface. This allows you to skip any intermediate windows. This facility is called launch in context.
For a description of how to use launch in context, see "Launching
Server Manager in Context" ![]() .
.
Server Manager's graphical interface is divided into three major components:
The following sections give you an overview of these components.
The Administration Manager is the primary administrative component of Server Manager. You will probably use the Administration Manager to perform most of your administrative tasks.
The Administration Manager divides database administration tasks into categories:
Each of these categories is associated with its own pull-down menus and dialog boxes.
The Administration Manager and these categories of tasks are discussed in detail in Part II , "The Administration Manager."
A SQL Worksheet allows you to dynamically enter SQL statements, PL/SQL code, and Server Manager commands. You can also run scripts from a SQL Worksheet.
A SQL Worksheet maintains a history of the commands you have entered. Thus, you can use the SQL Worksheet to edit and re-execute an earlier command without having to retype it.
You can have multiple SQL Worksheets open at a time, each of which is separate from the others. So, you can commit or roll back work in each worksheet independently.
SQL Worksheets are discussed in detail in Part III, "The SQL Worksheet."
The System Monitors allow you to gather and inspect performance statistics. These statistics can be useful for tuning your database.
The types of System Monitors are:
By selecting which aspects of system performance you want to monitor, you can view performance statistics. You can sample these statistics as frequently as you like by setting sampling intervals.
The System Monitors and the specific types of statistics you can monitor are discussed in detail in Part IV , "System Monitors."
Server Manager includes four main pull-down menus:
Some windows include other menus as well. For example, when you open the Tablespaces folder in the Administration Manager, a pull-down menu called Tablespace is added to the menu bar.
When a menu item is dimmed, it is not currently available. Menu items that end with an ellipsis (...) indicate that you will be asked to enter more information to complete the command.
The File menu items allow you to open or close Server Manager windows and create new connections.
The following figure illustrates the File menu.
 Figure 1 - 2. File
Menu
Figure 1 - 2. File
Menu
The File menu is described below:
Displays the Connect dialog box to connect to an instance and open an Administration window for that database.
Brings the associated Administration window forward, or displays a new Administration window.
Starts a new SQL Worksheet.
Displays the Monitor dialog box, which allows you to choose a System Monitor to start.
Closes the current window.
Exits Server Manager.
The Administration window, New Worksheet, and Monitor menu items are only available from a window connected to an instance. These items display a window associated with that connection.
The Edit menu contains the standard editing menu items for your platform. These commands are useful when editing text in the SQL Worksheet or in the filters in the System Monitors. On some platforms, these editing capabilities may also be available for use in dialog boxes, although sometimes via keyboard equivalents only.
The following figure illustrates the Edit menu.
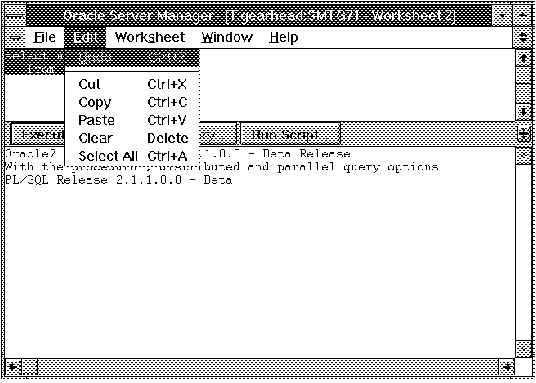 Figure 1 - 3. Edit
Menu
Figure 1 - 3. Edit
Menu
Warning: The Undo menu item, when available, undoes the last edit you performed on text. It does not undo the last operation performed on the database you are administering.
The Window menu contains a list of all the Server Manager windows you have open. To bring a window forward, choose its name from the Window menu.
The following figure illustrates a sample Window menu.
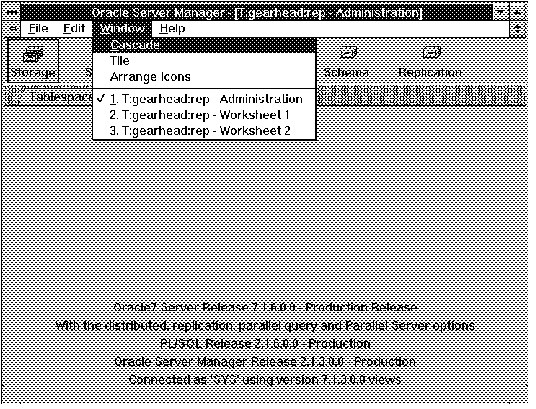 Figure 1 - 4. Window
Menu
Figure 1 - 4. Window
Menu
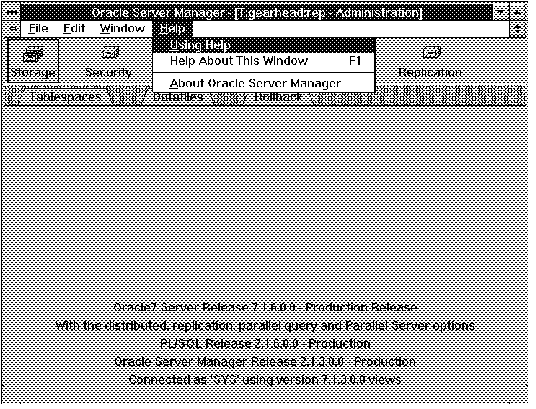
From the Help menu, you can access the Server Manager online Help system.
For more information about Server Manager online Help system, see "Using
Online Help" ![]() .
.
The following figure illustrates the Help menu.
Displays a dialog box containing information about the Help system.
See "Using Online Help" ![]() for information about the Help dialog box.
for information about the Help dialog box.
Help About This Window
Displays a dialog box containing information about the current window.
About Oracle Server Manager
Displays a dialog box containing version information about Server Manager and its components. See Figure 1 - 6.
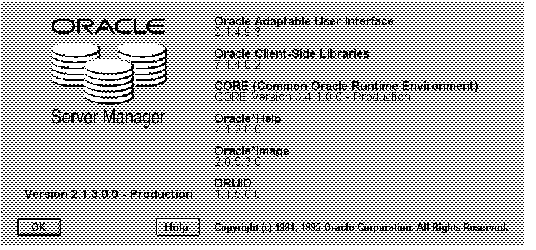 Figure
1 - 6. About Oracle Server Manager Dialog Box
Figure
1 - 6. About Oracle Server Manager Dialog Box
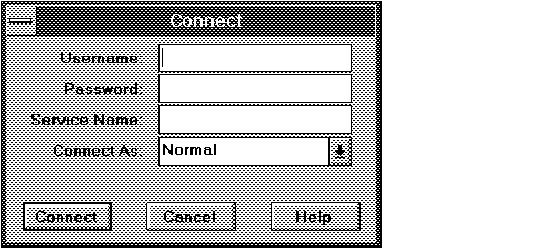
You can connect to an Oracle instance using the Server Manager Connect dialog box. When you start up Server Manager, the Connect dialog box appears. You can connect to an instance, or click Cancel and connect later. You can also display the Connect dialog box by choosing Connect from the File menu.
The following figure illustrates the Connect dialog box.
 Figure
1 - 7. Connect Dialog Box
Figure
1 - 7. Connect Dialog Box
The elements of the Connect dialog box are described below:
Username
Your Oracle username for the database to which you are connecting.
Password
Your Oracle password for the database to which you are connecting.
SQL*Net service name for the database to which you are connecting.
Server Manager accepts connections using SQL*Net Version 1 or SQL*Net Version 2. Server Manager recognizes SQL*Net Version 1 connect strings, such as T:BOSTON:A, and SQL*Net Version 2 service names, such as NY_FINANCE.
Pop-up menu containing Normal, SYSOPER, and SYSDBA for Oracle7 release 7.1 or later. Only Normal is allowed for release 7.0.
Connect
Initiates connection.
Cancel
Exits dialog box without connecting.
Help
Displays help information.
Additional Information: If you do not specify a database service name, you connect to the default database for your platform. Refer to your operating system-specific Oracle documentation and SQL*Net documentation for more information.
In Server Manager you can have multiple connections open simultaneously. For each connection you initiate, you can have one Administration window, multiple SQL Worksheets, and one of each type of System Monitor.
The service name you specify when you connect becomes part of the title for each window associated with that connection. If you do not specify a service name, the title of each window associated with the connection begins with the word "Default". This scheme distinguishes windows associated with different connections, and organizes them conveniently in the Window menu.
Using the File menu, you can open new windows from the Administration Manager, a SQL Worksheet, or a System Monitor. When you open a new window, it is associated with the instance and username of your current window.
Each new SQL Worksheet automatically initiates a separate physical connection to an instance; you do not have to re-enter your connection information. The first System Monitor you open also creates a new physical connection. However, subsequent monitors share the same connection.
On some platforms there may be a limit on the number of connections you can have open simultaneously.
Additional Information: For information about the limit on open connections, see your operating system-specific Oracle documentation.
Server Manager includes an online Help system that provides you with help information for every window and dialog box. The Help system is context sensitive, but you can also search through help information to find a particular topic.
There are two ways of accessing the online Help system. In a main window, such as the Administration window, you can access the Help system by choosing Help About This Window from the Help menu. Figure 1 - 5 illustrates the Help menu.
In a dialog box, click Help to access the online Help system. Figure 1 - 7 shows the Connect dialog box and its Help button.
On Microsoft Windows, Server Manager provides a native online help system. Refer to your Microsoft Windows documentation for information on using online help.
On Motif systems, Server Manager also provides an online help system. See Appendix E, "Motif-Specific Operations," for instructions on using the online help when running Server Manager for Motif.
Using the launch in context facility, you can start up Server Manager and immediately access a specific window or dialog box. You specify the location to jump to using command-line parameters.
With the command-line parameters, you can bypass initial windows that require user input (such as the Connect dialog box) and jump directly to Server Manger's Administration Manager, SQL Worksheet, or System Monitor components. For example, the statement:
svrmgrm user=scott password=tiger service=t:oraserv:smtg71
subsystem=administration area=requestlog
does the following:
Suggestion: You can use launch in context under your own command-line interface or via menu items and commands in management consoles.
Additional Information: Starting Server Manager using the launch in context facility varies with specific operating systems. For information about using the launch in context facility, see your operating system-specific Oracle documentation. For information on using launch in context with Windows, see Appendix F, "Windows-Specific Operations."
When accessing the Administration Manager, you can specify:
When accessing a SQL Worksheet, you can specify:
When accessing System Monitors, you can specify the monitor to display.
The global parameters for launch in context control your database connection and the Server Manager component you access when you start up Server Manager.
Table 1 - 1 lists the various global parameters you can use with launch in context.
| Global Parameter | Value | Specifies |
| user | username | Name of user to connect as. |
| password | password | Password for the user. |
| service | service name | SQL*Net service name for the database to which you are connecting. |
| as | normal | sysdba | sysoper | Privileges with which to connect. Default is normal. |
| subsystem | administration | monitor | worksheet | Subsystem to access. Default is administration. |
Table 1 - 1. Global Launch in Context Parameters
When you start up Server Manager without any command-line parameters,
the copyright window and Connect dialog box appear. See Figure
1 - 7 ![]() for an example of a Connect box.
for an example of a Connect box.
However, if you specify the connect information on the command line, you bypass the copyright window and Connect dialog box.
If you do not specify enough information on the command line for Server Manager to complete the connection, the Connect dialog box appears partially filled in. For example, if you specify a service name but omit the user, Server Manager opens the Connect dialog box with the service name filled in.
You must supply the missing information to complete the connection and click Connect to proceed.
Suggestion: For security reasons, you may want to omit the password parameter and require that users enter a password in the Connect dialog box when using the launch in context facility.
Server Manager normally proceeds to the Administration Manager after connecting to a database. However, you can specify a different subsystem to jump to using the SUBSYSTEM parameter.
For example, the statement:
svrmgrm subsystem=worksheet
starts up Server Manager and immediately displays the Connect dialog box. Once you have specified the connect information and connected to a database, Server Manager jumps to a SQL Worksheet.
The Administration Manager parameters control the drawer that is opened, the folder that is displayed, the object that is selected, and the menu command that is executed.
Table 1 - 2 lists the Administration Manager parameters you can use with launch in context.
| Administration Parameter | Value | Specifies |
| area | folder_name | Name of the folder to open. Server Manager infers
the correct drawer to open. See "AREA Parameter" |
| object | object_name | Name of the object to select. See "OBJECT
Parameter" |
| menu | menu_item | default | Menu command to execute for the folder specified.
See "MENU Parameter" |
Table 1 - 2. Administration Manager in Context Parameters
Use the AREA parameter to specify the folder to open in the Administration Manager. Because the folder names are unique, Server Manager infers the corresponding drawer to open.
Folder names for the AREA parameter must be entered:
For example, the statement:
svrmgrm user=scott password=tiger service=t:oraserv:smtg71
area=requestlog
does the following:
Suggestion: Because Server Manager normally proceeds to the Administration Manager after connecting, you can omit the SUBSYSTEM parameter when you want to jump to any location in the Administration Manager.
Table 1 - 3 lists the possible folder names for the AREA parameter.
| Area Argument | Specifies | |
| tablespaces | Storage drawer | Tablespaces folder |
| datafiles | Storage drawer | Datafiles folder |
| rollback | Storage drawer | Rollback folder |
| users | Security drawer | Users folder |
| profiles | Security drawer | Profiles folder |
| roles | Security drawer | Roles folder |
| audit | Security drawer | Audit folder |
| database | Instance drawer | Database folder |
| initialization | Instance drawer | Initialization folder |
| transactions | Instance drawer | Transactions folder |
| sessions | Instance drawer | Sessions folder |
| backup | Recovery drawer | Backup folder |
| recovery | Recovery drawer | Recovery folder |
| redologs | Recovery drawer | Redo Logs folder |
| optimizer | Schema drawer | Optimizer folder |
| explainplans | Schema drawer | Explain Plans folder |
| snapshots | Schema drawer | Snapshots folder |
| snapshotlogs | Schema drawer | Snapshot Logs folder |
| links | Schema drawer | Links folder |
| synonyms | Schema drawer | Synonyms folder |
| packages | Schema drawer | Packages folder |
| triggers | Schema drawer | Triggers folder |
| constraints | Schema drawer | Constraints folder |
| schemas | Replication drawer | Schemas folder |
| objects | Replication drawer | Objects folder |
| registeredsnapshots | Replication drawer | Registered Snapshots folder |
| masters | Replication drawer | Masters folder |
| conflictresolution | Replication drawer | Conflict Resolution folder |
| deferredtransactions | Replication drawer | Deferred Transactions folder |
| errors | Replication drawer | Errors folder |
| requestlog | Replication drawer | Request Log folder |
Table 1 - 3. Values for the AREA Parameter
Use the OBJECT parameter to specify the object you want to select in the object list. The entry in the first column is the identifier for each object.
Object names for the OBJECT parameter:
For example, the statement:
svrmgrm user=scott password=tiger service=t:oraserv:smtg71
subsystem=administration area=tablespaces object=SYSTEM
does the following:
Note: "Tablespace" is the first column of the Tablespace object list. SYSTEM is the identifier for the object and is located in the "Tablespace" column.
Attention: If the object list is long, the selected object may not be visible. Scroll down the list to display the object.
If you specify an object that does not exist, Server Manager opens the folder you specified but does not select any objects in the folder's object list. If there are multiple objects with the same identifier in the first column, the first object that matches is selected.
Use the MENU parameter to specify the menu command to execute on a selected object.
Menu commands for the MENU parameter must be either:
Attention: The position number includes menu separator lines.
See Figure 2 - 3 ![]() for an example of a pull-down menu. In that menu, Add Datafile is in position
5.
for an example of a pull-down menu. In that menu, Add Datafile is in position
5.
or
For example, both statements:
svrmgrm user=scott password=tiger service=t:oraserv:smtg71
subsystem=administration area=tablespaces object=SYSTEM
menu=2
and
svrmgrm user=scott password=tiger service=t:oraserv:smtg71
subsystem=administration area=tablespaces object=SYSTEM
menu=default
do the following:
Note: The Alter menu command is the second menu item from the top of the Tablespace pull-down menu.
Equivalently, double-clicking on SYSTEM in Tablespaces object list also executes the Alter command.
The launch in context parameter for the SQL Worksheet is the COMMAND parameter. Use the COMMAND parameter to specify a statement, command, or script to execute.
The value for COMMAND:
Attention: When running under Windows, you can only use the COMMAND parameter to specify a script to execute.
For example, the statement:
svrmgrm user=scott password=tiger service=t:oraserv:smtg71
subsystem=worksheet command=@utlxplan
does the following:
The COMMAND parameter is optional. You can specify SUBSYSTEM equals worksheet without including the COMMAND parameter. In this case, Server Manager just starts a SQL Worksheet.
The launch in context parameter for the System Monitors is the MONITOR parameter. Use the MONITOR parameter to specify the type of monitor to start.
You may only start one monitor with the MONITOR parameter.
Monitor names for the MONITOR parameter must:
For example, the statement:
svrmgrm user=scott password=tiger service=t:oraserv:smtg71
monitor=systemi/o
does the following:
Suggestion: If you specify a monitor type with the MONITOR parameter, you can omit the SUBSYSTEM parameter.
Table 1 - 4 lists the possible monitor names for the MONITOR parameter.
| Monitor Arguments | Specifies |
| circuit | Circuit monitor |
| dispatcher | Dispatcher monitor |
| filei/o, file | File I/O monitor |
| latch | Latch monitor |
| librarycache, library | Library Cache monitor |
| lock | Lock monitor |
| process | Process monitor |
| queue, q | Queue monitor |
| rollback | Rollback monitor |
| session | Session monitor |
| sharedserver, shared | Shared Server monitor |
| sqlarea, sql | SQL Area monitor |
| systemi/o, sio | System I/O monitor |
| systemstatistics, ss | System Statistics monitor |
| tableaccess, table | Table Access monitor |
| tablespace | Tablespace monitor |
Table 1 - 4. Values for the MONITOR Parameter
The MONITOR parameter is optional. You can specify SUBSYSTEM equals
monitor without including the MONITOR parameter. In this case, Server Manager
jumps to the Monitor dialog box from which you can select the type of monitor
to start.
Prev Next |
Copyright © 1996 Oracle Corporation. All Rights Reserved. |
Library |
Product |
Contents |
Index |