Release 2.0 for Windows NT
A55738-01
Library |
Product |
Contents |
Index |
| Oracle Web Publishing Assistant Getting Started Release 2.0 for Windows NT A55738-01 |
|
![]()
![]()
This chapter provides an overview of the Oracle Web Publishing Assistant. It also lists the system requirements and describes how to get started using the product.
Specific topics discussed are:
You have an Oracle database and tablespaces filled with useful information. You want to share this information with your co-workers, customers, and the rest of the world. How can you get this information, and present it in an easy-to-read format?
Oracle Web Publishing Assistant web-enables an Oracle database, offering high performance and scalability with a user-friendly interface. Use the Oracle Web Publishing Assistant Create Web Page Wizard to create web page queries (data retrieved from an Oracle database merged with HTML web pages). The default HTML template provided with Oracle Web Publishing Assistant is Java-enabled, providing scalability to accommodate your query results. Oracle Web Publishing Assistant uses database connection sharing and the Oracle Call Interface (OCI8) to improve performance and maximize server resources.
To make the web page available on an intranet or the World Wide Web, you must configure a web server. A web server is not necessary if you only want to view the page locally. To view the page locally, use your web browser to open the file (see the section "Software Requirements" in this chapter).
This release of Oracle Web Publishing Assistant offers these new features:
Oracle Web Publishing Assistant features an easy-to-use toolbar interface that enables you to create new and administer existing web page queries:
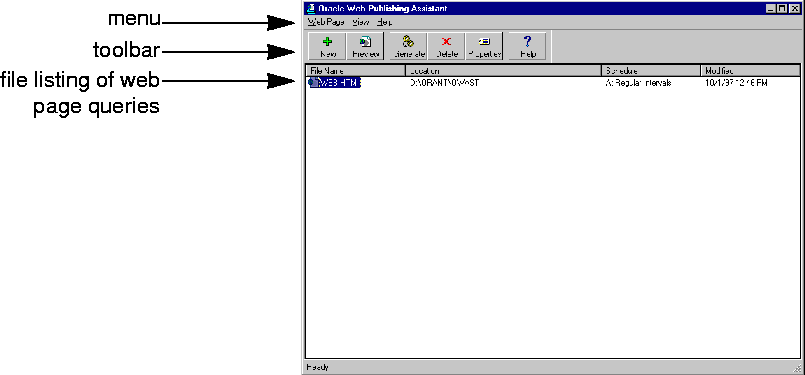
Perform administrative tasks using either the menu or the toolbar. The menu provides the same functionality as the toolbar, but the menu also includes commands that enable you to modify the look of Oracle Web Publishing Assistant. For example, you can change the listing to icons, and display (or hide) the status bar and toolbar.
The toolbar provides easy access to Oracle Web Publishing Assistant functionality:
The file listing shows you the:
Double-click a web page query file name in the listing to preview the web page in your web browser. Because Oracle Web Publishing Assistant uses an asynchronous processing model, the actual web page may not have been generated immediately. If the page does not yet exist when you double-click the file in the listing (or click Preview), Oracle Web Publishing Assistant prompts you to create the page immediately.
Use these hardware components with Oracle Web Publishing Assistant:
Oracle Web Publishing Assistant requires these software components:
Before installing this product, review Oracle8 Enterprise Edition Release Notes, included in this package for the most recent information about this product.
Oracle Web Publishing Assistant is automatically installed with Oracle8 Enterprise Edition, if you choose a Typical installation.
To de-install Oracle Web Publishing Assistant:
From the taskbar, choose Start > Programs > Oracle for Windows NT > Oracle Installer.
The installed products screen of Oracle Installer appears on the right side of your screen.
A message appears confirming your decision to remove the product. A window shows the progress of the de-installation. A message appears, confirming that the product has been de-installed.