A
Integrating Pro*C/C++ into Microsoft Visual C++
This appendix describes how to integrate Pro*C/C++ into Microsoft
Visual C++ 6.0.
Specific topics discussed are:
Integrating
Pro*C/C++ within Microsoft Visual C++ Projects
This section describes how to integrate
Pro*C/C++ within Microsoft Visual C++ 6.0 projects.
All the precompiler errors and warnings are displayed in
the output box where Microsoft Visual C++ displays compiler and linker
messages. You do not have to precompile a file separately from the Microsoft
Visual C++ build environment. In addition, Microsoft Visual C++ maintains
the dependencies between .C and .PC files.
Perform all of the procedures in this section within Microsoft
Visual C++.
Specifying
the Location of the Pro*C/C++ Executable
For Microsoft Visual C++ to run Pro*C/C++,
it must know the location of the Pro*C/C++ executable. If Microsoft Visual
C++ was installed before any Oracle 8.1 products were installed, then you
must add the directory path.
To specify the location of the Pro*C/C++ executable:
-
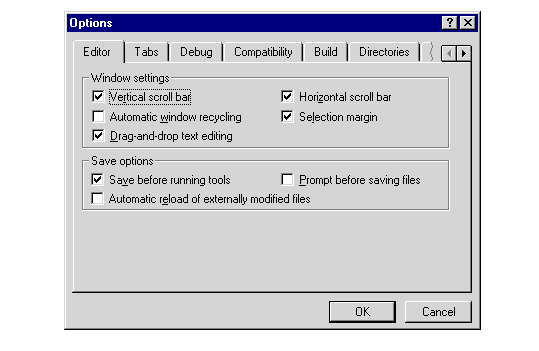
Choose Options from the Tools menu.
The Options dialog box appears.
-
Click the Directories tab.
-
Select Executable files from the Show directories
for drop-down list box.
-
Scroll to the bottom of the Directories field and
click the dotted rectangle.
-
Enter the ORACLE_BASE\ORACLE_HOME\BIN
directory. For example:
C:\ORACLE\ORA81\BIN
-
Click OK.
Specifying
the Location of the Pro*C/C++ Header Files
To specify the location of the Pro*C/C++ header files:
-
Choose Options from the Tools menu.
The Options dialog box appears.
-
Click the Directories tab.
-
Select Include Files from the Show directories for
drop-down list box.
-
Scroll to the bottom of the Directories field and
click the dotted rectangle.
-
Enter the ORACLE_BASE\ORACLE_HOME\PRECOMP\PUBLIC
directory. For example:
C:\ORACLE\ORA81\PRECOMP\PUBLIC
-
Click OK.
Adding
.PC Files to a Project
After you create a project, you need
to add the .PC file(s).
To add a .PC file to a project:
-
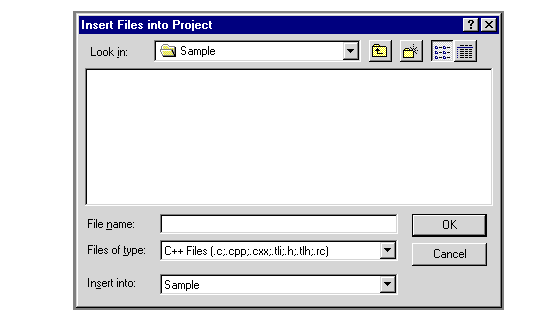
Choose Add To Project from the Project menu, and then
choose Files.
The Insert Files into Project dialog box
appears.
-
Select All Files from the Files of type drop-down
list box.
-
Select the .PC file.
-
Click OK.
Adding
References to .C Files to a Project
For each .PC file, you need to add a reference to the .C
file that will result from precompiling.
To add a reference to a .C file to a project:
-
Choose Add To Project from the Project menu, and then
choose Files.
The Insert Files into Project dialog box
appears.
-
Type the name of the .C file in the File Name field.
-
Click OK.
Because the .C file has not been created yet,
Microsoft Visual C++ displays the following message: "The specified file
does not exist. Do you want to add a reference to the project anyway?"
-
Click Yes.
Adding
the Pro*C/C++ Library to a Project
Pro*C/C++ applications must link with the ORASQL8.LIB library
file.
To add the Pro*C/C++ library to a project:
-
Choose Add To Project from the Project menu, and then
choose Files.
The Insert Files into Project dialog box
appears.
-
Select All Files from the Files of type drop-down
list box.
-
Select ORASQL8.LIB from the ORACLE_BASE\ORACLE_HOME\PRECOMP\LIB\MSVC
directory.
-
Click OK.
Specifying
Custom Build Options
In this procedure, you specify the custom
build options for a .PC file.
To specify custom build options:
-
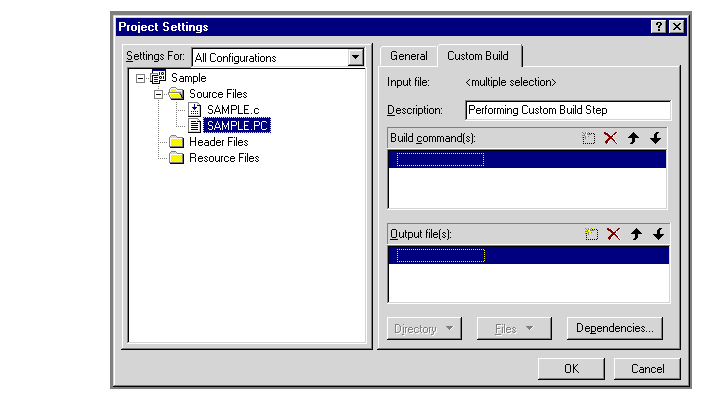
In FileView, right-click a .PC file and choose Settings.
The Project Settings dialog box appears with the
Custom Build tab displayed.
-
Enter the following on one line in the Build command(s)
field:
$(ProjDir)\..\..\..\..\bin\proc $(ProjDir)\$(InputName).pc
include=$(ProjDir)\..\..\..\public include="$(MSDEVDIR)\..\vc\include"
$(ProjDir) and $MSDEVDIR are macros for custom build commands
in Microsoft Visual C++. See the Microsoft Visual C++ documentation for
more information.
Enter one of the following in the Output file(s) field:
When the project is built, Microsoft Visual C++ checks the
dates of the output files to determine whether they need to be rebuilt
for any new modifications made to the source code. See the Microsoft Visual
C++ documentation for more information.
Click OK.
Adding
Pro*C/C++ to the Tools Menu
You can include Pro*C/C++ as a choice
in the Tools menu of Microsoft Visual C++ 6.0.
To add Pro*C/C++ to the Tools menu:
-
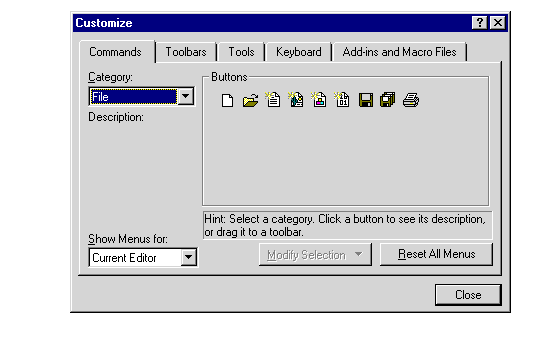
Choose Customize from the Tools menu.
The Customize dialog box appears.
-
Click the Tools tab.
-
Scroll to the bottom of the Menu contents field and
click the dotted rectangle.
-
Enter the following text:
Pro*C/C++ 8.1
-
Type the path and file name of the graphical Pro*C/C++
executable in the Command field, or use the Browse button to the right
of the field to select the file name. For example:
C:\ORACLE\ORA81\BIN\PROCUI.EXE
-
Enter the following text in the Arguments field:
$(TargetName)
When you choose Pro*C/C++ 8.1 from the Tools menu, Microsoft
Visual C++ uses the $(TargetName) argument to pass the name of the current
development project to Pro*C/C++. Pro*C/C++ then opens a precompile project
with the same name as the opened project, but with a .PRE extension in
the project directory.
-
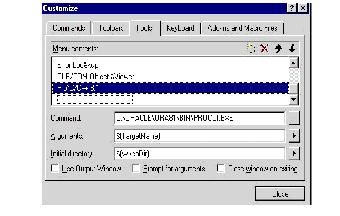
Enter the following text in the Initial directory
field:
$(WkspDir)
The Customize dialog box should now look like the
following graphic (although the Oracle home directory may be different
on your computer):
-
Click Close.
Microsoft Visual C++ adds Pro*C/C++ to the Tools
menu.