Release 2 (9.0.2) for Windows and UNIX
Part Number A95828-02
Home |
Solution Area |
Contents |
Index |
| Oracle9i Developer Suite Installation Guide Release 2 (9.0.2) for Windows and UNIX Part Number A95828-02 |
|
Before proceeding with the installation instructions in this chapter, make sure you have reviewed and performed the preinstallation tasks described in Chapter 2, "Getting Started".
This chapter provides detailed installation steps and basic postinstallation tasks. The topics include:
Oracle Universal Installer displays in the language as specified in the current locale. For instructions on starting the installer, see Section 2.8.2, "Starting Oracle Universal Installer".
|
Note: (For Windows only) If you encounter a Windows System Files error during installation, click OK to close the error dialog. Then follow the instructions in Section 2.8.2.1.1, "Windows System Files Installation". |
Once Oracle Universal Installer is launched, the Welcome screen appears.

The Welcome screen provides information about the Oracle Universal Installer.
The following function buttons appear on the Welcome screen and all installation screens that follow it.
The Welcome screen has two additional buttons. They are:
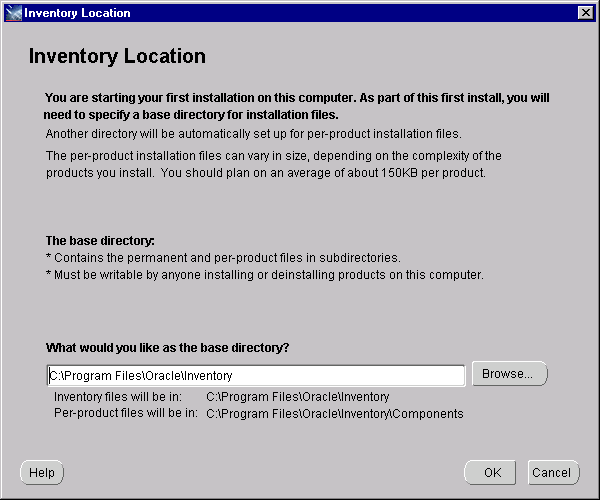
The Inventory Location screen appears only during the first time installation is performed on the machine. The screen lets you set up the base directory for installation files. You can accept the default value or enter another value.
The base directory contains the permanent and per-product files in subdirectories, and must be writable by anyone installing or deinstalling products on the computer.
C:\Program Files\Oracle\Inventory. The per-product installation files will automatically be stored in a subdirectory of the base directory, e.g., C:\Program Files\Oracle\Inventory\Components.
/private1. The per-product installation files will automatically be stored in a subdirectory of the base directory, e.g., /private1/Components.
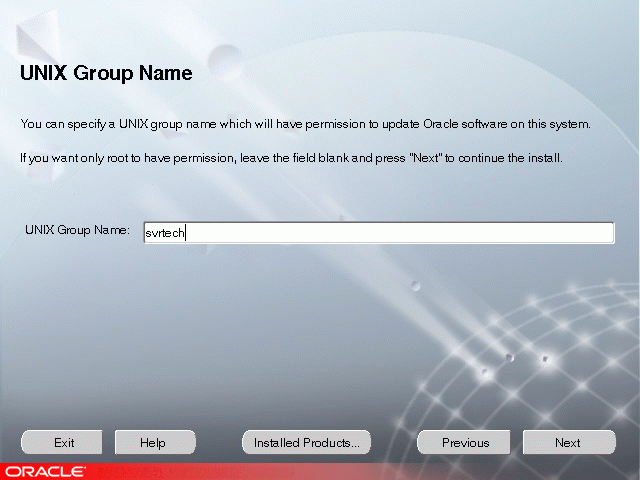
The UNIX Group Name screen appears only on the first time you run Oracle Universal Installer on the machine. The UNIX Group Name screen grants permission for the oraInventory directory to the group specified. For more information, refer to Section 2.7.6, "Creating UNIX Accounts and Groups".
prompt> id
orainstRoot.sh file. (You may need to execute the shell script by typing "./" before orainstRoot.sh). The Root.sh installation screen shows the location of the orainstRoot.sh file. The script creates pointers to the components as the installer installs them in the system so that they can be identified later in the installation procedure. It produces the /var/opt/oracle/oraInst.loc file, which provides a pointer to the oraInventory directory.
Following execution of the Bourne shell script, continue with the installation process.
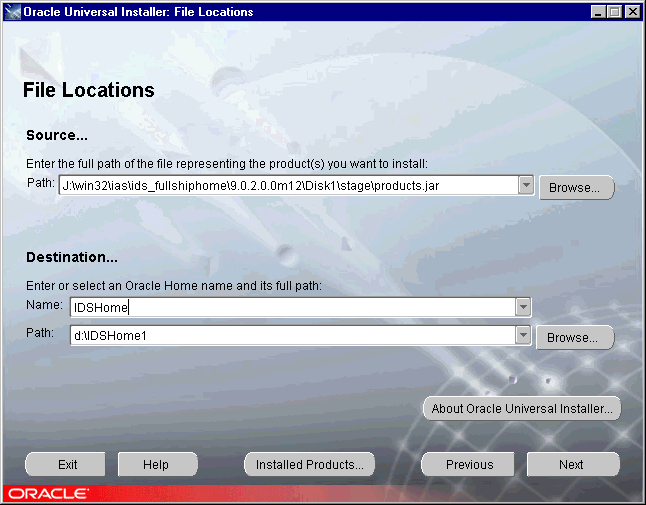
The File Locations screen lets you enter the full path for the source and destination locations for your installation.
products.jar file from which the product will be installed. The installer detects and uses the default values of the products.jar file of the installation program. Do not change the path.
You may use the default name and path provided or select another name. See Section 2.6.1, "ORACLE_HOME Considerations" if you need more information.
For UNIX, the installer uses the default Oracle Home set in Section 2.7.5.1, "ORACLE_HOME".
Do not install Oracle9iDS into an existing:
Do not install Oracle9iDS into an existing Oracle9iDS home directory unless you are selecting another installation type or performing an install upgrade.
For more information about Oracle Homes, see Section 2.6, "Coexistence".
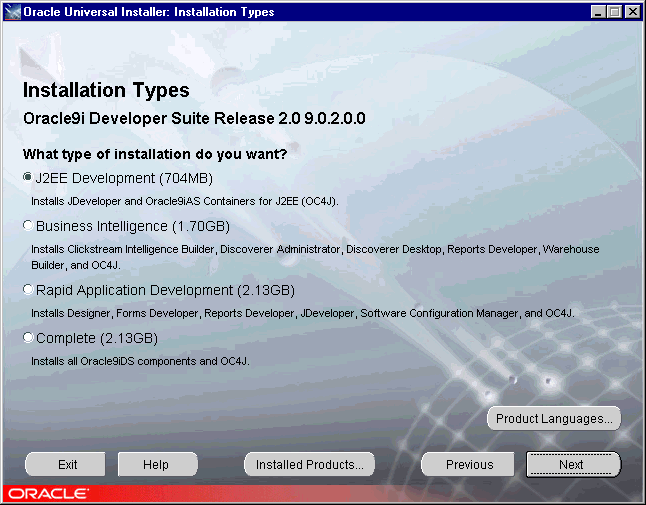
The Installation Types screen lets you select the type of installation you want to perform and the product languages to install.
The available install options are:
Product Languages: To select the languages your installed product will run in, click the Product Languages button to display the Languages Selection screen. You can install multiple product languages and thus switch between product runtime language user interfaces by changing the NLS_LANG environment variable. During product runtime, if the translation files for the language are available and the installed language files are correctly mapped to each other, the product will run in the current locale, otherwise the product will run in English.
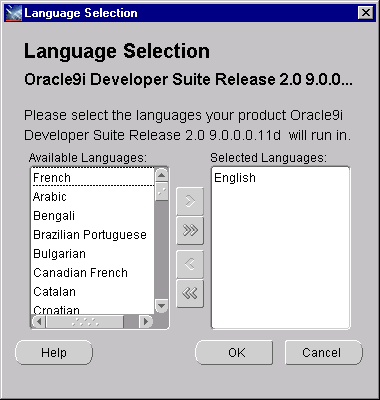
The Language Selection screen lets you select multiple languages to be installed.
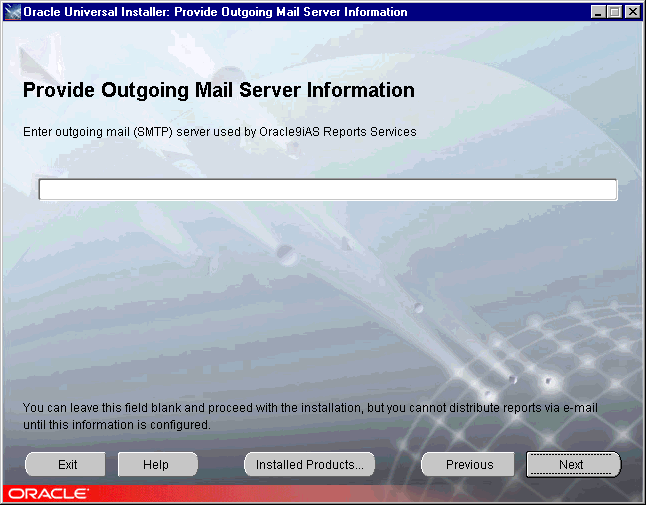
If you intend to generate Oracle Reports from within Oracle9i Designer, you must provide an outgoing mail server name.
The Provide Outgoing Mail Server Information screen appears only if you selected the Business Intelligence, Rapid Application Development, or Complete install option. This screen lets you enter a name for the outgoing mail server that is to be used by Oracle9iAS Reports Services to distribute reports via e-mail, e.g., mysmtp01.mycorp.com. This mail server will also be used by Oracle9iAS Reports Services to send job success notifications when requested by users.
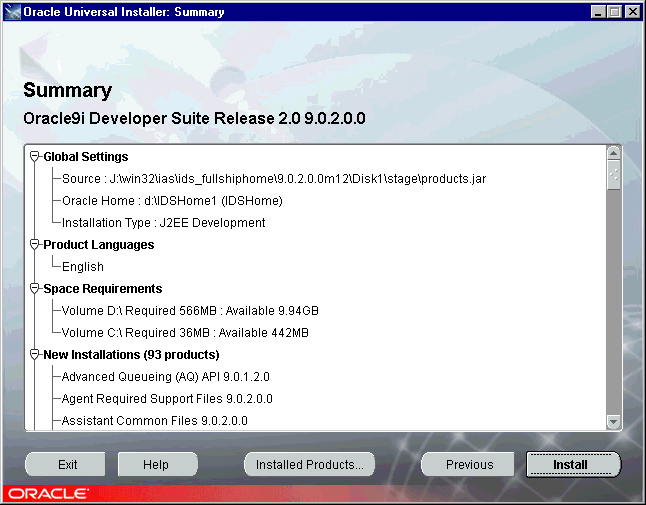
The Summary screen lets you review the selections you have made before the actual installation starts. The Summary list includes the source and destination locations, installation type, product languages, space requirements, and the components to be installed.
To make changes to any of the selections, click Previous to return to the appropriate screen.
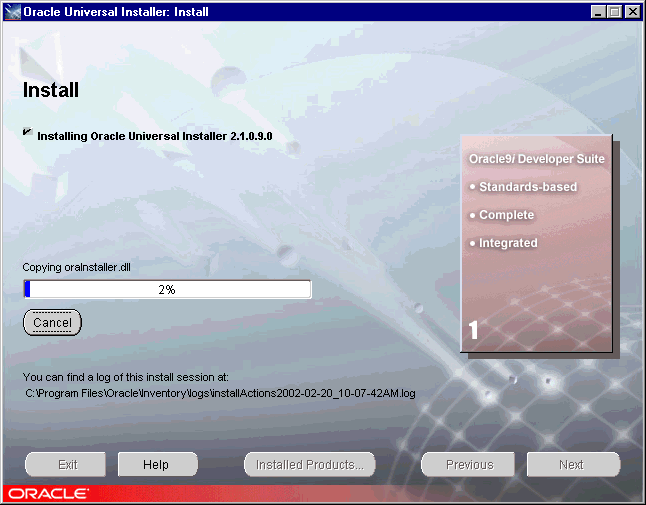
The Install screen appears while the product is installing. Installation operations include executing actions such as file copy and linking, and execution decision points and calculations. At the Install screen, you can:
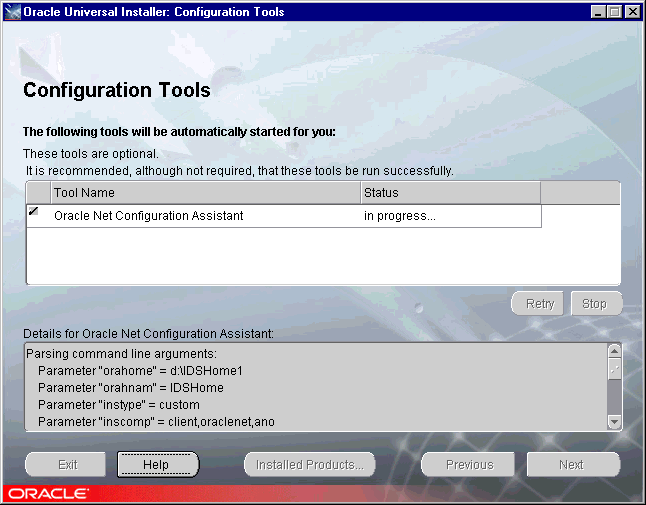
The Configuration Tools screen appears while the Oracle Net Configuration Assistant is running. It configures basic network components and creates the tnsnames.ora and sqlnet.ora files for you. The Oracle Net Configuration Assistant tool is automatically started by the installer. Click Help on the Oracle Net Configuration Assistant Welcome screen if you need information on how to use the tool.
At the Configuration Tools screen, you can:
For users of Windows assistive technologies: If you are using assistive technologies and you encounter a problem with the screen reader at this stage of the installation, follow these instructions:
ORACLE_OEM_CLASSPATH=<drive_letter>:\Program Files\Oracle\jre\1.1.8\lib\access-bridge.jar;<drive_letter>:\Program Files\Oracle\jre\1.1.8\lib\jaccess.jar
where <drive_letter> is C, D, or wherever the Program Files directory is located on your PC.
Start > Programs > Oracle -IDSHome > Configuration and Migration Tools > Net Configuration Assistant
After copying the required files, the installer prompts you to run the root.sh script. Use the following steps to run the root.sh script.
root.sh script in the Oracle Home directory.
prompt> $ORACLE_HOME/root.sh
Once you see "Finished running generic part of the root.sh script" and "Now product-specific root actions will be performed", exit root user and return to the Install screen.
The root.sh script detects:
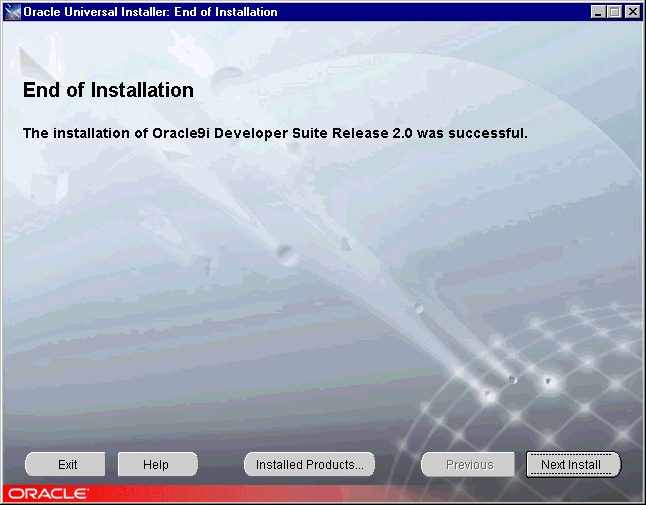
The End of Installation screen appears at the end of the installation process. It indicates whether the installation is successful or unsuccessful.
After successfully installing the product, proceed to Section 3.2, "Postinstallation Tasks" for further instructions.
The postinstallation tasks for Oracle9iDS are divided into the following parts:
Review the general postinstallation checklist and perform any required tasks.
Depending on the product languages selected during installation, the required translation files are installed for each component. To change the component runtime language, set NLS_LANG to the appropriate language.
NLS_LANG determines the environmental values for the language, territory dependent conventions, and character set to be used during product runtime. NLS_LANG consists of three parameters:
For example
sets the NLS environmental values so that components run in Japanese, use Japanese cultural conventions, and use the EUC character set for data manipulation.
Refer to the Oracle9i Application Server Globalization Support Guide (included in the Oracle9i Application Server Documentation Library) for more details about NLS_LANG values.
Depending on the installation type selected, the tnsnames.ora and sqlnet.ora files may be installed in the %ORACLE_HOME%\network\admin directory (Windows) or $ORACLE_HOME/network/admin directory (UNIX). You can update the files manually using a text editor, or use the configuration tool, Oracle Net Configuration Assistant. For more information about the configuration tool, refer to your database documentation library--Oracle9i Net Services Administrator's Guide or Net8 Administrator's Guide.
Following installation, the Oracle Universal Installer creates a file showing the port assignments during installation of Oracle9iDS components. The installation process automatically detects any port conflicts and chooses an alternate port in the range allocated for that component.
The file portlist.ini is located in the %ORACLE_HOME%\install directory (Windows) or $ORACLE_HOME/install directory (UNIX). This file lists component entries as "port name = port value". For example:
Oracle Java Object Cache port = 7000
Oracle Intelligent Agent = 1748, 1754, 1808, 1809
Table 3-1 lists the default port numbers that the Oracle Universal Installer uses for select components during installation.
| Components | Default Port Number | Port Number Range |
|---|---|---|
|
OC4J for JDeveloper testing |
9227 |
9227 - 9237 |
|
OC4J for Forms Developer and Reports Developer testing |
8888 |
none |
ORACLE_HOME/j2ee/Oracle9iDS directory:
On Windows, you can also use the Start Menu to access the scripts, as follows:
Start > Programs > Oracle9i Developer Suite - ORACLE_HOME
If you use assistive technologies such as screen readers, to work with Java-based applications and applets, the Windows-based computer where you have installed Oracle9iDS must have Sun's Java Access Bridge installed in all the Java virtual machine locations on the computer.
The Oracle Universal Installer for Oracle9iDS has installed files for JDK/JRE 1.1.8 and JDK/JRE 1.3 on your computer, but it has installed Java Access Bridge 1.0.2 files in the JDK/JRE 1.3 location only.
For assistive technologies to work with Oracle9iDS components that have JDK/JRE 1.1.8 dependencies, you must install the production version of Java Access Bridge 1.0.2 in the JDK/JRE 1.1.8 location as well. See Section 2.7.4, "Installing Java Access Bridge (Windows only)" for instructions. Then use the steps below to make sure the Java Access Bridge files are set up properly.
To verify that Java Access Bridge files are installed:
These instructions assume that you have downloaded the Java Access Bridge 1.0.2 zip file, extracted the contents of the zip file into a temporary directory named accessbridge_home, and installed Java Access Bridge 1.0.2. (See Section 2.7.4, "Installing Java Access Bridge (Windows only)" for more information.)
access-bridge.jar and jaccess.jar are added to the folders Program Files\Oracle\jre\1.1.8\lib and Program Files\Oracle\jre\1.3.1\lib\ext.
JavaAccessBridge.dll and WindowsAccessBridge.dll are added to the folder Winnt\System32 as they must be in the system path.
access-bridge.jar and jaccess-1_3.jar are added to the folder %ORACLE_HOME%\jdk\jre\lib\ext. If necessary, copy them from <accessbridge_home>\installer\installerFiles to the folder.
JavaAccessBridge.dll and WindowsAccessBridge.dll are added to the folder %ORACLE_HOME%\jdk\jre\lib\ext. If necessary, copy them from <accessbridge_home>\installer\installerFiles to the folder.
PATH environment variable has been updated to include the directory where the DLL files are installed, %ORACLE_HOME%\jdk\jre\lib\ext.
ORACLE_OEM_CLASSPATH environment variable has been updated to include the directory where the Access Bridge files are installed for JRE 1.1.8, ORACLE_OEM_CLASSPATH=<drive_letter>:\Program Files\Oracle\jre\1.1.8\lib\access-bridge.jar;<drive_letter>:\Program Files\Oracle\jre\1.1.8\lib\jaccess.jar
accessibility.properties in the folders %ORACLE_HOME%\jdk\jre\lib and Program Files\Oracle\jre\1.3.1\lib includes the following line:
assistive_technologies=com.sun.java.accessibility.AccessBridge
If necessary, copy the file from <accessbridge_home>\installer\installerFiles to the appropriate folders.
Review the component-specific postinstallation checklist and perform any required tasks.
To effectively use JDeveloper, follow the instructions in this section. For information about supported deployment environments, see Section B.1, "Oracle9i JDeveloper".
Before you can use WebDAV support in JDeveloper, you first need to download the WebDAV addin for JDeveloper from OTN. The WebDAV addin download includes IBM's DAV4J driver.
To download the WebDAV Addin for JDeveloper:
http://otn.oracle.com/software/products/jdev/content.html.
jdev9iWebDAV.zip.
To install the WebDAV Addin for JDeveloper:
jdev9iWebDAV.zip file to a temporary directory.
dav4j.jar, dav4j_license.htm, jdwebdav.jar and xml4j.jar into the %ORACLE_HOME%\jdev\lib\ext directory (Windows) or $ORACLE_HOME/jdev/lib/ext directory (UNIX).
When you next start JDeveloper, you will be able to create and use WebDAV connections.
For information about using WebDAV support in JDeveloper, see the JDeveloper online help.
A connection to an Oracle9i Software Configuration Manager (SCM) repository is required to perform source code control using SCM from JDeveloper. The repository resides within an Oracle database and must be precreated. Install the Rapid Application Development option, then use the Repository Administration Utility in SCM to create the repository in the database. For instructions on creating the repository, see the Oracle SCM Repository Installation Guide (available on the Oracle9i Developer Suite Product CD).
If you see an error similar to:
Font specified in font.properties not found [--symbol-medium-r-normal--*-%d-*-*-p-*-adobe-fontspecific]
when starting JDeveloper on a Unix computer, your JDK isn't set up to use the mentioned font. JDeveloper, by default, uses the information in the file font.properties included with each JDK. If this file references fonts not available on your computer, you will see the above error (or one like it). To fix this error, you'll either need to install a new font, or change your font.properties file. For information on installing new fonts on your computer, contact your vendor. For information on updating the font.properties file, see your JDK vendor's documentation or Sun's Font Overview documentation at
http://java.sun.com/j2se/1.3/docs/guide/intl/addingfonts.html
If you have set the IDE option to use hosted documentation, JDeveloper is pre-configured to use documentation hosted on OTN. The URL to the documentation set on OTN is
http://otn.oracle.com/hosted_doc/jdev/jdeveloper/jdeveloper.hs
Please note that the first launch of the hosted help system may take several minutes to initialize.
In addition to this site, you can set up your own host for serving hosted documentation. You may want to do this if you are behind a firewall, or you find network access times slow, or if you want to add information to the JDeveloper documentation. If you want to extend the JDeveloper documentation, refer to the Oracle Help for Java (OHJ) documentation, which is included with JDeveloper.
To host JDeveloper documentation:
ORACLE_HOME/jdev/doc/ohj onto your web server. If you have the base install, you will have to download the documentation from OTN. Each jar should be uncompressed into its own directory.
jdeveloper.hs file to point to the correct URL for each of the subhelpsets on your server. Look at the file jdeveloper-hosted-example.xml in ORACLE_HOME/jdev/doc/ohj/jdeveloper.jar for an example of how to configure this file.
Once you have done that, your users will have to set their copy of JDeveloper to use your new server. In the IDE Settings dialog, navigate to "Documentation". Ensure that "Use Hosted Documentation" radio button is selected. Provide the URL to the jdeveloper.hs file on your server.
You can install JDeveloper in Microsoft Terminal Server or Citrix WinFrame environment, allowing many clients to access one installation of JDeveloper. In all cases, users can save their projects locally.
When installing and configuring JDeveloper for a multiuser environment, you'll need to account for the resource planning, such as number of users and power of the server, to deliver optimal performance for JDeveloper and your users.
Installing JDeveloper on a Citrix WinFrame Server or a Microsoft Terminal Server
You need to have administrative privileges to install JDeveloper.
Configuring User Home Directories in a Multiuser Environment
(The following information is written for Windows, but the logic applies to UNIX as well.)
Before you run JDeveloper in a terminal server environment, you must define the user home environment variable and set its value for each user in order for JDeveloper to identify user home directories correctly. If the variable is not defined and set, JDeveloper uses the ORACLE_HOME\jdev as the home directory for all users. Using this directory may cause unstable behavior in JDeveloper with multiple users.
ORACLE_HOME\jdev\bin\jdev.conf in a text editor. Use an editor that recognizes UNIX end-of-line characters, such as WordPad.
This is the default variable that JDeveloper will look for at startup. As the terminal server's administrator, you may change the name of this variable to follow your system's naming conventions.
To set the environment variable:
JDEV_USER_DIR, or the name you chose in the previous procedure, as a User Variable.
N:\users\jdoe) and click OK.
set j
You should see output similar to the following:
JDEV_USER_DIR=N:\users\jdoe
ide.user.dir is set to your user home directory.
Configuring Terminal Server Clients for Running JDeveloper
These topics assume that you have already installed a Citrix WinFrame or Microsoft Terminal Server client locally and that JDeveloper has been installed and configured by the System Administrator.
JDEV_USER_DIR.
JDEV_USER_DIR as the variable containing the path to the user's home directory.
set
You should see output similar to the following:
JDEV_USER_DIR=n:\users\jdoe
ide.user.dir is set to your user home directory.
If you run JDeveloper in a multiuser environment and you see the error
The system DLL ole32.dll was relocated in memory. The application will not run properly. The relocation occurred because the DLL Dynamically Allocated Memory occupied an address range reserved for Windows NT system DLL's. The vendor supplying the DLL should be contacted for a new DLL.
you'll need to update the ORACLE_HOME\jdev\bin\jdev.conf file by adding the line:
AddVMOption -Xheapbase10000000
Use an editor that recognizes UNIX end-of-line characters, such as WordPad. You may have to change the number upward or downward if you still get the error when starting JDeveloper. When you save the file, WordPad will warn you that it is about to save the file in text-only format. You can ignore this warning.
In addition, you will need to set the same option with the same value in Project |Default Project Settings |Runner |Java options.
To make this setting available for all other users, the administrator should perform this change, exit JDeveloper and then copy the file
<userhome>\system\DefaultWorkspace\Project1.jpr
to
ORACLE_HOME\jdev\multi\system\DefaultWorkspace\Project1.jpr
Included with the J2EE Development installation is a fully functioning version of Oracle9i Application Server Containers for J2EE (OC4J). If you are using JDeveloper to test your applications, you will be using the embedded version of OC4J and you will not have to make any modifications to your configuration. If you would like to use the same configuration for your server, you can use the version included with JDeveloper.
To configure the OC4J server for non-embedded mode:
ORACLE_HOME/j2ee/home run the command
The server will auto-unpack several jars. You will then be prompted to enter an admin password.
You will be prompted to confirm the password.
Installation will be complete.
You can now start the server.
To start the OC4J server for use in non-embedded mode:
ORACLE_HOME/j2ee/home run the command:
java -jar oc4j.jar
java -XdoCloseWithReadPending -jar oc4j.jar
Several jar files will be auto-deployed and you will see the server output
Oracle9iAS (2.0.0.0) Containers for J2EE initialized
For more information on fine tuning your OC4J server instance, see the OC4J documentation in the Oracle9i Developer Suite Documentation Library.
Using the included server will have no impact on using JDeveloper for testing and running your projects.
First, follow the steps in Section 3.2.1.5, "Assistive Technologies (Windows only)" to make sure the Java Access Bridge files have been installed properly. Then use the following instructions to make sure JDeveloper works with Java Access Bridge:
JavaAccessBridge.dll and WindowsAccessBridge.dll are added to the Winnt\System32 directory, as they must be in the system path in order to work with JDeveloper. If necessary, copy them from <accessbridge_home>\installer\installerFiles to the directory.
jdev.conf located in the folder %ORACLE_HOME%\jdev\bin to uncomment the AddVMOption line as shown below:
#
# Prepend patches to the bootclasspath. Currently, rtpatch.jar contains a
# patch that fixes the javax.swing.JTree accessibility problems.
# Uncomment the line below if you need to run JDeveloper under JAWS.
#
AddVMOption -Xbootclasspath/p:../../jdk/jre/lib/patches/rtpatch.jar
SetJavaVM line in the jdev.conf file as follows:
SetJavaVM hotspot
The steps above assume you are running Windows and using a Windows-based screen reader. A console window that contains error information (if any) will open first and then the main JDeveloper window will appear, once JDeveloper has started.
jdev.conf file, as described in the Help topic "JDeveloper's Connection Requirements for Oracle's Type 2 JDBC Drivers (OCI)." The jdev.conf file is in the ORACLE_HOME/jdev/bin directory, where ORACLE_HOME is the name of the Oracle9iDS Oracle Home you created during installation. Furthermore, if you want to use a version of Oracle9i client other than that certified for Oracle9iDS (and which ships with it), then you must modify two JavaLibFile entries in jdev.conf. The modified entries should read as follows, where ORACLE_HOME is the Oracle Home directory where the certified version of Oracle9i client is installed:
reports_server_name.conf, located in the %ORACLE_HOME%\reports\conf directory (Windows) or $ORACLE_HOME/reports/conf directory (UNIX).
To use the Merant JDBC drivers supplied with Oracle9iAS, install the J2EE and Web Cache install option of Oracle9iAS into the Oracle Home where you installed Oracle9iDS. Then modify the %ORACLE_HOME%\reports\conf\jdbcpds.conf file (Windows) or $ORACLE_HOME/reports/conf/jdbcpds.conf file (UNIX) to specify the driver information of the Merant JDBC drivers.
The driver information is typically the driver name, connect string format, and the driver class.
For example, an entry for the Merant driver for Sybase would look like:
<driver name = "sybase-merant" subProtocol = "merant:sybase"
connectString = "jdbc:subProtocol://databaseName"
class = "com.merant.datadirect.jdbc.sybase.SybaseDriver" ></driver>
where:
name is any unique name by which you want to refer to a specific JDBC driver you use in Reports Developer.
subProtocol is specific to each driver and you can find it in the driver documentation. For example, for the Merant driver to the Sybase database, subProtocol is merant:sybase and for sql-server database it is sqlserver.
connectString is the format of the connect string of the driver.
In the example,
jdbc:subProtocol://databaseName specifies the format.
class is the main Java class file name of the driver. This value is specific to each driver and you can find it in the driver documentation. For example, the driver class name for the Merant driver to the Sybase database is com.merant.datadirect.jdbc.sybase.SybaseDriver and, for sql-server database, it is com.merant.datadirect.jdbc.sqlserver.SQLServerDriver.
For more information, please refer to the guidelines given in the %ORACLE_HOME%\reports\conf\jdbcpds.conf file (Windows) or $ORACLE_HOME/reports/conf/jdbcpds.conf file (UNIX). You can also refer to the section called JDBC PDS in the Reports Developer online help for more information about building reports with JDBC drivers.
X:\ORACLE_HOME\owb\bin\win32\owbclient.bat
Change the parameter -mx to a larger amount of memory. Make sure you have enough RAM to support the OWB Client and all other concurrent processes.
The following instructions assume you have installed the Business Intelligence and Forms option of Oracle9i Application Server Release 2 (9.0.2), which means the two Clickstream schemas (clkrt and clkana) already exist in a database.
click.mdl into OWB.
Use the OWB import utility to import click project metadata into a pre-existing OWB repository. For specific instructions on accomplishing this task, refer to the Oracle9i Warehouse Builder User's Guide in the Oracle9i Developer Suite Documentation Library.
Click.mdl is located in %ORACLE_HOME%\click\admin\repository, where ORACLE_HOME is the name of the Oracle9iDS Oracle Home you created during installation. The .mdl file enables extension of the Clickstream Intelligence data model via OWB. This click project file contains definitions of all Oracle9iAS Clickstream Intelligence objects as they exist in Oracle9i Warehouse Builder. See Oracle9i Clickstream Intelligence Data Model Reference for information about extending the Clickstream data model.
First, create an empty EUL with the EUL Manager dialog that is part of Discoverer Administrator.
Next, use the Discoverer Administrator Import Wizard to populate the EUL with Clickstream EUL objects. This metadata is stored in the clickstream_intelligence_eul_full.eex file that is located in %ORACLE_HOME%\install\analytics\discoverer\LANGUAGE, where ORACLE_HOME is the name of the Oracle9iDS Oracle Home you created, and LANGUAGE is the two letter language code you selected during installation. The LANGUAGE variable for the clickstream_intelligence_eul_full.eex file must be the same language code as the language selected during installation.
Finally, use the Discoverer Administrator File Import utility to import the Clickstream EUL into the Clickstream Analytics schema (clkana).
For specific instructions on accomplishing the tasks, refer to the Oracle9i Discoverer Administrator Administration Guide in the Oracle9i Developer Suite Documentation Library.
The file clickstream_intelligence_eul_full.eex enables extension of the reporting functionality via Oracle9iAS Discoverer. The metadata stored in the Clickstream EUL defines the clkana database schema, which serves as the basis for extending Clickstream Analytics. For more information about Clickstream Analytics, see the Oracle9iAS Clickstream Intelligence User's Guide in the Oracle9i Application Server Documentation Library.
%ORACLE_HOME%\dbs directory (Windows) or $ORACLE_HOME/dbs directory (UNIX). You will need the following files to install Java Object support:
dejavins.sql
dejavaux.sql
derefls.plb
dereflb.plb
dedbjava.jar
SYSTEM.
If the installation is correct, then you will see the ORA_DE_REFLECTION package (derefls.plb and dereflb.plb) under the schema SYSTEM.
jinit.exe located in %ORACLE_HOME%\jinit.
During use of Designer, there are further steps that must be followed in order to run generated Oracle Forms. These steps are given in the Oracle9i Designer Release Notes.
All components have online help that is installed with the product. Some components provide additional documentation that is available on the Oracle9i Developer Suite Documentation Library CD-ROM. For information on viewing and installing the Oracle9i Developer Suite Documentation Library, see Appendix C, "Installing the Documentation Library".
For release notes and further component-specific information on postinstallation and configuration tasks, refer to the release notes and the component-specific administration or configuration guide on the documentation library CD-ROM.
For Windows users, you can access release notes and Getting Started information from the Start Menu as follows:
Start > Programs > Oracle9i Developer Suite - ORACLE_HOME > Release Notes
Start > Programs > Oracle9i Developer Suite - ORACLE_HOME > Documentation > Getting Started
Alternatively, you can point your browser to the file <ORACLE_HOME>/doc/ids902welcome/index.htm.
For documentation updates, white papers, or other collateral, please visit the Oracle Technology Network at
|
|
 Copyright © 2002 Oracle Corporation. All Rights Reserved. |
|