2
Installing and Configuring eMail Server
This chapter describes eMail Server installation and configuration procedures for new installations and upgrades.
The chapter contains these topics:
Installing eMail Server
This section contains the following tasks:
Task 1: Mount the Product CD-ROM
The Oracle product installation CD-ROM is in RockRidge format. If you are using the Solaris Volume Management software (installed by default on Sun SPARC Solaris 2.x), the CD-ROM is mounted automatically when you place it into the CD-ROM drive. If you are not using the Solaris Volume Management software, use the following procedure to mount the CD-ROM manually. You must have root privileges to mount or unmount the CD-ROM manually. Be sure to unmount the CD-ROM before removing it from the drive.
- Place the product installation CD-ROM in the CD-ROM drive.
- Log in as the
root user:
% su -root
- Create a CD-ROM mount point directory:
# mkdir mount_point_directory
- Mount the CD-ROM drive on the mount point directory and exit the root account:
# mount options device_name mount_point_directory
# exit
Task 2: Monitor Log Files
You will want to have several UNIX windows available to you during the installation process so you can monitor the installation as it happens using the log files. If any errors occur during the installation, the information in the log files will tell you where they occurred.
Monitor this log file during the Oracle Universal Installer phase of the installation:
Monitor the following two log files when you start the Setup Wizard:
Task 3: Run Oracle Universal Installer
The Oracle Universal Installer (OUI) assists you with the installation of many Oracle products. Follow these steps to run OUI:
- Log in as the user who installed Oracle products on this machine and change to the installation directory on the CD-ROM:
% cd mount_point_directory
- Ensure that the DISPLAY environment variable is set to your display address as follows:
% echo $DISPLAY.
The DISPLAY environment variable should be set to your display address. If it is not, enter the following:
% setenv DISPLAY hostname:0.0 (C Shell)
$ DISPLAY=hostname:0.0;export DISPLAY (Bourne or Korn Shell)
Ensure that xhost, while physically located on the host machine, is set to enable access to the X server on your machine. Use the following command:
% /usr/openwin/bin/xhost +
|
See Also:
See the UNIX man pages for more information on xhost
|
From the installation directory on the CD-ROM, enter the following:
% ./runInstaller
The ./runInstaller command launches the OUI and displays the Welcome screen.
Figure 2-1 OUI Welcome Screen
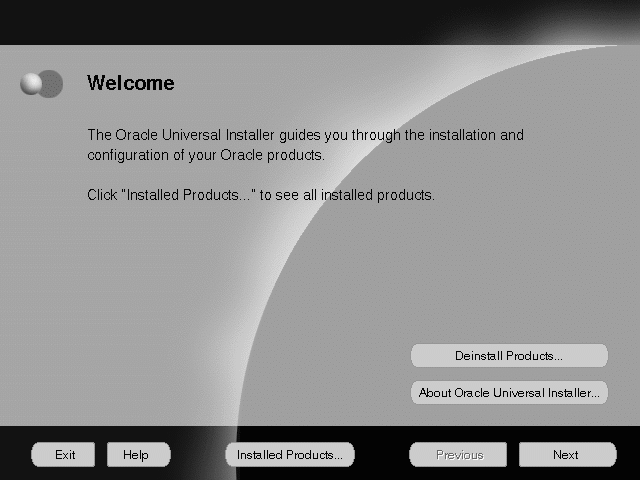
Text description of the illustration ouiweclo.gif
The following table provides information about OUI screen buttons.
LL
Using another window, enter the following to monitor the installActions.log file located in the $ORACLE_BASE/oraInventory/logs directory:
% tail -f installActions.log
Leave this window open in the background. You will notice text scrolling up that window as the installation progresses.
- Click Next to display the File Locations screen.
Task 4: Enter File Locations
At the File Locations screen, enter the locations of the source and destination files. The source file is the location from which eMail Server will be installed, while the destination is the $ORACLE_HOME where eMail Server will be installed.
Figure 2-2 OUI File Locations Screen
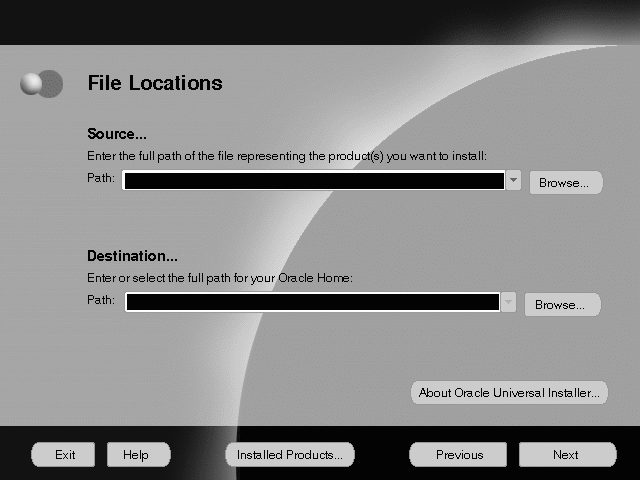
Text description of the illustration ouifilel.gif
- Enter the source and destination path information, or use the Browse button to select the source and destination directories for the installation.
- Click Next to display the Available Products screen.
Task 5: Select Available Products
At the Available Products screen, select the eMail Server products to install.
Figure 2-3 OUI Available Products Screen
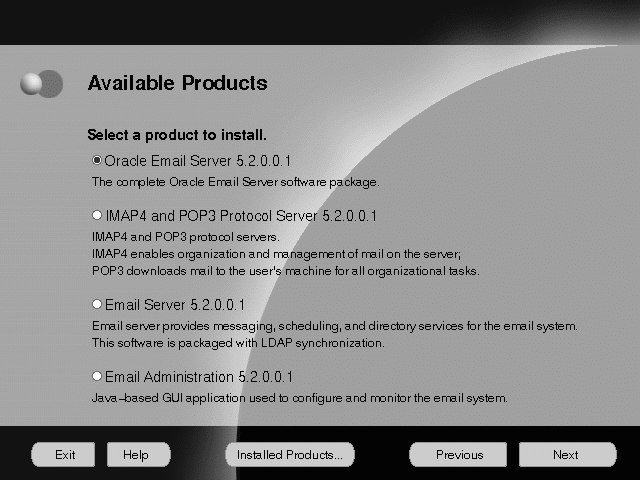
Text description of the illustration ouiavpro.gif
Select the product to install and click Next to display the Summary screen.
Task 6: Verify Installation Settings
Verify your installation settings at the Summary screen. The settings include the source and destination locations you specified; the installation type you selected; the product language; the space requirement for installation, and the space currently available; and the eMail Server products that will be installed.
Figure 2-4 OUI Summary Screen
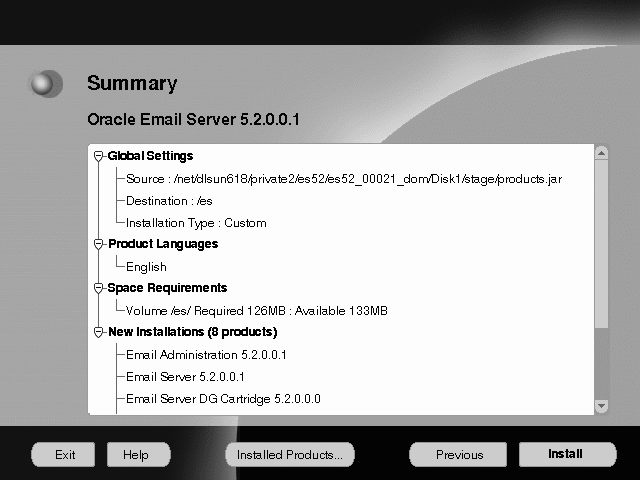
Text description of the illustration ouisumma.gif
- To change the source or destination location, or installation type, click Previous to return to the appropriate screen.
- To begin the installation, click Install to display the Install screen.
The Install screen shows the installation progress. To stop the installation, click Cancel.
Running the root.sh Script
During installation process, a dialog box prompts you to run the root.sh script.
Note:
You must run the root.sh script to set up the appropriate permissions for the servers because, prior to completing the installation, it changes the owner of the servers and sets the userid bit. This is extremely important.
|
Using a different window (one that is not monitoring the installation progress), perform the following steps to run the root.sh script:
- Log in as
root:
% su -root
- Change to the installation directory and run the
root.sh script:
# cd $ORACLE_HOME
# ./root.sh
# exit
When you have completed running the root.sh script, click OK. The installation process continues and installs the products in the specified location.
Task 7: Complete the Installation
When installation is complete, the End of Installation screen displays.To begin configuration, click the Configuration Tools button to display the Optional Configuration Tools screen. Otherwise, click Exit.
Configuring eMail Server
This section contains the following tasks:
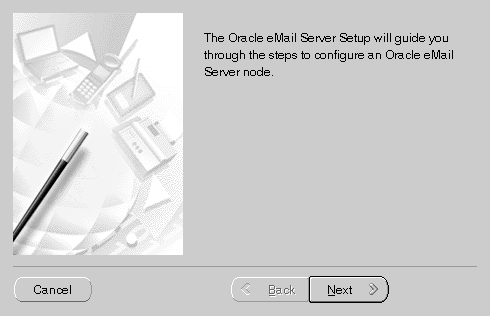
Task 1: Start the Configuration Assistant
The Configuration Assistant is designed to aid in configuring Oracle eMail Server. Launch the Configuration Assistant screen automatically or manually.
Starting the Configuration Assistant Automatically
- From the End of Installation screen, select the Configuration Tools button to display the Optional Configuration Tools screen.
Figure 2-5 Optional Configuration Tools Screen

Text description of the illustration opconfig.gif
Double click on Setup Wizard in the Configuration Tools field to display the Configuration Assistant screen.
Starting the Configuration Assistant Manually
At the operating system prompt, enter the following to launch the Configuration Assistant:
% $ORACLE_HOME/bin/imconfig
Using the Configuration Assistant
The Configuration Assistant helps configure eMail Server.
Figure 2-6 Setup Wizard Configuration Assistant Screen
Text description of the illustration configas.gif
The following table provides information about the Configuration Assistant screen buttons.
Click Next to display the Configuration Type screen.
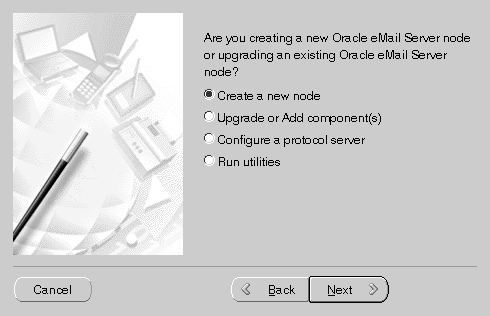
Task 2: Select the Configuration Type
The Configuration Type screen allows you to select the appropriate configuration for your installation. Use the table below to choose which is right for you.
Figure 2-7 Configuration Type Screen
Text description of the illustration configty.gif
Select the appropriate configuration type and click Next.
Task 3: Create a New Node
When you select Create a new node from the Configuration Type screen, the First Domain screen displays.
Figure 2-8 First Domain Screen
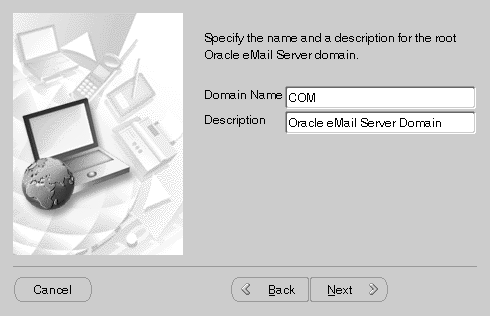
Text description of the illustration firstdom.gif
To install a new Oracle eMail Server, type the domain name and the domain description in the corresponding fields and click Next. The Default/Custom Install screen displays. Some examples of domain names are com, gov, org, and edu.
Note:
Write down the domain name you choose, as you will need it later.
|
Figure 2-9 Default/Custom Install Screen
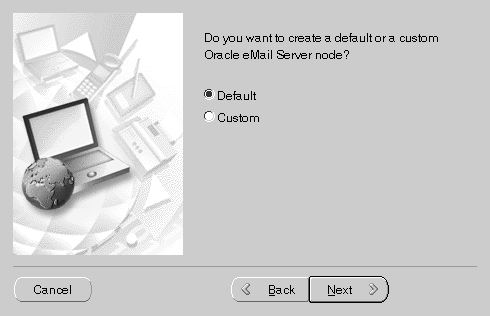
Text description of the illustration defcusin.gif
Make your selection and click Next. The next screen displayed will ask you if you have an existing database. eMail Server cannot be installed unless there is an existing database. Select Yes and click Next to proceed.
Task 4: Configure a Custom Node
Select Custom node from the Default/Custom Install screen and click Next. The First Node screen displays.
Figure 2-10 First Node Screen
Text description of the illustration firstnod.gif
From the First Node screen, you can make the following selections:
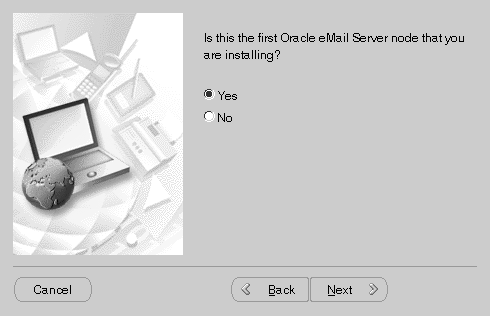
Installing Your First Oracle eMail Server Node
If this is the first eMail Server node you are installing, select Yes from the First Node screen and click Next. The Node Information screen displays.
Figure 2-11 Node Information Screen

Text description of the illustration nodeinfo.gif
- At the Node Information screen, if you choose not to use the default node name and description of ESNODE and Oracle eMail Server, respectively, enter your node name and description and click Next.
Note:
If you choose to change the node name and description at this time, be sure to write down the node name you choose, because you will be asked to enter it later. Also, you may change the values of these two fields, and the values of subsequent fields, later.
|
The First Community screen displays.
Figure 2-12 First Community Screen
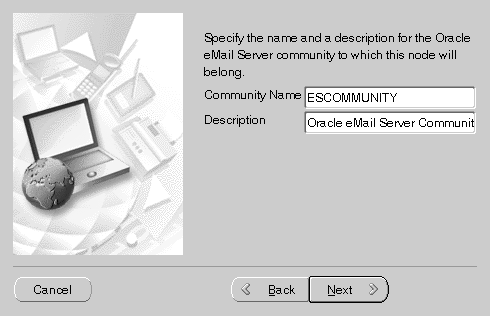
Text description of the illustration firstcom.gif
At the First Community screen, enter the community name and the descriptions and click Next. The TNS Connection screen displays.
Figure 2-13 TNS Connection Screen
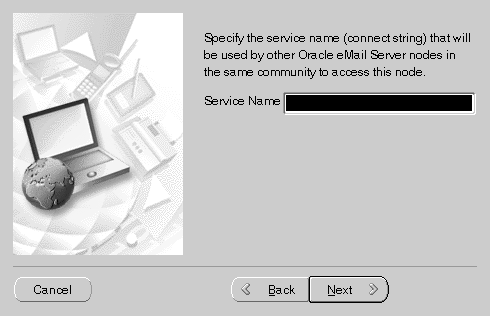
Text description of the illustration tnsconn.gif
At the TNS Connection screen, specify the service name or connect string in the Service Name field that will be used by other Oracle eMail Server nodes in the same community to access this node. Click Next to display the Time Zone screen.
- At the Time Zone screen, select the time zone for your area from the dropdown list and click Next. The ADMIN User screen displays.
Figure 2-15 Admin User Screen

Text description of the illustration adminuse.gif
At the Admin User screen Enter the admin password and confirmation password and click Next. The User Account screen displays.
Figure 2-16 User Account Screen

Text description of the illustration useracct.gif
At the User Account, enter the eMail Server database password and confirmation password in the corresponding fields and click Next. The eMail Protocol screen displays.
Note:
Remember to write down the passwords you entered for Steps 5 and 6.
|
Proceed to "Task 9: Enable the IMAP4 and POP3 Servers".
Installing Additional Oracle eMail Server Nodes
Note:
Additional eMail Server nodes must be installed on a different database, with a different $ORACLE_HOME, from the initial installation.
|
- At the First Node screen, if this is not the first eMail Server node you are installing, select No and click Next. The Sponsor Node screen displays.
Figure 2-17 Sponsor Node Screen
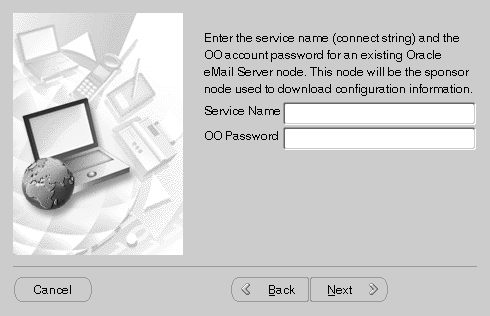
Text description of the illustration sponsorn.gif
Enter the service name and OO password and click Next. The Node Definition screen displays.
Figure 2-18 Node Definition Screen
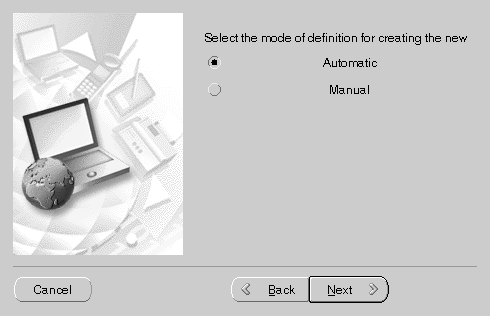
Text description of the illustration nodedef.gif
At the Node Definition screen, select the mode of definition for creating the new Node and click Next. The New Domain screen displays.
Figure 2-19 New Domain Screen
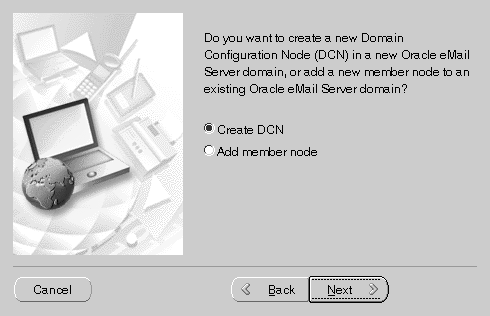
Text description of the illustration newdom.gif
At the New Domain Screen, choose one of the following:
Creating a New Domain Configuration Node
Note:
Additional domain configuration nodes must be installed on a different database, with a different $ORACLE_HOME, from the initial installation.
|
To create a domain configuration node (DCN), select Create DCN from the New Domain screen (see Figure 2-19) and click Next. The Domain Parent screen displays.
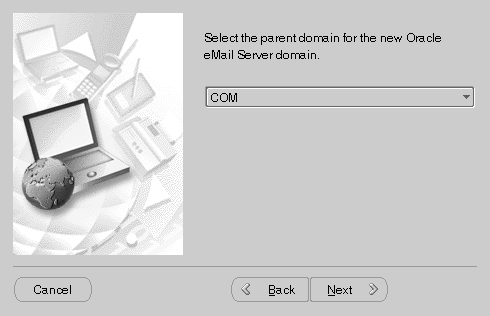
Figure 2-20 Domain Parent Screen
Text description of the illustration dompar.gif
- Click the drop down list, select the parent domain, and click Next. The Domain Information screen displays.
Figure 2-21 Domain Information Screen

Text description of the illustration dominfo.gif
At the Domain Information screen, enter the domain name and description and click Next. The New Node Information screen displays.
Figure 2-22 New Node Information Screen
Text description of the illustration nodeinfo.gif
At the New Node Information screen, enter the node name and description and click Next. The Select Community screen displays.
Figure 2-23 Select Community Screen
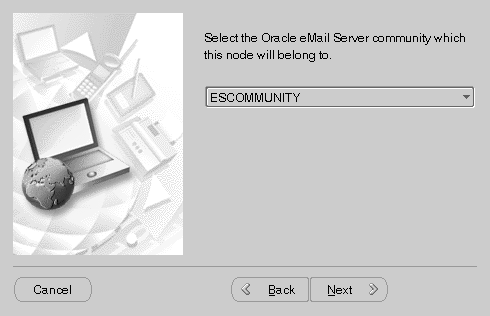
Text description of the illustration selcomm.gif
At the Select Community screen, select the Oracle eMail Server community of the node from the dropdown list and click Next. The TNS Connection screen displays (see Figure 2-13).
In the Service Name field of the TNS Connection screen, enter the service name and click Next. The Time Zone screen displays (see Figure 2-14).
At the Time Zone screen, select the time zone for your area from the dropdown list and click Next. The Admin User screen displays (see Figure 2-15).
At the Admin User screen enter the admin password and confirmation password and click Next. The User Account screen displays (see Figure 2-16).
At the User Account screen enter the eMail Server database password and confirmation password and click Next.
Proceed to "Task 9: Enable the IMAP4 and POP3 Servers".
Adding a Member Node
To add a member node to an existing Oracle eMail Server domain, select Add member node from the New Domain screen (see Figure 2-19) and click Next. The Select Domain screen displays.
- Click on the dropdown list, select the parent domain, and click Next. The New Node Information screen displays (see Figure 2-11).
- At the New Node Information screen, enter the domain name and the domain description and click Next. The Select Community screen displays (see Figure ).
- From the dropdown list, select the Oracle eMail Server community to which this node will belong and click Next. The TNS Connection screen displays (see Figure 2-13).
- In the Service Name field of the TNS Connection screen, enter the service name and click Next. The Time Zone screen displays (see Figure 2-14).
- At the Time Zone screen, select the time zone for your area from the dropdown list and click Next. The Admin User screen displays (see Figure 2-15).
- At the Admin User screen, enter the admin password and confirmation password and click Next. The User Account screen displays (see Figure 2-16).
- At the User Account screen, enter the eMail Server database password and confirmation password and click Next.
- Proceed to "Task 9: Enable the IMAP4 and POP3 Servers".
Task 5: Upgrade an Existing eMail Server Node
Note:
Before running setup wizard to upgrade to eMail Server Version 5.2, the user has to copy all config files from the old
$ORACLE_HOME/office/admin to the new
$ORACLE_HOME/office/admin.
|
If the previous installation does not use default tablespace names for Oracle eMail Server objects, you need to create the default tablespaces as described below before starting the upgrade.
- To create default tablespaces, use SQL*Plus as the SYS user and run the
deftblspc.sql script located in the
$ORACLE_HOME/office/admin/rsql directory:
% cd $ORACLE_HOME/office/admin/rsql
% sqlplus SYS/SYS_password
SQL> @deftblspc.sql
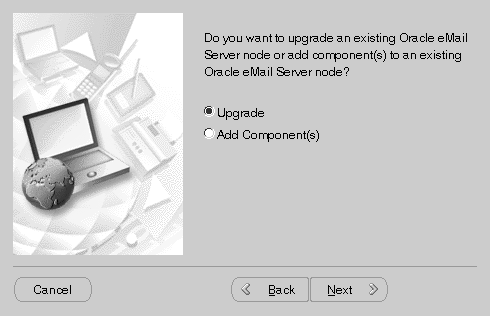
From the Configuration Type screen (see Figure 2-7), select Upgrade or Add component(s) and click Next. The Upgrade screen displays.
Figure 2-24 Upgrade Screen
Text description of the illustration upgrade.gif
From the Upgrade screen, select Upgrade and click Next. The Existing Node screen displays.
Figure 2-25 Existing Node Screen
Text description of the illustration exnode.gif
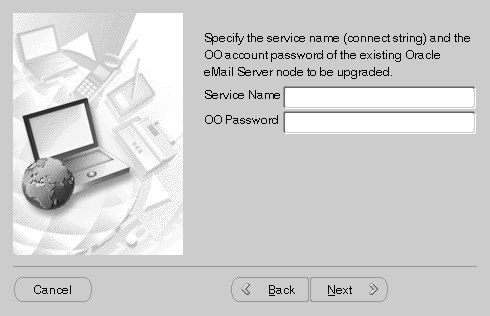
At the Existing Node screen enter the Service Name and OO Password and click Next. The Begin Upgrade screen displays.
Figure 2-26 Begin Upgrade Screen
Text description of the illustration begupgr.gif
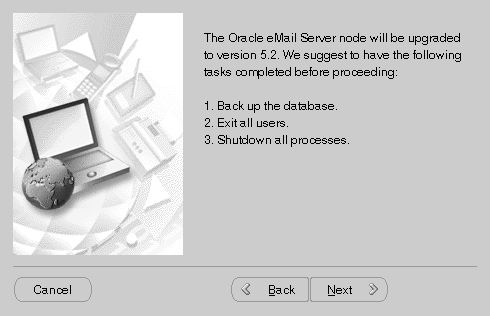
Once you have completed the steps listed, click Next. The DCN Version screen displays.
Figure 2-27 DCN Version Screen

Text description of the illustration dcnver.gif
If the DCN version is 4.03 or greater, select Yes. Otherwise select No and click Next. In either case, the following steps and screen displays are the same.
- To determine your DCN version, enter:
% oomgr
The computer returns the following:
Oracle eMail Server Manager: Release #
The Release # is your version.
Figure 2-28 Database User Screen
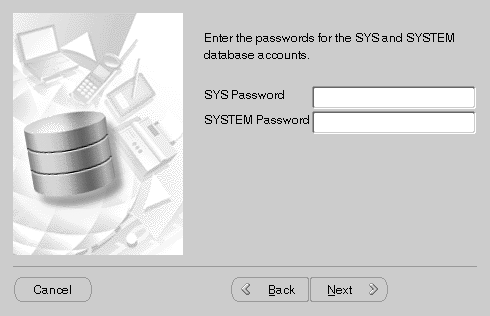
Text description of the illustration dbuser.gif
At the Database User screen, enter the SYS and SYSTEM Passwords and click Next. The CTXSYS User screen displays.
Figure 2-29 CTXSYS User Screen
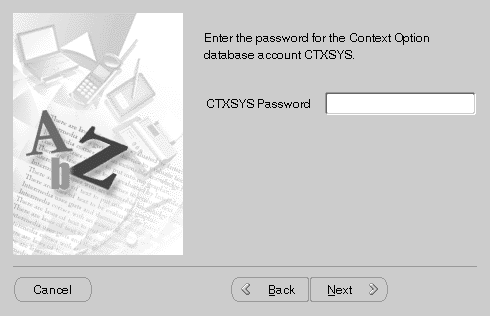
Text description of the illustration ctxsysus.gif
Note:
If you installed Oracle interMedia prior to installing Oracle eMail Server, then enter in your CTXSYS password as instructed in Step #6. If you did not install Oracle interMedia prior to Oracle eMail Server, the Configuration Assistant skips the CTXSYS screen.
|
At the CTXSYS User screen, enter in the CTXSYS password (the default CTXSYS Password is CTXSYS) and click Next. The Begin Setup screen displays.
At the Begin Setup screen, click Next to begin configuration, or click Cancel to exit the Configuration Assistant.
Task 6: Add Components to an Existing Node
From the Configuration Type screen (see Figure 2-7), select Upgrade or Add component(s) and click Next. The Upgrade screen displays (see Figure ).
- Select Add Components and click Next. The Existing Node screen displays (see Figure ).
- At the Existing Node screen, enter the service name and OO password and click Next. The Email Protocol screen displays.
Task 7: Configure a Protocol Server
This section describes the procedures for configuring a protocol server.
- From the Configuration Type screen (see Figure 2-7), select Configure a protocol server and click Next. The Existing Node screen displays (see Figure ).
- At the Existing Node screen, enter the service name and OO password and click Next. The Guardian screen displays.
Figure 2-30 Guardian Screen
\
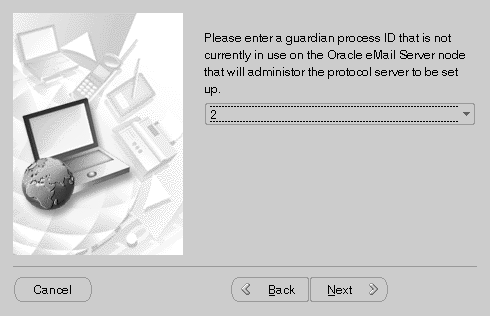
Text description of the illustration guard.gif
Select a Guardian Process ID that is not being used by the eMail Server node, and click Next.
Proceed to "Task 9: Enable the IMAP4 and POP3 Servers".
Task 8: Run Utilities
This section describes the procedures to perform the following functions:
The Utilities Menu, obtained from the Configuration Type screen, allows you to perform these functions.
Generating an SSL Certificate
Use the following procedure to generate an SSL certificate.
- At the Configuration Type screen (see Figure 2-7), select Run Utilities and click Next. The Utility screen displays
Figure 2-31 Utility Screen
.
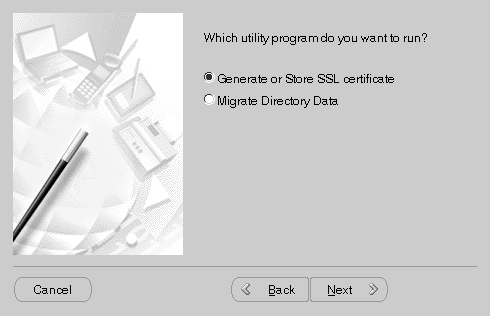
Text description of the illustration utility.gif
Select Generate or Store SSL Certificate and click Next. The Generate SSL screen displays.
Figure 2-32 Generate SSL Screen
Text description of the illustration genssl.gif
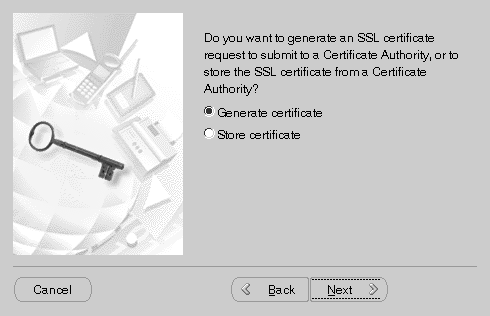
Select Generate Certificate and click Next. The Certify SSL screen displays.
Figure 2-33 Certify SSL
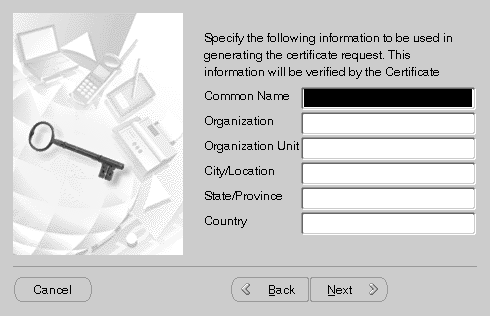
Text description of the illustration certssl.gif
Specify the Common Name, Organization, Organization Unit, City/Location, State/Province, and Country. See the table below for more information.Click Next to display the SSL Contact screen.
Figure 2-34 SSL Contact Screen
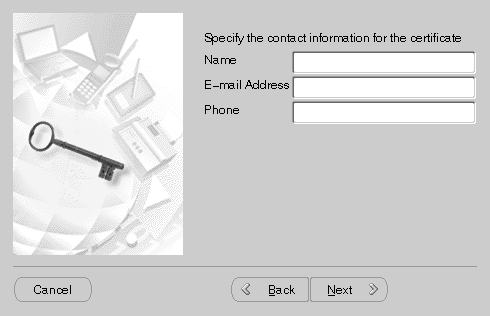
Text description of the illustration sslcont.gif
Specify the contact information for the certificate and click Next. The SSL Password screen displays.
Figure 2-35 SSL Password Screen
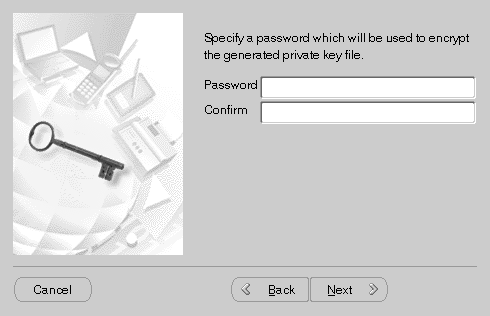
Text description of the illustration sslpass.gif
Enter the password and click Next. The SSL Processing screen displays.
At the SSL Processing screen, click Next to complete the process and generate a certificate.
Storing an SSL Certificate
Use the following procedure to store an SSL certificate.
- At the Configuration Type screen (see Figure 2-7), select Run Utilities and click Next. The Utility screen displays.
- Select Store certificate and click Next. The SSL Admin screen displays.
Figure 2-36 SSL Admin Screen
Text description of the illustration ssladmin.gif
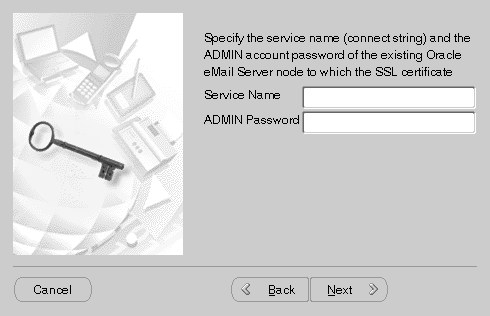
At the SSL Admin screen, enter the service name and admin password and click Next. The SSL/Protocol screen displays.
Figure 2-37 SSL/Protocol Screen
Text description of the illustration sslprot.gif
At the SSL Admin Password screen, enter the service name and admin password and click Next. The SSL/Protocol screen displays.
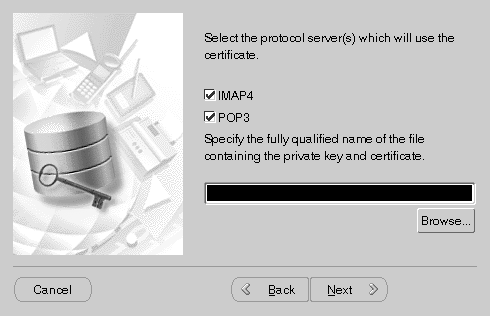
At the SSL/Protocol screen, select the protocol server or servers that will be using the SSL certificate. You can select one or both protocol servers.
Enter the file location of the private key and certificate. You can also click Browse to find the location.
Click Next. The Password Specification screen displays.
At the Password Specification screen, enter the password you want to use to encrypt and decrypt the private key.
In the Confirm field of the Password Specification screen, enter the password again to confirm the password and click Next. The Generate Certificate Request screen displays.
Click Next to generate the certificate, or click Cancel to exit the Configuration Assistant.
Migrating Directory Data
Use the following procedure to migrate directory data.
- At the Configuration Type screen (see Figure 2-7), select Run Utilities and click Next. The Utility screen displays.
- At the Utility screen, select Migrate Directory Data and click Next. The Existing Node screen displays (see Figure ).
- At the Existing Node screen, enter the Service Name and OO Password and click Next. The Migration screen displays.
Figure 2-38 Migration Screen
Text description of the illustration migratio.gif
Select the domain, specify your admin password, and click Next. The LDAP Migration screen displays.
Click Next to start directory data migration, or click Cancel to exit the Configuration Assistant.
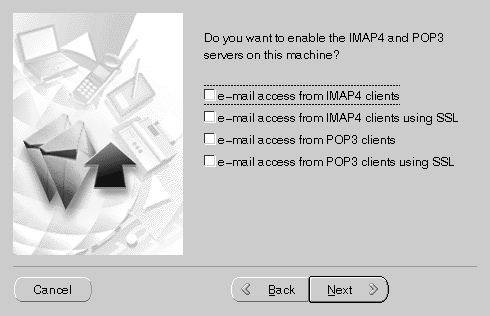
Task 9: Enable the IMAP4 and POP3 Servers
You have been directed to this part of the installation from various locations depending upon which configuration you are using. Use the following procedure to enable IMAP or POP3 servers.
- At the Email Protocol screen, select the IMAP4 and POP3 servers you want to enable and click Next.
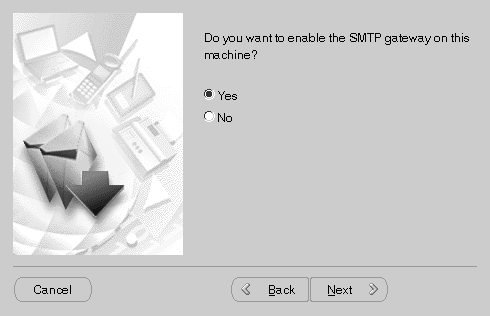
- You can select more than one option. The SMTP Gateway screen displays.
Figure 2-40 SMTP Gateway Screen
Text description of the illustration smtpgate.gif
Task 10: Enable the SMTP Gateway
Use the following procedure to enable SMTP.
- At the SMTP Gateway screen, select Yes and click Next. The Gateway screen displays.
Figure 2-41 Gateway Screen

Text description of the illustration gateway.gif
At the Gateway screen, select Define and configure a new gateway or Configure a previously defined gateway, and click Next. The SMTP Information screen displays.
Figure 2-42 SMTP Information Screen
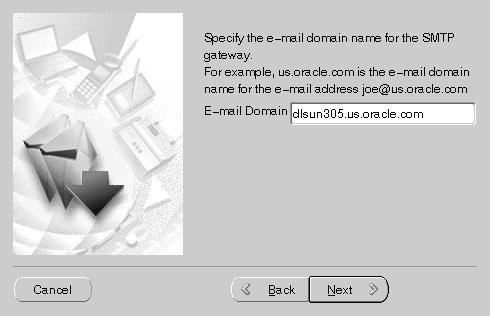
Text description of the illustration smtpinfo.gif
At the SMTP Information screen, enter the e-mail domain for the SMTP gateway and click Next. The LDAP screen displays.
Figure 2-43 LDAP Screen
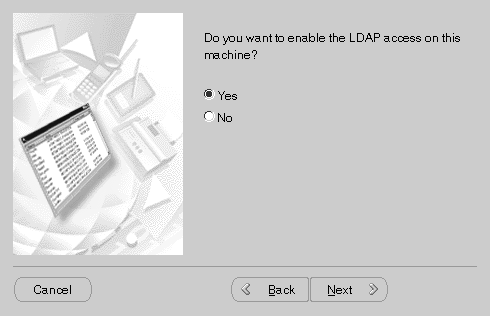
Text description of the illustration ldap.gif
If you do not want to enable LDAP, select No and click Next. Go to "Task 12: Complete the Configuration"
Task 11: Enable LDAP
- To enable LDAP, at the LDAP screen, select Yes and click Next. The LDAP Server screen displays.
Figure 2-44 LDAP Server Screen

Text description of the illustration ldapserv.gif
At the LDAP Server screen, select the directory server with which you want the eMail Server directory to synchronize and click Next. The Synchronization screen displays.
Figure 2-45 Synchronization Screen
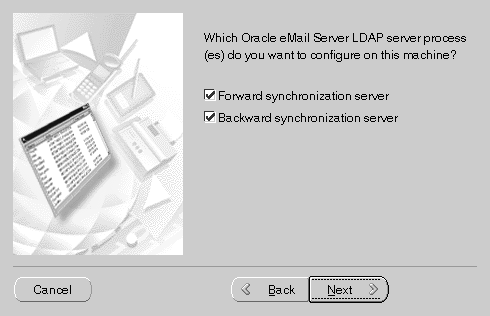
Text description of the illustration synch.gif
At the Synchronization screen, select the server process or processes you want to configure. You can select more than one. See the table below for more information.
Once you have made your selection, click Next.
Forward Synchronization Parameters
- From the Synchronization screen, select Forward synchronization server (or both Forward and Backward synchronization server) and click Next. The Forward Synchronization screen displays.
Figure 2-46 Forward Synchronization Screen
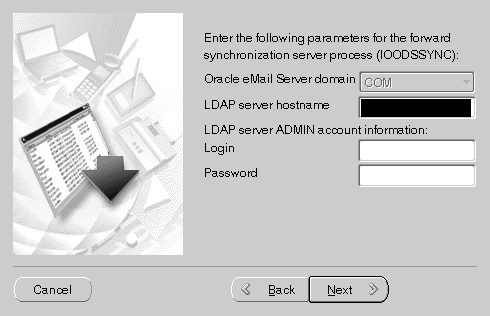
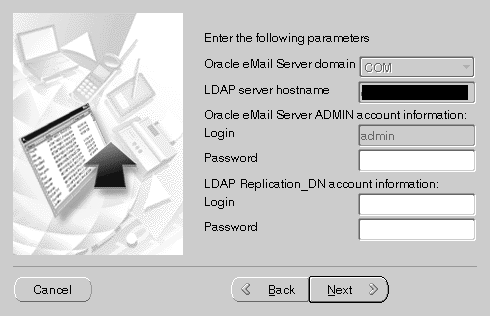
Text description of the illustration forsynch.gif
Enter the LDAP server hostname and the LDAP server ADMIN account login and password, and click Next.
Backward Synchronization Parameters
From the Synchronization screen, select Backward synchronization server (or both Forward and Backward sycnchronization server) and click Next. The Backward Synchronization screen displays.
Figure 2-47 Backward Synchronization Screen
Text description of the illustration backsync.gif
- Enter the eMail Server Admin account login and password, and the LDAP Replication_DN account login and password, and click Next. The Database screen displays.
- At the Database screen, you are asked if you have an existing database. Select Yes and click Next. The Database Connection screen displays.
Figure 2-48 Database Connection Screen
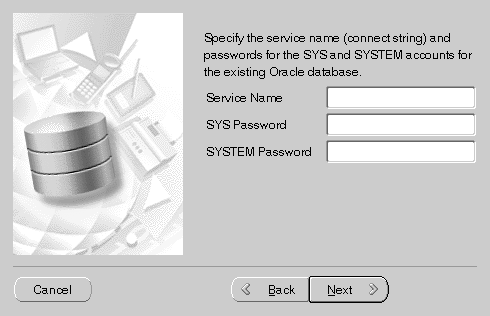
Text description of the illustration dbconn.gif
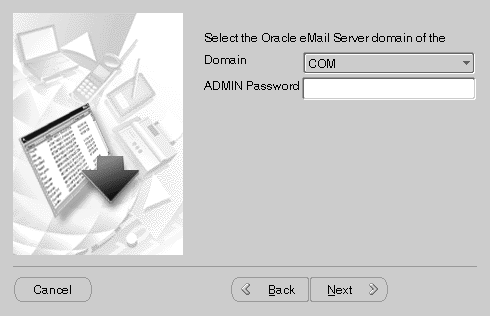
At the Database Connection screen, enter the Service Name, SYS Password, and SYSTEM Password, and click Next. The CTXSYS User screen displays (see Figure 2-30).
See "Task 12: Complete the Configuration" to complete this procedure.
Task 12: Complete the Configuration
Use the following procedure to complete configuration of the eMail Server system.
- At the Database screen, click Next. The Database Connection screen displays (see Figure 2-48).
- At the Database Connection screen, enter the Service Name, SYS Password, and SYSTEM Password, and click Next. The CTXSYS User screen displays.
- If you installed Oracle interMedia prior to installing Oracle eMail Server, proceed to Step 3.
- If you did not install Oracle interMedia prior to Oracle eMail Server, proceed to Step 6.
- At the CTXSYS User screen, type in the CTXSYS password (the default CTXSYS Password is
CTXSYS) and click Next. The Begin Setup screen displays.
- Click Next to start the configuration, or click Cancel to exit the Configuration Assistant.