Release 4.1
A90225-02
Library |
Solution Area |
Contents |
Index |
| Oracle Applications InterConnect User Guide Release 4.1 A90225-02 |
|
This chapter describes the design time concepts and iStudio. In addition, this chapter describes how to perform important tasks using iStudio.
This chapter discusses the following topics:
Application integration using Oracle Applications InterConnect involves the following two phases:
During the design phase, a business analyst uses iStudio to define the integration objects, applications which participate in the integration, and the specifications of the data exchanged between applications. All the specifications are stored as metadata in the Oracle Applications InterConnect Repository.
For each application participating in a specific integration, Oracle Applications InterConnect attaches one or more adapters to it. At runtime, the adapters retrieve the metadata from the Repository to determine the format of messages, perform transformations between the various data formats, and route the messages to the appropriate queues in the Oracle Applications InterConnect hub.
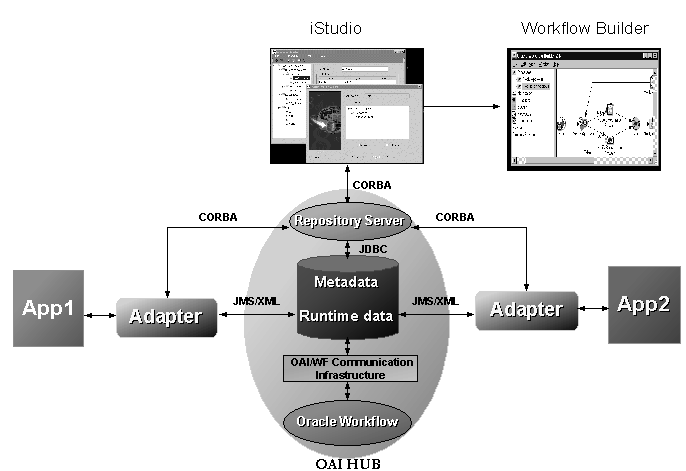
iStudio exposes an integration methodology that eliminates the complexities of point-to-point custom integration solutions. The integration methodology is based on a hub-and-spoke model.
An integration point is defined as an "event" that triggers communication between two or more participating applications in the integration scenario. The following are examples of such "events:"
App2 also. Therefore, "Create Customer" is an "event" that triggers the communication between the two applications--App1 produces the information, App2 consumes it.
App1, it is necessary to query App2 for information on the item. Therefore, "Get Item Info" is an integration point between the two applications because it triggers communication between the two applications--App1 produces a query, App2 consumes it, App2 produces the response, and App1 consumes it.
The common view consists of a list of such integration points, each with its own associated data. Applications participate in the integration by binding to one or more of these common view integration points.
In the context of each binding, applications have their own application view of data that needs to be exchanged. Each binding involves mapping, or transformation, between the application view and the common view in the context of the integration point. In this model, the application views are at the spokes and the common view is the hub.
The Create Customer example helps to explain Figure 2-2, "Oracle Applications InterConnect Hub-and-Spoke Model". Create Customer is an integration point. If the information to exchange is the new customer's name only, then the common view has all the information potentially captured in a name defined in an application-independent way. In the very least, this information must be a superset of all the information that needs to be exchanged across App1 and App2.
Prefix, First Name, Last Name, Middle Initial, Maiden Name, Suffix is an example of a common view customer name definition.
Now, App1's internal "definition" of name (App1's application view) could be First Name, Last Name, Middle Initial, Prefix.
App2's application view could be Name (one field that contains Last Name, First Name).
For App1, in the context of sending this information out or publishing an event, transformations are defined from its application view to the common view. For App2, in the context of receiving this information or subscribing to an event, transformations are defined from the common view to its application view.
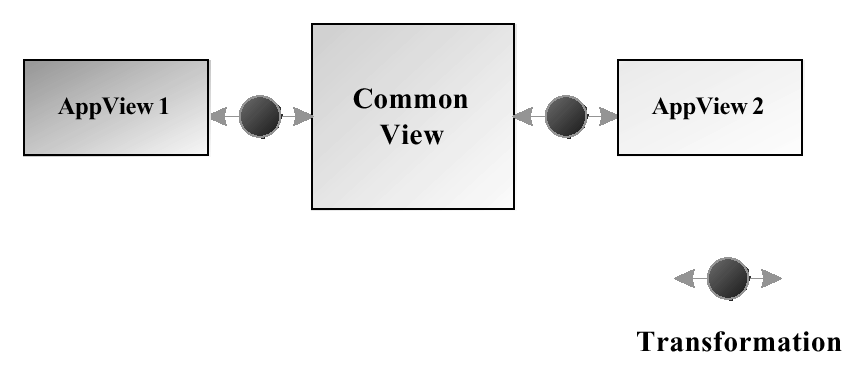
This hub-and-spoke model has the following advantages:
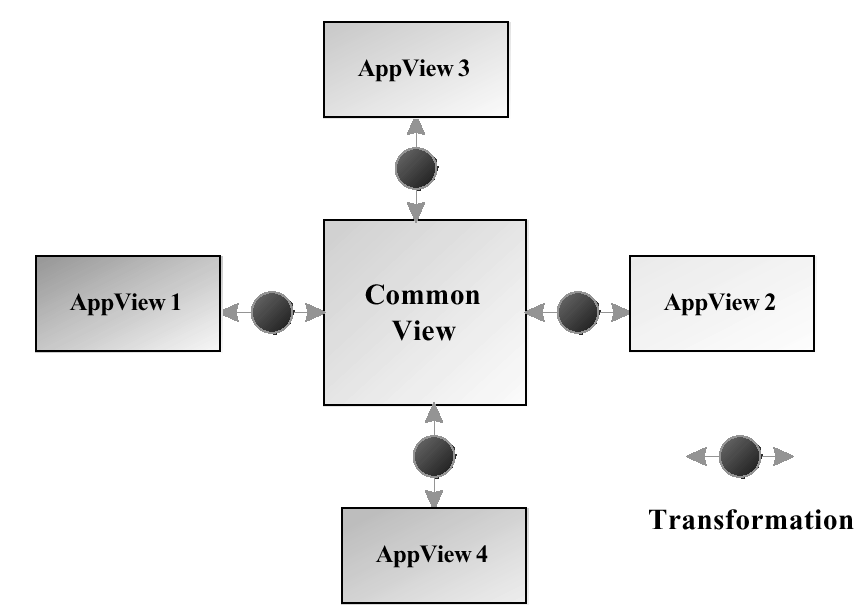
In the diagram below, App3 and App4 have been added to the integration scenario by plugging them into the common view. This does not affect the integration of App1 or App2.
Oracle Applications InterConnect supports the following messaging paradigms:
These paradigms are defined in iStudio at design time. The definitions are used at runtime to route the messages appropriately.
An application publishes a message if it sends data out to the Oracle Applications InterConnect hub without knowing the destination applications. Furthermore, it does not expect any data in return. An application subscribes to a message if it receives the data from the Oracle Applications InterConnect hub regardless of who sent out the data. Furthermore, it does not send any data out in return. Events in iStudio are used to model this paradigm.
If an application publishes a message and expects a message in return as a reply, it is participating in the Request/Reply paradigm. The application subscribing to the request sends a reply back to the sender after consuming the request. Procedures in iStudio are used to model this paradigm. Request/Reply has the following two flavors:
Both Publish/Subscribe and Request/Reply can take a point-to-point characteristic if the sending application explicitly calls out which application should receive the message. This can be modeled through content-based routing in iStudio.
iStudio is the design time modeling tool for Oracle Applications InterConnect. iStudio has several concepts explained in this section. The following concepts are discussed:
A workspace stores user settings and preferences such as application login credentials and last opened project. Inside a workspace, users can work on multiple projects.
A project in iStudio encapsulates all the integration logic for one integration scenario. An integration scenario is defined as a set of two ore more applications integrated with each other using Oracle Applications InterConnect. One project corresponds to one repository. For example, a user may have a development integration environment and a production integration environment. These are two separate projects and must, therefore be self-contained in their own separate repositories.
Since iStudio is a multi-user tool, multiple users can work on the same project simultaneously without jeopardizing the integrity of the metadata. To create a project in iStudio, a repository connection must be defined.
Each component integrated with Oracle Applications InterConnect is referred to as an application. Each application expresses interest in specific messages, what its internal data type is, and how the message should be mapped to or from that internal type to the external world.
As described earlier in this chapter, Oracle Applications InterConnect follows a hub-and-spoke integration methodology. The common view is the "hub view" of the integration where each spoke is the application that wishes to participate in the integration. The common view consists of the following elements:
An integration point is defined as any "event" triggering communication across two or more applications. Consider the following examples with two applications, App1 and App2.
App1, the customer should also be created in App2. Therefore, "Create Customer" is an "event" triggering the communication between the two applications--App1 produces the information, App2 consumes it.
App1 requests information on some item stored in App1. The information on that item may be segmented across the two applications. To give a meaningful response to the user of App1 it is necessary to query App2 for information on the item. Therefore, "Get Item Info" is an integration point between the two applications because it triggers communication between the two applications--App1 produces a query, App2 consumes it, App2 produces the response, App1 consumes it.
Business Objects are a collection of logically related integration points. For example, Create Customer, Update Customer, Delete Customer, Get Customer Info are all integration points that logically belong under a Customer business object. In other words, a business object is a way to organize integration points in iStudio.
An event is an integration point used to model the Publish/Subscribe paradigm. An event has associated data which is the common view of all the data to be exchanged through this event. In other words, the data associated with an event in the common view must be a superset of the data of participating applications.
For example App1 and App2 publishes customer names and App3 subscribes to it. If App1 publishes First Name, Last Name, and Middle Initial, and App2 publishes First Name, Last Name, Middle Initial, Prefix, and Suffix, the event could be defined as follows:
New Customer Event
Prefix
First Name
Last Name
Middle Initial
Suffix
|
Note: Standard application-independent definitions can be used for event-associated data in the common view such as Open Applications Group XML business object definitions. |
A procedure is an integration point used to model the Request/Reply paradigm. This is a modeling paradigm only, no actual procedures are called. An application can either invoke a procedure to model sending a request and receiving a reply, or implement a procedure to model receiving a request and sending a reply. Similar to events, a procedure has associated data. While an event is only associated with one data set, a procedure has two data sets--one for the request or IN data and one for the reply or OUT data.
For example, if a Get Address procedure is defined so that the request contains the social security number for a person and the reply contains the address in four fields--Street, City, Zip, State, then the procedure is defined as follows:
get Address Procedure
SS# IN
Street OUT
City OUT
Zip OUT
State OUT
Procedures can be used to implement both synchronous and asynchronous request/reply.
|
Note: Standard application-independent definitions can be used for procedure-associated data in the common view such as Open Applications Group XML business object definitions. |
When defining the data associated with an event or a procedure, it is possible to define the data once and reuse it for different integration points. Common data types are used to define such data for reuse and is especially useful for defining complex hierarchical data.
For example, a purchase order contains a header object and an array of line item objects. In addition, the Header object contains two address objects: Bill To and Ship To. Therefore, the purchase order can be defined once and used for other purchase order-related integration points such as Create Purchase Order, Update Purchase Order, and Get Purchase Order. Moreover, Address can be defined once and used in the Bill To and Ship To addresses.
For participating in the integration, each application has its own application view of data. This application view of data plugs into the common view through transformations.
Transformations are in the context of one integration point. For example, an event is created for transferring customer names across applications:
Common View Event New CustomerPrefix First Name Last Name Middle Initial SuffixApplication View for App1 that publishes the eventFirst Name Last Name Middle InitialApplication View for App2 that subscribes to the eventName -- One field which contains First Name and Last Name separated by a comma.
When publishing or subscribing to the event, iStudio users must map the application view for App1 and App2 to the common view using transformations. There are twenty-seven built-in transformation routines provided with Oracle Applications InterConnect which are used to build complex mappings. In addition, the iStudio SDK allows users to create new transformation routines using Java, import them into iStudio to add to the built-in list, and use them just like a built-in routine.
Application data types have the same function as Common Data Types but are in the context of a particular application.
iStudio supports versioning for application and common data types, events, procedures, and messages.
An owner is the creator of the object and only the creator of an object can modify the object. However, other users can create new versions or copy the original object under a new name. The owner is specified at the time of Repository installation.
In the following example, the metadata is created at Oracle Corporation and at the time of Repository installation, Oracle Applications InterConnect is specified as the owner of the metadata. The following functionality is available for versioning:
OAI and the version is V1. This event name is NewCustomerEvent/OAI/V1.
In the example, all the metadata is built at Oracle Corporation and this metadata can be transmitted to the customer, NewCorp. When NewCorp installs the repository and specifies the owner as NewCorp, the metadata is in a read-only state. If NewCorp wants to customize NewBigCustomerEvent/OAI/V1, they cannot modify the existing version since the owners are different. However, they can use the other features described.
To customize the metadata, NewCorp must create a new version so that NewBigCustomerEvent/OAI/V1 and NewBigCustomerEvent/NewCorp/V2 coexist in the repository. NewCorp can use both events in defining messages if required and NewCorp can now modify the event it owns.
Event maps allow you to map application data to an Oracle Applications InterConnect event without the application having to know about the Oracle Applications InterConnect event itself. For example, if an application is publishing a Create Customer event, it doesn't have to explicitly say that the message it is publishing corresponds to an Oracle Applications InterConnect Create Customer event. Instead, in iStudio, you can associate certain fields in the application view to help Oracle Applications InterConnect figure out which event the message maps to.
Event maps allow application data to be mapped to an Oracle Applications InterConnect event without the application needing to know about the event itself. For example, if an application publishes a Create Customer event, it does not need to explicitly specify that the message it is publishing corresponds to the Oracle Applications InterConnect Create Customer event. Instead, using iStudio, certain fields can be associated with the application view to help determine which event the message maps to.
In addition, if an application publishes exactly the same structure of data for two or more events, event maps help Oracle Applications InterConnect distinguish which message corresponds to which event. For example, an application publishes the same Customer Application Data Type regardless of whether it is a Create Customer or an Update Customer event. Through event map, Oracle Applications InterConnect can determine which messages correspond to Create Customer and Update Customer.
Messages can be routed to specific applications based on business rules or message content. For example, a procurement system can route fulfillment requests to different fulfillment centers based on originating location or item requested. iStudio provides support for defining the business rules through wizard-based point-and-click steps.
Keys for corresponding entities created in different applications can be correlated through cross referencing. For example, a purchase order created in a procurement system has a native id X. It is then routed to a fulfillment system. The purchase order is created in the fulfillment system with native id Y. X and Y must be cross referenced so Oracle Applications InterConnect can correlate communication about this same logical entity in two different systems without each system knowing the native ids of the other.
Code tables can be mapped across systems using domain value mapping. For example, a purchase order in a procurement system has a purchase order status field with possible domain values of Booked and Shipped. The corresponding field in a fulfillment system has the domain value set of 1 and 2. Oracle Applications InterConnect creates mappings such as booked=1 and shipped=2 so these values can be correlated at runtime without each system knowing the domain value set of the other.
In the Oracle Applications InterConnect hub, Advanced Queues in the database are used to store, route, and forward messages from the sending application adapters to the receiving application adapters. The following paradigm is used for routing messages. The sending adapters evaluate who the recepients are based on metadata.
Tracking fields are one or more application view fields in the context of a particular message. If specified in iStudio, tracking fields can be used to track messages at runtime using the Oracle Applications InterConnect Runtime Management Console. Tracking is executed only from the perspective of the sending application.
For example, if App1 publishes a new purchase order and specifies the purchase order number field as the tracking field, then the user can log into the runtime console and specify the message to track, or New Purchase Order in this case. The user is then prompted to enter the purchase order number to display the corresponding tracking information.
iStudio is the graphical development tool that implements the Oracle Applications InterConnect concepts.
The following graphic displays the iStudio toolbar. You can also select the tasks by clicking the icons in the toolbar.

The following topics discuss workspaces and projects.
For more information on projects, see "Projects". To define a new project in iStudio:
The New Project Dialog displays:


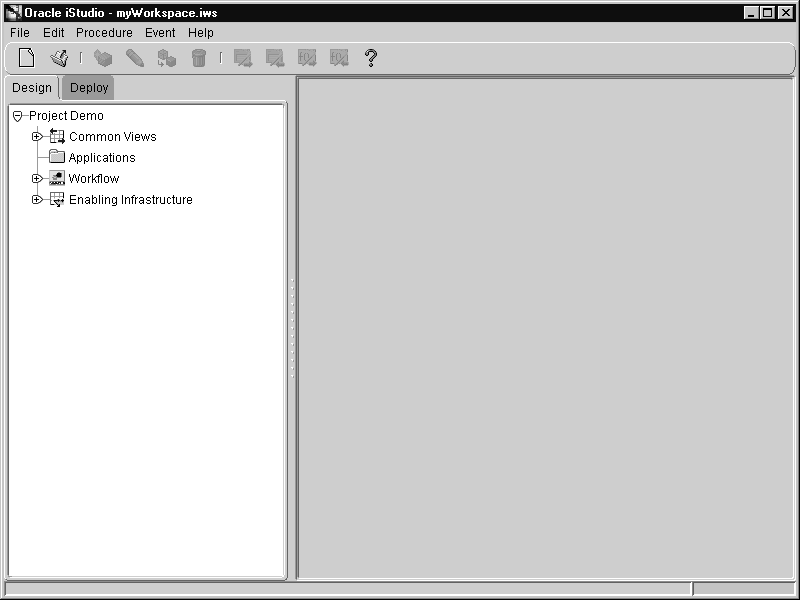
When you start iStudio, the default workspace myWorkspace.iws and the last opened project is automatically loaded. To save the SAP and DB login credentials, check the Save settings as default checkbox in the SAP and DB login dialogs. The user settings are automatically saved to the workspace. For more information on workspaces, see "Workspaces".
To create a new workspace:
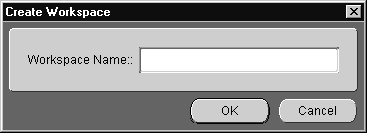
To open a workspace that has already been created:

iStudio generates stored-procedure stubs to enable an application to interface with the Oracle Applications InterConnect run-time easily. These stubs are exported to a file using the export functionality.
To export stored-procedures:

For more information on business objects, see "Business Objects". To create a new business object:
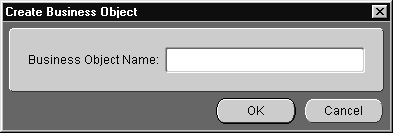
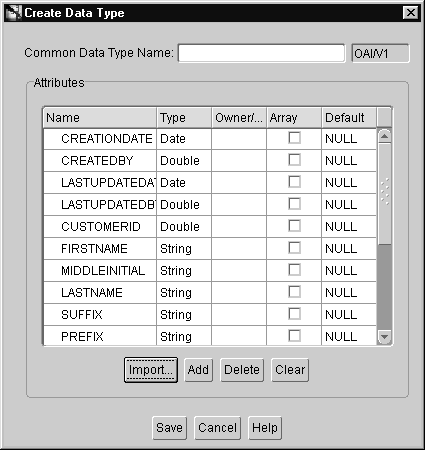
For more information on common data types, see "Common Data Types". To create a common data type:
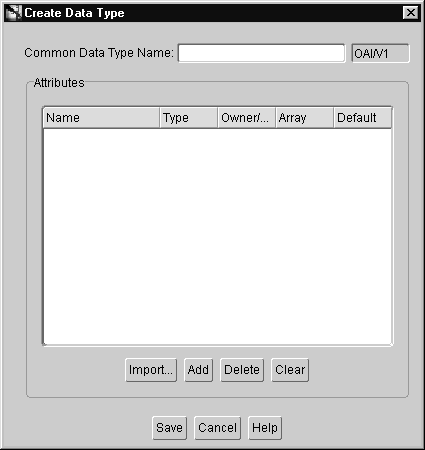
The owner and version number of the common data type display next to the common data type name. This field cannot be edited.
To add attributes one by one:
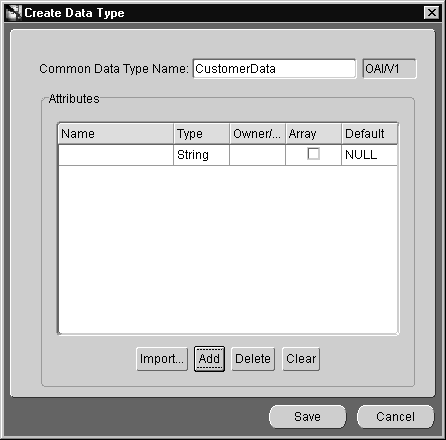
To import attributes:
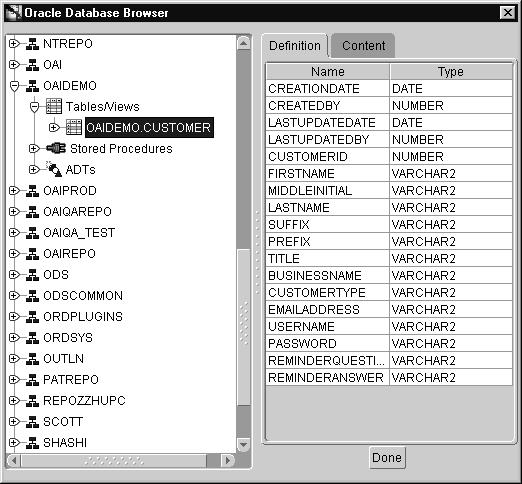
The following example utilizes the Database import facility.
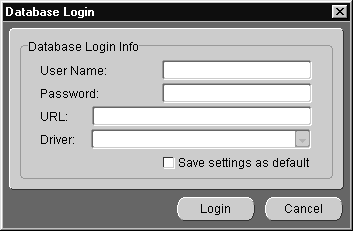
After logging in, the database tables and arguments display in the Database Browser Window.
Select the fields by clicking on them.
To delete a selected attribute:
To clear all attributes:
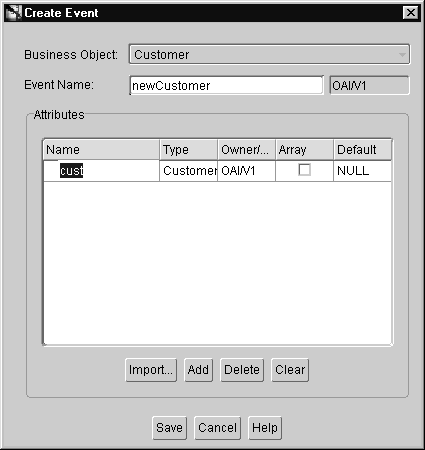
For more information on events, see "Events". To create an event:
For more information on procedures, see "Procedures". To create a procedure:

For more information on adding attributes, see "Adding Attributes One by One".
For more information on importing attributes, see "Importing Attributes".
For more information on deleting and clearing attributes, see "Deleting and Clearing Attributes".
The following topics discuss application view information in iStudio.
To create an application:

To publish an event in an application:
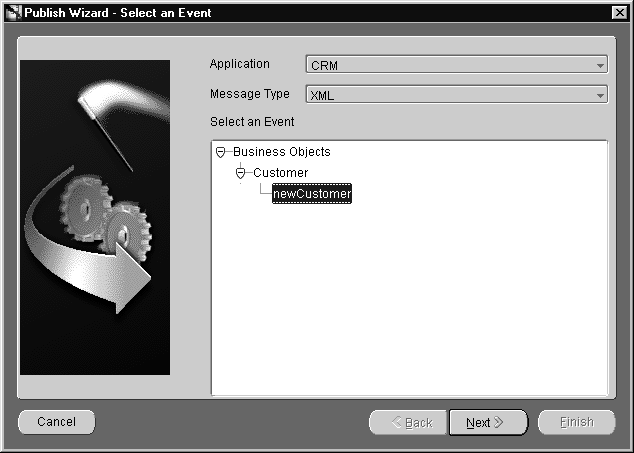
The Event Publish Wizard provides a series of pages to follow for creating a publish event. This wizard provides a series of pages for creating a publish event.
Select from the following message types:
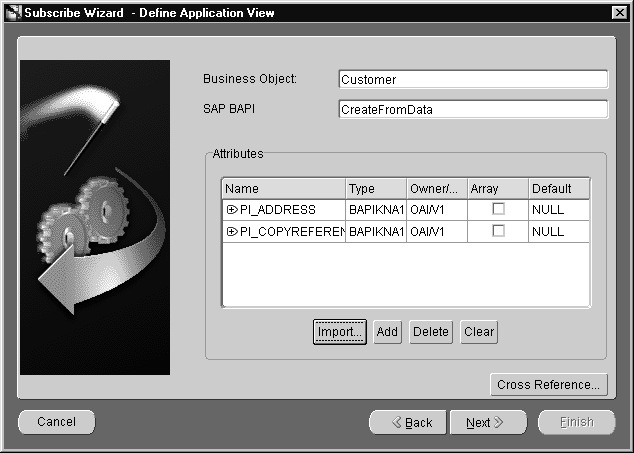
Using this page, the application view is defined. This page is initially an empty table. Define the attributes using Add or import the definitions from a database or an API Repository using Import.
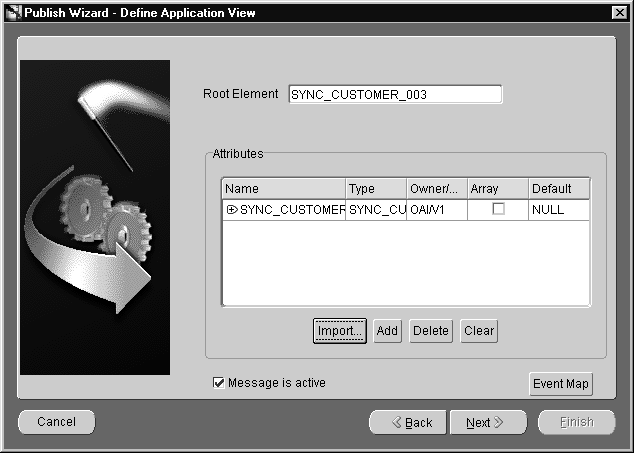
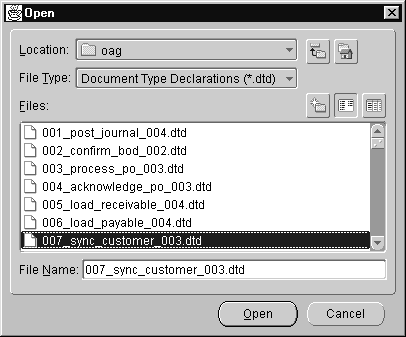
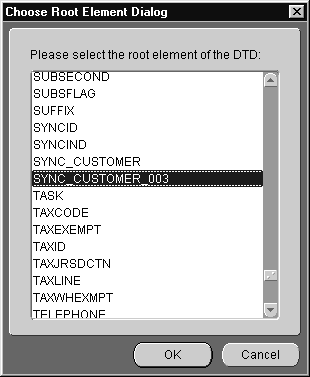
If this is a XML type message, the Event Map button is enabled. To define the event map, click Event Map. The Event Map dialog displays:

To add an event map attribute:
To delete an event map item:
For more information on adding attributes, see "Adding Attributes One by One".
For more information on importing attributes, see "Importing Attributes".
For more information on deleting and clearing attributes, see "Deleting and Clearing Attributes".
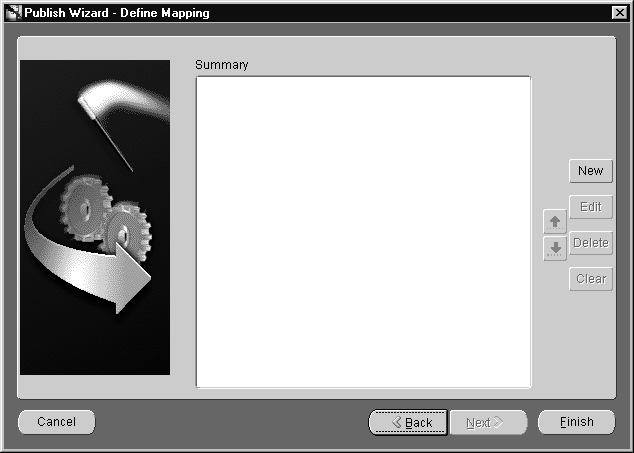
Mapping can either involve copying the individual fields, or simple shape-change transformations.
To map fields in the application view to fields in the common view, use the concat transform. For example, to map fields in the FirstName and LastName in the application view to Name in the common view, use the concat transform.
The following steps illustrate this example:
ConcatFields. For information on custom transformations, see "Adding Custom Transformations".
The transformation may have parameters. After clicking Apply or OK, the Mapping Parameters dialog may display:
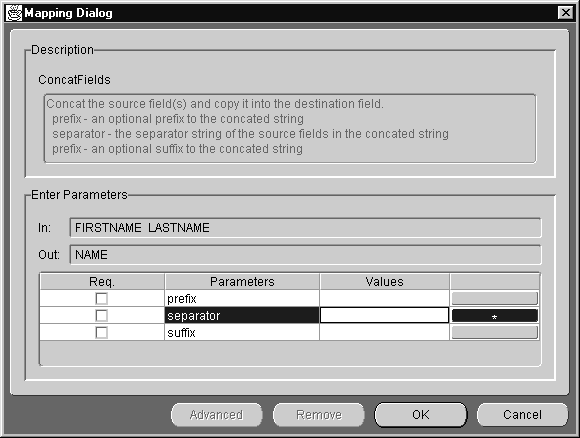
In the Parameters field, enter the values for the transformation parameters. For example, a blank value indicates a value for the separator parameter.
To subscribe to an event in an application:
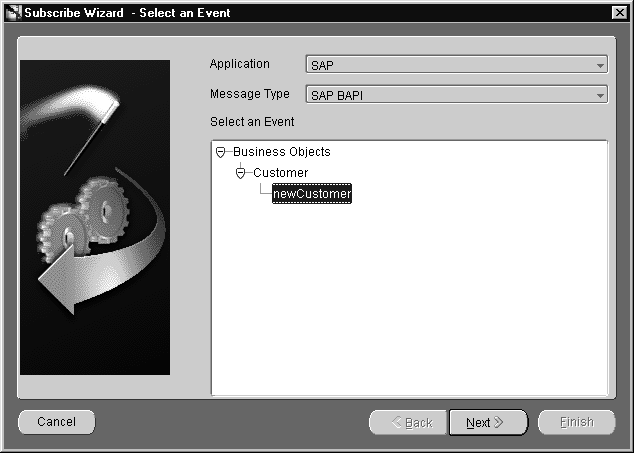
Database--The Adapter picks the message data from the database.
SAP BAPI--The Adapter communicates with the application using Business API.
SAP IBP--The Adapter communicates with the application using IBP.
SAP IDOC--The Adapter communicates with SAP using IDOC.
XML--The Adapter communicates with the application using XML.
Generic--The Adapter communicates with application using a user-defined bridge.
After selecting the event to publish, the application view is defined on the Define Application View Page. The application view window is initially an empty table. Use Add to define attributes or import definitions from a database or API repository using Import.
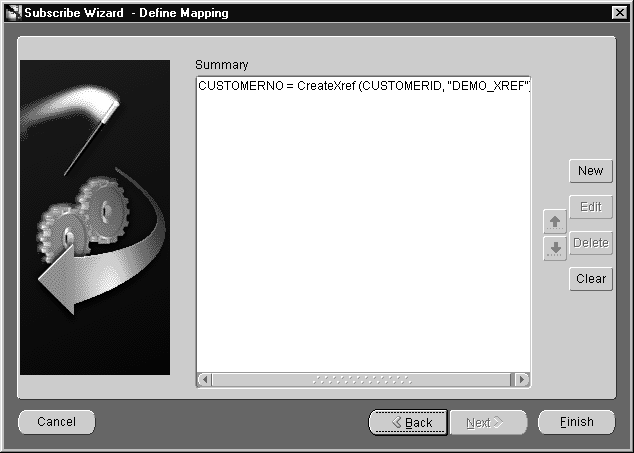
Mapping can either involve copying the individual fields or simple shape change transformations.
To define mappings, use the Define Mappings page:
To invoke a procedure in an application, from the iStudio main menu panel, click Procedure. Then click Invoke from the pull-down menu. The Invoke Wizard displays.
When the Invoke Wizard is started, the Select a Procedure page displays:

Database--The Adapter picks the message data from the database.
SAP BAPI--The Adapter communicates with the application using Business API.
SAP IDOC--The Adapter communicates with SAP using IDOC.
XML--The Adapter communicates with the application using XML.
Generic--The Adapter communicates with application using a user defined bridge.
After selecting the procedure to invoke, the application view is defined. The application view dialog is initially an empty table. Attributes are defined by using the add button. Attribute definitions can be imported from a database or an API Repository using Import.
After clicking Next on the Select a Procedure page, the Define Application View page displays:

For information on adding attributes, see "Adding Attributes One by One".
For information on importing attributes, see "Importing Attributes".
For information on deleting and clearing attributes, see "Deleting and Clearing Attributes".
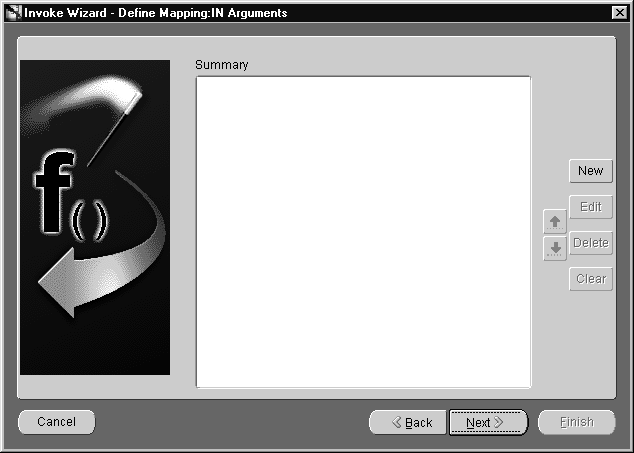
Mapping can either involve copying the individual fields or simple shape-change transformations. After clicking Next on the Define Application View page, the Define Mapping IN Arguments page displays:
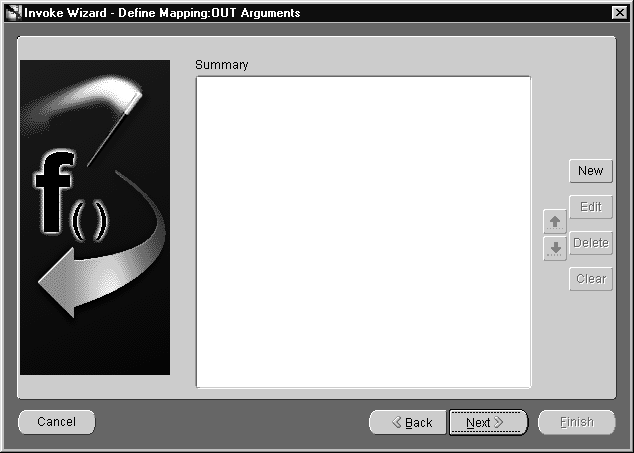
Mapping can either involve copying the individual fields, or simple shape-change transformations. You map the common view return arguments to the application view return arguments on this page.
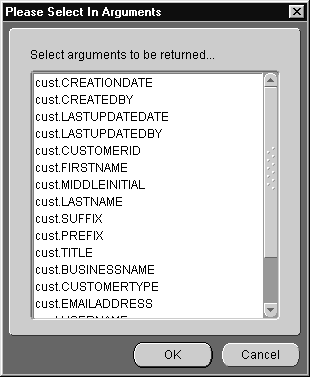
If the message type selected was database, the data is received by a stored procedure. In this stored procedure, the action performed when the values are returned to the application can be specified. The adapter invokes the stored procedure at runtime with the appropriate data.
The following arguments will be returned:
After clicking Next on the Define Mapping OUT Arguments page, the Define Stored Procedure page displays:

To implement a procedure:
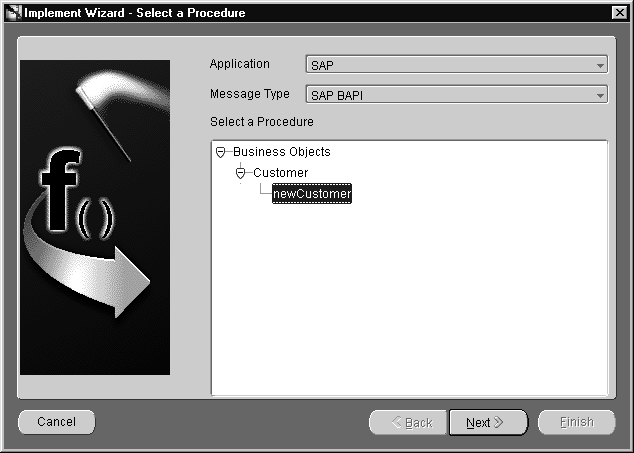
Use this page to select a procedure to implement.
Database--The Adapter retrieves the message data from the database.
SAP BAPI--The Adapter communicates with the application using Business API.
SAP IBP--The Adapter communicates with the application using IBP.
SAP IDOC--The Adapter communicates with SAP using IDOC.
XML--The Adapter communicates with the application using XML.
Generic--The Adapter communicates with the application using a user-defined bridge.
After selecting the procedure to implement, the application view is defined. The Define Application View page is initially an empty table. Attributes can be defined by using Add. Attribute definitions can be imported from a database or an API Repository by using Import.
After clicking Next on the Select a Procedure page, the Define Application View page displays:

For information on adding attributes, see "Adding Attributes One by One".
For information on importing attributes, see "Importing Attributes".
For information on deleting and clearing attributes, see "Deleting and Clearing Attributes".

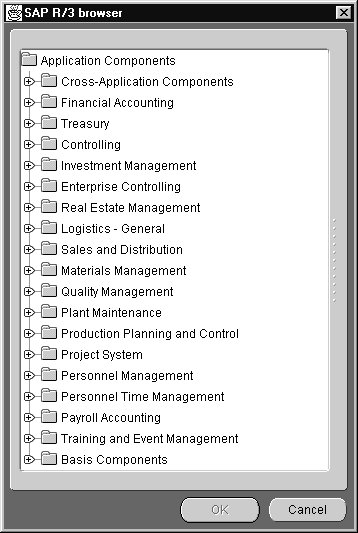
Mapping may involve copying individual fields, or simple shape-change transformations. After clicking next on the Define Application View page, the Define Mapping IN Arguments page displays:

Use this page to define mapping IN arguments.
After clicking Next on the Define Mapping IN Arguments page, the Define Mapping OUT Arguments page displays:
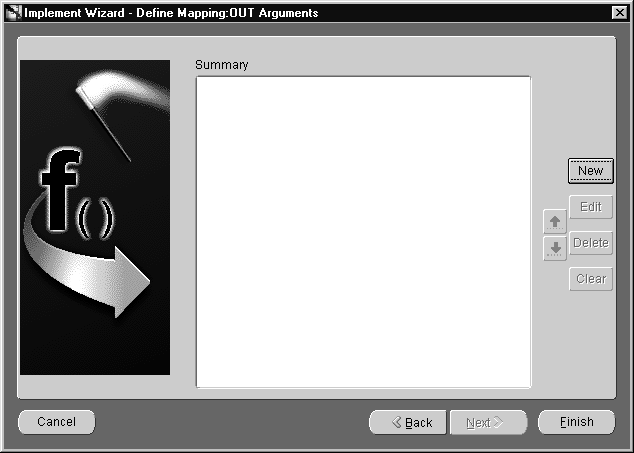
Use this page to define mapping IN arguments.
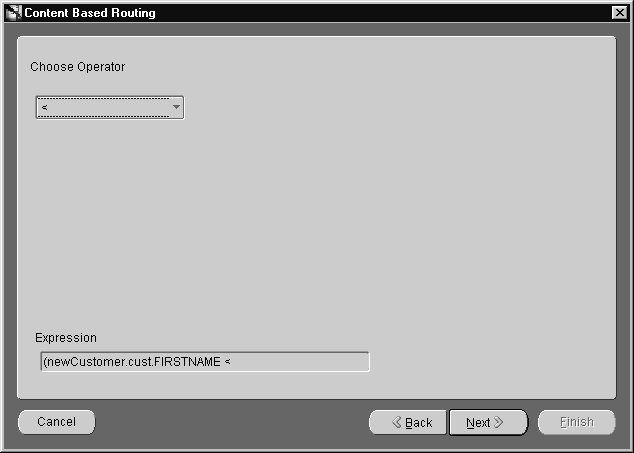
For more information on content based routing, see "Content-Based Routing". To modify content based routing for an event or procedure:




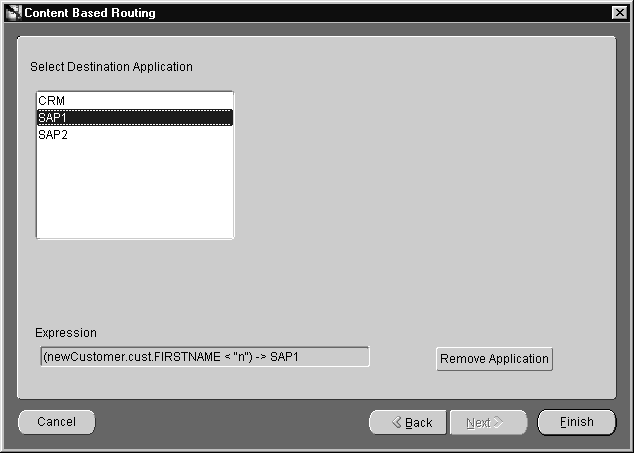
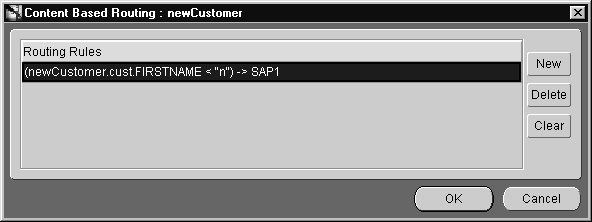
For more information on cross reference tables, see "Cross Reference Tables".
To create a cross reference table:
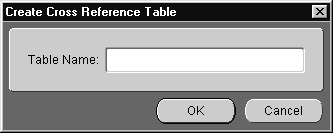
To add applications to the cross reference table:
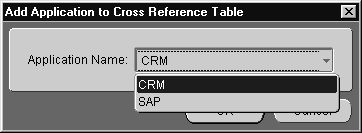
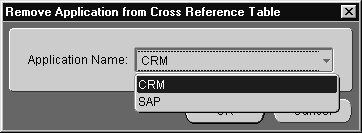
To remove applications from the cross reference table:
To populate the cross reference tables, returned arguments must first be defined. Returned arguments are the arguments returned by the subscribe or implement code for populating the cross reference table.
To populate cross reference tables:
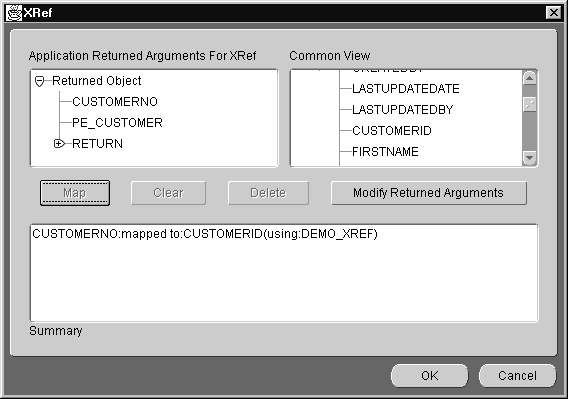
The Application Returned Arguments box displays the returned arguments. This information is initially populated with any OUT arguments from the application view.
Specify the Cross Reference Table name to be populated using these attributes' values.
For more information on domain value mappings, see "Domain Value Mapping".
To create a domain value mappings table:

To add applications to domain value mappings:
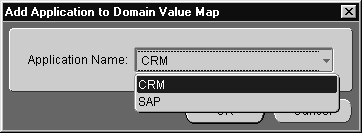
To remove applications from the domain value mappings:
To add data to domain value mappings:
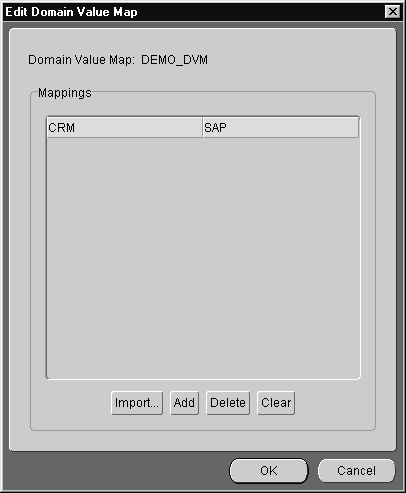
To delete a selected domain value mapping:
To delete the domain value mapping table:
To modify a selected attribute mapping, use the Define Mapping dialog in the Publish Wizard:
To delete a selected attribute mapping, use the Define Mapping dialog in the Publish Wizard:
To create custom transformations:

Using the Transformation dialog, you can delete custom transformations. To delete a selected transformation:
To add a mapping variables, use the Mapping dialog.


To delete a mapping variable, use the Mapping dialog:
|
|
 Copyright © 2001 Oracle Corporation. All Rights Reserved. |
|