Release 3.0.8
Part Number A87570-01
Library |
Service |
Contents |
Index |
| Oracle Portal Building Portals Release 3.0.8 Part Number A87570-01 |
|
This chapter describes how to use Oracle Portal to build an interface, or a portal, that contains such material as calendars, reports from your own database, links to external Web sites, and customized HTML. If you've already built several portals and wish to work with advanced applications, see Chapter 4, "Creating a line of business page for your intranet portal".
In this chapter, you will create a portal that enables users to access multiple components and information from the same screen. The first step in creating a portal is designing the page: figuring out what applications your users need, what information they would like to see, and how you want the information to display. For more information on planning how your portal look and function, see Chapter 2, "Planning Your Web Content".
You will then set up the page for your portal (the screen that displays the applications, links, etc.) with a style you like, create the applications you want to include in the portal, then add those applications to the portal so users can easily access them.
To build a simple intranet portal, you will use the Create Page Wizard to create a page and the Customize Page tab set to add and edit portlets. You will also use the Create Calendar, Create Forms, Create Sequence, and Create Links wizards to build an event calendar.
You need Edit or higher access privileges to the demo schema to complete this chapter. You also need Edit or higher application privileges to build the calendar portion of this chapter. If you do not have these privileges, contact your portal administrator.
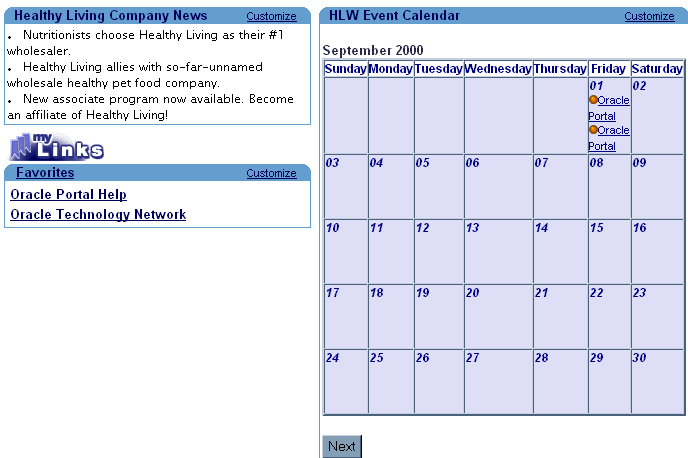
The following figure illustrates the four parts of your simple intranet portal.
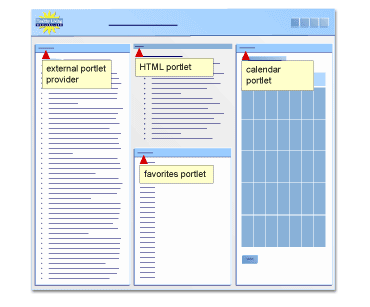
The completed portal is available in the installation package that contains the demo schema. For more information, contact your portal administrator.
This chapter contains the following sections:
| Feature | Location |
|---|---|
|
Use the Create Page Wizard to create a page. |
|
|
Create an HTML portlet that contains your own customized HTML content. |
|
|
Add and modify a Favorites portlet. |
|
|
Use the Create Calendar Wizard, the Create Link Wizard, the Create Form Wizard, and the Create Database Sequence Wizard to build an updateable calendar portlet. |
Section 3.4, "Create an event calendar and add it as a portlet" |
|
Display the portal to the public. |
The steps in this section show you how to use the Create Page Wizard to create a page, and design its layout.
For more information: Visit the Oracle Portal Online Help. From the Categories list, choose Page Tasks and click Go. In the right pane, click Creating a page.
Note: If you do not have a user name and password, contact your portal administrator.
The Page Properties tab of the Create Page Wizard displays.
A preview of the layout displays below the list.
A preview of the style displays below the list.
Tip: If you end your Oracle Portal session, you can always return to this page by going to the Navigator. Click the Pages tab, then My Pages. Then, find the Main page. Click any of the actions listed next to the Main page, such as View or Customize.
Note: You can change the graphic in the banner by clicking the Edit Defaults link in the banner located on the Portlets tab of the Customize Page dialog. Under Banner Logo Settings, enter the file name of the logo you want to use.
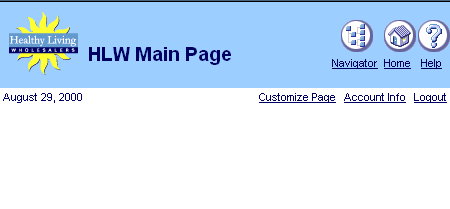
The page should look something like this:
The steps in this section help you to add customized HTML as a portlet. When you create an HTML portlet, you can write your own HTML in a text editor and paste it in a portlet, or write HTML directly into the portlet. You can use this portlet when you have HTML you want to copy into your portal, for example a banner. In this section, we create a company news HTML page and paste it into the portlet.
 .
.
 to add the portlet.
<html>
  <li>Nutritionists choose Healthy Living as their #1 wholesaler.</li>
  <li>Healthy Living allies with so-far-unnamed wholesale healthy pet food
company.</li>
  <li>New associate program now available. Become an affiliate of Healthy
Living!</body></html>
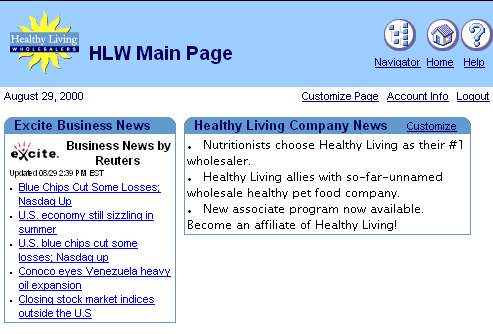
Your portal should now look something like this:
The steps in this section help you customize the Favorites portlet by adding a new favorite link and deleting existing links. You can use the Favorites portlet to maintain and organize your more commonly used services. For example, instead of relying on the bookmarks in your browser, you can add the same links to the Favorites portlet and access the Web sites via your portal.
 .
.
 to add the portlet.
When you add the Favorites portlet, the Oracle Portal default links display. To take advantage of this portlet, you will always want to add new links to this portlet. You can enable your users to add and remove links, but you might want to add a few commonly-used ones. For example, you might add your organization's Internet address.
Tip: To display the Main page, click the Pages tab in the Navigator. Click My Pages, then find <YourName> Main.
The Add Favorite page displays.
Oracle Portal creates the new link and displays the Add Favorite page again so you can add another favorite link.
Note: You can click the link at the top of the page to edit the link you just created.
The new Oracle Technology Network favorite now displays on the Navigate Favorites page.
The Oracle Technology Network link should now display in the Favorites portlet.
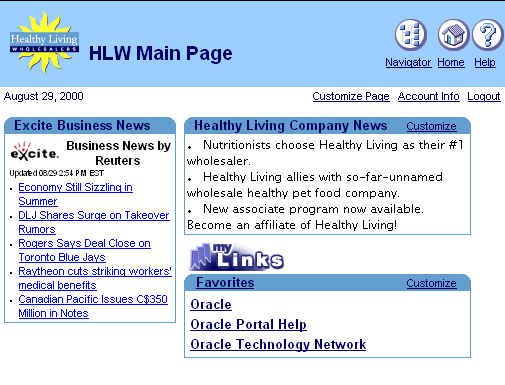
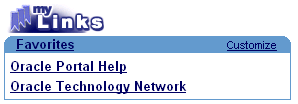
The Favorites portlet should now look like this:
The steps in this section help you create an event calendar, where you can add an event and display it in a calendar format. One of the most common portal functions is a calendaring application, where users can immediately see the events for a particular day.
In these steps, you will create an Oracle Portal application. To do so, you will use the following:
Note: To create the components in this section, you must have access to the <DEMO SCHEMA>.EVENTS table, where DEMO SCHEMA is the name of the schema where the demo schema objects are installed. You must also have access to create components within the Casebook30_Application application. If you do not have access to this table, or if you do not have access to this application, contact your portal administrator. Instructions are in Appendix A of this manual.
To create a view-only calendar, where users can view the dates but not add events, you can simply follow the steps in this section (Section 3.4.1). To make the calendar updateable, however, you will need to complete all sections in Section 3.4, "Create an event calendar and add it as a portlet".
For more information: Visit the Oracle Portal Online Help. From the Categories list, choose Application Tasks and click Go. In the right pane, click Building Components.
 .
.
You should now see the following path: Path: Applications, Casebook30_Application.
The Create Calendar Wizard displays.
select
    e.event_start_date   the_date,
    e.event_title        the_name,
    null                 the_name_link,
    null                 the_date_link,
    null                 the_target
from <DEMO SCHEMA>.hlw_events e
order by 1

Note: Do not directly copy and paste the SQL from this text. You must replace the
schema name (DEMO SCHEMA) with the name of the schema where the demo schema
objects are installed.
Note: Doing so accepts the defaults in the remainder of the wizard. You can always return to the wizard later to customize the appearance of the calendar.
Note: You can always view the Manage Component dialog for a particular component by clicking Manage next to the component name on the Application tab.
The calendar displays in a new browser window, and should look something like this:
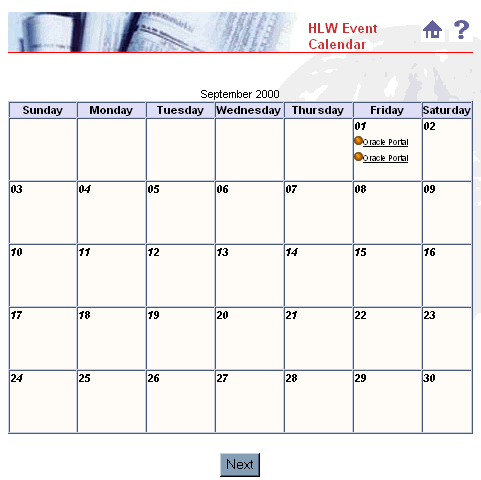
Note: If you get the error "No Rows Returned," it's because you have no data in the calendar. Continue the steps in this section. After you've created the form, you can insert data, and the calendar should display.
To manage events using the calendar, you'll need to create a form in which users can add, remove, and modify events.
Note: To complete this section, you must have UPDATE privileges on the <DEMO SCHEMA>.HLW_EVENTS table. If you do not have these privileges, contact your database administrator.
Tip: Follow steps 2 through 5 in Section 3.4.1, "Create an event calendar using the Create Calendar Wizard".
The Create Form from Table or View Wizard displays.
Note: DEMO_SCHEMA is the name of the schema in which the demo schema objects are installed. The table now displays in the Table or View field.
go('<http://<host name>/pls/<DAD>/<DEMO SCHEMA>.<YourName>_EVENT_
CAL.show>');
Note: Replace the text "<host name>" with the URL for Oracle Portal, ex. "http://mycomputer.domain.com/pls/portal30". You can find this URL by displaying the Manage Component dialog for the <yourName>_EVENT_CAL and dragging your mouse over RUN. The URL displays at the bottom of your browser.
Doing so builds the form using the default values in the remaining steps of the wizard. If you want to see the default values, click Next in each of the wizard steps, but do not change any of the values. Then, click Finish when you're done.
Note: Selecting this check box enables you to display the form as a portlet.
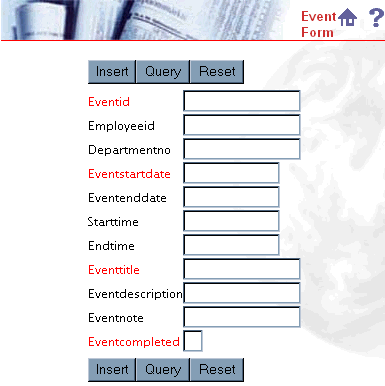
The new form displays in a separate browser window.
Since users of your calendar will also use the form to update and view events in the calendar, you might also want to customize the way the form displays.
 .
.
Start Date (DD-MON-YY).
The form now displays in a new browser window with the new colors and label names.

Since you will be allowing users to add, update, and delete events by using your new form, you will need to assign sequence numbers to each record. You can use the Create Sequence Wizard to enable Oracle Portal to automatically generate a new sequence number for each record in the database. This way, when a user edits or removes an event, the user (and Oracle Portal) can refer to the sequence number to retrieve the appropriate record.
Note: You must have MANAGE ALL SCHEMAS global privilege or Manage privileges on the <DEMO_SCHEMA> schema to create database objects.
For more information: Visit the Oracle Portal Online Help. From the Categories list, choose Administration Tasks and click Go. In the right pane, click Building Database Objects.
 .
.
<YourName>_EVENT_SEQ now displays in the Database Navigator.
Note: If you don't see the sequence in the list, you may have to click Next, or you can use the Find field.
Tip: Granting access to PUBLIC enables the form you create to use this sequence. Doing so also enables anyone who can use your form to insert records in the database. Note that you can also grant access on a user-by-user or group-by-group basis.
Note: If you select the with Grant Option check box, you will enable the public to grant other users privileges to the database sequence.
 next to FORM to display all the columns.
#<DEMO_SCHEMA>.<YourName>_EVENT_SEQ.nextval
Now, whenever a user adds an event using the EVENT_FORM, Oracle Portal automatically assigns the new record an ID number. This number is unique to each record, and makes it easy to retrieve, update, and delete the record.
To enable users to update the event calendar, you must create a link between the form and the calendar.
For more information: Visit the Oracle Portal Online Help. From the Categories list, choose Application Tasks and click Go. In the right pane, click Building Components, then click Using a link between components.
The link now displays in the Manage Component dialog.
Note: Before you perform the following steps, you need to note down the module id of <YourName>_EVENT_FORM. You can find this value by displaying the Manage Component dialog for <YourName>_EVENT_FORM. See your portal administrator for more details.
The SQL Query for your event calendar displays.
select
    e.event_start_date the_date,
    e.event_title      the_name,
 <PORTAL_SCHEMA>.wwv_app_module.link?p_arg_names=moduleid&p_arg_
values=<EventFormID>&p_arg_names=_event_id_cond&p_arg_values=%3D&p_arg_
names=_show_header&p_arg_values=YES'||E.EVENT_ID||'
'       the_date_link,
    null               the_target
from <DEMO_SCHEMA>.hlw_events e
order by 1
Note: Do not copy and paste the code directly from this text. You should change the text from PORTAL_SCHEMA to the name of the schema in which Oracle Portal is installed, and DEMO SCHEMA name of the schema in which the demo objects are installed. Also, replace "EventFormID" with the module ID of <YourName>_EVENT_FORM that you noted down earlier.
You have now finished creating links for your calendar.
To make the form conveniently accessible, you need to create a button on the calendar.
 to display the Additional PL/SQL Code tab.
To do so, in the field, enter:
htp.formOpen(owa_util.get_owa_service_path||'<PORTAL_SCHEMA>.wwa_app_
module.link?p_arg_names=_moduleid&p_arg_values=<EventFormID>&p_arg_names=_
sessionid&p_arg_values=&p_arg_names=EVENT_START_DATE&p_arg_
values=%23sysdate&p_arg_names=_event_start_date_cond&p_arg_values=%3D&p_arg_
names=_show_header&p_arg_values=YES');
htp.formSubmit(null, 'New Appointment');
htp.formClose;
Note: Replace "EventFormID" with the module ID of <YourName>_EVENT_FORM that you noted down for the previous exercise. You can find the module ID for a component in its Manage Component dialog. Copy the code in the calendar column in the `... after displaying the header' box.
The event now displays in the calendar.
Now that you've created a calendar that users can update, you can add the calendar directly to your intranet portal.
 .
.
 to add a column.
 to add a portlet.
Tip: If your calendar does not display in the drop-down list, return to the Navigator and find the event calendar. Next to the calendar, click Manage. On the Access tab, make sure the Publish to Portal check box is selected, then click Apply.
 to add the calendar as a portlet.
The calendar now displays as a portlet in the right-hand region of your page.
Currently, the only users who can view your portal are the DBA and yourself. To make your portal useful to others, you should grant other users access to the portal.
Tip: To access the Navigator, click
 in the shortcut bar.
Congratulations! You have created an intranet portal and added different types of portlets to it. You now know how to:
For more information about creating a portal and using portlets, see the Oracle Portal Online Help.
|
|
 Copyright © 2001 Oracle Corporation. All Rights Reserved. |
|