10g (9.0.4)
Part Number B10448-01
Home |
Solution Area |
Contents |
Index |
| Oracle Application Server InterConnect Adapter for Siebel 7 Installation and User's Guide 10g (9.0.4) Part Number B10448-01 |
|
The Siebel 7 adapter enables OracleAS InterConnect users to use the Siebel eBusiness Application to maintain/synchronize customer, product, pricing, and sales order information.
This chapter discusses the following topics:
The Siebel 7 adapter allows you to browse and call Siebel Business Services (objects with methods) and Business Components (data sets which you can query and update).
Business Components are representations of a set of one or more joined tables. They have certain "table like" behaviors such as the ability to query a set of records. Business Services are effectively containers for code. Custom business services can be defined using the Siebel Tools, including defining a list of arguments and data types.
To create an implemented procedure using iStudio:
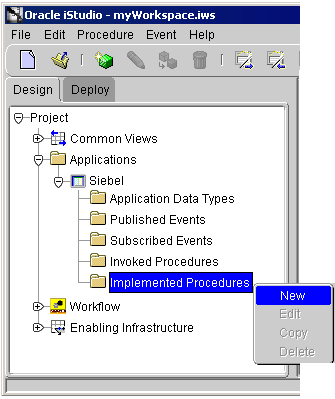
The Implement Wizard--Select a Procedure dialog displays.

The Implement Wizard--Define Application View dialog displays.
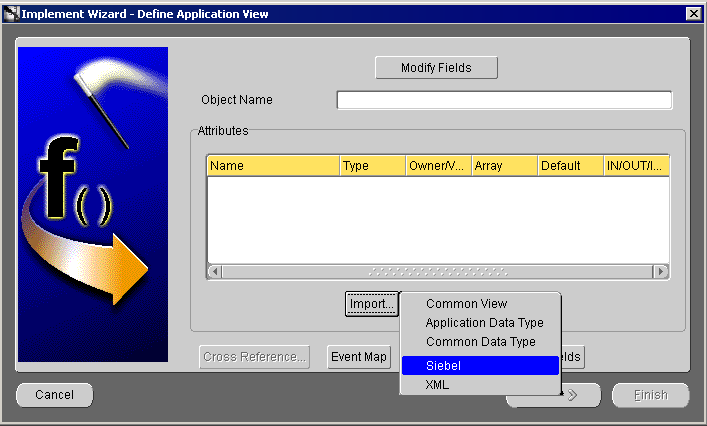
Text description of the illustration isdefineapplicationview.gif
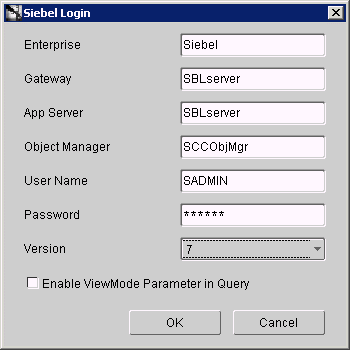
If this is the initial login for this machine, enter the correct information.
If this machine has been logged in to Siebel before, enter the password on the Siebel Login dialog and click OK.
When you use iStudio to import attributes from Siebel, you must first log on to Siebel. When logging into Siebel from iStudio, the login fields automatically populate, leaving the Password field the only field that requires input.
To import attributes from Siebel:
The Siebel Login dialog displays.
The first time you log on from a new workstation, you are required to enter information in every field that is required for your setup. Subsequent logins from that workstation only require a password to log on.
viewMode is added to Query method of all Business Components. View mode is one of the security features provided by Siebel. The value of the viewMode parameter at runtime determines the number of records returned by a Query for a Business Component.
The Component Selector dialog displays with Business Components.

Text description of the illustration iscomponentselector.gif
The Implement Wizard--Define Applications View dialog displays the selected component and its attributes.
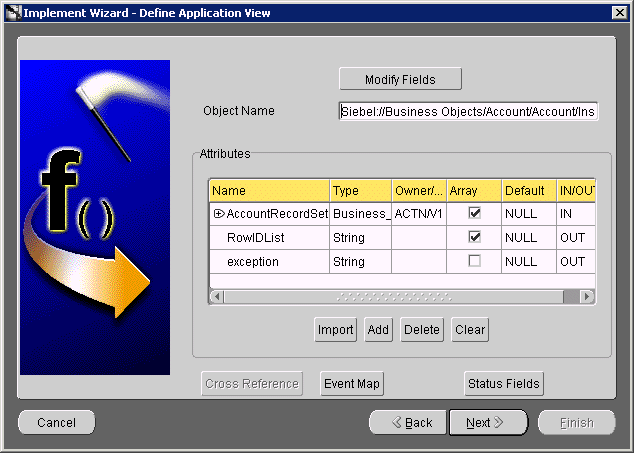
Text description of the illustration ispopulateddefineapp.gif
The Define Mappings dialog displays.
The new populated event displays in the right panel of iStudio.
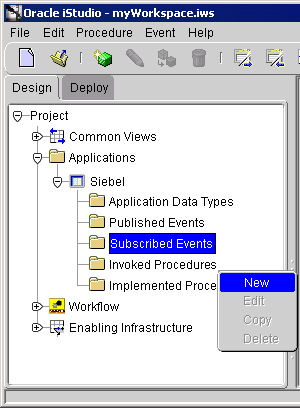
To create an subscribed event using iStudio:
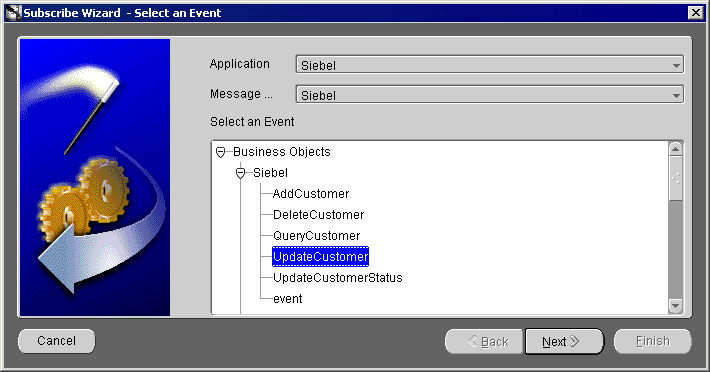
The Subscribe Wizard--Select an Event dialog displays.
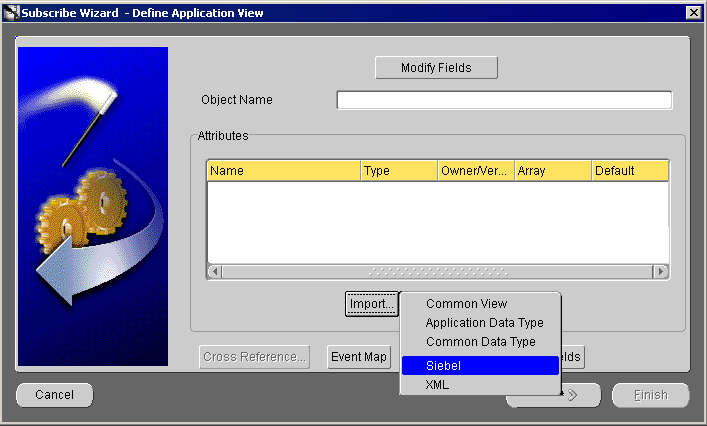
The Define Application View dialog displays.
If this is the initial login for this machine, enter the correct information.
If this machine has been logged on to Siebel before, enter the password on the Siebel Login dialog and click OK.
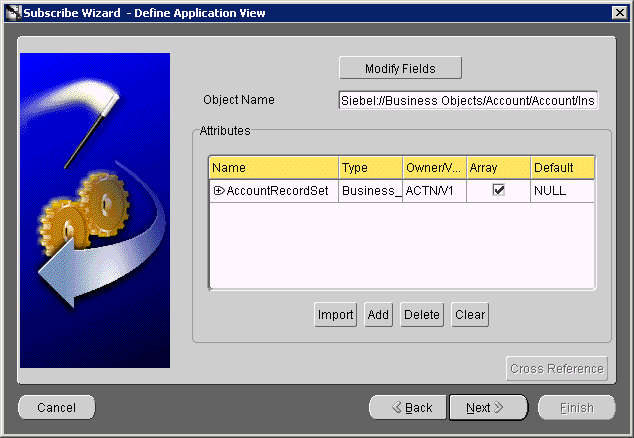
After attributes are imported, the Define Applications View dialog displays the selected component and its attributes.
The Define Mappings dialog displays.
The new populated event displays in the right panel of iStudio.
|
|
 Copyright © 2002, 2003 Oracle Corporation. All Rights Reserved. |
|