10g (9.0.4)
Part Number B10448-01
Home |
Solution Area |
Contents |
Index |
| Oracle Application Server InterConnect Adapter for Siebel 7 Installation and User's Guide 10g (9.0.4) Part Number B10448-01 |
|
This chapter describes how to use the Configuration Editor to configure the Siebel 7 adapter. The Configuration Editor is only used at runtime.
The following topics are discussed:
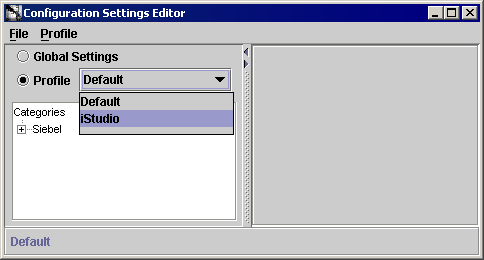
To configure settings for the Siebel 7 adapter you must access the Siebel Configuration Editor as follows:
...\oai\9.0.4\config\configeditor using a DOS prompt.
The Configuration Editor displays.

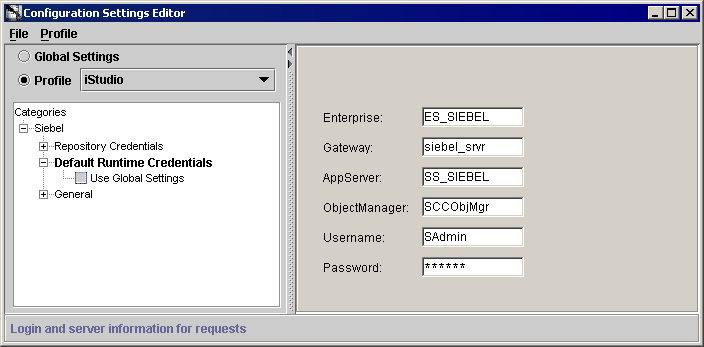
The Default Login to Siebel allows you to program your application to automatically connect to Siebel servers. The login credentials under both Repository credentials and Default Runtime Credentials branches are used by the Siebel 7 adapter. The default credentials are used at runtime to submit requests to the business functions.
The Default Login to Siebel authenticates your runtime credentials. From the Configuration Editor main menu:
The Configuration Settings Editor login dialog displays in the right panel.

siebel.
SDK-Lab2. This can be an IP address or a gateway name.
SDK-Lab2. The metadata is the information regarding the Business Services and Business Objects, which is the container for Business Components.
SCCObjMgr.
To assist in connecting to a Siebel system, the following provides a brief description of Siebel terms and where you can locate information in a Siebel system.
You can retrieve the name of the Gateway server, Siebel server, and Enterprise from the siebel.cfg file located in <siebel-root>/siebsrvr/BIN/ENU directory.
You can verify the Siebel user name and password by running Siebel Call Center. When you launch this application, enter a name and password (which has administrator privileges).
You can verify the Siebel Gateway, Enterprise, App server, and repository names with the corresponding entries in the siebel.cfg file.
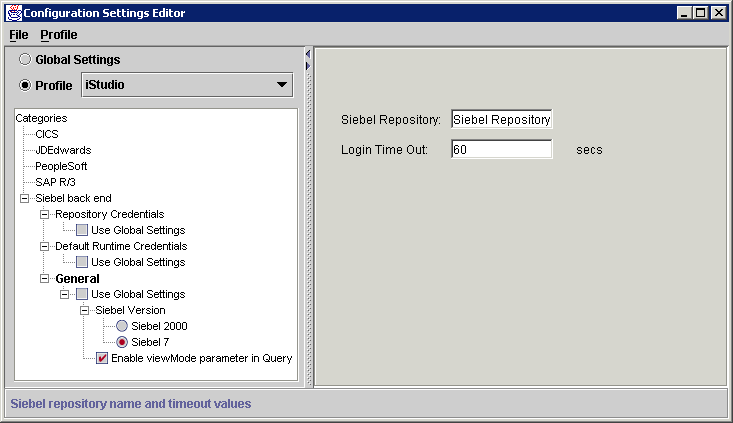
In the General section, you can modify where to locate the Siebel Repository, the Login Time Out interval. From the Configuration Settings Editor main dialog:
In the dialog to the right, you can edit the fields.
When checked, a third parameter called viewMode is added to the Query operation. viewMode is a Siebel security feature. The value of the viewMode parameter determines the number of records returned by a query for a business component.
When checked, the Siebel 7 adapter exposes the viewMode parameter in the query. At runtime, the Siebel 7 adapter fetches the value of the viewMode parameter (default is 0) and calls setViewMode on the Business Component before executing the Query.
Enter the name of the repository where the Siebel Repository files are located. The Siebel Repository contains Business Service methods, Business Components, and typed method arguments.

This variable determines how long you have to wait for a response before the system timesout. This value must be set between 10 and 300 seconds. Networks with a higher load should have this timeout variable set to a higher limit to allow enough time for the request to process.
The purpose of having a log in time out is to keep the threads from deadlocking. If there is no response within the specified time, the system stops sending packets and issues a 'timeout'. If a 'timeout' is issued you must login again.
|
|
 Copyright © 2002, 2003 Oracle Corporation. All Rights Reserved. |
|