3
Modeling Interactions for Oracle Application Server Integration Adapter for IMS/DB
Modeling interactions for Oracle Application Server Integration Adapter for IMS/DB involves defining the data source and an Oracle Connect for IMS/DB backend adapter using Oracle Studio. All the definitions specified in Oracle Studio are written to the OS/390.
This chapter contains the following sections:
Setting Up the IMS/DB Data Source
Oracle Connect for IMS/DB requires you to specify the IMS/DB data source as the first step in setting up the adapter.
Task: Adding the IMS/DB Data Source Definition
- On the machine where Oracle Studio is installed, from the Start menu, choose Start > Programs > Oracle > Studio > Studio.
- In the Configuration Explorer, click the + next to the machine defined in "Configuring Oracle Connect for IMS/DB".
- Click the + next to the Bindings node. The binding configurations available on this machine are listed.
- Click the + next to the NAV binding node. The NAV binding configuration includes branches for data sources and adapters that are located on the machine.
Caution:
You must not delete the NAV binding configuration since it also contains Oracle Connect for IMS/DB system settings.
|
- Right-click Data sources in the Configuration Explorer and choose New data source from the popup menu, to open the New data source wizard.
- In the New window, enter a name for the IMS/DB data source. The name can contain letters and numbers and the underscore character only.
- Change the
Type field as follows:
- For IMS-DLI, click Finish. Otherwise, click Next.
- Enter the Data source connect string. The connect string information is dependent on whether the data source type is
IMS-DBCTL or IMS-DBDC.
If you chose IMS-DBCTL, the following window opens:

Text description of the illustration 11.gif
where:
PSB Name - The name of the PSB file that contains details of all the IMS/DB databases that you want to access.
Target System - The VTAM applid of the CICS target system. You can determine this value by activating the CEMT transaction on the target CICS system. On the bottom right corner of the screen appears the legend APPLID=target_system. The default value is CICS.
VTAM NetName - The VTAM netname of the specific connection being used by EXCI (and MRO) to relay the program call to the CICS target system. For example, if you issue to CEMT the following command:
CEMT INQ CONN
you see on the display screen that the netname is BATCHCLI (this is the default connection supplied by IBM upon the installation of CICS). The default value is ATYCLIEN.
If you chose IMS-DBDC, the following window opens:

Text description of the illustration 12.gif
where:
XCF group - The Cross System Coupling Facility collection of XCF members the connection belongs to. A group may consist of up to eight characters, and may span between multiple systems.
XCF server - The Cross System Coupling Facility group member.
TPipe prefix - The transaction pipe prefix used to associate between the transaction and the transaction pipe it is using. The default is ATTU.
User name - The security facility user identification (for example, the RACF user identification).
Group name - The security facility group identification (for example, the RACF group identification).
- Click Finish.
The data source you just defined now appears in the Configuration Explorer list.
Importing Metadata for the IMS/DB Data Source
Oracle Connect for IMS/DB requires metadata describing the IMS/DB data source records and the fields in these records.
Use the Import Metadata perspective in Oracle Studio to import metadata for the IMS/DB data source from COBOL copybooks, which describe the data. To import the metadata involves the following tasks:
Task 1: Defining an Import Procedure
- On the machine where Oracle Studio is installed, from the Start menu, choose Start > Programs > Oracle > Studio > Studio.
- In the Configuration Explorer, click the + next to the machine defined in "Configuring Oracle Connect for IMS/DB".
- Click the + next to the Bindings node. The binding configurations available on this machine are listed.
- Click the + next to the NAV binding node.
- Click the + next to the Data sources node.
- Right-click the IMS/DB data source defined in "Setting Up the IMS/DB Data Source".
- Choose Import from the popup menu, to open the Metadata Import perspective, with the IMS/DB data source displayed under the data sources list in the Metadata Import Explorer.
- Right-click the IMS/DB data source and choose New Import from the popup menu, to open the New Metadata Import wizard.
- Enter a name for the import. The name can contain letters and numbers and the underscore character only.
Note:
The New import window is the same for all the IMS/DB imports (IMS/DB under IMS/TM (IMS_DBDC), under CICS (IMS-DBCTL) and direct (IMS-DLI)), with the exception of the Import Type value.
|
- Click Finish. The metadata import wizard opens in Oracle Studio.

Text description of the illustration 17.gif
Task 2: Generating Metadata for the IMS/DB Data
After defining an import as described in the preceding task, the metadata import wizard opens in Oracle Studio. DBD files and COBOL copybooks are used to create the metadata. Optionally, a PSB file can also be specified.
Note:
The import procedure described here is the same from a users perspective for all three of the IMS/DB data source types (IMS-DBDC, IMS-DBCTL and IMS-DLI).
|
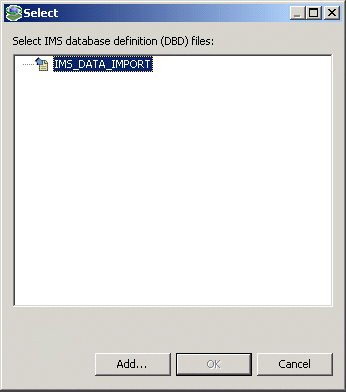
- Click Add to add DBD files.
A Select window opens. This window lists any files selected.
Text description of the illustration ftp.gif
- Click Add.
The Add Resource window opens, which provides the option to select files from the local machine or FTP the files from another machine.

Text description of the illustration 18.gif
- If the files are on another machine, select the Import resource from remote machine option to start a file transfer process from the machine.
- Click Next to open the File Transfer wizard.

Text description of the illustration 19.gif
- Enter the server name where the DBD files, COBOL copybooks or PSB file reside and, if not using anonymous access, enter a username and password to access the machine.
- Click Next. The machine is accessed and the directory structure displayed, enabling you to browse to the files to be transferred.

Text description of the illustration 20.gif
You access the OS/390 machine at the high-level qualifier for the user name. To change the high-level qualifier, enter the name of the high-level qualifier in the Directory name field and click the Chg Root Dir button.
- Navigate to the location where the files reside and select the files to be transferred and the transfer method (Text or Binary).
You can select the DBD files, COBOL copybooks and PSB file to be transferred together.
- Click Next. A summary screen is displayed with details of what is going to be transferred.
- Click Finish to start the transfer. The Select window is redisplayed with the list of transferred files.

Text description of the illustration 21.gif
- Select the DBD files for the files you want to use in the import and click OK.
- Click Add to add COBOL copybooks. The same Select window is displayed, with all the available files.
- Select the COBOL copybooks you want to use in the import and click OK.
- Optionally, click Add to add a PSB file. The same Select window is displayed, with all the available files.
- Select the PSB file you want to use in the import and click OK.
Note:
You can import the metadata from one DBD file or COBOL copybook and later add to this metadata by redoing the import using different DBD files or COBOL copybooks.
The format of the DBD files and COBOL copybooks must be the same. That is, you cannot import a DBD file or COBOL copybook that uses the first six columns with a DBD file or COBOL copybook that ignores the first six columns. In this case, you must do separate imports.
|

Text description of the illustration 22.gif
The files selected are displayed in the wizard. In the Metadata Import Explorer the files used for the input and created for the output can be seen under the Input and Output nodes respectively.
- When you have completed adding the list of DBD files, COBOL copybooks and, optionally, a PSB file, click Next.

Text description of the illustration 23.gif
- Apply filters to the COBOL copybooks.
The following filters are available:
ignoreFirst6 - Ignore the first six columns in the COBOL copybook.
ignoreFrom72 - Ignore columns 73 to 80 in the COBOL copybook.
prefixNestedColumns - Prefix all nested columns with the previous level heading.
In addition, for the COBOL copybooks, you can specify a search string and the string that will replace this search string in the generated metadata, and whether the replacement is dependent on the case of the found string.
- Apply filters to the DBD files.
The following filters are available:
ignoreFirst6 - Ignore the first six columns in the file.
ignoreFrom72 - Ignore columns 73 to 80 in the file.
ignoreLabels - Ignore labels in the file.
- Apply filters to the PSB files.
The following filters are available:
ignoreFirst6 - Ignore the first six columns in the file.
ignoreFrom72 - Ignore columns 73 to 80 in the file.
- Click Next to apply the filter settings.
- The records that are identified in DBD file are displayed. You can select the records you want to import.

Text description of the illustration 24.gif
- Click Next.
- Match each table selected from the DBD file with the COBOL copybook that contains the relevant table structure. Select the files and tables from the drop-down lists for each DBD entry.

Text description of the illustration 25.gif
- Click Next.
The import manager identifies the names of the records in the COBOL copybooks that will be imported as tables.

Text description of the illustration 26.gif
- Click Next.

Text description of the illustration 27.gif
- Click Next.

Text description of the illustration 28.gif
- Click Next.

Text description of the illustration 29.gif
- Click Next to generate the metadata.

Text description of the illustration 30.gif
- Specify that you want to transfer the metadata from the Windows machine to the OS/390 machine and click Finish.
The metadata is imported based on the options specified and it is stored on the OS/390 machine with the data source. An XML representation of the metadata is generated, together with a PSB file and JCL to allocate a dataset for the PSB file. These files can be viewed by expanding the Output node.

Text description of the illustration 31.gif
After performing the import, you can view the metadata in the Metadata perspective in Oracle Studio. You can also make any fine adjustments to the metadata and maintain it, as necessary.
Setting Up the Oracle Connect for IMS/DB Backend Adapter
To work with the Oracle Connect for IMS/DB, you need to set up a Database adapter definition on the OS/390 machine to handle the interactions to and from IMS/DB. You use Oracle Studio to specify these definitions.
Task: Setting Up the Adapter
- On the machine where Oracle Studio is installed, from the Start menu, choose Start > Programs > Oracle > Studio > Studio.
- In the Configuration Explorer, click the + next to the machine defined in "Configuring Oracle Connect for IMS/DB".
- Click the + next to the Bindings node. The binding configurations available on this machine are listed.
- Click the + next to the NAV binding node. The NAV binding configuration includes branches for data sources and adapters that are located on the machine.
- Right-click Adapters and choose New Adapter from the popup menu, to open the New Adapter wizard.
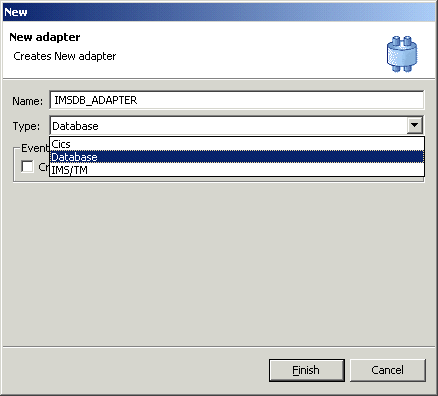
- In the New window, enter a name for the adapter.
Note:
The name specified for the adapter is also the name specified setting up the delivery channel in Oracle Application Server ProcessConnect. For details see, "Defining the Delivery Channel".
|
Note:
The word event is a reserved word and cannot be used when naming an adapter.
|
- Select the
Database adapter type from the Type drop-down list:
Text description of the illustration 35a.gif
- Check the Create event queue for the adapter checkbox.
- Click Finish. The Adapter is added to the tree and the definition opened for editing.
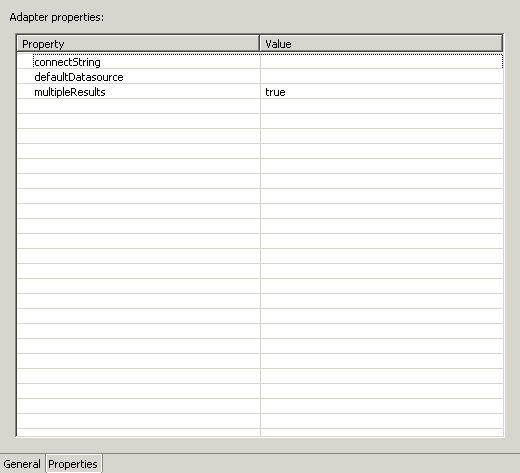
- Select the Properties tab.
Text description of the illustration 35b.gif
- Set the following properties for the adapter:
Note:
You must specify the IMS/DB data source name for the defaultDatasoure property.
|
Generating Outbound Interactions
Oracle Connect for IMS/DB requires metadata describing the adapter interactions, including the structures used to pass information to and from the adapter.
Use the Metadata perspective in Oracle Studio to generate interaction metadata for the adapter.
Task 1: Setting Up the Metadata Perspective
- On the machine where Oracle Studio is installed, from the Start menu, choose Start > Programs > Oracle > Studio > Studio.
- In the Configuration Explorer, click the + next to the machine defined in "Configuring Oracle Connect for IMS/DB".
- Click the + next to the Bindings node. The binding configurations available on this machine are listed.
- Click the + next to the NAV binding node.
- Click the + next to the Adapters node.
- Right-click the Oracle Connect for IMS/DB backend adapter defined in "Setting Up the Oracle Connect for IMS/DB Backend Adapter".
- Choose Edit metadata from the popup menu, to open the Metadata perspective, with the IMS/DB adapter displayed under the adapters list:
Task 2: Generating Outbound Interactions
- In the Metadata perspective, right-click the Interactions node and choose New from the popup menu, to open the New Interaction wizard.
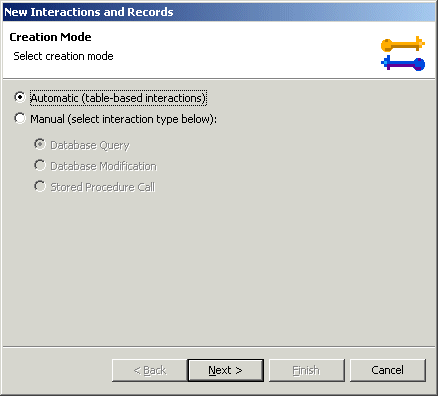
The New Interaction wizard opens with two options displayed, to create interactions:
It is recommended that you choose the automatic mode to create interactions.
Text description of the illustration 39.gif
- Click Next. The Select Tables screen opens, enabling you to add tables from the IMS/DB data source that you want to access with the interaction.
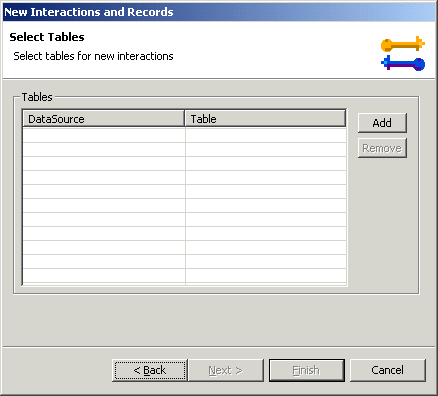
Text description of the illustration 43.gif
- Click Add to add tables.
The data sources that have been defined and all the tables, for each data source, that have had metadata defined for them are displayed.
Select the tables that you want to access with the interaction and click the right arrow to move these tables into the right pane.
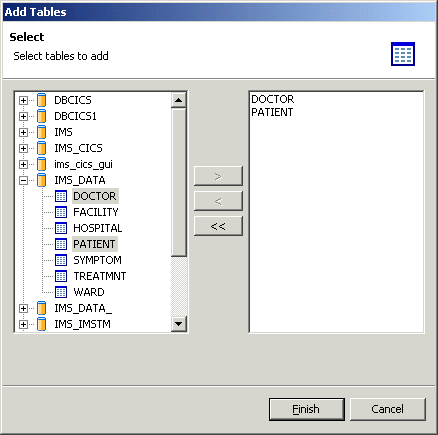
Text description of the illustration 44.gif
- Click Finish. The selected tables are displayed.
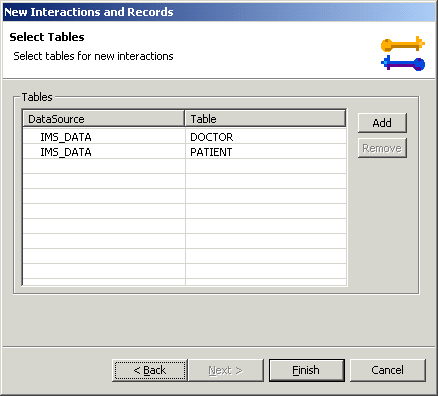
Text description of the illustration 45.gif
- Click Finish. Four interactions are generated for each table selected, together with the record structures to support the interactions and the responses from the IMS/DB data source.
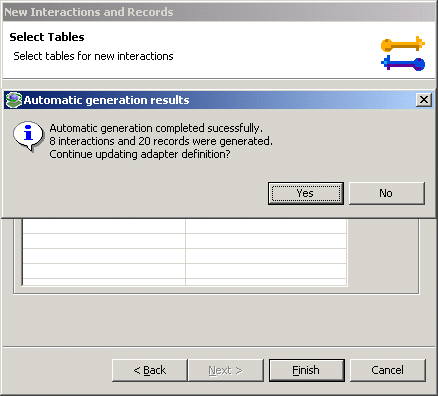
Text description of the illustration 46.gif
- Click Yes to complete the task. The interactions and the record structures that relate to the interactions are displayed in the Metadata list.
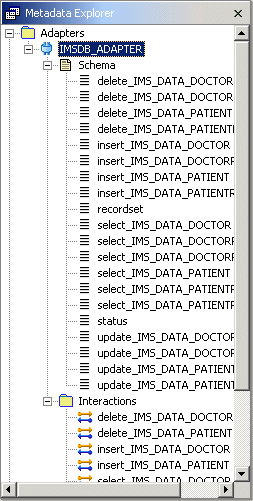
Text description of the illustration 47.gif
The SQL used in the interactions can be modified to the exact application requirements using the Metadata perspective, as described in "Task 3: Modifying the Generated Outbound Interactions".
Task 3: Modifying the Generated Outbound Interactions
You can modify the interaction definitions to the exact requirements of the application in the Metadata perspective. The following example uses the DELETE interaction generated in the previous task to describe how the interactions can be modified.
- In the Metadata perspective, right-click the interaction to modify and choose Edit Interaction from the popup menu.
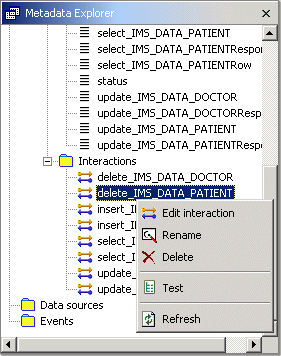
Text description of the illustration 48.gif
The adapter metadata editor opens, displaying the Interaction General tab.
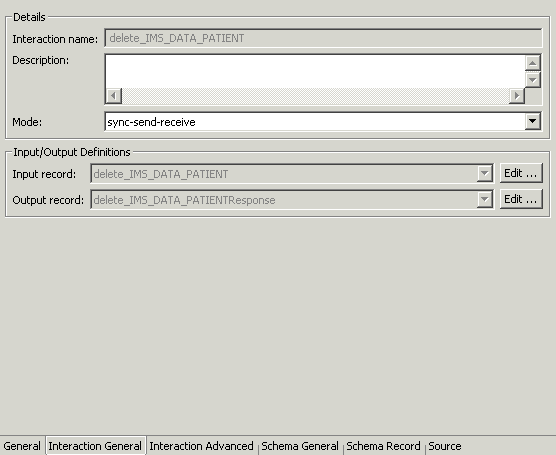
Text description of the illustration 49.gif
The Interaction General tab displays general information about the way the interaction is executed. You can add a description of the interaction and define the mode of operation for the interaction. The following modes are available:
- sync-send-receive - The interaction sends a request and expects to receive a response.
- sync-send - The interaction sends a request and does not expect to receive a response.
- sync-receive - The interaction expects to receive a response.
The information for a request is passed in the input record. The information for the response from the IMS/DB data source is passed in the output record.
- Click the Interaction Advanced tab to display specific information about the interaction.
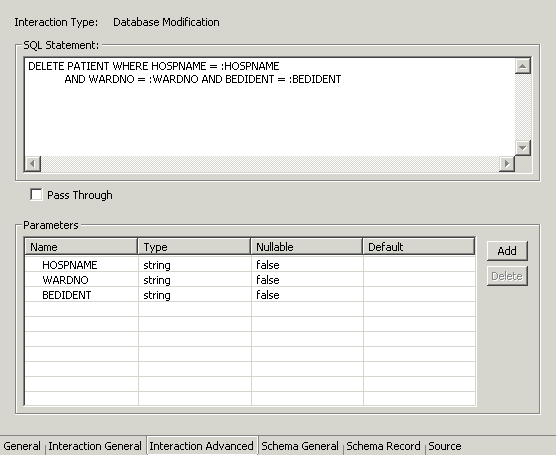
Text description of the illustration 49a.gif
As, required, change the SQL and the parameters associated with the SQL.
Parameters are specified in a SET clause or in a WHERE clause with the following format:
:parameter_name
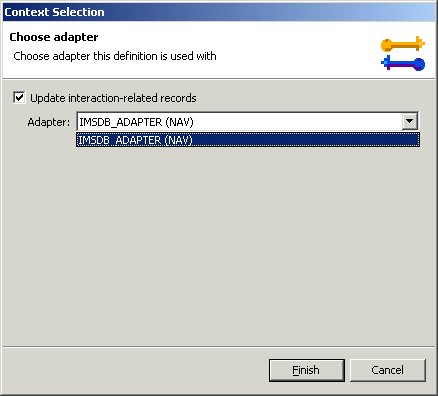
- Dependent on the changes made to the SQL, when you close the editor, or click the Save button, the Context Selection window opens.
Text description of the illustration 49b.gif
Specify the adapter from the list and check the Update interaction-related records checkbox. Any changes that need making to the record structures in the schema part of the metadata are done automatically.
Note:
The interaction records are built based on all the fields in the table and cannot be changed manually, even if you change the SQL so that less fields are involved.
|
Note:
Modifying interactions is the same as described above, which uses a DELETE SQL statement, for all types of SQL statements (INSERT, UPDATE, etc.).
|
Generating Inbound Interactions
Inbound interactions are defined as events in Oracle Studio. When you defined the Oracle Connect for IMS/DB backend adapter with the Create event queue for the adapter box checked, as described in "Task: Setting Up the Adapter", an event adapter was defined automatically. The event adapter is defined with the same name as the backend adapter with the word event appended to it. The backend adapter and the event adapter are linked by Oracle Studio. You can jump from one adapter definition to the other by right-clicking the adapter or event in the Configuration Explorer list and choosing the Linked Event or Linked Adapter option respectively.
The event adapter requires metadata describing the inbound interactions, including the structures used to pass information to and from the adapter.
Use the Import Metadata perspective in Oracle Studio to generate interaction metadata for the adapter.
Task 1: Defining an Import Procedure
- On the machine where Oracle Studio is installed, from the Start menu, choose Start > Programs > Oracle > Studio > Studio.
- In the Configuration Explorer, click the + next to the machine defined in "Configuring Oracle Connect for IMS/DB".
- Click the + next to the Bindings node. The binding configurations available on this machine are listed.
- Click the + next to the NAV binding node.
- Click the + next to the Adapters node.
- Right-click the IMS/DB adapter defined in "Setting Up the Oracle Connect for IMS/DB Backend Adapter".
- Choose Linked Event from the popup menu, to jump to the event adapter.
- Right-click the event adapter and choose Edit Event from the popup menu.
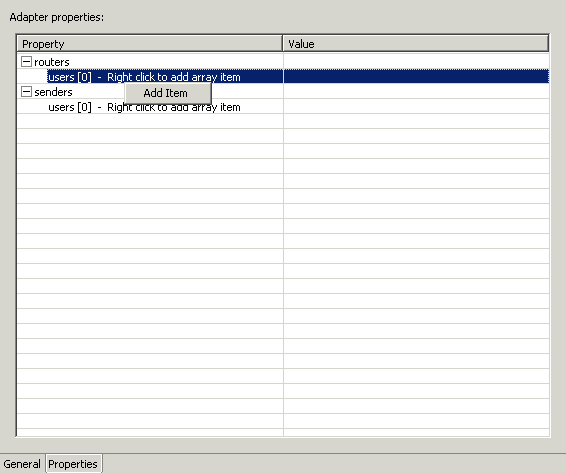
- Select the Properties tab to add the names of Oracle Application Server ProcessConnect users who can retrieve inbound interactions and OS/390 users who can send inbound interactions.
- To add Oracle Application Server ProcessConnect users, click the + next to the routers node and right click the users property to add the user.
Text description of the illustration 50a.gif
- Enter the name of the Oracle Application Server ProcessConnect user in the Value column for the item added.
- To add OS/390 users, click the + next to the senders node and right click the users property to add the user.
- Enter the name of the OS/390 user in the Value column for the item added.
- Click the Save Editor Contents button to save the changes.
- Right-click the event adapter in the Configuration Explorer and choose Import from the popup menu, to open the Metadata Import perspective, with the event adapter displayed under the Events list.
- Right-click the event adapter and choose New Import from the popup menu, to open the New Metadata Import wizard.
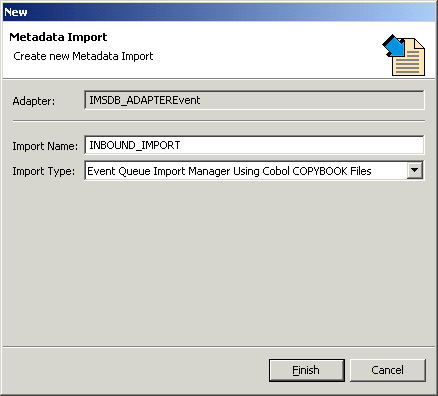
- Enter a name for the import. The name can contain letters and numbers and the underscore character only.
- Select Event Queue Import Manager Using Cobol COPYBOOK Input Files for the
Import Type.
Text description of the illustration 51.gif
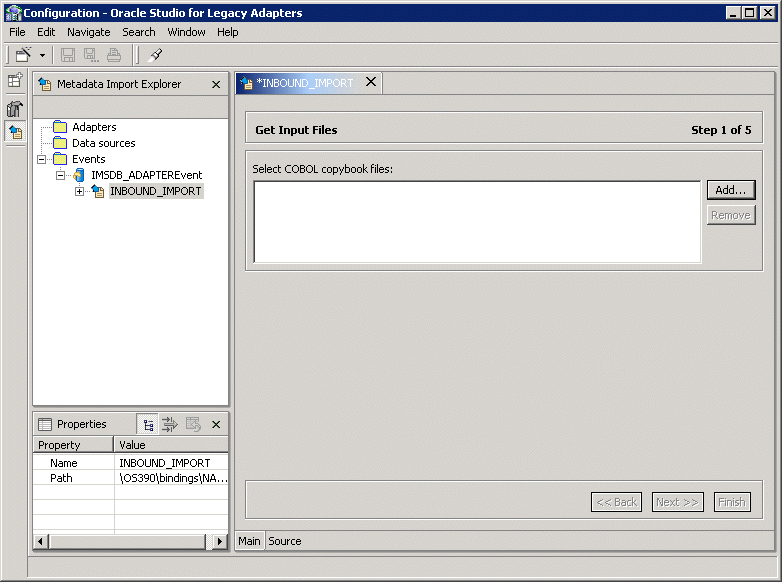
- Click Finish. The metadata import wizard opens in Oracle Studio.
Text description of the illustration 52.gif
Task 2: Generating Inbound Interactions
After defining an import as described in the preceding task, the metadata import wizard opens in Oracle Studio. COBOL copybooks are used to create the metadata. The import wizard generates record structures, which are used for the record structures for inbound interactions.
- Click Add to add COBOL copybooks.
A Select window opens. This window lists any files selected.
- Click Add.
The Add Resource window opens, which provides the option to select files from the local machine or FTP the files from another machine.
- If the files are on another machine, select the Import resource from remote machine option to start a file transfer process from the machine.
- Click Next to open the File Transfer wizard.
- Enter the server name where the COBOL copybooks reside and, if not using anonymous access, enter a username and password to access the machine.
- Click Next. The machine is accessed and the directory structure displayed, enabling you to browse to the files to be transferred.
You access the OS/390 machine at the high-level qualifier for the user name. To change the high-level qualifier, enter the name of the high-level qualifier in the Directory name field and click the arrow button.
- Navigate to the location where the files reside and select the files to be transferred and the transfer method (Text or Binary).
- Click Next. A summary screen is displayed with details of what is going to be transferred.
- Click Finish to start the transfer. The Select window is redisplayed with the list of transferred files.
- Select the files you want to use in the import and click OK.
Note:
You can import the metadata from one COBOL copybook and later add to this metadata by redoing the import using different COBOL copybooks.
The format of the COBOL copybooks must be the same. That is, you cannot import a COBOL copybook that uses the first six columns with a COBOL copybook that ignores the first six columns. In this case, you must do separate imports.
|

Text description of the illustration 53.gif
- In the metadata import wizard, click Next after you have completed adding the list of copybooks.
Text description of the illustration 53a.gif
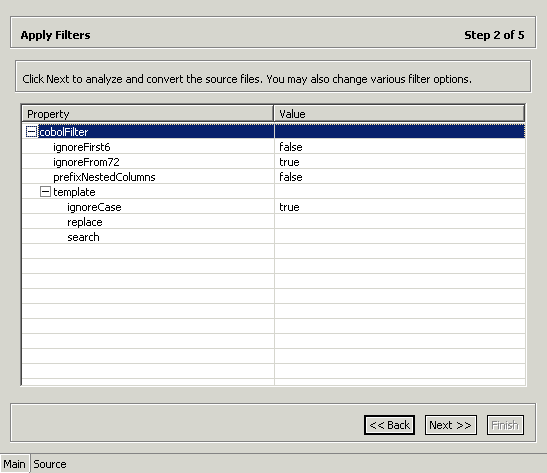
- Apply filters to the copybooks.
The following filters are available:
ignoreFirst6 - Ignore the first six columns in the COBOL copybook.
ignoreFrom72 - Ignore columns 73 to 80 in the COBOL copybook.
prefixNestedColumns - Prefix all nested columns with the previous level heading.
In addition, you can specify a search string and the string that will replace this search string in the generated metadata, and whether the replacement is dependent on the case of the found string.
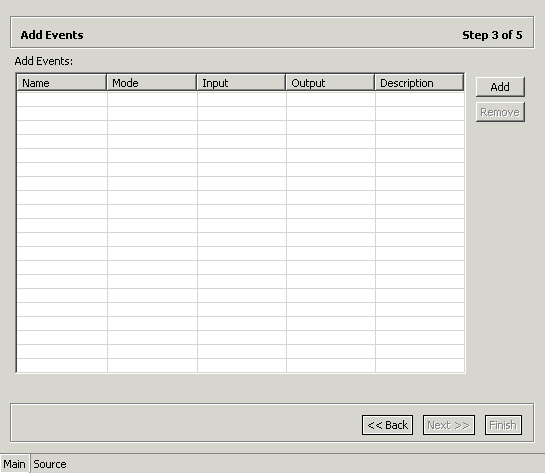
- Click Next to apply the filter settings. The Add Events window opens.
Text description of the illustration 54.gif
- Click Add to add an interaction for the IMS/DB adapter.
Interaction name - The name of the interaction.
Mode - The interaction mode:
async-send - The inbound interaction sends a request and does not expect to receive a response.
Input - Identifies an input record. The input record is the data structure for the inbound interaction. The records generated from the COBOL programs specified at the beginning of the procedure are listed in a drop-down list. Select the relevant record for the interaction.
Note:
You must specify an input record for each interaction before you can click Next.
|
Output - For internal use. You cannot specify in value in this field.
Description - Free text describing the interaction.
- Add as many interactions as necessary and then click Next.
Text description of the illustration 55.gif
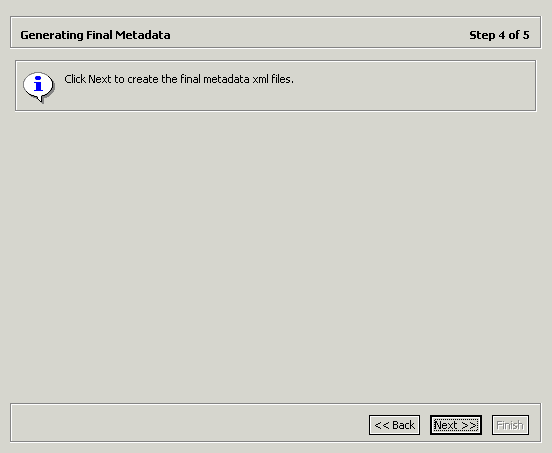
- Click Next to generate the metadata definitions for the adapter.
Text description of the illustration 56.gif
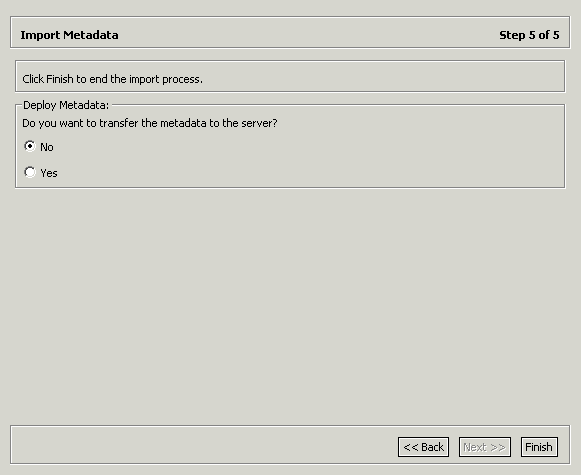
- Specify that you want to transfer the metadata from the Windows machine to the OS/390 machine and click Finish.
The metadata is imported based on the options specified and it is stored on the OS/390 machine. An XML representation of the metadata is generated. This XML file can be viewed by expanding the Output node.
After performing the import, you can view the metadata in the Metadata perspective in Oracle Studio. You can also make any fine adjustments to the metadata and maintain it, as necessary.


