10g (9.0.4)
Part Number B10271-01
Home |
Contents |
Index |
| Oracle Discoverer Administrator Tutorial 10g (9.0.4) Part Number B10271-01 |
|
It will probably take you about 10 minutes to complete this lesson.
In this lesson you will label information in a business area to help end users identify the information they will want to access. This includes adding a description to the New Video Stores business area and renaming folders and items to more clearly identify the data that they represent.
This lesson consists of the following exercises:
In this exercise you will add a description to the business area.
A descriptive phrase about the business area can help remind end users of the purpose of a business area.
To add a description to the business area:
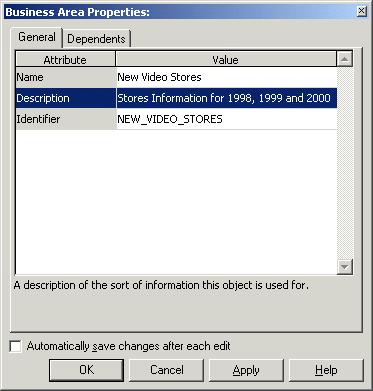
Stores Information for 1998, 1999 and 2000.
Hint: Many Discoverer dialogs have an OK button and an Apply button. If you click the Apply button, Discoverer puts the changes into effect, but does not close the dialog. You can continue making changes to other items using the same dialog. If you click the OK button, Discoverer applies the changes and closes the dialog. If you select the Automatically save changes after each edit check box, you don't have to click the Apply button as changes are saved as you make them.
In this exercise you added a description to the business area.
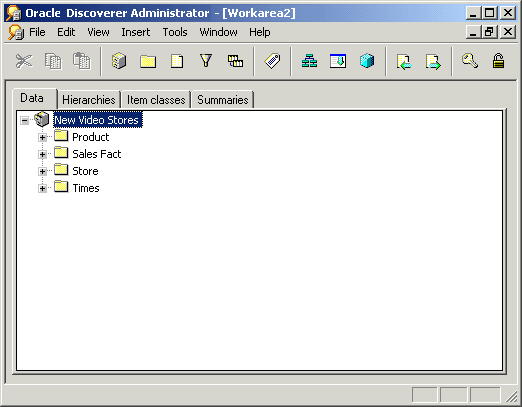
In this exercise you will rename and add descriptions to folders.
Folders are the basic elements that end users see when working with a business area. For that reason, folders must have meaningful names as well as useful descriptions that explain the folder's primary use.
To rename and add descriptions to folders:
This expands the list of folders in the business area.
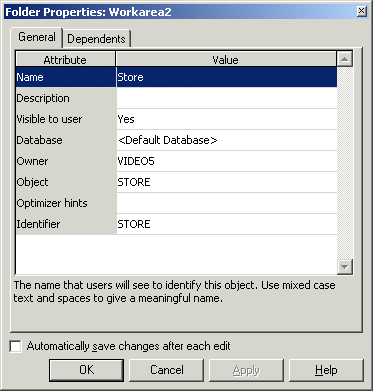
Store details including values such as name, floor plan type, and location.
The folder name and description will be visible in Discoverer Plus and Discoverer Viewer.
Click Apply and repeat the steps for each folder using the new text listed in the table below under the column heading New folder name.
| Original folder name | New folder name |
|---|---|
|
Product |
Product Information |
|
Sales Fact |
Sales Details |
|
Times |
Time Information |
Hint: While the Properties dialog is open, you can click another object in the Workarea to switch your view to the properties for that object.
Now that you have given the folders more meaningful names and provided a description for the contents of each folder, end users can see the new names and descriptions when deciding which folders to use in a report.
In this exercise you renamed and added descriptions to folders.
In this exercise you will rename items in the Time Information folder.
Database columns often have cryptic names that have little meaning for end users. When columns are loaded into a business area, the items that represent them are given the same names, depending on the options you choose. Just as you can change folder names and add descriptions to them, you can also change item names and add descriptions to them.
To rename items in the Time Information folder:
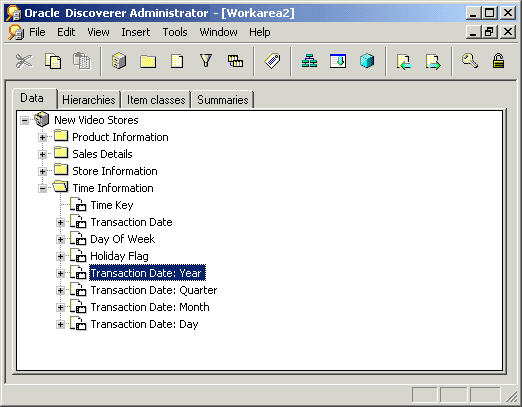
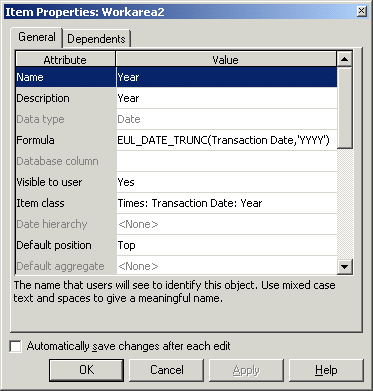
The change you make in the Name field also automatically registers in the Heading field (you might need to use the scroll bar if you want to display the Heading field).
You can also change the description. However, in the case of date or time-related items, the default description is adequate.
In this exercise you renamed items in the Time Information folder.
In this lesson you labelled information in a business area to help end users identify the information they will want to access.
In this lesson you completed the following exercises:
In the next lesson, you will further enhance the business area by creating a custom folder.
|
|
 Copyright © 1996, 2003 Oracle Corporation. All Rights Reserved. |
|