10g (9.0.4)
Part Number B10271-01
Home |
Contents |
Index |
| Oracle Discoverer Administrator Tutorial 10g (9.0.4) Part Number B10271-01 |
|
It will probably take you about 20 minutes to complete this lesson.
In this lesson you will use the Summary Wizard to create summary folders:
Although the New Video Stores business area is now ready for end users, it might be inefficient to allow frequently repeated end user queries to access the detail tables in a production database. It can take a long time to return query results if the detail tables contain very large numbers of rows.
To improve query efficiency, Discoverer Administrator enables you to create summary folders. A summary folder references pre-aggregated data that you know your end users will want to analyze in a worksheet. Discoverer queries can be directed to the pre-aggregated data, avoiding aggregating large volumes of detail data each time a query runs, and therefore optimizing query efficiency.
Note: As the Discoverer manager, you are advised to use Discoverer's ASM facility to create summary folders. For more information about ASM, click Help.
This lesson consists of the following exercises:
In this exercise you will use the Summary Wizard to create summary folders using Automated Summary Management (ASM).
ASM is a Discoverer facility that creates and manages summary folders for you.
You can run ASM in the following ways:
When using the Load Wizard: Step 4 dialog you can select the Summaries based on folders that are created check box (for more information, click Help).
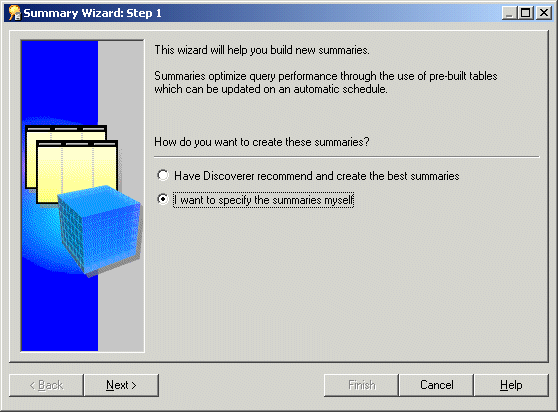
To create a summary folder using ASM:

ASM starts by analyzing folders in the current EUL so that it can propose a suitable set of summary folders to create.
Discoverer displays a progress bar indicating the current step and the number of folders analyzed.
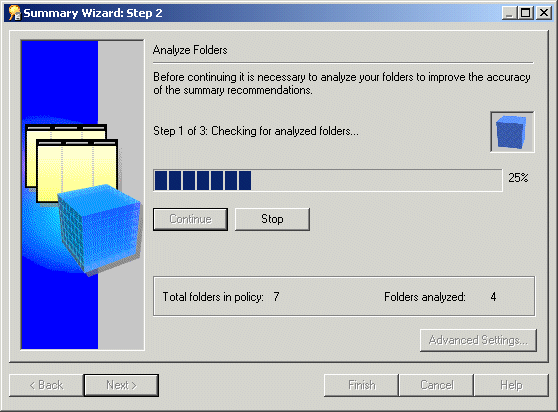
When folder analysis is complete, Discoverer displays the message Analyzing completed. Press Next to continue.
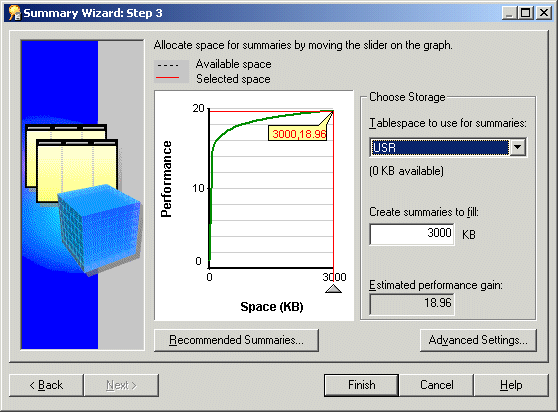
The above dialog displays a graph that indicates:
This dialog enables you to set the size of table space that you want ASM to fill with summary folders. Both the graph pointer and the Create summaries to fill field enable you to alter the size of the table space that Discoverer will use.
Note: Do not reduce the values to either the Table space to use for summaries field or the Create summaries to fill field.
Note: The estimated performance gain displayed above is calculated partly from query statistics gathered from end user queries and partly from data about the database tables. The performance gain can be very large in normal use because Discoverer collects statistics from end user queries that have previously been executed. However, Discoverer might not yet have collected any end user query statistics.
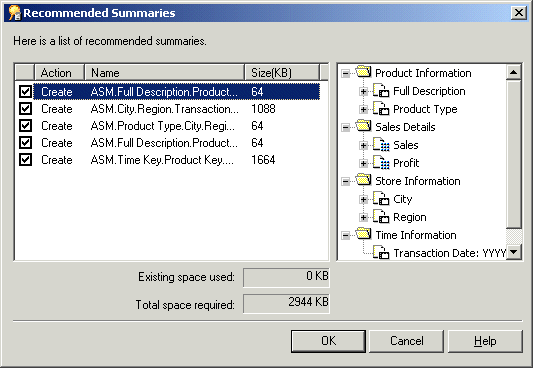
The Recommended Summaries dialog displays the summary folders suggested by ASM.
Discoverer displays a progress dialog while it creates the summary folders.
Discoverer then displays the Automated Summary Creation dialog indicating that summary folder creation is complete.
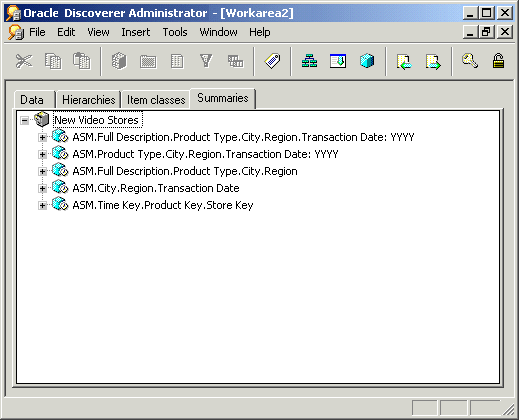
ASM has created summary folders that will improve end user query performance. To make sure that end users have the most appropriate summary folders, you must run ASM regularly.
For more information about ASM, click Help.
In this exercise you used the Summary Wizard to create summary folders using Automated Summary Management (ASM).
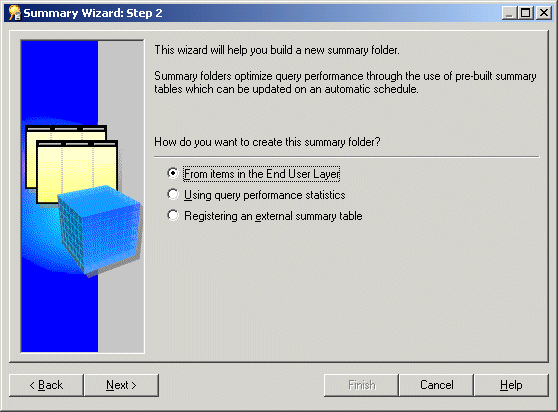
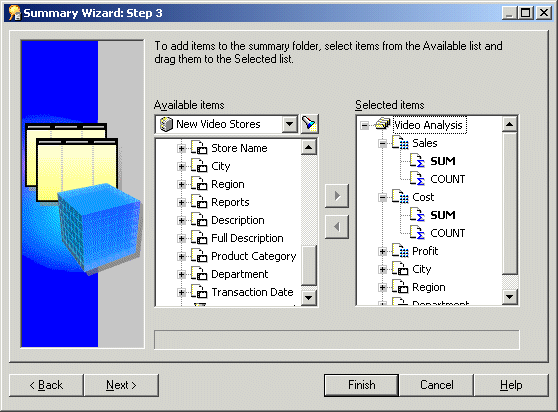
In this exercise you will use the Summary Wizard to create summary folders manually by specifying summary folders that are based on items that exist in the EUL.
To manually create a summary folder:
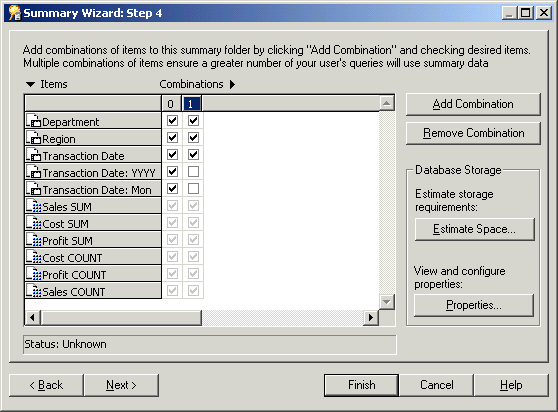
Your next task is to choose the summary combinations that you want Discoverer to build and manage.
Note: Summary combination are individual sets of axis and measure items that together make up a summary folder. If an end user runs a query with the same items as those specified in a summary combination, the query will run against pre-aggregated summary data instead of the detail data in the database. Consequently, the query performance is improved because it uses the pre-aggregated data instead of scanning all the detail rows.
In the Summary Wizard: Step 4 dialog, each numbered column represents a summary combination.
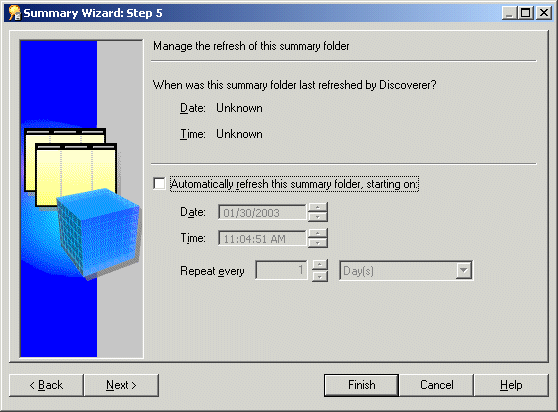
Your next task is to schedule the initial summary folder refresh and periodic refresh intervals then name the summary folder and schedule its build.
Note: The refresh schedule establishes the time frame in which Discoverer automatically updates the data in the summary folder. It is important for you, as the Discoverer manager, to set up a periodic refresh that ensures that the aggregated summary data is current at the periods required by end users.
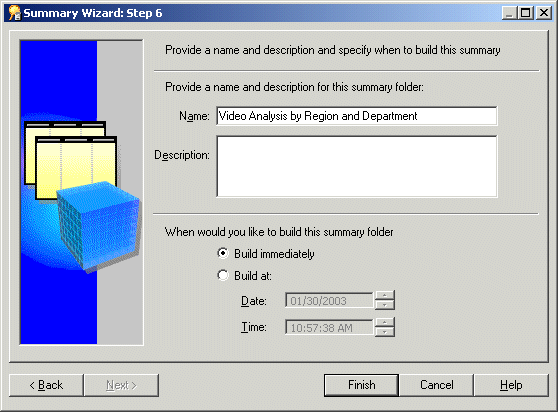
Video Analysis by Region and Department in the Name field.
Discoverer displays a progress bar while creating the summary.
You have now created a summary folder manually using Discoverer's Summary Wizard. End user queries that match any of the summary combinations can use this summary folder and benefit from the performance gain that it offers.
In this exercise you used the Summary Wizard to create a summary folder manually by specifying that the summary folder is based on items that exist in the EUL.
In this lesson you used the Summary Wizard to create summary folders:
In the next chapter you can remove remove all of the work that you completed as part of this tutorial.
|
|
 Copyright © 1996, 2003 Oracle Corporation. All Rights Reserved. |
|