|
Oracle® Business Intelligence Discoverer Plus User's Guide
10g Release 2 (10.1.2.0.0) Part No. B13915-01 |
|
 Previous |
 Next |
|
Oracle® Business Intelligence Discoverer Plus User's Guide
10g Release 2 (10.1.2.0.0) Part No. B13915-01 |
|
 Previous |
 Next |
You save a workbook when you want to store Discoverer worksheets in the database. When a workbook is saved to the database, it is available in Discoverer Plus Relational and Discoverer Viewer to all users with which it is shared (for more information, see "About sharing workbooks").
Hint: Before you can save it to the database, the Discoverer manager must have given you permission to do so. For more information, see "About saving a workbook to the database".
To save a workbook for the first time:
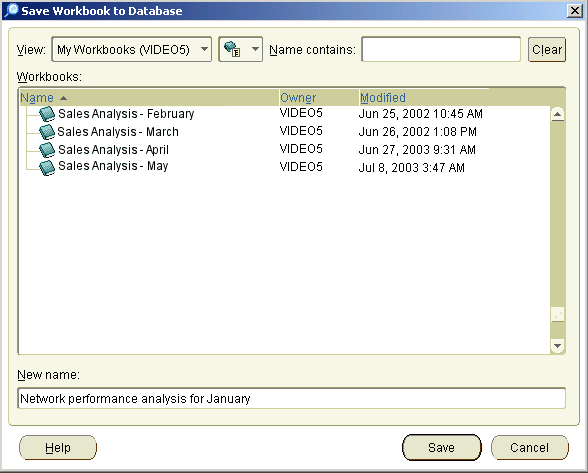
Choose File | Save to display the "Save Workbook to Database dialog".

Enter a new unique workbook name in the New name field.
Hint: You can enter a name that includes upper or lower case characters, and spaces (for example Jchan Sales Analysis Workbook for March).
Note: To avoid export issues on some platforms, do not use the colon (:) in workbook names.
Click Save to save the workbook.
The workbook is saved to the database, and is now available in Discoverer Plus Relational and Discoverer Viewer to all users with which it is shared (for more information about sharing workbooks, see "About sharing workbooks").
To save changes to a workbook and keep the workbook open:
Choose File | Save.
The changes are saved and the workbook remains open.
To save changes to a workbook and close the workbook:
Choose File | Close.
If you have not made changes to any worksheet in the workbook, the workbook closes. If the workbook contains unsaved changes on any worksheet, a prompt reminds you to save the changes.
To make a copy of a workbook:
Open a workbook.
Choose File | Save As.
Enter a new name in the New name field.
Notes
You can only save changes to a shared workbook if you own that workbook. If you change a shared wookbook that you do not own and you want to keep the changes, you must save a copy of the shared workbook by selecting File | Save As. The copy of the shared workbook containing your changes becomes your own private copy of the workbook. The original shared wookbook remains unchanged. For more information about shared workbooks, see "About sharing workbooks".