| Oracle® Application Server Adapter for SAP R/3 User's Guide 10g Release 2 (10.1.2) B14061-03 |
|
 Previous |
 Next |
| Oracle® Application Server Adapter for SAP R/3 User's Guide 10g Release 2 (10.1.2) B14061-03 |
|
 Previous |
 Next |
This chapter contains the following examples:
The scenarios shown in this chapter require the following prerequisites.
Prerequisites
The following are installation and configuration requirements:
OracleAS Adapter for SAP must be installed on Oracle Application Server.
SAP must be configured for outbound processing. See Appendix A, "Configuring SAP for Inbound and Outbound Processing" for more information.
OracleAS Database adapter must be deployed and properly configured.
OracleAS Integration InterConnect Adapter Plugin for EIS must be installed and running.
The examples in this chapter present the configuration steps necessary for demonstrating service and event integration with SAP. Prior to using this material, you must be familiar with the following:
How to configure OracleAS Adapter for SAP for services and events. For more information, see Chapter 2, "Configuring OracleAS Adapter for SAP".
How to configure OracleAS Integration InterConnect iStudio (iStudio) for service and event interactions. All required steps are shown in the examples.
|
See Also: Oracle Application Server Integration InterConnect User's Guide |
Overview of InterConnect Integration
InterConnect provides a comprehensive application integration framework. OracleAS Adapter for SAP used in conjunction with InterConnect enables you to seamlessly integrate enterprise software, eliminating the need to write custom code. Functional modeling, as opposed to custom coding solutions, allows for software reuse and reduces the complexity and management challenges that arise over the software lifecycle. This integration model consists of two components--high-level integration logic and low-level platform services.
Adapter integration with OracleAS InterConnect is a two-step process:
Design Time: OracleAS Adapter for SAP is configured in Application Explorer for services and events, as described in Chapter 2, "Configuring OracleAS Adapter for SAP". Integration logic is modeled in iStudio. Metadata are stored in repositories.
Runtime: The underlying platform treats this metadata as runtime instructions to enable the communication between participating applications.
The following example describes how to establish a connection to your SAP system, and how to create a port and a channel for DEBMAS05.
Connecting to SAP
Start Application Explorer.
Expand the Adapters node.

Perform the following steps:
Expand the SAP node.
Click the target name, for example, SAPTarget, under the SAP node.
The Connection dialog box opens, populated with values you have previously entered.
Verify your connection parameters.
Provide the required password.
Right-click the target name and select Connect.
The X over the icon disappears, indicating that the node is connected.

Expand the ALE(IDOCS) node and select DEBMAS.

Expand the DEBMAS list and select DEBMAS05.
Creating an Event Port for DEBMAS05
To create an event port for DEBMAS05:
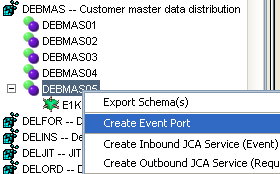
Right-click the DEBMAS05 node and select Create Event Port.
The Create Event Port dialog box is displayed.
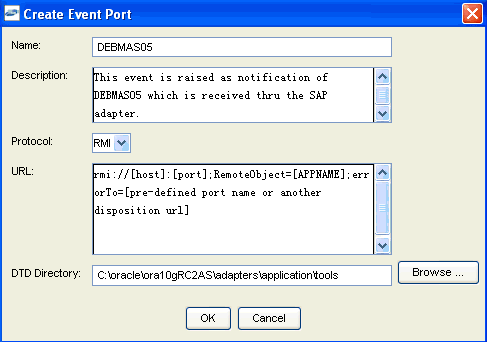
Perform the following steps:
Click OK.
The port appears under the ports node in the left pane.

In the right pane, a table appears that summarizes the information associated with the event port you created.

You can now associate the event port with a channel.
Creating a Channel
Expand the SAP node.
The ports and channels nodes appear in the left pane.

Right-click Channels and select Add Channel.
The Add Channel dialog box opens.
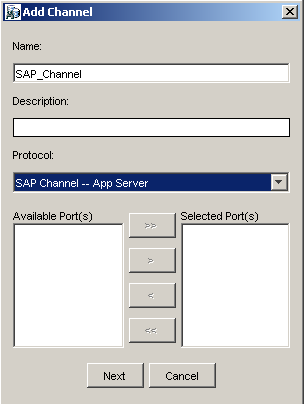
Perform the following steps:
Type a name for the channel, for example, TEST_CHANNEL.
Type a brief description.
Select an event port from the list of available ports. To select more than one, hold down the Ctrl key and click the ports.
To transfer the ports to the list of selected ports, click the double right (>>) arrow button.
Click Next.
The Application Server dialog box opens.
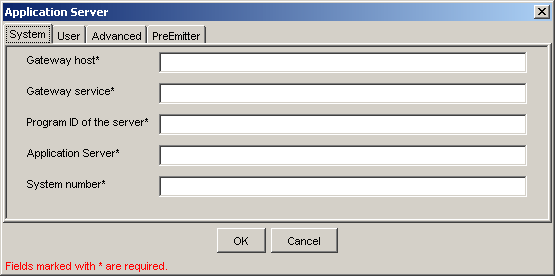
The following tabs are available:
System (Required)
User (Required)
Advanced
For the System tab, type the appropriate information for your SAP channel, based on the information in the following table.
Click the User tab.
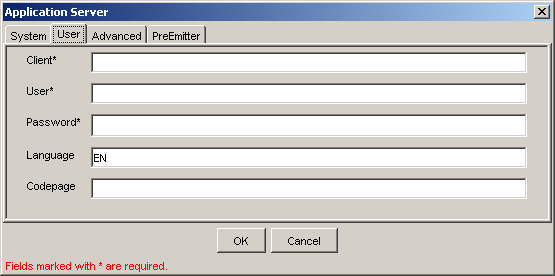
For the User tab, type the appropriate information for your SAP channel, based on the information in the following table.
Table 6-2 User Tab Parameters
| Target Parameter | Description |
|---|---|
|
Client |
The client number defined for the SAP application for client communications. |
|
User |
A valid user ID for the SAP application. |
|
Password |
A valid password for the SAP application. |
|
Language |
A language key. EN (English) is the default. |
|
Code page |
A character code page value. |
For the Advanced tab (optional), type the appropriate information for your SAP channel, based on the information in the following table.
Table 6-3 Advanced Tab Parameters
| Target Parameter | Description |
|---|---|
|
Select an IDoc type from the list. |
|
|
User Defined Function Modules |
Enter the path to the user-defined function module you created. |
|
Select this check box if you want to enable SAP traces for troubleshooting purposes. |
|
|
Unicode |
Select this check box if you are expecting your response in Unicode format. |
|
Synchronous Processing |
Select the type of synchronous processing from the list. |
Click OK.
The channel appears under the channels node in the left pane.
An x over the icon indicates that the channel is currently disconnected. You must start the channel to activate your event configuration.
Right-click the channel node and select Start.
The channel you created becomes active.

The x over the icon in the left pane disappears.
To stop the channel, right-click the connected channel node and select Stop.
This topic illustrates SAP service integration. It describes the design-time and runtime configuration steps.
The following procedures describe how to start the InterConnect repository, create a common view, and define invoked and implemented procedures. Then, it describes how to export PL/SQL code from iStudio.
Starting the Repository
To start the InterConnect repository, double-click the start.bat file located in the following directory:
InterConnect_home\repository\start.bat
Where InterConnect_home is the directory where InterConnect is installed, for example, C:\OraHome_1\integration\interconnect\.
Creating a Common View
Start iStudio by double-clicking the start.bat file located in the following directory:
InterConnect_home\istudio\iStudio.bat
iStudio starts.
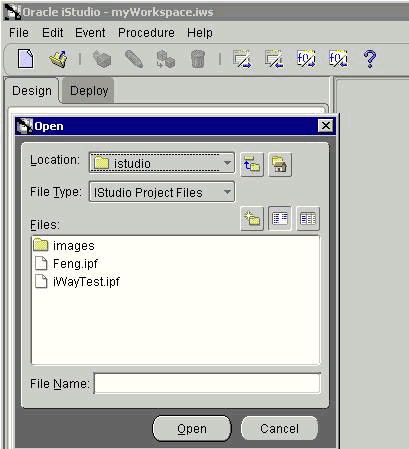
Open a project.
Open Common Views and Business Objects.
Create a Business Object called SAPGetDetailFL.
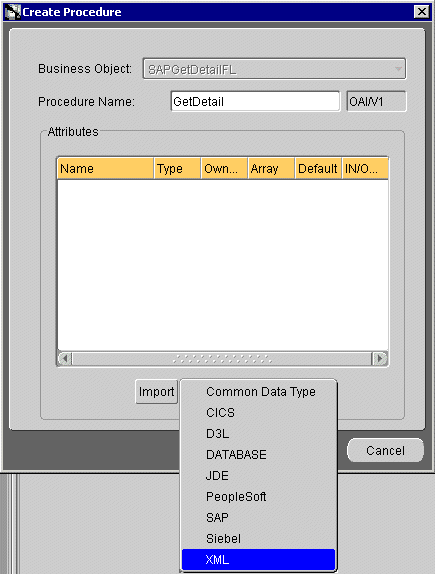
Create a new procedure under SAPGetDetailFL and type GetDetail as the procedure name.
Open the DTD generated from Application Explorer and load it.
The Choose Root Element dialog box is displayed.
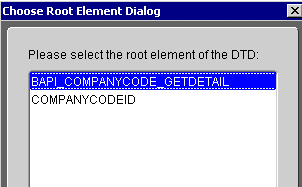
Select the root element, BAPI_COMPANYCODE_GETDETAIL, for this example.
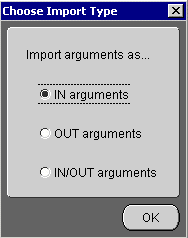
Select IN arguments as the import type for the request DTD and click OK.
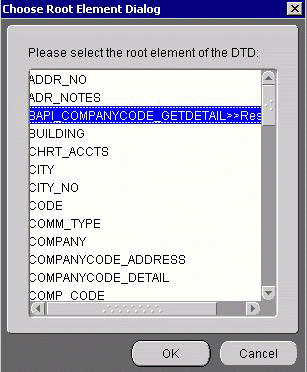
Import the response DTD, select the root element, and click OK.
The Choose Import Type dialog box is displayed.
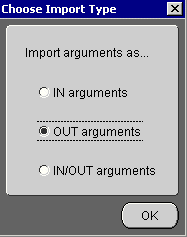
Select OUT arguments as the import type for the response DTD and click OK.
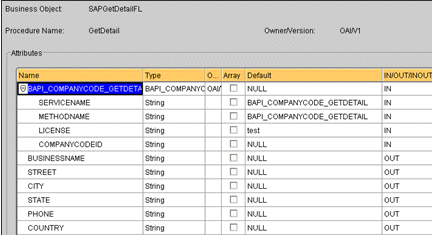
Manually enter all the OUT parameters as shown in the previous image.
To save the new procedure, click Save.
Creating an Invoked Procedure
To create an invoked procedure:
Create a new application called DBAPP_SAP.
Right-click Invoked Procedures and select New.
The Invoke Wizard - Select a Procedure window is displayed.
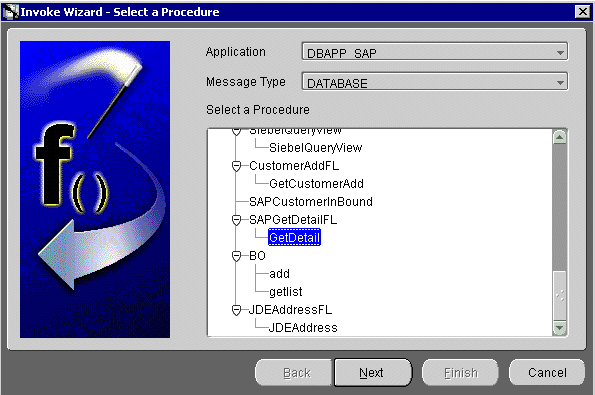
Perform the following steps:
From the Message Type list, select DATABASE.
Expand the SAPGetDetailFL business object as the event and select GetDetailFL.
Click Next.
The Invoke Wizard - Define Application View window is displayed.
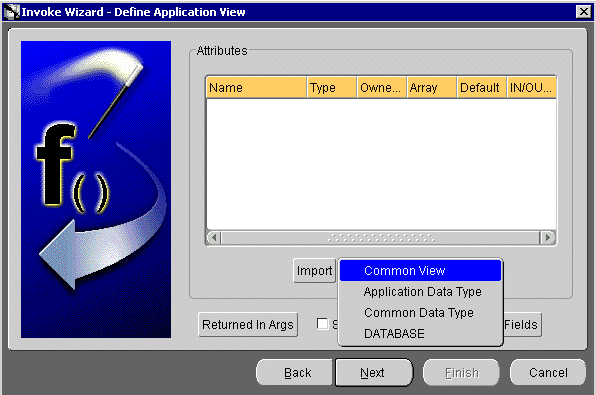
Perform the following steps:
Click Import.
Select Common View.
Information appears in the right pane.
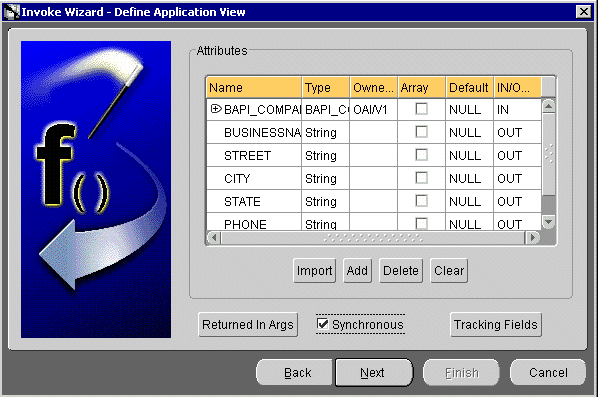
Select the Synchronous check box, because this is a request and a response.
Click Next.
Click New to create a mapping between the Common View and the Application View for the IN parameters. 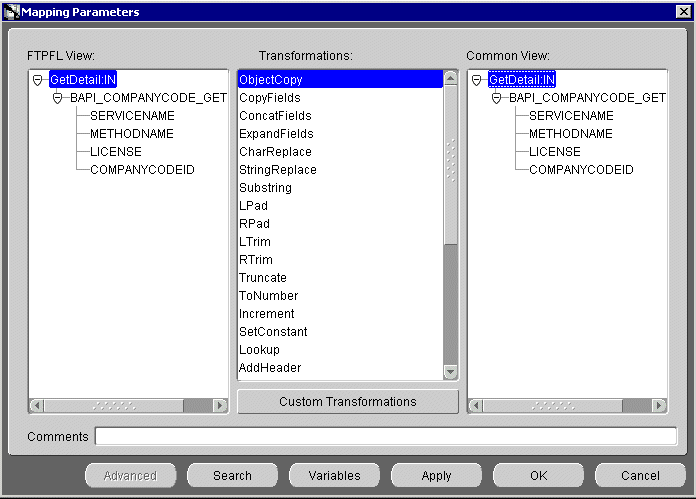
Description of the illustration map_params.gif
In this example, the Application View and the Common View have the same structure. All the attributes can be mapped by using ObjectCopy Transformation.
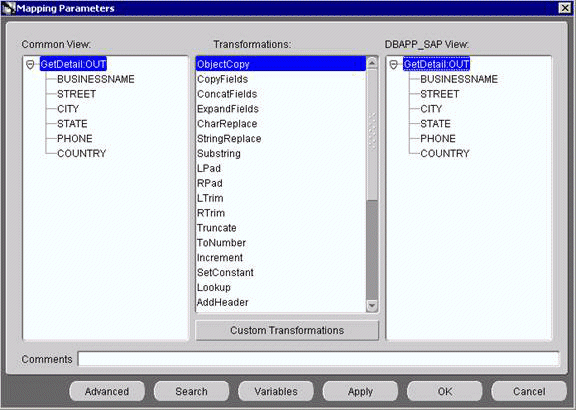
Click Apply and then OK.
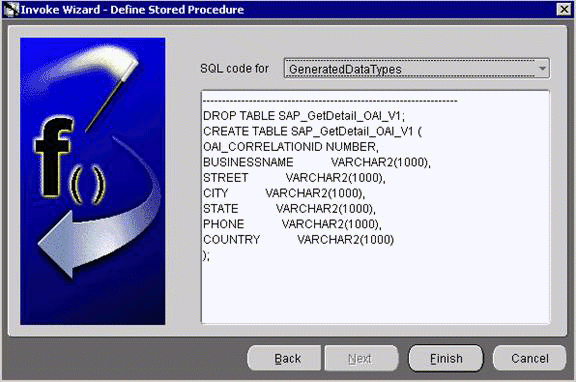
Click Finish.
The application definition for the invoked procedure is now complete.
Defining an Implemented Procedure
To define an implemented procedure:
Create a new application called SAPCompanyCodeFL.
Expand SAPCompanyCode_FL.
Right-click Implemented Procedure and select New.
The Implement Wizard - Select a Procedure window is displayed.
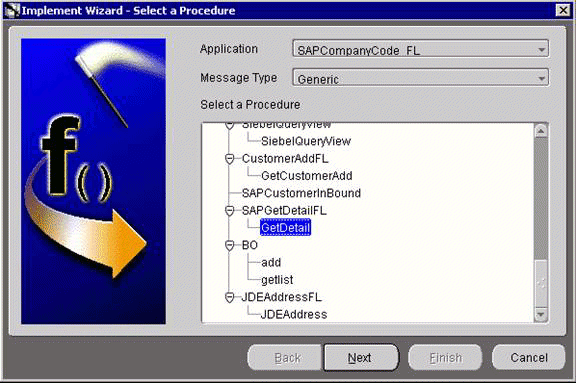
Perform the following steps:
Click Next.
Perform the following steps:
Click Import.
Select XML.
Select the request and response DTDs generated by Application Explorer.
Import the request and response DTDs into iStudio.
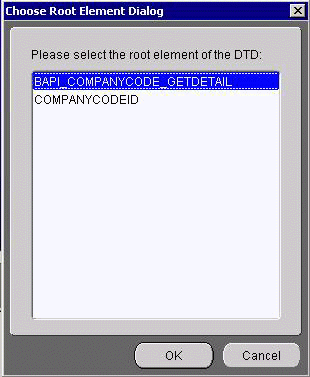
Select BAPI_COMPANYCODE_GETDETAIL as the root element of the request DTD.
The Choose Import Type dialog box is displayed.

Select IN arguments as the import type for the request DTD and click OK.
The Implement Wizard - Define Application View window is displayed.
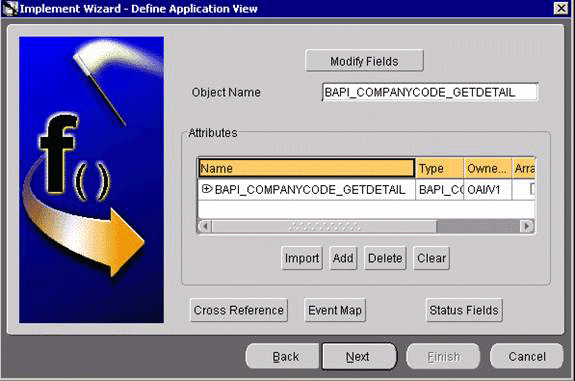
Type the root element of the request DTD in the Object Name field, if it is not automatically populated after importing the request DTD and click Import.
The Choose Root Element dialog box is displayed.
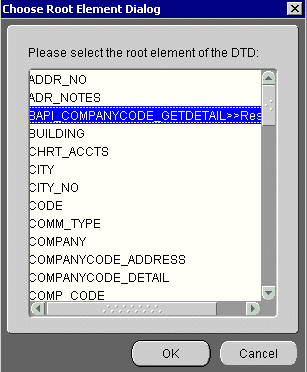
Select BAPI_COMPANYCODE_GETDETAIL as the root element and click OK.

Select OUT arguments as the import type for the response DTD and click OK.
Both the request and response DTDs are now imported into iStudio.
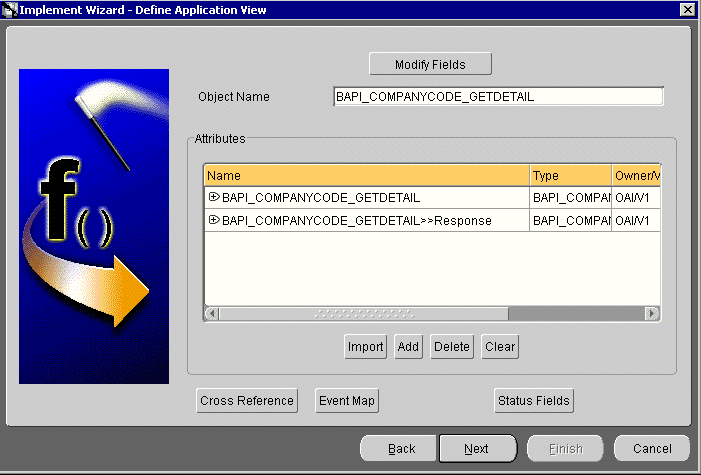
To define a mapping between the Application View and the Common View, click Next and then New.
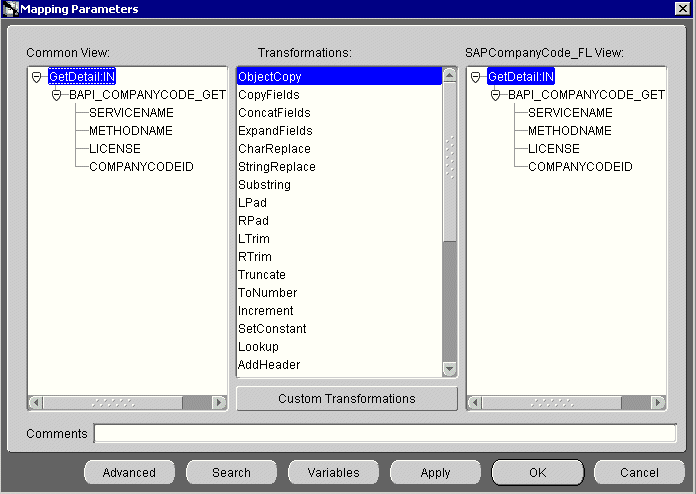
Because the Common View IN and the Application View IN have the same structure, ObjectCopy transformation is used for the mapping.
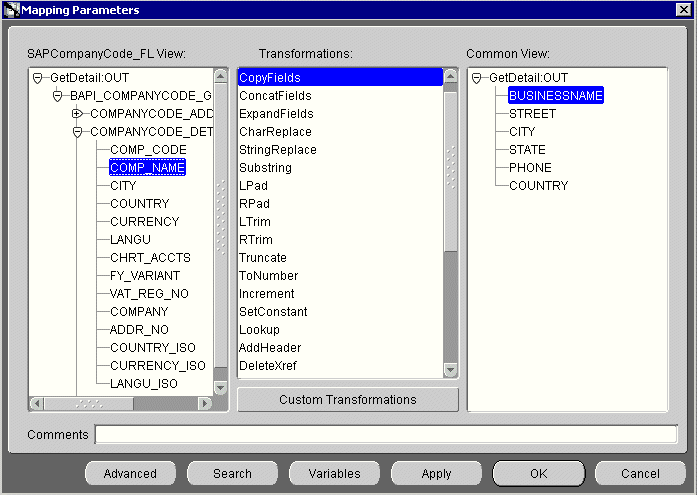
Click Apply and then OK.
To complete the definition of the implemented procedure, click Next and then Finish.
Exporting PL/SQL Code from iStudio
You must export the PL/SQL code created in "Defining an Implemented Procedure" and run it against the appropriate schema. In this example, the schema used is DBAPP_SAP.
To export PL/SQL code from iStudio:
In iStudio, click File and Export PL/SQL.
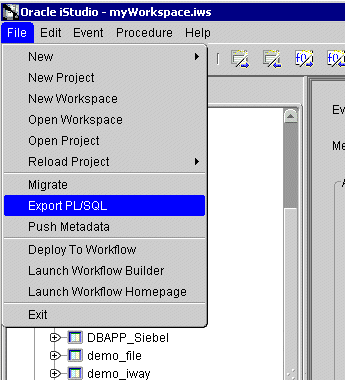
The Export Application dialog box is displayed.
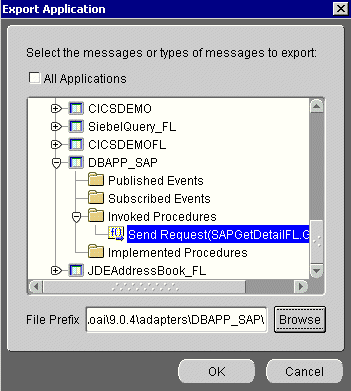
Perform the following steps:
Select the application from which to export PL/SQL.
Type or browse to the file prefix (path to the application).
Click OK.
In this example, two SQL scripts are created:
DBAPP_SAP_SAPGetDetailFLTYPES.sql
DBAPP_SAP_SAPGetDetailFL.sql
Log on to the database with the appropriate privileges (in this example, DBAPP_SAP) and run the following in the order given:
DBAPP_SAP_SAPGetDetailFLTYPES.sql
DBAPP_SAP_SAPGetDetailFL.sql
Create another stored procedure, COMPANYGETDETAIL_EXE, in the same schema. It is carried out at runtime to create the database message that is sent to the hub.
CREATE OR REPLACE  PROCEDURE "DBAPP_SAP"."COMPANYGETDETAIL_EXE" (
servicename LONG,
methodname  LONG,
license     LONG,
customerid  LONG
)
AS
  moid NUMBER;
  aoid NUMBER;
  coid NUMBER;
  businessname LONG;
  address LONG;
  city LONG;
  state LONG;
  phone LONG;
  country LONG;
  detailid NUMBER;
BEGIN
  SAPGetDetailFL.crMsg_GetDetail_OAI_V1(moid, aoid);
  detailid := SAPGetDetailFL.cr_BAPI_COMPANYCODE_GETDETAIL_(servicename,methodname,license,customerid,moid,aoid);
  coid := SAPGetDetailFL.inv_GetDetail_OAI_V1(moid,'DBAPP_SAP','',businessname,address,city,state,phone,country);
COMMIT;
END;
Editing the adapter.ini File
The adapter.ini file located under InterConnect_home\adapters\appname may require editing as described in the following procedure. If the following information is missing in adapter.ini, you must add it manually.
Open the adapter.ini file located under
InterConnect_home\adapters\appname
Where appname is the name of the application you created.
Add the following two lines to adapter.ini:
// Bridge class
bridge_class=com.iwaysoftware.iwbridge.IWBridge

// IBSE URL
ibse_url=http://hostname:port/ibse/IBSEServlet/XDSOAPRouter
Where hostname is the name of the Oracle Application Server host and port is the server port number. The default server port number for Oracle Application Server is 7777.
The following topic describes how to verify service integration using OracleAS Adapter for SAP.
Verifying Service Integration
To verify service integration:
Start Oracle Application Server or ensure that the server is running.
If necessary, restart OC4J by issuing the following command:
OracleAS_home\opmn\bin\opmnctl stopproc process-type=homeOracleAS_home\opmn\bin\opmnctl startproc process-type=home
Check the status of OC4J by issuing the following command:
OracleAS_home\opmn\bin\opmnctl status
Start the adapter by issuing the following commands:
InterConnect_home\adapters\SAPCompanyCode_FL\start.bat
InterConnect_home\adapters\DBAPP_SAP\start.bat
Log on to SQL*Plus with DBAPP_SAP and run the following command:
exec
companygetdetail_exe
('BAPI_COMPANYCODE_GETDETAIL','BAPI_COMPANYCODE_GETDETAIL','test','0001');
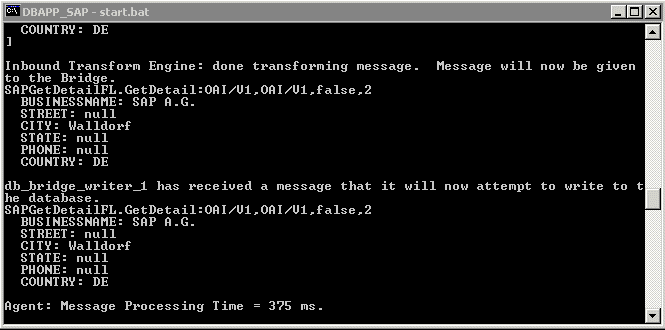
The following image shows the SAPCompanyCode_FL example. It receives a reply from SAP and returns the reply to the hub.
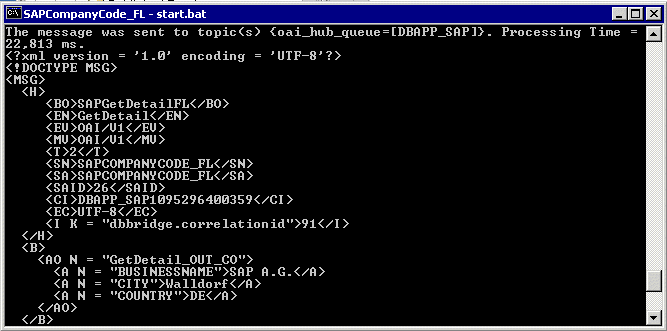
The following image shows the DBAPP_SAP example. It receives a reply from the hub and writes the data to the database table.
This example demonstrates how OracleAS Adapter for SAP integrates with SAP to receive event data. In this example, an SAP event occurs when a customer record is added to an SAP system. The adapter receives the SAP event customer data and disposes the data to an RMI event port. The RMI server resides on the OracleAS Integration InterConnect Hub. An OracleAS Database adapter on the OracleAS Integration InterConnect Hub subscribed to this event receives the customer data, transforms the event data, and then inserts the data into a database table. Design-time and runtime configuration is described in the following sections.
The following procedures describe how to start the repository and create a common view and then publish and subscribe an event.
Starting the Repository
To start the InterConnect repository, double-click the start.bat file located in the following directory:
InterConnect_home\repository\start.bat
Creating a Common View
Start iStudio.
The iStudio start.bat file is located in the following directory:
InterConnect_home\istudio\iStudio.bat
iStudio starts.

Open a new project.
Open Common Views and Business Objects.
Create a Business Object called CustomerFL and a new event under CustomerFL.

Click Import and select XML from the list.

Open the DTD generated from Application Explorer.

Select the root element, which must be identical to the event name specified earlier.

Publishing an Event
Create a new application called SAPFL.
Expand SAPFL.
Right-click Publish Events and select New.

Select XML as the message type and select DEBMAS05 under the CustomerFL business object as the event.
Click Next.

Click Import and select Common View from the list.
The structure from the selected Common View loads.

Ensure you enter the root element of the XML message, for example, DEBMAS05.
Click Next.
Click New to create a mapping between the Common View and Application View.
In this example, the Application View and Common View have the same structure. All the attributes can be mapped by using the ObjectCopy transformation.

Click Apply, OK, and then Finish.
The application definition for a published event is now complete.
Subscribing an Event
Create a new application called DBAPP.
Expand DBAPP.
Right-click Subscribe Events and select New.

Perform the following steps:
Select Database as the message type.
Under the CustomerFL business object, select DEBMAS05 as the event.
Click Next.

Click Import and select Database from the list.
The Database Login dialog box is displayed.

Type the appropriate login credentials and click Login.

Perform the following steps:
Expand the DBAPP schema.
Select the previously defined table, in this example, DBAPP.CUSTOMER2.
Click Next.
Click New to define mapping between the Application View and the Common View.

Perform the following steps:
When you have finished the mapping process, click OK.
The SQL code window is displayed.
Select sub_DEBMAS05_OAI_V1 from the SQL code list.
The procedure details are displayed.
Enter the appropriate code, if necessary.
In the following example, the INSERT statement is entered between BEGIN and END to insert received event data into the Customer2 table.
You must run this script to insert event data into the database table.

Click Finish.
The application definition for a subscribed event is now complete.
The following topic describes how to trigger an event in SAP and verify event integration using OracleAS Adapter for SAP.
Triggering an Event in SAP
To trigger an event in SAP:
Start the SAP Workbench and log in to the SAP system.

Carry out the bd12 transaction.

Perform the following steps:
In the Customer field, enter a customer number with a range from 1 to 3.
In the Output type field, enter DEBMAS.
In the Logical system field, specify the logical system you are using with SAP.
Click the check mark icon in the upper left-hand corner.

Ensure DEBMAS appears in the Message type column.
Customer master data is sent to the logical system specified. If a channel in Application Explorer defined the Program ID with the same value, the channel receives this customer master data from SAP.