Skip Headers

Oracle Discoverer Administrator Tutorial
10g (9.0.4)

Part Number B10271-01
Go To Documentation Library
Home
Go To Table Of Contents
Contents
Go To Index
Index

Go to previous page Go to next page

2
Lesson 1: Creating a private End User Layer

Lesson 1: Creating a private End User Layer for a new tutorial database user

It will probably take you about 5 minutes to complete this lesson.

In this lesson you will create a private End User Layer (EUL) for a new tutorial database user.

Each tutorial database user has their own EUL. This enables each tutorial database user to create their own version of a Discoverer Administrator business area.

The VIDEO5 user, tables and tutorial data must have been installed by your Discoverer manager before you can complete the tutorial (for more information, see Appendix A, "Installing the Discoverer tutorial EUL, data, and workbook").

This lesson consists of the following exercise:

Exercise 1: Creating a private End User Layer for a new tutorial database user

In this exercise you will create a private end user layer for a new tutorial database user. The tutorial database user that you create in this exercise you will use in the other tutorial lessons.

To create a private End User Layer for a new tutorial database user:
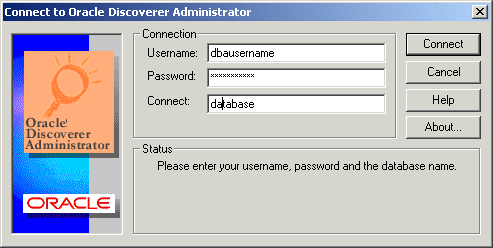
  1. Choose Programs | Oracle Developer Suite - <HOME_NAME> | Discoverer Administrator from the Windows Start menu to display the Connect dialog.

Figure 2-1 Connect to Oracle Discoverer Administrator dialog


Text description of conndba.gif follows.
Text description of the illustration conndba.gif

  1. Enter a database user with DBA privileges (for more information about the DBA username and password, see your database administrator).

  2. Enter the database user password in the Password field.

  3. In the Connect field:

    • If you are connecting to a default database, leave this field blank and click Connect.

      With Oracle 8.1.7 (or later) Enterprise Edition databases an entry is required in your tnsnames.ora file for this to work (for more information, see your Discoverer manager).

    • If you are connecting to an Oracle database that is not your default database, specify the appropriate SQL*Net connect string and click Connect (for more information about the connect string, see your database administrator).

    • If you are connecting to a non-Oracle database, type ODBC:<data source name> and click Connect.

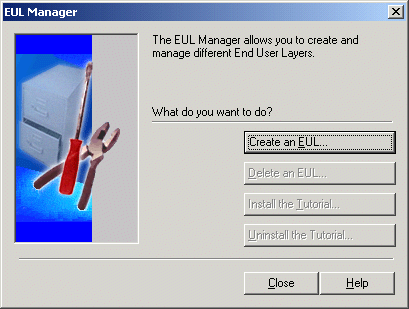
  4. To display the EUL Manager dialog:

    Discoverer Administrator behaves differently depending on whether an EUL has already been created for the database user that you use to connect with.
    • If no End User Layers exist, Discoverer Administrator displays a dialog with the message Do you want to create an EUL now? Click Yes to display the EUL Manager dialog.

    • If one or more End User Layers exist, Discoverer Administrator displays the Load Wizard. Click Cancel in the Load Wizard and choose Tools | EUL Manager to display the EUL Manager dialog.

    Figure 2-2 EUL Manager dialog


    Text description of eulmgr.gif follows.
    Text description of the illustration eulmgr.gif

    1. Click Create an EUL to display the Create EUL Wizard dialog.

    Figure 2-3 Create EUL Wizard dialog


    Text description of eulwz1.gif follows.
    Text description of the illustration eulwz1.gif

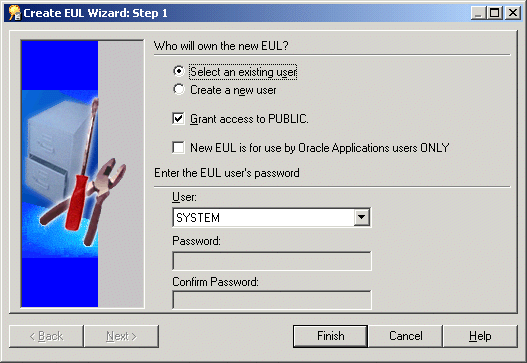
    Use this wizard to create an EUL and a new database user. You will use the new database user for all the lessons in this tutorial.

    1. Select the Create a new user radio button.

    2. Clear the following check boxes:

      • Grant access to PUBLIC

      • New EUL is for use by Oracle Applications users ONLY

    3. Type admintutor followed by your by your initials (e.g. admintutorjs if your name is John Smith) in the User field.

      This will be your database username for the tutorial.

    4. Enter the same username that you entered in the User field, in both the Password and Confirm Password fields.

    5. Make sure that the Create EUL Wizard dialog displays the settings for radio buttons and check boxes as shown below.

    Figure 2-4 Create EUL Wizard dialog


    Text description of eulwiz1.gif follows.
    Text description of the illustration eulwiz1.gif

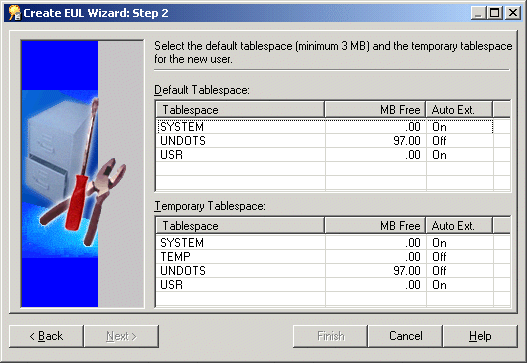
    1. Click Next to display the Create EUL Wizard: Step 2 dialog.

    Figure 2-5 Create EUL Wizard: Step 2 dialog


    Text description of eulwz2.gif follows.
    Text description of the illustration eulwz2.gif

    1. Select the default and temporary tablespaces.

      For example, select USER_DATA, as the default tablespace and TEMP as your temporary tablespace. If you are in doubt about selecting a default and temporary tablespace, see your database administrator.
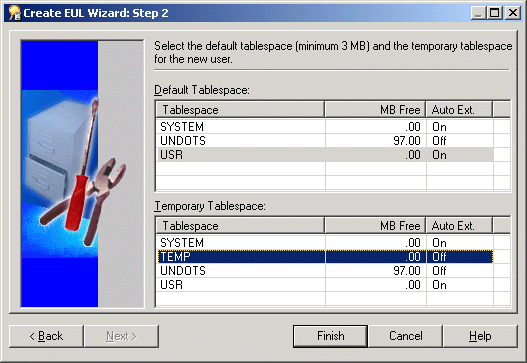
    Figure 2-6 Create EUL Wizard: Step 2 dialog


    Text description of eulwiz2.gif follows.
    Text description of the illustration eulwiz2.gif

    1. Click Finish for Discoverer Administrator to build the EUL.

      Discoverer Administrator displays a progress bar showing the creating EUL status.
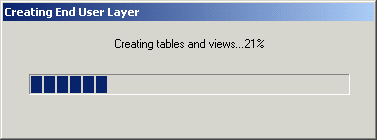
    Figure 2-7 Creating EUL progress bar


    Text description of eulprog.gif follows.
    Text description of the illustration eulprog.gif

    Once Discoverer has created the new EUL Discoverer Administrator displays a message that the EUL has been created successfully.
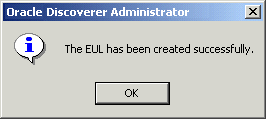
    Figure 2-8 EUL created successfully message


    Text description of eulsuc.gif follows.
    Text description of the illustration eulsuc.gif

    Note: The following steps enable you to close Discoverer Administrator by navigating through a series of dialogs. This help you to start the other tutorial lessons from a common starting point.

    1. Click OK to display the following dialog.

    Figure 2-9 Install tutorial data in EUL dialog


    Text description of instut.gif follows.
    Text description of the illustration instut.gif

    1. Click No, Discoverer Administrator displays the following dialog.

      Note: The reason you are asked to click No is because the tutorial data has already been installed by your Discoverer manager. For more information, see your Discoverer manager or Appendix A, "Installing the Discoverer tutorial EUL, data, and workbook".

    Figure 2-10 Do you want to connect as the owner of the EUL you just created? dialog


    Text description of coneul.gif follows.
    Text description of the illustration coneul.gif

    1. Click No to display the EUL Manager dialog.

    Figure 2-11 EUL Manager dialog


    Text description of eulmgr.gif follows.
    Text description of the illustration eulmgr.gif

    1. Click Close to close the EUL Manager dialog and display the following dialog.

    Figure 2-12 Do you want to create an EUL now? dialog


    Text description of creul.gif follows.
    Text description of the illustration creul.gif

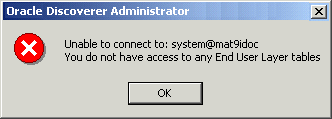
    1. Click No to close the above dialog and display the following dialog.

    Figure 2-13 Unable to connect to dialog


    Text description of unable.gif follows.
    Text description of the illustration unable.gif

    1. Click OK. to close the above dialog and display the Connect dialog

    Figure 2-14 Connect dialog


    Text description of conndba.gif follows.
    Text description of the illustration conndba.gif

    1. Click Cancel to close the Connect dialog.

    2. Click File | Exit to close Discoverer Administrator.

    In this exercise you have created a private end user layer for a new tutorial database user.

    Lesson summary

    In this lesson you:

    • created a private EUL for a new tutorial database user

    Having created a new EUL for a new tutorial database user you can now complete the tutorial lessons in the following chapters.

    In the next lesson you will create a business area, described in "Lesson 2: Connecting to Discoverer Administrator, using the Load Wizard and the Workarea".


Go to previous page Go to next page
Oracle
Copyright © 1996, 2003 Oracle Corporation.

All Rights Reserved.
Go To Documentation Library
Home
Go To Table Of Contents
Contents
Go To Index
Index