| Oracle® SOA Suite Tutorial Release 3 (10.1.3.1.0) Part Number B28937-01 |
|
|
View PDF |
| Oracle® SOA Suite Tutorial Release 3 (10.1.3.1.0) Part Number B28937-01 |
|
|
View PDF |
The focus of this chapter is how to get a client application such as the SOADemo-Client application to interface with the projects in the SOA Order Booking application.
This chapter does not cover how to create the client application in detail because the client application uses the standard ADF technology, which is covered in detail in the ADF Developer's Guide and ADF Tutorial.
This chapter includes the following topics:
The SOADemo-Client application is a Web-based application that customers use to place orders with Global Company. When a customer logs into the application, he or she can browse products, place products into the shopping cart, and submit the order. For details on the pages in the SOADemo-Client application, see the Oracle SOA Suite Quick Start Guide.
The SOADemo-Client application uses ADF technology to simplify the application development process and to make the application easier to maintain. You can use JDeveloper to create ADF applications.
The SOADemo-Client application makes calls to these services provided by the SOA Order Booking application:
CustomerService. In the login process, the client application uses the "find customer by email" service provided by CustomerService to validate the customer's login ID and password.
CustomerService. The SOADemo-Client application provides a Register button that enables new customers to add themselves to the database. The Register button invokes the "add new customer" service provided by CustomerService.
OrderBookingESB. When the customer submits an order, it invokes the OrderBookingESB project. The OrderBookingESB project in turn invokes the SOAOrderBooking BPEL process, which is the main flow for the SOA Order Booking application.
For the SOADemo-Client application to be able to invoke services provided by CustomerService and OrderBookingESB, you have to generate web service proxies for the services. In the code for the client, you call methods in the web service proxy, which then invokes the corresponding methods in CustomerService or OrderBookingESB. You can use JDeveloper to generate web service proxies.
This section describes how to generate a web service proxy for CustomerService, and how to call it from the client application.
Section 10.2.1, "Generate a Web Service Proxy for CustomerService"
Section 10.2.3, "Write Code to Invoke the Web Service Proxy for CustomerService"
To generate web service proxy for CustomerService, you create a project for it in the client application. The following procedure starts by creating an empty project, then invokes the Create Web Service Proxy wizard to create the proxy for CustomerService.
Create a project in your client application to contain the web service proxy for CustomerService. Begin by creating an empty project:
Right-click the client application, and select New Project.
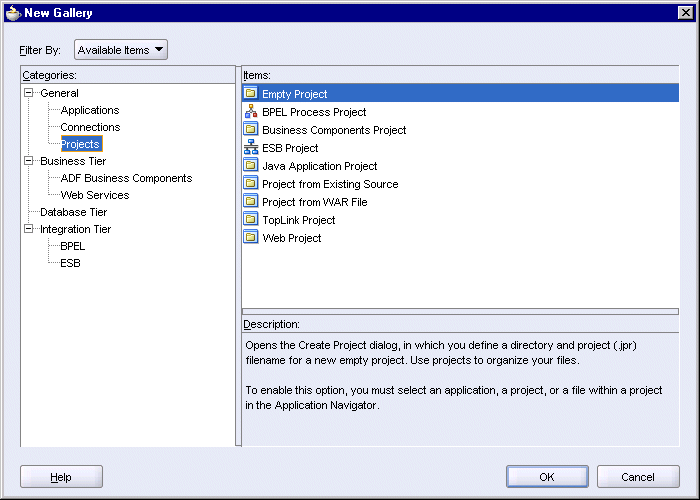
In the New Gallery, in the Categories section, expand General and select Projects. In the Items section, select Empty Project.
Figure 10-1 New Gallery for Creating an Empty Project
Click OK.
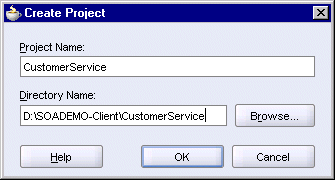
In the Create Project dialog, enter CustomerService in the Project Name field.
Figure 10-2 Create Project Dialog for the CustomerService Web Service Proxy Project
Click OK.
In the Application Navigator, you should see an empty CustomerService project located under the client application.
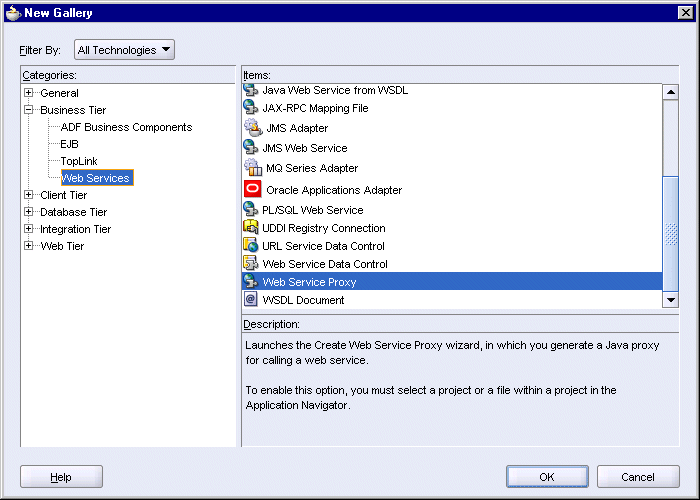
Right-click the CustomerService project, and select New. In the New Gallery, in the Categories section, expand Business Tier and select Web Services. In the Items section, select Web Service Proxy.
Figure 10-3 New Gallery for Creating a Web Service Proxy
Click OK. This launches the Create Web Service Proxy wizard. Click Next to continue.
In Step 1, Web Service Description:
WSDL Document URL: enter the following URL:
http://host:port/CustomerService/CustomerService?WSDL
host specifies the name of the machine running Oracle Application Server, and port specifies the HTTP at which Oracle HTTP Server or OC4J is listening.
Mapping File: leave it blank.
Figure 10-4 Create Web Service Proxy Wizard, Step 1: Web Service Description

Click Next. If nothing happens, click the UDDI button. This pops up another wizard. Click Cancel in that wizard. Now click Next again.
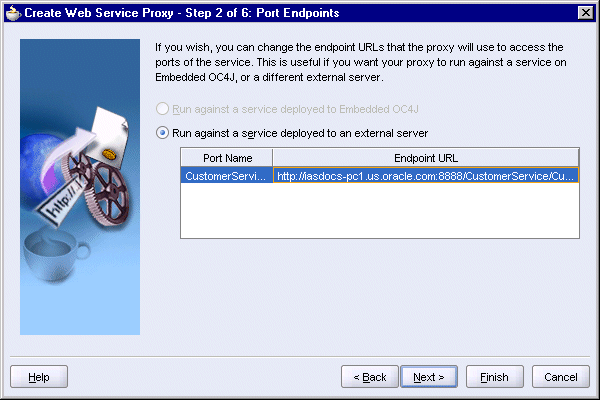
In Step 2, Port Endpoints, select Run against a service deployed to an external server, and click Next.
Figure 10-5 Create Web Service Proxy Wizard, Step 2: Port Endpoints
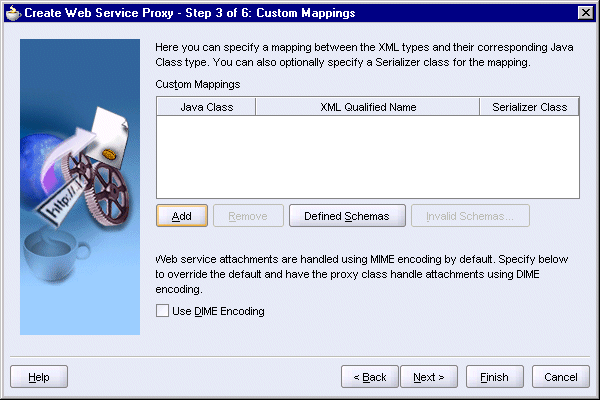
In Step 3, Custom Mappings, click Next.
Figure 10-6 Create Web Service Proxy Wizard, Step 3, Custom Mappings
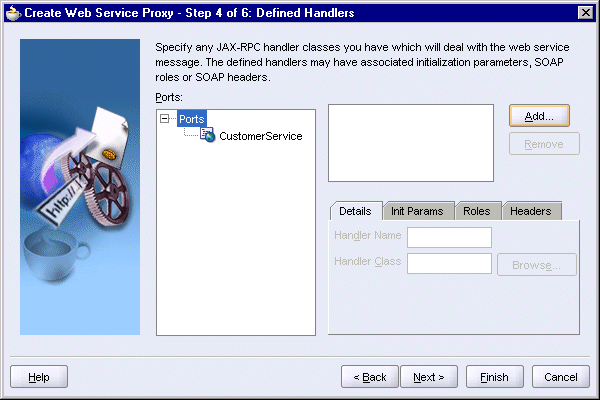
In Step 4, Defined Handlers, click Next.
Figure 10-7 Create Web Service Proxy Wizard, Step 4, Defined Handlers
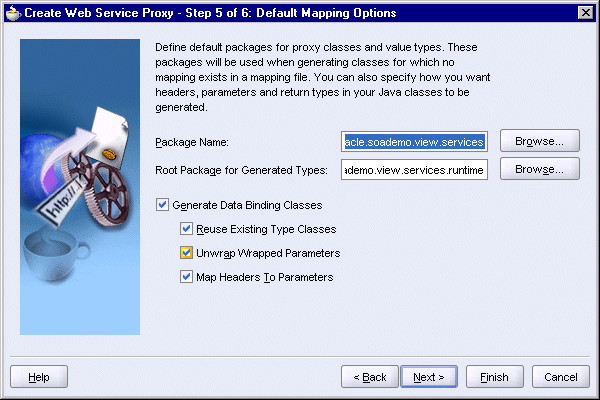
In Step 5, Default Mapping Options:
Package Name: enter oracle.soademo.view.services.
Root Package for Generated Types: enter oracle.soademo.view.services.runtime.
Select all the options on the page:
Generate Data Binding Classes
Reuse Existing Type Classes
Unwrap Wrapped Parameters
Map Headers to Parameters
Figure 10-8 Create Web Service Proxy Wizard, Step 5, Default Mapping Options
Click Next.
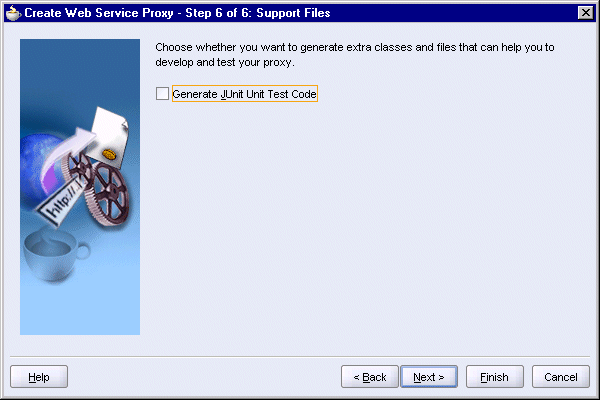
In Step 6, Support Files, select Generate JUnit Unit Test Code only if you want to write test cases using JUnit. Note that to be able to compile the files that use JUnit classes, you need to download the JUnit library files from an external site (for example, http://www.junit.org).
Click Next.
Figure 10-9 Create Web Service Proxy Wizard, Step 6, Support Files
In the Finish step, click Finish.
JDeveloper creates the web service proxy files in src directory of the project.
If you selected Generate JUnit Unit Test Code in step 8, then you need to download JUnit from an external site (for example, http://www.junit.org).
Add the JUnit jar file to the project before building the project. To add the jar file to the project, right-click the CustomerService project in the client and select Project Properties. In the Project Properties dialog, select Libraries on the left side, and click Add Jar/Directory on the right side. Select the JUnit jar file to add to the project.
Right-click the CustomerService project in the client and select Rebuild.
The main web service proxy file for CustomerService is src\oracle\soademo\view\services\CustomerServiceClient.java. This file lists the methods provided by CustomerService. Your client application can call the methods in this class, and you deploy your client application with the web service proxy.
The SOADemo-Client application invokes the web service proxy for CustomerService in two places:
In the SOADemo-Client application, when the customer clicks the Login button, it invokes the login_action method in Login.java, located in the SOADEMO-CLIENT\UserInterface\src\oracle\soademo\view\backing directory.
The login_action method calls the findCustomerByEmail method in CustomerServiceClient to verify the customer's login. The method is passed the email and password information entered by the customer on the login page. If the customer is found, it stores the customer information in the session and returns "success".
public String login_action() {
   String AUTH_USER = "Authorized_User";

   // Check credentials
   FacesContext ctx = FacesContext.getCurrentInstance();

   // Call Web service to check user credentials
   try {
      oracle.soademo.view.services.CustomerServiceClient myPort =
               new oracle.soademo.view.services.CustomerServiceClient();
      System.out.println("calling " + myPort.getEndpoint());

      // test adding new customer
      Customer newCust = null;
      newCust = myPort.findCustomerByEmail(emailId.getValue().toString(),
                                               pwd.getValue().toString());

      //Store customer info on session
      if (newCust != null)
         JSFUtils.storeOnSession(ctx, "custinfo", newCust);
      else {
         FacesMessage msg = new FacesMessage("Login Failed!");
         msg.setSeverity(msg.SEVERITY_ERROR);
         FacesContext.getCurrentInstance().addMessage(null, msg);
         return null;
      }
   } catch (Exception ex) {
      FacesMessage msg = new FacesMessage("Login Failed!");
      msg.setSeverity(msg.SEVERITY_ERROR);
      FacesContext.getCurrentInstance().addMessage(null, msg);
      //ex.printStackTrace();
      return null;
   }

   // Set CurrentUser mananged bean properties

   JSFUtils.setManagedBeanValue(ctx,"Current_User.loggedIn",true);
   JSFUtils.setManagedBeanValue(ctx,"Current_User.userid",
                                    emailId.getValue().toString());
   JSFUtils.storeOnSession(ctx, AUTH_USER, "Authorized_User");

   return "success";
}
The Register page enables new customers to add themselves to the database. When the customer fills in the information and clicks the Register button on the page, it invokes the register_action method in Register.java, also located in the SOADEMO-CLIENT\UserInterface\src\oracle\soademo\view\backing directory.
The register_action method collects the customer information and invokes the addNewCustomer method on CustomerService.
public void register_action(ActionEvent ae) {
   String AUTH_USER = "Authorized_User";
   FacesContext ctx = FacesContext.getCurrentInstance();
   Customer newCust = new Customer();
   if (password.getValue().toString().equals(password_chk.getValue().toString())) {
      // Call Web service to register new customer
      try {
         oracle.soademo.view.services.CustomerServiceClient myPort =
                        new oracle.soademo.view.services.CustomerServiceClient();
         System.out.println("calling " + myPort.getEndpoint());

         // Adding new customer info
         Address addr = new Address();

         newCust.setFname(fname.getValue().toString());
         newCust.setLname(lname.getValue().toString());
         newCust.setEmail(email.getValue().toString());
         newCust.setPhonenumber(phone.getValue().toString());
         newCust.setPassword(password.getValue().toString());

         addr.setStreet(street.getValue().toString());
         addr.setCity(city.getValue().toString());
         addr.setState(state.getValue().toString());
         addr.setZip(zip.getValue().toString());
         // For now set to US address
         addr.setCountry("USA");

         List addrList = new ArrayList();
         addrList.add(addr);
         newCust.setAddressList(addrList);
         myPort.addNewCustomer(newCust);

         // Generate successful registration message
         FacesContext.getCurrentInstance().addMessage(null,
                        new FacesMessage("Registration Successful!"));

      } catch (Exception ex) {
         FacesMessage msg = new FacesMessage("Registration Failed!");
         msg.setSeverity(msg.SEVERITY_ERROR);
         FacesContext.getCurrentInstance().addMessage(null, msg);
         FacesContext.getCurrentInstance().addMessage(null,
                              new FacesMessage(ex.getMessage()));
         ex.printStackTrace();
      }

      //Store customer info on session
      JSFUtils.storeOnSession(ctx, "custinfo", newCust);
      // Set CurrentUser mananged bean properties
      JSFUtils.setManagedBeanValue(ctx,"Current_User.loggedIn",true);
      JSFUtils.setManagedBeanValue(ctx,"Current_User.userid",
                                       email.getValue().toString());
      JSFUtils.storeOnSession(ctx, AUTH_USER, "Authorized_User");
   } else {
      // Generate  password mismatch msg
      FacesMessage msg = new FacesMessage("Your password values do not match!");
      msg.setSeverity(msg.SEVERITY_ERROR);
      FacesContext.getCurrentInstance().addMessage(null, msg);
   }
}
Creating the web service proxy for the OrderBookingESB project is slightly different from creating the proxy for CustomerService, because OrderBookingESB is an ESB project.
Before you can run the Create Web Service Proxy wizard, you need the concrete URL that returns the WSDL for OrderBookingESB. You can do this using the ESB Console.
Access the ESB Console using the following URL:
http://hostname:port/esb/esb/EsbConsole.html
hostname specifies the name of the machine running Oracle Application Server, and port specifies the HTTP port at which Oracle HTTP Server or OC4J is listening.
On the left side of the ESB Console, select OrderBookingService. This is the starting point for the OrderBookingESB project.
On the right side of the ESB Console, select the Definition tab. You should see a page that looks something like Figure 10-10:
Figure 10-10 ESB Console Showing the Page for OrderBookingService, Definition Tab
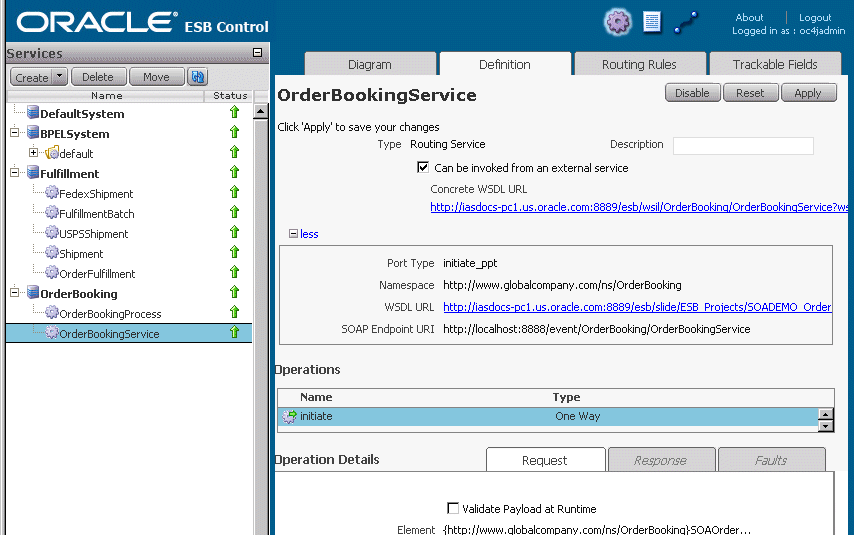
Copy the concrete URL so that you can paste it in the Create Web Service Proxy wizard. You can also click the URL if you want to see what the WSDL looks like.
Create a project in your client application to contain the web service proxy for OrderBookingESB. Begin by creating an empty project in your client application:
Right-click the client application, and select New Project.
In the New Gallery, in the Categories section, expand General and select Projects. In the Items section, select Empty Project.
Figure 10-11 New Gallery for Creating an Empty Project

Click OK.
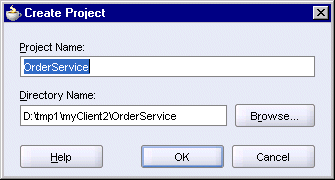
In the Create Project dialog, enter OrderService in the Project Name field.
Figure 10-12 Create Project Dialog for the OrderService Web Service Proxy Project
Click OK.
In the Application Navigator, you should see an empty OrderService project located under the client application.
Right-click the OrderService project, and select New. In the New Gallery, in the Categories section, expand Business Tier and select Web Services. In the Items section, select Web Service Proxy.
Figure 10-13 New Gallery for Creating a Web Service Proxy

Click OK. This launches the Create Web Service Proxy wizard. Click Next to continue.
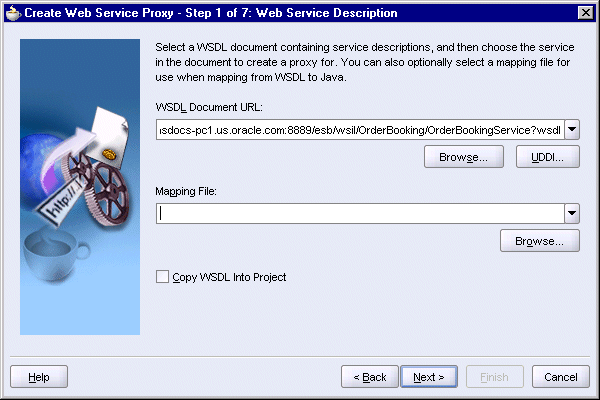
In Step 1, Web Service Description:
WSDL Document URL: enter the URL for OrderBookingESB. Section 10.3.1, "Retrieve the Concrete WSDL URL" describes how to obtain this URL.
Mapping File: leave it blank.
Copy WSDL Into Project: do not select this option.
Figure 10-14 Create Web Service Proxy Wizard, Step 1: Web Service Description
Click Next. If nothing happens, click the UDDI button. This pops up another wizard. Click Cancel in that wizard. Now click Next again.
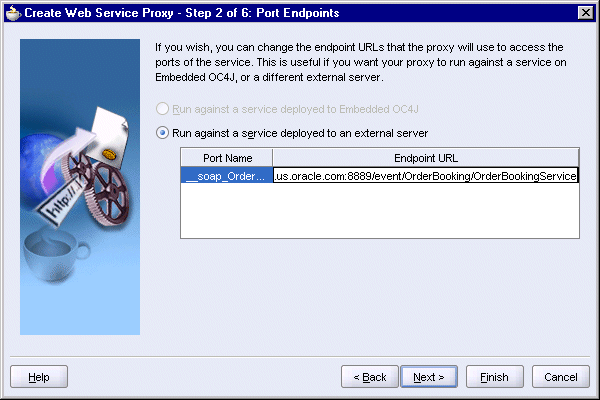
In Step 2, Port Endpoints, select Run against a service deployed to an external server.
In Endpoint URL, edit the URL as follows:
Replace localhost with the name of the machine running the OrderBookingESB project.
Verify and correct the port number, if necessary.
Click Next.
Figure 10-15 Create Web Service Proxy Wizard, Step 2: Port Endpoints
In Step 3, Custom Mappings, click Next.
Figure 10-16 Create Web Service Proxy Wizard, Step 3, Custom Mappings
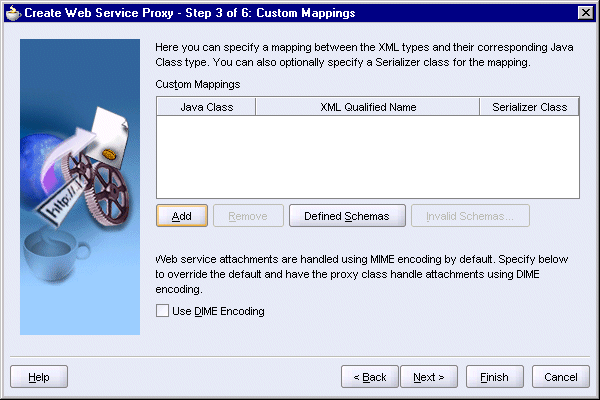
In Step 4, Defined Handlers, click Next.
Figure 10-17 Create Web Service Proxy Wizard, Step 4, Defined Handlers
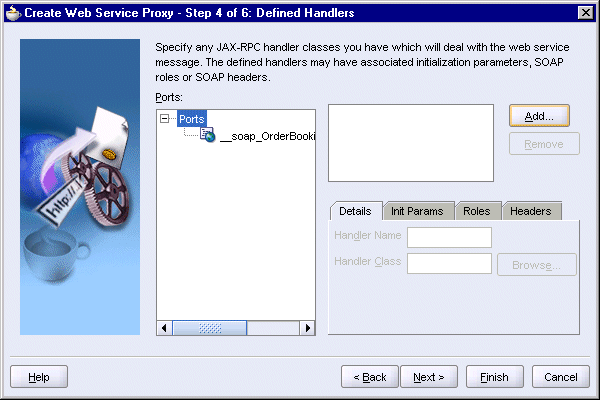
In Step 5, Default Mapping Options:
Package Name: enter oracle.soademo.view.services.
Root Package for Generated Types: enter com.globalcompany.ns.order.
Select all the options on the page:
Generate Data Binding Classes
Reuse Existing Type Classes
Unwrap Wrapped Parameters
Map Headers to Parameters
Figure 10-18 Create Web Service Proxy Wizard, Step 5, Default Mapping Options
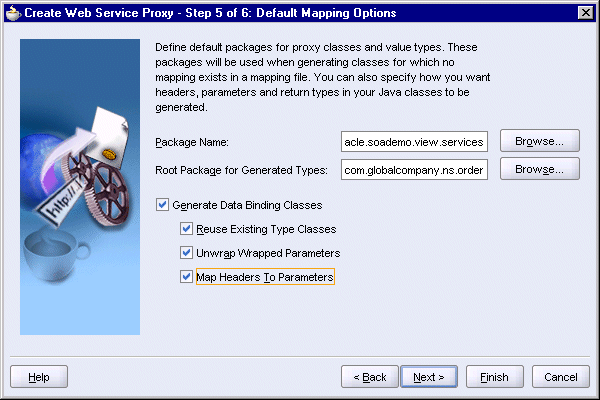
Click Next.
In Step 6, Support Files, select Generate JUnit Unit Test Code only if you want to write test cases using JUnit. Note that to be able to compile the files that use JUnit classes, you need to download the JUnit library files from an external site (such as http://www.junit.org).
Click Next.
Figure 10-19 Create Web Service Proxy Wizard, Step 6, Support Files
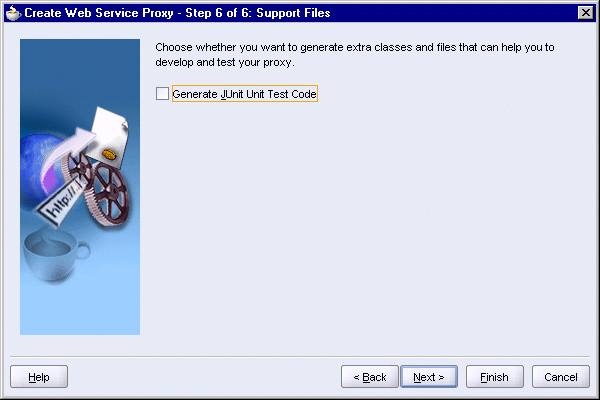
In the Finish step, click Finish.
If you selected Generate JUnit Unit Test Code in step 8, then you need to download JUnit from an external site (for example, http://www.junit.org).
Add the JUnit jar file to the project before building the project. To add the jar file to the project, right-click the OrderService project in the client and select Project Properties. In the Project Properties dialog, select Libraries on the left side, and click Add Jar/Directory on the right side. Select the JUnit jar file to add to the project.
Right-click the OrderService project in the client and select Rebuild.
On the Shopping Cart page in the SOADemo-Client application, customers click the Place Order button to submit their order. This button invokes the PlaceOrder_action method in ShoppingCart.java (located in the SOADEMO-CLIENT\UserInterface\src\oracle\soademo\view\backing directory).
The PlaceOrder_action method:
creates an instance of __soap_initiate_pptClient, which is the proxy for OrderBookingESB. This class was generated by the Web Service Proxy wizard.
You should check the name of the generated file in your environment. The name of the class may be slightly different (for example, __soap_OrderBookingService_initiate_pptClient.java).
gets the order information from the shopping cart
gets the customer information from the session
creates a purchase order and populates it with the order and customer information
calls initiate on the proxy to invoke OrderBookingESB
sets the shopping cart to empty.
The lines in bold show the places where the code invokes the web service proxy.
public String PlaceOrder_action() {
    // Place order
    FacesContext ctx = FacesContext.getCurrentInstance();

    // Get order items from Cart
    Cart cartBean = (Cart) JSFUtils.getManagedObject("Shopping_Cart");
    List CartItemList =  cartBean.getItemList();

    // Get Customer info from session
    Customer currentCustomer = (Customer) JSFUtils.getFromSession(ctx,
                                               "custinfo");

    try {
        oracle.soademo.view.services.__soap_initiate_pptClient myPort =
                    new oracle.soademo.view.services.__soap_initiate_pptClient();
        System.out.println("calling " + myPort.getEndpoint());

        PurchaseOrderType po = new PurchaseOrderType();

        // Customer ID
        po.setCustID(currentCustomer.getCustid());

        // Need to randomly set ID for now since WS won't auto-assign
        po.setID("" + (int)(Math.random() * 1000));

        // Order Info
        OrderInfoType order  = new OrderInfoType();
        order.setOrderPrice(cartBean.getOrderTotal());
        order.setOrderComments("This order was issued from the SOA Retail
                                                                 Client.");
        Calendar caldate = Calendar.getInstance();
        order.setOrderDate(caldate);
        order.setOrderStatus("pending");

        po.setOrderInfo(order);

        // Order Items
        OrderItemsType oitems = new OrderItemsType();

        ItemType[] items = new ItemType[CartItemList.size()];

        for (int i = 0; i < CartItemList.size(); i++) {
            items[i] = (ItemType) CartItemList.get(i);
        }
        oitems.setItem(items);
        po.setOrderItems(oitems);

        // Supplier Info
        // For now hard code fictional Supplier
        SupplierInfoType supplier = new SupplierInfoType();
        supplier.setSupplierName("Express Deliveries");

        // Supplier has 10% discount
        supplier.setSupplierPrice(cartBean.getOrderTotal().
                             subtract(cartBean.getOrderTotal().movePointLeft(1)));
        po.setSupplierInfo(supplier);

        // Contact Info
        ContactType contact = new ContactType();
        contact.setEmailAddress(currentCustomer.getEmail());
        contact.setPhoneNumber(currentCustomer.getPhonenumber());
        po.setUserContact(contact);

        // Initiate Order
        myPort.initiate(po);
        System.out.println("Order submitted...");
    }
    catch (Exception ex) {
        ex.printStackTrace();
    }

    //  report success
    ctx.addMessage(null, new FacesMessage("Order Submitted!"));
    cartBean.EmptyCart();
    return "home";
}
This section describes how to deploy the pre-built client application from the soademo_101310_prod.zip file.
To deploy the SOADEMO-Client application from the zip file:
In JDeveloper, open SOADEMO-CLIENT\SOADEMO-CLIENT.jws. This is the project file for the SOADEMO-Client application.
This step is required only if you meet any of these conditions:
You are running JDeveloper and Oracle Application Server on different machines.
Your Oracle Application Server installation is listening for HTTP requests on a port other than 8888.
If you meet either or both of the conditions above, you need to perform these steps:
Edit these files:
SOADEMO-CLIENT\CustomerService\src\oracle\soademo\view\services\runtime\CustomerServiceSoapHttp_Stub.java
In JDeveloper, you can access this file from the Application Navigator as follows:
i. In JDeveloper, select View > Structure to display the Structure window.
ii. In the Application Navigator, select SOADEMO-CLIENT > CustomerService > Application Sources > oracle.soademo.view > services > CustomerSvcProxy.
iii. Double-click CustomerServiceSoapHttp_Stub.java in the Structure window.
SOADEMO-CLIENT\OrderService\src\oracle\soademo\view\services\runtime\__soap_initiate_ppt_Stub.java
In JDeveloper, you can access this file from the Application Navigator as follows:
i. In JDeveloper, select View > Structure to display the Structure window.
ii. In the Application Navigator, select SOADEMO-CLIENT > OrderService > Application Sources > oracle.soademo.view > services > Initiate_pptServiceProxy.
iii. Double-click __soap_initiate_ppt_Stub.java in the Structure window.
Make the following changes in the files:
Search for "localhost" and replace it with the fully qualified name (including the domain name) of the machine running Oracle Application Server.
Search for "8888" and replace it with the HTTP port for your environment.
Delete (or rename) these files:
SOADEMO-CLIENT\UserInterface\deploy\soaui.war
SOADEMO-CLIENT\UserInterface\deploy\soaui.ear
Regenerate the files you just deleted.
i. Expand SOADEMO-CLIENT > UserInterface > Resources.
ii. Right-click soaui.deploy and select Deploy to WAR File.
iii. Right-click soaui.deploy and select Deploy to EAR File.
Expand SOADEMO-CLIENT > Assembly > Application Sources.
Right-click SOADEMO.deploy and select Deploy To > ApplicationServerConnection, where ApplicationServerConnection specifies the connection to your Oracle Application Server installation.
Click OK in the Configure Application dialog.