| Oracle® SOA Suite Tutorial Release 3 (10.1.3.1.0) Part Number B28937-01 |
|
|
View PDF |
| Oracle® SOA Suite Tutorial Release 3 (10.1.3.1.0) Part Number B28937-01 |
|
|
View PDF |
This chapter describes how to create the OrderBookingESB project. It contains these sections:
Section 9.4, "Create the "OrderBookingService" Routing Service"
Section 9.5, "Invoke the SOAOrderBooking Process ("OrderBookingProcess" External Service)"
Section 9.7, "Save All Files in the OrderBookingESB Project"
The OrderBookingESB project is the entry point to the SOA Order Booking application. The SOADemo-Client application invokes the OrderBookingESB project when a customer clicks the Place Order button.
The OrderBookingESB project invokes the SOAOrderBooking project, which is a BPEL project that defines the main flow of the SOA Order Booking application.
The OrderBookingESB project is an ESB project. In JDeveloper, it looks like the following:
Figure 9-1 OrderBookingESB Project in JDeveloper
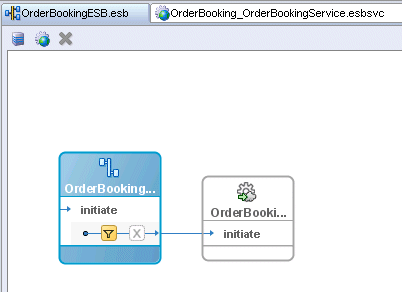
The OrderBookingESB project consists of:
OrderBookingService routing service
OrderBookingProcess external service
Right-click the SOADEMO application, and select New Project.
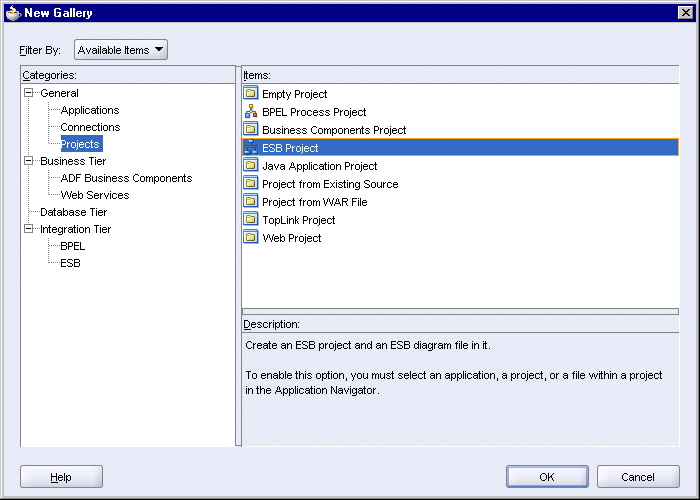
In the New Gallery, in the Categories section, expand General and select Projects. In the Items section, select ESB Project.
Figure 9-2 New Gallery for OrderBookingESB Project
Click OK.
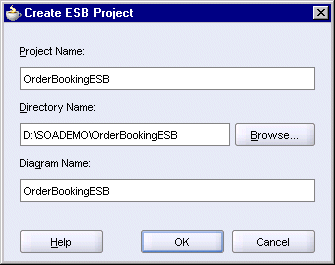
In the Create ESB Project dialog, enter OrderBookingESB in the Project Name field. Accept the defaults for the other fields.
Figure 9-3 Create ESB Project Dialog for OrderBookingESB
Click OK.
JDeveloper displays a blank page for the OrderBookingESB.esb file. In the Application Navigator, this file is located under OrderBookingESB > Resources.
Similar to the "Fulfillment" system that you created for the FulfillmentESB project (covered in Section 4.3, "Create a System Called "Fulfillment""), for the OrderBookingESB project you create a system called "OrderBooking". You can then set all the activities in the OrderBookingESB project to belong to this system.
If you do not create a system, JDeveloper places the activities in a system called "DefaultSystem".
To create a system called "OrderBooking":
In the empty OrderBookingESB.esb page, click the Create System/Group icon, located at the top of the page.
Figure 9-4 Create System/Group Icon at the Top of the OrderBookingESB.esb Page
In the Create ESB System or Service Group dialog:
System: select this option.
Name: enter OrderBooking.
Description: leave blank or enter a brief description.
Figure 9-5 Create ESB System or Service Group Dialog for the "OrderBooking" System

Click OK. In the Application Navigator, you should see an OrderBooking.esbsys file under OrderBookingESB > Resources.
Copy the following files from the soademo_101310_prod.zip file to the OrderBookingESB directory:
OrderBookingRequest.xsd
OrderBookingPO.xsd
In the soademo_101310_prod.zip file, these xsd files are located in the OrderBookingESB directory.
Select View > Component Palette to display the Component Palette. In the dropdown for the Component Palette, select ESB Services.
Drag the Routing Service icon from the Component Palette and drop it anywhere on the OrderBookingESB.esb page.
In the Create Routing Service dialog:
Name: enter OrderBookingService.
System/Group: set to OrderBooking.
Generate WSDL From Schemas: select this option.
Schema Location: click Browse, which displays the Type Chooser dialog. In the dialog, select Project Schema Files > OrderBookingRequest.xsd > SOAOrderBookingProcessRequest.
Figure 9-6 Type Chooser Dialog for OrderBooking Routing Service
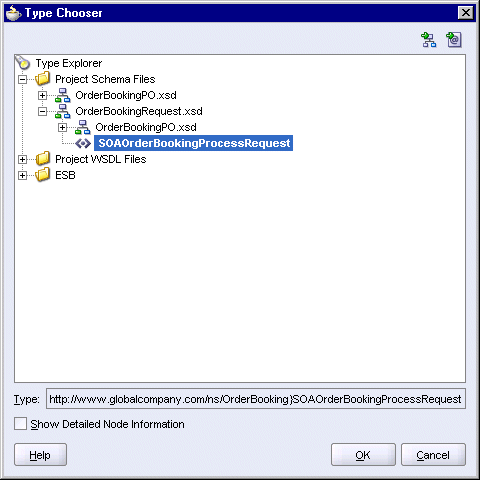
Click OK in the Type Chooser dialog. Schema Location should be set to OrderBookingRequest.xsd.
Schema Element: should be set to SOAOrderBookingProcessRequest.
Operation Name: enter initiate.
Namespace: enter http://www.globalcompany.com/ns/OrderBooking.
Figure 9-7 Create Routing Service Dialog for OrderBookingService
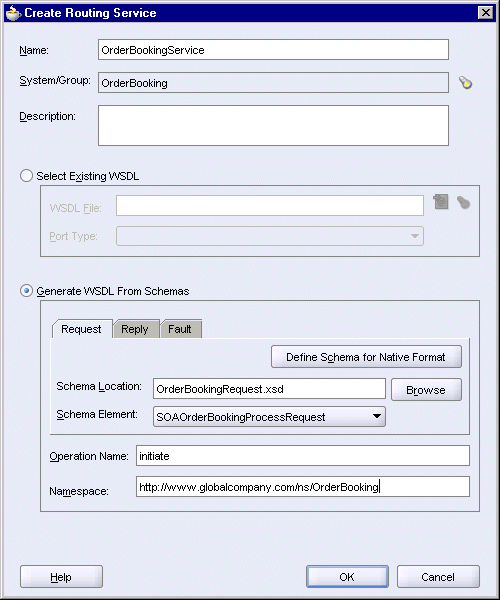
Click OK in the Create Routing Service dialog.
The OrderBookingESB.esb page now looks like this:
Figure 9-8 OrderBookingESB.esb Page Showing the OrderBookingService Routing Service
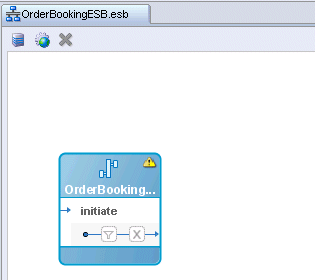
JDeveloper also creates a WSDL file for you: OrderBooking_OrderBookingService.wsdl in the OrderBookingESB directory.
This is the service that invokes the SOAOrderBooking process.
Select ESB Services from the dropdown in the Component Palette.
Drag the SOAP Service icon from the Component Palette and drop it to the right of the "OrderBookingService" routing service.
In the Create SOAP Invocation Service dialog:
Name: enter OrderBookingProcess.
System/Group: set to OrderBooking.
WSDL File: Click the Service Explorer (flashlight) icon and in the Service Explorer dialog, select Service Explorer > BPEL Services > soaIntegrationServer > processes > default > SOAOrderBooking.
soaIntegrationServer refers to the name of your Integration Server connection.
Click OK in the Service Explorer.
Port Type: select SOAOrderBooking.
The Create SOAP Invocation Service dialog should look like this:
Figure 9-10 Create SOAP Invocation Service Dialog for OrderBookingProcess

Click OK in the Create SOAP Invocation Service dialog.
You should see two activities in the OrderBookingESB.esb page:
Figure 9-11 OrderBookingESB.esb Page with OrderBookingService Routing Service and OrderBookingProcess External Service
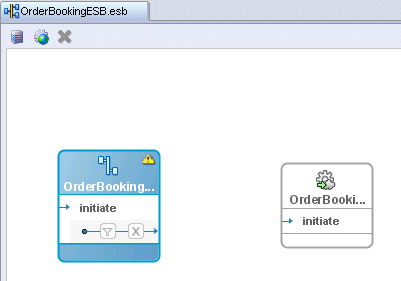
Set up routing rules so that requests can go from OrderBookingService to OrderBookingProcess.
Double-click OrderBookingService in the top section of the icon. This displays the page for the OrderBooking_OrderBookingService.esbsvc file.
In the Routing Rules section, click the [+] to expand the section.
In the Routing Rules section, click the green + icon. You may have to scroll to the right to see the icon.
In the Browse Target Service Operation dialog, select ESB > Services in project > OrderBooking > OrderBookingProcess > initiate.
Figure 9-13 Browse Target Service Operation Dialog
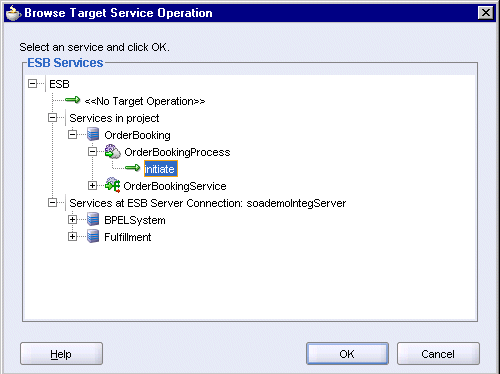
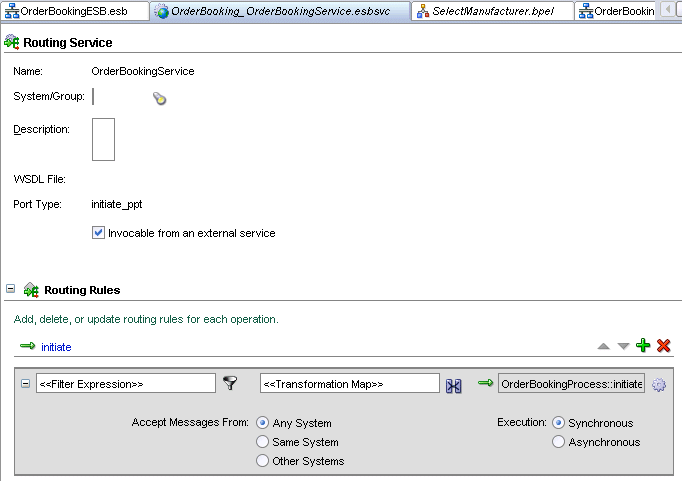
Click OK in the Browse Target Service Operation dialog. This returns you to the Routing Rules section, which should show "OrderBookingProcess::initiate" in the last column.
Figure 9-14 Routing Rules Showing the Link from OrderBookingService to OrderBookingProcess
In the Routing Rules section, click the filter icon.
In the Expression Builder, in the WSDL Message section, select SOAOrderBookingProcessRequest_request > SOAOrderBookingProcessRequest > tns:SOAOrderBookingProcessRequest.
Click Insert Into Expression. In the Expression box, you should see:
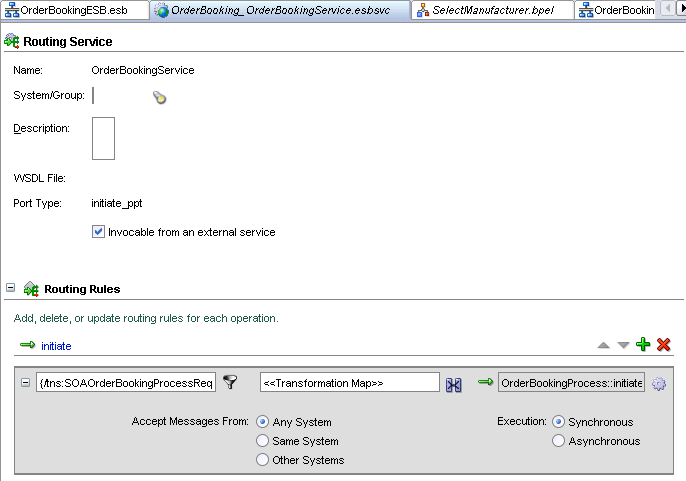
/tns:SOAOrderBookingProcessRequest
Click OK in the Expression Builder.
The routing rule now includes a filter, which simply passes the order information to the OrderBookingProcess activity. The routing rule section now looks like this, with the filter information in the first column.
Figure 9-16 Routing Rule Showing the Filter
Select File > Save to save OrderBooking_OrderBookingService.esbsvc.
Click the OrderBookingESB.esb tab.
On the OrderBookingESB.esb page, you should see a line connecting the two activities:
Figure 9-17 Final OrderBookingESB.esb Page

Browse through the OrderBookingESB files in the Application Navigator to ensure that all the files are saved. If you see a file in italics, select the file and save it.
In the Application Navigator, right-click the OrderBookingESB project and select Register with ESB > SoademoIntegServer, where SoademoIntegServer is the name of the connection to the integration server.
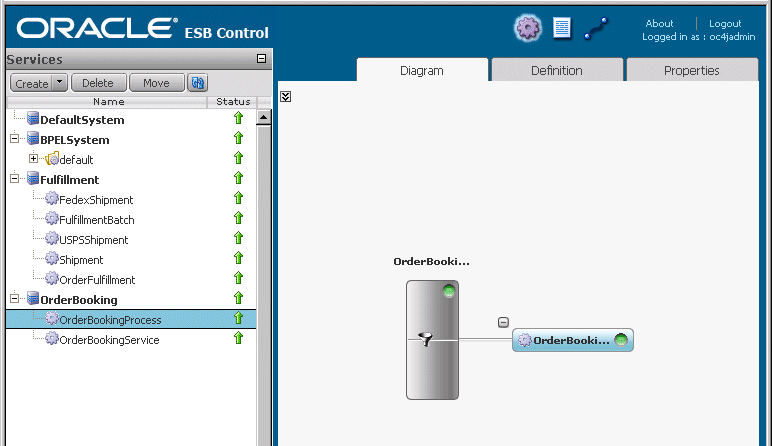
You can view the services that you created in the OrderBookingESB project in the ESB Console. To do this, enter the URL of the Oracle ESB Console in a browser:
http://host:port/esb/esb/EsbConsole.html
host specifies the name of the machine running Oracle Application Server, and port specifies the HTTP port at which Oracle HTTP Server or OC4J is listening.
Log in as the oc4jadmin user.
The services are grouped under OrderBooking, which is the name of the system that you created in Section 9.3, "Create a System Called "OrderBooking"".
Figure 9-18 Oracle ESB Console Showing the Services in the OrderBooking System
