| Oracle® SOA Suite Tutorial Release 3 (10.1.3.1.0) Part Number B28937-01 |
|
|
View PDF |
| Oracle® SOA Suite Tutorial Release 3 (10.1.3.1.0) Part Number B28937-01 |
|
|
View PDF |
This chapter describes how to create the SOAOrderBooking project, which is a BPEL project. It contains these sections:
Section 8.2, "Create a New BPEL Project for SOAOrderBooking"
Section 8.4, "Define Variables for the SOAOrderBooking Project"
Section 8.6, "Receive Input from the Client (Receive Activity)"
Section 8.7, "Insert Order Information in the Database ("InsertOrderIntoDB" Scope)"
Section 8.8, "Retrieve Information About the Customer ("CustomerService" Scope)"
Section 8.9, "Verify the Customer's Credit Card ("CreditService" Scope)"
Section 8.13, "Handle the Manager's Response ("requiresApproval" Switch)"
Section 8.15, "Determine the Shipping Method ("PostFulfillmentReq" Scope)"
Section 8.16, "Set the Order Status to "Completed" ("SetFinalOrderStatus" Scope)"
Section 8.17, "Send an Email Notification to the Customer ("NotifyCustomer" Scope)"
Section 8.18, "Call Back the Client ("callbackClient" Invoke Activity)"
The SOAOrderBooking project, which is a BPEL project, represents the main flow in the SOA Order Booking application. It sends the order information to the appropriate services at the appropriate times. For example, it contacts CreditService to check the customer's credit card, and if the credit card is acceptable, it contacts the suppliers (Select Manufacturer and Rapid Distributors) to get price quotes for the order.
The SOAOrderBooking project is a large project. This chapter begins by giving an overview of the major blocks in the project, then it goes into detail for each block.
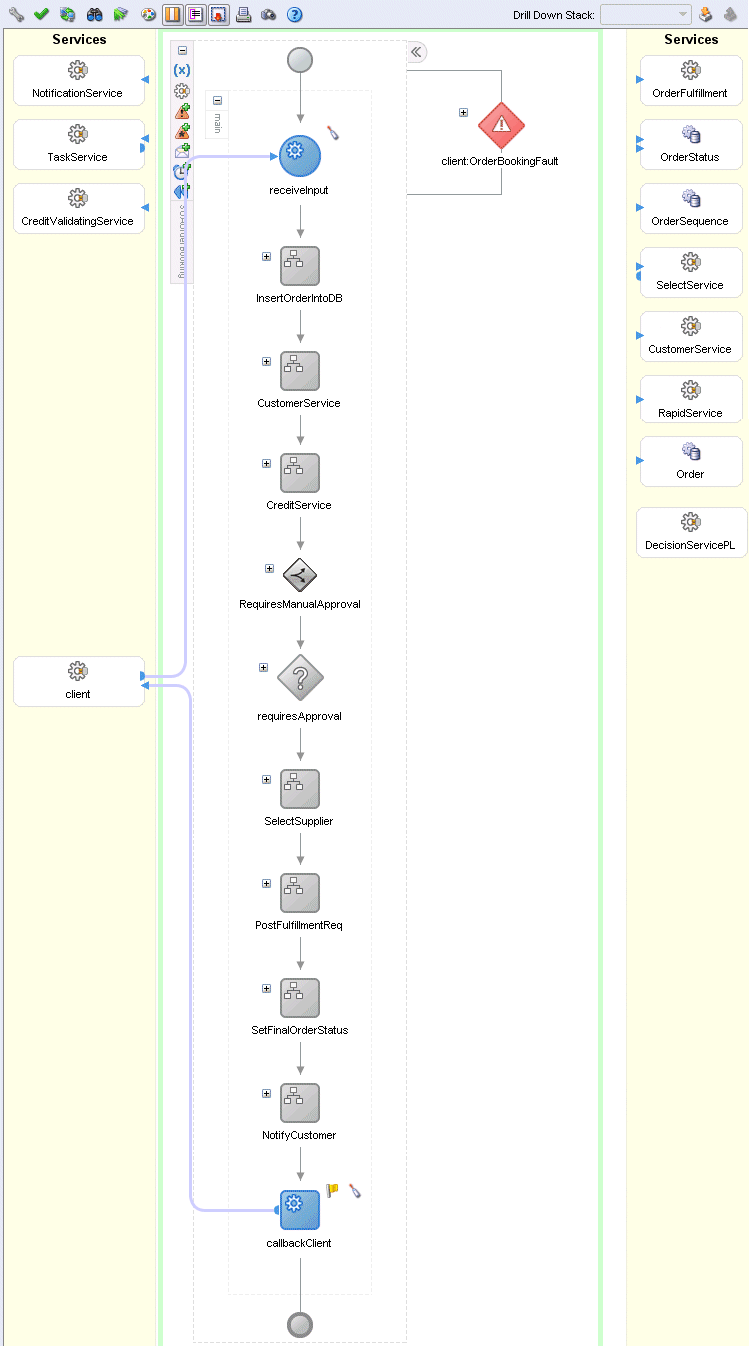
Table 8-1 lists the major blocks in the SOAOrderBooking project:
Table 8-1 Major Blocks in the SOAOrderBooking Project
| Block | Type | Description |
|---|---|---|
|
receiveInput |
Receive activity |
This activity receives incoming requests, which include the order information. |
|
InsertOrderIntoDB |
Scope |
This scope inserts the order information into the database. |
|
CustomerService |
Scope |
This scope retrieves the customer's information from the database. |
|
CreditService |
Scope |
This scope verifies that the customer has acceptable credit. |
|
RequiresManualApproval |
Decision |
This scope is a decide activity: it consults the rules set up in a rules repository to determine whether or not an order needs to be approved by a manager. The manager can approve or reject the order. |
|
requiresApproval |
Switch |
This switch checks whether the manager approved or rejected the order, and performs the appropriate activities. For approved orders, it just continues with the rest of the activities in this SOAOrderBooking project. For rejected orders, it throws a fault and does not continue. |
|
SelectSupplier |
Scope |
This scope selects which supplier (Select Manufacturer or Rapid Distributors) gets to fulfill the order. |
|
PostFulfillmentReq |
Scope |
This scope calls the FulfillmentESB project, which determines the shipping method for the order. |
|
SetFinalOrderStatus |
Scope |
This scope writes the final order status in the database. |
|
NotifyCustomer |
Scope |
This scope is an email service. It sends out email to the customers informing them that their orders have been processed successfully. |
|
callbackClient |
Invoke activity |
This invoke activity notifies the client that it is done. |
Figure 8-1 shows the SOAOrderBooking.bpel page in JDeveloper with the blocks minimized. Later sections in this chapter expand the blocks to show their contents and describe how to create the blocks.
Figure 8-1 Minimized View of the Blocks in SOAOrderBooking Project
Right-click the SOADEMO application in the Application Navigator and select New Project to display the New Gallery.
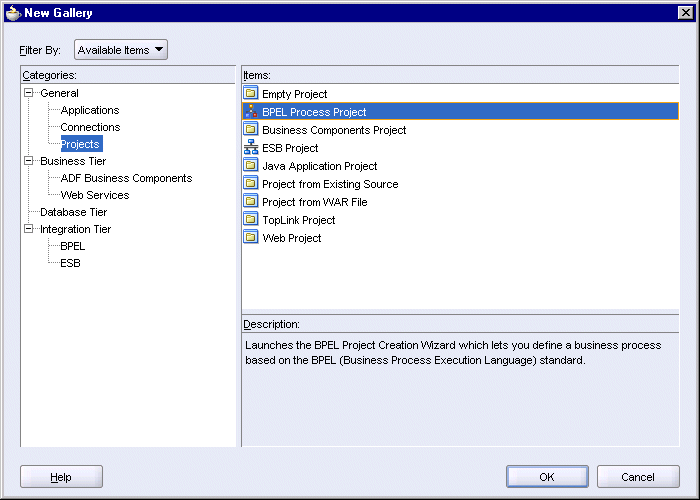
In the New Gallery, under Categories, expand General and select Projects. Under Items, select BPEL Process Project.
Figure 8-2 New Gallery for SOAOrderBooking Project
Click OK. This displays the BPEL Project Creation wizard.
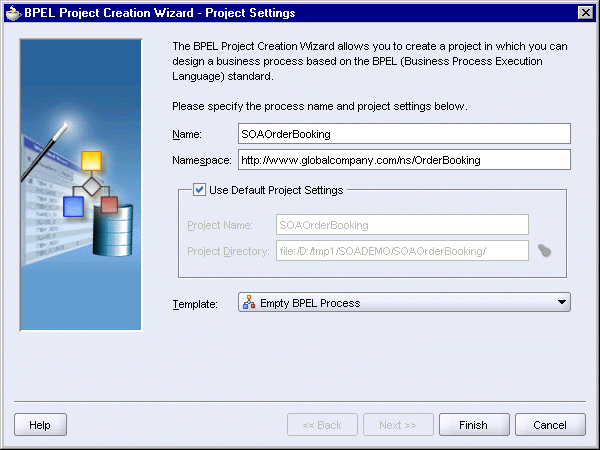
On the Project Settings page of the BPEL Project Creation wizard:
Name: enter SOAOrderBooking.
Namespace: enter http://www.globalcompany.com/ns/OrderBooking.
Use Default Project Settings: select this option.
Template: select Empty BPEL Process.
Figure 8-3 BPEL Project Creation Wizard: Project Settings Page
Click Finish.
Copy the following files from the soademo_101310_prod.zip file to the SOAOrderBooking\bpel directory:
SOAOrderBooking.wsdl
OrderBookingPO.xsd
OrderBookingRules.xsd
In the soademo_101310_prod.zip file, these files are located in the SOAOrderBooking\bpel directory.
In this step, you create two variables called inputVariable and outputVariable for the SOAOrderBooking project. Variables defined at the project level can be accessed by all activities in the project.
Double-click the SOAOrderBooking scope. You can double-click the "SOAOrderBooking" text that is displayed sideways.
This displays the Process dialog.
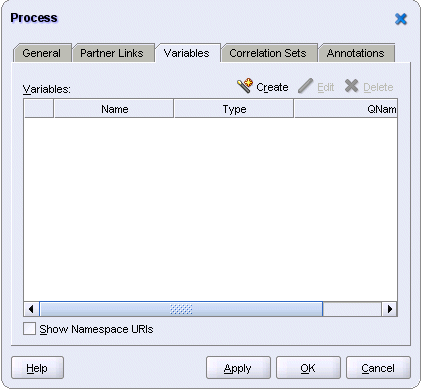
In the Process dialog, click the Variables tab.
Figure 8-4 Process Dialog for SOAOrderBooking
Create a variable called inputVariable.
Click Create to display the Create Variable dialog.
In the Create Variable dialog, set these values:
Name: enter inputVariable.
Type: select Message Type, and click the flashlight icon. This displays the Type Chooser dialog.
In the Type Chooser, select Type Explorer > Message Types > Project WSDL Files > SOAOrderBooking.wsdl > Message Types > SOAOrderBookingRequestMessage.
Figure 8-5 Type Chooser for inputVariable

Click OK in the Type Chooser. The Create Variable dialog now looks like this:
Figure 8-6 Create Variable Dialog for inputVariable
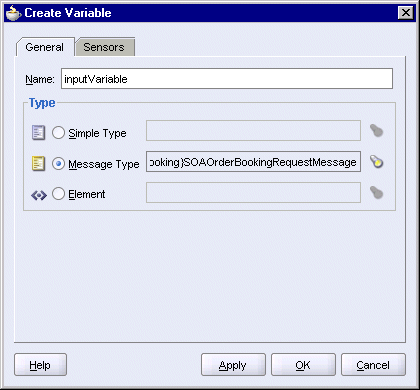
Click OK in the Create Variable dialog. This returns you to the Process dialog. You should see the inputVariable in the dialog.
Create a second variable called outputVariable.
Click Create in the Process dialog to display the Create Variable dialog.
In the Create Variable dialog, set these values:
Name: enter outputVariable.
Type: select Message Type, and click the flashlight icon. This displays the Type Chooser dialog.
In the Type Chooser, select Type Explorer > Message Types > Project WSDL Files > SOAOrderBooking.wsdl > Message Types > SOAOrderBookingResponseMessage.
Figure 8-7 Type Chooser for outputVariable

Click OK in the Type Chooser. The Create Variable dialog now looks like this:
Figure 8-8 Create Variable Dialog for outputVariable
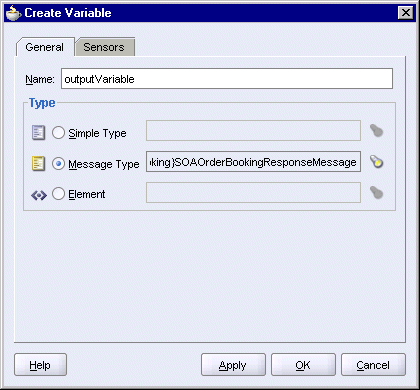
Click OK in the Create Variable dialog.
In the Process dialog, you should see the two variables:
Figure 8-9 Process Dialog Showing inputVariable and outputVariable
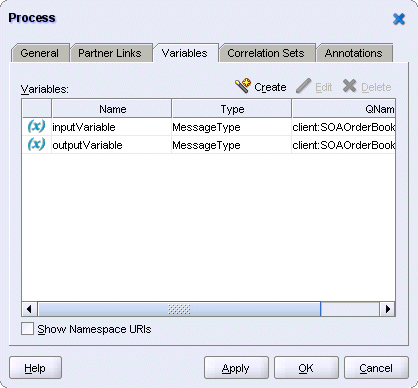
Click OK in the Process dialog.
Select File > Save to save your work.
This client partner link represents the client, which passes data to the receiveInput activity and gets invoked at the end of the flow to receive the return value.
If the Component Palette is not showing, select View > Component Palette. Select Services from the dropdown in the Component Palette.
Drag the Partner Link icon from the Component Palette and drop it into a Services swimlane. This displays the Create Partner Link dialog.
In the Create Partner Link dialog, set these values:
Name: enter client.
WSDL File: click the Service Explorer icon (second icon from the left) to display the Service Explorer dialog. In the Service Explorer dialog, expand Project WSDL Files and select SOAOrderBooking.wsdl.
Figure 8-10 Service Explorer for client Partner Link

Click OK in the Service Explorer.
Partner Link Type: select SOAOrderBooking (automatically filled in for you).
Partner Role: select SOAOrderBookingRequester.
My Role: select SOAOrderBookingProvider.
Process: leave it blank.
Before clicking OK, check that Name is still set to client. JDeveloper may have changed it to SOAOrderBooking when it was filling in the other fields for you.
Figure 8-11 Create Partner Link Dialog for client
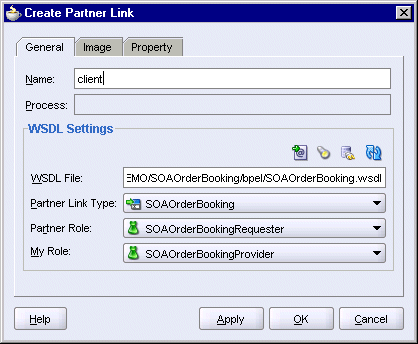
Click OK in the Create Partner Link dialog.
Select File > Save to save your work.
Create a receive activity to receive the input data from the client. In the receive activity, you also define a sensor to send data to a JMS topic.
Create the receive activity:
Select Process Activities from the dropdown in the Component Palette.
Drag the Receive icon from the Component Palette and drop it on the page where it says "Drop Activity Here".
The page should look like this at this point:
Figure 8-12 SOAOrderBooking Page with Receive Activity
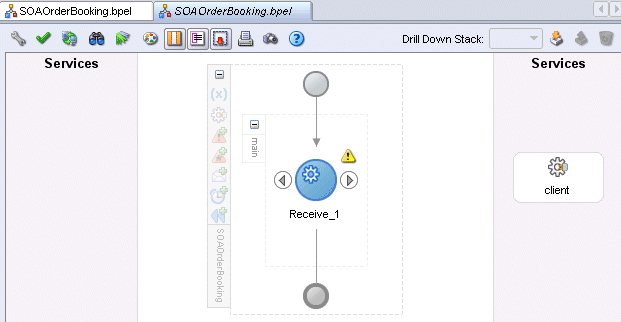
Do one of the following to display the Receive dialog:
Drag one of the arrows on the side of the Receive_1 activity and drop it on the "client" partner link. This associates the receive activity with the partner link.
Double-click the new Receive_1 activity.
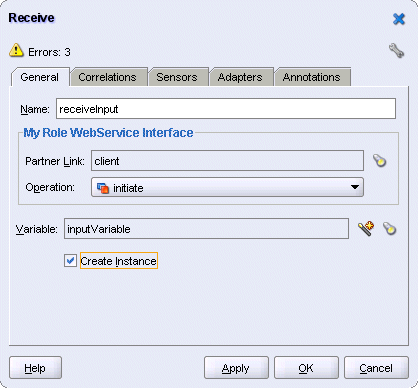
In the Receive dialog, enter these values:
Name: enter receiveInput.
Partner Link: should be set to client. This is filled in for you if you dragged the arrow from the Receive_1 activity and dropped it on the "client" partner link. If not, click the flashlight to display the Partner Link Chooser dialog and select client.
Figure 8-13 Partner Link Chooser Dialog for "receiveInput" Receive Activity
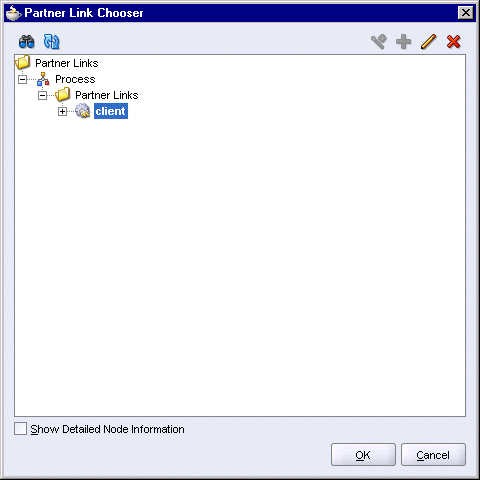
Click OK in the Partner Link Chooser dialog.
Operation: select initiate. This should be filled in automatically for you.
Variable: click the Browse Variables icon (the icon on the right). In the Variable Chooser dialog, select inputVariable.
Figure 8-14 Variable Chooser Dialog for "receiveInput" Receive Activity

Click OK in the Variable Chooser.
Create Instance: select this option.
The Receive dialog now looks like this:
Figure 8-15 Receive Dialog for "receiveInput" Receive Activity
Click OK in the Receive dialog.
Select File > Save to save your work.
In this receive activity create an activity sensor for the receive activity. After this activity runs, this sensor writes the order information to a JMS topic. There is no consumer for this JMS topic; the purpose of this sensor is to show how to send order information to another destination.
Double-click the "receiveInput" activity to display the Receive dialog.
Click the Sensors tab in the Receive dialog.
Click Create to create a new sensor. This displays the Create Activity Sensor dialog.
In the Create Activity Sensor dialog, set the Name to InstanceStart.
Set the Evaluation Time to Completion. This specifies when the sensor fires. Completion signifies that the sensor fires after this activity has run.
In the Activity Variable Sensors section, click Create to display the Create Activity Variable Sensor dialog.
Figure 8-16 Create Activity Variable Sensor Dialog
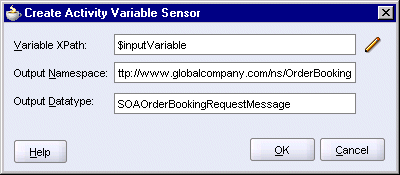
In the Create Activity Variable Sensor dialog, click the pencil icon for Variable XPath. This displays the Variable XPath Builder dialog.
Figure 8-17 Variable XPath Builder Dialog
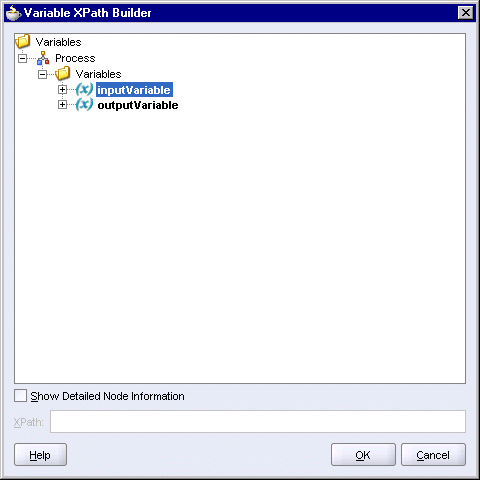
Select Variables > Process > Variables > inputVariable.
Click OK in the Variable XPath Builder. The Create Activity Variable Sensor dialog should be filled in with these values for you (see Figure 8-16):
Variable XPath: $inputVariable
Output Namespace: http://www.globalcompany.com/ns/OrderBooking
Output Datatype: SOAOrderBookingRequestMessage
Click OK in the Create Activity Variable Sensor dialog. This takes you back to the Create Activity Sensor dialog (Figure 8-21).
In the Create Activity Sensor dialog, click the Add icon in the Sensor Actions section. This displays the Sensor Action Chooser dialog.
In the Sensor Action Chooser dialog, select Sensor Actions and select Sensor Action from the wand icon. This displays the Create Sensor Action dialog.
In the Create Sensor Action dialog:
Name: enter InstanceStart.
Publish Type: select JMS Topic.
JMS Connection Factory: enter jms/TopicConnectionFactory.
Publish Target: enter jms/demoTopic.
Filter: leave blank.
Enable: select this option.
Click OK in the Create Sensor Action dialog. The Sensor Action Chooser dialog now shows the InstanceStart sensor action.
Click OK in the Sensor Action Chooser. This takes you back to the Create Activity Sensor dialog, which now looks like this:
Figure 8-21 Create Activity Sensor Dialog
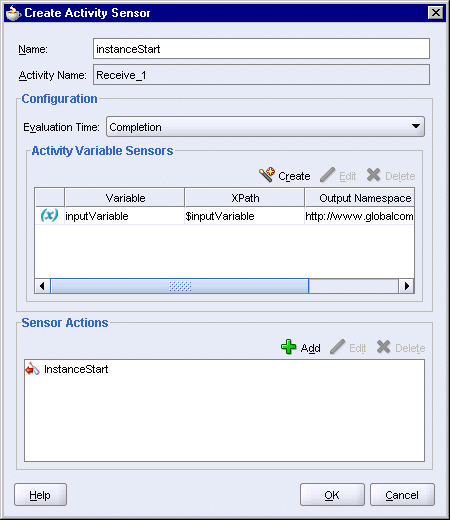
Click OK in the Create Activity Sensor dialog.
In the Receive dialog, the Sensors tab now looks like this:
Click OK in the Receive dialog.
Select File > Save to save your work.
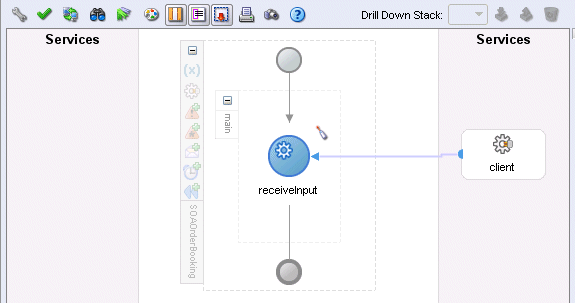
The SOAOrderBooking page now looks like this:
Figure 8-23 SOAOrderBooking.bpel Page with Receive Activity
The sensor information is stored in these files in the SOAOrderBooking\bpel directory:
sensor.xml
sensorAction.xml
In this scope, you create activities to insert the order information into the database. Figure 8-24 shows the activities that you will create for the "InsertOrderIntoDB" scope.
Figure 8-24 Activities in the "InsertOrderIntoDB" Scope
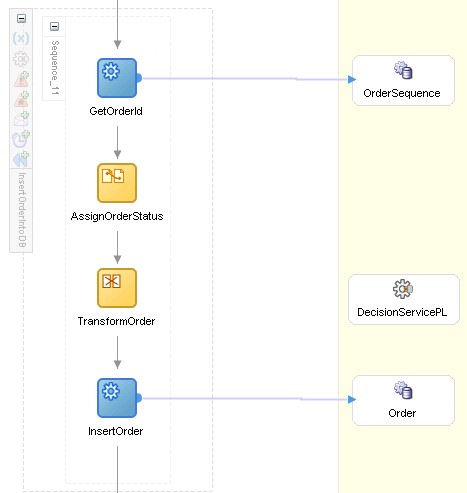
Activities in the "InsertOrderIntoDB" scope use a database adapter for writing order information to the ORDERS table in the database. During runtime, the database adapter connects to the database through the eis/DB/soademo connection that you set up in Section 2.6.4, "Create a Database Adapter Connection Factory".
To create the database adapter:
In the Component Palette, select Services from the dropdown.
Drag the Database Adapter icon from the Component Palette and drop it in a Services swimlane. This launches the Adapter Configuration wizard. Click Next on the welcome page to continue.
In Step 1, Service Name, enter Order as the Service Name, and click Next.
Figure 8-25 Adapter Configuration Wizard, Step 1, Service Name

In Step 2, Service Connection:
Connection: select the database connection for the SOADEMO schema.
JNDI Name: enter eis/DB/soademo. This is the JNDI location you specified when you created connection factory in Oracle Application Server (see Section 2.6.4, "Create a Database Adapter Connection Factory").
Figure 8-26 Adapter Configuration Wizard, Step 2, Service Connection
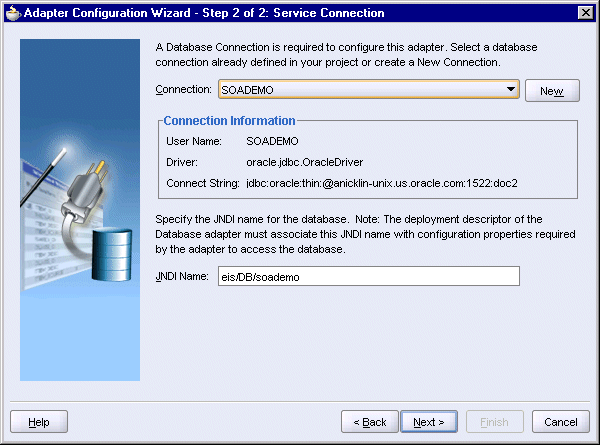
Click Next.
In Step 3, Operation Type, select Perform an Operation on a Table, and select Insert or Update (Merge). The SOA Order Booking application only needs to insert rows in the table.
Figure 8-27 Adapter Configuration Wizard, Step 3, Operation Type
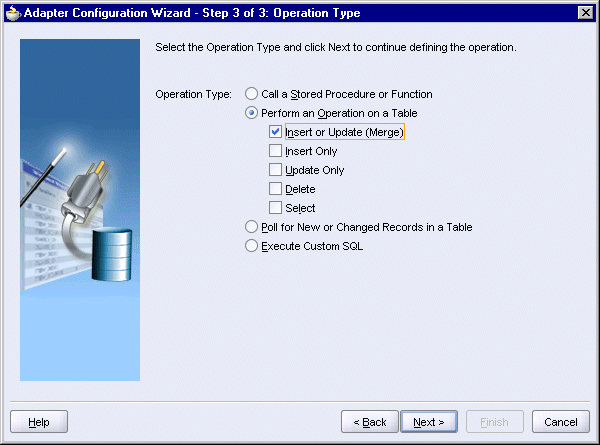
Click Next.
In Step 4, Select Table, click Import Tables.
In the Import Tables dialog, click Query.
Select ORDERS and ITEMS and click the right-arrow button to move them to the Selected box. The database adapter will write to these tables.
Figure 8-28 Import Tables Dialog for FedexShipment

Click OK in the Import Tables dialog. Step 4, Select Table, now looks like this:
Figure 8-29 Adapter Configuration Wizard, Step 4, Select Table
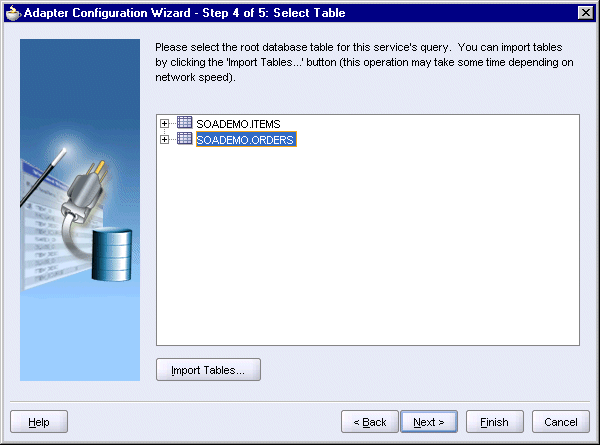
Select SOADEMO.ORDERS and click Next.
In Step 5, Relationships, click Next.
Figure 8-30 Adapter Configuration Wizard, Step 5, Relationships

On the Finish page, click Finish.
JDeveloper displays the Create Partner Link dialog with the fields filled in:
Figure 8-31 Create Partner Link Dialog for Order Database Adapter
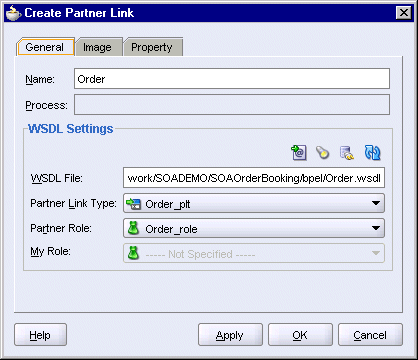
Click OK in the Create Partner Link dialog. You should see the "Orders" database adapter in the Services swimlane.
Select File > Save to save your work.
The wizard creates the following files in the SOAOrderBooking directory:
bpel\DBAdapterOutboundHeader.wsdl -- this file contains generic information for connecting to a database.
bpel\Order.wsdl -- this file contains the information that you specified in the wizard.
bpel\Order_table.xsd -- this file contains the schema information for the ORDERS and ITEMS tables.
bpel\Order_toplink_mappings.xml -- this file is used by TopLink
src\Order\Orders.java
src\Order\Items.java
database\SOADEMO\ORDERS.table
database\SOADEMO\ITEMS.table
toplink\Order\Order.mwp
Before you can insert order information in the ORDERS table in the database, you need to retrieve the order ID from the database. The order ID is generated from a database sequence.
In the Component Palette, select Services from the dropdown.
Drag the Database Adapter icon from the Component Palette and drop it in a Services swimlane. This launches the Adapter Configuration Wizard. Click Next on the welcome page to continue.
In Step 1, Service Name, enter OrderSequence as the Service Name, and click Next.
Figure 8-32 Adapter Configuration Wizard, Step 1, Service Name

In Step 2, Service Connection:
Connection: select the database connection for the SOADEMO schema.
JNDI Name: enter eis/DB/soademo. This is the JNDI location you specified when you created connection factory in Oracle Application Server (see Section 2.6.4, "Create a Database Adapter Connection Factory").
Figure 8-33 Adapter Configuration Wizard, Step 2, Service Connection
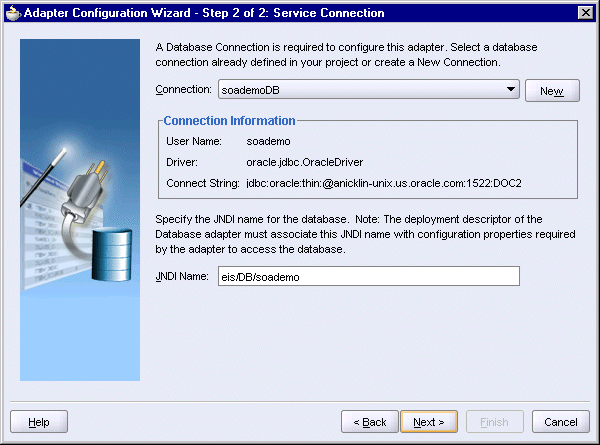
Click Next.
In Step 3, Operation Type, select Execute Custom SQL.
Figure 8-34 Adapter Configuration Wizard, Step 3, Operation Type
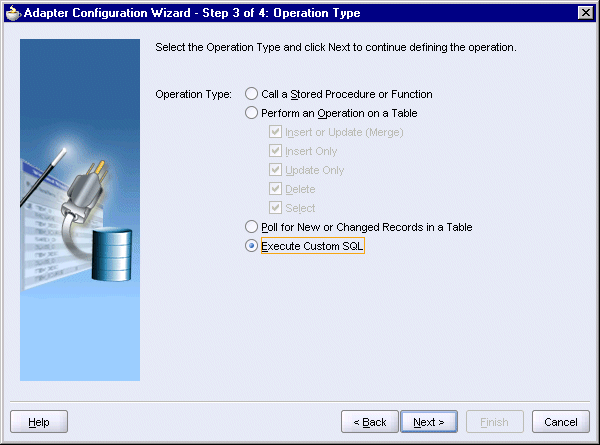
Click Next.
In Step 4, Custom SQL, enter the following SQL statement in the SQL box:
select order_seq_id_gen.nextval from dual
The wizard displays the appropriate statements in the XSD box.
Figure 8-35 Adapter Configuration Wizard, Step 4, Custom SQL
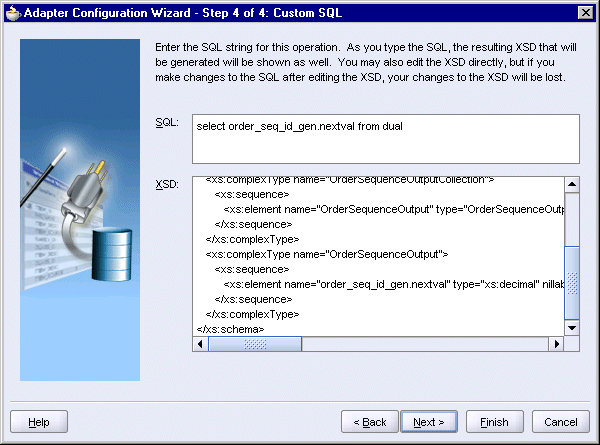
Click Next.
On the Finish page, click Finish.
JDeveloper displays the Create Partner Link dialog with the fields filled in:
Figure 8-36 Create Partner Link Dialog for OrderSequence Database Adapter
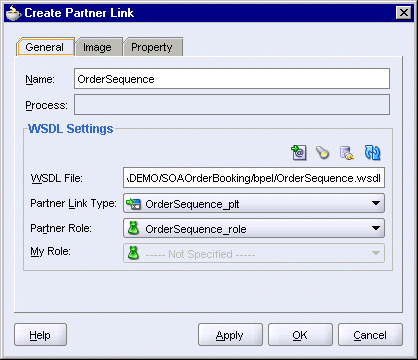
Click OK in the Create Partner Link dialog. You should see the OrderSequence database adapter in the Services swimlane.
Select File > Save to save your work.
The wizard creates the following files in the SOAOrderBooking directory:
bpel\OrderSequence.wsdl -- this file contains the information that you specified in the wizard.
bpel\OrderSequence.xsd -- this file defines the format of the sequence input and output.
Create a new scope called "InsertOrderIntoDB" to contain the activities for writing order information in the database.
In the Component Palette, select Process Activities from the dropdown.
Drag the Scope icon from the Component Palette and drop it between the "receiveInput" activity and the "callbackClient" activity".
Double-click the new scope to display the Scope dialog.
In the Scope dialog, in the General tab:
Name: enter InsertOrderIntoDB.
Variable Access Serializable: do not select.
Click the Variables tab. You need to create three variables for this scope: orderRequest, orderSequenceInput, orderSequenceOutput.
Create the orderRequest variable:
In the Variables tab, click Create.
In the Create Variable dialog:
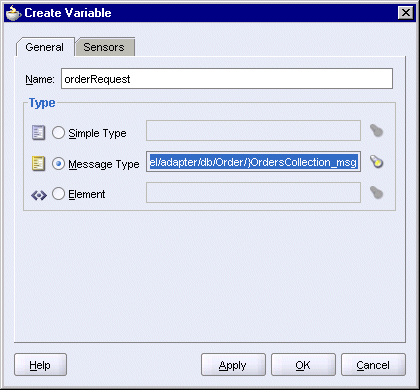
Name: enter orderRequest.
Select Message Type and click the flashlight icon to display the Type Chooser. In the Type Chooser, select Type Explorer > Message Types > Partner Links > Order > Order.wsdl > Message Types > OrdersColllection_msg.
Figure 8-37 Type Chooser Dialog for orderRequest Variable

Click OK in the Type Chooser.
In the Create Variable dialog, the Message Type is set to {http://xmlns.oracle.com/pcbpel/adapter/db/Order/}OrdersCollection_msg.
Figure 8-38 Create Variable Dialog for orderRequest Variable
Click OK in the Create Variable dialog. This returns you to the Scope dialog.
Create the orderSequenceInput variable:
In the Variables tab, click Create.
In the Create Variable dialog:
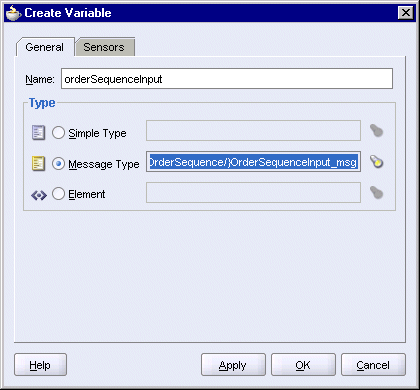
Name: enter orderSequenceInput.
Select Message Type and click the flashlight icon to display the Type Chooser. In the Type Chooser, select Type Explorer > Message Types > Partner Links > OrderSequence > OrderSequence.wsdl > Message Types > OrderSequenceInput_msg.
Figure 8-39 Type Chooser Dialog for orderSequenceInput Variable

Click OK in the Type Chooser.
In the Create Variable dialog, the Message Type is set to {http://xmlns.oracle.com/pcbpel/adapter/db/OrderSequence/}OrderSequenceInput_msg.
Figure 8-40 Create Variable Dialog for orderSequenceInput Variable
Click OK in the Create Variable dialog. This returns you to the Scope dialog.
Create the orderSequenceOutput variable:
In the Variables tab, click Create.
In the Create Variable dialog:
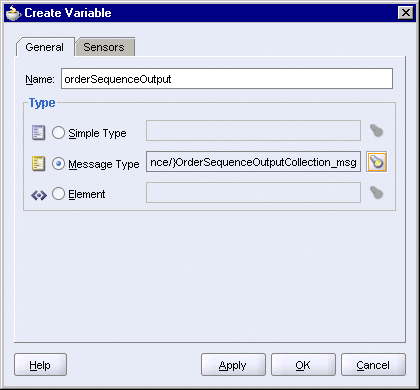
Name: enter orderSequenceOutput.
Select Message Type and click the flashlight icon to display the Type Chooser. In the Type Chooser, select Type Explorer > Message Types > Partner Links > OrderSequence > OrderSequence.wsdl > Message Types > OrderSequenceOutputCollection_msg.
Figure 8-41 Type Chooser Dialog for orderSequenceOutput Variable

Click OK in the Type Chooser.
In the Create Variable dialog, the Message Type is set to {http://xmlns.oracle.com/pcbpel/adapter/db/OrderSequence/}OrderSequenceOutputCollection_msg.
Figure 8-42 Create Variable Dialog for orderSequenceOutput Variable
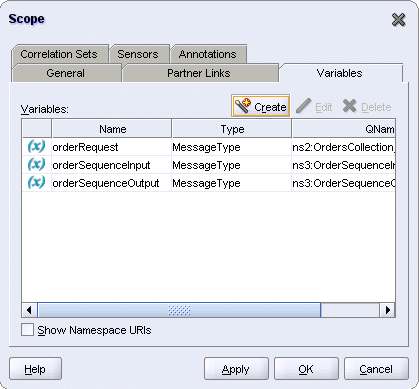
Click OK in the Create Variable dialog. This returns you to the Scope dialog. You should see all three variables in the dialog.
Figure 8-43 Scope Dialog for InsertOrderIntoDB, Variables Tab
Click OK in the Scope dialog.
Select File > Save to save your work.
This invoke activity retrieves the next value from the order_seq_id_gen database sequence and stores it in the orderSequenceOutput variable.
Expand the "InsertOrderIntoDB" scope.
Drag the Invoke icon from the Component Palette and drop it in the "InsertOrderIntoDB" scope.
Do one of the following to display the Invoke dialog:
Drag one of the arrows on the side of the "Invoke_1" activity and drop it on the "OrderSequence" database adapter. This associates the invoke activity with the database adapter.
Double-click the new Invoke_1 activity.
In the Invoke dialog, set these values:
Name: enter GetOrderId.
Partner Link: should be set to OrderSequence. If not, click the flashlight and select OrderSequence from the Partner Link Chooser.
Figure 8-44 Partner Link Chooser for "InsertOrder" Invoke Activity
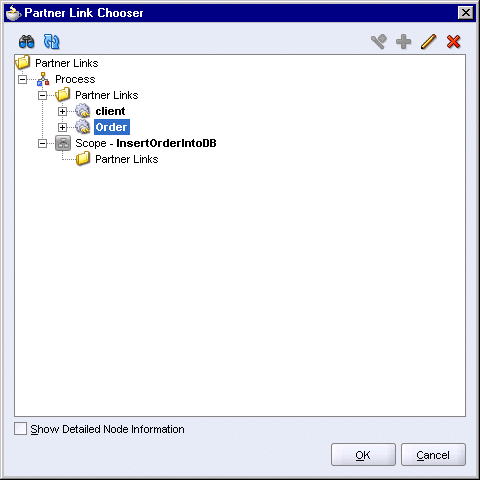
Click OK in the Partner Link Chooser.
Operation: select OrderSequence.
Input Variable: click the Browse Variables icon (the second icon from the left) and select Process > Variables > Scope - InsertOrderIntoDB > Variables > orderSequenceInput.
Figure 8-45 Variable Chooser Dialog for Input Variable for "GetOrderId" Invoke Activity
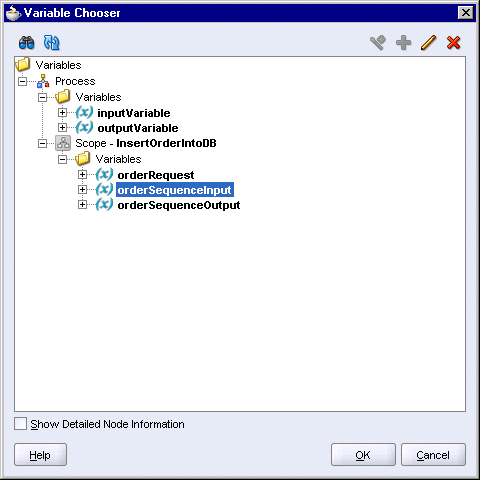
Click OK in the Variable Chooser.
Output Variable: click the Browse Variables icon (the second icon from the left) and select Process > Variables > Scope - InsertOrderIntoDB > Variables > orderSequenceOutput.
Figure 8-46 Variable Chooser Dialog for Output Variable for "GetOrderId" Invoke Activity

Click OK in the Variable Chooser.
The Invoke dialog should look like this:
Figure 8-47 Invoke Dialog for "GetOrderId" Invoke Activity
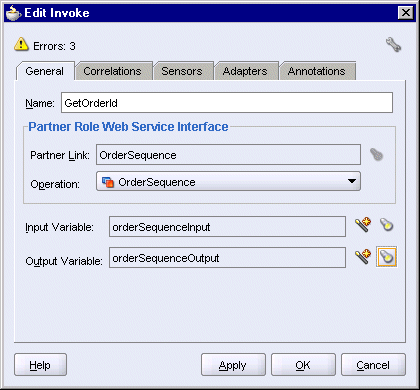
Click OK in the Invoke dialog.
Select File > Save to save your work.
The SOAOrderBooking.bpel page should now look like this:
This assign activity prepares two values for insertion into the database:
It invokes the order_seq_id_gen database sequence to get the order ID.
It sets the order status to "pending".
These values are used by the "InsertOrder" invoke activity when it writes the order information to the database.
To create this assign activity:
Drag the Assign activity icon from the Component Palette and drop it below the "GetOrderId" activity in the "InsertOrderIntoDB" scope.
Double-click the new assign activity to display the Assign dialog.
In the Assign dialog, click the General tab, and set the Name to AssignOrderStatus.
Still in the Assign dialog, click the Copy Operation tab and create two copy operations: one to copy the order ID and another one to copy the order status.
Create the copy operation to copy the order ID:
Select Copy Operation from the Create dropdown. This displays the Create Copy Operation dialog.
In the From side, set Type to Variable, and select Variables > Process > Scope - InsertOrderIntoDB > Variables > orderSequenceOutput > OrderSequenceOutputCollection > ns4:OrderSequenceOutputCollection > ns4:OrderSequenceOutput > ns4:order_seq_id_gen.nextval.
In the To side, set Type to Variable, and select Variables > Process > Variables > inputVariable > payload > client:SOAOrderBookingProcessRequest > ns1:PurchaseOrder > ns1:ID.
Figure 8-49 Create Copy Operation Dialog for "AssignOrderStatus" Assign Activity, Copy the Order ID
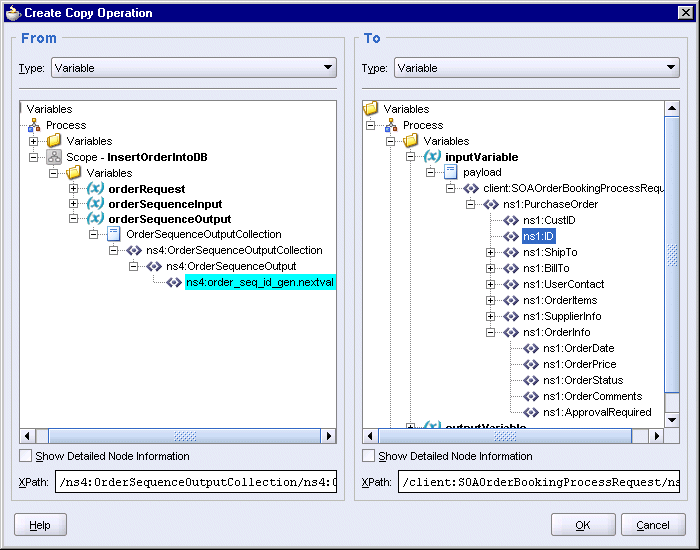
Click OK in the Create Copy Operation dialog.
Create the copy operation to copy the order status:
Select Copy Operation from the Create dropdown again to create the second copy operation. This displays the Create Copy Operation dialog.
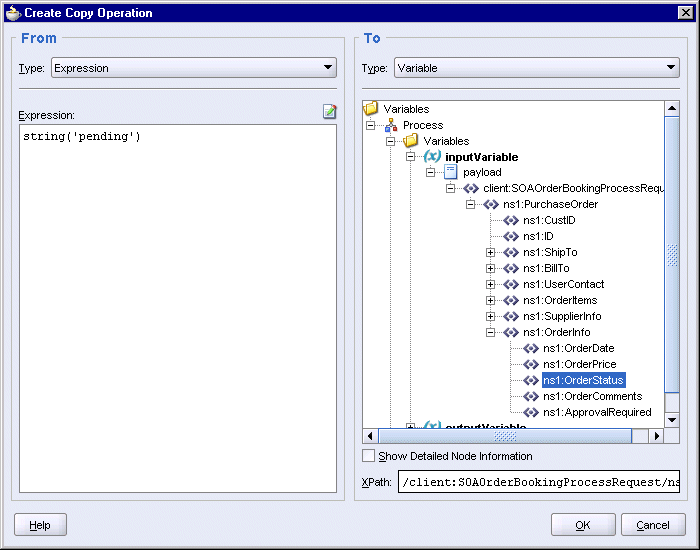
In the From side, set Type to Expression, and enter the following line in the Expression box:
string('pending')
In the To side, set Type to Variable, and select Variables > Process > Variables > inputVariable > payload > client:SOAOrderBookingProcessRequest > ns1:PurchaseOrder > ns1:OrderInfo > ns1:OrderStatus.
Figure 8-50 Create Copy Operation Dialog for "AssignOrderStatus" Assign Activity, Copy the Order Status
Click OK in the Create Copy Operation dialog.
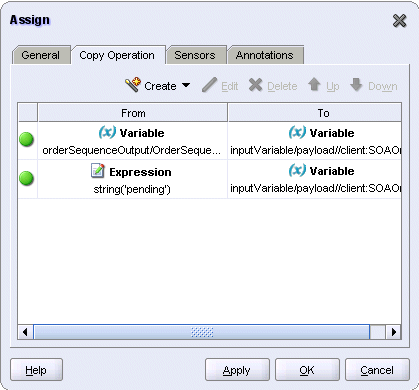
You should see two copy operations in the Assign dialog. Click OK.
Figure 8-51 Assign Dialog for "AssignOrderStatus" Activity
Select File > Save to save your work.
The SOAOrderBooking.bpel page should now look like this:
In this transform service, you create a file called TransformOrder.xsl to map the incoming order information to the schema defined in Order_table.xsd, which prepares it for insertion in the database. Order_table.xsd was created by the Adapter Configuration wizard that you ran in Section 8.7.1, "Create a Database Adapter for Writing to the ORDERS Table".
In the Component Palette, select Process Activities from the dropdown.
Drag the Transform icon from the Component Palette and drop it after the "AssignOrderStatus" activity.
Double-click the new transform activity to display the Transform dialog.
In the Transform dialog, click the General tab and set the Name to TransformOrder.
Click the Transformation tab in the dialog and set these values:
Source Variable: select inputVariable. The Source Part should be set to payload.
Target Variable: select orderRequest. The Target Part should be set to OrdersCollection.
Mapper File: enter TransformOrder.xsl and click the Create Mapping icon (the middle icon). This displays the Data Mapping tool for TransformOrder.xsl.
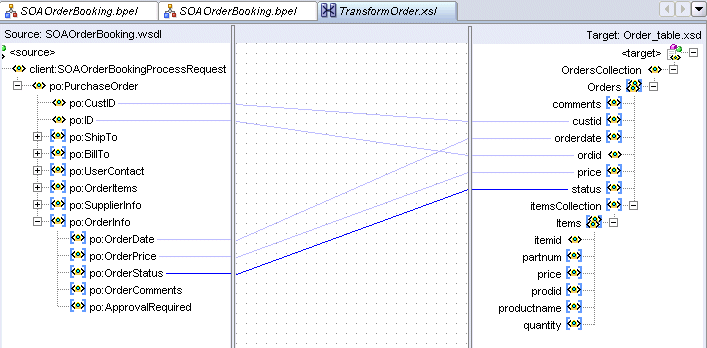
In the Data Mapping tool, create the simple mappings shown in Table 8-2. The left column shows the source side and the right column shows the target side. You create the simple mappings by dragging and dropping the labels from the source side to the target side.
Table 8-2 Simple Mappings
| Source > client:SOAOrderBookingProcessRequest > po:PurchaseOrder | Target > OrdersCollection > Orders |
|---|---|
|
po:CustID |
custid |
|
po:ID |
ordid |
|
po:OrderInfo > po:OrderDate |
orderdate |
|
po:OrderInfo > po:OrderPrice |
price |
|
po:OrderInfo > po:OrderStatus |
status |
Figure 8-53 shows the Data Mapper with the simple mappings done.
Figure 8-53 Data Mapper for Transform Activity in InsertOrderIntoDB Scope
Process all the items in the order by creating a "for-each" element in the XSL file:
a. Select XSLT Constructs from the dropdown in the Component Palette in the Data Mapper.
b. On the target side, expand itemsCollection and Items.
c. Drag the for-each item from the Component Palette and drop it on Items. You want the for-each label to show up between itemsCollection and Items on the target side.
d. Expand po:OrderItems on the source side to that you can see po:Item below it. Expand po:Item as well.
e. Drag a line from po:Item on the source side to the for-each item on the target side.
f. Map the following item fields:
Table 8-3 Mappings for the "for-each" Items
| Source > client:SOAOrderBookingProcessRequest > po:PurchaseOrder > po:OrderItems > po:Item | Target > OrdersCollection > Orders > itemsCollection > for-each > Items |
|---|---|
|
po:ProductName |
productname |
|
po:partnum |
partnum |
|
po:price |
price |
|
po:Quantity |
quantity |
For itemid on the target side, you want to map it to the position() function. To do this in the Data Mapper:
a. Select Node-set Functions from the dropdown in the Component Palette.
b. Drag the position item from the Component Palette and drop it in the middle area (between the source and target areas).
c. Drag a line from itemid on the target side to the position item in the middle area.
d. Select File > Save to save TransformOrder.xsl.
Figure 8-54 shows the complete transformation in the Data Mapper.
Figure 8-54 Data Mapper Showing Complete Mappings for the Transformation Activity

e. Select File > Close to close TransformOrder.xsl. This takes you back to the main editor in JDeveloper.
Select File > Save in the main editor to save SOAOrderBooking.bpel.
This invoke activity inserts the data into the database.
In the Component Palette, select Process Activities from the dropdown.
Drag the Invoke icon from the Component Palette and drop it below the "TransformOrder" activity.
Do one of the following to display the Invoke dialog:
Drag one of the arrows on the side of the Invoke_1 activity and drop it on the "Order" database adapter. This associates the Invoke_1 activity with the database adapter.
Double-click the new Invoke_1 activity.
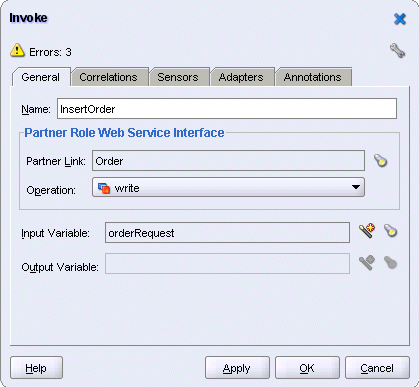
In the Invoke dialog, set these values:
Name: enter InsertOrder.
Partner Link: should be set to Order. If not, click the flashlight and select Order from the Partner Link Chooser.
Figure 8-55 Partner Link Chooser for "InsertOrder" Invoke Activity

Click OK in the Partner Link Chooser.
Operation: select write.
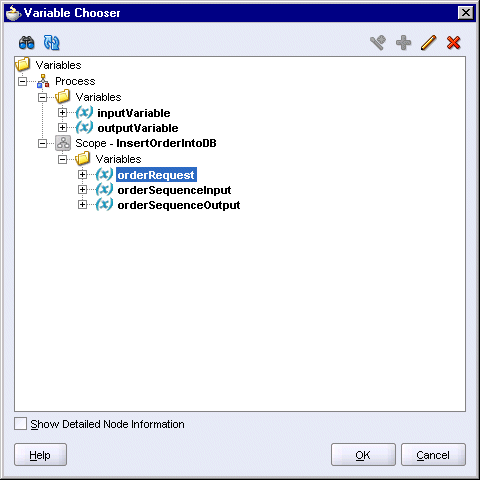
Input Variable: click the Browse Variables icon (the second icon from the left) and select Variables > Process > Scope - InsertOrderIntoDB > Variables > orderRequest.
Figure 8-56 Variable Chooser Dialog for Input Variable for "InsertOrder" Invoke Activity
Click OK in the Variable Chooser.
The Invoke dialog should look like this:
Figure 8-57 Invoke Dialog for "InsertOrder" Invoke Activity
Click OK in the Invoke dialog.
Select File > Save to save your work.
The SOAOrderBooking.bpel project should now look like this:
Click the [-] icon for the "InsertOrderIntoDB" scope to minimize it. When it is minimized, it makes it easier to create a new scope that is at the same level as the scope you minimized. Otherwise, you can accidentally drag and drop a new scope inside the existing scope. To see what a minimized scope looks like, see Figure 8-1.
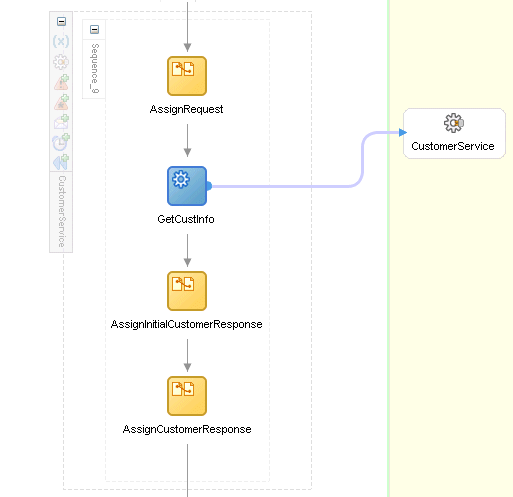
This scope invokes the CustomerService service to retrieve information about the customer. It uses the assign activity to populate variables with the returned information.
Figure 8-59 shows the activities in the "CustomerService" scope.
Figure 8-59 Activities in the "CustomerService" Scope
The "CustomerService" partner link provides the SOAOrderBooking project with a way to communicate with the CustomerService service deployed on Oracle Application Server. The CustomerSvc.wsdl file includes a URL that returns the WSDL for CustomerService.
Copy the following file from the soademo_101310_prod.zip file to the SOAOrderBooking\bpel directory.
CustomerSvc.wsdl
In the soademo_101310_prod.zip file, the CustomerSvc.wsdl file is located in the SOAOrderBooking\bpel directory.
Verify the URL in the CustomerSvc.wsdl file.
In JDeveloper, select File > Open and open the CustomerSvc.wsdl file.
Click the Source tab at the bottom of the editor to view the lines in the file.
The http://localhost:8888 reference in the file assumes that Oracle Application Server is running on the same machine as JDeveloper, and that Oracle Application Server is listening for requests on port 8888.
If necessary, change localhost to the name of the machine running Oracle Application Server, and 8888 to the correct port used by your Oracle Application Server installation, for example: mypc.mydomain.com:8889.
If you edited the file, save the file and close it.
In the Component Palette, select Services from the dropdown.
Drag the Partner Link icon from the Component Palette and drop it in a Services swimlane.
In the Create Partner Link dialog:
Name: enter CustomerService.
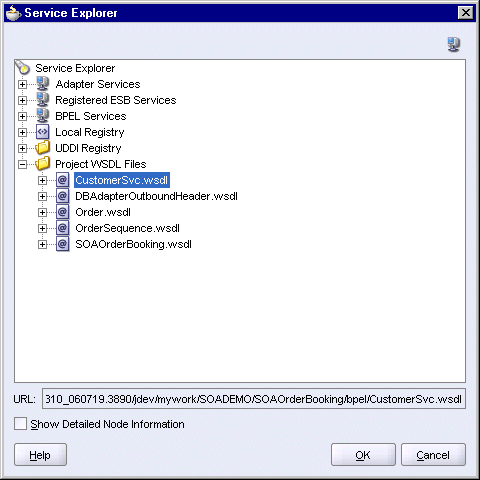
WSDL File: click the Service Explorer icon (second icon from the left) to display the Service Explorer dialog. In the Service Explorer dialog, expand Project WSDL Files and select CustomerSvc.wsdl.
Figure 8-60 Service Explorer for "CustomerService" Partner Link
Click OK in the Service Explorer.
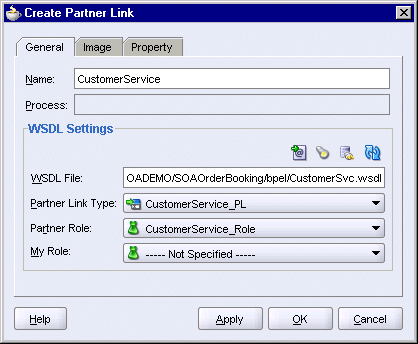
Partner Link Type: select CustomerService_PL (automatically filled in for you).
Partner Role: select CustomerService_Role.
My Role: leave it blank.
The Create Partner Link dialog should look like this:
Figure 8-61 Create Partner Link Dialog for "CustomerService" Partner Link
Before clicking OK, check that the Name is CustomerService. JDeveloper may have changed it CustomerSvc. Click OK in the Create Partner Link dialog.
Create a new scope called "CustomerService".
In the Component Palette, select Process Activities from the dropdown.
Drag the Scope icon from the Component Palette and drop it below the "InsertOrderIntoDB" scope.
Double-click the new scope to display the Scope dialog.
In the Scope dialog, in the General tab:
Name: enter CustomerService.
Variable Access Serializable: do not select.
Click the Variables tab. You need to create a variable for this scope.
In the Variables tab, click Create.
In the Create Variable dialog:
Name: enter customerServiceRequest.
Select Message Type and click the flashlight icon to display the Type Chooser. In the Type Chooser, select Type Explorer > Message Types > Partner Links > CustomerService > CustomerSvc.wsdl > Imported WSDL > CustomerService > Message Types > CustomerService_findCustomerById.
Figure 8-62 Type Chooser Dialog for "customerServiceRequest" Variable

Click OK in the Type Chooser.
In the Create Variable dialog, the Message Type is set to {http://www.globalcompany.com/ns/customer}CustomerService_findCustomerById.
Figure 8-63 Create Variable Dialog for "customerServiceRequest" Variable
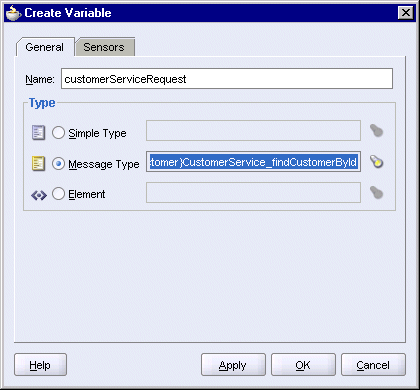
Click OK in the Create Variable dialog.
The customerServiceRequest variable appears in the Variables tab of the Scope dialog.
Figure 8-64 Scope Dialog Showing Variables Tab for CustomerService Scope
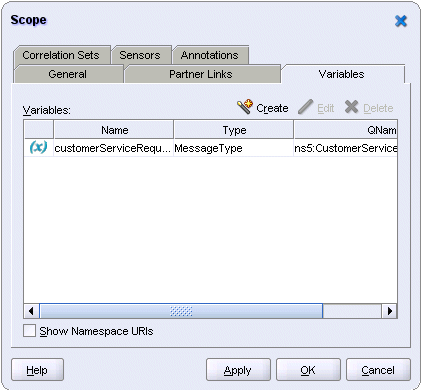
Click OK in the Scope dialog.
This assign activity assigns the customer ID information to the customerServiceRequest variable. This variable is then used as the input variable in the "GetCustInfo" invoke activity.
Expand the CustomerService scope.
Drag the Assign activity icon from the Component Palette and drop it in the CustomerService scope.
Double-click the new assign activity to display the Assign dialog.
In the Assign dialog, click the General tab, and set the Name to AssignRequest.
Still in the Assign dialog, click the Copy Operation tab.
Select Copy Operation from the Create dropdown. This displays the Create Copy Operation dialog.
In the From side, set Type to Variable, and select Variables > Process > Variables > inputVariable > payload > client:SOAOrderBookingProcessRequest > ns1:PurchaseOrder > ns1:CustID.
In the To side, set Type to Variable, and select Variables > Process > Scope - Customer Service > Variables > customerServiceRequest > parameters > ns8:findCustomerById > ns8:custid.
Figure 8-65 Create Copy Operation Dialog for "AssignRequest" Activity
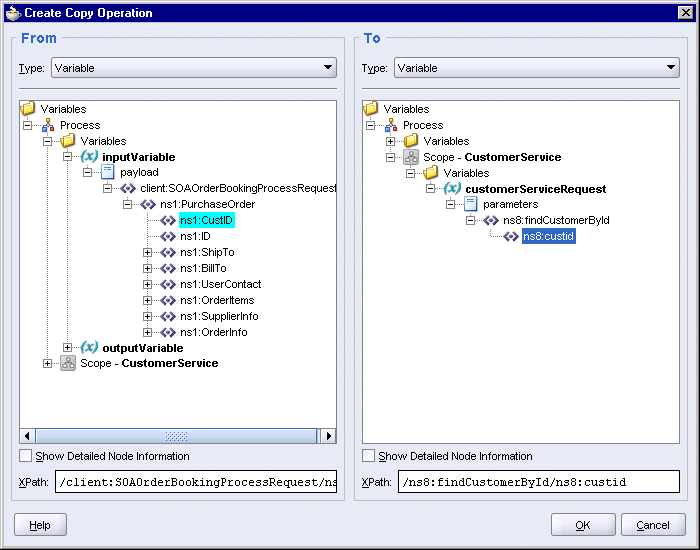
Click OK in the Create Copy Operation dialog.
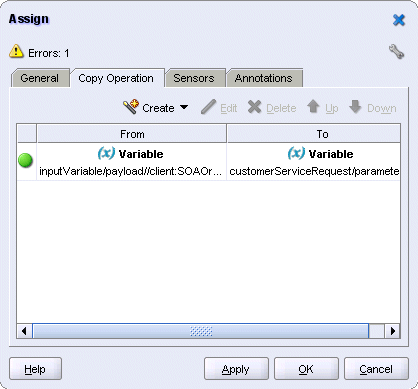
You should see the copy operation in the Assign dialog. Click OK.
Figure 8-66 Assign Dialog for "AssignRequest" Activity
The customerServiceResponse variable is used to contain the results of the findCustomerById operation.
Create the customerServiceResponse variable in the SOAOrderBooking scope. The variable is created at this level so that any activity in this BPEL process can access it.
Double-click the SOAOrderBooking scope. You can double-click the "SOAOrderBooking" text that is sideways. This displays the Process dialog.
In the Process dialog, click Create in the Variables tab. This displays the Create Variable dialog.
In the Create Variable dialog:
Name: enter customerServiceResponse.
Type: select Message Type, and click the flashlight icon. This displays the Type Chooser dialog.
In the Type Chooser, select Type Explorer > Message Types > Partner Links > CustomerService > CustomerSvc.wsdl > Imported WSDL > Customer Service > Message Types > CustomerService_findCustomerByIdResponse.
Figure 8-67 Type Chooser Dialog for "customerServiceResponse" Process Variable

Click OK in the Type Chooser. The Create Variable dialog now looks like this:
Figure 8-68 Create Variable Dialog for "customerServiceResponse" Process Variable
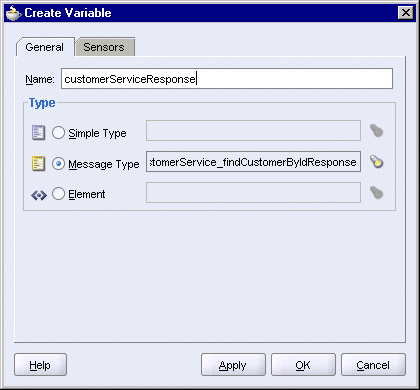
Click OK in the Create Variable dialog. The customerServiceResponse variable appears in the Process dialog.
Figure 8-69 Process Dialog Showing customerServiceResponse Variable

Click OK in the Process dialog.
Select File > Save to save your work.
This invoke activity accesses the CustomerService partner link and invokes the findCustomerById operation. The operation is invoked with the customer ID assigned in the "AssignRequest" activity. The results of the operation is stored in the customerServiceResponse variable.
Drag the Invoke icon from the Component Palette and drop it below the "AssignRequest" activity.
Do one of the following to display the Invoke dialog:
Drag one of the arrows on the side of the Invoke_1 activity and drop it on the "CustomerService" partner link. This associates the invoke activity with the partner link.
Double-click the new Invoke_1 activity.
In the Invoke dialog, set these values:
Name: enter GetCustInfo.
Partner Link: should be set to CustomerService. If not, click the flashlight and select CustomerService from the Partner Link Chooser.
Figure 8-70 Partner Link Chooser Dialog for "GetCustInfo" Invoke Activity

Click OK in the Partner Link Chooser.
Operation: select findCustomerById.
Input Variable: click the Browse Variables icon (the second icon from the left) and select Variables > Process > Scope - CustomerService > Variables > customerServiceRequest.
Figure 8-71 Variable Chooser Dialog for the Input Variable for the "GetCustInfo" Invoke Activity
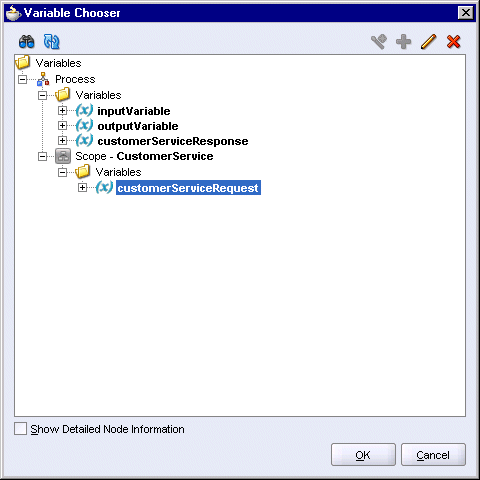
Click OK in the Variable Chooser.
Output Variable: click the Browse Variables icon (the second icon from the left) and select Variables > Process > Variables > customerServiceResponse.
Figure 8-72 Variable Chooser Dialog for the Output Variable for the "GetCustInfo" Invoke Activity
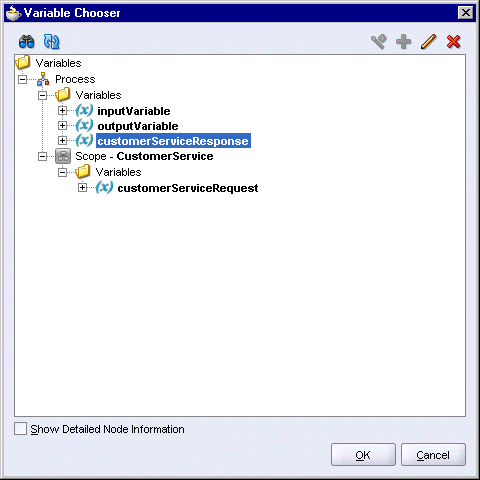
Click OK in the Variable Chooser.
The Invoke dialog should look like this:
Figure 8-73 Invoke Dialog for the "GetCustInfo" Invoke Activity
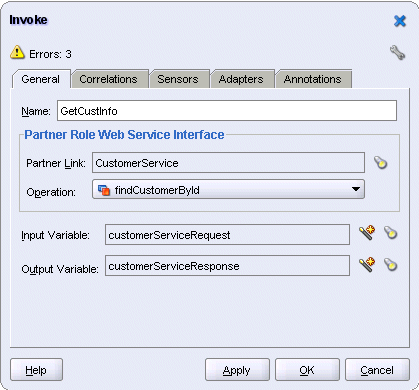
Click OK in the Invoke dialog.
Select File > Save to save your work.
This assign activity appends the customer's first name and last name to the payload part of the inputVariable. It uses an XML fragment to perform this append operation.
Drag the Assign activity icon from the Component Palette and drop it below the "GetCustInfo" activity.
Double-click the new assign activity to display the Assign dialog.
In the Assign dialog, click the General tab, and set the Name to AssignInitialCustomerResponse.
Still in the Assign dialog, click the Copy Operation tab. You will create an append operation.
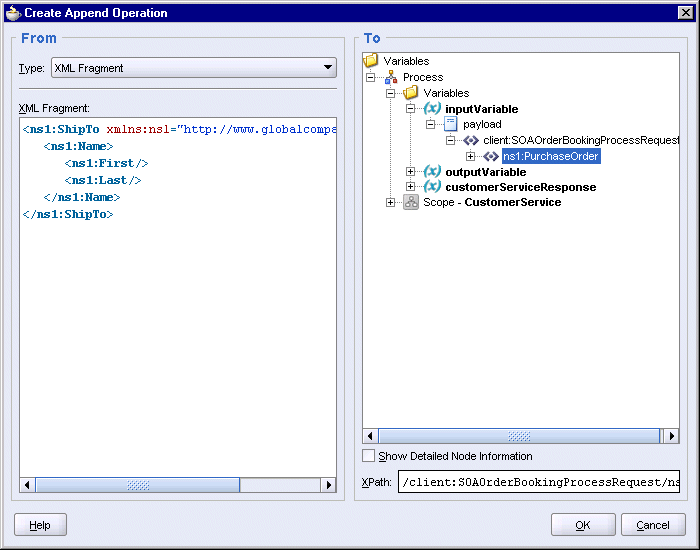
Select Append Operation from the Create dropdown. This displays the Create Append Operation dialog.
In the From side, select XML Fragment from the Type dropdown, and enter the following in the XML Fragment box:
<nsx:ShipTo xmlns:nsx="http://www.globalcompany.com/ns/order">
   <nsx:Name>
      <nsx:First/>
      <nsx:Last/>
   </nsx:Name>
</nsx:ShipTo>
Note that you need to replace the nsx prefix with the prefix for "http://www.globalcompany.com/ns/order". To determine the prefix, scroll to the beginning of your SOAOrderBooking.bpel file and look for this line:
xmlns:prefix="http://www.globalcompany.com/ns/order"
For example, if the line in your file looks like the following:
xmlns:ns1="http://www.globalcompany.com/ns/order"
then you need to change the prefix to ns1 in the XML fragment.
In the To side, select Variables > Process > Variables > inputVariable > payload > client:SOAOrderBookingProcessRequest > ns1:PurchaseOrder.
Figure 8-74 Create Append Operation Dialog for the "AssignInitialCustomerResponse" Activity
Click OK in the Create Append Operation dialog.
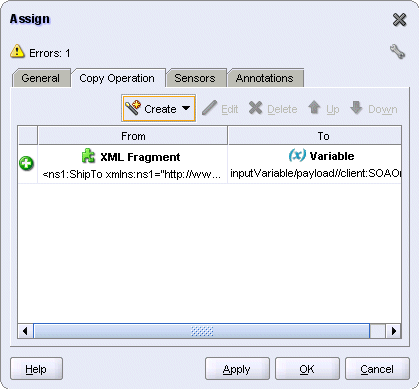
You should see the append operation in the Assign dialog.
Figure 8-75 Assign Dialog for the "AssignInitialCustomerResponse" Activity
Click OK in the Assign dialog.
Select File > Save to save your work.
This assign activity assigns the first and last names of the customer (which were retrieved from the database) to the inputVariable.
Drag the Assign activity icon from the Component Palette and drop it below the "AssignInitialCustomerResponse" activity.
Double-click the new assign activity to display the Assign dialog.
In the Assign dialog, click the General tab, and set the Name to AssignCustomerResponse.
Still in the Assign dialog, click the Copy Operation tab. You will create two copy operations.
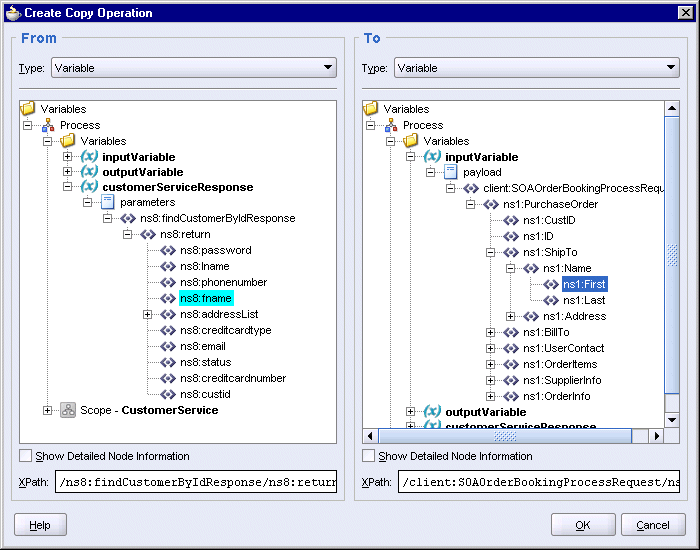
Create the first copy operation: Select Copy Operation from the Create dropdown. This displays the Create Copy Operation dialog.
In the From side, set Type to Variable, and select Variables > Process > Variables > customerServiceResponse > parameters > ns8:findCustomerByIdResponse > ns8:return > ns8:fname.
In the To side, set Type to Variable, and select Variables > Process > Variables > inputVariable > payload > client:SOAOrderBookingProcessRequest > ns1:PurchaseOrder > ns1:ShipTo > ns1:Name > ns1:First.
Figure 8-76 Create Copy Operation Dialog for "AssignCustomerResponse" Activity, First Copy Operation
Click OK in the Create Copy Operation dialog.
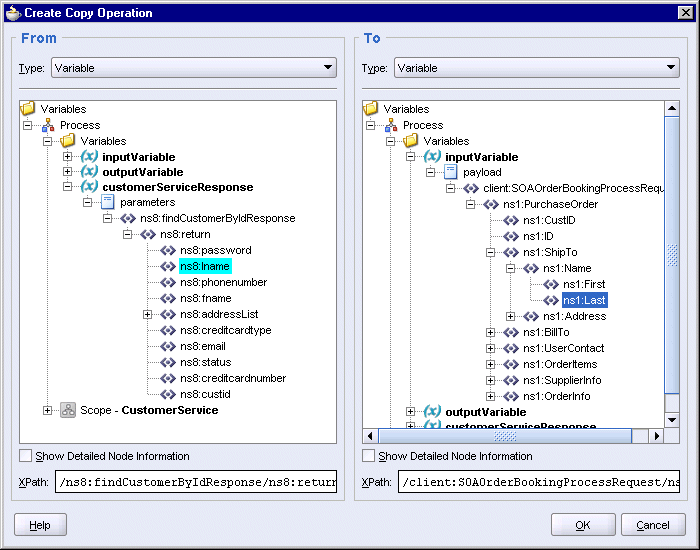
Create the second copy operation: Select Copy Operation from the Create dropdown again. This displays the Create Copy Operation dialog.
In the From side, set Type to Variable, and select Variables > Process > Variables > customerServiceResponse > parameters > ns8:findCustomerByIdResponse > ns8:return > ns8:lname.
In the To side, set Type to Variable, and select Variables > Process > Variables > inputVariable > payload > client:SOAOrderBookingProcessRequest > ns1:PurchaseOrder > ns1:ShipTo > ns1:Name > ns1:Last.
Figure 8-77 Create Copy Operation Dialog for "AssignCustomerResponse" Activity, Second Copy Operation
Click OK in the Create Copy Operation dialog.
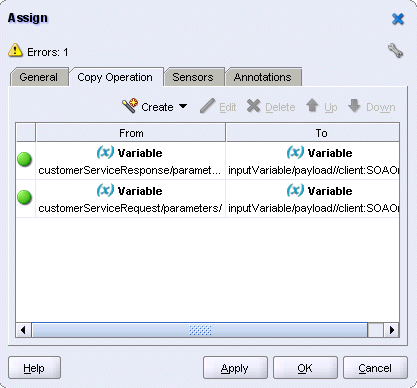
You should see two copy operations in the Assign dialog. Click OK.
Figure 8-78 Assign Dialog for the "AssignCustomerResponse" Activity
Select File > Save to save your work.
This scope verifies the credit of the customer. If a customer does not pass the credit check, the scope throws a fault and does not continue with the rest of the flow.
Figure 8-79 shows the activities in the "CreditService" scope.
Figure 8-79 Activities in the CreditService Scope
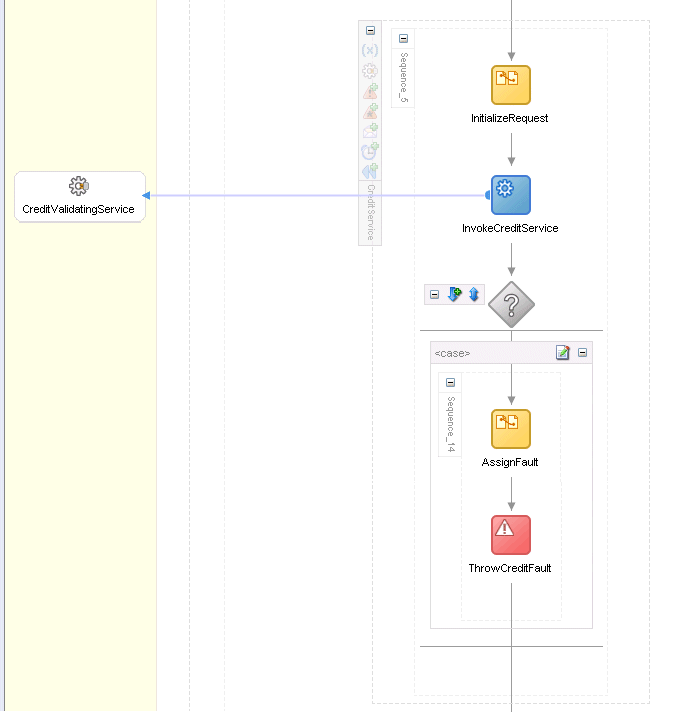
The "CreditService" scope uses the CreditService created in Chapter 5, "Creating the CreditService Project". The "CreditValidatingService" partner link is the interface to the CreditService.
Copy the following file from the soademo_101310_prod.zip file to the SOAOrderBooking\bpel directory.
CreditValidatingService.wsdl
In the soademo_101310_prod.zip file, the CreditValidatingService.wsdl file is located in the SOAOrderBooking\bpel directory.
Verify the URL in the CreditValidatingService.wsdl file.
In JDeveloper, select File > Open and open the CreditValidatingService.wsdl file.
Click the Source tab at the bottom of the editor to view the lines in the file.
The http://localhost:8888 reference in the file assumes that Oracle Application Server is running on the same machine as JDeveloper, and that Oracle Application Server is listening for requests on port 8888.
If necessary, change localhost to the name of the machine running Oracle Application Server, and 8888 to the correct port used by your Oracle Application Server installation, for example: mypc.mydomain.com:8889.
If you edited the file, save the file and close it.
In the Component Palette, select Services from the dropdown.
Drag the Partner Link icon from the Component Palette and drop it in a Services swimlane.
In the Create Partner Link dialog:
Name: enter CreditValidatingService.
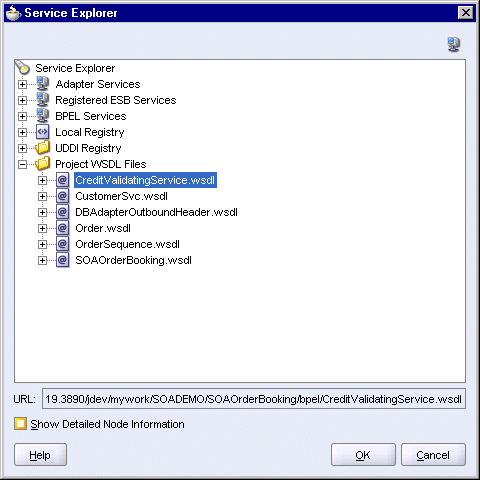
WSDL File: click the Service Explorer icon (second icon from the left) to display the Service Explorer dialog. In the Service Explorer dialog, expand Project WSDL Files and select CreditValidatingService.wsdl.
Figure 8-80 Service Explorer Dialog for "CreditValidatingService" Partner Link
Click OK in the Service Explorer.
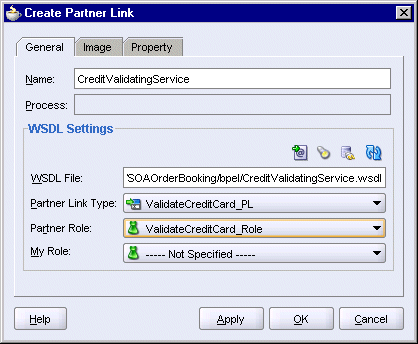
Partner Link Type: select ValidateCreditCard_PL (automatically filled in for you).
Partner Role: select ValidateCreditCard_Role.
My Role: leave it blank.
The Create Partner Link dialog should look like this:
Figure 8-81 Create Partner Link for the "CreditValidatingService" Partner Link
Click OK in the Create Partner Link dialog.
Create a new scope called "CreditService".
In the Component Palette, select Process Activities from the dropdown.
Drag the Scope icon from the Component Palette and drop it below the "CustomerService" scope.
Double-click the new scope to display the Scope dialog.
In the Scope dialog, in the General tab:
Name: enter CreditService.
Variable Access Serializable: do not select.
Click the Variables tab. You need to create two variables for this scope.
In the Variables tab, click Create.
In the Create Variable dialog:
Name: enter validateRequest.
Select Message Type and click the flashlight icon to display the Type Chooser. In the Type Chooser, select Type Explorer > Message Types > Partner Links > CreditValidatingService > CreditValidatingService.wsdl > Imported WSDL > ValidateCreditCardServiceSoapHttp > Message Types > CreditCardValidationRequestMessage.
Figure 8-82 Type Chooser Dialog for the "validateRequest" Variable

Click OK in the Type Chooser.
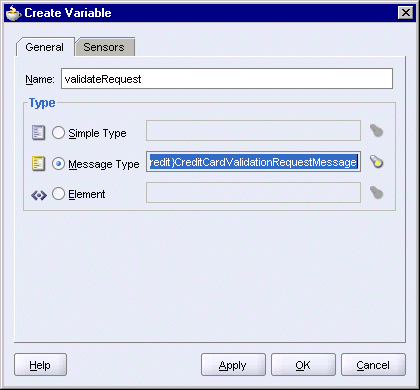
In the Create Variable dialog, the Message Type is set to {http://www.globalcompany.com/ns/credit}CreditCardValidationRequestMessage.
Figure 8-83 Create Variable Dialog for the "validateRequest" Variable
Click OK in the Create Variable dialog.
Click Create again to create a second variable.
In the Create Variable dialog:
Name: enter validateResponse.
Select Message Type and click the flashlight icon to display the Type Chooser. In the Type Chooser, select Type Explorer > Message Types > Partner Links > CreditValidatingService > CreditValidatingService.wsdl > Imported WSDL > ValidateCreditCardServiceSoapHttp > Message Types > CreditCardValidationResponseMessage.
Figure 8-84 Type Chooser Dialog for the "validateResponse" Variable

Click OK in the Type Chooser.
In the Create Variable dialog, the Message Type is set to {http://www.globalcompany.com/ns/credit}CreditCardValidationResponseMessage.
Figure 8-85 Create Variable Dialog for the "validateResponse" Variable

Click OK in the Create Variable dialog.
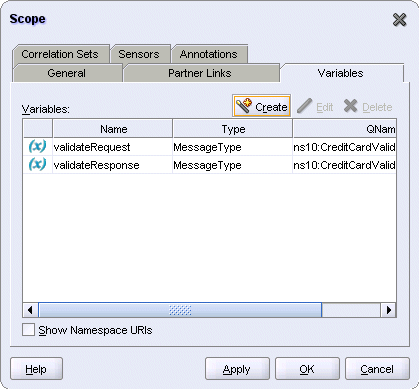
The validateRequest and validateResponse variables appear in the Variables tab of the Scope dialog.
Figure 8-86 Scope Dialog for the "CreditService" Scope
Click OK in the Scope dialog.
Select File > Save to save your work.
This assign activity copies the credit card number and type (which were retrieved from the CustomerService's findCustomerById operation) to the validateRequest variable.
Expand the "CreditService" scope.
Drag the Assign activity icon from the Component Palette and drop it in the "CreditService" scope.
Double-click the new assign activity to display the Assign dialog.
In the Assign dialog, click the General tab, and set the Name to InitializeRequest.
Still in the Assign dialog, click the Copy Operation tab. You will create two copy operations.
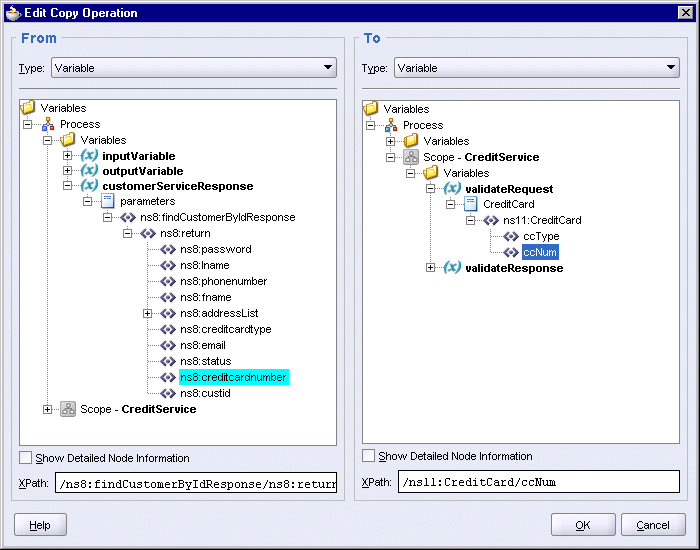
Create the first copy operation: Select Copy Operation from the Create dropdown. This displays the Create Copy Operation dialog.
In the From side, set Type to Variable, and select Variables > Process > Variables > customerServiceResponse > parameters > ns8:findCustomerByIdResponse > ns8:return > ns8:creditcardnumber.
In the To side, set Type to Variable, and select Variables > Process > Scope - Credit Service > Variables > validateRequest > CreditCard > ns11:CreditCard > ccNum.
Figure 8-87 Create Copy Operation Dialog for the "InitializeRequest" Activity, First Copy Operation
Click OK in the Create Copy Operation dialog.
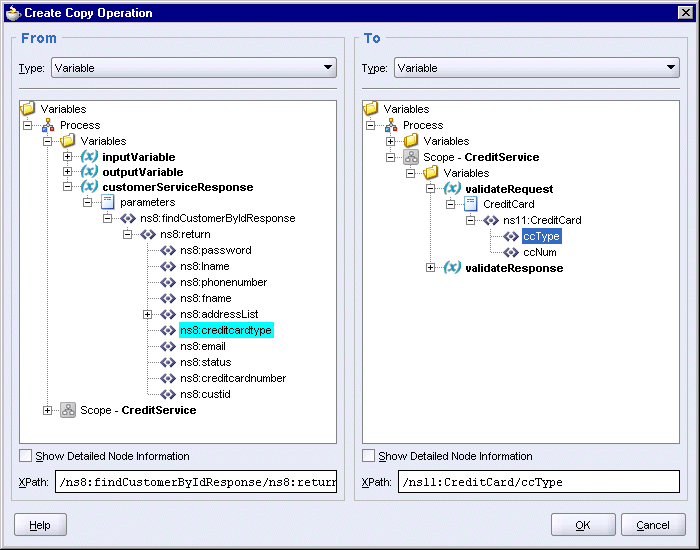
Create the second copy operation: Select Copy Operation from the Create dropdown again. This displays the Create Copy Operation dialog.
In the From side, set Type to Variable, and select Variables > Process > Variables > customerServiceResponse > parameters > ns8:findCustomerByIdResponse > ns8:return > ns8:creditcardtype.
In the To side, set Type to Variable, and select Variables > Process > Scope - Credit Service > Variables > validateRequest > CreditCard > ns11:CreditCard > ccType.
Figure 8-88 Create Copy Operation Dialog for the "InitializeRequest" Activity, Second Copy Operation
Click OK in the Create Copy Operation dialog.
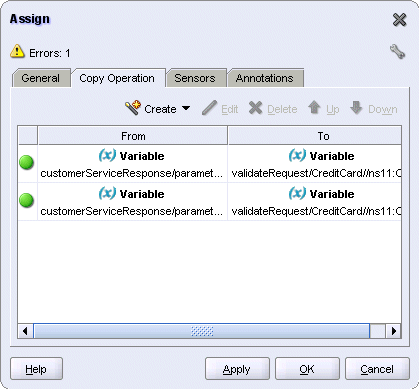
You should see the copy operations in the Assign dialog. Click OK.
Figure 8-89 Assign Dialog for the "InitializeRequest" Activity
This invoke activity checks whether or not the customer's credit card is valid. The invoke activity uses the values assigned in the previous assign activity.
Drag the Invoke icon from the Component Palette and drop it below the "InitializeRequest" activity.
Do one of the following to display the Invoke dialog:
Drag one of the arrows on the side of the Invoke_1 activity and drop it on the "CreditValidatingService" partner link. This associates the invoke activity with the partner link.
Double-click the new Invoke_1 activity.
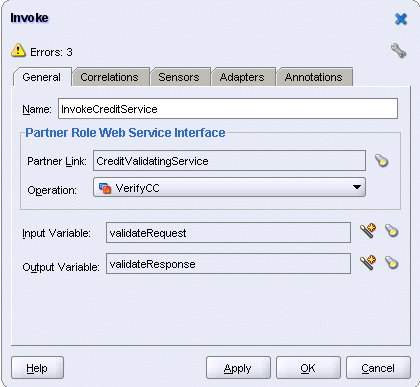
In the Invoke dialog, set these values:
Name: enter InvokeCreditService.
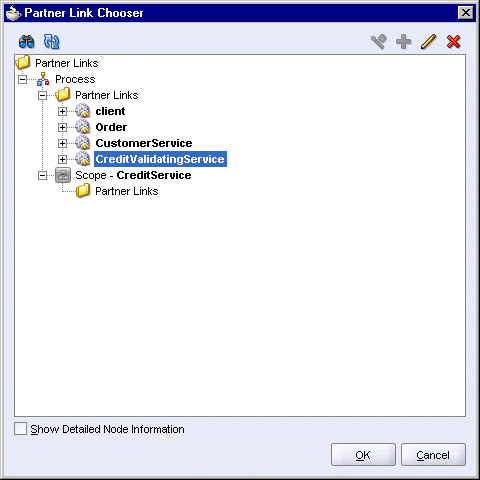
Partner Link: should be set to CreditValidatingService. If not, click the flashlight and select CreditValidatingService from the Partner Link Chooser.
Figure 8-90 Partner Link Chooser for the "InvokeCreditService" Activity
Click OK in the Partner Link Chooser.
Operation: select VerifyCC (should be filled in for you automatically).
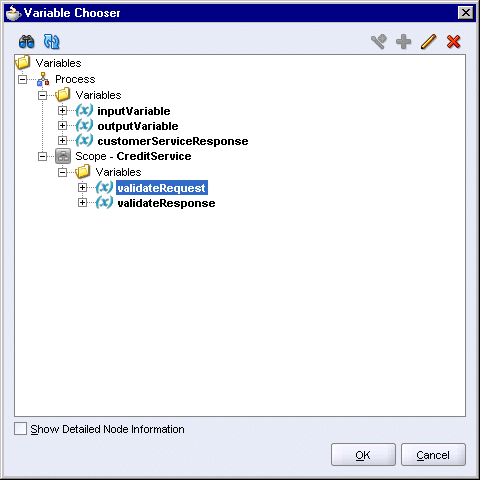
Input Variable: click the Browse Variables icon (the second icon from the left) and select Variables > Process > Scope - CreditService > Variables > validateRequest.
Figure 8-91 Variable Chooser Dialog for the Input Variable for the "InvokeCreditService" Activity
Click OK in the Variable Chooser.
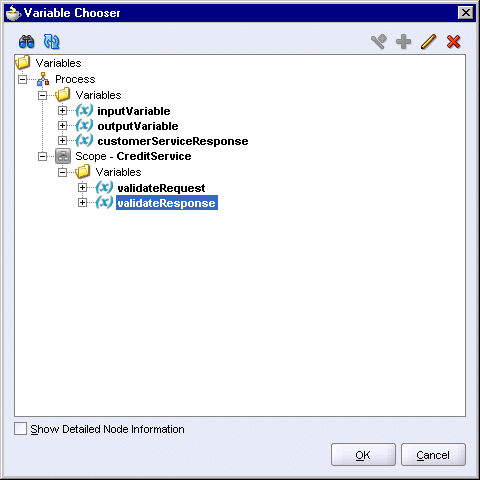
Output Variable: click the Browse Variables icon (the second icon from the left) and select Variables > Process > Scope - CreditService > Variables > validateResponse.
Figure 8-92 Variable Chooser Dialog for the Output Variable for the "InvokeCreditService" Activity
Click OK in the Variable Chooser.
The Invoke dialog should look like this:
Figure 8-93 Invoke Dialog for the "InvokeCreditService" Activity
Click OK in the Invoke dialog.
Select File > Save to save your work.
Create the OrderBookingFault variable in the SOAOrderBooking scope. This variable is created at this level so that any activity in this BPEL flow can access it.
Scroll to the top of the page and double-click the SOAOrderBooking scope. You can double-click the "SOAOrderBooking" text that is sideways. This displays the Process dialog.
In the Process dialog, click Create in the Variables tab. This displays the Create Variable dialog.
In the Create Variable dialog:
Name: enter OrderBookingFault.
Type: select Message Type, and click the flashlight icon. This displays the Type Chooser dialog.
In the Type Chooser, select Type Explorer > Message Types > Partner Links > client > SOAOrderBooking.wsdl > Message Types > SOAOrderBookingFaultMessage.
Figure 8-94 Type Chooser Dialog for the "OrderBookingFault" Process Variable
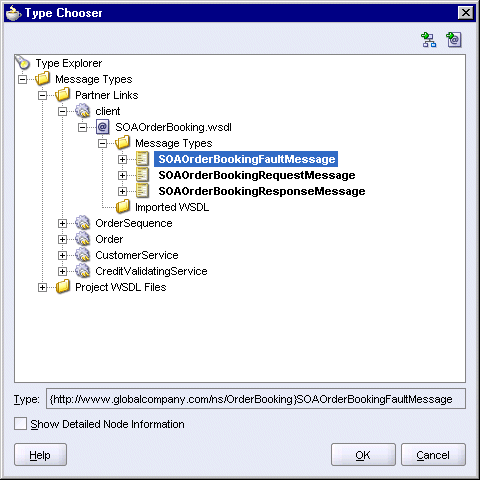
Click OK in the Type Chooser. The Create Variable dialog now looks like this:
Figure 8-95 Create Variable Dialog for the "OrderBookingFault" Process Variable
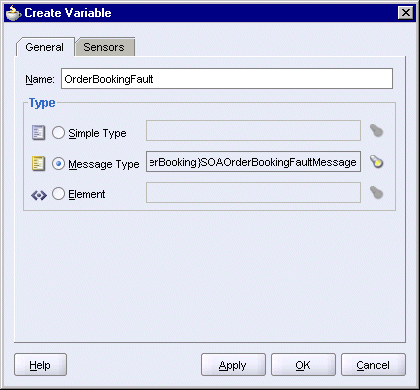
Click OK in the Create Variable dialog. The OrderBookingFault variable appears in the Process dialog.
Select File > Save to save your work.
This switch checks the result of the "InvokeCreditService" invoke activity. If the customer's credit card is valid, the flow continues. If the customer's credit card is not valid, the switch throws a fault.
Drag the Switch icon from the Component Palette and drop it below the "InvokeCreditService" activity.
Expand the switch.
Delete the <otherwise> case. This switch only handles invalid credit responses, for which it throws a fault. For credit cards that are valid, the switch does not apply to them and for those cases, they just continue to the next step in the flow.
For the <case> branch, you want to handle cases where a customer's credit is not valid. This information is stored in the validateResponse variable.
Double-click the title bar of the <case> box to display the Switch Case dialog.
In the Switch Case dialog, click the XPath Expression Builder icon above the Expression box to display the Expression Builder dialog.
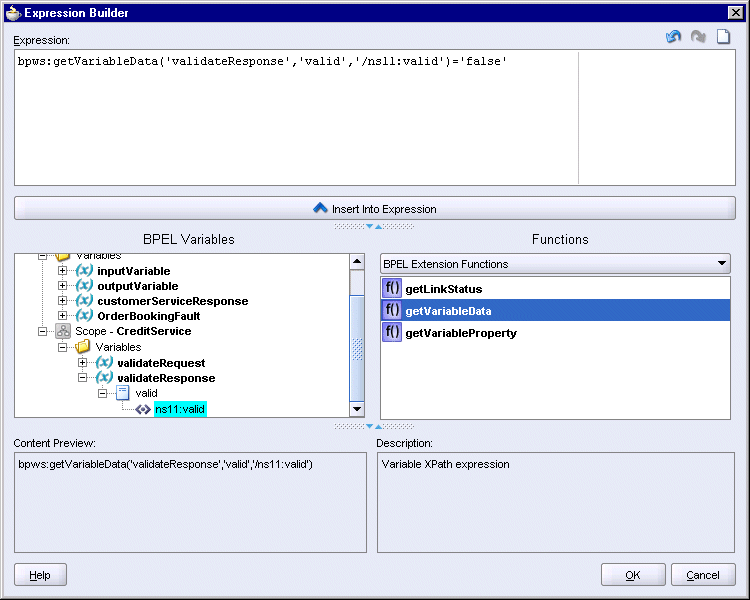
In the Expression Builder dialog, in the BPEL Variables box, select Variables > Process > Scope - CreditService > Variables > validateResponse > valid > ns11:valid.
The Content Preview box should show bpws:getVariableData('validateResponse', 'valid', 'ns11:valid').
The ns11 prefix maps to the "http://www.globalcompany.com/ns/credit.xsd" namespace. It may be different on your system. If you want, you can scroll to the top of your SOAOrderBooking.bpel file (in source view) to verify the prefix.
Click Insert Into Expression. The Expression box should show the function with the three parameters.
Append ='false' to the expression in the Expression box so that the expression looks like this:
bpws:getVariableData('validateResponse','valid','/ns11:valid')='false'
Figure 8-97 Expression Builder Dialog Showing the Complete Expression for <case>
Click OK in the Expression Builder dialog.
Click OK in the Switch Case dialog.
This assign activity sets the value of the OrderBookingFault variable to "credit problem".
Drag the Assign activity icon from the Component Palette and drop it in the <case> area of the switch.
Double-click the new assign activity to display the Assign dialog.
In the Assign dialog, click the General tab, and set the Name to AssignFault.
Still in the Assign dialog, click the Copy Operation tab. You will create one copy operation.
Select Copy Operation from the Create dropdown. This displays the Create Copy Operation dialog.
In the From side, set Type to Expression, and enter the following line in the Expression box:
string('credit problem')
In the To side, set Type to Variable, and select Variables > Process > Variables > OrderBookingFault > payload > client:SOAOrderBookingProcessFault > client:status.
Figure 8-98 Create Copy Operation Dialog for the "AssignFault" Activity

Click OK in the Create Copy Operation dialog.
You should see the copy operation in the Assign dialog. Click OK.
Figure 8-99 Assign Dialog for the "AssignFault" Activity
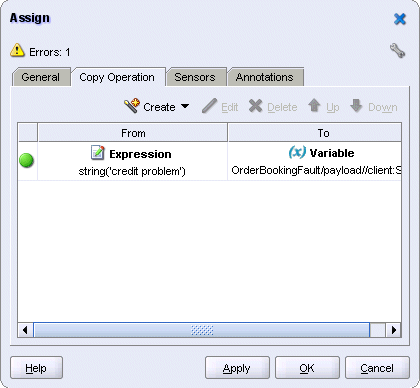
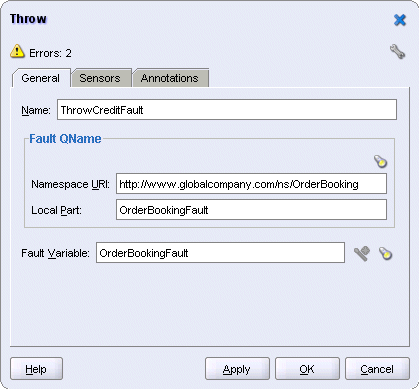
This throw activity throws a fault called OrderBookingFault. This fault value is stored in a variable also called OrderBookingFault. The SOAOrderBooking process terminates after executing the throw activity.
Drag the Throw icon from the Component Palette and drop it below the "AssignFault" activity.
Double-click the new throw activity to display the Throw dialog.
In the Throw dialog:
Name: enter ThrowCreditFault.
Namespace URI: enter http://www.globalcompany.com/ns/OrderBooking. You have to enter it manually.
Local Part: enter OrderBookingFault. You have to enter it manually.
Fault Variable: click the flashlight and select OrderBookingFault.
Figure 8-100 Throw Dialog for the "ThrowCreditFault" Throw Activity
Click OK in the Throw dialog.
Select File > Save to save your work.
The repository for Oracle Business Rules contains the rules used by the decision service in Oracle BPEL Process Manager to determine whether or not an order needs to be approved manually by a manager. The Oracle Business Rules repository is separate from the SOA Order Booking application: you can edit the rules without modifying and redeploying the SOA Order Booking application.
The rules that you will create in the repository are:
If a customer's status is platinum, then a manager's approval is not required, regardless of the amount of the order.
If an order's total is $1000 or more and the customer's status is not platinum, then a manager's approval is required.
If an order's total is under $1000, then a manager's approval is not required.
To create a repository file for Oracle Business Rules and to define the rules in it, you use Oracle Business Rules Rule Author ("Rule Author"), which is a Web-based tool that enables you to create and manage Oracle Business Rules repositories.
Location of the Repository File
Create the repository file in the SOAOrderBooking\bpel\rules\oracle directory.
However, if you are running JDeveloper and Oracle Application Server on different machines, you have to create the repository file on the Oracle Application Server machine (because Rule Author creates the file on the Oracle Application Server machine). After you have created the repository file and populated it with rules, you copy it from the Oracle Application Server machine to the JDeveloper machine.
Create the following directory where you are building the SOA Order Booking application:
SOADEMO\SOAOrderBooking\bpel\rules\oracle\
This is the directory where you will place the Oracle Business Rules repository file.
In a browser, go to the Rule Author page. The URL for Rule Author is:
http://host:port/ruleauthor
host specifies the machine running Oracle Application Server, and port specifies the HTTP port (for example, 8888).
Log in as the oc4jadmin user.
In the Repository tab:
Repository Type: select File.
File Location: enter SOADEMO\SOAOrderBooking\bpel\rules\oracle\sample_repository. (SOADEMO refers to the directory where you are building the SOA Order Booking application.) Rule Author will create the sample_repository file.
If you are running JDeveloper and Oracle Application Server on different machines, enter a path on the Oracle Application Server machine, for example, C:\rules\sample_repository. It does not matter where you place it, because after creating the file and defining the rules in it, you copy it from the Oracle Application Server machine to the SOADEMO\SOAOrderBooking\bpel\rules\oracle\ directory on the JDeveloper machine.
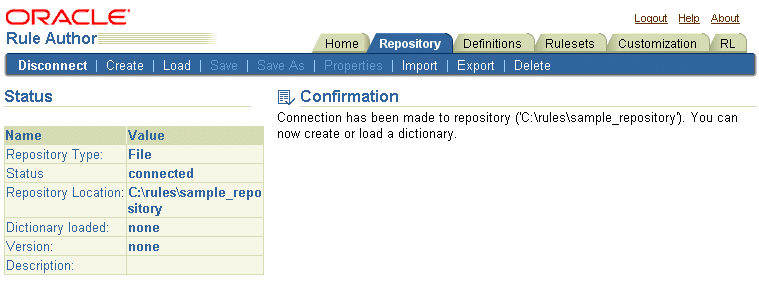
Click Create. You should see a confirmation page. Rule Author is now connected to the new repository, and you can define rules in it.
Figure 8-102 Rule Author, Confirmation Page
A repository contains one or more dictionaries. A dictionary contains rulesets, which contain rules. A dictionary typically contains rulesets for an application.
Click the Create secondary tab on the Confirmation page. This displays the Create Dictionary page.
On the Create Dictionary page, enter OrderBookingRules as the dictionary name.
Figure 8-103 Rule Author, Create Dictionary Page

Click Create. You should get a confirmation page.
Figure 8-104 Rule Author, Create Dictionary Page, Confirmation

This step is required only if you are running JDeveloper and Oracle Application Server on different machines. If you are running both on the same machine, you already have the OrderBookingRules.xsd file on the Oracle Application Server machine (you copied the file in Section 8.3, "Copy Files").
The OrderBookingRules.xsd file in the soademo_101310_prod.zip file describes the XML elements that provide the facts for Oracle Business Rules. The XSD file is located in the SOAOrderBooking\bpel directory in the zip file.
If you are running JDeveloper and Oracle Application Server on different machines, copy this file from the soademo_101310_prod.zip file to the Oracle Application Server machine, to the directory where you placed the repository file (for example, C:\rules). See step 4.
In Section 8.10.4, "Generate JAXB Classes for the Elements in the XML Schema", you use Rule Author to generate Java classes for the XML elements defined in OrderBookingRules.xsd.
Use Rule Author to generate Java objects for the elements in the OrderBookingRules.xsd file.
Click the Definitions tab, then click XMLFact on the left side. This displays the XML Fact Summary page. At this time, the OrderBookingRules dictionary does not contain any XML facts.
Click Create.
On the XML Schema Selector page:
XML Schema: enter the fullpath to the OrderBookingRules.xsd file.
If you are running JDeveloper and Oracle Application Server on the same machine, enter SOADEMO\SOAOrderBooking\bpel\OrderBookingRules.xsd.
If you are running JDeveloper and Oracle Application Server on different machines, enter C:\rules\OrderBookingRules.xsd.
JAXB Class Directory: enter the fullpath to the directory where you want Rule Author to create the Java objects (.java and .class files).
If you are running JDeveloper and Oracle Application Server on the same machine, enter SOADEMO\SOAOrderBooking\bpel\rules.
If you are running JDeveloper and Oracle Application Server on different machines, enter C:\rules.
Target Package Name: enter com.oracle.demos.orderbooking. This specifies the package name for the classes that are to be created.
Click Add Schema.
Figure 8-107 shows the resulting page with the package hierarchy expanded.
Figure 8-107 XML Schema Selector Page, Showing the Generated Classes
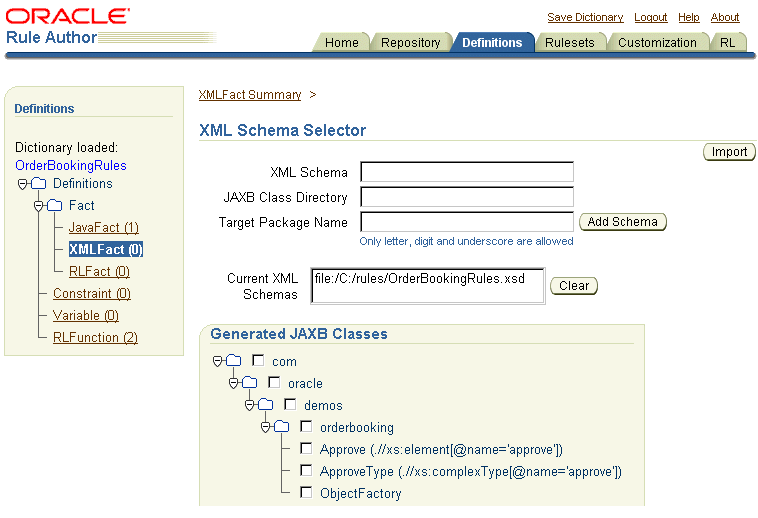
In the directory that you specified in the JAXB Class Directory field, you should see the following files:
Approve.java and Approve.class
ApproveImpl.java and ApproveImpl.class
ApproveType.java and ApproveType.class
ApproveTypeImpl.java and ApproveTypeImpl.class
jaxb.properties
ObjectFactory.java and ObjectFactory.class
After generating the JAXB classes, you can import them into the Oracle Business Rules data model. These JAXB classes become XML facts that you can use when you create your rules.
If you are not on the XML Schema Selector page, click the Definitions tab, then click XML Fact on the left side, then click Create on the XMLFact Summary page.
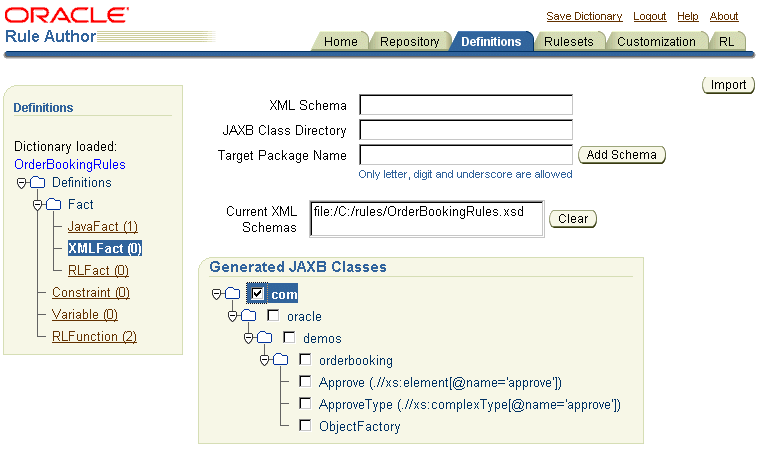
Select the check box next to com.
Figure 8-108 XML Schema Selector Page, with "com" Selected
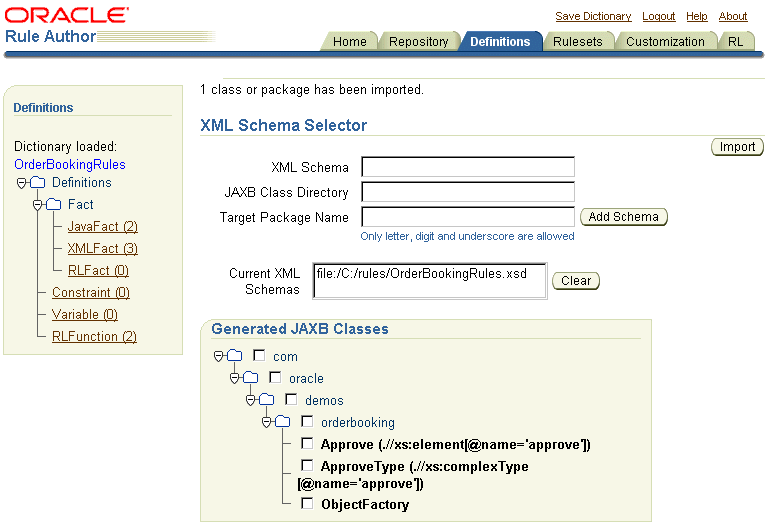
Click Import. You should see a confirmation page. The classes that have been imported are shown in bold. Also on the left side, note that there are now three XML Facts.
Figure 8-109 XML Schema Selector Page Showing the Imported Classes
You define variables in the data model so that if you need to make changes later, you only need to edit the value of the variable. In the case of the SOA Order Booking application, you create a variable called AUTOMATED_ORDER_LIMIT to define the dollar amount where orders above this amount would need manual approval from a manager and orders under this amount are approved automatically.
In the Definitions tab, click Variable on the left side.
In the Variable Summary page, click Create.
On the Variable page:
Name: enter AUTOMATED_ORDER_LIMIT.
Alias: enter AUTOMATED_ORDER_LIMIT.
Final: select this option.
Type: select float.
Expression: enter 1000.00.
Click OK. Rule Author shows the Variable Summary page. Note that the variable name is prefixed with DM (for "data model").
A ruleset contains rules. Before you can create rules, you need a ruleset.
Click the Rulesets tab. This displays the RuleSet Summary page.
On the RuleSet Summary page, click Create. This displays the Ruleset page.
On the Ruleset page, enter ApproveOrderRequired as the Name. You can also enter a description if you like.
Click OK. You should see the RuleSet Summary page showing the new ruleset. The new ruleset also appears on the left side.
You can now define your rules in the "ApproveOrderRequired" ruleset. For the SOA Order Booking application, create the following three rules:
Table 8-4 Rules
| Rule Name | Description |
|---|---|
|
|
If an order's total price is less than the value set in the AUTOMATED_ORDER_LIMIT variable, the order is approved automatically. See Section 8.10.8.1, "Create the "belowLimit" Rule". |
|
|
If an order's total price is greater than or equal to the value set in the AUTOMATED_ORDER_LIMIT variable and the customer is not a platinum customer, the order requires a manager's approval. See Section 8.10.8.2, "Create the "overLimit" Rule". |
|
|
If the customer is a platinum customer, the order is approved automatically, regardless of the order amount. See Section 8.10.8.3, "Create the "platinumMember" Rule". |
The "belowLimit" rule states that if an order's total price is less than the value set in the AUTOMATED_ORDER_LIMIT variable, the order is approved automatically.
Click the Rulesets tab.
Click the ApproveOrderRequired ruleset on the left side. This displays the Ruleset page.
Figure 8-114 Ruleset Page for the "ApproveOrderRequired" Ruleset

In the Rules section, click Create. This displays the Rule page.
On the Rule page, enter belowLimit for the Name. Keep the default value for Priority.
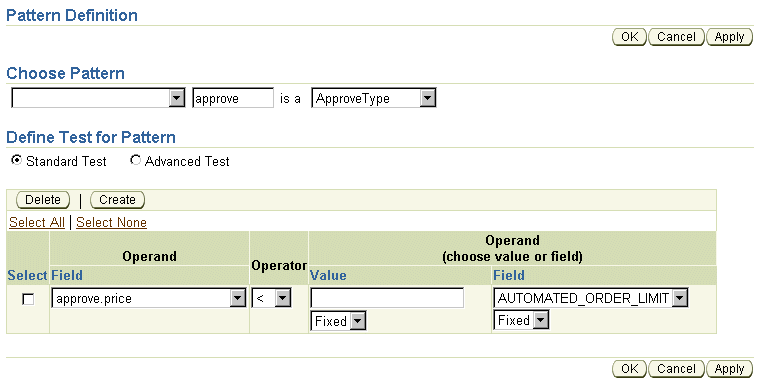
In the "If" section, click New Pattern. This pops up the Pattern Definition window.
In the Pattern Definition window, in the Choose Pattern section:
Do not choose anything from the first field (that is, leave it empty).
Enter approve in the second field.
Select ApproveType from the dropdown.
In the Define Test for Pattern section, click Create. Then fill in the section as follows:
Operand: select approve.price.
Operator: select < (less than).
Operand (choose Value or Field): select AUTOMATED_ORDER_LIMIT under Field. Select Fixed in the dropdown.
The Pattern Definition window should look like this:
Figure 8-115 Pattern Definition for "belowLimit" Rule
Click Apply in the Pattern Definition window. You should see a confirmation message at the top of the Pattern Definition window.
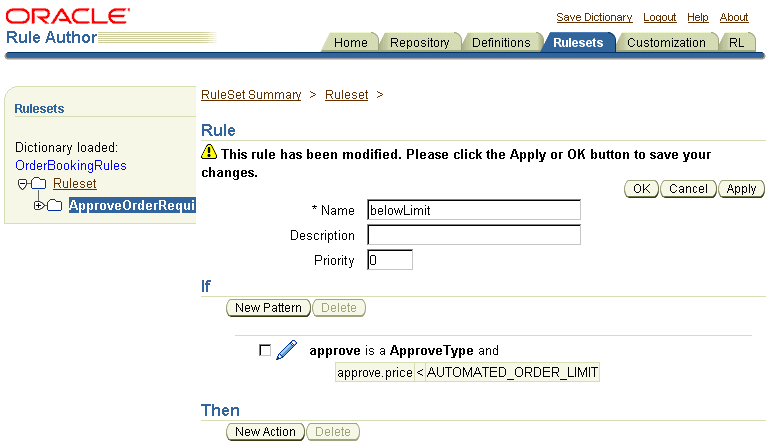
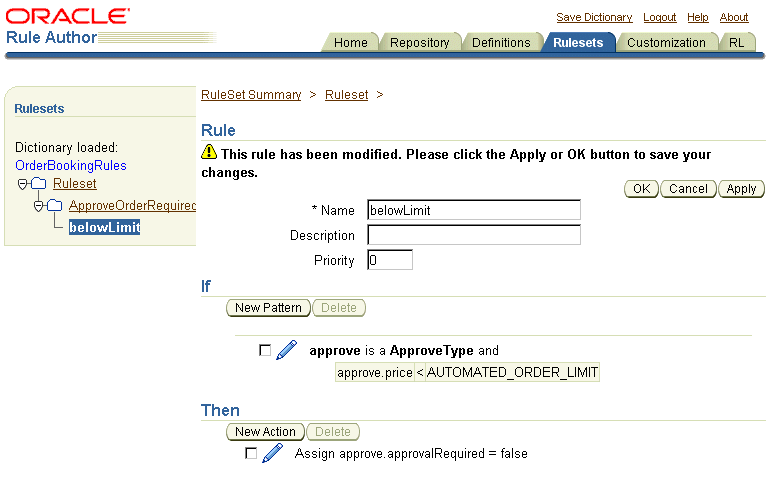
Click OK to return to the Rule page, which now looks like this:
Figure 8-116 Rule Page for the "belowLimit" Rule
Click Apply on the Rule page. You should see a confirmation message at the top of the Rule page.
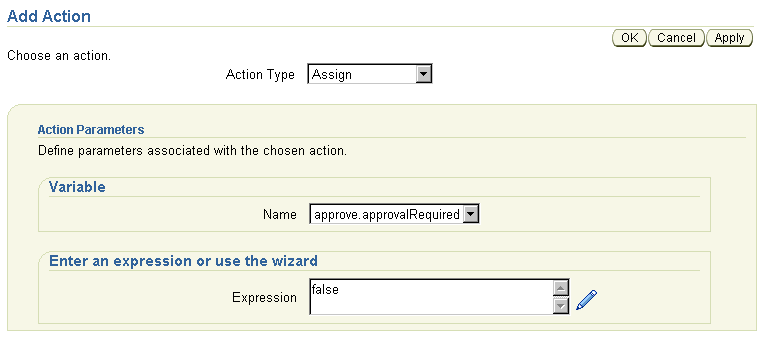
In the "Then" section of the Rule page, click New Action. This pops up the Add Action window.
In the Add Action window:
Action Type: select Assign.
Name: select approve.approvalRequired.
Expression: enter false.
Figure 8-117 Add Action for the "belowLimit" Rule
Click Apply.
Click OK to return to the Rule page, which now looks like this:
Figure 8-118 Rule Page for the "belowLimit" Rule
Click Apply.
Save your work. Click the Save Dictionary link at the top of the page, then click Save on the Save Dictionary page.
The "overLimit" rule states that if an order's total price is greater than or equal to the value set in the AUTOMATED_ORDER_LIMIT variable and the customer is not a platinum customer, the order requires a manager's approval. If the customer is a platinum customer, then the order is approved automatically, regardless of the amount of the order.
Click the Rulesets tab.
Click the ApproveOrderRequired ruleset on the left side. This displays the Ruleset page. The "belowLimit" rule is already created.
Figure 8-119 Ruleset Page for the "ApproveOrderRequired" Ruleset
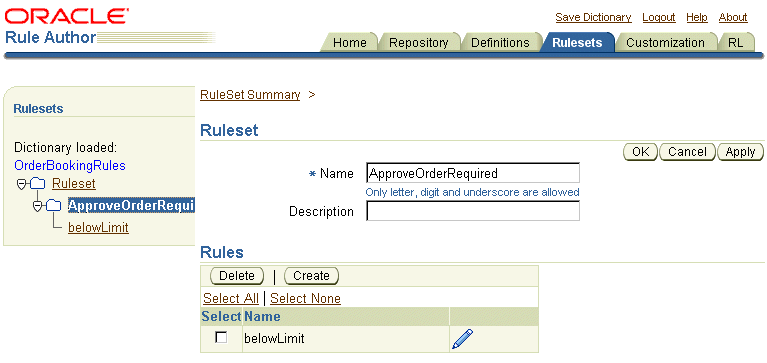
In the Rules section, click Create. This displays the Rule page.
On the Rule page, enter overLimit for the Name. Keep the default value for Priority.
In the "If" section, click New Pattern. This pops up the Pattern Definition window.
In the Pattern Definition window, in the Choose Pattern section:
Do not choose anything from the first field (that is, leave it empty).
Enter approve in the second field.
Select ApproveType from the dropdown.
In the Define Test for Pattern section, click Create. Then fill in the section as follows.
Operand: select approve.price.
Operator: select >= (greater than or equal to).
Operand (choose Value or Field): select AUTOMATED_ORDER_LIMIT under Field. Select Fixed in the dropdown.
The Pattern Definition window should look like this:
Figure 8-120 Pattern Definition for the "overLimit" Rule (part 1 of 2)
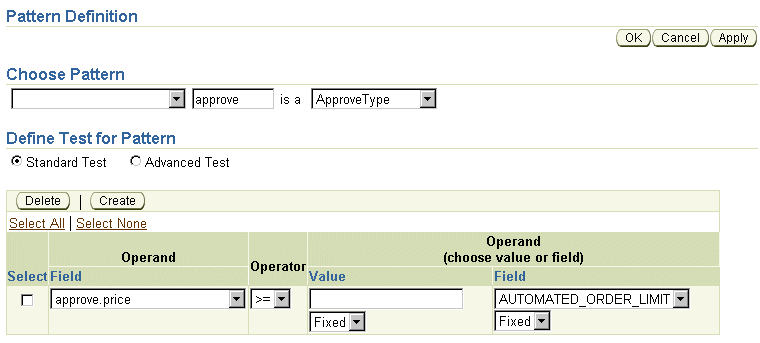
Click Create again to define the second test. Fill in the section as follows.
Operand: select approve.status.
Operator: select != (not equal to).
Operand (choose Value or Field): enter "Platinum" (include the double-quote characters) under Value. Select Fixed in the dropdown.
The Pattern Definition window should look like this:
Figure 8-121 Pattern Definition for the "overLimit" Rule (part 2 of 2)
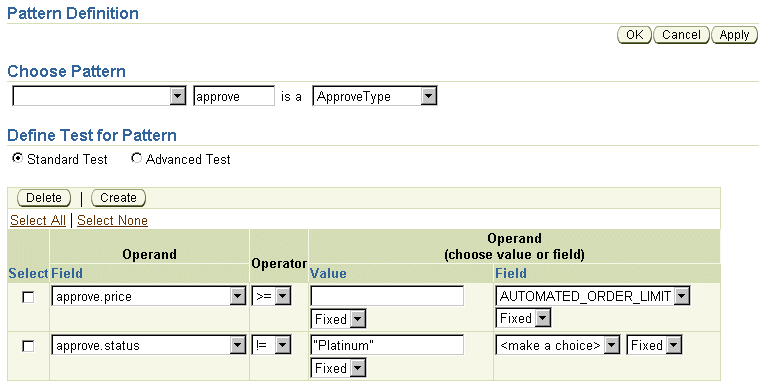
Click Apply in the Pattern Definition window. You should see a confirmation message at the top of the Pattern Definition window.
Click OK to return to the Rule page.
The Rule page now looks like this:
Figure 8-122 Rule Page for the "overLimit" Rule
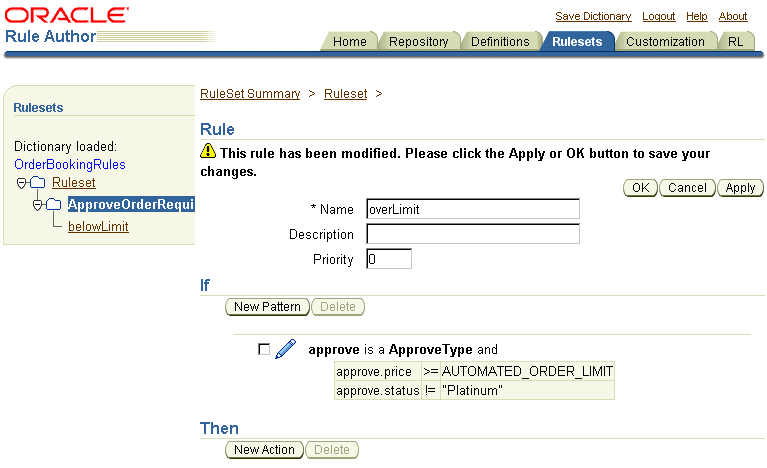
Click Apply on the Rule page. You should see a confirmation message at the top of the Rule page.
In the "Then" section of the Rule page, click New Action. This pops up the Add Action window.
In the Add Action window:
Action Type: select Assign.
Name: select approve.approvalRequired.
Expression: enter true.
Figure 8-123 Add Action for the "overLimit" Rule
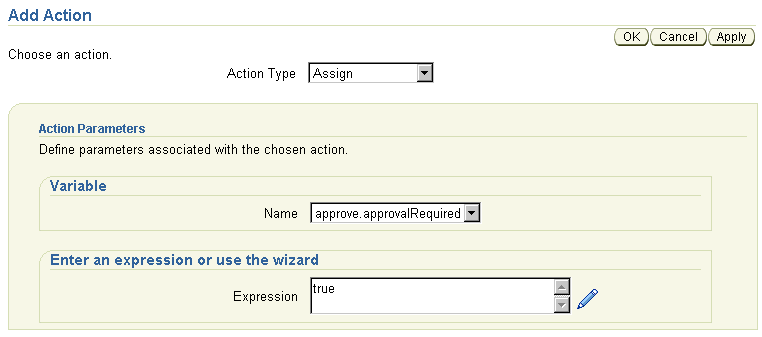
Click Apply.
Click OK to return to the Rule page, which now looks like this:
Figure 8-124 Rule Page for the "overLimit" Rule
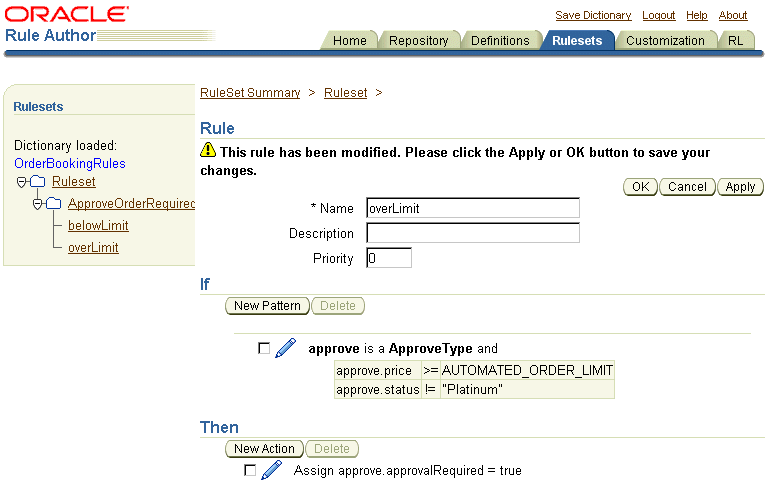
Click Apply.
Save your work. Click the Save Dictionary link at the top of the page, then click Save in the Save Dictionary page.
The "platinumMember" rule states that if a customer is a platinum customer, the order is approved automatically, regardless of the amount of the order.
Click the Rulesets tab.
Click the ApproveOrderRequired ruleset on the left side. This displays the Ruleset page. The "belowLimit" and "overLimit" rules are already created.
Figure 8-125 Ruleset Page for the "ApproveOrderRequired" Ruleset
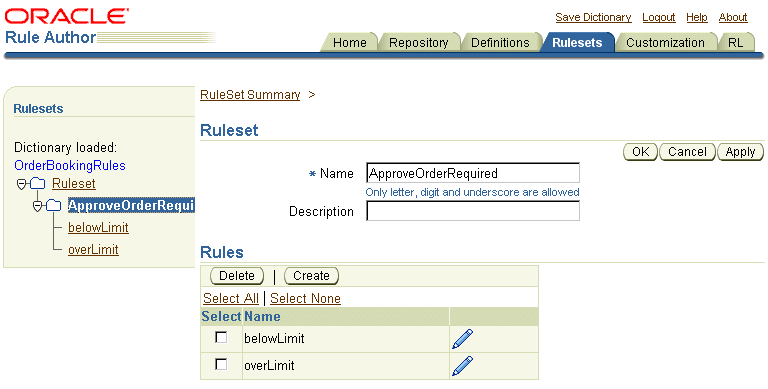
In the Rules section, click Create. This displays the Rule page.
On the Rule page, enter platinumMember for the Name. Keep the default value for Priority.
In the "If" section, click New Pattern. This pops up the Pattern Definition window.
In the Pattern Definition window, in the Choose Pattern section:
Do not choose anything from the first field (that is, leave it empty).
Enter approve in the second field.
Select ApproveType from the dropdown.
In the Define Test for Pattern section, click Create. Then fill in the section as follows.
Operand: select approve.status.
Operator: select == (equal to).
Operand (choose Value or Field): enter "Platinum" (include the double-quote characters) under Value. Select Fixed in the dropdown.
The Pattern Definition window should look like this:
Figure 8-126 Pattern Definition for the "platinumMember" Rule
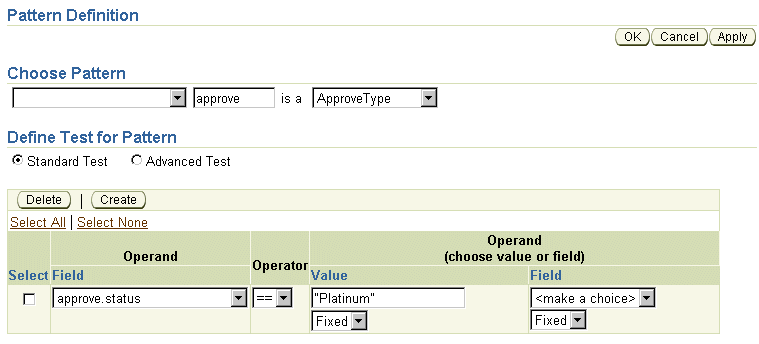
Click Apply in the Pattern Definition window. You should see a confirmation message at the top of the Pattern Definition window.
Click OK to return to the Rule page.
The Rule page now looks like this:
Figure 8-127 Rule Page for the "platinumMember" Rule
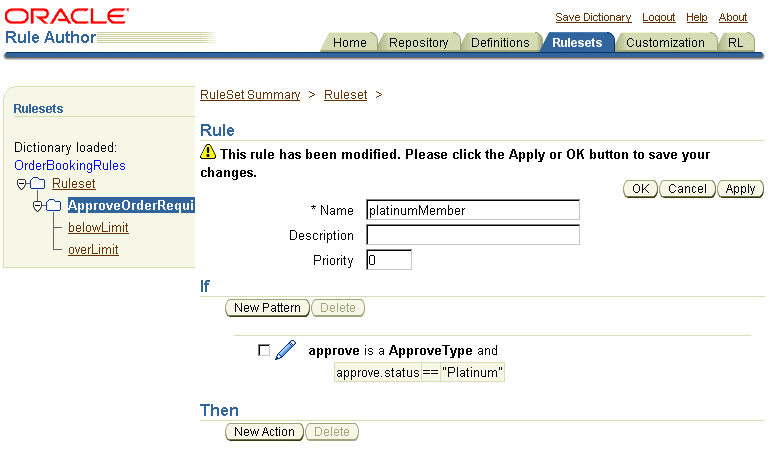
Click Apply on the Rule page. You should see a confirmation message at the top of the Rule page.
In the "Then" section of the Rule page, click New Action. This pops up the Add Action window.
In the Add Action window:
Action Type: select Assign.
Name: select approve.approvalRequired.
Expression: enter false.
Figure 8-128 Add Action for the "platinumMember" Rule

Click Apply.
Click OK to return to the Rule page, which now looks like this:
Figure 8-129 Rule Page for the "platinumMember" Rule

Click Apply.
Save your work. Click the Save Dictionary link at the top of the page, then click Save on the Save Dictionary page.
Click the Logout link at the top of the page.
On the Logout Confirmation page, click Save and Logout.
This section is applicable only if you are running JDeveloper and Oracle Application Server on different machines. If you are running both on the same machine, then the files are already on the JDeveloper machine.
Copy the files generated by Rule Author from the Oracle Application Server machine to the JDeveloper machine:
Copy the c:\rules\sample_repository file to the SOADEMO\SOAOrderBooking\bpel\rules\oracle directory.
Copy the files from c:\rules\com\oracle\demos\orderbooking to the SOADEMO\SOAOrderBooking\bpel\rules\com\oracle\demos\orderbooking directory.
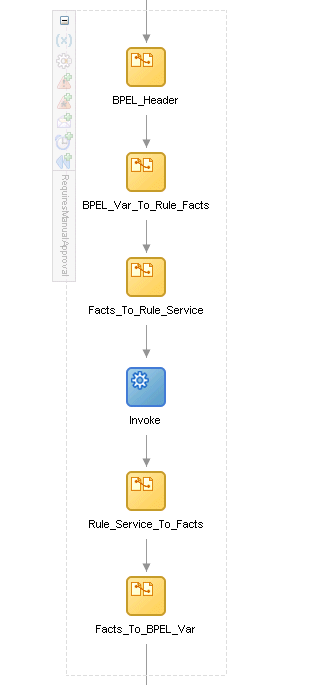
This decide activity checks if an order requires to be approved by a manager. It determines this by checking the rules in the Oracle Business Rules repository. You created the rules in Section 8.10, "Set up Oracle Business Rules".
Figure 8-130 shows the activities in the "RequiresManualApproval" decide activity.
Figure 8-130 Activities in the "RequiresManualApproval" Decide Activity
In the Component Palette, select Process Activities from the dropdown.
Drag the Decide icon from the Component Palette and drop it after the "CreditService" scope. This displays the Edit Decide dialog.
In the Edit Decide dialog, enter RequiresManualApproval in the Name field.
For the Decision Service field, click the wand icon. This launches the Decision Service wizard.
In Step 1, Select a Ruleset or Function:
Service Name: enter DecisionService (which is the default name).
Namespace: enter http://www.globalcompany.com/ns/OrderBooking/DecisionService (which is the default).
Invocation Pattern: select Execute Ruleset.
Ruleset: click the flashlight icon, which displays the Rule Explorer. In the Rule Explorer, you should see sample_repository. Expand it, then expand OrderBookingRules (which is the name of the dictionary), and select ApproveOrderRequired (which is the name of the ruleset).
Click OK in the Rule Explorer.
Back in step 1 of the wizard, select Assert Fact and Watch Fact for Approve.
Check here to assert all descendants from the top level element: do not select.
Figure 8-132 Decision Service Wizard, Step 1, Select a Ruleset or Function
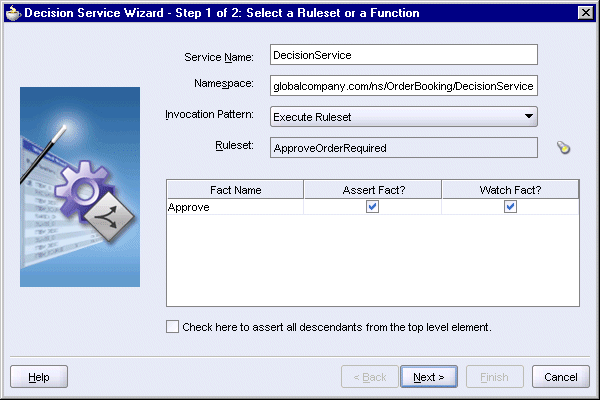
Click Next.
If the wizard complains about missing files, copy the files that it wants to the desired location. This screen is likely to appear if you are running JDeveloper and Oracle Application Server on separate machines and you copied the Oracle Business Rules repository from the Oracle Application Server machine to the JDeveloper machine.
Figure 8-133 Decision Service Wizard, Step 2, Copy XSD Files
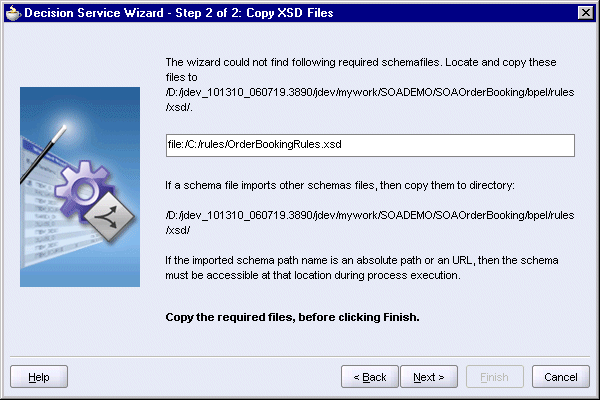
Click Next.
On the Finish page, click Finish.
Back to the Edit Decide dialog:
Decision Service: set to DecisionService automatically.
Operation: select Assert facts, execute rule set, retrieve results.
The Edit Decide dialog now looks like this:
Click OK.
Select File > Save to save your work.
JDeveloper creates the following items:
the SOAOrderBooking\decisionservices directory
the "DecisionServicePL" partner link
the following activities in the "RequiresManualApproval" decide activity (expand "RequiresManualApproval" to see the activities):
Assign activity: "BPEL_Var_To_Rule_Facts"
Assign activity: "Facts_To_Rule_Service"
Assign activity: "BPEL_Header"
Invoke activity: "Invoke"
Assign activity: "Rule_Service_To_Facts"
Assign activity: "Facts_To_BPEL_Var"
If JDeveloper displays these activities in a somewhat random order, save and close the SOAOrderBooking.bpel file. Then reopen it.
the following variables in the "RequiresManualApproval" decide activity:
com_oracle_demos_orderbooking_Approve_i
com_oracle_demos_orderbooking_Approve_o
dsIn
dsOut
To see these variables, click the (x) icon on the left side of the "RequiresManualApproval" decide activity (Figure 8-135). This displays the Variables dialog (Figure 8-136).
Figure 8-135 The Red Circle Highlights the Variable Icon for the "RequiresManualApproval" Decide Activity

You should see these variables:
The default "BPEL_Var_To_Rule_Facts" assign activity does not contain any operations. You have to define the operations yourself. For the SOA Order Booking application, you define two copy operations:
Copy the order total price to the com_oracle_demos_orderbooking_Approve_i variable. Copy it to the approve/price element of the variable.
Copy the status of the customer (retrieved from findCustomerById) to the com_oracle_demos_orderbooking_Approve_i variable. Copy it to the approve/status element of the variable.
Double-click the "BPEL_Var_To_Rule_Facts" activity to display the Assign dialog.
Click the Copy Operation tab. You will define two copy operations.
For the first copy operation, select Copy Operation from the Create dropdown. This displays the Create Copy Operation dialog.
On the To side, set Type to Expression.
Click the XPath Expression Builder icon above the Expression box to display the Expression Builder dialog. You will use the Expression Builder to create the expression.
In the Expression Builder dialog, in the BPEL Variables box, select Variables > Process > Variables > inputVariable > payload > client:SOAOrderBookingProcessRequest > ns4:PurchaseOrder > ns4:OrderInfo > ns4:OrderPrice.
The Content Preview box should show bpws:getVariableData('inputVariable', 'payload', '/client:SOAOrderBookingProcessRequest/ns4:PurchaseOrder/ns4:OrderInfo/ns4:OrderPrice').
The ns4 prefix maps to the "http://www.globalcompany.com/ns/order" namespace. It may be different on your system. If you want, you can scroll to the top of your SOAOrderBooking.bpel file (in source view) to verify the prefix.
Click Insert Into Expression. The Expression box should show the function with the three parameters.
In the Expression box, wrap the number() function around the entire bpws:getVariableData function. The value in the Expression box should look like this:
number(bpws:getVariableData('inputVariable','payload',
'/client:SOAOrderBookingProcessRequest/ns4:PurchaseOrder/
ns4:OrderInfo/ns4:OrderPrice'))
Click OK in the Expression Builder dialog.
On the From side, set Type to Variable.
Select Variables > Process > Scope - RequiresManualApproval > Variables > com_oracle_demos_orderbooking_Approve_i > ns13:approve > ns13:price.
Figure 8-138 Create Copy Operation Dialog
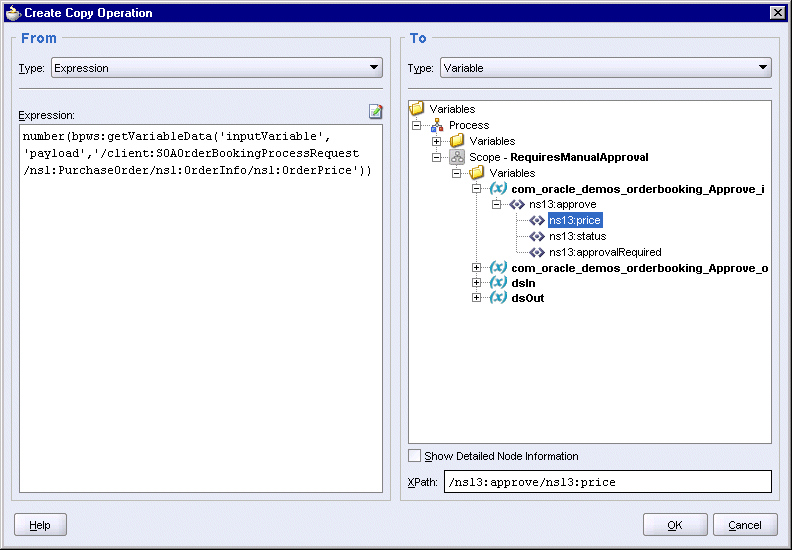
Click OK in the Create Copy Operation dialog. This returns you to the Assign dialog.
Select Copy Operation from the Create dropdown again to create the second copy operation.
On the To side, set Type to Expression.
Click the XPath Expression Builder icon above the Expression box to display the Expression Builder dialog. You will use the Expression Builder to create the expression.
In the Expression Builder dialog, in the BPEL Variables box, select Variables > Process > Variables > customerServiceResponse > parameters > ns8:findCustomerByIdResponse > ns8:return > ns8:status.
The Content Preview box should show bpws:getVariableData('customerServiceResponse','parameters','/ns8:findCustomerByIdResponse/ns8:return/ns8:status').
The ns8 prefix maps to the "http://www.globalcompany.com/ns/customer" namespace. It may be different on your system. If you want, you can scroll to the top of your SOAOrderBooking.bpel file (in source view) to verify the prefix.
Click Insert Into Expression. The Expression box should show the function with the three parameters.
In the Expression box, wrap the string() function around the entire bpws:getVariableData function. The value in the Expression box should look like this:
string(bpws:getVariableData('customerServiceResponse','parameters',
'/ns8:findCustomerByIdResponse/ns8:return/ns8:status'))
Click OK in the Expression Builder dialog.
On the From side, set Type to Variable.
Select Variables > Process > Scope - RequiresManualApproval > Variables > com_oracle_demos_orderbooking_Approve_i > ns13:approve > ns13:status.
Figure 8-140 Create Copy Operation Dialog
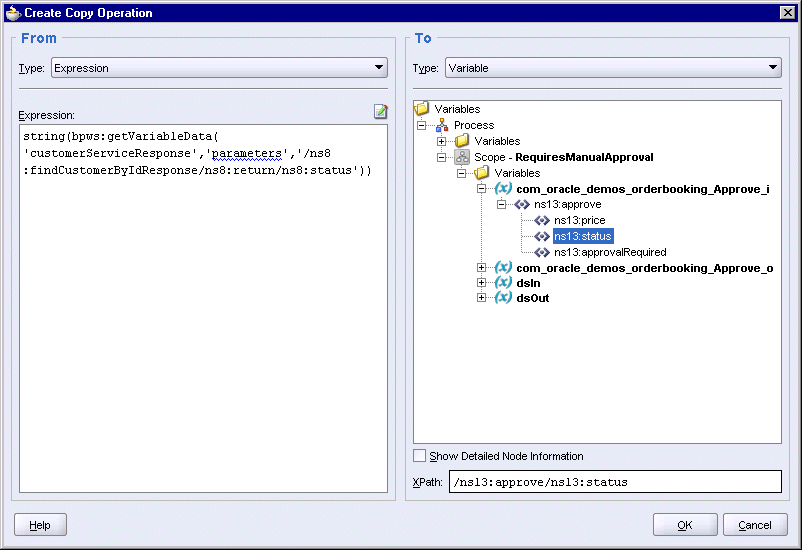
Click OK in the Create Copy Operation dialog.
Click OK in the Assign dialog.
Select File > Save to save your work.
The default "BPEL_Header" assign activity comes with seven copy operations. Add another copy operation to copy the conversation ID to the dsIn variable.
Double-click the "BPEL_Header" activity to display the Assign dialog.
Click the Copy Operation tab.
Select Copy Operation from the Create dropdown. This displays the Create Copy Operation dialog.
On the From side, set Type to Expression.
Enter the following in the Expression box.
ora:getConversationId()
On the To side, set Type to Variable.
Select Variables > Process > Scope - RequiresManualApproval > Variables > dsIn > payload > ns12:assertExecuteWatchStateful > ns12:bpelInstance > ns14:conversationId.
Figure 8-141 Create Copy Operation Dialog
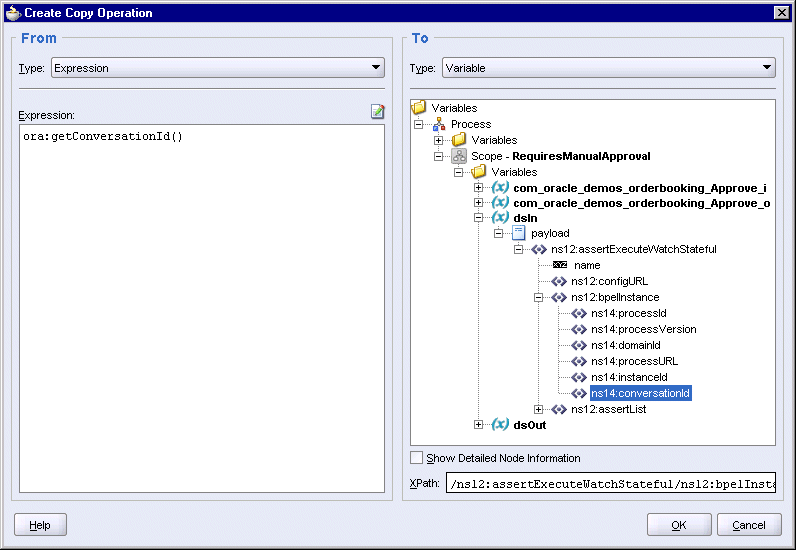
Click OK in the Create Copy Operation dialog. This returns you to the Assign dialog.
Click OK in the Assign dialog.
Select File > Save to save your work.
Create the requiresApproval variable in the SOAOrderBooking scope. This variable is created at this level so that any activity in this BPEL flow can access it.
This variable is used in the switch that you will create later in Section 8.12.2, "Set the Condition for the <case>".
Scroll to the top of the page and double-click the SOAOrderBooking scope. You can double-click the "SOAOrderBooking" text that is sideways. This displays the Process dialog.
In the Process dialog, click Create in the Variables tab. This displays the Create Variable dialog.
In the Create Variable dialog:
Name: enter requiresApproval.
Type: select Simple Type, and click the flashlight icon. This displays the Type Chooser dialog.
In the Type Chooser, select boolean and click OK.
The Create Variable dialog now looks like this:
Figure 8-142 Create Variable Dialog for the "requiresApproval" Process Variable

Click OK in the Create Variable dialog. The requiresApproval variable appears in the Process dialog.
Figure 8-143 Process Dialog Showing the "requiresApproval" Variable
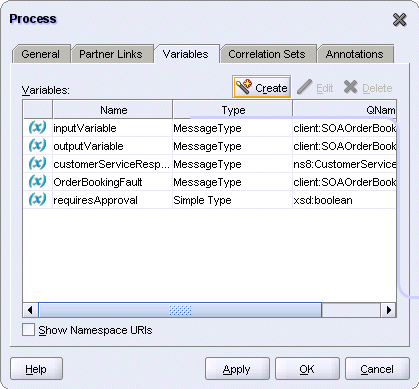
Click OK in the Process dialog.
Select File > Save to save your work.
The default "Facts_To_BPEL_Var" assign activity does not come with any operations. Create a copy operation to copy the result returned by the "DecisionService" partner link to the requiresApproval process variable.
Double-click the "Facts_To_BPEL_Var" assign activity to display the Assign dialog.
Click the Copy Operation tab.
Select Copy Operation from the Create dropdown. This displays the Create Copy Operation dialog.
On the From side, set Type to Variable.
Select Variables > Process > Scope - RequiresManualApproval > Variables > dsOut > payload > ns12:assertExecuteWatchStatefulDecision > ns12:resultList > ns13:approve > ns13:approvalRequired.
On the To side, set Type to Variable.
Select Variables > Process > Variables > requiresApproval.
Figure 8-144 Create Copy Operation Dialog
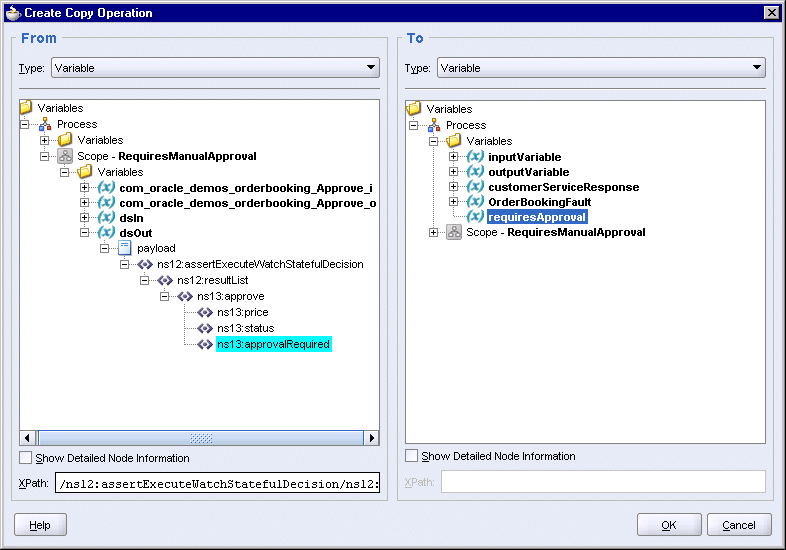
Click OK in the Create Copy Operation dialog.
You should see the copy operation in the Assign dialog. Click OK.
Select File > Save to save your work.
For orders that require manual approval, the "requiresApproval" switch passes control to a human task activity. This enables a manager to approve or reject the orders.
The "requiresApproval" consists of a <case> branch only. It does not have an <otherwise> branch. For orders that do not require manual approval, this switch does not apply to them.
The <case> branch contains a human task activity and another switch activity (Figure 8-146).
Figure 8-146 "requiresApproval" Switch Contains a Human Task and a Switch (Minimized View)
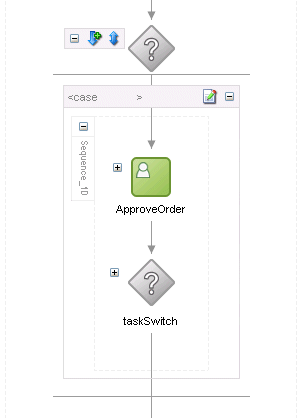
Figure 8-147 shows the human task activity expanded.
Figure 8-148 shows the switch activity expanded.
Figure 8-147 <case> Branch for Switch Activity, Human Task Activity Expanded
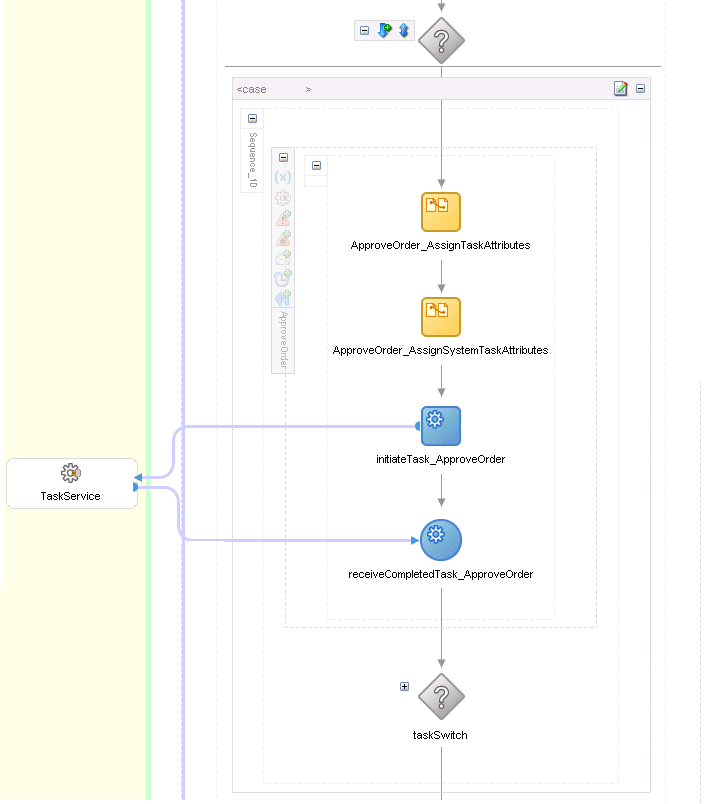
In the Component Palette, select Process Activities from the dropdown.
Drag the Switch icon from the Component Palette and drop it below the "RequiresManualApproval" decide activity.
Double-click the new switch activity and set its name to requiresApproval in the Switch dialog. Click OK.
Expand the switch activity.
Delete the <otherwise> box. For this switch, you only need to handle the case where an order requires manual approval.
Double-click the title bar of the <case> box to display the Switch Case dialog.
In the Switch Case dialog, click the XPath Expression Builder icon above the Expression box to display the Expression Builder dialog.
In the Expression Builder dialog, select getVariableData in the Functions box.
The Content Preview box should show bpws:getVariableData().
Add the first parameter to the function: In the BPEL Variables box, select Variables > Process > Variables > requiresApproval.
requiresApproval is a process variable that you defined in Section 8.11.4, "Create the "requiresApproval" Process Variable".
The Content Preview box should show bpws:getVariableData('requiresApproval').
Click Insert Into Expression. The Expression box should show the function with the one parameter.
Append ='true' to the expression in the Expression box so that the expression looks like this:
bpws:getVariableData('requiresApproval')='true'
In the Expression box, wrap the string() function around the entire bpws:getVariableData function. The value in the Expression box should look like this:
string(bpws:getVariableData('requiresApproval')) = 'true'
Figure 8-149 Expression Builder Dialog Showing the Complete Expression for <case>
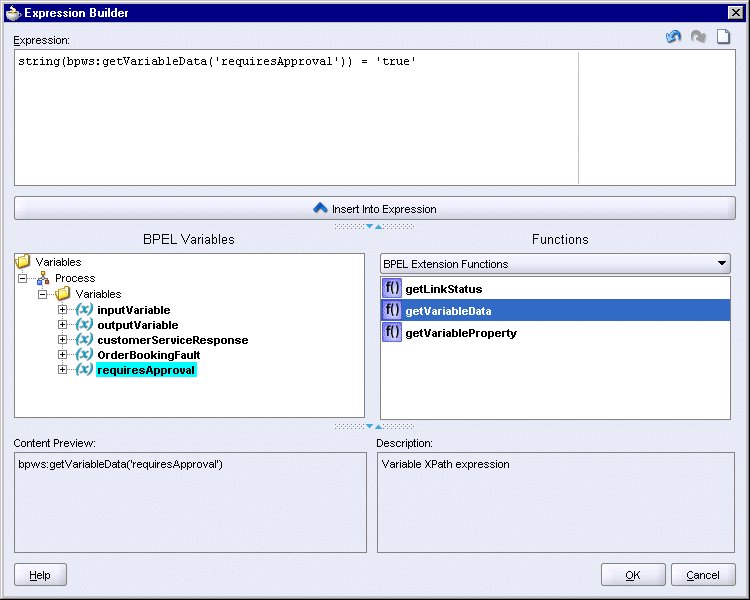
Click OK in the Expression Builder dialog. The Switch Case dialog now contains the expression:
Click OK in the Switch Case dialog.
Select File > Save to save your work.
The <case> branch will contain two activities (a human task activity and a switch activity). This means that you need a sequence activity to be the container for these two activities.
Drag the Sequence icon from the Component Palette and drop it in the <case> box. The <case> box now looks like this:
Figure 8-151 Sequence Activity in the <case> Branch
Create a human task activity in the <case> branch.
In the Component Palette, select Process Activities from the dropdown.
Drag the Human Task icon from the Component Palette and drop it in the Sequence area in the <case> box. This displays the Add a Human Task dialog.
In the Add a Human Task dialog, click the Create Task Definition icon (the second icon for the Task Definition field). This displays a different Add a Human Task dialog.
In the second Add a Human Task dialog, enter ApproveOrder for the Human Task Name. This sets the location to: SOADEMO\SOAOrderBooking\bpel\ApproveOrder\ApproveOrder.task.
Click OK. JDeveloper closes the Add a Human Task dialog and displays the ApproveOrder.task page.
In the ApproveOrder.task page, you can leave the Title empty.
For Parameters:
Click the green + icon, which displays the Add Task Parameter dialog.
In the Add Task Parameter dialog, select Element and click the flashlight icon, which displays the Type Chooser dialog. In the Type Chooser dialog, select Type Explorer > Project Schema Files > OrderBookingPO.xsd > PurchaseOrder.
Figure 8-153 Type Chooser Dialog for ApproveOrder.task Parameter

Click OK in the Type Chooser dialog. The Add Task Parameter dialog now looks like this:
Click OK in the Add Task Parameter dialog.
For Assignment and Routing Policy:
Click the green + icon. This displays the Add Participant Type dialog.
For Type, select Single Approver.
For Label, enter Manager.
Select By Name, and click the flashlight for Group Id(s) because you want to give the approve authority to a group. This displays the Identity Lookup dialog.
In the Identity Lookup dialog, click Lookup. This should produce a list of group names in the Search Group box.
Select Supervisor in the Search Group box and click Select. This moves the name to the Selected Group box.
Figure 8-156 "Supervisor" Selected and Moved to the Selected Group Box
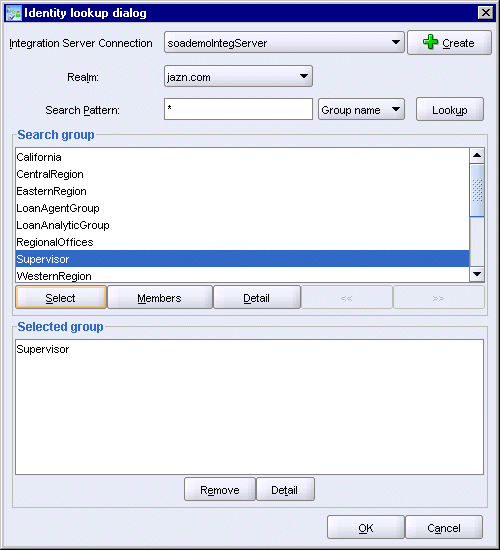
Click OK in the Identity Lookup dialog. "Supervisor" now appears in the Add Participant Type dialog (see Figure 8-155).
Click OK in the Add Participant Type dialog.
The ApproveOrder.task page now looks like this:
Figure 8-157 ApproveOrder.task Page, Completed

Select File > Save to save ApproveOrder.task.
Close ApproveOrder.task (select File > Close).
Back on the SOAOrderBooking.bpel main page, double-click the "ApproveOrder_1" human task activity. This displays the Human Task dialog.
For the Task Title field, enter Approve Order.
The Task Parameters column is filled in with "PurchaseOrder", but the BPEL Variable column is blank. Click the flashlight icon in the BPEL Variable column.
In the Task Parameters dialog, select Variables > Process > Variables > inputVariable > payload > client:SOAOrderBookingProcessRequest > ns1:PurchaseOrder.
Click OK in the Task Parameters dialog.
The Human Task dialog now looks like the following:
Figure 8-159 Human Task Dialog, Completed
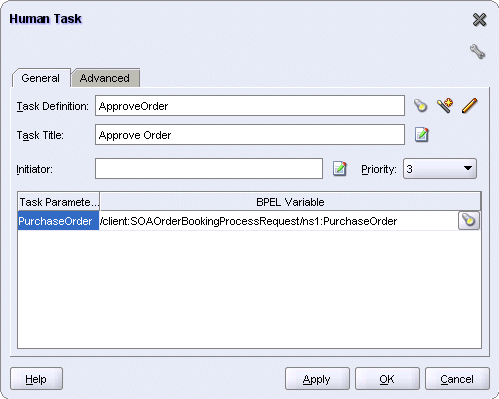
Click OK in the Human Task dialog.
JDeveloper creates the SOADEMO\SOAOrderBooking\bpel\ApproveOrder directory, and creates these files in it:
ApproveOrder.task
ApproveOrder_payload.xsd
WorkflowTask.xsd
When a manager wants to see the orders that are waiting for approval, the manager logs into the Worklist application. You can access this application from the Start menu of the machine running Oracle Application Server: Start > Programs > Oracle - ORACLE_HOME_NAME > Oracle BPEL Process Manager > Worklist Application.
You need to create a form that the Worklist application can use. This form enables the Worklist application to display data specific to the SOA Order Booking application.
To create this form:
In the Application Navigator, right-click the ApproveOrder folder (located under SOAOrderBooking > Integration Content) and select Auto Generate Simple Task Form.
JDeveloper displays the payload-body.jsp file in the editor. You can close it without making any changes to it.
JDeveloper creates the following directory and files:
SOADEMO\SOAOrderBooking\bpel\ApproveOrder\ApproveOrder_Display.tform
SOADEMO\SOAOrderBooking\public_html\
Expand the "ApproveOrder_1" human task activity to see the activities contained in this scope (see Figure 8-147). You can just accept the default settings for these activities.
JDeveloper created a switch for you automatically after the human task activity. This switch enables you to define the actions to take depending on whether the manager approved or rejected the order, or if the order has expired.
The switch handles these cases:
The manager rejected the order.
The manager approved the order.
The order has expired.
If the manager rejected the order, you want to perform these two activities:
set the status item to a string saying that the order has been rejected, and
create a throw activity
Expand the switch.
For <case Task outcome is REJECT>, delete the default "CopyPayloadFromTask" assign activity. There are now no activities for the REJECT case.
In the Component Palette, select Process Activities from the dropdown.
Drag the Assign activity icon from the Component Palette and drop it in the REJECT case.
Double-click the new assign activity to display the Assign dialog.
In the Assign dialog, click the Copy Operation tab.
Select Copy Operation from the Create dropdown. This displays the Create Copy Operation dialog.
In the From side, set Type to Expression, and enter the following line in the Expression box:
string('Order has been rejected by the manager')
In the To side, set Type to Variable, and select Variables > Process > Variables > OrderBookingFault > payload > client:SOAOrderBookingProcessFault > client:status.
Figure 8-160 Create Copy Operation Dialog for the REJECT Case
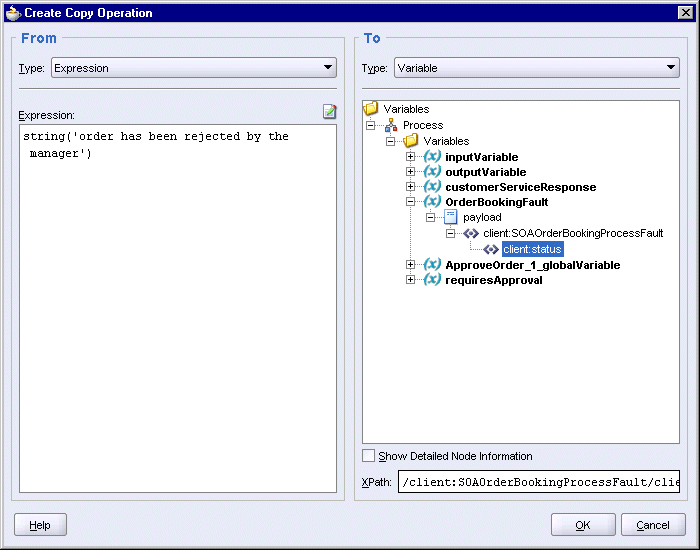
Click OK in the Create Copy Operation dialog. You should see the copy operation in the Assign dialog.
Click OK in the Assign dialog.
Figure 8-161 Assign Dialog Showing Copy Operation for the REJECT Case
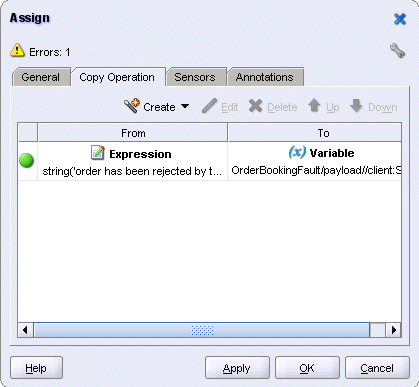
Create a throw activity to stop the flow from continuing.
Drag the Throw icon from the Component Palette and drop it below the previous assign activity.
Double-click the new throw activity to display the Throw dialog.
In the Throw dialog:
Name: enter Throw_1 (keep the default name).
Namespace URI: enter http://www.globalcompany.com/ns/OrderBooking. You have to enter it manually.
Local Part: enter OrderBookingFault. You have to enter it manually.
Fault Variable: click the flashlight and select OrderBookingFault.
Figure 8-162 Throw Dialog for the REJECT Case
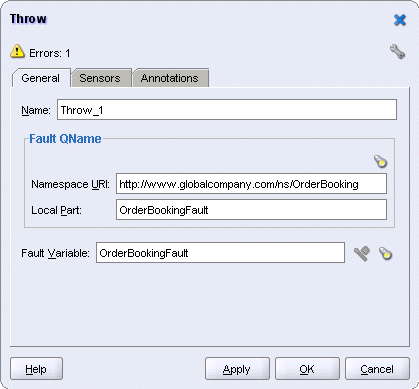
Click OK in the Throw dialog.
In the Approve case, delete the default assign activity and create an empty activity by dragging the Empty icon from the Component Palette to the APPROVE case. You only need the empty activity because nothing needs to happen here. The flow just needs to continue to the next step.
You handle the Expired, Stale, Withdrawn, or Errored case in the same manner as for the Approve case, that is, delete the default assign activity and replace it with an empty activity. This is acceptable because in the SOA Order Booking application, orders do not expire and users will not encounter this case.
This scope sends the order information to the two suppliers, Select Manufacturer and Rapid Service, and the suppliers return their bids for the orders. The scope then chooses the supplier that provided the lower bid.
Figure 8-163 shows the activities in the "SelectSupplier" scope at a high level. The scope uses a flow activity to send the order information to the two suppliers in parallel. The flow contains two scopes, one for each supplier. After the suppliers have returned their bids, a switch activity selects the lower bid.
Figure 8-163 Activities for the "SelectSupplier" Scope Shown at a High Level

Figure 8-164 shows the activities in the flow, and also the switch activity after the flow.
The scope for Select Manufacturer includes a receive activity, which is not required for the scope for Rapid Service. This is because Select Manufacturer is invoked asynchronously. The receive activity is needed to receive the bid when Select Manufacturer returns it. Rapid Service is invoked synchronously; the invoke activity invokes the request and receives the response (that is, the bid value).
The switch activity has two branches: the <case> branch handles the case where SelectManufacturer returned the lower bid, and the <otherwise> branch handles the case where Rapid Service returned the lower bid.
Figure 8-164 "SelectSupplier" Scope Showing Flow and Switch Activities
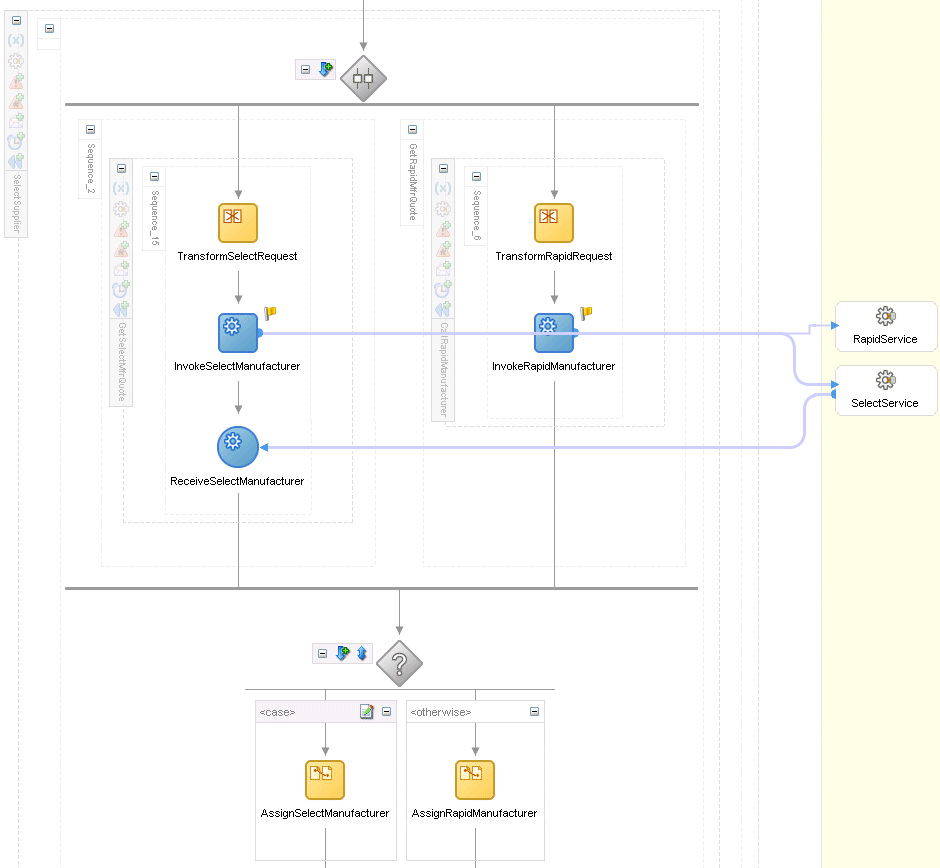
Before you can create the scope, you need to:
create and deploy the SelectManufacturer and RapidService services, which were described in Chapter 7, "Creating the SelectManufacturer Project" and Chapter 6, "Creating the RapidService Project".
create partner links to SelectManufacturer and RapidService.
In the Component Palette, select Services from the dropdown.
Drag the Partner Link icon from the Component Palette and drop it in a Services swimlane.
In the Create Partner Link dialog:
Name: enter SelectService.
WSDL File: click the service explorer (flashlight) icon (the second icon from the left). This displays the Service Explorer dialog.
In the Service Explorer dialog, select Service Explorer > BPEL Services > soaDemoIntgServer > processes > default > SelectManufacturer.
soaDemoIntgServer refers to your connection to the Integration Server where you deployed Select Manufacturer.
Figure 8-165 Service Explorer Dialog for the "SelectService" Partner Link
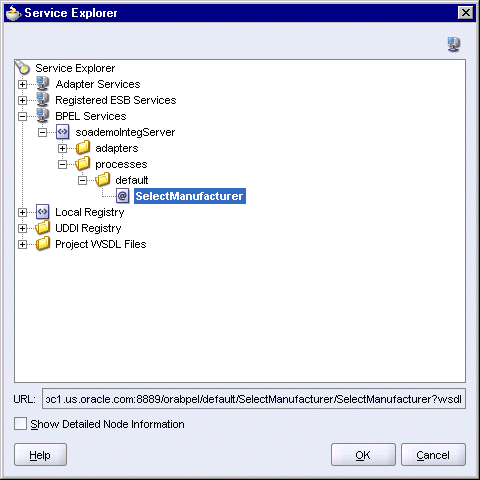
Click OK in the Service Explorer dialog.
Partner Link Type: select SelectService_PL (automatically filled in for you).
Partner Role: select SelectServiceProvider.
My Role: select SelectServiceRequester.
The Create Partner Link dialog should look like this:
Figure 8-166 Create Partner Link Dialog for the "SelectService" Partner Link

Click OK in the Create Partner Link dialog.
Select File > Save to save your work.
Copy the following file from the soademo_101310_prod.zip file to the SOAOrderBooking\bpel directory.
RapidService.wsdl
The WSDL file is located in the SOAOrderBooking\bpel directory in the soademo_101310_prod.zip file.
Verify the URL in the RapidService.wsdl file.
Select File > Open and open the RapidService.wsdl file.
Click the Source tab at the bottom of the editor to view the lines in the file.
The http://localhost:8888 reference in the file assumes that Oracle Application Server is running on the same machine as JDeveloper, and that Oracle Application Server is listening for requests on port 8888.
If necessary, change localhost to the name of the machine running Oracle Application Server, and 8888 to the correct port used by your Oracle Application Server installation, for example: mypc.mydomain.com:8889.
If you edited the file, save the file and close it.
Drag the Partner Link icon from the Component Palette and drop it in a partner link area.
In the Create Partner Link dialog:
Name: enter RapidService.
WSDL File: click the Service Explorer icon (second icon from the left) to display the Service Explorer dialog. In the Service Explorer dialog, expand Project WSDL Files and select RapidService.wsdl.
Figure 8-167 Service Explorer Dialog for the "RapidService" Partner Link
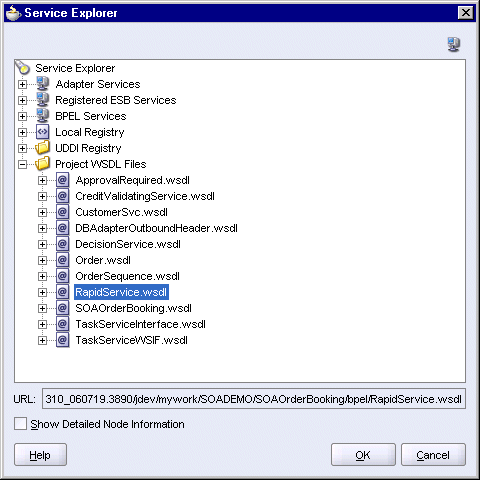
Click OK in the Service Explorer.
Partner Link Type: select RapidQuote_PL (automatically filled in for you).
Partner Role: select RapidQuote_Role.
My Role: leave it blank.
The Create Partner Link dialog should look like this:
Figure 8-168 Create Partner Link Dialog for RapidService
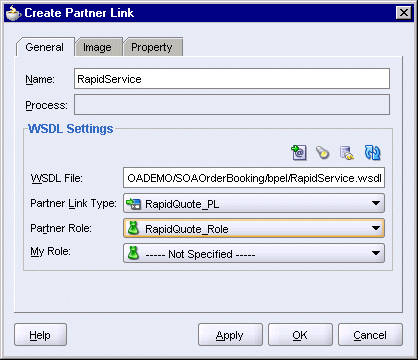
Click OK in the Create Partner Link dialog.
Select File > Save to save your work.
In the Component Palette, select Process Activities from the dropdown.
Drag the Scope icon from the Component Palette and drop it below the "requiresApproval" switch activity.
Double-click the new scope to display the Scope dialog.
In the Scope dialog, in the General tab:
Name: enter SelectSupplier.
Variable Access Serializable: do not select.
Click the Variables tab. You need to create two variables for this scope.
In the Variables tab, click Create to create the first variable.
In the Create Variable dialog:
Name: enter selectManufacturerResponse.
Select Message Type and click the flashlight icon to display the Type Chooser. In the Type Chooser, select Type Explorer > Message Types > Partner Links > SelectService > SelectManufacturer > Message Types > RequestQuote_processRequestQuoteResponse.
Figure 8-169 Type Chooser Dialog for the "selectManufacturerResponse" Variable

Click OK in the Type Chooser.
In the Create Variable dialog, the Message Type is set to {http://www.globalcompany.com/ns/selectservice}RequestQuote_processRequestQuoteResponse.
Figure 8-170 Create Variable Dialog for the "selectManufacturerResponse" Variable
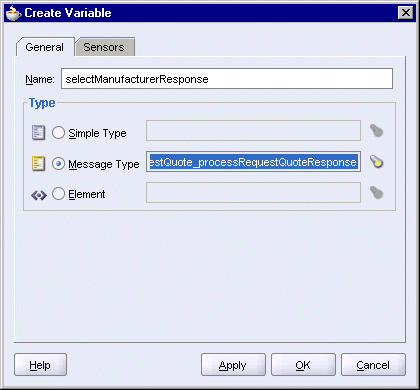
Click OK in the Create Variable dialog.
In the Variables tab, click Create again to create the second variable.
In the Create Variable dialog:
Name: enter rapidManufacturerResponse.
Select Message Type and click the flashlight icon to display the Type Chooser. In the Type Chooser, select Type Explorer > Message Types > Partner Links > RapidService > RapidService.wsdl > Imported WSDL > RequestQuoteSoapHttpPort > Message Types > RequestQuotePortType_POItemsQuoteResponse.
Figure 8-171 Type Chooser Dialog for the "rapidManufacturerResponse" Variable

Click OK in the Type Chooser.
In the Create Variable dialog, the Message Type is set to {http://www.globalcompany.com/ns/rapidservice}RequestQuotePortType_POItemsQuoteResponse.
Figure 8-172 Create Variable Dialog for the "rapidManufacturerResponse" Variable
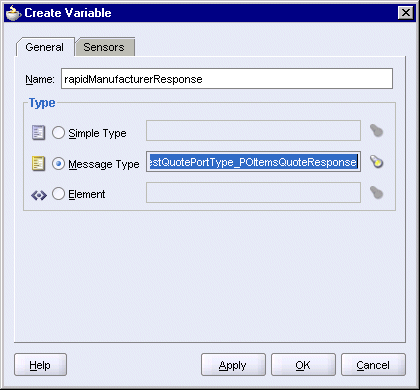
Click OK in the Create Variable dialog.
The variables appear in the Variables tab of the Scope dialog.
Figure 8-173 Scope Dialog for the "SelectSupplier" Scope
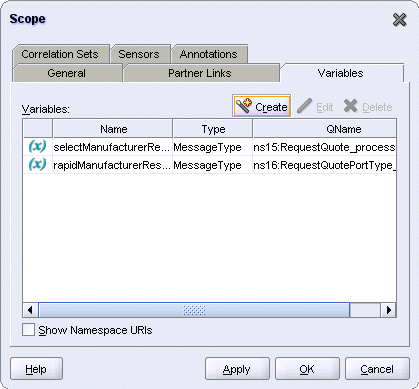
Click OK in the Scope dialog.
You use a flow activity in order to send out requests to more than one supplier at the same time. In the case of this application, you send out requests to two suppliers: Select Manufacturer and Rapid Service.
Expand the new "SelectSupplier" scope.
Drag the Flow icon from the Component Palette and drop it into the new "SelectSupplier" scope.
Double-click the new flow instance and in the Flow dialog, set the name to CallManufacturers.
To get a quote from Select Manufacturer, you create these activities:
Expand the "CallManufacturers" flow. The flow has two parallel areas where you can define activities.
Figure 8-174 Flow Activity in the SOAOrderBooking.bpel Page
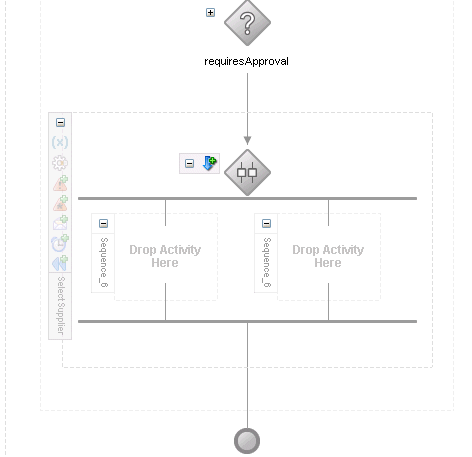
Drag the Scope icon from the Component Palette and drop it into the left side of the flow. The left side of the flow handles requests to and responses from Select Manufacturer.
Double-click the new scope instance. This displays the Scope dialog.
In the Scope dialog, in the General tab:
Name: enter GetSelectMfrQuote.
Variable Access Serializable: do not select.
Click the Variables tab. You need to create a variable for this scope.
In the Variables tab, click Create.
In the Create Variable dialog:
Name: enter manufacturerRequest.
Select Message Type and click the flashlight icon to display the Type Chooser. In the Type Chooser, select Type Explorer > Message Types > Partner Links > SelectService > SelectManufacturer > Message Types > RequestQuote_processRequestQuote.
Figure 8-175 Type Chooser Dialog for the "manufacturerRequest" Variable

Click OK in the Type Chooser.
In the Create Variable dialog, the Message Type is set to {http://www.globalcompany.com/ns/selectservice}RequestQuote_processRequestQuote.
Figure 8-176 Create Variable Dialog for the "manufacturerRequest" Variable
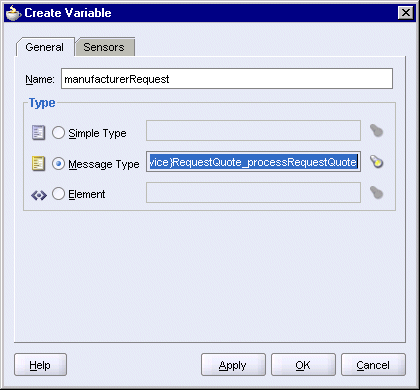
Click OK in the Create Variable dialog.
The manufacturerRequest variable appears in the Variables tab of the Scope dialog.
Figure 8-177 Scope Dialog for the "GetSelectMfrQuote" Scope
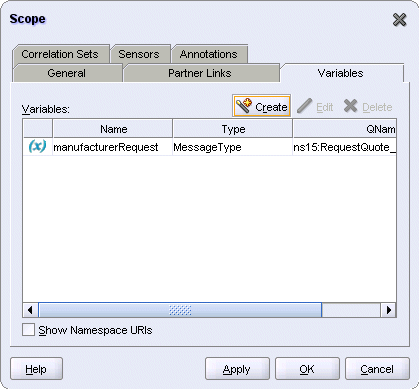
Click OK in the Scope dialog.
Expand the "GetSelectMfrQuote" scope.
Drag the Transform icon from the Component Palette and drop it in the "GetSelectMfrQuote" scope.
Double-click the transform activity to display the Transform dialog.
In the General tab, set the name to TransformSelectRequest.
In the Transformation tab, set the Source Variable to inputVariable, and the Source Part to payload.
Set the Target Variable to manufacturerRequest and the Target Part to parameters.
Set the Mapper File to SelectTransformation.xsl. This file does not exist yet; you will use the Data Mapper to generate it.
Click the Create Mapping icon (second icon from the left). This displays the Data Mapper, which you will use to generate the SelectTransformation.xsl file.
In the Data Mapper, on the Source (left) side, expand po:PurchaseOrder > po:OrderItems > po:Item.
On the Target (right) side, expand tns:param0.
Drag po:ProductName to tns:itemId.
Drag po:Quantity to tns:quantity. The Data Mapper should look like the following:
Figure 8-178 Data Mapper for Select Manufacturer (Not Complete Yet)
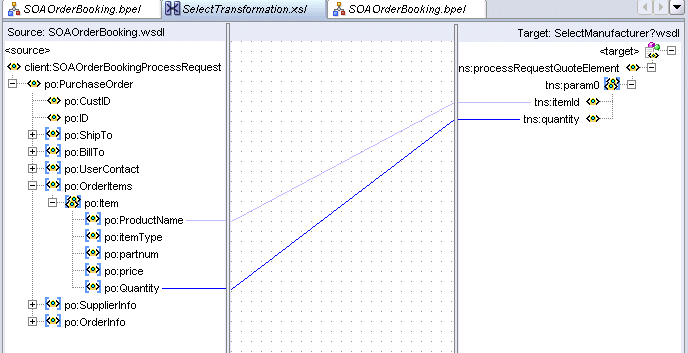
In the Component Palette for the Data Mapper, select XSLT Constructs from the dropdown.
Drag the for-each icon from the Component Palette and drop it on tns:param0 on the target side. You want the for-each item to appear between tns:processRequestQuoteElement and tns:param0.
Drag po:Item to the for-each item on the target side. The Data Mapper should now look like this:
Figure 8-179 Data Mapper for Select Manufacturer
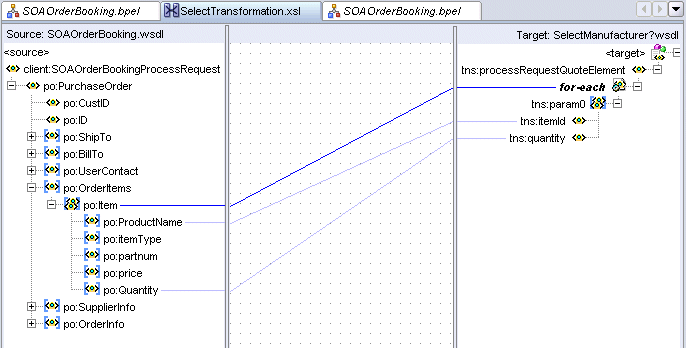
Select File > Save to save SelectTransformation.xsl. This file is created in the SOAOrderBooking\bpel directory.
Select File > Close to close the Data Mapper for SelectTransformation.xsl.
Select File > Save to save SOAOrderBooking.bpel.
This invoke activity invokes the SelectManufacturer partner link.
Drag the Invoke icon from the Component Palette and drop it below the "TransformSelectRequest" transform activity.
Do one of the following to display the Invoke dialog:
Drag one of the arrows on the side of the new invoke activity and drop it on the "SelectService" partner link. This associates the invoke activity with the partner link.
Double-click the new invoke activity.
In the Invoke dialog, set the name of the invoke activity to InvokeSelectManufacturer.
If the Partner Link field is not set to SelectService, click the flashlight. In the Partner Link Chooser, select SelectService and click OK.
Figure 8-180 Partner Link Chooser Dialog for the "InvokeSelectManufacturer" Invoke Activity
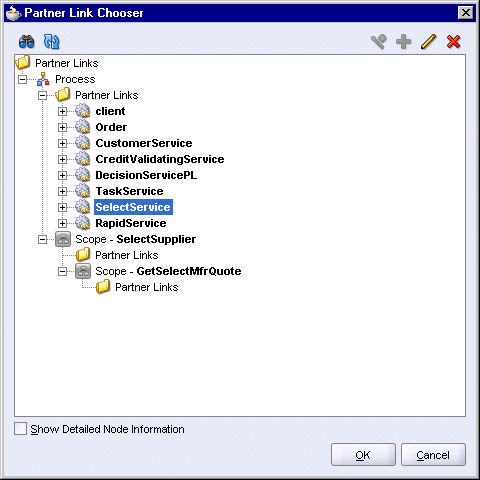
For Operation, select processRequestQuote. This should be filled in automatically for you.
For Input Variable, click the Browse Variable icon, which displays the Variable Chooser dialog. In the dialog, select Variables > Process > Scope - SelectSupplier > Scope - GetSelectMfrQuote > Variables > manufacturerRequest.
Figure 8-181 Variable Chooser for the Input Variable for the "InvokeSelectManufacturer" Invoke Activity
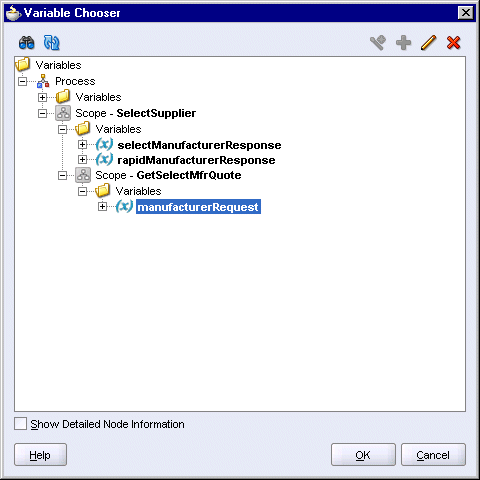
Click OK in the Variable Chooser.
The Invoke dialog looks like the following:
Figure 8-182 Invoke Dialog for the "InvokeSelectManufacturer" Invoke Activity
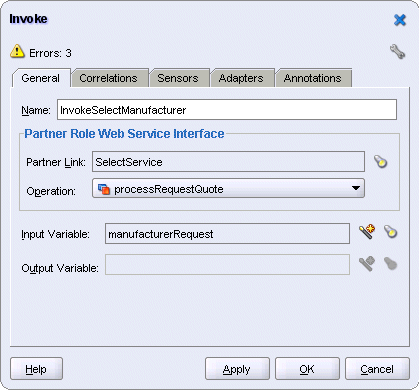
Click OK in the Invoke dialog.
This receive activity receives the quote from the Select Manufacturer.
Drag the Receive icon from the Component Palette and drop it below the "InvokeSelectManufacturer" activity.
Do one of the following to display the Receive dialog:
Drag one of the arrows on the side of the new receive activity and drop it on the "SelectService" partner link. This associates the receive activity with the partner link.
Double-click the new receive activity.
For Name, set it to ReceiveSelectManufacturer.
Partner Link should be set to SelectService. If not, click the flashlight icon, which displays the Partner Link Chooser. Select SelectService and click OK.
Figure 8-183 Partner Link Chooser Dialog for the "ReceiveSelectManufacturer" Receive Activity
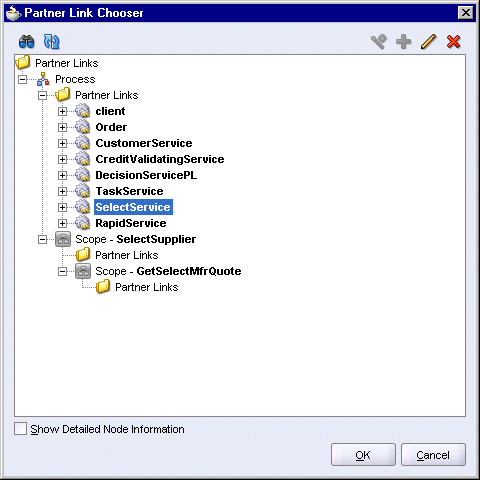
For Operation, set it to processRequestQuoteResponse. This should be filled in automatically for you.
For Variable, click the Browse Variable icon, which displays the Variable Chooser. Select Variables > Process > Scope - SelectSupplier > Variables > selectManufacturerResponse.
Figure 8-184 Variable Chooser Dialog for the "ReceiveSelectManufacturer" Receive Activity

Click OK in the Variable Chooser.
For the Create Instance option, do not select it.
The Receive dialog looks like Figure 8-185. Click OK.
Select File > Save to save your work.
To get a quote from Rapid Manufacturer, you create these activities:
You use the right side of the flow activity to define the activities for Rapid Manufacturer.
Drag the Scope icon from the Component Palette and drop it in the right side of the flow. You will define activities in this scope to handle requests to and responses from Rapid Manufacturer.
Double-click the new scope activity to display the Scope dialog.
In the General tab, set the name of the scope to CallRapidManufacturer.
Do not select Variable Access Serializable.
In the Variables tab, click Create, which displays the Create Variable dialog.
In the Create Variable dialog, enter manufacturerRequest as the variable name.
Select Message Type and click the flashlight, which displays the Type Chooser. In the Type Chooser, select Type Explorer > Message Types > Partner Links > RapidService > RapidService.wsdl > Imported WSDL > RequestQuoteSoapHttpPort > Message Types > RequestQuotePortType_POItemsQuote.
Figure 8-186 Type Chooser Dialog for the "CallRapidManufacturer" Scope
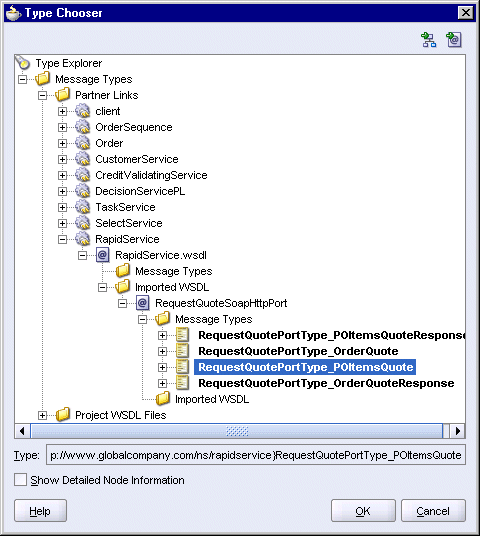
Click OK in the Type Chooser.
In the Create Variable dialog, the Message Type is set to {http://www.globalcompany.com/ns/rapidservice}RequestQuotePortType_POItemsQuote.
Figure 8-187 Create Variable Dialog for the "CallRapidManufacturer" Scope
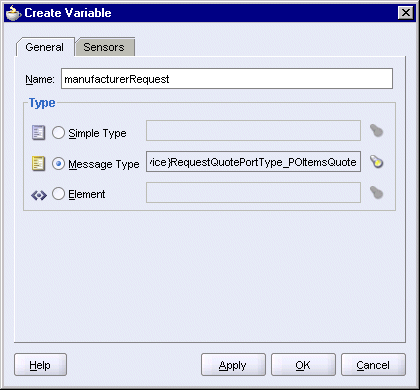
Click OK in the Create Variable dialog.
The manufacturerRequest variable appears in the Variables tab of the Scope dialog.
Figure 8-188 Scope Dialog for the "CallRapidManufacturer" Scope
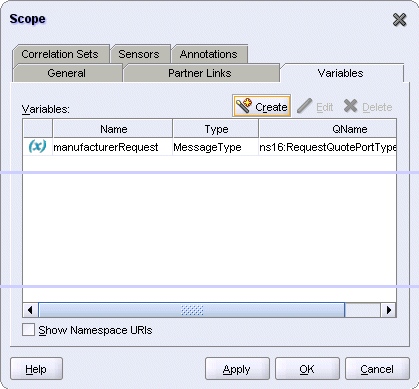
Click OK in the Scope dialog.
Expand the "CallRapidManufacturer" scope.
Drag the Transform icon from the Component Palette and drop it in the "CallRapidManufacturer" scope.
Double-click the transform activity to display the Transform dialog.
In the General tab, set the name to TransformRapidRequest.
In the Transformation tab, set the Source Variable to inputVariable, and the Source Part to payload.
Set the Target Variable to manufacturerRequest and the Target Part to parameters.
Set the Mapper File to RapidTransformation.xsl. This file does not exist yet; you will use the Data Mapper to generate it.
Click the Create Mapping icon (second icon from the left). This displays the Data Mapper, which you will use to generate the RapidTransformation.xsl file.
In the Data Mapper, on the Source (left) side, expand po:PurchaseOrder > po:OrderItems > po:Item.
On the Target (right) side, expand tns:items.
Drag po:ProductName to tns:itemId.
Drag po:Quantity to tns:quantity. The Data Mapper should look like the following:
Figure 8-189 Data Mapper for Rapid Manufacturer (Not Complete Yet)

In the Component Palette for the Data Mapper, select XSLT Constructs from the dropdown.
Drag the for-each icon from the Component Palette and drop it on tns:items on the target side. You want the for-each item to appear between tns:POItemsQuote and tns:items.
Drag po:Item to the for-each item on the target side. The Data Mapper should now look like this:
Figure 8-190 Data Mapper for Rapid Manufacturer
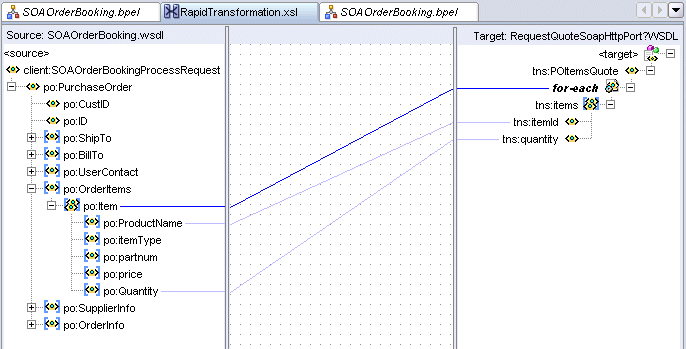
Select File > Save to save RapidTransformation.xsl. This file is created in the SOAOrderBooking\bpel directory.
Select File > Close to close the Data Mapper for RapidTransformation.xsl.
Select File > Save to save SOAOrderBooking.bpel.
This invoke activity invokes the RapidService partner link.
Drag the Invoke icon from the Component Palette and drop it below the "TransformRapidRequest" transform activity.
Do one of the following to display the Invoke dialog:
Drag one of the arrows on the side of the new invoke activity and drop it on the "RapidService" partner link. This associates the invoke activity with the partner link.
Double-click the new invoke activity.
In the Invoke dialog, set the name of the invoke activity to InvokeRapidManufacturer.
The Partner Link field should be set to RapidService. If not, click the flashlight and in the Partner Link Chooser, select RapidService and click OK.
Figure 8-191 Partner Link Chooser Dialog for the "InvokeRapidManufacturer" Activity
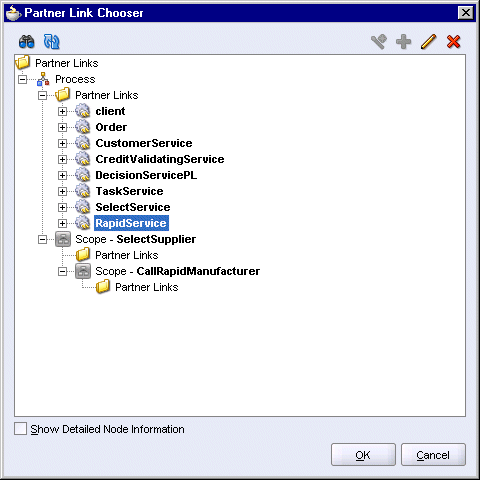
For Operation, select POItemsQuote. This should be filled in automatically for you.
For Input Variable, click the Browse Variable icon, which displays the Variable Chooser dialog. In the dialog, select Variables > Process > Scope - SelectSupplier > Scope - CallRapidManufacturer > Variables > manufacturerRequest.
Figure 8-192 Variable Chooser Dialog for the Input Variable for the "InvokeRapidManufacturer" Activity
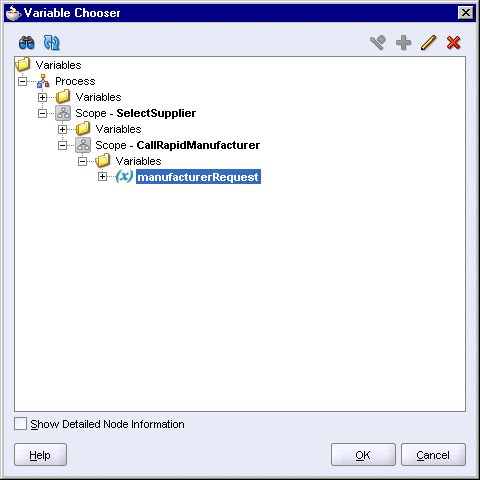
Click OK in the Variable Chooser.
For Output Variable, click the Browse Variable icon, which displays the Variable Chooser dialog. In the dialog, select Variables > Process > Scope - SelectSupplier > Variables > rapidManufacturerResponse.
Figure 8-193 Variable Chooser Dialog for the Output Variable for the "InvokeRapidManufacturer" Activity
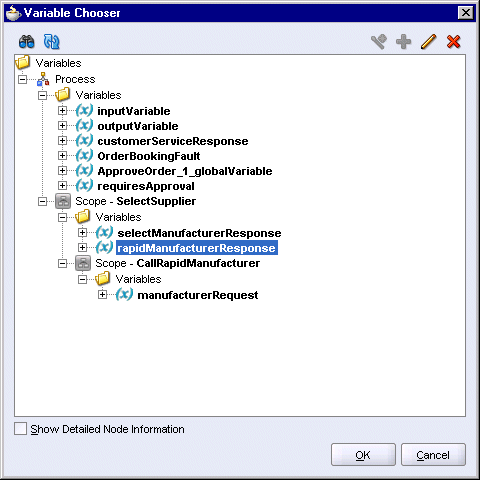
Click OK in the Variable Chooser.
The Invoke dialog looks like the following:
Figure 8-194 Invoke Dialog for the "InvokeRapidManufacturer" Activity
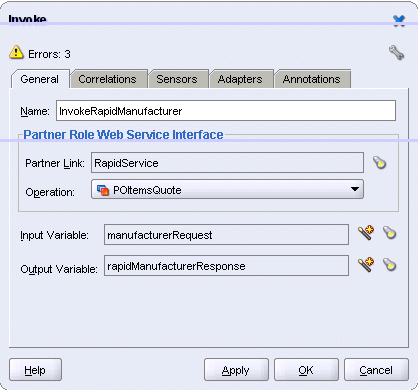
Click OK in the Invoke dialog.
Select File > Save to save your work.
Create a switch so that you can pick the manufacturer that responded with the lower-priced quote.
Minimize the flow activity in the "SelectSupplier" scope. (But do not minimize the scope.) The page should look like this:
Figure 8-195 Minimize Only the Flow Activity
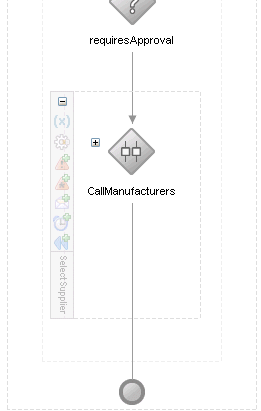
Drag the Switch icon from the Component Palette and drop it below the "CallManufacturers" flow activity, but still within the "SelectSupplier" scope.
Double-click the switch to display the Switch dialog.
In the Switch dialog, set the name to SelectByPrice and click OK.
For this switch activity, you just need to specify the condition for the <case> branch. For the <otherwise> branch, you do not have to set a condition. If the condition in the <case> branch is not met, then the activities in the <otherwise> branch are executed.
Expand the switch activity.
Double-click the titlebar of the <case> box to display the Switch Case dialog.
The <case> branch handles the case where Select Manufacturer returns a lower price than Rapid Service. In the Expression area, enter the following line:
number(bpws:getVariableData('selectManufacturerResponse','parameters',
'/ns15:processRequestQuoteResponseElement/ns15:return/ns15:supplierPrice')) <
number(bpws:getVariableData('rapidManufacturerResponse','parameters',
'/ns16:POItemsQuoteResponse/ns30:return/ns30:supplierPrice'))
You may need to replace the prefixes for the namespaces, as follows:
ns15 is the prefix for http://www.globalcompany.com/ns/selectservice.
ns16 is the prefix for http://www.globalcompany.com/ns/rapidservice.
You can also use the Expression Builder to create the condition:
In the Switch Case dialog, click the XPath Expression Builder icon above the Expression box.
In the Expression Builder dialog, select Variables > Process > Scope - SelectSupplier > Variables > selectManufacturerResponse > parameters > ns15:processRequestQuoteResponseElement > ns15:return > ns15:supplierPrice.
The Content Preview box in the dialog shows the bpws:getVariableData function with parameters to get the supplierPrice data.
Click Insert Into Expression.
The Expression Builder dialog should now look like this:
In the Expression Builder dialog, in the Expression box, type a < (less than) character. Figure 8-197 shows the Expression box in the Expression Builder dialog.
Figure 8-197 Expression Builder Showing the First Half of the Condition

In the Expression Builder dialog, select Variables > Process > Scope - SelectSupplier > Variables > rapidManufacturerResponse > parameters > ns16:POItemsQuoteResponse > ns16:return > ns16:supplierPrice.
Click Insert Into Expression.
The Expression Builder dialog should now look like this:
Figure 8-198 Expression Builder Dialog Showing Both Parts of the Condition
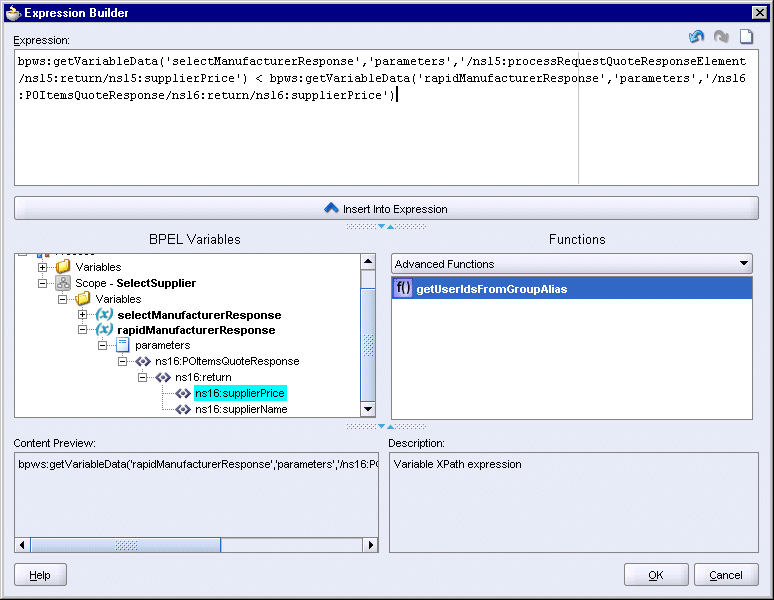
Wrap each bpws:getVariableData function with the number function, so that the expression looks like this:
number(bpws:getVariableData(....)) < number(bpws:getVariableData(....))
You have to manually type in number( before the bpws:getVariableData function and the closing parenthesis ) after the function.
The final expression should look like this:
Figure 8-199 Expression Builder Dialog Showing the Final Expression

Click OK in the Expression Builder dialog.
Figure 8-200 Switch Case Dialog for <case>

Click OK in the Switch Case dialog.
Define the activities for Select Manufacturer if it bid the lower quote. In this case, assign the bid value to the supplierPrice field of inputVariable.
Drag the Assign activity icon from the Component Palette and drop it in the <case> box.
Double-click the new assign activity to display the Assign dialog.
In the Assign dialog, click the General tab, and set the Name to AssignSelectManufacturer.
Still in the Assign dialog, click the Copy Operation tab. You will create two copy operations.
Select Copy Operation from the Create dropdown. This displays the Create Copy Operation dialog.
In the From side, set Type to Variable, and select Variables > Process > Scope - SelectSupplier > Variables > selectManufacturerResponse > parameters > ns15:processRequestQuoteResponseElement > ns15:return > ns15:supplierPrice.
In the To side, set Type to Variable, and select Variables > Process > Variables > inputVariable > payload > client:SOAOrderBookingProcessRequest > ns1:PurchaseOrder > ns1:SupplierInfo > ns1:SupplierPrice.
Figure 8-201 Create Copy Operation Dialog for the "AssignSelectManufacturer" Activity, First Copy Operation
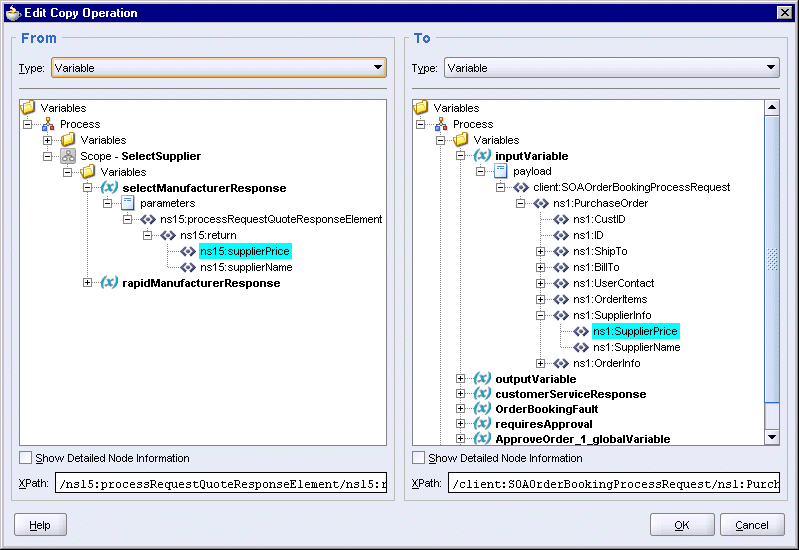
Click OK in the Create Copy Operation dialog.
Select Copy Operation from the Create dropdown again to create the second copy operation. This displays the Create Copy Operation dialog.
In the From side, set Type to Variable, and select Variables > Process > Scope - SelectSupplier > Variables > selectManufacturerResponse > parameters > ns15:processRequestQuoteResponseElement > ns15:return > ns15:supplierName.
In the To side, set Type to Variable, and select Variables > Process > Variables > inputVariable > payload > client:SOAOrderBookingProcessRequest > ns1:PurchaseOrder > ns1:SupplierInfo > ns1:SupplierName.
Figure 8-202 Create Copy Operation Dialog for the "AssignSelectManufacturer" Activity, Second Copy Operation
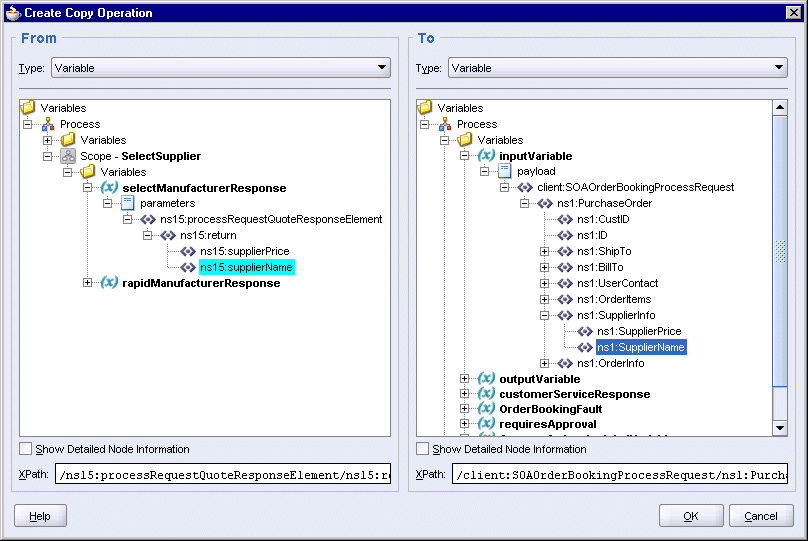
Click OK in the Create Copy Operation dialog.
You should see two copy operations in the Assign dialog. Click OK.
Figure 8-203 Assign Dialog for the "AssignSelectManufacturer" Activity

Define the activities for Rapid Manufacturer if it bid the lower quote. In this case, assign the bid value to the supplierPrice field of inputVariable.
Drag the Assign activity icon from the Component Palette and drop it in the <otherwise> box.
Double-click the new assign activity to display the Assign dialog.
In the Assign dialog, click the General tab, and set the Name to AssignRapidManufacturer.
Still in the Assign dialog, click the Copy Operation tab. You will create two copy operations.
Select Copy Operation from the Create dropdown. This displays the Create Copy Operation dialog.
In the From side, set Type to Variable, and select Variables > Process > Scope - SelectSupplier > Variables > rapidManufacturerResponse > parameters > ns16:POItemsQuoteResponse > ns16:return > ns16:supplierPrice.
In the To side, set Type to Variable, and select Variables > Process > Variables > inputVariable > payload > client:SOAOrderBookingProcessRequest > ns1:PurchaseOrder > ns1:SupplierInfo > ns1:SupplierPrice.
Figure 8-204 Create Copy Operation Dialog for the "AssignRapidManufacturer" Activity, First Copy Operation
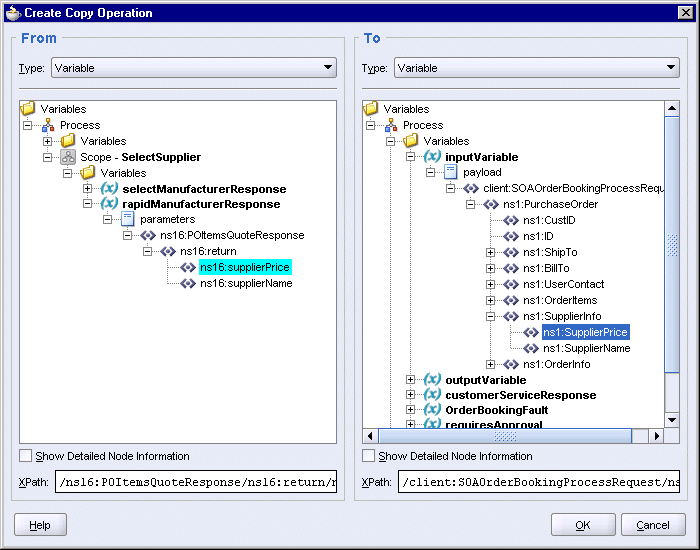
Click OK in the Create Copy Operation dialog.
Select Copy Operation from the Create dropdown again to create the second copy operation. This displays the Create Copy Operation dialog.
In the From side, set Type to Variable, and select Variables > Process > Scope - SelectSupplier > Variables > rapidManufacturerResponse > parameters > ns16:POItemsQuoteResponse > ns16:return > ns16:supplierName.
In the To side, set Type to Variable, and select Variables > Process > Variables > inputVariable > payload > client:SOAOrderBookingProcessRequest > ns1:PurchaseOrder > ns1:SupplierInfo > ns1:SupplierName.
Figure 8-205 Create Copy Operation Dialog for the "AssignRapidManufacturer" Activity, Second Copy Operation
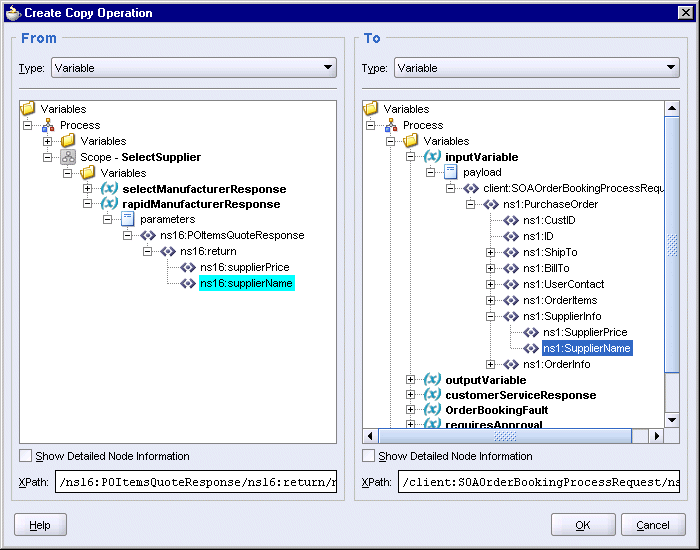
Click OK in the Create Copy Operation dialog.
You should see two copy operations in the Assign dialog. Click OK.
Figure 8-206 Assign Dialog for the "AssignRapidManufacturer" Activity
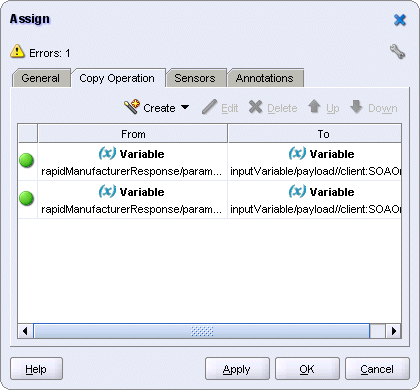
Select File > Save to save your work.
This scope invokes the FulfillmentESB project, which determines how an order is to be shipped. For orders $500 and over, Fedex is the shipment method. For orders less than $500, USPS is the shipment method. These rules are defined in the FulfillmentESB project, described in Chapter 4, "Creating the FulfillmentESB Project".
Before you can create the "PostFulfillmentReq" scope, the "FulfillmentESB" project must be registered with Oracle Application Server.
Figure 8-207 shows the activities in the "PostFulfillmentReq" scope.
Figure 8-207 Activities in the "PostFulfillmentReq" Scope
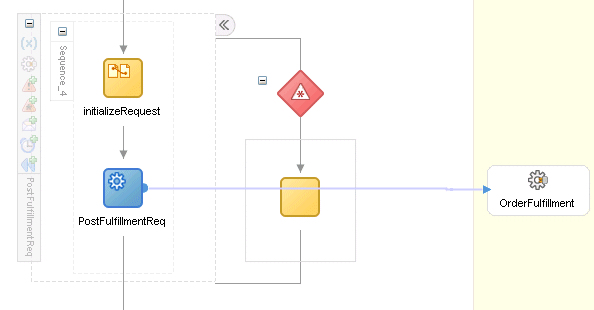
In the Component Palette, select Services from the dropdown.
Drag the Partner Link icon from the Component Palette and drop it in a Services swimlane. This displays the Create Partner Link dialog.
For Name, enter OrderFulfillment.
For WSDL File, click the Service Explorer icon (second icon from the left) to display the Service Explorer dialog. In the Service Explorer dialog, select Service Explorer > Registered ESB Services > soademoIntegServer > Fulfillment > OrderFulfillment. soademoIntegServer refers to the name of the Integration Server connection.
Figure 8-208 Service Explorer for the "OrderFulfillment" Partner Link
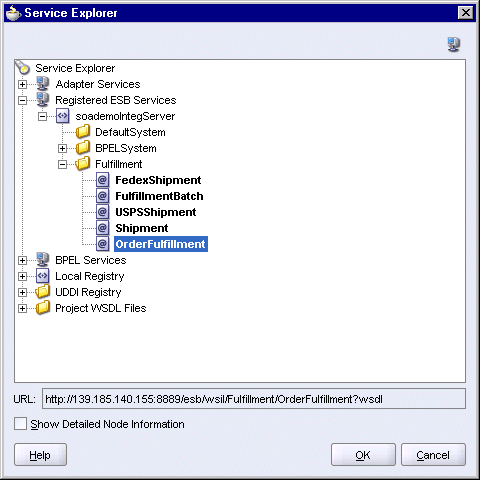
Click OK in the Service Explorer.
Back in the Create Partner Link dialog, if you get a java.net.UnknownHostException error:
Check that the proxy settings are set correctly. To view the proxy settings in JDeveloper, select Tools > Preferences. In the Preferences dialog, select Web Browser and Proxy on the left side.
If the proxy settings are correct, replace the IP address in the URL with the hostname. For example:
http://pc1.mydomain.com:8888/esb/wsil/Fulfillment/OrderFulfillment?wsdl
Press the Tab key after you have entered the hostname.
For Partner Link Type, select execute_pptLT. This should be filled in for you automatically.
For Partner Role, select execute_pptProvider.
For My Role, leave blank.
The Create Partner Link dialog should look like this:
Figure 8-209 Create Partner Link Dialog for the "OrderFulfillment" Partner Link
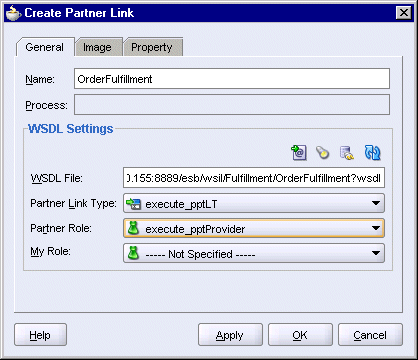
Click OK in the Create Partner Link dialog.
In the Component Palette, select Process Activities from the dropdown.
Drag the Scope icon from the Component Palette and drop it below the "SelectSupplier" scope.
Double-click the new scope to display the Scope dialog.
In the General tab:
Name: enter PostFulfillmentReq.
Variable Access Serializable: do not select.
Click the Variables tab. You need to create one variable for this scope.
In the Variables tab, click Create.
In the Create Variable dialog:
Name: enter orderFulfillmentRequest.
Select Message Type and click the flashlight icon to display the Type Chooser.
In the Type Chooser, select Type Explorer > Message Types > Partner Links > OrderFulfillment > Imported WSDL > Fulfillment_OrderFulfillment.wsdl > Message Types > PurchaseOrder_request.
Figure 8-210 Type Chooser Dialog for the "PostFulfillmentReq" Scope
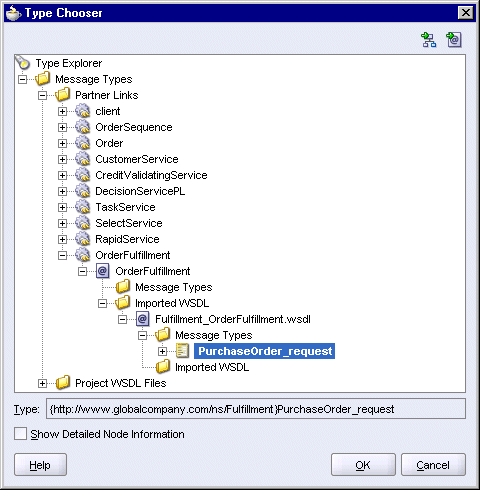
Click OK in the Type Chooser.
In the Create Variable dialog, the Message Type is set to {http://www.globalcompany.com/ns/Fulfillment}PurchaseOrder_request.
Figure 8-211 Create Variable Dialog for the "PostFulfillmentReq" Scope
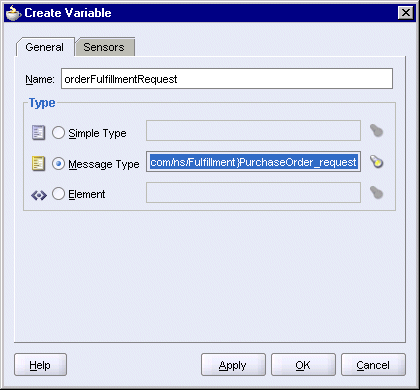
Click OK in the Create Variable dialog.
The orderFulfillmentRequest variable appears in the Variables tab of the Scope dialog.
Figure 8-212 Scope Dialog for the "PostFulfillmentReq" Scope
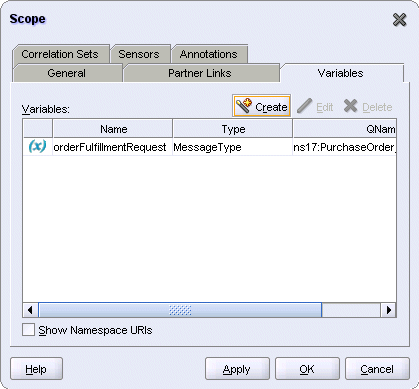
Click OK in the Scope dialog.
Select File > Save to save your work.
Expand the "PostFulfillmentReq" scope.
Drag the Assign activity icon from the Component Palette and drop it in the "PostFulfillmentReq" scope.
Double-click the new assign activity to display the Assign dialog.
In the Assign dialog, click the General tab, and set the Name to initializeRequest.
Still in the Assign dialog, click the Copy Operation tab. You will create a copy operation.
Select Copy Operation from the Create dropdown. This displays the Create Copy Operation dialog.
In the From side, set Type to Variable, and select Variables > Process > Variables > inputVariable > payload > client:SOAOrderBookingProcessRequest > ns1:PurchaseOrder.
Figure 8-213 Create Copy Operation Dialog for the "initializeRequest" Activity
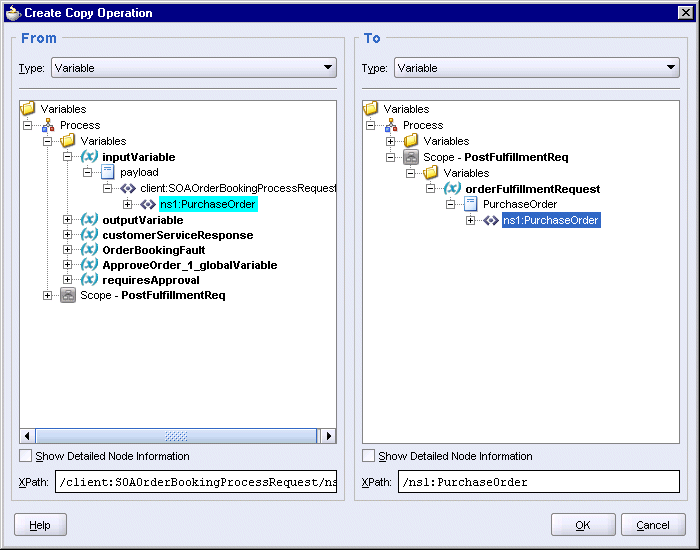
Click OK in the Create Copy Operation dialog.
You should see the copy operation in the Assign dialog. Click OK.
Figure 8-214 Assign Dialog for the "initializeRequest" Activity
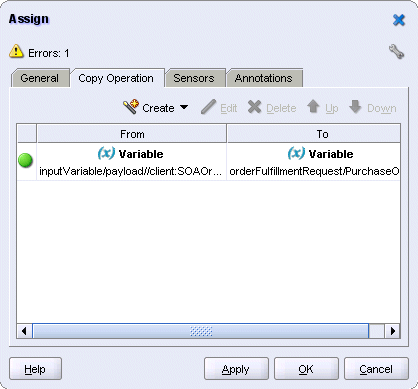
Drag the Invoke icon from the Component Palette and drop it below the "initializeRequest" assign activity.
Do one of the following to display the Invoke dialog:
Drag one of the arrows on the side of the new invoke activity and drop it on the "OrderFulfillment" partner link. This associates the invoke activity with the partner link.
Double-click the new invoke activity.
In the Invoke dialog, set these values:
Name: enter PostFulfillmentReq.
Partner Link: should be set to OrderFulfillment. If not, click the flashlight and select OrderFulfillment from the Partner Link Chooser.
Figure 8-215 Partner Link Chooser Dialog for the "PostFulfillmentReq" Invoke Activity

Click OK in the Partner Link Chooser.
Operation: select execute (should be filled in for you automatically).
Input Variable: click the Browse Variables icon (the second icon from the left) and select Variables > Process > Scope - PostFulfillmentReq > Variables > orderFulfillmentRequest.
Figure 8-216 Variable Chooser Dialog for the Input Variable for the "PostFulfillmentReq" Invoke Activity
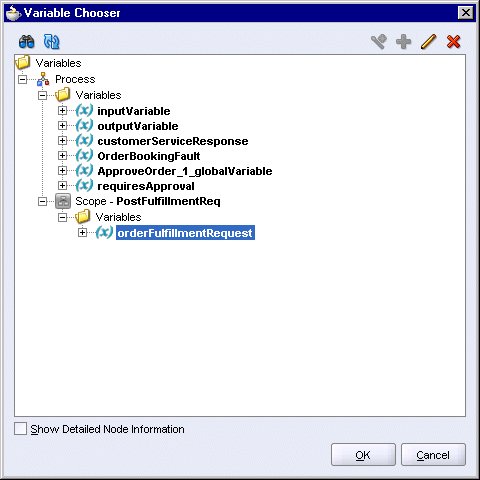
Click OK in the Variable Chooser.
The Invoke dialog should look like this:
Figure 8-217 Invoke Dialog for the "PostFulfillmentReq" Invoke Activity
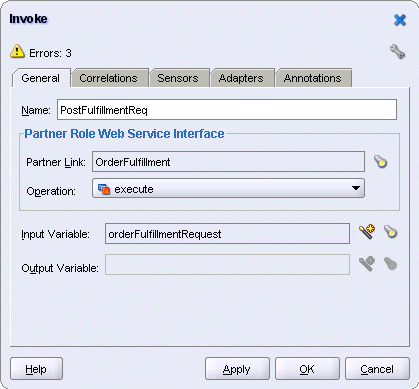
Click OK in the Invoke dialog.
Select File > Save to save your work.
Create a catch-all branch to catch all exceptions.
Click the "Add CatchAll Branch" icon on the side of the "PostFulfillmentReq" scope.
Figure 8-218 CatchAll Icon on the Side of the "PostFulfillmentReq" Scope
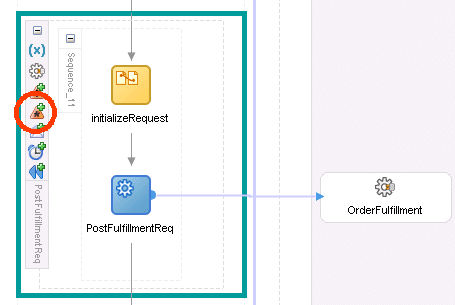
This displays a catchall branch off the side of the scope.
Figure 8-219 Catchall Branch off the Side of the "PostFulfillmentReq" Scope
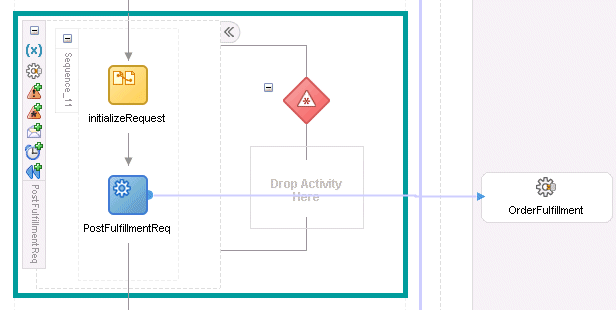
Expand the catch-all branch.
Drag the Empty icon from the Component Palette and drop it in the catchall branch. The catch just catches the exceptions without processing them.
Select File > Save to save your work.
This scope uses a database adapter to update the order status in the database.
Figure 8-220 shows the activities in the scope.
Figure 8-220 Activities in the "SetFinalOrderStatus" Scope
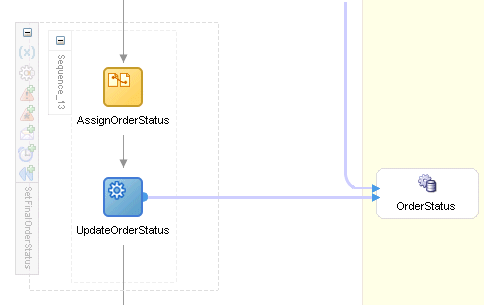
In the Component Palette, select Services from the dropdown.
Drag the Database Adapter icon from the Component Palette and drop it in a Services swimlane. This starts the Adapter Configuration Wizard. Click Next to start.
In Step 1, Service Name, set the Service Name to OrderStatus. Leave Description blank.
Figure 8-221 Adapter Configuration Wizard: Step 1, Service Name
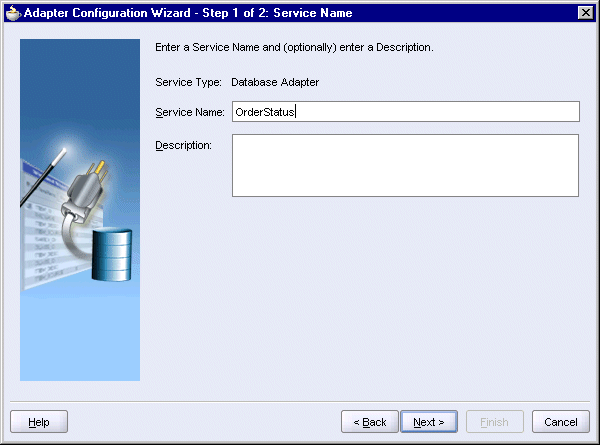
Click Next.
In Step 2, Service Connection, for Connection, select the name of the database connection. The JNDI Name should be set automatically to eis/DB/soademo.
Figure 8-222 Adapter Configuration WIzard: Step 2, Service Connection
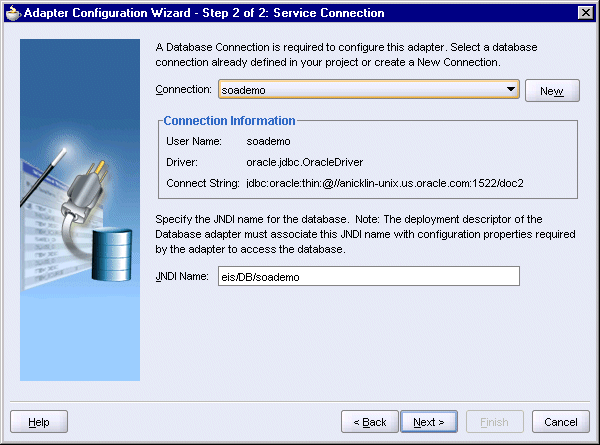
Click Next.
In Step 3, Operation Type, select Perform an Operation on a Table and select Update Only.
Figure 8-223 Adapter Configuration WIzard: Step 3, Operation Type
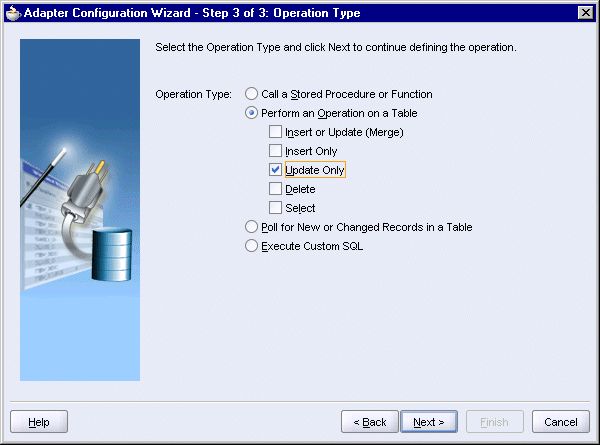
Click Next.
In Select Table, click Import Tables. This displays the Import Tables dialog.
In the Import Tables dialog:
Schema: select SOADEMO.
Name Filter: enter %.
Click Query.
Select the ORDERS table on the left side and click the right arrow to move it to the Selected box.
Figure 8-224 Adapter Configuration WIzard: Import Tables
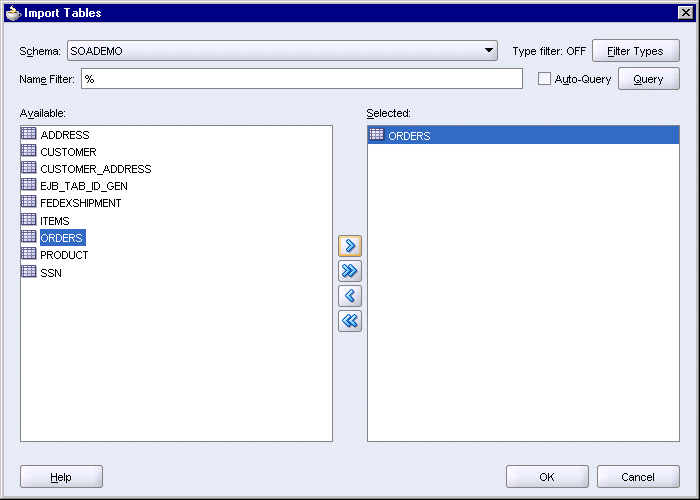
Click OK in the Import Tables dialog.
Back in the Select Table page, select SOADEMO.ORDERS.
Figure 8-225 Adapter Configuration WIzard: Step 4, Select Table
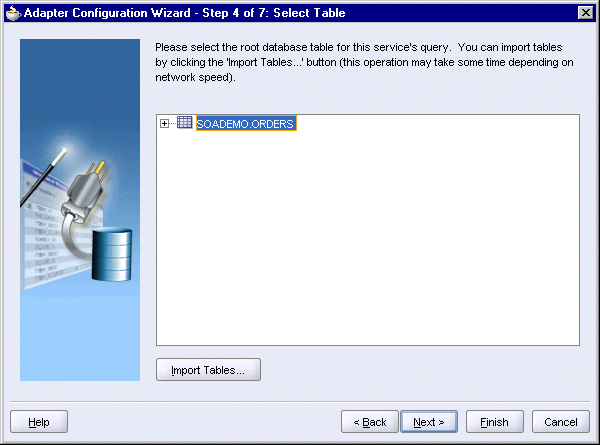
Click Finish to accept the defaults for the remaining screens.
The wizard creates the following files:
SOAOrderBooking\bpel\OrderStatus.wsdl
SOAOrderBooking\bpel\OrderStatus_table.xsd
SOAOrderBooking\bpel\OrderStatus_toplink_mappings.xml
SOAOrderBooking\src\OrderStatus\Orders.java
SOAOrderBooking\toplink\OrderStatus\OrderStatus.mwp
Oracle JDeveloper now displays the Partner Link dialog with some fields already filled in for you:
Name: OrderStatus
WSDL File: SOAOrderBooking/bpel/OrderStatus.wsdl
Partner Link Type: OrderStatus_plt
Partner Role: OrderStatus_role
Figure 8-226 Create Partner Link Dialog for the "OrderStatus" Database Adapter
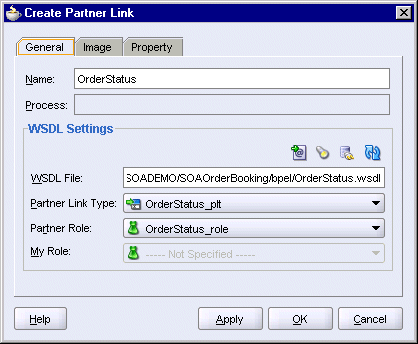
Click OK.
Select File > Save to save your work.
In the Component Palette, select Process Activities from the dropdown.
Drag the Scope icon from the Component Palette and drop it below the "PostFulfillmentReq" scope.
Double-click the new scope to display the Scope dialog.
In the General tab:
Name: enter SetFinalOrderStatus.
Variable Access Serializable: do not select.
Click the Variables tab. You need to create one variable for this scope.
In the Variables tab, click Create.
In the Create Variable dialog:
Name: enter orderStatusRequest.
Select Message Type and click the flashlight icon to display the Type Chooser.
In the Type Chooser, select Type Explorer > Message Types > Partner Links > OrderStatus > OrderStatus.wsdl > Message Types > OrdersCollection_msg.
Figure 8-227 Type Chooser Dialog for the "orderStatusRequest" Variable in the "SetFinalOrderStatus" Scope
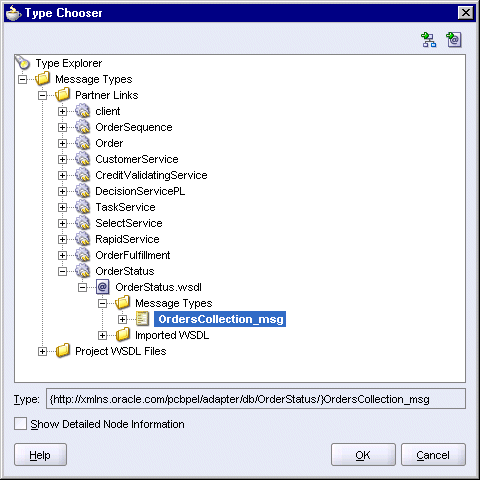
Click OK in the Type Chooser.
In the Create Variable dialog, the Message Type is set to {http://xmlns.oracle.com/pcbpel/adapter/db/OrderStatus/}OrdersCollection_msg.
Figure 8-228 Create Variable Dialog for the "orderStatusRequest" Variable in the "SetFinalOrderStatus" Scope
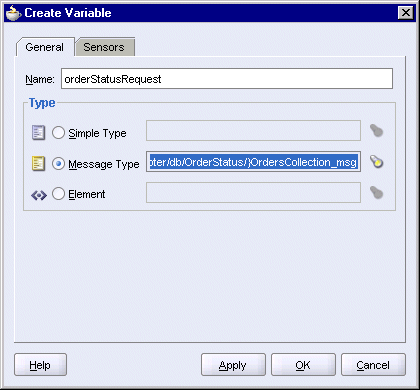
Click OK in the Create Variable dialog.
The orderStatusRequest variable appears in the Variables tab of the Scope dialog.
Figure 8-229 Scope Dialog for the "SetFinalOrderStatus" Scope

Click OK in the Scope dialog.
Select File > Save to save your work.
Expand the "SetFinalOrderStatus" scope.
Drag the Assign activity icon from the Component Palette and drop it in the "SetFinalOrderStatus" scope.
Double-click the new assign activity to display the Assign dialog.
In the Assign dialog, click the General tab, and set the Name to AssignOrderStatus.
Still in the Assign dialog, click the Copy Operation tab. You will create two copy operations.
Create the first copy operation: Select Copy Operation from the Create dropdown. This displays the Create Copy Operation dialog.
In the From side, set Type to Variable, and select Variables > Process > Variables > inputVariable > payload > client:SOAOrderBookingProcessRequest > ns1:PurchaseOrder > ns1:ID.
In the To side, set Type to Variable, and select Variables > Process > Scope - SetFinalOrderStatus > Variables > orderStatusRequest > OrdersCollection > ns19:OrdersCollection > ns19:Orders > ns19:ordid.
Figure 8-230 Create Copy Operation Dialog for the "AssignOrderStatus" Activity, First Copy Operation
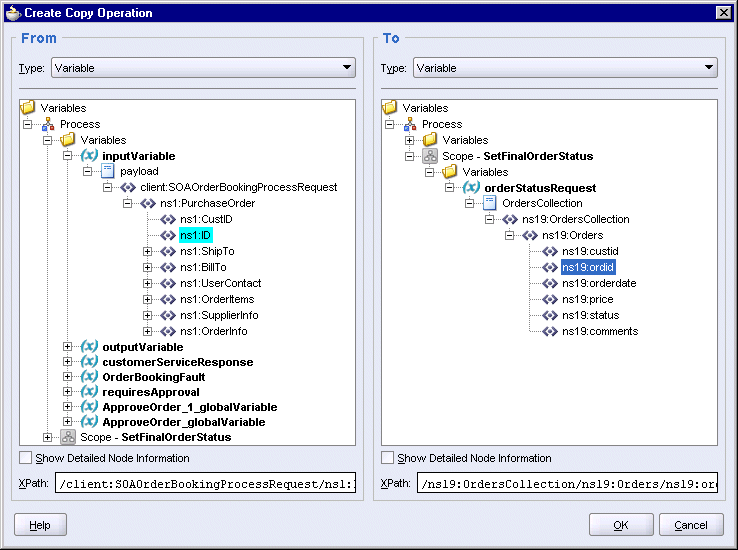
Click OK in the Create Copy Operation dialog.
Create the second copy operation: Select Copy Operation from the Create dropdown again. This displays the Create Copy Operation dialog.
In the From side, set Type to Expression, and enter the following line in the Expression box:
string('completed')
In the To side, set Type to Variable, and select Variables > Process > Scope - SetFinalOrderStatus > Variables > orderStatusRequest > OrdersCollection > ns19:OrdersCollection > ns19:Orders > ns19:status.
Figure 8-231 Create Copy Operation Dialog for the "AssignOrderStatus" Activity, Second Copy Operation

Click OK in the Create Copy Operation dialog.
You should see the copy operations in the Assign dialog. Click OK.
Figure 8-232 Assign Dialog for the "AssignOrderStatus" Activity
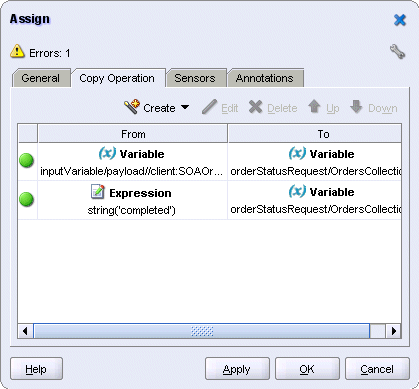
Create the "UpdateOrderStatus" invoke activity to update the order status in the ORDERS table in the database.
Drag the Invoke icon from the Component Palette and drop it below the "AssignOrderStatus" assign activity.
Do one of the following to display the Invoke dialog:
Drag one of the arrows on the side of the new invoke activity and drop it on the "OrderStatus" database adapter. This associates the invoke activity with the database adapter.
Double-click the new invoke activity.
In the Invoke dialog, set these values:
Name: enter UpdateOrderStatus.
Partner Link: should be set to OrderStatus. If not, click the flashlight and select OrderStatus from the Partner Link Chooser.
Figure 8-233 Partner Link Chooser Dialog for the "UpdateOrderStatus" Invoke Activity

Click OK in the Partner Link Chooser.
Operation: select update.
Input Variable: click the Browse Variables icon (the second icon from the left) and select Variables > Process > Scope - SetFinalOrderStatus > Variables > orderStatusRequest.
Figure 8-234 Variable Chooser Dialog for the Input Variable in the "UpdateOrderStatus" Invoke Activity
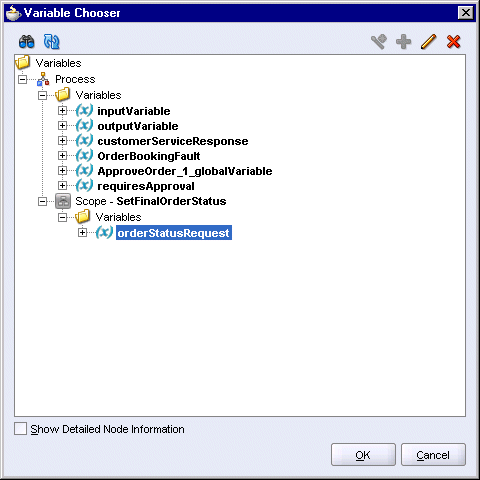
Click OK in the Variable Chooser.
The Invoke dialog should look like this:
Figure 8-235 Invoke Dialog for the "UpdateOrderStatus" Invoke Activity
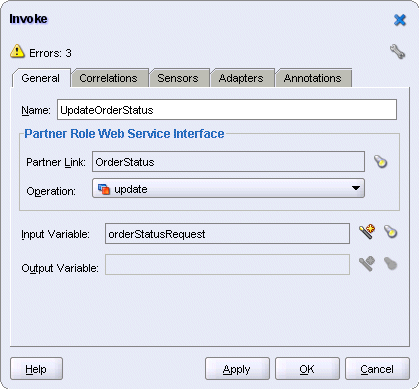
Click OK in the Invoke dialog.
Select File > Save to save your work.
This scope uses the notification service to send an email to the customer when the order is fulfilled.
Figure 8-236 shows the activities in the "NotifyCustomer" scope.
Figure 8-236 Activities in the "NotifyCustomer" Scope
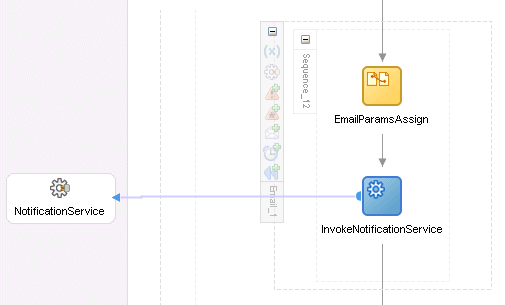
Drag the Email icon from the Component Palette and drop it below the "SetFinalOrderStatus" scope. This displays the Edit Email dialog.
In the Edit Email dialog, enter any information you want for the email fields. Figure 8-237 shows an example.
For most of the fields, you can click the XPath Expression Builder icon to display the Expression Builder. This enables you to customize the data for the field.
Example 1: Entering the customer's email address in the To field:
In the To field, click the XPath Expression Builder icon (the icon on the right).
In the Expression Builder dialog, select Variables > Process > Variables > inputVariable > payload > client:SOAOrderBookingProcessRequest > ns4:PurchaseOrder > ns4:UserContact > ns4:EmailAddress.
Click Insert Into Expression. The dialog should look like this:
Figure 8-238 Expression Builder Dialog Showing the EmailAddress Field

Click OK.
Example 2: Including the customer name, order ID, and order status in the Body of the email. The text that you want to enter looks like this:
Dear firstName

This is to inform you that your order number, orderID, has been
orderStatus
If you have a question about your order, please contact customer service or
send an email to customerservice@globalcompany.com

Thank you for doing business with Global Company. We appreciate your business!
Global Company Customer Service
firstName, orderID, and orderStatus are placeholders for data that are to be retrieved dynamically.
Click the XPath Expression Builder icon for Body.
You will use the concat function to concatenate the pieces of the body text.
Start by entering the following line in the Expression box:
concat(string('Dear '), )
Place the insertion point before the last closing parenthesis.
Add the variable for first name: select Variables > Process > Variables > inputVariable > payload > client:SOAOrderBookingProcessRequest > ns4:PurchaseOrder > ns4:ShipTo > ns4:Name > ns4:First.
Click Insert Into Expression. The expression now looks like this:
concat(string('Dear '), bpws:getVariableData('inputVariable','payload',
'/client:SOAOrderBookingProcessRequest/ns4:PurchaseOrder/ns4:ShipTo/
ns4:Name/ns4:First'))
Add the next part of the message, up to order ID: place the insertion point before the last closing parenthesis, and type in the next part of the message, shown in bold:
concat(string('Dear '), bpws:getVariableData('inputVariable','payload',
'/client:SOAOrderBookingProcessRequest/ns4:PurchaseOrder/ns4:ShipTo/
ns4:Name/ns4:First'), string('This is to inform you that your order number '), )
You cannot insert line breaks in the Expression box but you can insert line breaks in the Edit Email dialog.
Place the insertion point before the last closing parenthesis.
Add the variable for the order ID: select Variables > Process > Variables > inputVariable > payload > client:SOAOrderBookingProcessRequest > ns4:PurchaseOrder > ns4:ID.
Click Insert Into Expression. The expression now looks like this:
concat(string('Dear '), bpws:getVariableData('inputVariable','payload',
'/client:SOAOrderBookingProcessRequest/ns4:PurchaseOrder/ns4:ShipTo/
ns4:Name/ns4:First'), string('This is to inform you that your order
number '), bpws:getVariableData('inputVariable','payload',
'/client:SOAOrderBookingProcessRequest/ns4:PurchaseOrder/ns4:ID'))
Add the string "has been " to the message. The new part is shown in bold.
concat(string('Dear '), bpws:getVariableData('inputVariable','payload',
'/client:SOAOrderBookingProcessRequest/ns4:PurchaseOrder/ns4:ShipTo/
ns4:Name/ns4:First'), string('This is to inform you that your order
number '), bpws:getVariableData('inputVariable','payload',
'/client:SOAOrderBookingProcessRequest/ns4:PurchaseOrder/ns4:ID')
, string('has been '), )
Place the insertion point before the last closing parenthesis.
Add the variable for the order status: select Variables > Process > Variables > inputVariable > payload > client:SOAOrderBookingProcessRequest > ns4:PurchaseOrder > ns4:OrderInfo > ns4:OrderStatus.
Click Insert Into Expression. The expression now looks like this:
concat(string('Dear '), bpws:getVariableData('inputVariable','payload',
'/client:SOAOrderBookingProcessRequest/ns4:PurchaseOrder/ns4:ShipTo/
ns4:Name/ns4:First'), string('This is to inform you that your order
number '), bpws:getVariableData('inputVariable','payload',
'/client:SOAOrderBookingProcessRequest/ns4:PurchaseOrder/ns4:ID')
, string('has been '), bpws:getVariableData('inputVariable','payload',
'/client:SOAOrderBookingProcessRequest/ns4:PurchaseOrder/ns4:OrderInfo/
ns4:OrderStatus'))
Add the final part of the message, shown in bold:
concat(string('Dear '), bpws:getVariableData('inputVariable','payload',
'/client:SOAOrderBookingProcessRequest/ns4:PurchaseOrder/ns4:ShipTo/
ns4:Name/ns4:First'), string('This is to inform you that your order
number '), bpws:getVariableData('inputVariable','payload',
'/client:SOAOrderBookingProcessRequest/ns4:PurchaseOrder/ns4:ID')
, string('has been '), bpws:getVariableData('inputVariable','payload',
'/client:SOAOrderBookingProcessRequest/ns4:PurchaseOrder/ns4:OrderInfo/
ns4:OrderStatus'), string('If you have a question about your order, please
contact customer service or send an email to
customerservice@globalcompany.com
Thank you for doing business with Global Company. We appreciate your
business!
Global Company Customer Service'))
Click OK in the Expression Builder. The Edit Email dialog now looks like the following. Line breaks have been added to the body text to make it easier to read.
Click OK in the Edit Email dialog.
Select File > Save to save your work.
If you expand the "Email_1" activity, you can see that it contains two activities: an assign activity and an invoke activity. You do not have to edit these activities.
The assign activity, "EmailParamsAssign", contains the information that you provided in the Edit Email dialog.
The invoke activity, "InvokeNotificationService", calls on the notification service to send the emails.
This invoke activity returns status to the client.
Figure 8-240 "callbackClient" Invoke Activity
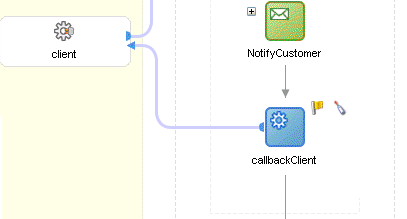
Drag the Invoke icon from the Component Palette and drop it below the "NotifyCustomer" (which is the "Email_1" scope) scope.
Do one of the following to display the Invoke dialog:
Drag one of the arrows on the side of the new invoke activity and drop it on the "client" partner link. This associates the invoke activity with the partner link.
Double-click the new invoke activity.
In the Invoke dialog, set these values:
Name: enter callbackClient.
Partner Link: should be set to client. If not, click the flashlight and select client from the Partner Link Chooser.
Figure 8-241 Partner Link Chooser Dialog for the "callbackClient" Invoke Activity
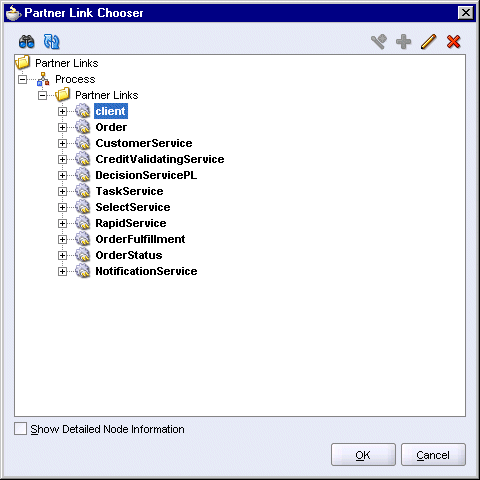
Click OK in the Partner Link Chooser.
Operation: select onResult (this should be filled in automatically for you).
Input Variable: click the Browse Variables icon (the second icon from the left) and select outputVariable.
Figure 8-242 Variable Chooser Dialog for the Input Variable in the "callbackClient" Invoke Activity

Click OK in the Variable Chooser.
The Invoke dialog should look like this:
Figure 8-243 Invoke Dialog for the "callbackClient" Invoke Activity
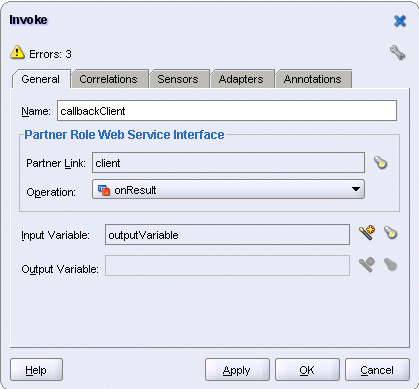
Select File > Save to save your work.
You can add a sensor to the "callbackClient" invoke activity to write information for completed orders to different destination types such as databases, files, or JMS.
Recall that you also created a sensor at the beginning of the project, for the "receiveInput" receive activity described in Section 8.6, "Receive Input from the Client (Receive Activity)".
Double-click the "callbackClient" invoke activity. This displays the Invoke dialog.
Click the Sensors tab in the Invoke dialog.
Click Create to create a new sensor. This displays the Create Activity Sensor dialog.
In the Create Activity Sensor dialog, set the Name to InstanceCompleted.
Set the Evaluation Time to Completion. This specifies when the sensor fires. Completion signifies that the sensor fires after this activity has run.
In the Activity Variable Sensors section, click Create to display the Create Activity Variable Sensor dialog.
Figure 8-244 Create Activity Variable Sensor Dialog
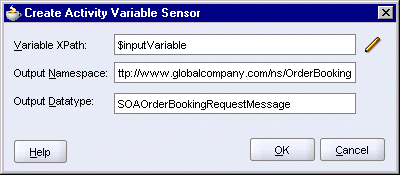
In the Create Activity Variable Sensor dialog, click the pencil icon for Variable XPath. This displays the Variable XPath Builder dialog.
Figure 8-245 Variable XPath Builder Dialog
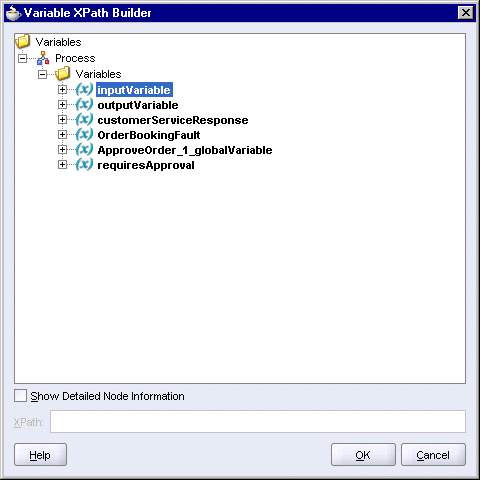
Select Variables > Process > Variables > inputVariable.
Click OK in the Variable XPath Builder dialog. The Create Activity Variable Sensor dialog should be filled in with these values for you (see Figure 8-244):
Variable XPath: $inputVariable
Output Namespace: http://www.globalcompany.com/ns/OrderBooking
Output Datatype: SOAOrderBookingRequestMessage
Click OK in the Create Activity Variable Sensor dialog. This takes you back to the Create Activity Sensor dialog, which now looks like this.
Figure 8-246 Create Activity Sensor Dialog
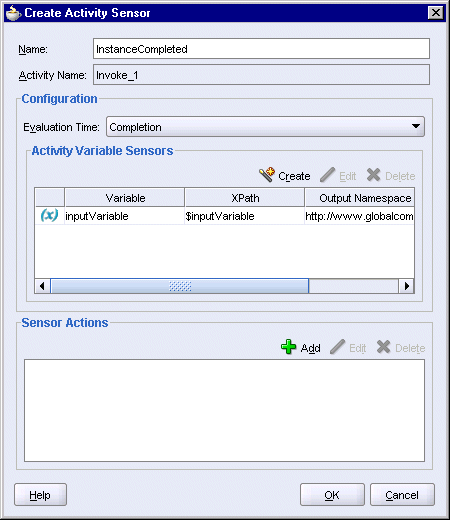
In the Create Activity Sensor dialog, click the Add icon in the Sensor Actions section. This displays the Sensor Action Chooser dialog. It shows an existing sensor called InstanceStart, which you created in Section 8.6.2, "Create a Sensor for the Receive Activity".
Figure 8-247 Sensor Action Chooser Dialog
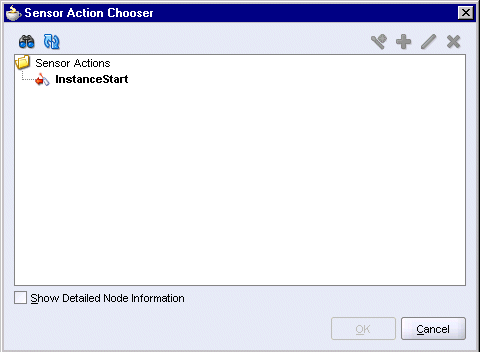
In the Sensor Action Chooser dialog, select Sensor Actions and select Sensor Action from the wand icon. This displays the Create Sensor Action dialog.
In the Create Sensor Action dialog:
Name: enter InstanceCompleted.
Publish Type: select JMS Topic.
JMS Connection Factory: enter jms/TopicConnectionFactory.
Publish Target: enter jms/demoTopic.
Filter: leave blank.
Enable: select this option.
Click OK in the Create Sensor Action dialog. The Sensor Action Chooser dialog now shows the InstanceCompleted sensor action.
Figure 8-249 Sensor Action Chooser Dialog

Click OK in the Sensor Action Chooser. This takes you back to the Create Activity Sensor dialog, which now looks like this:
Figure 8-250 Create Activity Sensor Dialog
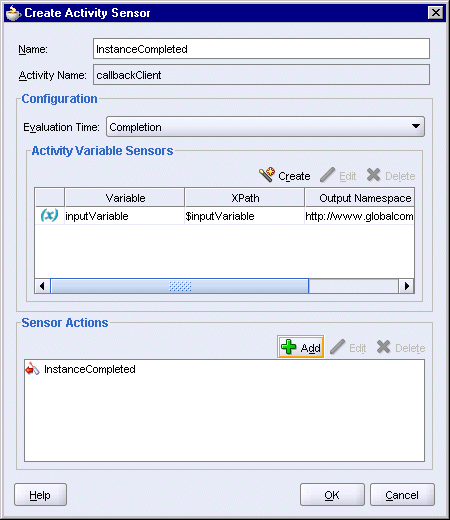
Click OK in the Create Activity Sensor dialog.
In the Invoke dialog, the Sensors tab now looks like this:
Click OK in the Invoke dialog.
Select File > Save to save your work.
Add a catch branch to the project as a whole so that you can update the order status in the database in case an error occurs anywhere in the project.
Figure 8-252 shows the activity in the catch.
Figure 8-252 Activities in the "client:OrderBookingFault" Catch
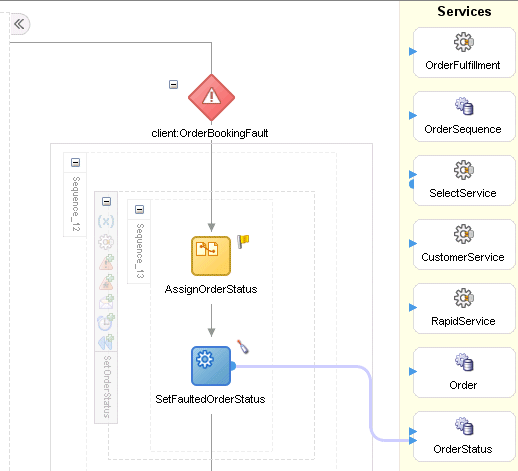
Click the triangular icon with an exclamation point at the "SOAOrderBooking" scope to add a catch branch to the project. Adding it at this level enables all activities in the project to use this catch.
Figure 8-253 "Add Catch Branch" Icon at the SOAOrderBooking Scope
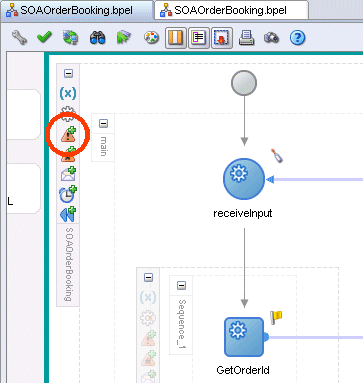
Scroll to the right to see the new catch branch, and expand it. The new branch does not have any activity in it.
Double-click the catch icon to display the Catch dialog.
In the Catch dialog;
Namespace URI: enter http://www.globalcompany.com/ns/OrderBooking.
Local Part: enter OrderBookingFault.
Fault Variable: enter OrderBookingFault.
Click OK in the Catch dialog.
Create a scope in the catch area because you need to define a variable for the activities in the catch area.
Drag the Scope icon from the Component Palette and drop it in the catch area.
Double-click the new scope to display the Scope dialog.
In the Scope dialog, in the General tab:
Name: enter SetOrderStatus.
Variable Access Serializable: do not select.
Click the Variables tab. You need to create a variable for this scope.
In the Variables tab, click Create.
In the Create Variable dialog:
Name: enter orderStatusRequest.
Select Message Type and click the flashlight icon to display the Type Chooser. In the Type Chooser, select Type Explorer > Message Types > Partner Links > OrderStatus > OrderStatus.wsdl > Message Types > OrdersColllection_msg.
Figure 8-256 Type Chooser Dialog for orderStatusRequest Variable

Click OK in the Type Chooser.
In the Create Variable dialog, the Message Type is set to {http://xmlns.oracle.com/pcbpel/adapter/db/OrderStatus/}OrdersCollection_msg.
Figure 8-257 Create Variable Dialog for orderStatusRequest Variable

Click OK in the Create Variable dialog.
The orderStatusRequest variable appears in the Variables tab of the Scope dialog.
Figure 8-258 Scope Dialog for Catch, Variables Tab
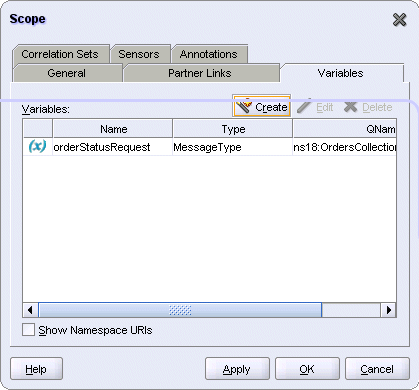
Click OK in the Scope dialog.
Expand the "SetOrderStatus" scope.
Drag the Assign activity icon from the Component Palette and drop it in the "SetOrderStatus" scope.
Double-click the new assign activity to display the Assign dialog.
In the Assign dialog, click the General tab, and set the Name to AssignOrderStatus.
Still in the Assign dialog, click the Copy Operation tab. You will create three copy operations.
Create the first copy operation: Select Copy Operation from the Create dropdown. This displays the Create Copy Operation dialog.
In the From side, set Type to Variable, and select Variables > Process > Variables > inputVariable > payload > client:SOAOrderBookingProcessRequest > ns1:PurchaseOrder > ns1:ID.
In the To side, set Type to Variable, and select Variables > Process > Scope - SetOrderStatus > Variables > orderStatusRequest > OrdersCollection > ns19:OrdersCollection > ns19:Orders >ns19:ordid.
Figure 8-259 Create Copy Operation Dialog for "AssignOrderStatus" Assign Activity, First Copy Operation
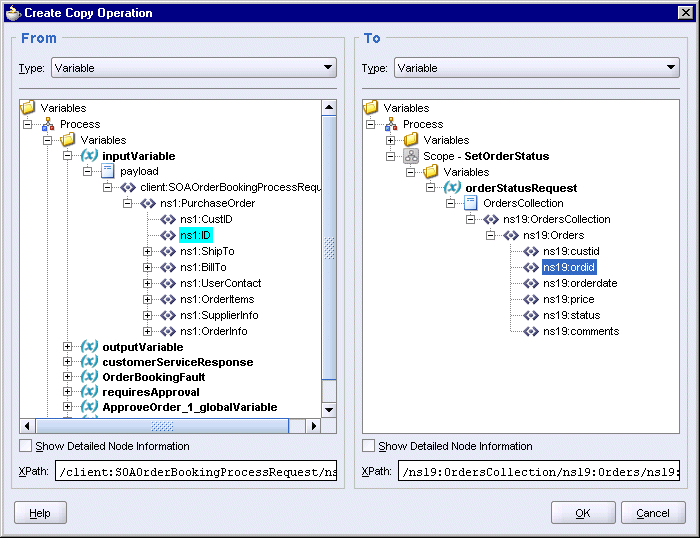
Click OK in the Create Copy Operation dialog.
Create the second copy operation: Select Copy Operation from the Create dropdown again. This displays the Create Copy Operation dialog.
In the From side, set Type to Expression, and enter the following line in the Expression box:
string('canceled')
In the To side, set Type to Variable, and select Variables > Process > Scope - SetOrderStatus > Variables > orderStatusRequest > OrdersCollection > ns19:OrdersCollection > ns19:Orders >ns19:status.
Figure 8-260 Create Copy Operation Dialog for "AssignOrderStatus" Assign Activity, Second Copy Operation
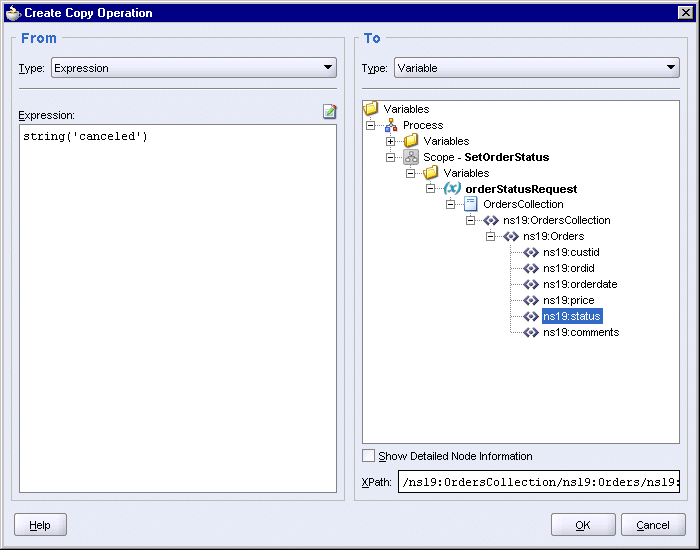
Click OK in the Create Copy Operation dialog.
Create the third copy operation: Select Copy Operation from the Create dropdown again. This displays the Create Copy Operation dialog.
In the From side, set Type to Variable, and select Variables > Process > Variables > OrderBookingFault > payload > client:SOAOrderBookingProcessFault > client:status.
In the To side, set Type to Variable, and select Variables > Process > Scope - SetOrderStatus > Variables > orderStatusRequest > OrdersCollection > ns19:OrdersCollection > ns19:Orders >ns19:comments.
Figure 8-261 Create Copy Operation Dialog for "AssignOrderStatus" Assign Activity, Third Copy Operation
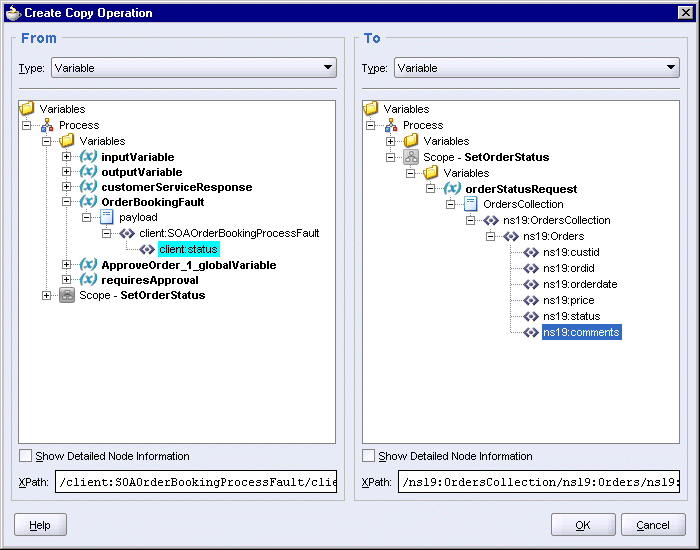
Click OK in the Create Copy Operation dialog.
You should see the three copy operations in the Assign dialog. Click OK.
Figure 8-262 Assign Dialog for "AssignOrderStatus" Activity
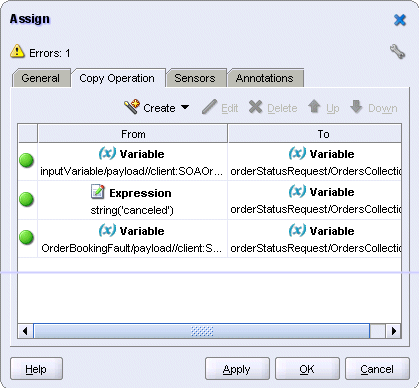
Select File > Save to save your work.
Drag the Invoke icon from the Component Palette and drop it below the "AssignOrderStatus" assign activity in the catch area.
Do one of the following to display the Invoke dialog:
Drag one of the arrows on the side of the new invoke activity and drop it on the "OrderStatus" database adapter. This associates the invoke activity with the database adapter.
Double-click the new invoke activity.
In the Invoke dialog, set these values:
Name: enter SetFaultedOrderStatus.
Partner Link: should be set to OrderStatus. If not, click the flashlight and select OrderStatus from the Partner Link Chooser.
Figure 8-263 Partner Link Chooser Dialog for the "SetFaultedOrderStatus" Invoke Activity
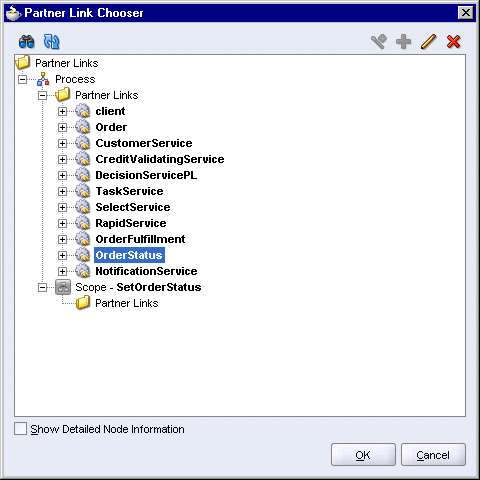
Click OK in the Partner Link Chooser.
Operation: select update.
Input Variable: click the Browse Variables icon (the second icon from the left) and select Variables > Process > Scope - SetOrderStatus > Variables > orderStatusRequest.
Figure 8-264 Variable Chooser Dialog for the Input Variable in the "SetFaultedOrderStatus" Invoke Activity
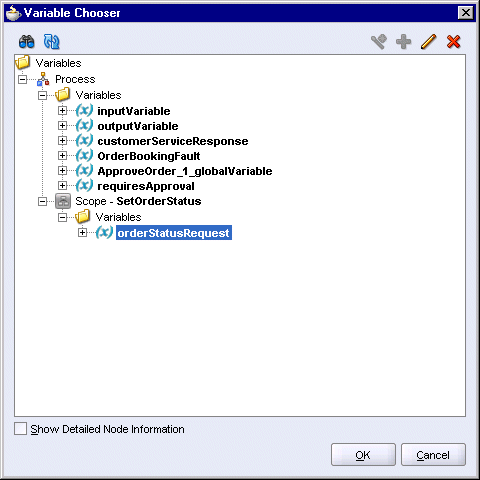
Click OK in the Variable Chooser.
The Invoke dialog should look like this:
Figure 8-265 Invoke Dialog for the "SetFaultedOrderStatus" Invoke Activity
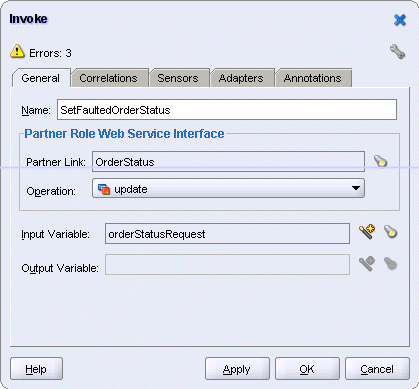
Click OK in the Invoke dialog.
Select File > Save to save your work.
Create a sensor in the "SetFaultedOrderStatus" invoke activity to write order information for orders that did not complete for any reason to different destinations such as databases, files, or JMS. In this case, you write to a JMS topic.
Double-click the "SetFaultedOrderStatus" invoke activity to display the Invoke dialog.
Click the Sensors tab in the Invoke dialog.
Click Create to create a new sensor. This displays the Create Activity Sensor dialog.
In the Create Activity Sensor dialog, set the Name to InstanceFaulted.
Set the Evaluation Time to Completion. This specifies when the sensor fires. Completion signifies that the sensor fires after this activity has run.
In the Activity Variable Sensors section, click Create to display the Create Activity Variable Sensor dialog.
Figure 8-266 Create Activity Variable Sensor Dialog
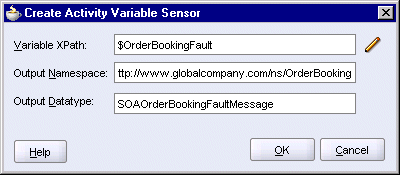
In the Create Activity Variable Sensor dialog, click the pencil icon for Variable XPath. This displays the Variable XPath Builder dialog.
Figure 8-267 Variable XPath Builder Dialog
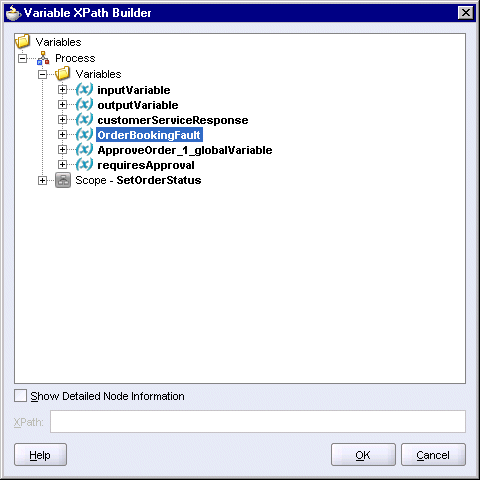
Select Variables > Process > Variables > OrderBookingFault.
Click OK in the Variable XPath Builder. The Create Activity Variable Sensor dialog should be filled in with these values for you (see Figure 8-266):
Variable XPath: $OrderBookingFault
Output Namespace: http://www.globalcompany.com/ns/OrderBooking
Output Datatype: SOAOrderBookingFaultMessage
Click OK in the Create Activity Variable Sensor dialog. This takes you back to the Create Activity Sensor dialog, which now looks like this.
Figure 8-268 Create Activity Sensor Dialog
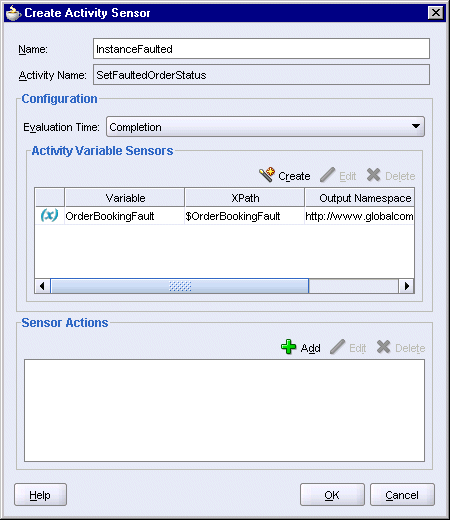
In the Create Activity Sensor dialog, click the Add icon in the Sensor Actions section. This displays the Sensor Action Chooser dialog. It shows existing sensors called InstanceStart and InstanceCompleted, which you created in Section 8.6.2, "Create a Sensor for the Receive Activity" and Section 8.18.2, "Add a Sensor".
Figure 8-269 Sensor Action Chooser Dialog
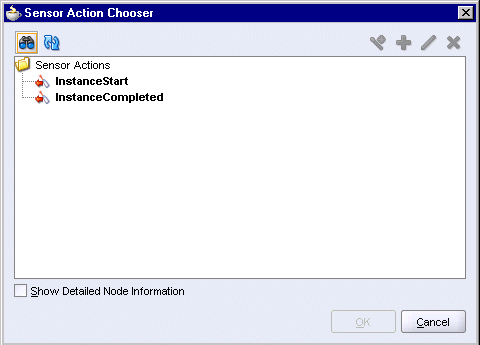
In the Sensor Action Chooser dialog, select Sensor Actions and select Sensor Action from the wand icon. This displays the Create Sensor Action dialog.
In the Create Sensor Action dialog:
Name: enter InstanceFaulted.
Publish Type: select JMS Topic.
JMS Connection Factory: enter jms/TopicConnectionFactory.
Publish Target: enter jms/demoTopic.
Filter: leave blank.
Enable: select this option.
Click OK in the Create Sensor Action dialog. The Sensor Action Chooser dialog now shows the InstanceFaulted sensor action.
Figure 8-271 Sensor Action Chooser Dialog
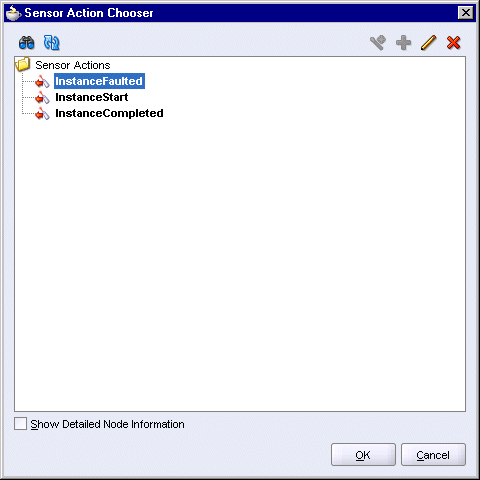
Click OK in the Sensor Action Chooser. This takes you back to the Create Activity Sensor dialog, which now looks like this:
Figure 8-272 Create Activity Sensor Dialog
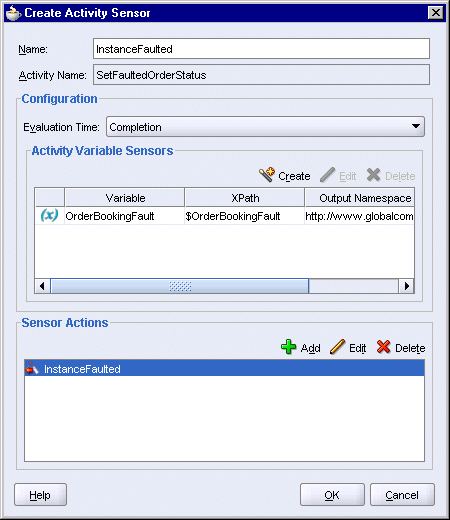
Click OK in the Create Activity Sensor dialog.
In the Invoke dialog, the Sensors tab now looks like this:
Click OK in the Invoke dialog.
Select File > Save to save your work.
Double-click build.properties, located under SOAOrderBooking > Resources in the Application Navigator. This file defines values that are used by build.xml when you deploy the BPEL project.
Uncomment (by removing the # character) these lines in the build.properties file:
platform=ias_10g
domain=default
rev=1.0
admin.user=oc4jadmin
admin.password=welcome99
http.hostname=myAppServerMachine.mydomain.com
http.port=8888
j2ee.hostname=myAppServerMachine.mydomain.com
rmi.port=23793
opmn.requestport=6005
oc4jinstancename=home
Edit the values as necessary. The values in bold italics are the typical values you need to modify.
To determine the value for rmi.port, run:
ORACLE_HOME\opmn\bin\opmnctl status -l
ORACLE_HOME specifies the Oracle home for Oracle Application Server.
To determine the value for opmn.requestport, see step 6.
Select File > Save to save your changes to build.properties.
Right-click build.xml, and select Run Ant.
In the Run Ant dialog, click the Properties tab.
In the Property Files section, click Add. In the Add Ant Property File dialog, select the build.properties file in the SOAOrderBooking directory and click Open.
The Run Ant dialog should look like this:
Figure 8-274 Run Ant Dialog, Properties Tab, With build.properties File Loaded
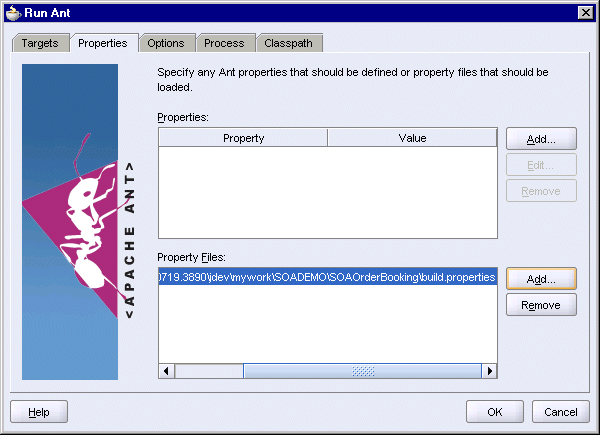
Click OK. JDeveloper runs Ant to compile and deploy the project. If you get errors, see the next section, Section 8.20.1, "Deploying Using Ant from the Developer Prompt".
If you get errors, check that the values you entered in the build.properties file are correct.
If the values are correct, but you still get errors, you can run ant from the Developer Prompt to deploy the project:
Select Start > Programs > Oracle - instanceName > Oracle BPEL Process Manager > Developer Prompt. This displays a shell window configured for Oracle BPEL Process Manager.
Note that you must run ant from the Developer Prompt shell window to deploy the SOAOrderBooking project. Running ant from a regular operating system shell for deploying the project is not supported.
In the Developer Prompt window, change directory to the SOADEMO\SOAOrderBooking directory, where SOADEMO refers to the directory where you created the SOA Order Booking application.
> cd SOADEMO
> cd SOAOrderBooking
If you are running JDeveloper and Oracle Application Server on separate machines, you can copy the SOAOrderBooking directory from the JDeveloper machine to the Oracle Application Server machine. You can place it anywhere on the Oracle Application Server machine. In the Developer Prompt, you can just navigate to that directory.
Run ant.
> ant
After deployment, SOAOrderBooking appears in the Oracle BPEL Control. Enter the following URL in a browser to bring up the Oracle BPEL Control:
http://hostname:port/BPELConsole
Log in as the oc4jadmin user.
SOAOrderBooking appears in the Dashboard tab of the Oracle BPEL Control:
Figure 8-275 Oracle BPEL Control Showing SOAOrderBooking

If you want to look at the WSDL for the SOAOrderBooking project, you can enter the following URL in a browser:
http://hostname:port/orabpel/default/SOAOrderBooking/1.0/SOAOrderBooking?wsdl