| Oracle® SOA Suite Tutorial Release 3 (10.1.3.1.0) Part Number B28937-01 |
|
|
View PDF |
| Oracle® SOA Suite Tutorial Release 3 (10.1.3.1.0) Part Number B28937-01 |
|
|
View PDF |
This chapter describes how to create the CreditService project. It contains these sections:
Section 5.5, "Display the List of Files in the Structure Window"
Section 5.7, "Write the Code to Perform Credit Card Validation"
Section 5.8, "Verify Hostname and Port in CreditService.wsdl"
Section 5.11, "Deploy Credit Service to Oracle Application Server"
The CreditService project checks whether a customer's credit card is valid or not. In this SOA Order Booking application, the code simply checks the value of the credit card number. If the credit card number is less than 12345678, then the card is invalid. Otherwise, it is valid.
The CreditService project is developed in a "top-down" fashion: you start with a WSDL and using this WSDL file, you generate Java classes. RapidService is the opposite: it is developed in a "bottom-up" fashion, where you start with Java classes and you develop a WSDL file from the Java classes.
Note that the WSDL file for the CreditService project contains hardcoded values of localhost:8888. You need to modify these values if you meet any of these conditions:
If you are running JDeveloper and Oracle Application Server on different machines, change the localhost value to the name of the machine running Oracle Application Server.
If your Oracle Application Server instance listens on a port other than 8888, you need to modify the port number.
Start by creating a new project for CreditService in JDeveloper:
Right-click the SOADEMO application, and select New Project.
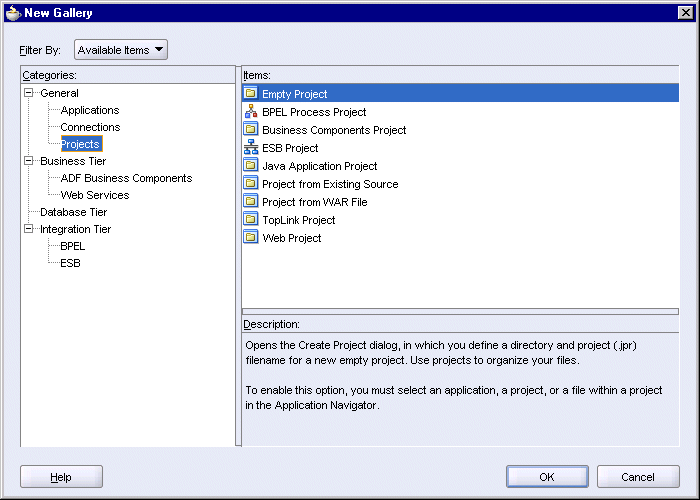
In the New Gallery, in the Categories section, expand General and select Projects. In the Items section, select Empty Project.
Figure 5-1 New Gallery for the CreditService Project
Click OK.
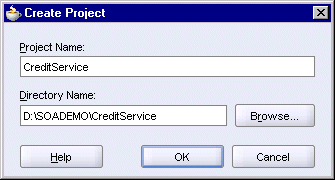
In the Create Project dialog, enter "CreditService" in the Project Name field.
Figure 5-2 Create Project Dialog for CreditService
Click OK.
In the Application Navigator, you should see an empty CreditService project located under the SOADEMO application.
Select File > Save to save your work.
Define the project type and copy the WSDL file from the soademo_101310_prod.zip file to the CreditService directory.
Right-click the CreditService project, and select New.
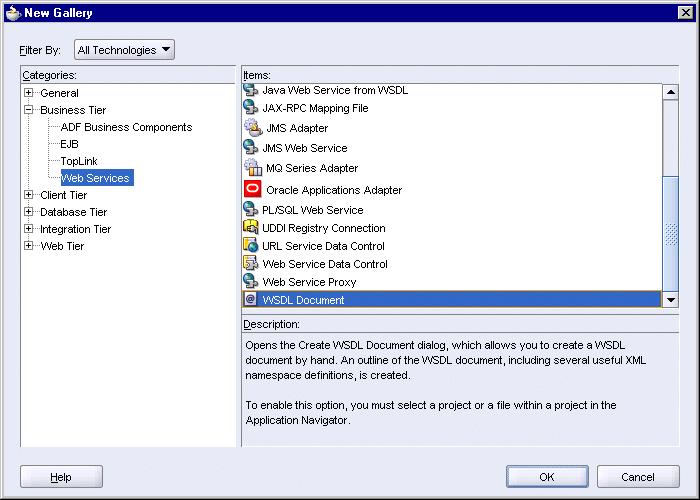
In the New Gallery dialog, in the Categories section, expand Business Tier and select Web Services. In the Items section, select WSDL Document.
Figure 5-3 New Gallery for Setting Up the WSDL File
Click OK. This launches the Create WSDL Document dialog.
In the Create WSDL Document dialog:
WSDL Name: enter CreditService.
Directory Name: accept the default (SOADEMO\CreditService\src).
Target Namespace: accept the default because you are going to overwrite the generated WSDL file anyway. In the WSDL file, the target namespace is http://www.globalcompany.com/ns/credit.
Click OK.
Close (by selecting File > Close) the CreditService.wsdl file that JDeveloper displays in the editor.
Copy CreditService\src\CreditService.wsdl from the soademo_101310_prod.zip file and overwrite the generated CreditService.wsdl in the SOADEMO\CreditService\src directory.
In this step, you generate Java classes for the methods declared in the WSDL file.
Right-click the CreditService project, and select New. In the New Gallery, in the Categories section, expand Business Tier and select Web Services. In the Items section, select Java Web Service from WSDL.
Figure 5-5 New Gallery for Generating Java from WSDL
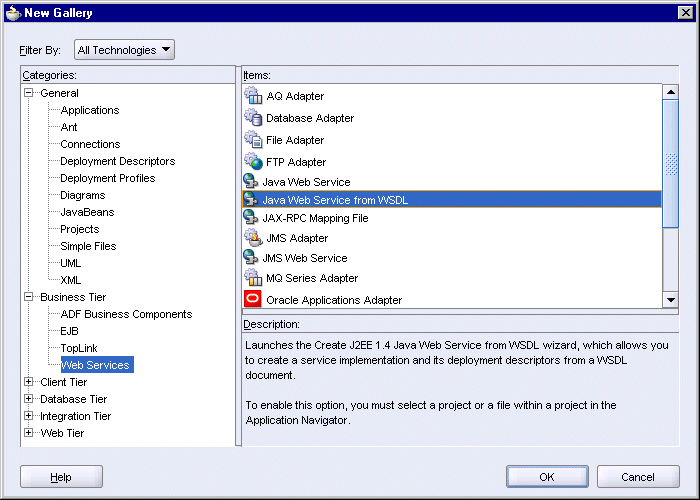
Click OK. This launches the Create J2EE 1.4 Java Web Service from WSDL wizard. Click Next in the wizard to begin.
In Step 1, Web Service Description, click Browse and select the CreditService.wsdl file from the SOADEMO\CreditService\src directory.
Mapping File: leave blank.
Figure 5-6 Create J2EE 1.4 Java Web Service from WSDL Wizard: Step 1, Web Service Description

Click Next.
In Step 2, Default Mapping Options:
Package Name: enter org.soademo.creditservice.
Root Package for Generated Types: enter org.soademo.creditservice.types.
Generate Data Binding Classes: select this option.
Reuse Existing Type Classes: select this option.
Map Headers to Parameters: select this option.
Figure 5-7 Create J2EE 1.4 Java Web Service from WSDL Wizard: Step 2, Default Mapping Options
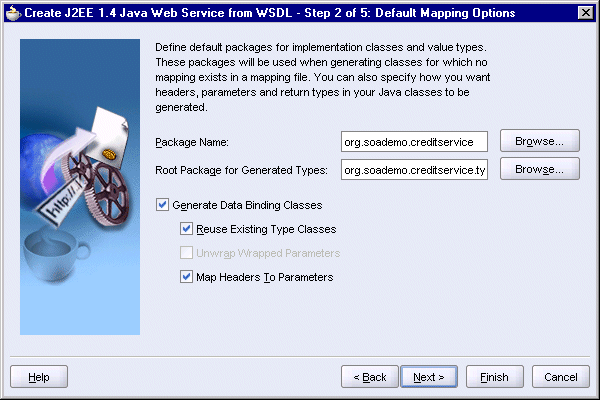
Click Next.
In Step 3, Specify Custom Data Type Serializer, leave blank and click Next.
Figure 5-8 Create J2EE 1.4 Java Web Service from WSDL Wizard: Step 3, Specify Custom Data Type Serializer
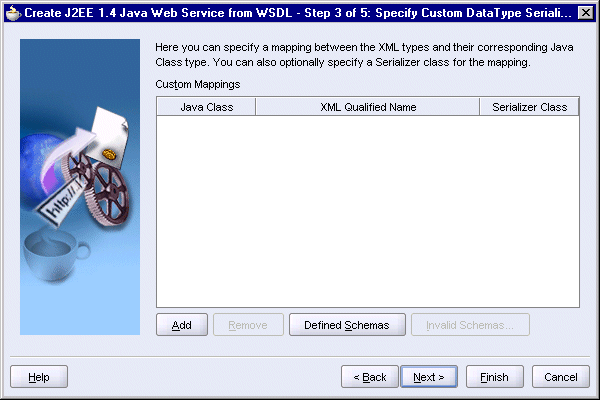
In Step 4, Handler Details, accept the defaults and click Next.
Figure 5-9 Create J2EE 1.4 Java Web Service from WSDL Wizard: Step 4, Handler Details

In Step 5, State, do not select Stateful Service. Click Next.
Figure 5-10 Create J2EE 1.4 Java Web Service from WSDL Wizard: Step 5, State
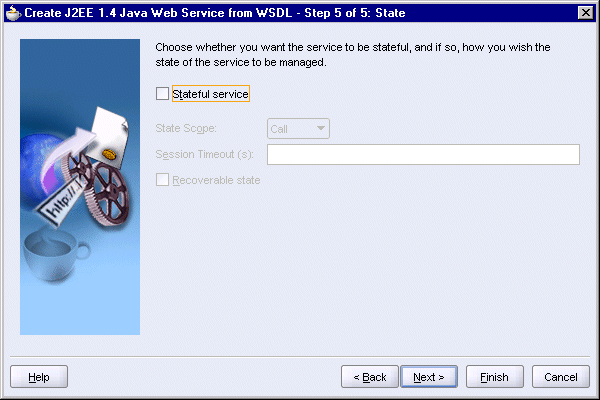
In the Finish screen, click Finish.
JDeveloper displays CreditService.wsdl in design view in the editor.
You should see the following files in the Structure window:
Select View > Structure to display the Structure window.
In the Application Navigator, select SOADEMO > CreditService > Application Sources > org.soademo.creditservice > CreditService.
In the Structure window, you should see the following files:
CreditService.wsdl
ValidateCreditCard.java
CreditCardValidationFaultMessage.java
CreditCard.java
CreditService-java-wsdl-mapping.xml
ValidateCreditCardImpl.java
Right-click the CreditService project and select Rebuild.
Double-click ValidateCreditCardImpl.java (from the Structure window) and edit the verifyCC method so that it looks like the following:
public boolean verifyCC(CreditCard creditCard)
                                  throws CreditCardValidationFaultMessage {
   boolean validOrNot = false;
   if ((creditCard.getCcType().equals("AMEX")) ||
         (creditCard.getCcType().equals("Visa"))) {
      validOrNot = true;
      Long ccnum = new Long (creditCard.getCcNum());
      if (ccnum < 12345678){
         validOrNot = false;
      } else {
         validOrNot = true;
      }
   } else {
      validOrNot = false;
   }
   return validOrNot;
}
There are two CreditService.wsdl files:
SOADEMO\CreditService\src\CreditService.wsdl
SOADEMO\CreditService\public_html\WEB-INF\wsdl\CreditService.wsdl
You have to verify the hostname and port in both wsdl files.
Double-click the first CreditService.wsdl (in the Application Navigator, CreditService.wsdl is located in SOADEMO > CreditService > Application Sources).
In the editor, under Services, expand CreditService > ValidateCreditCardServiceSoapHttp > soap:address.
Figure 5-11 JDeveloper Showing the CreditService.wsdl File in the Editor

Right-click soap:address and select Properties. This displays the soap:address Properties dialog.
Figure 5-12 soap:address Properties Dialog
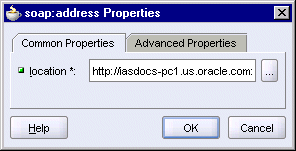
In the location field, edit the hostname and port in the URL as necessary. You may need to scroll all the way to the left to see the beginning of the URL.
The hostname specifies where Oracle Application Server is running, and the port specifies the HTTP port at which Oracle HTTP Server or OC4J is listening.
Click OK if you made any changes to the location. Click Cancel if you did not make any changes.
Select File > Save to save any changes you made to the WSDL file.
Repeat the same steps for the second wsdl file, located in CreditService > Web Content > WEB-INF\wsdl.
Close both files in the editor.
Right-click WebServices.deploy (located in SOADEMO > CreditService > Resources) and select Properties. This displays the WAR Deployment Profile Properties dialog.
Figure 5-13 WAR Deployment Profile Properties Dialog, General Section
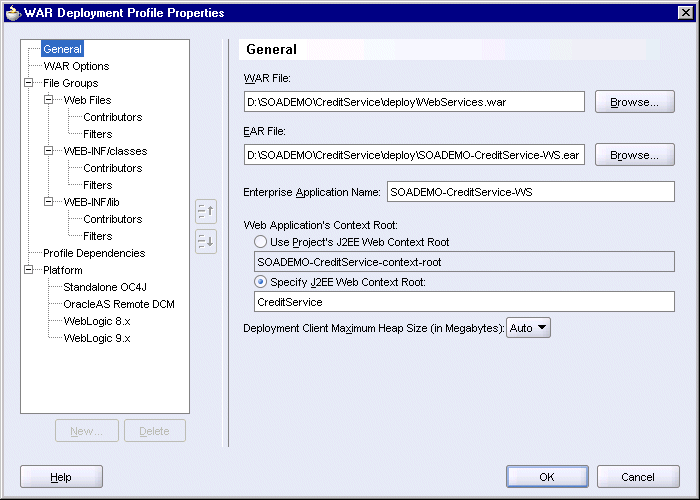
Select General on the left side. On the right side, select Specify J2EE Web Context Root and enter CreditService as its value.
Click OK.
Select File > Save to save your changes.
Right-click the CreditService project and select Rebuild.
When you created the Credit Service project, JDeveloper automatically created a WebServices.deploy deployment profile for you. You can use this deployment profile to deploy the Credit Service project to Oracle Application Server.
Expand CreditService > Resources and right-click WebServices.deploy. Select Deploy to and your application server connection.
In the Configure Application dialog, click OK.
After deploying CreditService, you can enter the following URL in a browser to see the WSDL for CreditService:
http://hostname:port/CreditService/ValidateCreditCardServiceSoapHttp?WSDL
For hostname, specify the name of the machine running Oracle Application Server.
For port, specify the HTTP port at which Oracle Application Server is listening. This is either the Oracle HTTP Server port or the OC4J port.
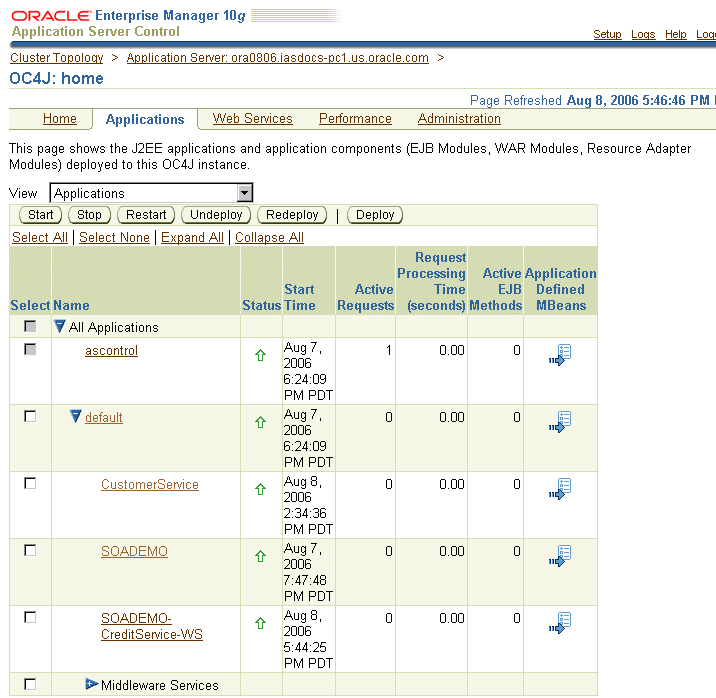
After deploying CreditService, you should see it in two places in the Application Server Control: in the Web Services tab (Figure 5-14) and the Applications tab (Figure 5-15) of the OC4J:home page.
Figure 5-14 Web Services Tab of OC4J:home Page Showing the ValidateCreditCardServiceSoapHttp Web Service
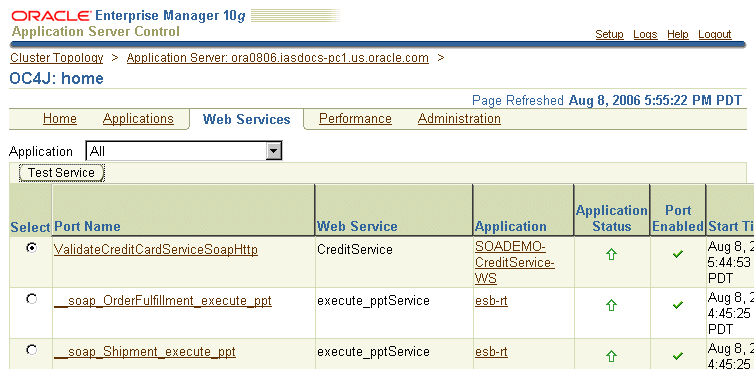
Figure 5-15 Applications Tab of OC4J:home Page Showing the SOADEMO-CreditService-WS Application
