|
Fundamentals > Sharing Information >
Exporting Data
The export feature is valuable when you query for specific data and need to export that data to a separate file. The exported data in the file can be read in Microsoft Excel or imported into other applications. If the data you are exporting includes dates or numbers, they will be formatted according to your machine's Regional Settings properties. Your Regional Settings are configured using the Microsoft Windows Control Panel. In some cases, the formatting may depend on the Regional Settings set up by your company on the server. Check with your Siebel administrator. Exporting is performed from a list, allowing you to export a single record or a list of records. NOTE: If a record you export includes a multi-value group field, only the primary value for that field is exported.
To export data to an external file
- Navigate to the screen from where you want to export data and run a query to display the desired records.
- In the main list of data, use the Columns Displayed function to add and remove columns in the list.
For more information, see Organizing Columns in a List.
NOTE: Only fields exposed in the list in the user interface are available for export. If there is a field that is not exposed in the user interface, it will not be available for export until it is exposed in the user interface.
- Click the menu button, and then click Export.
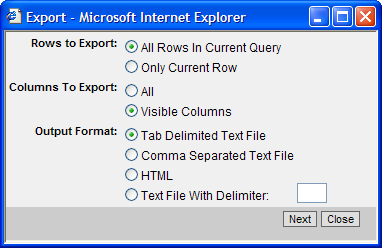
The Export dialog box appears.
- Use the Rows To Export and Columns To Export option buttons to define which rows and columns you want to export.
- Use the Output Format option buttons to define the format of the output document.
To correctly export Siebel data to a Microsoft Excel document, you should use the Tab Delimited Text File option.
Choosing the Text File With Delimiter option will add quotes around each field value. This is to help differentiate between each column value.
- Click Next.
The File Download dialog box appears.
- Select Save This File to Disk and click OK.
The Save As dialog box appears.
- Navigate to the location where you want to save the file and type a filename.
- Click Save.
CAUTION: Depending on the amount of data you are exporting, this process can take several minutes. Performance may be affected if you are exporting more than 50,000 records.
|