| Oracle® Application Server Installation Guide 10g Release 3 (10.1.3.2.0) for AIX 5L Based Systems (64-Bit) Part Number B32405-01 |
|
|
View PDF |
| Oracle® Application Server Installation Guide 10g Release 3 (10.1.3.2.0) for AIX 5L Based Systems (64-Bit) Part Number B32405-01 |
|
|
View PDF |
This chapter describes how to perform a basic installation of Oracle Application Server. The following topics are covered:
During the Basic Installation, you must install all of the components. If you do not want to install all the components, see Chapter 5, "Advanced Installation".
The following components are installed during the Basic Installation:
Oracle WebCenter Framework
Oracle WebCenter Framework augments the Java Server Faces (JSF) environment with the flexibility and power of portals to provide additional integration and runtime customization options.
Oracle Content Database
Oracle Content DB is a consolidated, database-centric content management system that provides a comprehensive, integrated solution for file and document life cycle management.
Oracle HTTP Server with SSL Support
This is the Web server component of Oracle Application Server.
Oracle Enterprise Manager 10g Application Server Control
This component is used for Web-based management of Oracle Application Server.
Oracle Process Manager and Notification Server
This component provides process control and monitoring for Oracle Application Server instances and their components.
This section describes the procedure for the basic installation of Oracle Application Server. It contains the following topics:
Before you begin installing Oracle Application Server, ensure that you have read both Chapter 2, "Requirements" and Chapter 3, "Things You Should Know Before Starting the Installation". These chapters contain important information with which you must be familiar before you begin the installation so you can avoid potential problems during the installation.
Note that you must have Oracle Database installed prior to starting the basic installation of Oracle Application Server. See Section 2.4, "Requirements for Oracle Content Database" for more information on requirements for Oracle Database.
To install Oracle Application Server with a basic installation, perform the following steps:
Start Oracle Universal Installer.
For more information, refer to Section 3.12, "Starting theOracle Universal Installer".
Oracle WebCenter Suite 10.1.3.2.0 Installation Screen
Figure 4-1 Oracle WebCenter Suite 10.1.3.2.0 Installation Screen
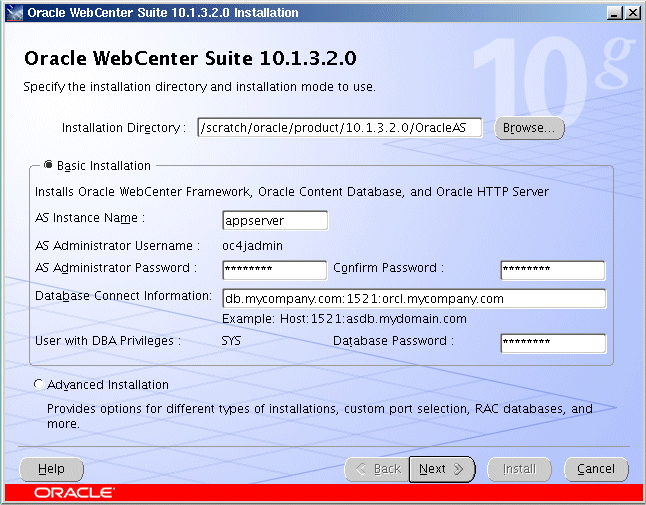
Installation Directory: Enter the directory where you want install Oracle Application Server.
Select Basic Installation.
AS Instance Name: The instance name identifies this Oracle Application Server instance. If you have more than one Oracle Application Server instance on the same host, the instances must have unique names.
AS Administrator Username: The administration username for Oracle Application Server instances is set to oc4jadmin and cannot be changed. To manage Oracle Application Server instances using Oracle Enterprise Manager 10g, log in as the oc4jadmin user.
AS Administrator Password and Confirm Password: Enter the password for the oc4jadmin user.
Database Connect Information: Enter the hostname, listener port number, and service name for the database. Note that the service name must include the database domain name. Enter the information in this format:
hostname:port_number:service_name
Note:
Real Application Clusters database is not supported in basic installation. If you want to use a Real Application Clusters database, you must perform an advanced installation. See Chapter 5, "Advanced Installation".User with DBA Privileges: The DBA user is set to SYS and cannot be changed. The installer needs SYS privileges to install the Oracle Workflow schema.
Database User Password: Enter the password for the SYS user.
Click Next.
Oracle Universal Installer: Specify Content Database Schema Password Screen
Figure 4-2 Specify Content Database Schema Password Screen
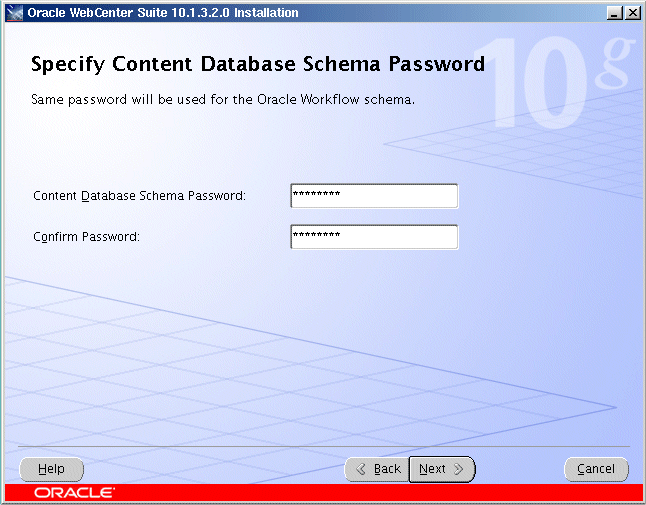
Enter and confirm the content database schema password. Refer to Section 5.3.6, "Specify Content Database Schema Password Screen" for more information.
Click Next.
Oracle Universal Installer: Specify User Repository Screen
Figure 4-3 Specify User Repository Screen
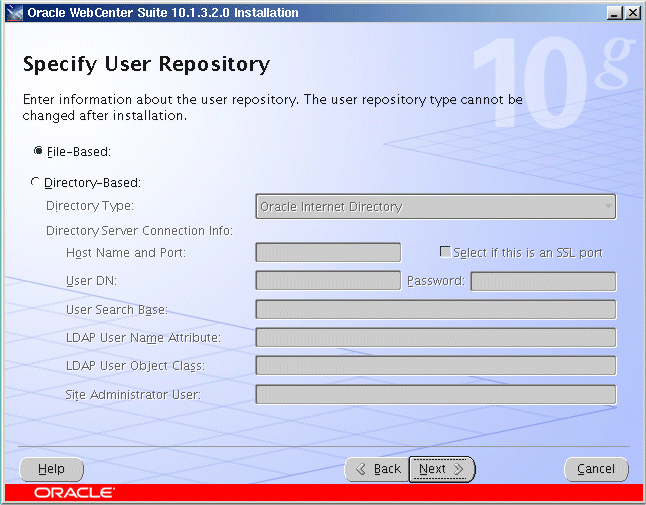
Select whether you want to use a File Based or Directory Based repository. Refer to Section 5.3.7, "Specify User Repository Screen" for more information.
Click Next.
Oracle Universal Installer: Install Screen
Figure 4-4 Oracle Universal Installer: Install Screen
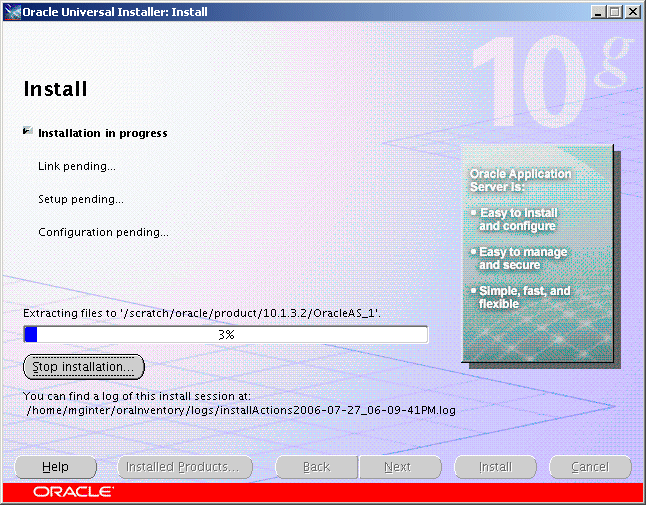
This screen shows the progress of installation.
Oracle Universal Installer: Configuration Assistants Screen
Figure 4-5 Oracle Universal Installer: Configuration Assistants Screen
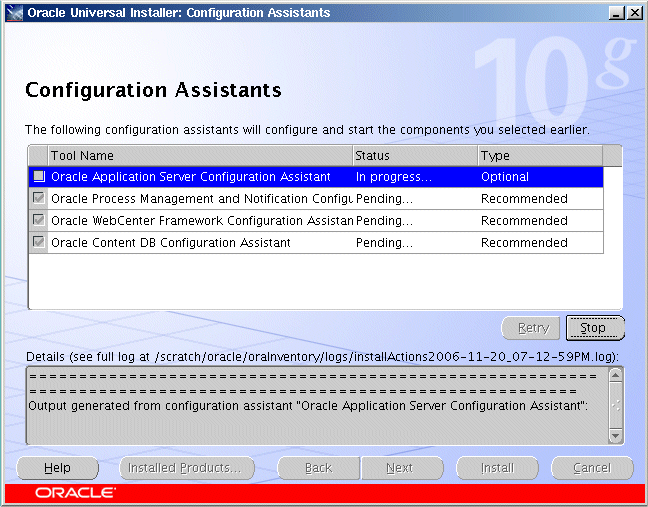
This screen shows the progress of the configuration assistants.
Oracle Universal Installer: End of Installation Screen
Figure 4-6 Oracle Universal Installer: End of Installation Screen
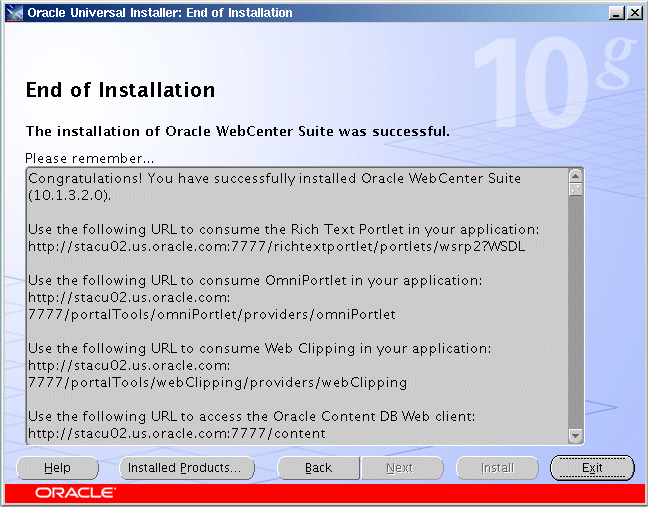
This screen tells you whether or not your installation was successful, and provides a link to the product release notes.
After the installation is complete, you should:
Refer to Chapter 7 for instructions and information about postinstallation tasks you should perform.
Refer to the Oracle Application Server Administrator's Guide for information about how to configure, administer, and manage Oracle Application Server after it has been successfully installed.